seat adjustment BMW ACTIVEHYBRID 5 2012 Owners Manual
[x] Cancel search | Manufacturer: BMW, Model Year: 2012, Model line: ACTIVEHYBRID 5, Model: BMW ACTIVEHYBRID 5 2012Pages: 319, PDF Size: 12.54 MB
Page 37 of 319
Switching on interior lamps and
courtesy lamps
Press the button on the remote control
with the vehicle locked.
Panic mode
You can trigger the alarm system if you find
yourself in a dangerous situation.
Press the button on the remote control
for at least 3 seconds.
To switch off the alarm: press any button.
Opening the trunk lid Press the button on the remote control
for approx. 1 second.
The trunk lid opens, regardless of whether it was
previously locked or unlocked.
During opening, the trunk lid pivots back and up.
Ensure that adequate clearance is available be‐
fore opening.
In some vehicle equipment variants, the trunk lid
can only be opened using the remote control if
the vehicle was unlocked first.
To avoid locking yourself out of the vehicle, do
not place the remote control into the cargo area.
The trunk lid is locked again as soon as it is
pushed closed.
Confirmation signals from the vehicle1."Settings"2."Door locks"3.Deactivate or activate the desired confirma‐
tion signals.▷"Acoustic sig. lock/unlock"▷"Flash when lock/unlock"
Retrieving the seat, mirror, and
steering wheel settings
The driver's seat, exterior mirror, and steering
wheel positions selected last are stored for the
currently used remote control.
When the vehicle is unlocked, these positions
are automatically retrieved if this function was
activated.
Pinch hazard when moving back the seat
If this function is used, first make sure that
the footwell behind the driver's seat is empty.
Otherwise, people can be injured or objects
damaged when the seat is moved back.◀
The adjustment procedure is interrupted:
▷When a seat position switch is pressed.▷When a button of the seat, mirror, and steer‐
ing wheel memory is pressed briefly.
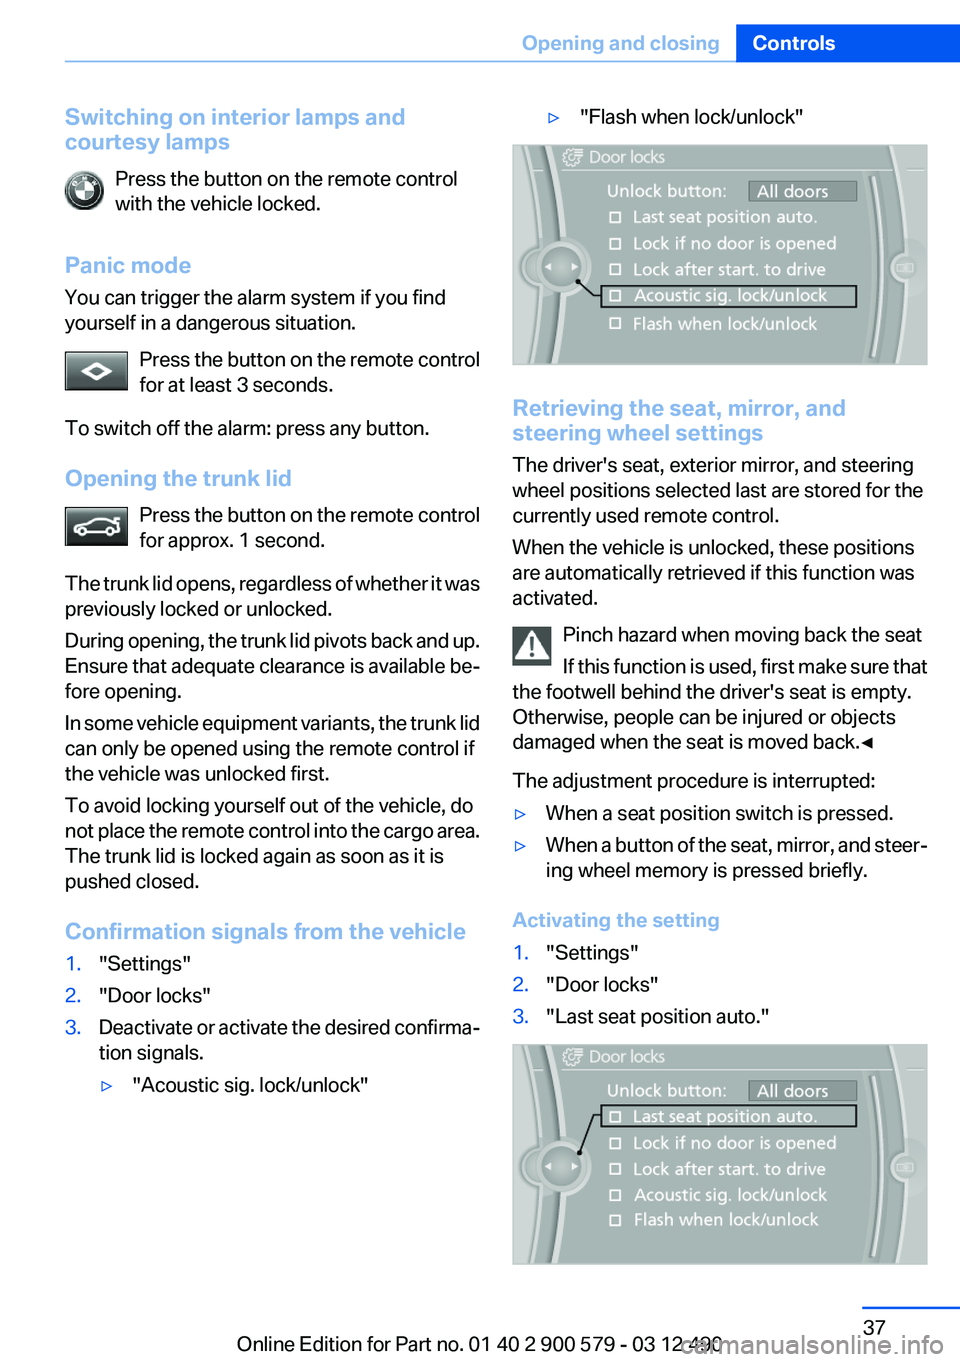
Activating the setting
1."Settings"2."Door locks"3."Last seat position auto."Seite 37Opening and closingControls37
Online Edition for Part no. 01 40 2 900 579 - 03 12 490
Page 50 of 319
Forward/backward
Pull the lever and slide the seat in the desired
direction.
After releasing the lever, move the seat forward
or back slightly to make sure it engages prop‐
erly.
Height
Move the button in the required direction.
Backrest
Move the button in the required direction.
Electrically adjustable seats
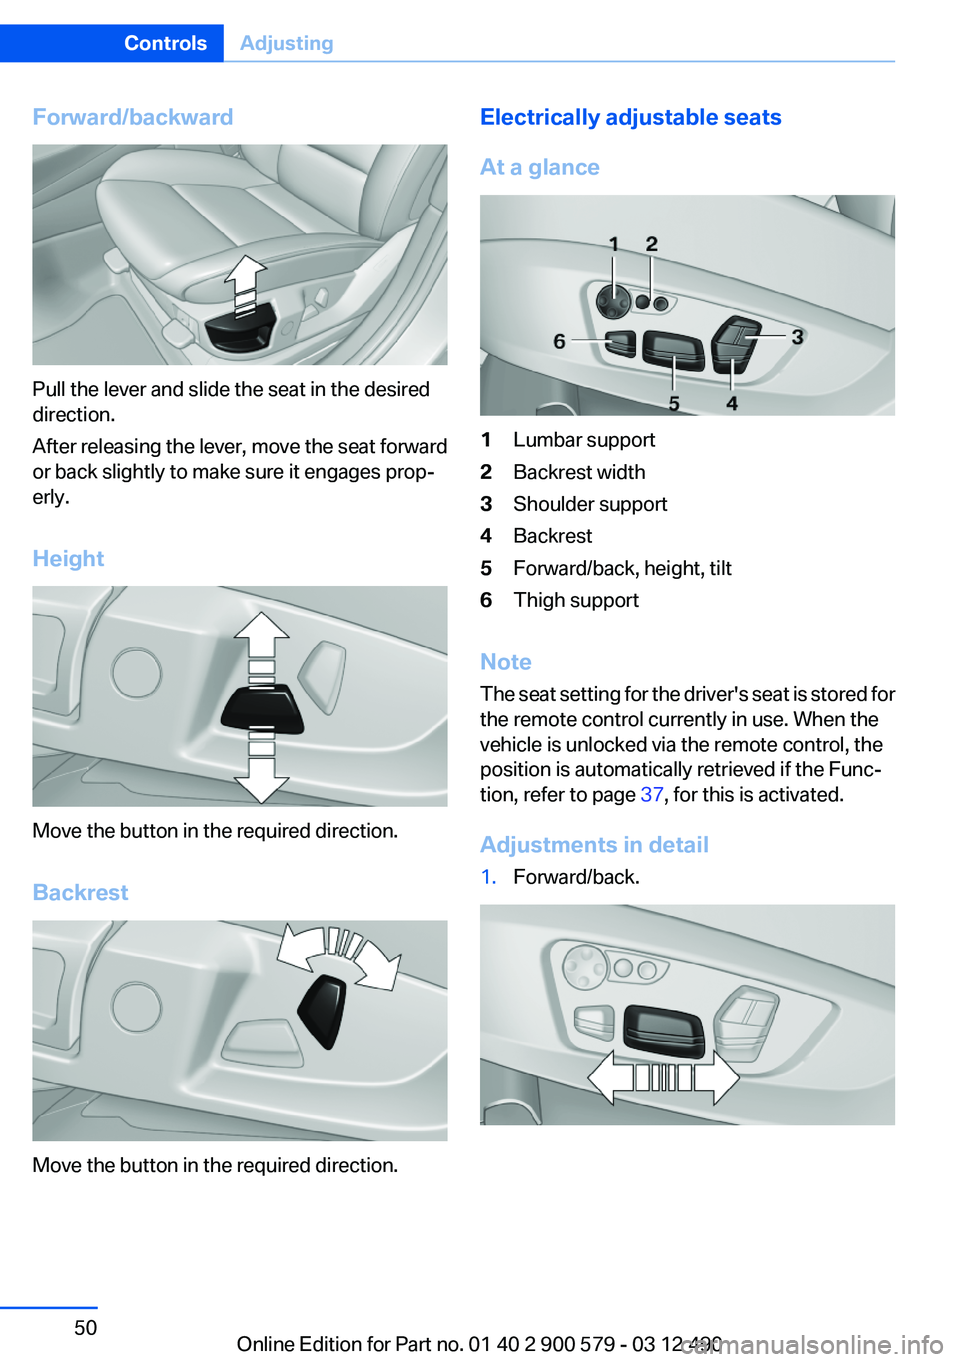
At a glance1Lumbar support2Backrest width3Shoulder support4Backrest5Forward/back, height, tilt6Thigh support
Note
The seat setting for the driver's seat is stored for
the remote control currently in use. When the
vehicle is unlocked via the remote control, the
position is automatically retrieved if the Func‐
tion, refer to page 37, for this is activated.
Adjustments in detail
1.Forward/back.Seite 50ControlsAdjusting50
Online Edition for Part no. 01 40 2 900 579 - 03 12 490
Page 51 of 319
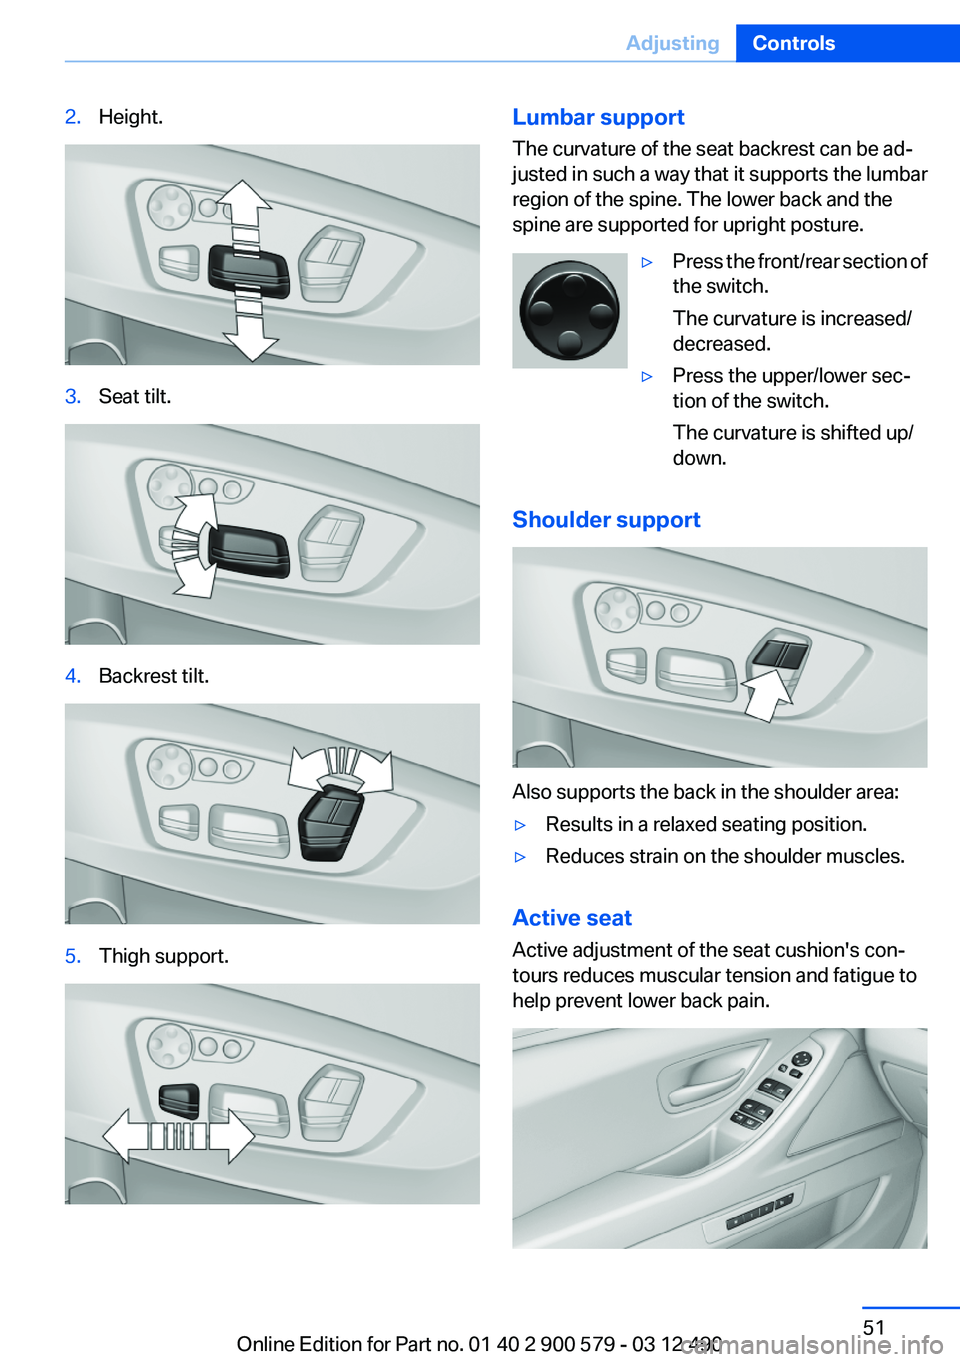
2.Height.3.Seat tilt.4.Backrest tilt.5.Thigh support.Lumbar support
The curvature of the seat backrest can be ad‐
justed in such a way that it supports the lumbar
region of the spine. The lower back and the
spine are supported for upright posture.▷Press the front/rear section of
the switch.
The curvature is increased/
decreased.▷Press the upper/lower sec‐
tion of the switch.
The curvature is shifted up/
down.
Shoulder support
Also supports the back in the shoulder area:
▷Results in a relaxed seating position.▷Reduces strain on the shoulder muscles.
Active seat
Active adjustment of the seat cushion's con‐
tours reduces muscular tension and fatigue to
help prevent lower back pain.
Seite 51AdjustingControls51
Online Edition for Part no. 01 40 2 900 579 - 03 12 490
Page 56 of 319
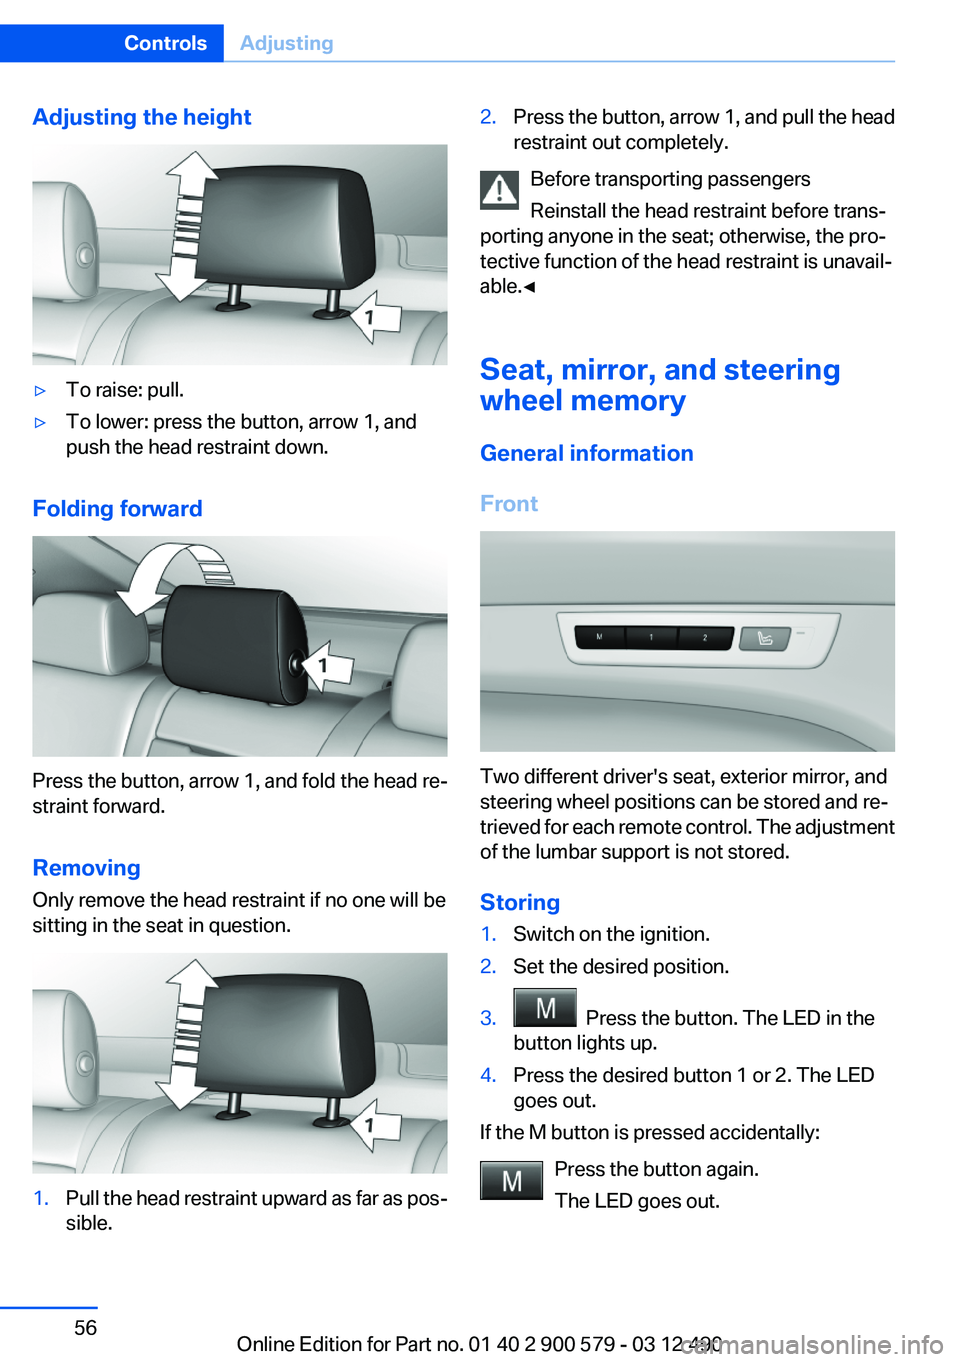
Adjusting the height▷To raise: pull.▷To lower: press the button, arrow 1, and
push the head restraint down.
Folding forward
Press the button, arrow 1, and fold the head re‐
straint forward.
Removing
Only remove the head restraint if no one will be
sitting in the seat in question.
1.Pull the head restraint upward as far as pos‐
sible.2.Press the button, arrow 1, and pull the head
restraint out completely.
Before transporting passengers
Reinstall the head restraint before trans‐
porting anyone in the seat; otherwise, the pro‐
tective function of the head restraint is unavail‐
able.◀
Seat, mirror, and steering
wheel memory
General information
Front
Two different driver's seat, exterior mirror, and
steering wheel positions can be stored and re‐
trieved for each remote control. The adjustment
of the lumbar support is not stored.
Storing
1.Switch on the ignition.2.Set the desired position.3. Press the button. The LED in the
button lights up.4.Press the desired button 1 or 2. The LED
goes out.
If the M button is pressed accidentally:
Press the button again.
The LED goes out.
Seite 56ControlsAdjusting56
Online Edition for Part no. 01 40 2 900 579 - 03 12 490
Page 57 of 319
Calling up settingsDo not retrieve the memory while driving
Do not retrieve the memory setting while
driving, as an unexpected movement of the seat
or steering wheel could result in an accident.◀
Comfort function1.Open the driver's door.2.Switch off the ignition.3.Briefly press the desired button 1 or 2.
The corresponding seat position is performed
automatically.
The procedure stops when a switch for adjust‐
ing the seat or one of the buttons is pressed.
Safety mode
1.Close the driver's door or switch on the ig‐
nition.2.Press and hold the desired button 1 or 2 until
the adjustment procedure is completed.
Calling up of a seat position
deactivated
After a brief period, the calling up of stored seat
positions is deactivated to save battery power.
To reactivate calling up of a seat position:
▷Open or close the door or trunk lid.▷Press a button on the remote control.▷Press the Start/Stop button.Mirrors
Exterior mirrors
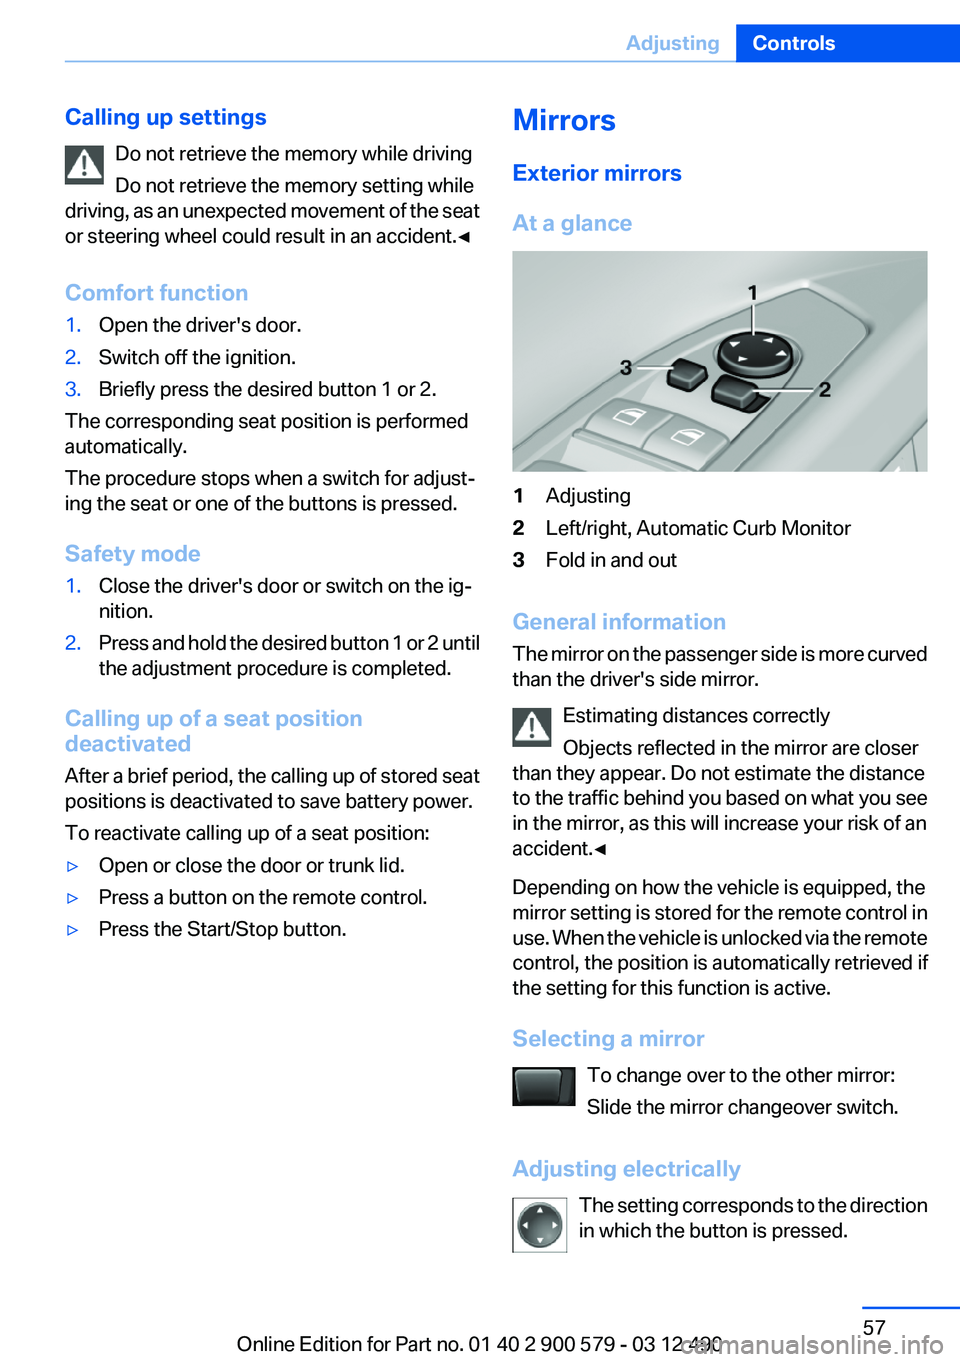
At a glance1Adjusting2Left/right, Automatic Curb Monitor3Fold in and out
General information
The mirror on the passenger side is more curved
than the driver's side mirror.
Estimating distances correctly
Objects reflected in the mirror are closer
than they appear. Do not estimate the distance
to the traffic behind you based on what you see
in the mirror, as this will increase your risk of an
accident.◀
Depending on how the vehicle is equipped, the
mirror setting is stored for the remote control in
use. When the vehicle is unlocked via the remote
control, the position is automatically retrieved if
the setting for this function is active.
Selecting a mirror To change over to the other mirror:
Slide the mirror changeover switch.
Adjusting electrically The setting corresponds to the direction
in which the button is pressed.
Seite 57AdjustingControls57
Online Edition for Part no. 01 40 2 900 579 - 03 12 490
Page 59 of 319
Functional requirement
For proper operation:▷Keep the photocells clean.▷Do not cover the area between the inside
rearview mirror and the windshield.
Steering wheel
General information Do not adjust while driving
Do not adjust the steering wheel while
driving; otherwise, an unexpected movement
could result in an accident.◀
Manual steering wheel adjustment
1.Fold the lever down.2.Move the steering wheel to the preferred
height and angle to suit your seating posi‐
tion.3.Fold the lever back.Power steering wheel adjustment
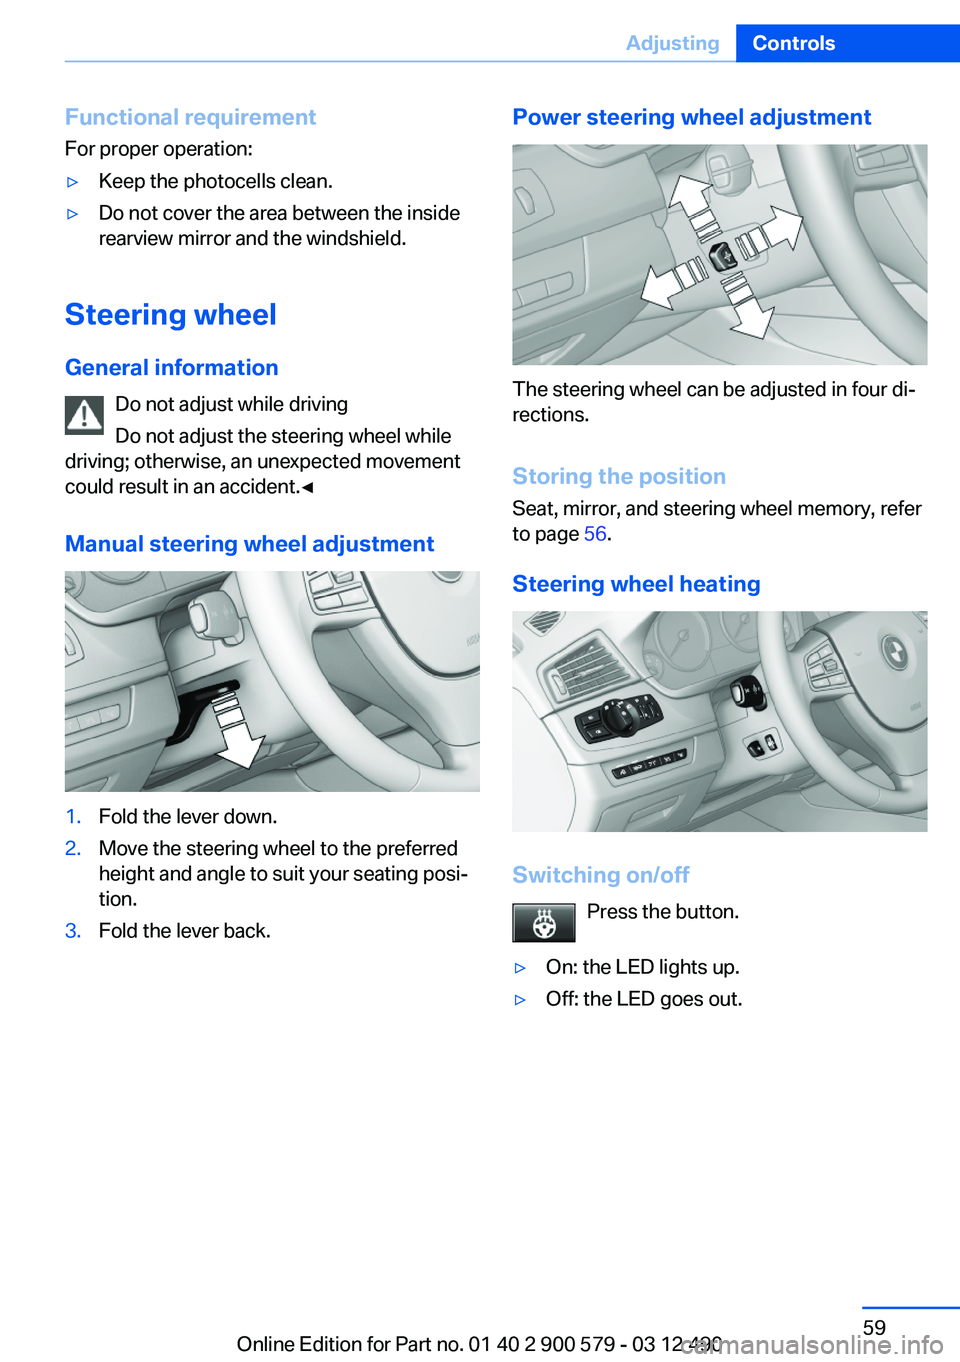
The steering wheel can be adjusted in four di‐
rections.
Storing the position
Seat, mirror, and steering wheel memory, refer
to page 56.
Steering wheel heating
Switching on/off Press the button.
▷On: the LED lights up.▷Off: the LED goes out.Seite 59AdjustingControls59
Online Edition for Part no. 01 40 2 900 579 - 03 12 490
Page 308 of 319
Everything from A to Z
IndexA
ABS, Antilock Brake Sys‐ tem 107
Activated-charcoal filter 133
Activate drive readiness 65
Active Blind Spot Detec‐ tion 104
ActiveHybrid, system 27
Active Protection 105
Active seat, front 51
Active seat ventilation, front 52
Adaptive brake lights, refer to Brake force display 105
Adaptive light control 91
Additional telephone 226
Additives, oil 271
Adjustments, seats/head re‐ straints 49
After washing vehicle 290
Airbags 94
Airbags, indicator/warning light 95
Air circulation, refer to Recir‐ culated-air mode 132
Air, dehumidifying, refer to Cooling function 132
Air distribution, manual 131
Air pressure, tires 261
Air vents, refer to Ventila‐ tion 133
Air volume, automatic climate control 131
Alarm system 44
Alarm, unintentional 45
All around the center con‐ sole 14
All around the headliner 15
All around the steering wheel 12 ALL program, automatic cli‐
mate control 132
All-season tires, refer to Win‐ ter tires 266
Alternating-code hand-held transmitter 142
Alternative oil types 271
AM/FM station 188
Announcement, navigation, refer to Spoken instruc‐
tions 176
Antifreeze, washer fluid 73
Antilock Brake System, ABS 107
Anti-slip control, refer to DSC 107
Applications 254
Appointments 243
Approved axle load 297
Approved engine oils 271
Apps 254
Apps, video playback 211
Armrest, refer to Center arm‐ rest 147
Arrival time 85
Ashtray 143
Ashtray, front 143
Ashtray, rear 144
Assistance for the combustion engine 68
Assistance, Roadside Assis‐ tance 284
Assistance when driving off 107
Assist, BMW 249
ASSIST, Hybrid system 68
Audio playback 197
Audio playback, Blue‐ tooth 212
AUTO H button, refer to Auto‐ matic Hold 69 AUTO intensity 131
Automatic car wash 289
Automatic climate con‐ trol 130
Automatic Curb Monitor 58
Automatic deactivation, front passenger airbags 96
Automatic deactivation of the hybrid system 287
Automatic engine start-stop function 66
Automatic headlamp con‐ trol 90
Automatic Hold 69
Automatic locking 39
Automatic recirculated-air control 132
Automatic Soft Closing, doors 39
Automatic tailgate 40
Automatic transmission with Steptronic 73
AUTO program, automatic cli‐ mate control 131
AUTO program, intensity 131
Auxiliary air conditioning 137
Auxiliary air conditioning/heat‐ ing system 136
AUX-IN port 208
Average fuel consumption 84
Average speed 84
Axle loads, weights 297
B
Backrest curvature, refer to Lumbar support 51
Backup camera 116
Balance 186
Band-Aids, refer to First aid kit 284 Seite 308ReferenceEverything from A to Z308
Online Edition for Part no. 01 40 2 900 579 - 03 12 490