high BMW ACTIVEHYBRID3 2013 User Guide
[x] Cancel search | Manufacturer: BMW, Model Year: 2013, Model line: ACTIVEHYBRID3, Model: BMW ACTIVEHYBRID3 2013Pages: 220, PDF Size: 5.09 MB
Page 31 of 220
Driving with the combustion engine:
DRIVE
The combustion engine provides the drive
power to move the vehicle. If necessary, the
high-voltage battery is charged at the same
time.
The hybrid system always starts the combus‐
tion engine automatically.
Energy recovery: CHARGE
The high-voltage battery of the hybrid system is
charged through energy recovery.
The electric motor acts as a generator and con‐
verts the kinetic energy of the vehicle into elec‐
tric current.
Charging can take place in various situations:▷When the vehicle is coasting if the acceler‐
ator is not pressed.▷During vehicle braking.
When exerting gentle pressure on the brakes,
the vehicle is only braked by the electric motor.
When the brake pedal is depressed further, the
brake system is activated additionally. This is
why only part of the brake energy is used to
charge the high-voltage battery when exerting
firm pressure on the brake.
Foresighted driving and the early reduction of
speed are important to make full use of the hy‐
brid characteristics of your vehicle.
Auto Start/Stop function
The Auto Start/Stop function, refer to
page 65, switches the combustion engine off
when coasting, braking and while the vehicle is
stopped. Convenience functions such as the
automatic climate control are supplied by the
high-voltage battery and can remain switched
on.
Auxiliary functions of the automatic
climate control
The hybrid system makes it possible to operate
the automatic climate control even with the
combustion engine switched off. In this way, the
interior of the vehicle can be cooled for example
during a break in the journey by residual cooling
or even before the trip by auxiliary air condition‐
ing.▷Residual cooling, refer to page 136.▷Auxiliary air conditioning, refer to
page 136
Adapting to the course of the road
When destination guidance is active, the hybrid
system uses the navigation data. This makes it
possible to switch off the combustion engine
upon reaching the destination zone even before
reaching the destination.
Pay attention to the notes in Adapting to the
course of the road, refer to page 80.
Display
The displays of the hybrid system, refer to
page 79, provide information about the cur‐
rent state of hybrid operation and show the sys‐
tem activity in a chart.
Energy-saving driving
To save energy while driving, read the following
information:
▷Saving fuel, refer to page 159▷Using the hybrid system efficiently, refer to
page 152▷ECO PRO mode, refer to page 160.
Safety information
Read the information on Safety of the hybrid
system, refer to page 198.
Seite 31BMW ActiveHybridAt a glance31
Online Edition for Part no. 01 40 2 917 825 - II/13
Page 47 of 220
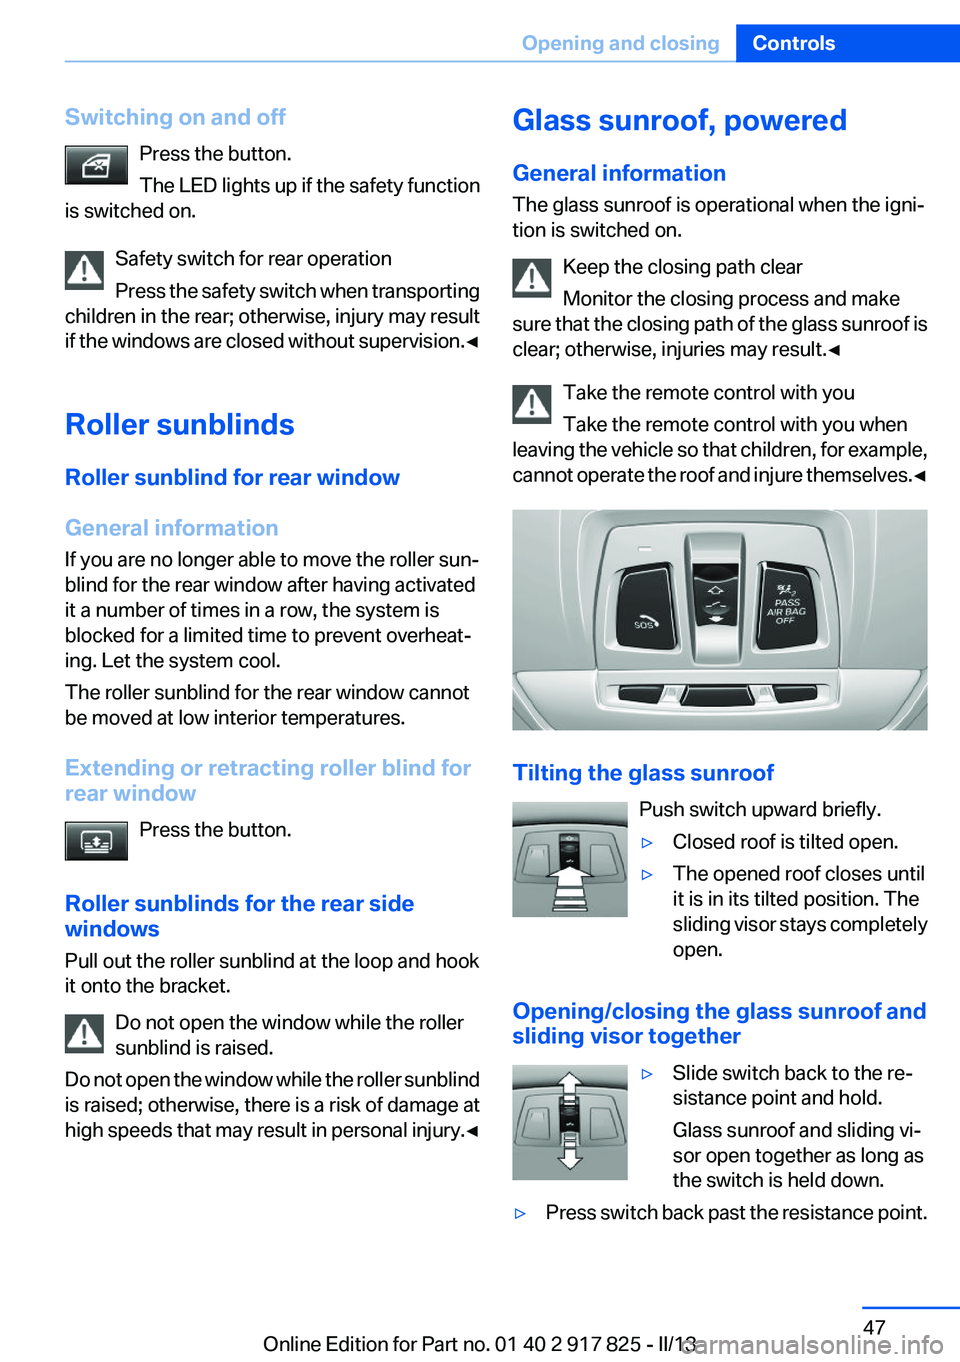
Switching on and offPress the button.
The LED lights up if the safety function
is switched on.
Safety switch for rear operation
Press the safety switch when transporting
children in the rear; otherwise, injury may result
if the windows are closed without supervision. ◀
Roller sunblinds
Roller sunblind for rear window
General information
If you are no longer able to move the roller sun‐
blind for the rear window after having activated
it a number of times in a row, the system is
blocked for a limited time to prevent overheat‐
ing. Let the system cool.
The roller sunblind for the rear window cannot
be moved at low interior temperatures.
Extending or retracting roller blind for
rear window
Press the button.
Roller sunblinds for the rear side
windows
Pull out the roller sunblind at the loop and hook
it onto the bracket.
Do not open the window while the roller
sunblind is raised.
Do not open the window while the roller sunblind
is raised; otherwise, there is a risk of damage at
high speeds that may result in personal injury. ◀Glass sunroof, powered
General information
The glass sunroof is operational when the igni‐
tion is switched on.
Keep the closing path clear
Monitor the closing process and make
sure that the closing path of the glass sunroof is
clear; otherwise, injuries may result.◀
Take the remote control with you
Take the remote control with you when
leaving the vehicle so that children, for example,
cannot operate the roof and injure themselves. ◀
Tilting the glass sunroof
Push switch upward briefly.
▷Closed roof is tilted open.▷The opened roof closes until
it is in its tilted position. The
sliding visor stays completely
open.
Opening/closing the glass sunroof and
sliding visor together
▷Slide switch back to the re‐
sistance point and hold.
Glass sunroof and sliding vi‐
sor open together as long as
the switch is held down.▷Press switch back past the resistance point.Seite 47Opening and closingControls47
Online Edition for Part no. 01 40 2 917 825 - II/13
Page 49 of 220
AdjustingVehicle equipment
All standard, country-specific and optional
equipment that is offered in the model series is
described in this chapter. Therefore, equipment
is also described that is not available in a vehicle,
e. g., because of the selected optional equip‐
ment or country variant. This also applies for
safety-related functions and systems.
Sitting safely
The ideal seating position can make a vital con‐
tribution to relaxed, fatigue-free driving.
The seating position plays an important role in
an accident in combination with:▷Safety belts, refer to page 52.▷Head restraints, refer to page 53.▷Airbags, refer to page 95.
Seats
General information Do not adjust the seat while driving
Do not adjust the driver's seat while driv‐
ing, or the seat could respond with unexpected
movement and the ensuing loss of vehicle con‐
trol could lead to an accident.◀
Do not incline the backrest too far to the
rear
Also on the front passenger side, do not incline
the backrest on the front passenger side too far
to the rear during driving, or there is a risk of
slipping under the safety belt in the event of an
accident. This would eliminate the protection
normally provided by the belt.◀
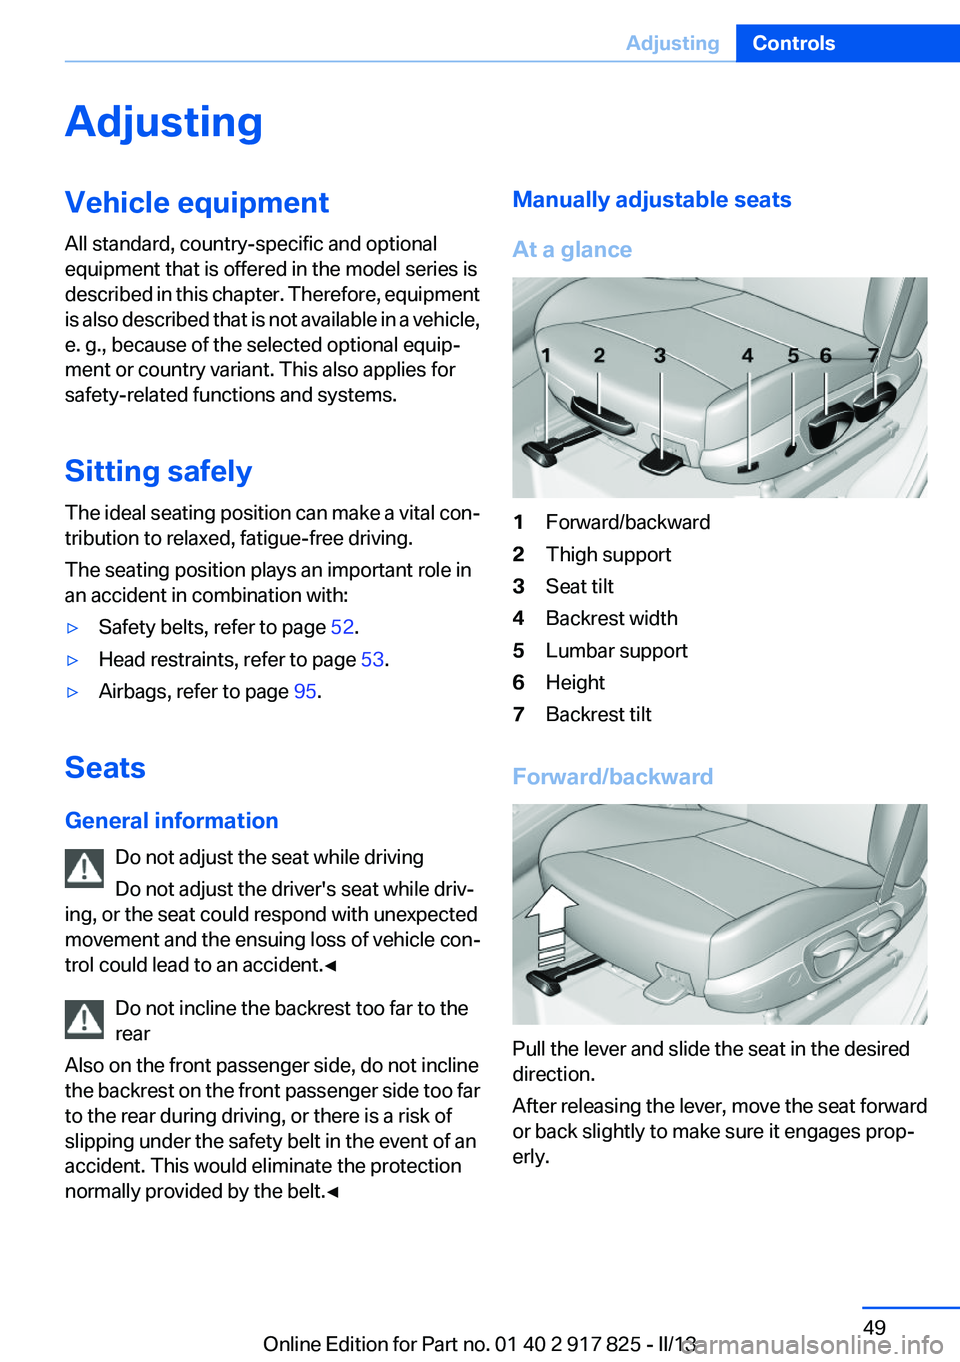
Manually adjustable seats
At a glance1Forward/backward2Thigh support3Seat tilt4Backrest width5Lumbar support6Height7Backrest tilt
Forward/backward
Pull the lever and slide the seat in the desired
direction.
After releasing the lever, move the seat forward
or back slightly to make sure it engages prop‐
erly.
Seite 49AdjustingControls49
Online Edition for Part no. 01 40 2 917 825 - II/13
Page 51 of 220

2.Height.3.Seat tilt.4.Backrest tilt.Thigh support
Pull the lever at the front of the seat and adjust
the thigh support.
Lumbar support
The curvature of the seat backrest can be ad‐
justed in such a way that it supports the lumbar
region of the spine. The lower back and the
spine are supported for upright posture.
▷Press the front/rear section of
the switch.
The curvature is increased/
decreased.▷Press the upper/lower sec‐
tion of the switch.
The curvature is shifted up/
down.
Backrest width
Change the width of the backrest
using the side wings to adjust the
lateral support.
Seite 51AdjustingControls51
Online Edition for Part no. 01 40 2 917 825 - II/13
Page 60 of 220
Deactivating the front passenger airbags
If a child restraint fixing system is used in
the front passenger seat, the front passenger
airbags must be deactivated; otherwise, there is
an increased risk of injury to the child when the
airbags are triggered, even with a child restraint
fixing system.◀
Seat position and height
Before installing a child restraint fixing system,
move the front passenger seat as far back as
possible and adjust its height to the highest po‐
sition to obtain the best possible position for the
belt and to offer optimal protection in the event
of an accident.
Do not change the seat position and height after
this.
Backrest width
Adjustable backrest width: before installing a
child restraint fixing system in the front passen‐
ger seat, open the backrest width completely.
Do not change the backrest width again and do
not call up a memory position.
Backrest width for the child seat
Before installing a child restraint fixing
system in the front passenger seat, the backrest
width must be opened completely. Do not
change the adjustment after this; otherwise, the
stability of the child seat will be reduced.◀Child seat security
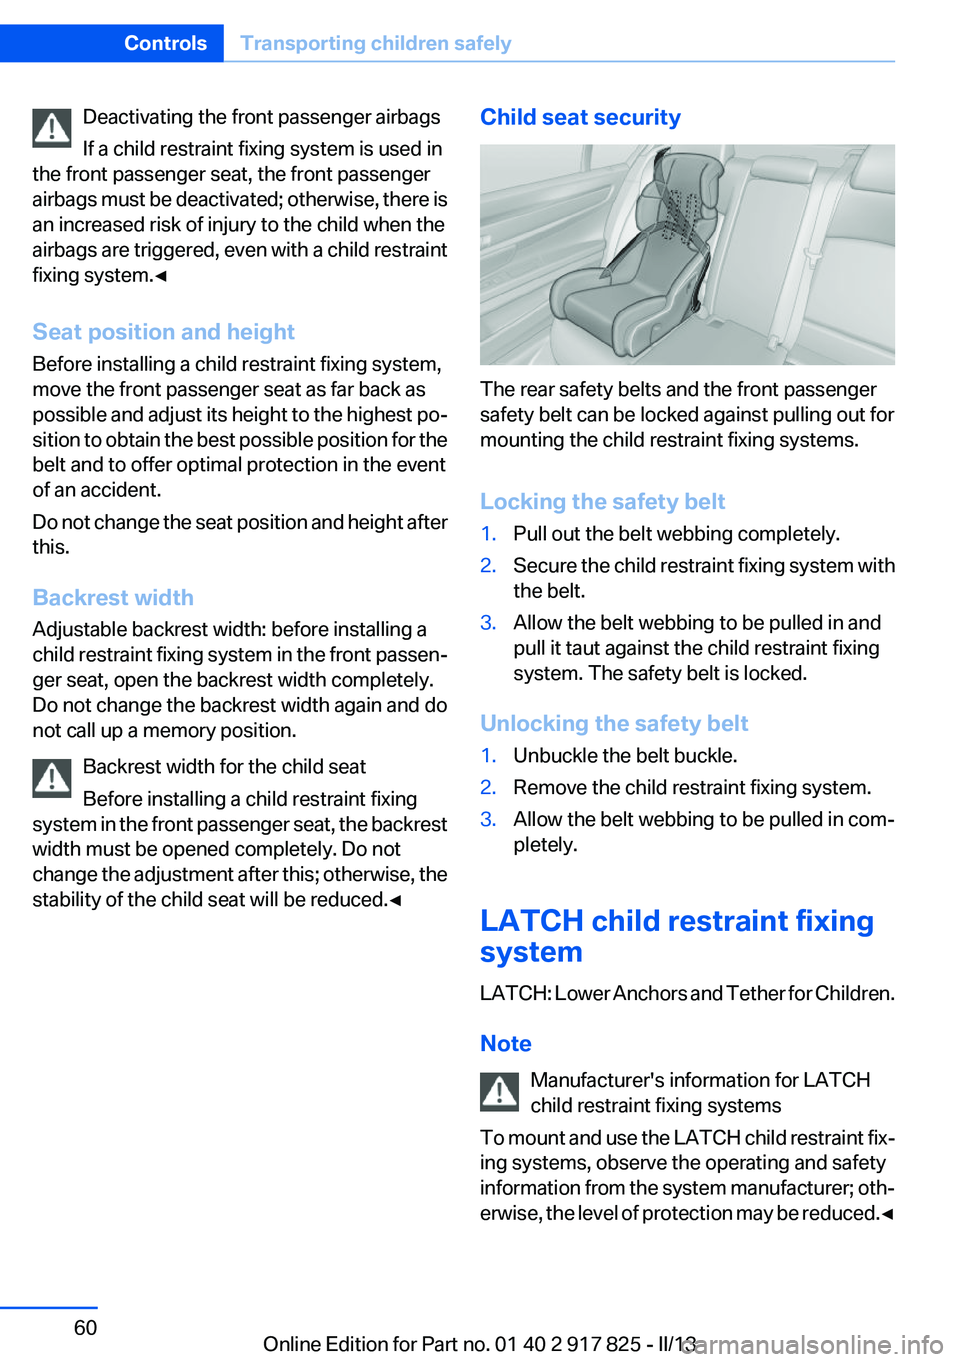
The rear safety belts and the front passenger
safety belt can be locked against pulling out for
mounting the child restraint fixing systems.
Locking the safety belt
1.Pull out the belt webbing completely.2.Secure the child restraint fixing system with
the belt.3.Allow the belt webbing to be pulled in and
pull it taut against the child restraint fixing
system. The safety belt is locked.
Unlocking the safety belt
1.Unbuckle the belt buckle.2.Remove the child restraint fixing system.3.Allow the belt webbing to be pulled in com‐
pletely.
LATCH child restraint fixing
system
LATCH: Lower Anchors and Tether for Children.
Note Manufacturer's information for LATCH
child restraint fixing systems
To mount and use the LATCH child restraint fix‐
ing systems, observe the operating and safety
information from the system manufacturer; oth‐
erwise, the level of protection may be reduced. ◀
Seite 60ControlsTransporting children safely60
Online Edition for Part no. 01 40 2 917 825 - II/13
Page 65 of 220
Starting the combustion engineEnclosed areas
Do not let the engine run in enclosed
areas; otherwise, breathing of exhaust fumes
may lead to loss of consciousness and death.
The exhaust gases contain carbon monoxide, an
odorless and colorless but highly toxic gas.◀
Unattended vehicle
Do not leave the vehicle unattended with
the engine running; doing so poses a risk of dan‐
ger.
Before leaving the vehicle with the engine run‐
ning, set the parking brake and place the trans‐
mission in position P or neutral to prevent the
vehicle from moving.◀
Repeated starting in quick succession
Avoid repeated unsuccessful attempts to
start the vehicle or starting the vehicle several
times in quick succession. Otherwise, the fuel is
not burned or is inadequately burned, posing a
risk of overheating and damage to the catalytic
converter.◀
The combustion engine is started with Activate
drive, refer to page 64, readiness under the fol‐
lowing conditions:▷The drive system is not at operating tem‐
perature.▷The temperature of the hybrid system is too
high.▷The high-voltage battery has an insufficient
charge.
Driving away
1.Activate drive readiness.2.Select transmission position D, M/S or R.3.Release the parking brake.4.Drive away.Deactivating drive readiness
After parking the vehicle, you may hear noises
due to operation of the hybrid system, such as
for cooling of the high-voltage battery.
After stopping the vehicle:1.Select transmission position P.2.Press the Start/Stop button.3.Set the parking brake.
Before driving into a car wash
In order for the vehicle to be able to roll into a car
wash, heed the information regarding Washing
in automatic car washes, refer to page 200.
Auto Start/Stop function
The concept
The Auto Start/Stop function helps save fuel.
The system switches off the combustion engine
when conditions for electric driving, refer to
page 66, have been met. The ignition remains
switched on.
READY appears on the tachometer. If neces‐
sary, the combustion engine starts automati‐
cally.
The combustion engine is also stopped during
the trip when braking or coasting. This driving
condition, in which the vehicle is traveling with‐
out power and energy recovery is not active, is
referred to as coasting, refer to page 66.
Note
The combustion engine is not switched off au‐
tomatically in the following situations:
▷The combustion engine is not yet at oper‐
ating temperature.▷The transmission selector lever is in position
M/S.▷The high-voltage battery charge is very low
or there is a high load on the vehicle electri‐Seite 65DrivingControls65
Online Edition for Part no. 01 40 2 917 825 - II/13
Page 66 of 220
cal system, for instance due to a high load
from automatic climate control.▷The interior is in the heating or cooling
phase.▷The engine compartment lid is unlocked.▷The vehicle is being optimized for the cur‐
rent driving style, for instance during the
breaking-in period or after a service appoint‐
ment.▷There are hybrid system faults.
Safety mode
The combustion engine does not start automat‐
ically in the following situations after an auto‐
matic engine stop:
▷When the driver's door is open and neither
the brake nor accelerator pedal are de‐
pressed.▷When the hood is unlocked.
The indicator lamps come on. The combustion
engine can only be started via the Start/Stop
button.
Switching off the vehicle during an
automatic engine stop
During an automatic engine stop, the vehicle
can be switched off permanently, e.g., when
leaving it.
1.Press the Start/Stop button. The ignition is
switched off. The Auto Start/Stop function
is deactivated.
Transmission position P is engaged auto‐
matically.2.Set the parking brake.
Malfunction
The Auto Start/Stop function no longer
switches of the engine automatically in the event
of a malfunction. A message is displayed. It is
possible to continue driving. Have the system
checked.
Electric driving: eDRIVE
Requirements
Electric driving is possible under the following
conditions:▷Speed up to approx. 35 mph, approx.
60 km/h. In ECO PRO mode, slightly higher
speeds are also possible.▷In ECO PRO mode, speed up to approx.
45 mph, approx. 75 km/h.▷The high-voltage battery is sufficiently
charged.▷Transmission position D or R is engaged.▷The drive system is at operating tempera‐
ture.▷The accelerator pedal is only slightly de‐
pressed.▷The driver's door is closed.
Possible cruising range
Depending on the charge of the high-voltage
battery, the vehicle can be driven using electric
power constantly for up to 2-2.5 miles/3-4 km.
Coasting
Under the conditions for electric driving, the
combustion engine is also switched off during
braking above 50 mph, approx. 80 km/h or when
coasting above 35 mph, approx. 60 km/h.
This driving condition is referred to as coasting.
In ECO PRO mode, it is possible to coast below
a speed of 100 mph, approx. 160 km/h.
Driving with the combustion
engine: DRIVE
The combustion engine provides the drive
power to move the vehicle. If necessary, the
high-voltage battery is charged at the same
time.
Seite 66ControlsDriving66
Online Edition for Part no. 01 40 2 917 825 - II/13
Page 67 of 220
Automatic start while driving
The combustion engine is automatically started
under the following conditions while driving:▷Transmission position M/S is engaged.▷The speed for electric driving is exceeded
while accelerating.▷The high-voltage battery charge is insuffi‐
cient or it is fully charged, such as when driv‐
ing downhill.▷The required power output is increased,
such as due to the accelerator pedal position
or driving uphill.▷System-related requirement for hybrid
components.▷Preparation for an upcoming route section
with activated destination guidance.
Automatic stopping while driving
When reducing speed, the combustion engine
is switched off when the conditions for electric
driving, refer to page 66, are met.
Assistance for the
combustion engine
The combustion engine provides the primary
drive power to move the vehicle.
The electric motor provides assistance as
needed with additional propulsive power.
ASSIST
During normal vehicle operation, the electric
motor assists the combustion engine, depend‐
ing on the situation.
eBOOST
Accelerating quickly, such as when passing, re‐
quires the maximum available power from the
electric motor. To do this, apply extra force to
the accelerator pedal.
Energy recovery: CHARGE
The hybrid system makes it possible to convert
kinetic energy into electrical power when brak‐
ing and coasting. This recovered energy
charges the high voltage battery. If necessary,
this stored electrical energy is output to the
electric motor.
The following conditions must be met to recover
kinetic energy:▷The vehicle is moving.▷Transmission position D, M/S is engaged.▷The high-voltage battery is not fully
charged.
Energy recovery displays in the instrument clus‐
ter, refer to page 80.
Parking brake
Applying
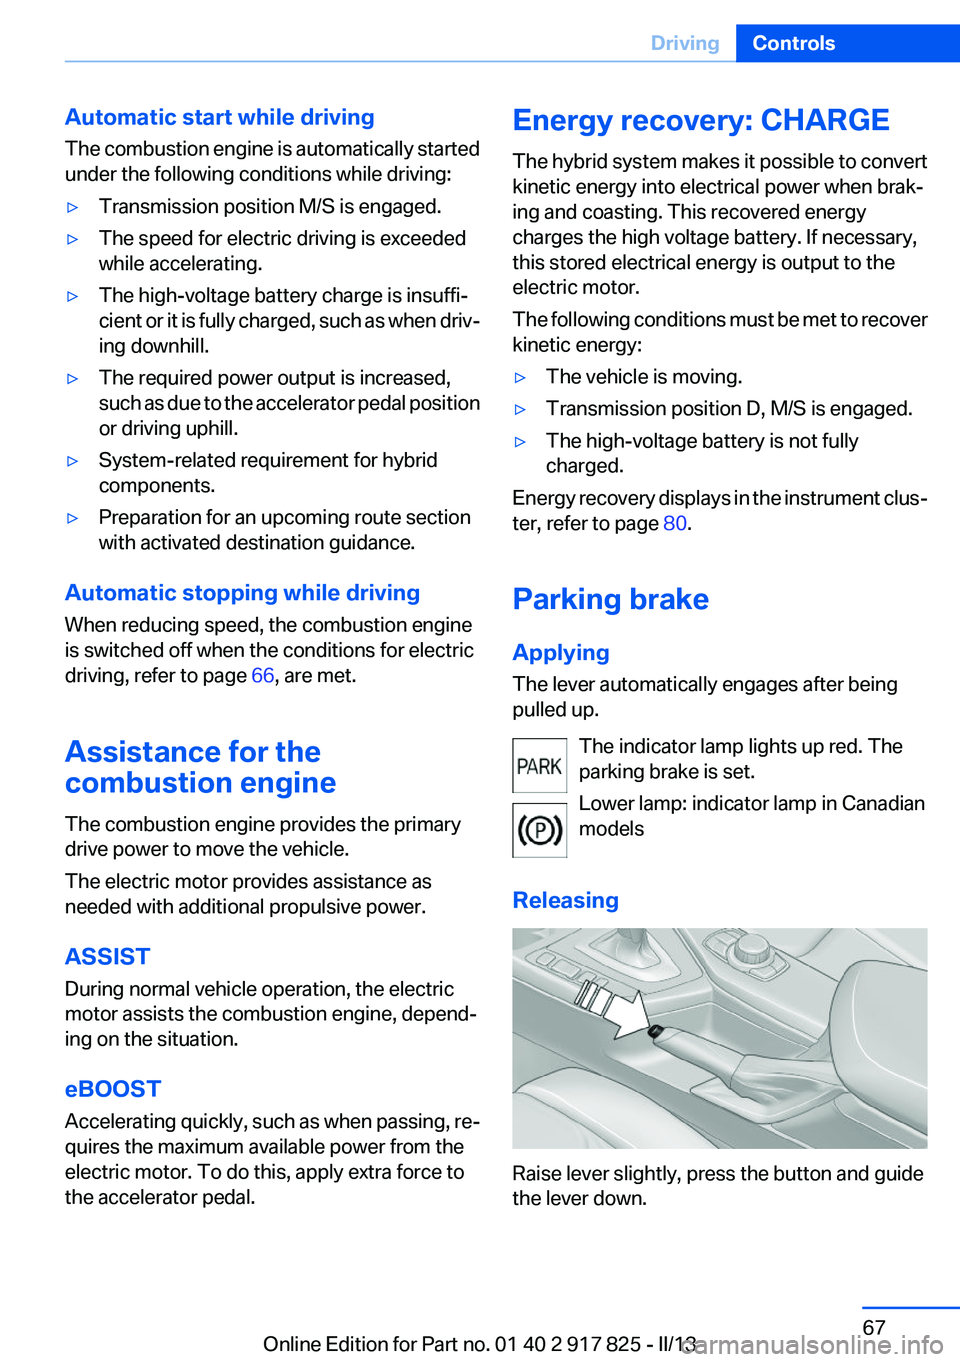
The lever automatically engages after being
pulled up.
The indicator lamp lights up red. The
parking brake is set.
Lower lamp: indicator lamp in Canadian
models
Releasing
Raise lever slightly, press the button and guide
the lever down.
Seite 67DrivingControls67
Online Edition for Part no. 01 40 2 917 825 - II/13
Page 68 of 220
HintsUse while driving
If on a rare occasion it is necessary to use
the parking brake while driving, do not use ex‐
cessive force when applying it. When using it,
keep the button on the lever depressed.
Otherwise, using excessive force when applying
the parking brake may cause the rear wheels to
lock, resulting in fishtailing.◀
To prevent corrosion and braking control on one
side only, lightly apply the parking brake period‐
ically while coasting, if traffic conditions permit.
The brake lamps will not light up if the parking
brake is engaged.
Turn signal, high beams,
headlamp flasher
Turn signal Do not fold in the exterior mirrors
Do not fold in the exterior mirror while driv‐
ing and when the turn signals/warning flashers
are working, or else the additional flasher lights
in the exterior mirror will no longer be in the pre‐
scribed position and will be difficult to see.◀
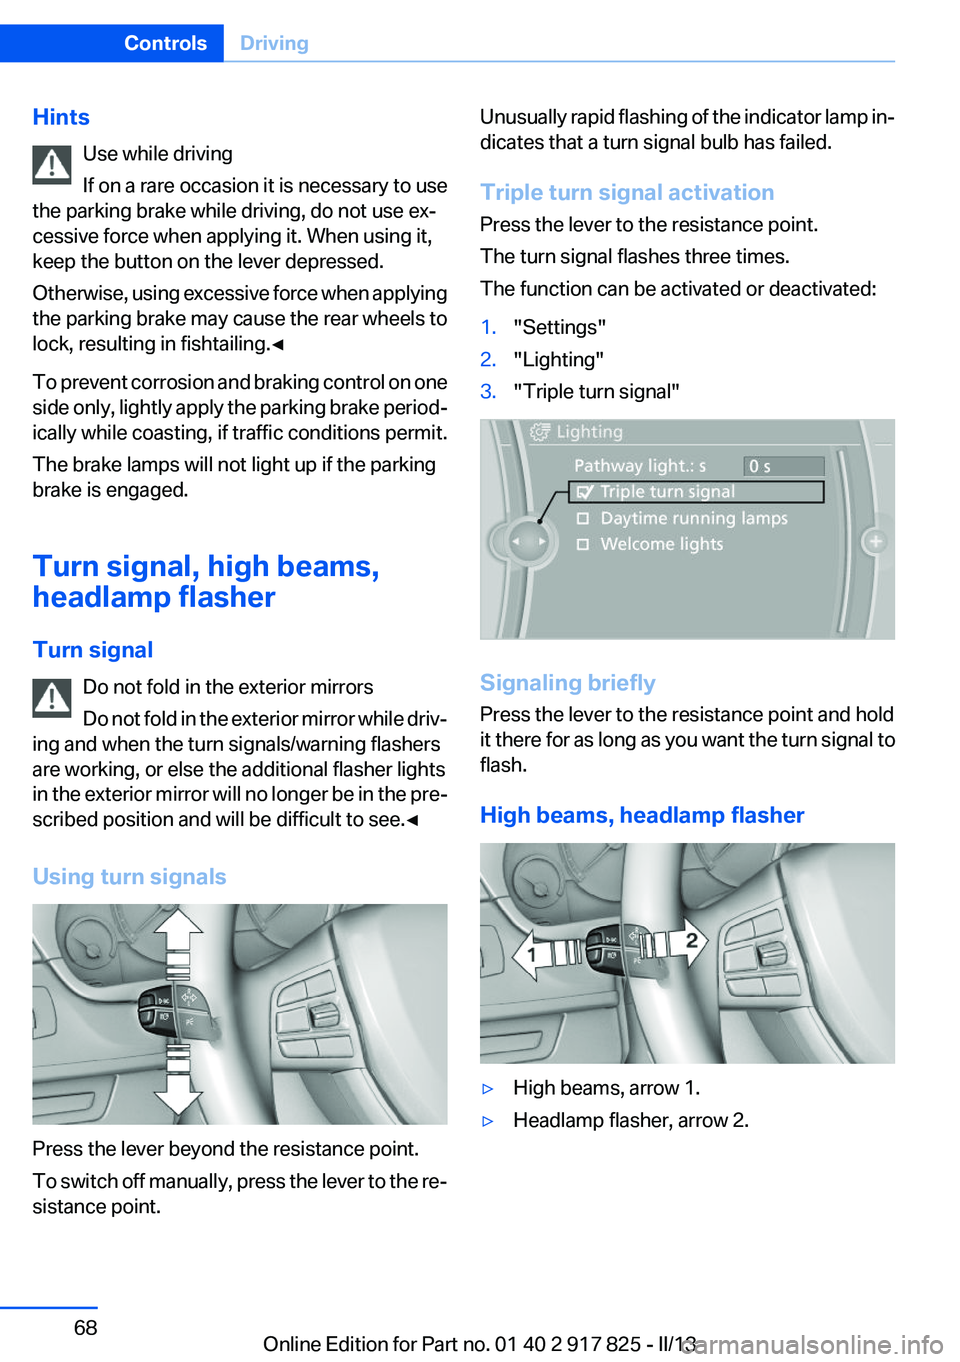
Using turn signals
Press the lever beyond the resistance point.
To switch off manually, press the lever to the re‐
sistance point.
Unusually rapid flashing of the indicator lamp in‐
dicates that a turn signal bulb has failed.
Triple turn signal activation
Press the lever to the resistance point.
The turn signal flashes three times.
The function can be activated or deactivated:1."Settings"2."Lighting"3."Triple turn signal"
Signaling briefly
Press the lever to the resistance point and hold
it there for as long as you want the turn signal to
flash.
High beams, headlamp flasher
▷High beams, arrow 1.▷Headlamp flasher, arrow 2.Seite 68ControlsDriving68
Online Edition for Part no. 01 40 2 917 825 - II/13
Page 72 of 220
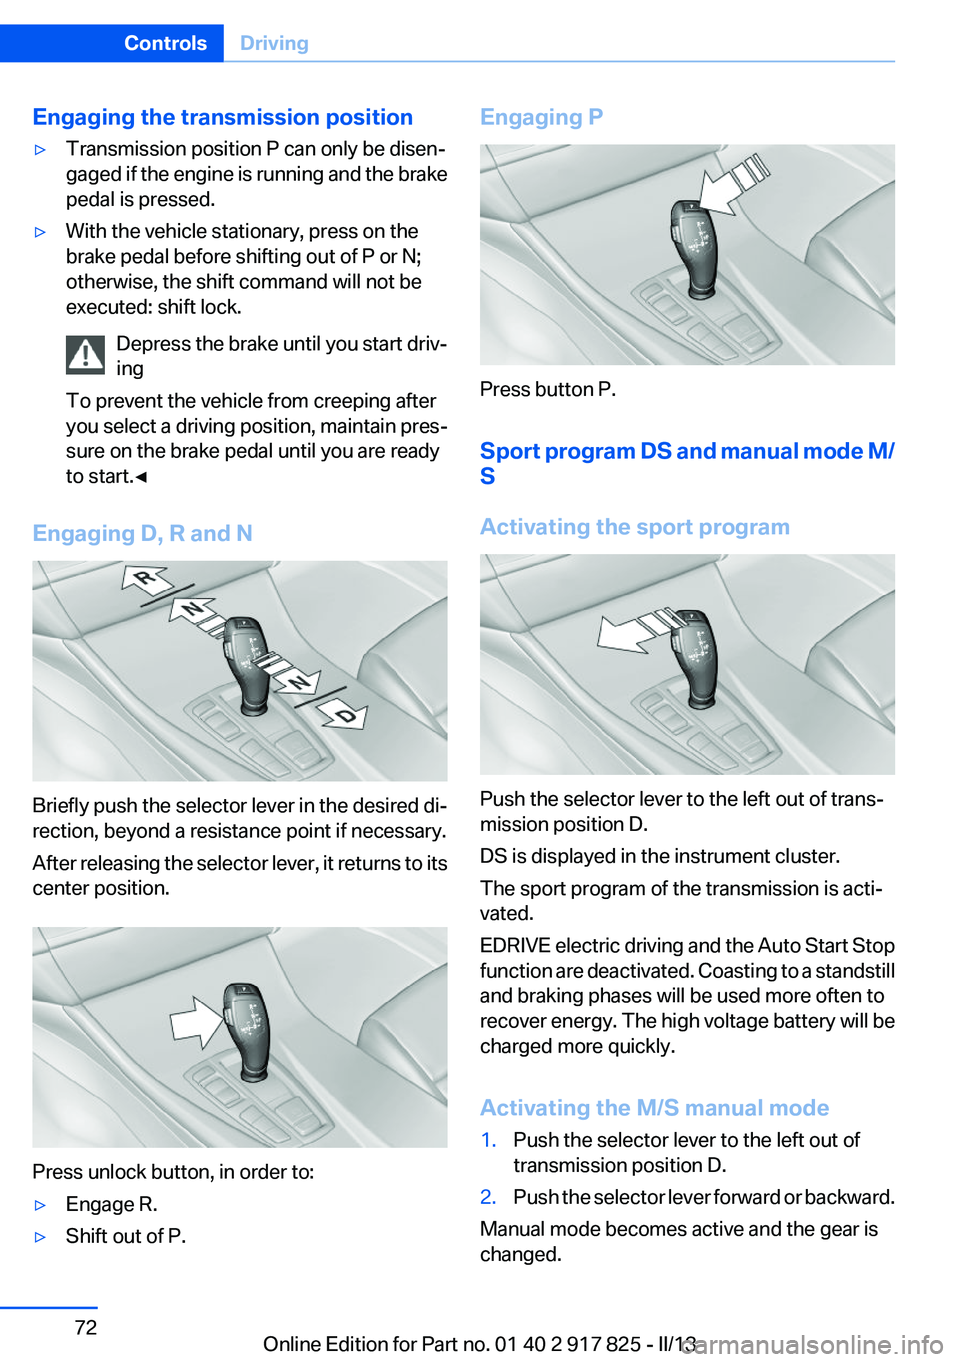
Engaging the transmission position▷Transmission position P can only be disen‐
gaged if the engine is running and the brake
pedal is pressed.▷With the vehicle stationary, press on the
brake pedal before shifting out of P or N;
otherwise, the shift command will not be
executed: shift lock.
Depress the brake until you start driv‐
ing
To prevent the vehicle from creeping after
you select a driving position, maintain pres‐
sure on the brake pedal until you are ready
to start.◀
Engaging D, R and N
Briefly push the selector lever in the desired di‐
rection, beyond a resistance point if necessary.
After releasing the selector lever, it returns to its
center position.
Press unlock button, in order to:
▷Engage R.▷Shift out of P.Engaging P
Press button P.
Sport program DS and manual mode M/
S
Activating the sport program
Push the selector lever to the left out of trans‐
mission position D.
DS is displayed in the instrument cluster.
The sport program of the transmission is acti‐
vated.
EDRIVE electric driving and the Auto Start Stop
function are deactivated. Coasting to a standstill
and braking phases will be used more often to
recover energy. The high voltage battery will be
charged more quickly.
Activating the M/S manual mode
1.Push the selector lever to the left out of
transmission position D.2.Push the selector lever forward or backward.
Manual mode becomes active and the gear is
changed.
Seite 72ControlsDriving72
Online Edition for Part no. 01 40 2 917 825 - II/13