BMW CONVERTIBLE 1998 Owners Manual
Manufacturer: BMW, Model Year: 1998, Model line: CONVERTIBLE, Model: BMW CONVERTIBLE 1998Pages: 179, PDF Size: 3.51 MB
Page 141 of 179
14 0
Under the luggage compartment lid.
Unscrew the wingnut for access.
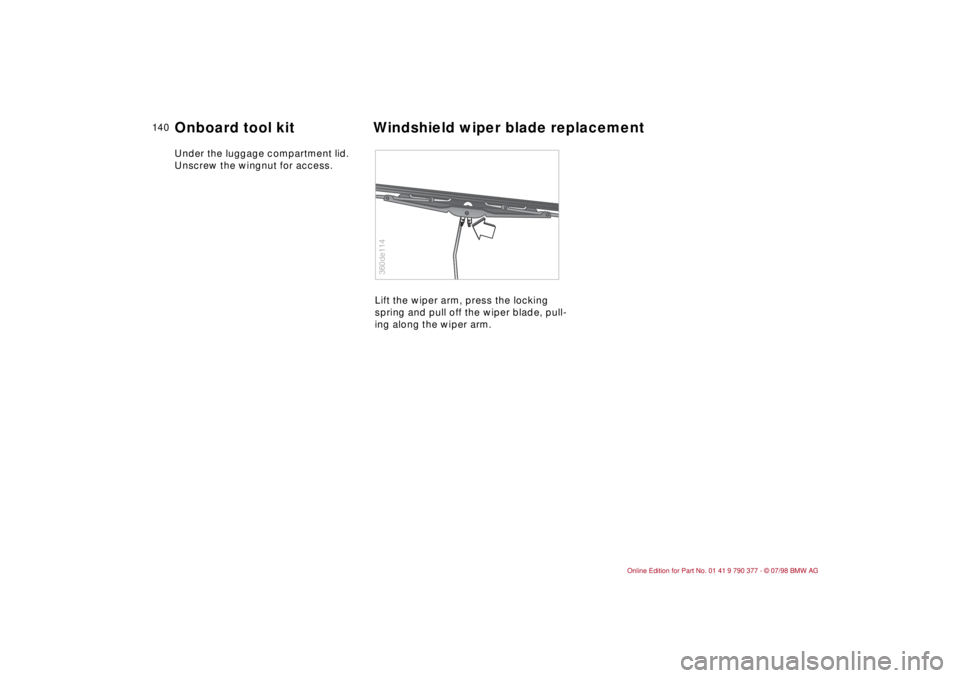
Lift the wiper arm, press the locking
spring and pull off the wiper blade, pull-
ing along the wiper arm.
360de114
Onboard tool kit Windshield wiper blade replacement
Page 142 of 179
14 1
At a glanceControlsCar careRepairsTechnicalDataIndex
The lamps and bulbs on your car play a
vital role in ensuring road safety, a fact
which you should always bear in mind
in caring for them. Carefully observe the
following instructions during bulb
replacement, referring any procedures
with which you are not familiar to your
BMW Retailer.b
Never touch the bulb glass of a
new lamp with your bare hands. Use a
clean cloth, paper napkin, etc. or hold
the bulb by its metallic base.c
A replacement bulb set is available from
your BMW Retailer.
a
To prevent short circuits, always
switch off all electrical systems and
components, or disconnect the negative
terminal of the battery, before working
on them.
To prevent injuries and damage, always
observe any instructions provided by
the bulb manufacturer.c
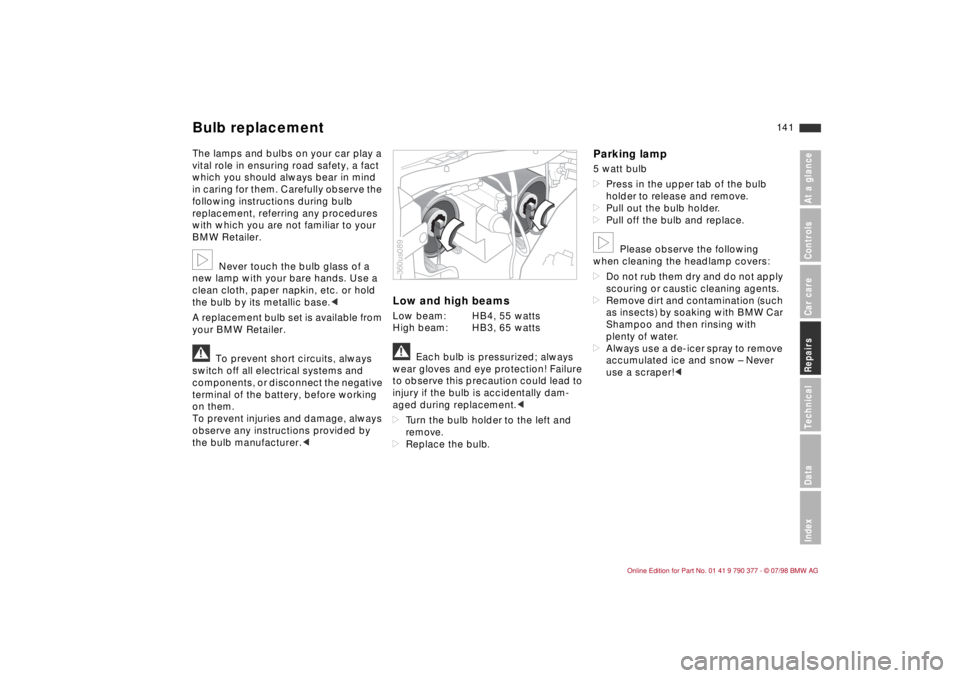
Low and high beamsLow beam: HB4, 55 watts
High beam: HB3, 65 wattsa
Each bulb is pressurized; always
wear gloves and eye protection! Failure
to observe this precaution could lead to
injury if the bulb is accidentally dam-
aged during replacement.c
dTurn the bulb holder to the left and
remove.
dReplace the bulb.
Parking lamp 5 watt bulb
dPress in the upper tab of the bulb
holder to release and remove.
dPull out the bulb holder.
dPull off the bulb and replace.b
Please observe the following
when cleaning the headlamp covers:
dDo not rub them dry and do not apply
scouring or caustic cleaning agents.
dRemove dirt and contamination (such
as insects) by soaking with BMW Car
Shampoo and then rinsing with
plenty of water.
dAlways use a de-icer spray to remove
accumulated ice and snow Ð Never
use a scraper!c
360us089
Bulb replacement
Page 143 of 179
14 2
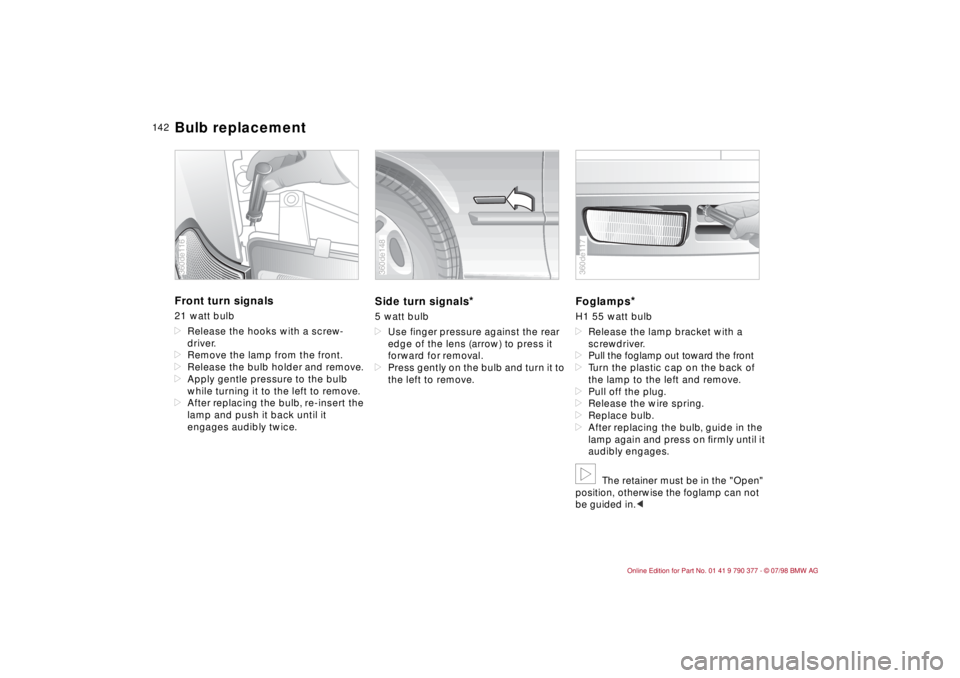
Front turn signals 21 watt bulb
dRelease the hooks with a screw-
driver.
dRemove the lamp from the front.
dRelease the bulb holder and remove.
dApply gentle pressure to the bulb
while turning it to the left to remove.
dAfter replacing the bulb, re-insert the
lamp and push it back until it
engages audibly twice.
Side turn signals
*
5 watt bulb
dUse finger pressure against the rear
edge of the lens (arrow) to press it
forward for removal.
dPress gently on the bulb and turn it to
the left to remove.
Foglamps
*
H1 55 watt bulb
dRelease the lamp bracket with a
screwdriver.
dPull the foglamp out toward the front
dTurn the plastic cap on the back of
the lamp to the left and remove.
dPull off the plug.
dRelease the wire spring.
dReplace bulb.
dAfter replacing the bulb, guide in the
lamp again and press on Þrmly until it
audibly engages.b
The retainer must be in the "Open"
position, otherwise the foglamp can not
be guided in.c
360de116
360de148
360de117
Bulb replacement
Page 144 of 179
14 3
At a glanceControlsCar careRepairsTechnicalDataIndex
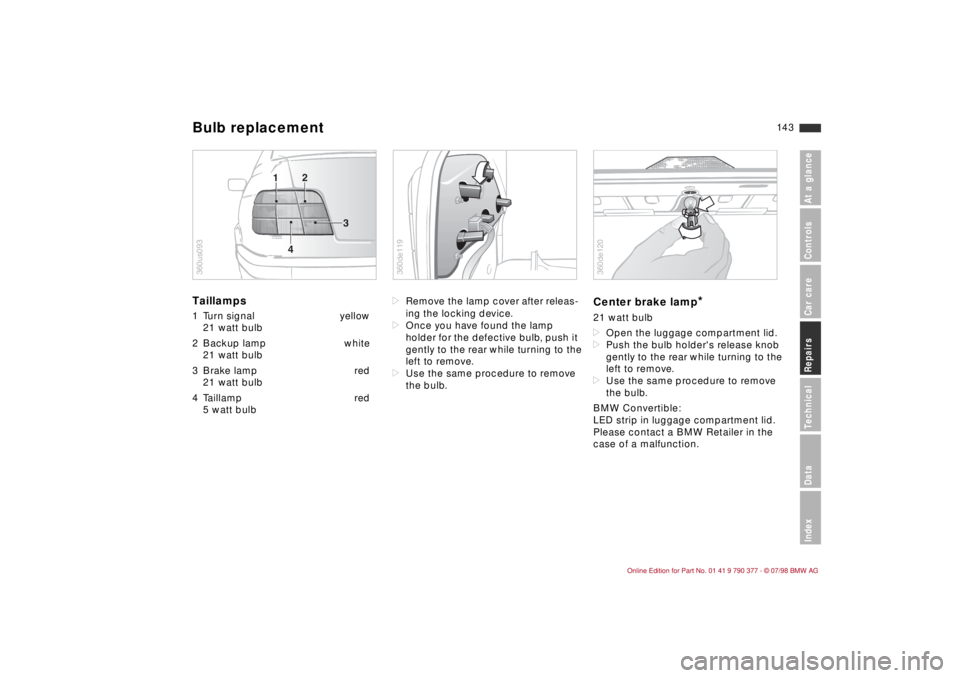
Taillamps 1 Turn signal yellow
21 watt bulb
2 Backup lamp white
21 watt bulb
3 Brake lamp red
21 watt bulb
4 Taillamp red
5 watt bulbdRemove the lamp cover after releas-
ing the locking device.
dOnce you have found the lamp
holder for the defective bulb, push it
gently to the rear while turning to the
left to remove.
dUse the same procedure to remove
the bulb.
Center brake lamp
*
21 watt bulb
dOpen the luggage compartment lid.
dPush the bulb holder's release knob
gently to the rear while turning to the
left to remove.
dUse the same procedure to remove
the bulb.
BMW Convertible:
LED strip in luggage compartment lid.
Please contact a BMW Retailer in the
case of a malfunction.
12
3
4
360us093
360de119
360de120
Bulb replacement
Page 145 of 179
14 4
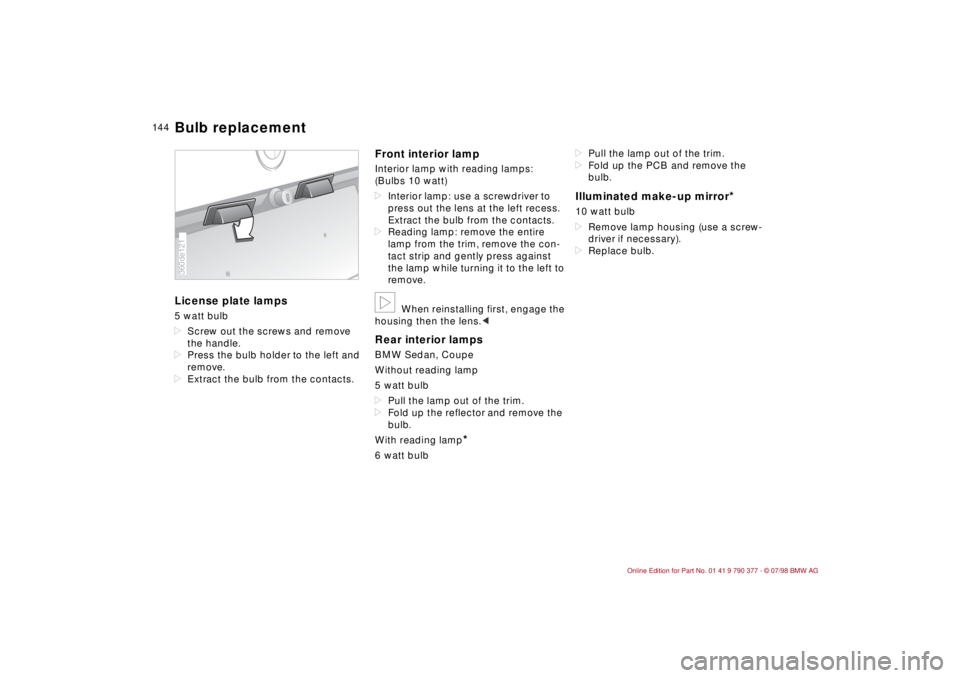
License plate lamps 5 watt bulb
dScrew out the screws and remove
the handle.
dPress the bulb holder to the left and
remove.
dExtract the bulb from the contacts.
Front interior lamp Interior lamp with reading lamps:
(Bulbs 10 watt)
dInterior lamp: use a screwdriver to
press out the lens at the left recess.
Extract the bulb from the contacts.
dReading lamp: remove the entire
lamp from the trim, remove the con-
tact strip and gently press against
the lamp while turning it to the left to
remove.b
When reinstalling first, engage the
housing then the lens.c
Rear interior lampsBMW Sedan, Coupe
Without reading lamp
5 watt bulb
dPull the lamp out of the trim.
dFold up the reflector and remove the
bulb.
With reading lamp
*
6 watt bulbdPull the lamp out of the trim.
dFold up the PCB and remove the
bulb.
Illuminated make-up mirror
*
10 watt bulb
dRemove lamp housing (use a screw-
driver if necessary).
dReplace bulb.
360de121Bulb replacement
Page 146 of 179
14 5
At a glanceControlsCar careRepairsTechnicalDataIndex
Luggage compartment lamps BMW Sedan, Coupe
10 watt bulb
Lamp on underside of rear shelf:
dUse a screwdriver to pry out the lamp
at the recess.
dReplace bulb.
BMW Convertible:
5 watt bulbs
There is one lamp each in the bulb cov-
ers of the rear lamps.
dUse a screwdriver to pry out the lamp
at the recess.
dReplace bulb.Glove compartment lamp 5 watt bulb
dUse a screwdriver to pry out the lamp
forward.
dReplace bulb.Footwell lamps
*
5 watt bulb
dUse a screwdriver to pry the lamp out
of the lower instrument panel trim.
dReplace bulb.
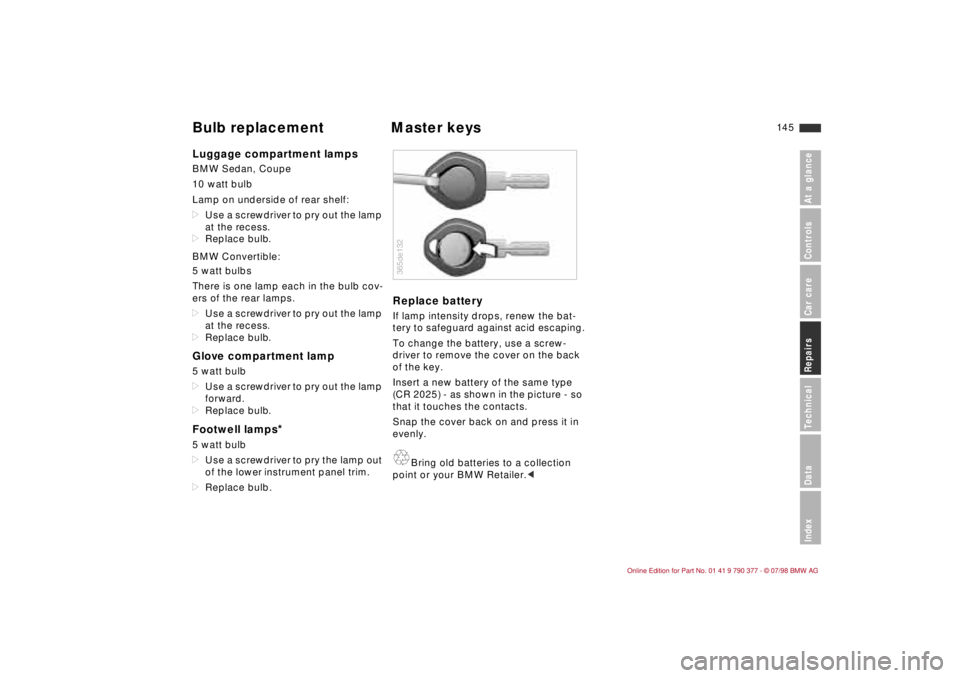
Replace batteryIf lamp intensity drops, renew the bat-
tery to safeguard against acid escaping.
To change the battery, use a screw-
driver to remove the cover on the back
of the key.
Insert a new battery of the same type
(CR 2025) - as shown in the picture - so
that it touches the contacts.
Snap the cover back on and press it in
evenly.A
Bring old batteries to a collection
point or your BMW Retailer.c365de132
Bulb replacement Master keys
Page 147 of 179
14 6
a
Change tires only on a flat, hard
surface affording good traction. Avoid
jacking the car on a soft or slippery sup-
port surface (snow, ice, loose gravel,
etc.), as it could slide sideways.
Take extra care to ensure that the base
of the jack is positioned on a solid sup-
port surface.
Never use wooden blocks or similar
objects to support the base of the jack,
as the weight of the car could exceed
their support capacity.
Never lie beneath the vehicle or start
the engine while the car is supported by
the jack - risk of fatal injury.
Additional precautions to observe when
changing flat tires:
When pulling over on the roadside to
change a tire, always try to park the car
as far as possible from passing traffic.
Switch on the hazard flashers.
All passengers should be outside the
car and well away from your immediate
working area (e.g., behind the guard-
rail).Turn the steering wheel to the straight-
ahead position, remove the key and
engage the steering lock. Shift into 1st
or reverse (selector lever in Park with
automatic) and engage the parking
brake.
If a warning triangle or portable hazard
warning lamp is available, set it up on
the roadside at an appropriate distance
from the rear of the vehicle. Observe all
safety guidelines and regulations.c
b
To avoid rattling noises, note the
positions of the tools and return them to
their original positions.c
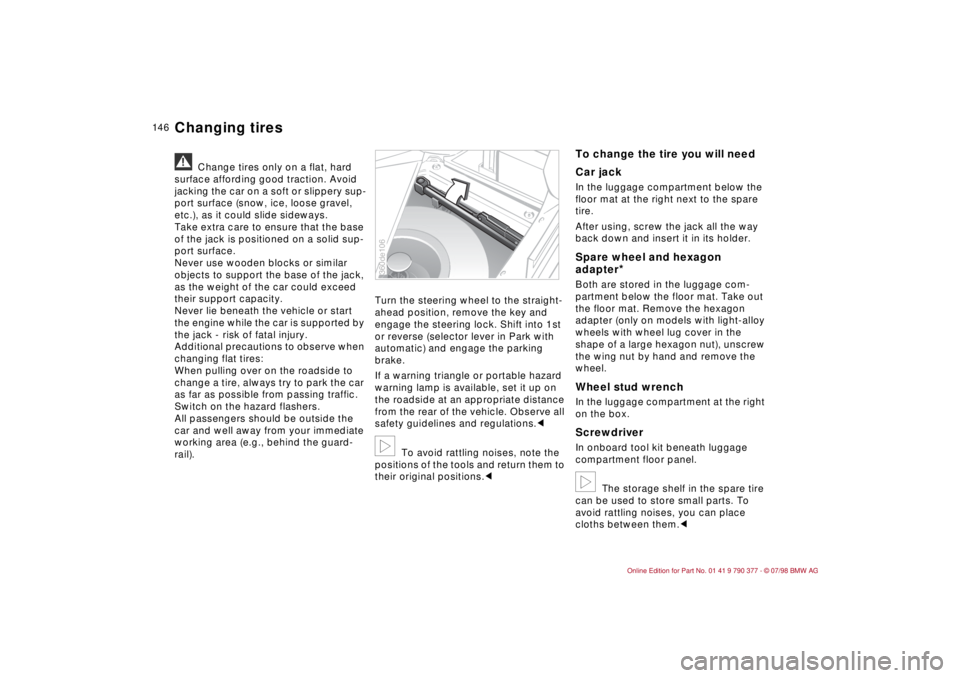
To change the tire you will need
Car jackIn the luggage compartment below the
floor mat at the right next to the spare
tire.
After using, screw the jack all the way
back down and insert it in its holder.Spare wheel and hexagon
adapter
*
Both are stored in the luggage com-
partment below the floor mat. Take out
the floor mat. Remove the hexagon
adapter (only on models with light-alloy
wheels with wheel lug cover in the
shape of a large hexagon nut), unscrew
the wing nut by hand and remove the
wheel.Wheel stud wrench In the luggage compartment at the right
on the box. ScrewdriverIn onboard tool kit beneath luggage
compartment floor panel.b
The storage shelf in the spare tire
can be used to store small parts. To
avoid rattling noises, you can place
cloths between them.c
360de106
Changing tires
Page 148 of 179
14 7
At a glanceControlsCar careRepairsTechnicalDataIndex
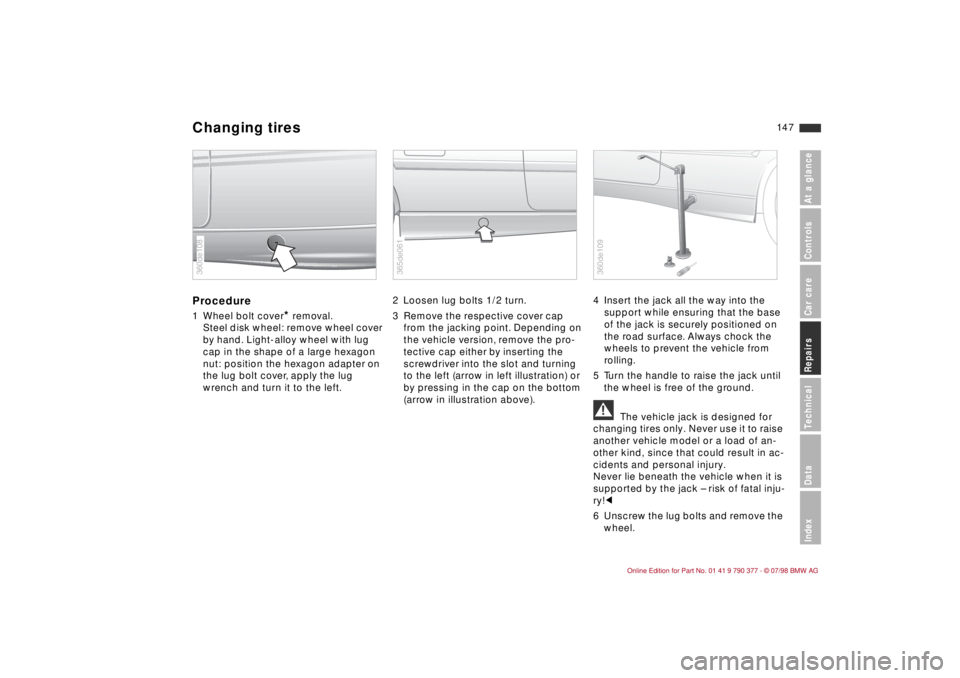
Procedure1 Wheel bolt cover
* removal.
Steel disk wheel: remove wheel cover
by hand. Light-alloy wheel with lug
cap in the shape of a large hexagon
nut: position the hexagon adapter on
the lug bolt cover, apply the lug
wrench and turn it to the left.2 Loosen lug bolts 1/2 turn.
3 Remove the respective cover cap
from the jacking point. Depending on
the vehicle version, remove the pro-
tective cap either by inserting the
screwdriver into the slot and turning
to the left (arrow in left illustration) or
by pressing in the cap on the bottom
(arrow in illustration above).4 Insert the jack all the way into the
support while ensuring that the base
of the jack is securely positioned on
the road surface. Always chock the
wheels to prevent the vehicle from
rolling.
5 Turn the handle to raise the jack until
the wheel is free of the ground.
a
The vehicle jack is designed for
changing tires only. Never use it to raise
another vehicle model or a load of an-
other kind, since that could result in ac-
cidents and personal injury.
Never lie beneath the vehicle when it is
supported by the jack Ð risk of fatal inju-
ry!c
6 Unscrew the lug bolts and remove the
wheel.
360de108
365de061
360de109
Changing tires
Page 149 of 179
14 8
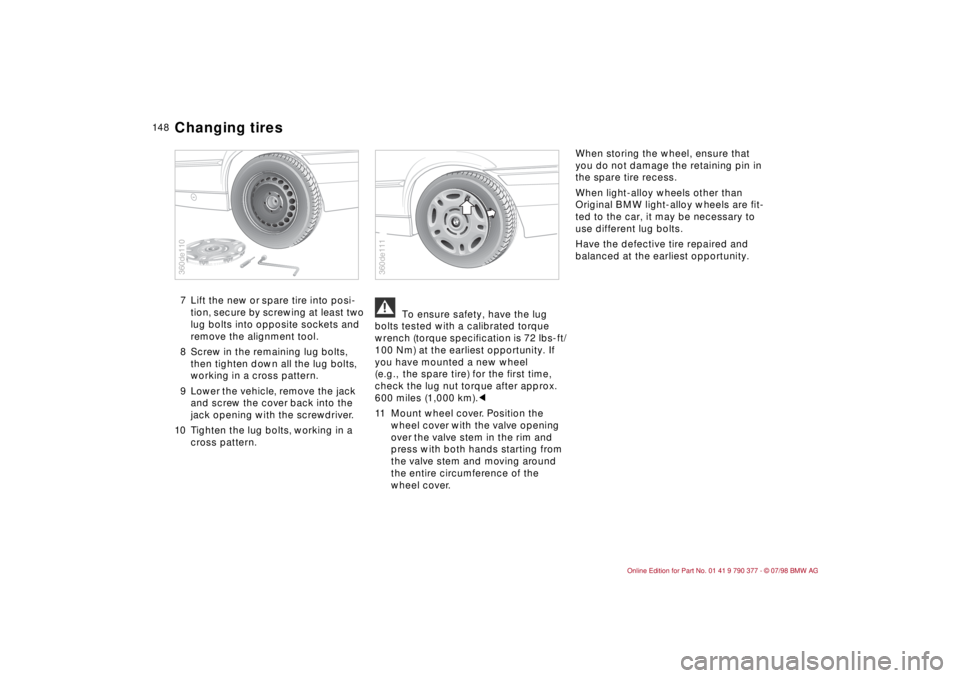
7 Lift the new or spare tire into posi-
tion, secure by screwing at least two
lug bolts into opposite sockets and
remove the alignment tool.
8 Screw in the remaining lug bolts,
then tighten down all the lug bolts,
working in a cross pattern.
9 Lower the vehicle, remove the jack
and screw the cover back into the
jack opening with the screwdriver.
10 Tighten the lug bolts, working in a
cross pattern.
a
To ensure safety, have the lug
bolts tested with a calibrated torque
wrench (torque specification is 72 lbs-ft/
100 Nm) at the earliest opportunity. If
you have mounted a new wheel
(e.g., the spare tire) for the first time,
check the lug nut torque after approx.
600 miles (1,000 km).c
11 Mount wheel cover. Position the
wheel cover with the valve opening
over the valve stem in the rim and
press with both hands starting from
the valve stem and moving around
the entire circumference of the
wheel cover.When storing the wheel, ensure that
you do not damage the retaining pin in
the spare tire recess.
When light-alloy wheels other than
Original BMW light-alloy wheels are fit-
ted to the car, it may be necessary to
use different lug bolts.
Have the defective tire repaired and
balanced at the earliest opportunity.
360de110
BMW
360de111
Changing tires
Page 150 of 179
14 9
At a glanceControlsCar careRepairsTechnicalDataIndex
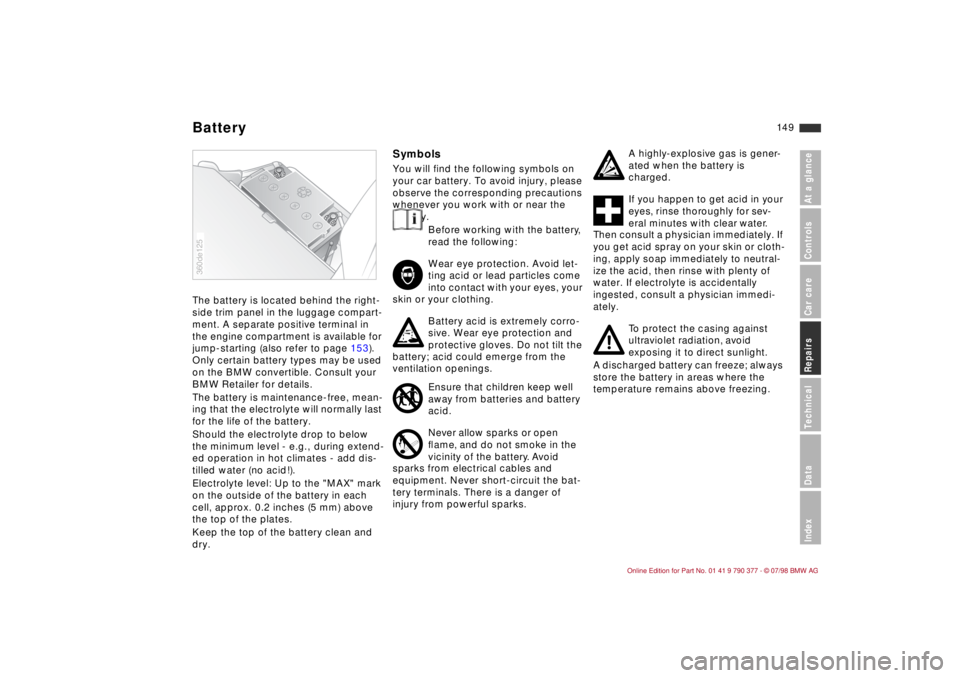
The battery is located behind the right-
side trim panel in the luggage compart-
ment. A separate positive terminal in
the engine compartment is available for
jump-starting (also refer to page 153).
Only certain battery types may be used
on the BMW convertible. Consult your
BMW Retailer for details.
The battery is maintenance-free, mean-
ing that the electrolyte will normally last
for the life of the battery.
Should the electrolyte drop to below
the minimum level - e.g., during extend-
ed operation in hot climates - add dis-
tilled water (no acid!).
Electrolyte level: Up to the "MAX" mark
on the outside of the battery in each
cell, approx. 0.2 inches (5 mm) above
the top of the plates.
Keep the top of the battery clean and
dry.
SymbolsYou will find the following symbols on
your car battery. To avoid injury, please
observe the corresponding precautions
whenever you work with or near the
battery.
360de125
Before working with the battery,
read the following:
R
Wear eye protection. Avoid let-
ting acid or lead particles come
into contact with your eyes, your
skin or your clothing.
S
Battery acid is extremely corro-
sive. Wear eye protection and
protective gloves. Do not tilt the
battery; acid could emerge from the
ventilation openings.
T
Ensure that children keep well
away from batteries and battery
acid.
U
Never allow sparks or open
ßame, and do not smoke in the
vicinity of the battery. Avoid
sparks from electrical cables and
equipment. Never short-circuit the bat-
tery terminals. There is a danger of
injury from powerful sparks.
V
A highly-explosive gas is gener-
ated when the battery is
charged.
W
If you happen to get acid in your
eyes, rinse thoroughly for sev-
eral minutes with clear water.
Then consult a physician immediately. If
you get acid spray on your skin or cloth-
ing, apply soap immediately to neutral-
ize the acid, then rinse with plenty of
water. If electrolyte is accidentally
ingested, consult a physician immedi-
ately.
X
To protect the casing against
ultraviolet radiation, avoid
exposing it to direct sunlight.
A discharged battery can freeze; always
store the battery in areas where the
temperature remains above freezing.
Battery