manual radio set BMW I8 2014 I12 Owner's Manual
[x] Cancel search | Manufacturer: BMW, Model Year: 2014, Model line: I8, Model: BMW I8 2014 I12Pages: 216, PDF Size: 12.45 MB
Page 36 of 216

Menu items in the Owner's ManualIn the Owner's Manual, menu items that can be
selected are set in quotation marks, e.g.,
"Settings".
Changing between panels
After a menu item is selected, e.g., "Radio", a
new panel is displayed. Panels can overlap.▷Move the controller to the left.
Closes current display and shows previous
display.
Reopens previous display by pressing
BACK button. In this case, the current
panel is not closed.▷Move the controller to the right.
Opens new display on top of previous
screen.
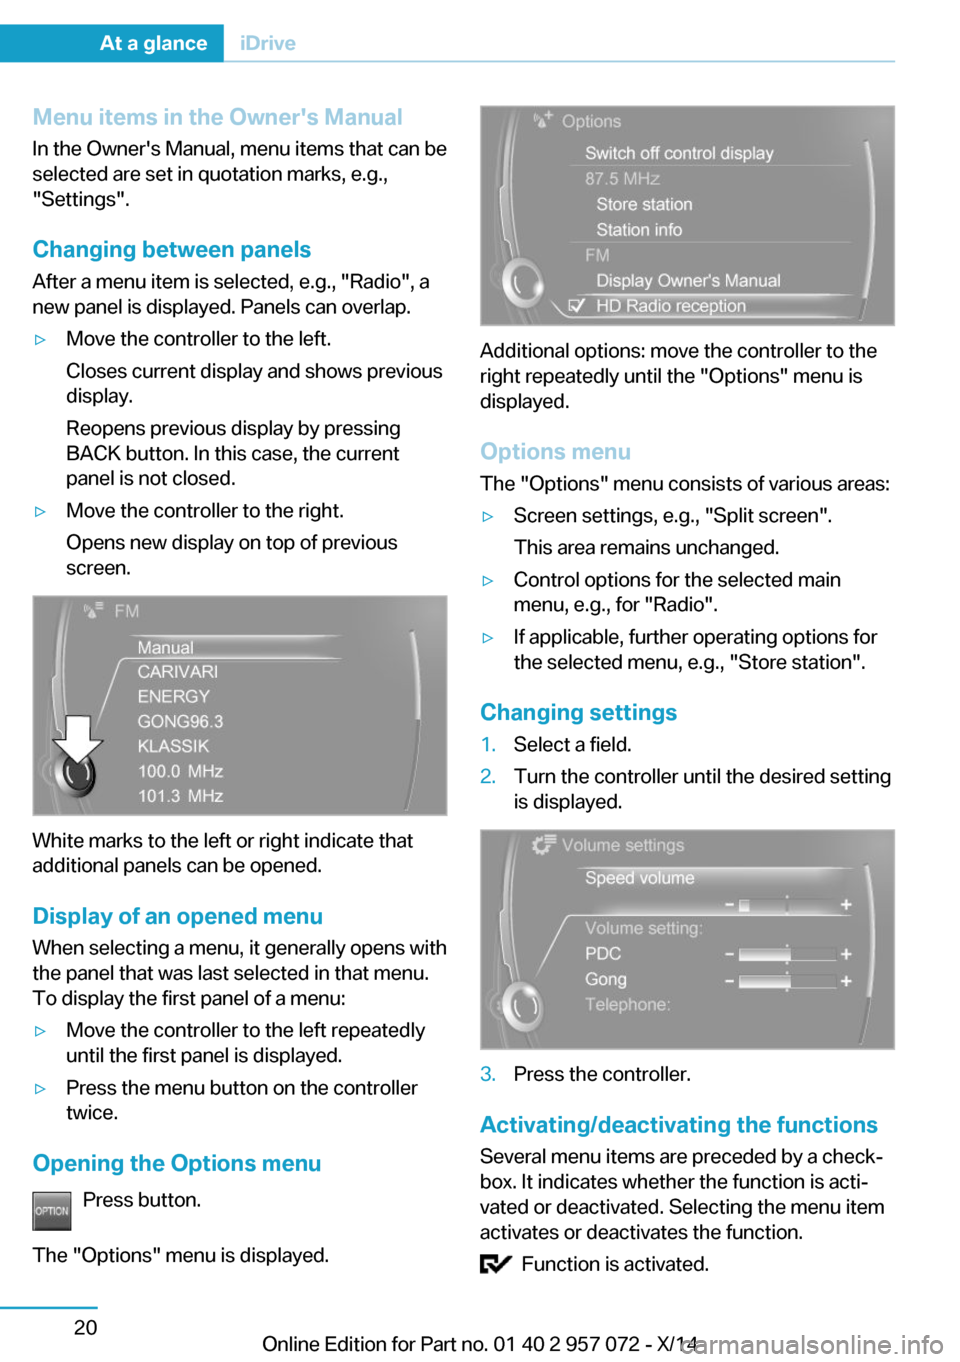
White marks to the left or right indicate that
additional panels can be opened.
Display of an opened menu
When selecting a menu, it generally opens with
the panel that was last selected in that menu.
To display the first panel of a menu:
▷Move the controller to the left repeatedly
until the first panel is displayed.▷Press the menu button on the controller
twice.
Opening the Options menu
Press button.
The "Options" menu is displayed.
Additional options: move the controller to the
right repeatedly until the "Options" menu is
displayed.
Options menu The "Options" menu consists of various areas:
▷Screen settings, e.g., "Split screen".
This area remains unchanged.▷Control options for the selected main
menu, e.g., for "Radio".▷If applicable, further operating options for
the selected menu, e.g., "Store station".
Changing settings
1.Select a field.2.Turn the controller until the desired setting
is displayed.3.Press the controller.
Activating/deactivating the functions
Several menu items are preceded by a check‐
box. It indicates whether the function is acti‐
vated or deactivated. Selecting the menu item
activates or deactivates the function.
Function is activated.
Seite 20At a glanceiDrive20
Online Edition for Part no. 01 40 2 957 072 - X/14
Page 56 of 216

LockingLocking from the outside
Do not lock the vehicle from the outside
with people inside the car, as the vehicle can‐
not be unlocked from inside without special
knowledge.◀
Press button on the remote control.
All doors and the tailgate are locked.
Anti-theft protection is switched on. It pre‐
vents the doors from being unlocked using the
door openers.
The alarm system, refer to page 45, is armed.
Switching on interior lights Press button on the remote control with
the vehicle locked.
This function is not available, if the interior
lamps were switched off manually.
If the button is pressed again within 10 sec‐
onds after vehicle was locked, the interior mo‐
tion sensor and tilt alarm sensor of the anti-
theft warning system, refer to page 46, are
turned off. After locking, wait 10 seconds be‐
fore pressing the button again.
Unlocking the tailgate Press button on the remote control for
approx. 1 second.
The tailgate opens slightly, regardless of
whether the vehicle was previously locked or
unlocked.
Depending on the features and the country
version, it is also possible to have door un‐ locked. Create the settings, refer to page 44.
If the doors were not unlocked, the tailgate is
locked again as soon as it closes.Do not place the remote control in the
cargo area
Take the remote control with you and do not
leave it in the cargo area; otherwise, the re‐
mote control is locked inside the vehicle when
the tailgate is closed.◀
Provide edge protection
Sharp objects or those with edges can
hit the rear window while driving and damage
the heat conductors of the rear window. Pro‐
vide edge protection.◀
Without alarm system: switching the
headlamp courtesy delay feature on
The headlight courtesy delay feature function
must be set for the remote control button. For
Settings, refer to page 44.
Briefly press the button on the remote
control.
The duration can be set in the Control Display.
With alarm system: panic mode You can trigger the alarm system if you find
yourself in a dangerous situation.
Press button on the remote control for
at least 3 seconds.
To reel off the alarm: press any button.
Malfunction
Remote control detection by the vehicle can
among others be malfunctioning under the fol‐
lowing circumstances:▷Interference of the radio connection from
transmission towers or other equipment
with high transmit power.▷Shielding of the remote control due to
metal objects.▷Interference of the radio connection from
mobile phones or other electronic devices
in direct proximity.Seite 40ControlsOpening and closing40
Online Edition for Part no. 01 40 2 957 072 - X/14
Page 128 of 216

Switching on/off
Switching on automatically PDC switches on automatically in the following
situations:▷If selector lever position R is engaged while
the engine is running or in electric mode.
The rearview camera also switches on.▷If equipped with front PDC: when obsta‐
cles are detected behind or in front of the
vehicle by PDC and the speed is slower
than approx. 2 mph/3 km/h.
You may turn off automatic activation:
1."Settings"2."Parking"3.Select setting.
Settings are stored for the profile currently
in use.
Automatic deactivation during forward
travel
The system switches off when a certain driving
distance or speed is exceeded.
Switch the system back on if needed.
With front PDC: switching on/off
manually
Press button.
▷On: the LED lights up.▷Off: the LED goes out.
The rearview camera image is displayed when
the reverse gear is engaged by pressing the
button.
Display
Signal tones When approaching an object, an intermittent
sound indicates the position of the object. E. g.
if an object is detected to the left rear of the
vehicle, a signal tone sounds from the left rear
speaker.
The shorter the distance to the object, the
shorter the intervals.
If the distance to a detected object in the front
is less than approx. 12 in/30 cm and in the rear
less than approx. 20 in/50 cm, a continuous
tone is sounded.
With front PDC: if objects are located both in
front of and behind the vehicle, an alternating
continuous signal is sounded.
The signal tone is switched off:▷When the vehicle moves away from an ob‐
ject by more than approx. 4 in/10 cm.▷When selector lever position P is engaged
on vehicles with Steptronic transmission.
Volume
The volume of the PDC signal tone can be ad‐
justed similar to the sound and volume set‐
tings of the radio.
Settings are stored for the profile currently in
use.
Visual warning
The approach of the vehicle to an object can
be shown on the Control Display. Objects that
are farther away are already displayed on the
Control Display before a signal sounds.
A display appears as soon as Park Distance
Control (PDC) is activated.
The range of the sensors is represented in the
colors green, yellow and red.
When the image of the rearview camera is dis‐
played, the reel can be made to PDC:
"Rear view camera"
System limits
Limits of ultrasonic measurement
Ultrasonic measuring might not function under
the following circumstances:
Seite 112ControlsDriving comfort112
Online Edition for Part no. 01 40 2 957 072 - X/14