cooling BMW I8 2015 I12 Owner's Manual
[x] Cancel search | Manufacturer: BMW, Model Year: 2015, Model line: I8, Model: BMW I8 2015 I12Pages: 224, PDF Size: 12.46 MB
Page 79 of 224
Lighting lights up steady blue
After drive readiness is switched on, light turns
blue. The vehicle is ready to drive. The READY
indicator lights up in the instrument cluster. In
addition, a signal sounds.
Lighting off
Drive readiness, operating readiness and
radio-ready state are turned off. The vehicle is
in the idle state. The charging cable may be
connected.
Activating drive readiness1.Close the driver's door.2.Depress the brake pedal.3.Press the Start/Stop button.
Drive readiness is active, electric driving, Silent
Start or Start of the combustion engine.
Electric drive readiness, Silent Start
The vehicle is ready for driving without starting
the combustion engine.
Silent Start is possible if the requirements for
Electric driving, refer to page 64, are met.
Display READY indicates drive readi‐
ness.
Starting the combustion engine Enclosed areas
Do not let the engine run in enclosed
areas, since breathing in exhaust fumes may
lead to loss of consciousness and death. The
exhaust gases contain carbon monoxide, an
odorless and colorless but highly toxic gas.◀
Unattended vehicle
Do not leave the vehicle unattended with
engine running or drive readiness switched on;
otherwise, it may pose a risk.
Before leaving the vehicle, engage lever in po‐
sition P P, and set the parking brake; other‐
wise, the vehicle is not secured against rolling
away.◀
Repeated starting in quick succession
Avoid trying to start the vehicle repeat‐
edly and in quick succession. Otherwise, the
fuel is not burned or is inadequately burned,
posing a risk of overheating and damage to the
catalytic converter.◀
The combustion engine is started with Acti‐
vate drive, refer to page 63, readiness under
the following conditions:▷The temperature of the hybrid system is
too high.▷The charge level or temperature of the
high-voltage battery is too low.
Driving away
1.Activate drive readiness.2.Apply the brake and engage lever in posi‐
tion P D, SPORT or R.3.Release the parking brake.4.Drive away.
Deactivating drive readiness
After parking the vehicle, you may hear noises due to operation of the hybrid system, such as
for cooling of the high-voltage battery.
After stopping the vehicle:
1.Depress the brake pedal.2.Set the parking brake.3.Press the Start/Stop button.
The READY indicator goes out and a signal
sounds. In case of longer idle times, follow the
instructions in the Care chapter, refer to
page 190.
Seite 63DrivingControls63
Online Edition for Part no. 01 40 2 960 891 - II/15
Page 140 of 224
Climate controlVehicle features and options
This chapter describes all standard, country-
specific and optional features offered with the
series. It also describes features that are not
necessarily available in your car, e. g., due tothe selected options or country versions. This
also applies to safety-related functions and
systems. The respectively applicable country
provisions must be observed when using the
respective features and systems.
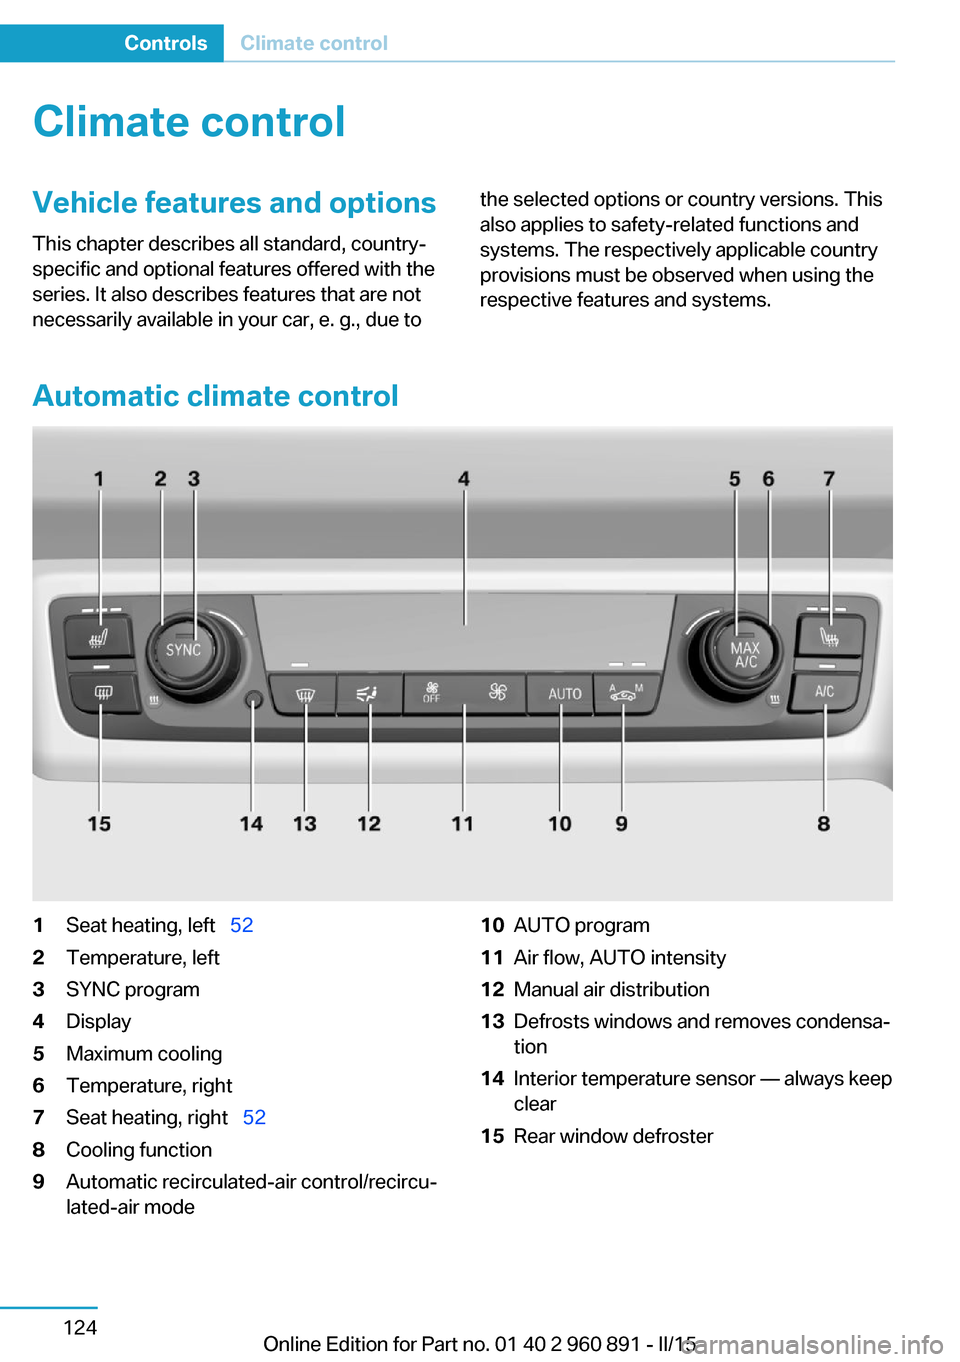
Automatic climate control
1Seat heating, left 522Temperature, left3SYNC program4Display5Maximum cooling6Temperature, right7Seat heating, right 528Cooling function9Automatic recirculated-air control/recircu‐
lated-air mode10AUTO program11Air flow, AUTO intensity12Manual air distribution13Defrosts windows and removes condensa‐
tion14Interior temperature sensor — always keep
clear15Rear window defrosterSeite 124ControlsClimate control124
Online Edition for Part no. 01 40 2 960 891 - II/15
Page 141 of 224
HintsSufficient ventilation
When remaining in the vehicle for an ex‐
tended period of time, ensure sufficient exter‐
nal ventilation. Do not continuously use recir‐
culated-air mode; otherwise the air quality in
the interior continuously deteriorates and win‐
dow condensation increases.◀
Climate control functions in detail
Temperature Turn the ring to set the desired
temperature.
The selected temperature is shown on the dis‐
play of the automatic climate control.
The automatic climate control reaches this
temperature as quickly as possible, if needed
by increasing the cooling or heating output,
and then keeps it constant.
Do not rapidly switch between different tem‐
perature settings. Otherwise, the automatic cli‐
mate control will not have sufficient time to ad‐
just the set temperature.
To reduce the energy consumption, the cool‐
ing or heating output is reduced in ECO-PRO
mode, refer to page 145. ECO PRO is shown
on the display of the automatic climate control.
SYNC program Press button.
The current setting of the temperature
on the driver's side is transferred to the front
passenger side.
The program is switched off if the setting on
the front passenger side is changed.Maximum cooling
Press button.
The system is set to the lowest tem‐
perature, optimum air flow and air circulation
mode.
Air flows out of the vents to the upper body re‐
gion. The vents need to be open for this.
The function is available above an external
temperature of approx. 32 ℉/0 ℃ and with the
engine running or when electrical drive readi‐
ness is indicated is indicated.
Adjust air flow with the program active.
Cooling function The car's interior can be cooled with the sta‐
tionary climate control or via the A/C button
with the engine running and/or with drive readi‐
ness activated.
Press button.
The air will be cooled and dehumidi‐
fied and, depending on the temperature set‐ ting, warmed again.
Depending on the weather, the windshield and
side windows may fog up briefly when the en‐
gine is started or drive readiness is activated.
The cooling function is switched on automati‐
cally with the AUTO program.
When using the automatic climate control,
condensation water, refer to page 141, devel‐
ops that exits underneath the vehicle.
Automatic recirculated-air control/
recirculated-air mode
You may respond to unpleasant odors or pollu‐tants in the immediate environment by tempo‐
rarily suspending the supply of outside air. The
system then recirculates the air currently
within the vehicle.
Press button repeatedly to select an
operating mode:Seite 125Climate controlControls125
Online Edition for Part no. 01 40 2 960 891 - II/15
Page 142 of 224
▷LEDs off: outside air flows in continuously.▷Left LED on, automatic recirculated-air
control: a sensor detects pollutants in the
outside air and shuts off automatically.▷Right LED on, recirculated-air mode: the
supply of outside air into the vehicle is per‐
manently blocked.
Recirculated air mode switches off automati‐
cally at low external temperatures after a cer‐
tain amount of time in order to avoid window
fogging.
To prevent window fogging, recirculated air
mode switches off automatically after a certain
amount of time, depending on the environ‐
mental conditions.
If the windows are fogged over, switch off the
recirculated-air mode and press the AUTO
button to utilize the condensation sensor.
Make sure that air can flow to the windshield.
Sufficient ventilation
When remaining in the vehicle for an ex‐
tended period of time, ensure sufficient exter‐
nal ventilation. Do not continuously use recir‐
culated-air mode; otherwise the air quality in
the interior continuously deteriorates and win‐
dow condensation increases.◀
AUTO program Press button.
Air flow, air distribution and tempera‐
ture are controlled automatically.
Depending on the selected temperature,
AUTO intensity program and outside influen‐
ces, the air is directed to the windshield, side
windows, upper body, and into the footwell.
The cooling function, refer to page 125, is
switched on automatically with the AUTO pro‐
gram.
At the same time, a condensation sensor con‐
trols the program so as to prevent window
condensation as much as possible.
To switch off the program: press the button
again or manually adjust the air distribution.
Intensity of the AUTO program
With the AUTO program activated, the auto‐
matic intensity control can be changed.
Press the left or right side of the but‐
ton: decrease or increase the inten‐
sity.
The selected intensity is shown on the display
of the automatic climate control.
Air flow, manual To manually adjust air flow turn off AUTO pro‐
gram first.
Press the left or right side of the but‐
ton: decrease or increase air flow.
The selected air flow is shown on the display of
the automatic climate control.
The air flow of the automatic climate control
may be reduced automatically to save battery
power.
Manual air distribution Press button repeatedly to select a
program:▷Windows.▷Upper body region.▷Footwell.▷Windows and upper body region.▷Windows and footwell.▷Upper body region and footwell.▷Windows, upper body region, and footwell.
The selected air distribution is shown on the
display of the automatic climate control.
If the windows are fogged over, press the
AUTO button to utilize the condensation sen‐
sor.
Seite 126ControlsClimate control126
Online Edition for Part no. 01 40 2 960 891 - II/15
Page 143 of 224
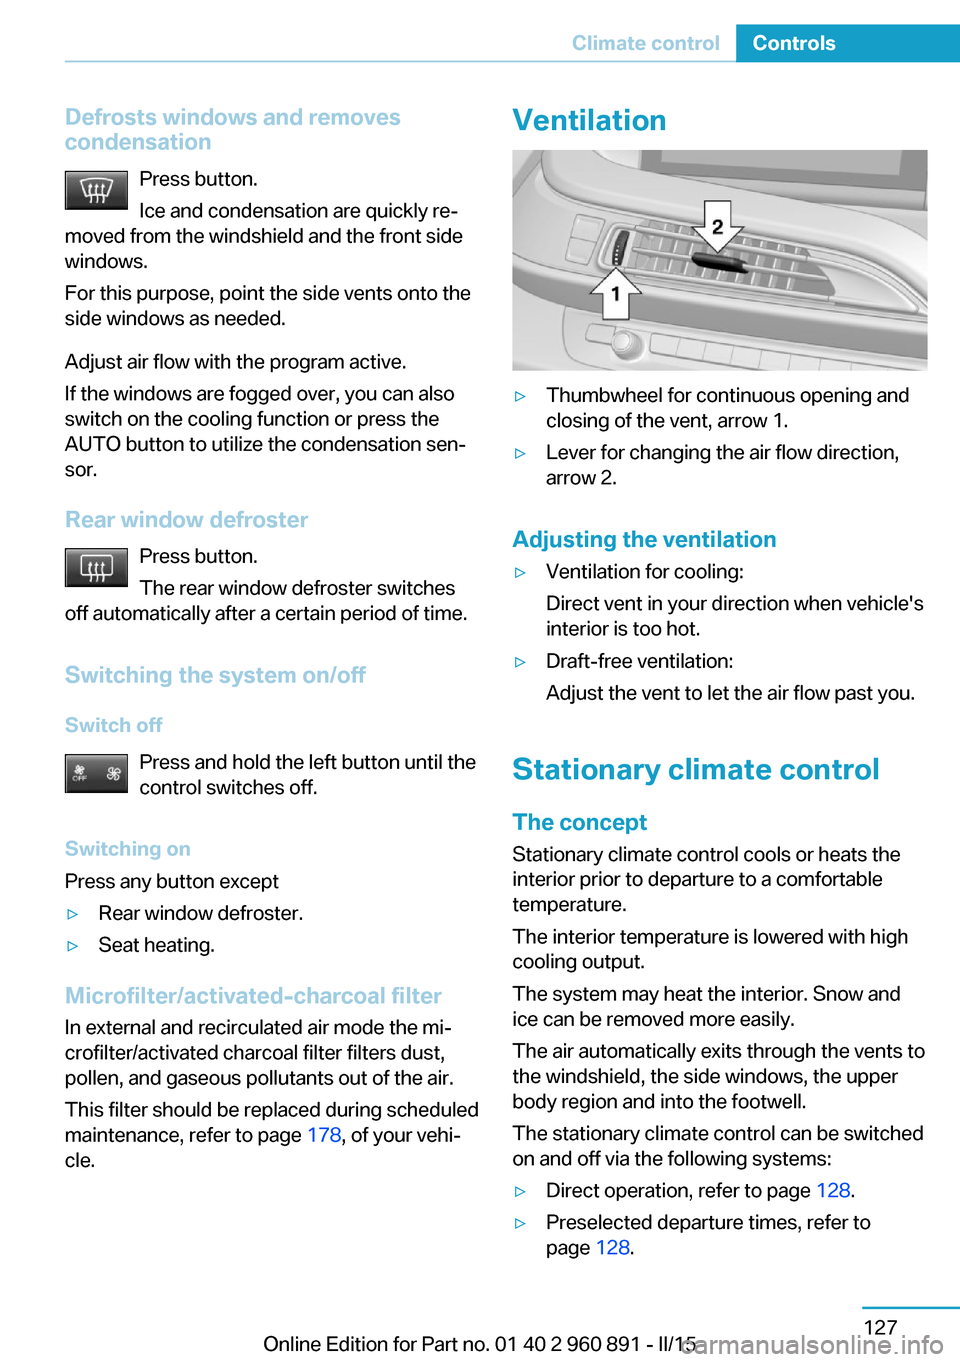
Defrosts windows and removes
condensation
Press button.
Ice and condensation are quickly re‐
moved from the windshield and the front side
windows.
For this purpose, point the side vents onto the
side windows as needed.
Adjust air flow with the program active.
If the windows are fogged over, you can also
switch on the cooling function or press the AUTO button to utilize the condensation sen‐
sor.
Rear window defroster Press button.
The rear window defroster switches
off automatically after a certain period of time.
Switching the system on/off
Switch off Press and hold the left button until the
control switches off.
Switching on
Press any button except▷Rear window defroster.▷Seat heating.
Microfilter/activated-charcoal filter
In external and recirculated air mode the mi‐
crofilter/activated charcoal filter filters dust,
pollen, and gaseous pollutants out of the air.
This filter should be replaced during scheduled
maintenance, refer to page 178, of your vehi‐
cle.
Ventilation▷Thumbwheel for continuous opening and
closing of the vent, arrow 1.▷Lever for changing the air flow direction,
arrow 2.
Adjusting the ventilation
▷Ventilation for cooling:
Direct vent in your direction when vehicle's
interior is too hot.▷Draft-free ventilation:
Adjust the vent to let the air flow past you.
Stationary climate control
The concept Stationary climate control cools or heats the
interior prior to departure to a comfortable
temperature.
The interior temperature is lowered with high
cooling output.
The system may heat the interior. Snow and
ice can be removed more easily.
The air automatically exits through the vents to
the windshield, the side windows, the upper
body region and into the footwell.
The stationary climate control can be switched
on and off via the following systems:
▷Direct operation, refer to page 128.▷Preselected departure times, refer to
page 128.Seite 127Climate controlControls127
Online Edition for Part no. 01 40 2 960 891 - II/15
Page 160 of 224
Increase rangeGeneral informationThe vehicle contains comprehensive technolo‐
gies for reducing the energy consumption and
for maximizing the range.
The range depends on a number of different
factors.
The implementation of certain measures, driv‐
ing style and regular maintenance can increase
range and thereby also reduce the environ‐
mental impact.
Remove unnecessary cargo
Additional weight increases fuel consumption.
Remove attached parts
following use
Attached parts on the vehicle impair the aero‐
dynamics and increase the energy consump‐
tion.
Closing the windows
Open windows increase air resistance and
therefore lead to greater fuel consumption.
Tires General information Tires can affect energy consumption in various
ways, for instance energy consumption can be
influenced by tire size.Check the tire inflation pressure
regularly
Check and, if needed, correct the tire inflationpressure at least twice a month and before
starting on a long trip.
Low tire inflation pressure increases rolling re‐
sistance and thus raises energy consumption
and tire wear.
Standing air conditioning Run advance climate control, refer to
page 127, in the vehicle during charging if pos‐
sible before driving off.
Heating and cooling operations are very en‐
ergy intensive and substantially reduce the
electric range.
Look well ahead when
driving
Avoid unnecessary acceleration and braking.
By maintaining a suitable distance to the vehi‐
cle driving ahead of you.
Driving smoothly and proactively reduces fuel
consumption.
Longer braking procedures result in more effi‐
cient charging of the high-voltage battery via
energy recovery from braking.
Use coasting
When approaching a red light, take your foot
off the accelerator and let the vehicle coast to
a halt.Seite 144Driving tipsIncrease range144
Online Edition for Part no. 01 40 2 960 891 - II/15
Page 161 of 224
Switch off any functions that
are not currently needed
Functions such as seat heating and the rear
window defroster require a lot of energy and
reduce the range, especially in city and stop-
and-go traffic.
Reel off these functions if they are not needed.
The ECO PRO driving program supports the
energy conserving use of comfort features.
These functions are automatically deactivated
partially or completely.
Have maintenance carried
out
Have vehicles maintained regularly to achieve
optimal vehicle efficiency and operating life.
The maintenance should be carried out by
your service center.
Also note the BMW Maintenance System, refer
to page 178.
ECO PRO
The concept
ECO PRO supports a driving style that saves
on fuel consumption. For this purpose, the en‐
gine control and comfort features, e. g. the cli‐
mate control output, are adjusted.
Under certain conditions the engine is auto‐
matically decoupled from the transmission in
the D selector lever position and the engine is
switched off. Selector lever position D remains
engaged.
At a glance
ECO PRO▷Reduce heat output or heating cycle for ex‐
terior mirror, rear window and seat heating.▷What reduces the the cooling and heating
output of the climate control system.
Activate ECO PRO
Press button repeatedly until ECO
PRO is displayed in the instrument
cluster.
Configuring ECO PRO
Via the Driving Dynamics Control
1.Activate ECO PRO.2."Configure ECO PRO"3.Configure the program.
Via the iDrive
1."Settings"2."ECO PRO mode"
Or
1."Settings"2."Driving mode"3."Configure ECO PRO"
Configure the program.
ECO PRO Tip
▷"Limit at:":
Adjust the ECO PRO speed.▷"ECO PRO speed warning":
The output is reduced once the set ECO
PRO speed is reached.
ECO PRO climate control
"ECO PRO climate control"
Climate control is set to be fuel-efficient.
By making a slight change to the set tempera‐
ture, or slowly adjusting the rate of heating or
cooling of the car's interior, fuel consumption
can be economized.
Seite 145Increase rangeDriving tips145
Online Edition for Part no. 01 40 2 960 891 - II/15
Page 172 of 224
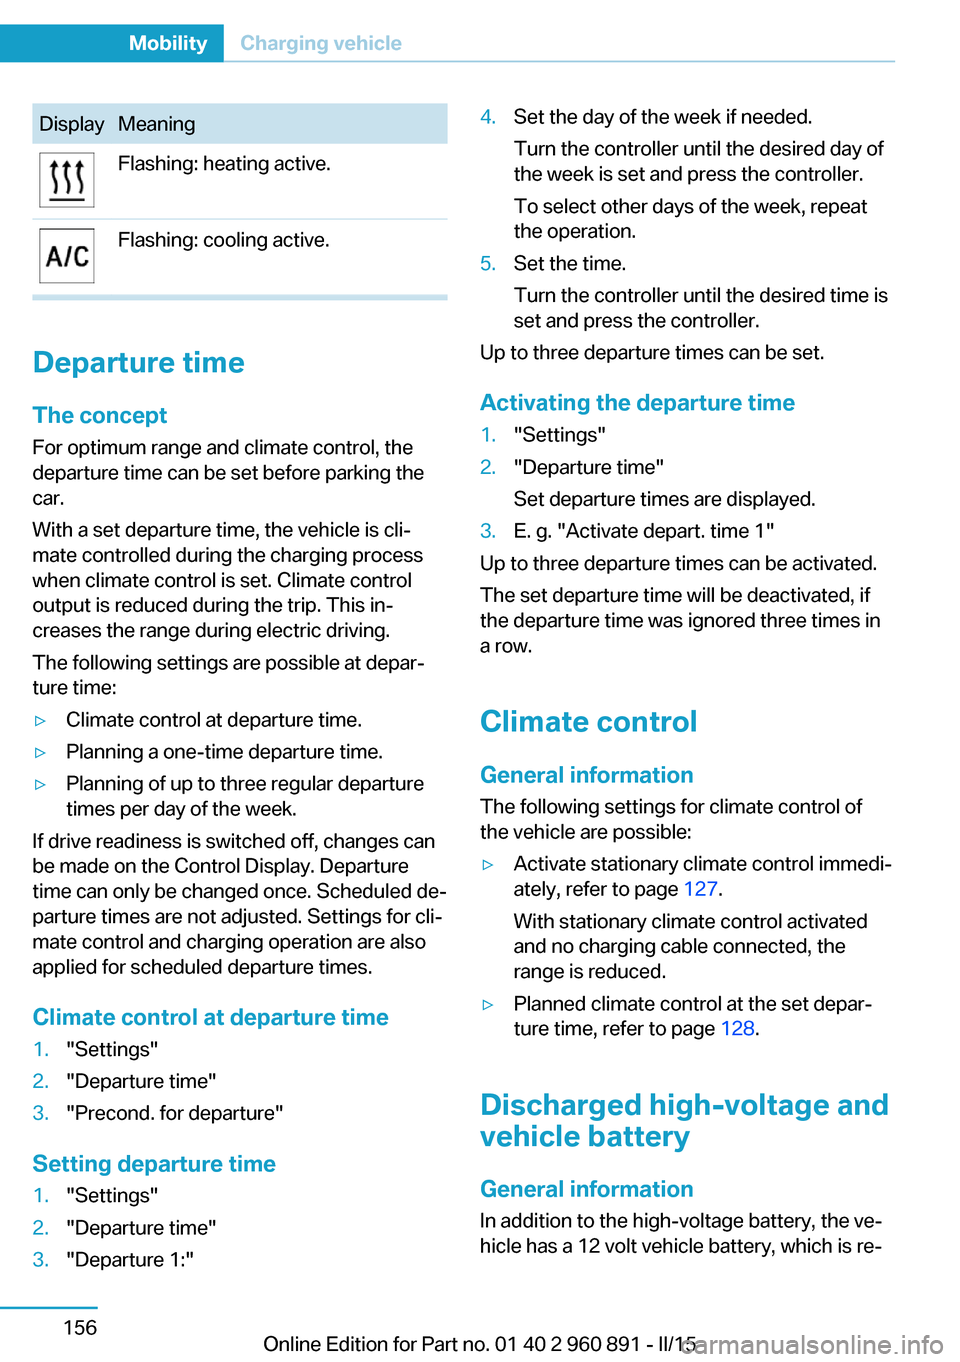
DisplayMeaningFlashing: heating active.Flashing: cooling active.
Departure time
The concept For optimum range and climate control, the
departure time can be set before parking the
car.
With a set departure time, the vehicle is cli‐
mate controlled during the charging process
when climate control is set. Climate control
output is reduced during the trip. This in‐
creases the range during electric driving.
The following settings are possible at depar‐
ture time:
▷Climate control at departure time.▷Planning a one-time departure time.▷Planning of up to three regular departure
times per day of the week.
If drive readiness is switched off, changes can
be made on the Control Display. Departure
time can only be changed once. Scheduled de‐
parture times are not adjusted. Settings for cli‐
mate control and charging operation are also
applied for scheduled departure times.
Climate control at departure time
1."Settings"2."Departure time"3."Precond. for departure"
Setting departure time
1."Settings"2."Departure time"3."Departure 1:"4.Set the day of the week if needed.
Turn the controller until the desired day of
the week is set and press the controller.
To select other days of the week, repeat
the operation.5.Set the time.
Turn the controller until the desired time is
set and press the controller.
Up to three departure times can be set.
Activating the departure time
1."Settings"2."Departure time"
Set departure times are displayed.3.E. g. "Activate depart. time 1"
Up to three departure times can be activated.
The set departure time will be deactivated, if
the departure time was ignored three times in
a row.
Climate control General information
The following settings for climate control of
the vehicle are possible:
▷Activate stationary climate control immedi‐
ately, refer to page 127.
With stationary climate control activated
and no charging cable connected, the
range is reduced.▷Planned climate control at the set depar‐
ture time, refer to page 128.
Discharged high-voltage and
vehicle battery
General information
In addition to the high-voltage battery, the ve‐
hicle has a 12 volt vehicle battery, which is re‐
Seite 156MobilityCharging vehicle156
Online Edition for Part no. 01 40 2 960 891 - II/15
Page 214 of 224
Everything from A to Z
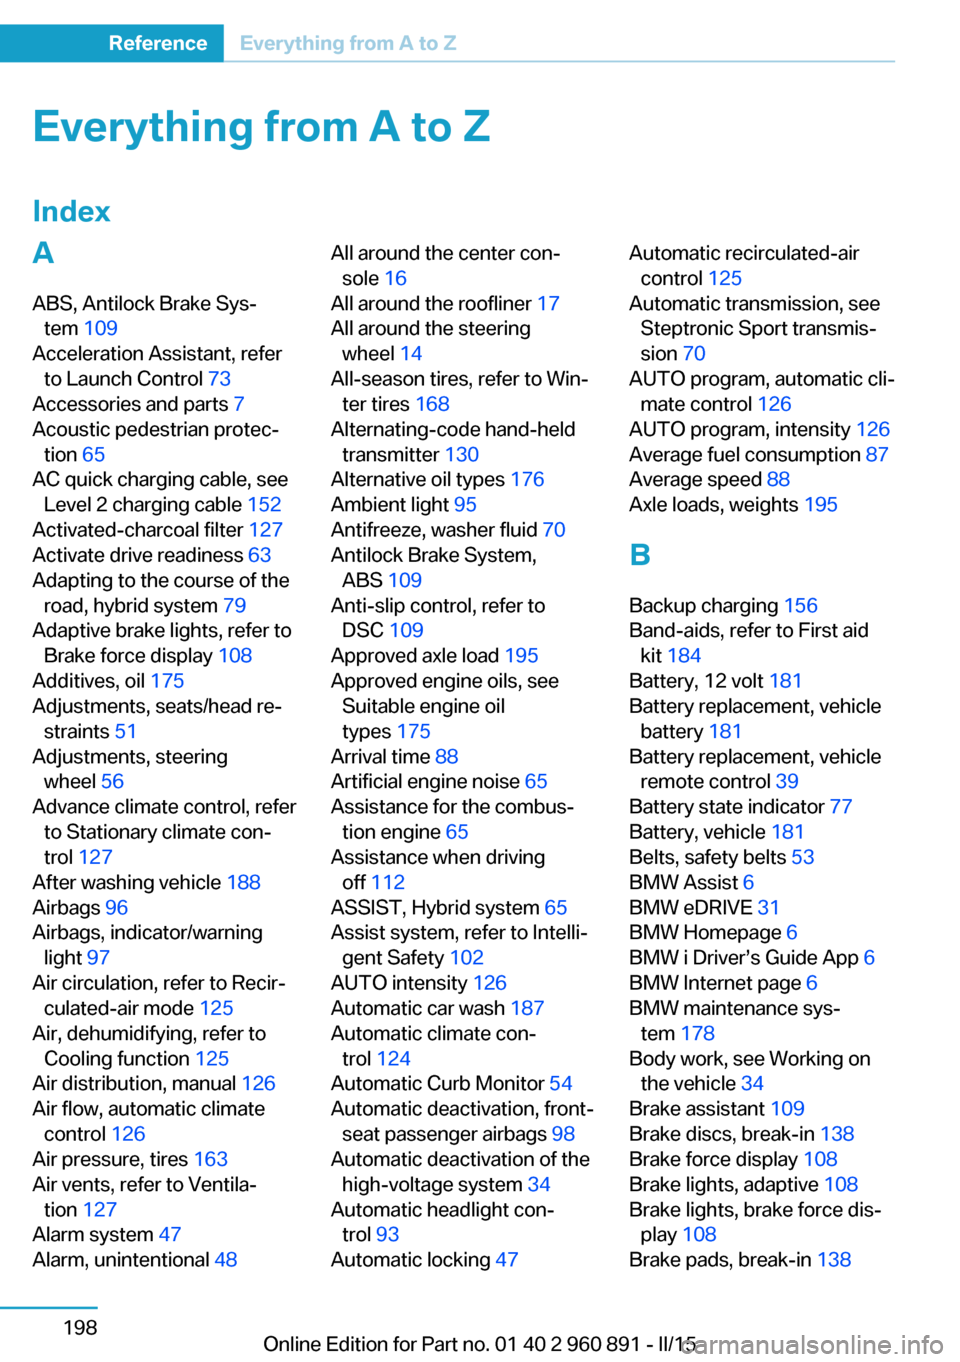
IndexA ABS, Antilock Brake Sys‐ tem 109
Acceleration Assistant, refer to Launch Control 73
Accessories and parts 7
Acoustic pedestrian protec‐ tion 65
AC quick charging cable, see Level 2 charging cable 152
Activated-charcoal filter 127
Activate drive readiness 63
Adapting to the course of the road, hybrid system 79
Adaptive brake lights, refer to Brake force display 108
Additives, oil 175
Adjustments, seats/head re‐ straints 51
Adjustments, steering wheel 56
Advance climate control, refer to Stationary climate con‐
trol 127
After washing vehicle 188
Airbags 96
Airbags, indicator/warning light 97
Air circulation, refer to Recir‐ culated-air mode 125
Air, dehumidifying, refer to Cooling function 125
Air distribution, manual 126
Air flow, automatic climate control 126
Air pressure, tires 163
Air vents, refer to Ventila‐ tion 127
Alarm system 47
Alarm, unintentional 48 All around the center con‐
sole 16
All around the roofliner 17
All around the steering wheel 14
All-season tires, refer to Win‐ ter tires 168
Alternating-code hand-held transmitter 130
Alternative oil types 176
Ambient light 95
Antifreeze, washer fluid 70
Antilock Brake System, ABS 109
Anti-slip control, refer to DSC 109
Approved axle load 195
Approved engine oils, see Suitable engine oil
types 175
Arrival time 88
Artificial engine noise 65
Assistance for the combus‐ tion engine 65
Assistance when driving off 112
ASSIST, Hybrid system 65
Assist system, refer to Intelli‐ gent Safety 102
AUTO intensity 126
Automatic car wash 187
Automatic climate con‐ trol 124
Automatic Curb Monitor 54
Automatic deactivation, front- seat passenger airbags 98
Automatic deactivation of the high-voltage system 34
Automatic headlight con‐ trol 93
Automatic locking 47 Automatic recirculated-air
control 125
Automatic transmission, see Steptronic Sport transmis‐
sion 70
AUTO program, automatic cli‐ mate control 126
AUTO program, intensity 126
Average fuel consumption 87
Average speed 88
Axle loads, weights 195
B Backup charging 156
Band-aids, refer to First aid kit 184
Battery, 12 volt 181
Battery replacement, vehicle battery 181
Battery replacement, vehicle remote control 39
Battery state indicator 77
Battery, vehicle 181
Belts, safety belts 53
BMW Assist 6
BMW eDRIVE 31
BMW Homepage 6
BMW i Driver’s Guide App 6
BMW Internet page 6
BMW maintenance sys‐ tem 178
Body work, see Working on the vehicle 34
Brake assistant 109
Brake discs, break-in 138
Brake force display 108
Brake lights, adaptive 108
Brake lights, brake force dis‐ play 108
Brake pads, break-in 138 Seite 198ReferenceEverything from A to Z198
Online Edition for Part no. 01 40 2 960 891 - II/15
Page 215 of 224
Braking, hints 140
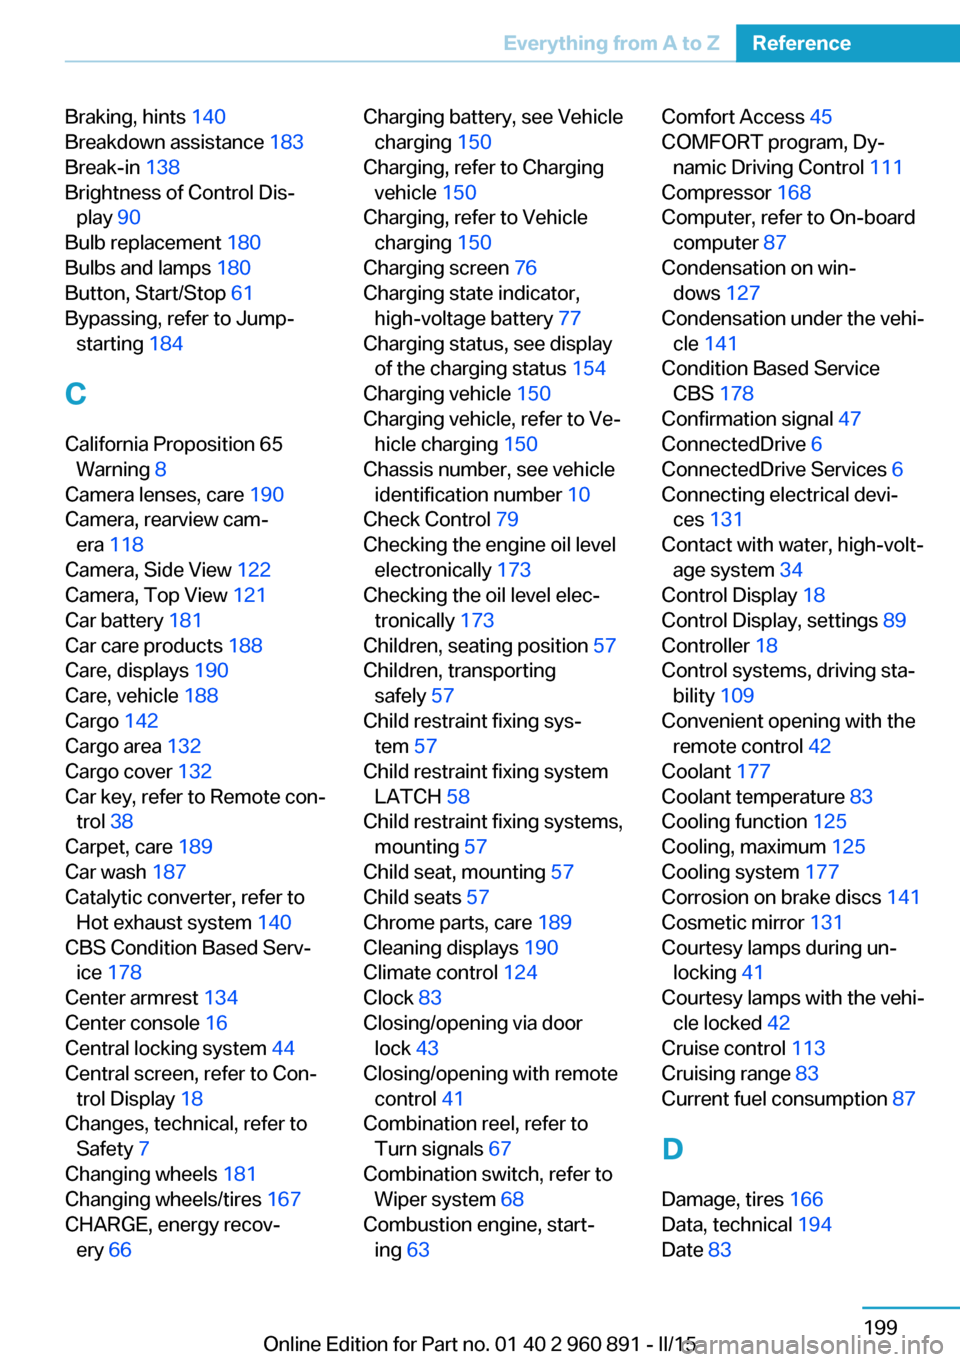
Breakdown assistance 183
Break-in 138
Brightness of Control Dis‐ play 90
Bulb replacement 180
Bulbs and lamps 180
Button, Start/Stop 61
Bypassing, refer to Jump- starting 184
C
California Proposition 65 Warning 8
Camera lenses, care 190
Camera, rearview cam‐ era 118
Camera, Side View 122
Camera, Top View 121
Car battery 181
Car care products 188
Care, displays 190
Care, vehicle 188
Cargo 142
Cargo area 132
Cargo cover 132
Car key, refer to Remote con‐ trol 38
Carpet, care 189
Car wash 187
Catalytic converter, refer to Hot exhaust system 140
CBS Condition Based Serv‐ ice 178
Center armrest 134
Center console 16
Central locking system 44
Central screen, refer to Con‐ trol Display 18
Changes, technical, refer to Safety 7
Changing wheels 181
Changing wheels/tires 167
CHARGE, energy recov‐ ery 66 Charging battery, see Vehicle
charging 150
Charging, refer to Charging vehicle 150
Charging, refer to Vehicle charging 150
Charging screen 76
Charging state indicator, high-voltage battery 77
Charging status, see display of the charging status 154
Charging vehicle 150
Charging vehicle, refer to Ve‐ hicle charging 150
Chassis number, see vehicle identification number 10
Check Control 79
Checking the engine oil level electronically 173
Checking the oil level elec‐ tronically 173
Children, seating position 57
Children, transporting safely 57
Child restraint fixing sys‐ tem 57
Child restraint fixing system LATCH 58
Child restraint fixing systems, mounting 57
Child seat, mounting 57
Child seats 57
Chrome parts, care 189
Cleaning displays 190
Climate control 124
Clock 83
Closing/opening via door lock 43
Closing/opening with remote control 41
Combination reel, refer to Turn signals 67
Combination switch, refer to Wiper system 68
Combustion engine, start‐ ing 63 Comfort Access 45
COMFORT program, Dy‐ namic Driving Control 111
Compressor 168
Computer, refer to On-board computer 87
Condensation on win‐ dows 127
Condensation under the vehi‐ cle 141
Condition Based Service CBS 178
Confirmation signal 47
ConnectedDrive 6
ConnectedDrive Services 6
Connecting electrical devi‐ ces 131
Contact with water, high-volt‐ age system 34
Control Display 18
Control Display, settings 89
Controller 18
Control systems, driving sta‐ bility 109
Convenient opening with the remote control 42
Coolant 177
Coolant temperature 83
Cooling function 125
Cooling, maximum 125
Cooling system 177
Corrosion on brake discs 141
Cosmetic mirror 131
Courtesy lamps during un‐ locking 41
Courtesy lamps with the vehi‐ cle locked 42
Cruise control 113
Cruising range 83
Current fuel consumption 87
D
Damage, tires 166
Data, technical 194
Date 83 Seite 199Everything from A to ZReference199
Online Edition for Part no. 01 40 2 960 891 - II/15