heating BMW I8 2015 I12 Owner's Manual
[x] Cancel search | Manufacturer: BMW, Model Year: 2015, Model line: I8, Model: BMW I8 2015 I12Pages: 224, PDF Size: 12.46 MB
Page 68 of 224
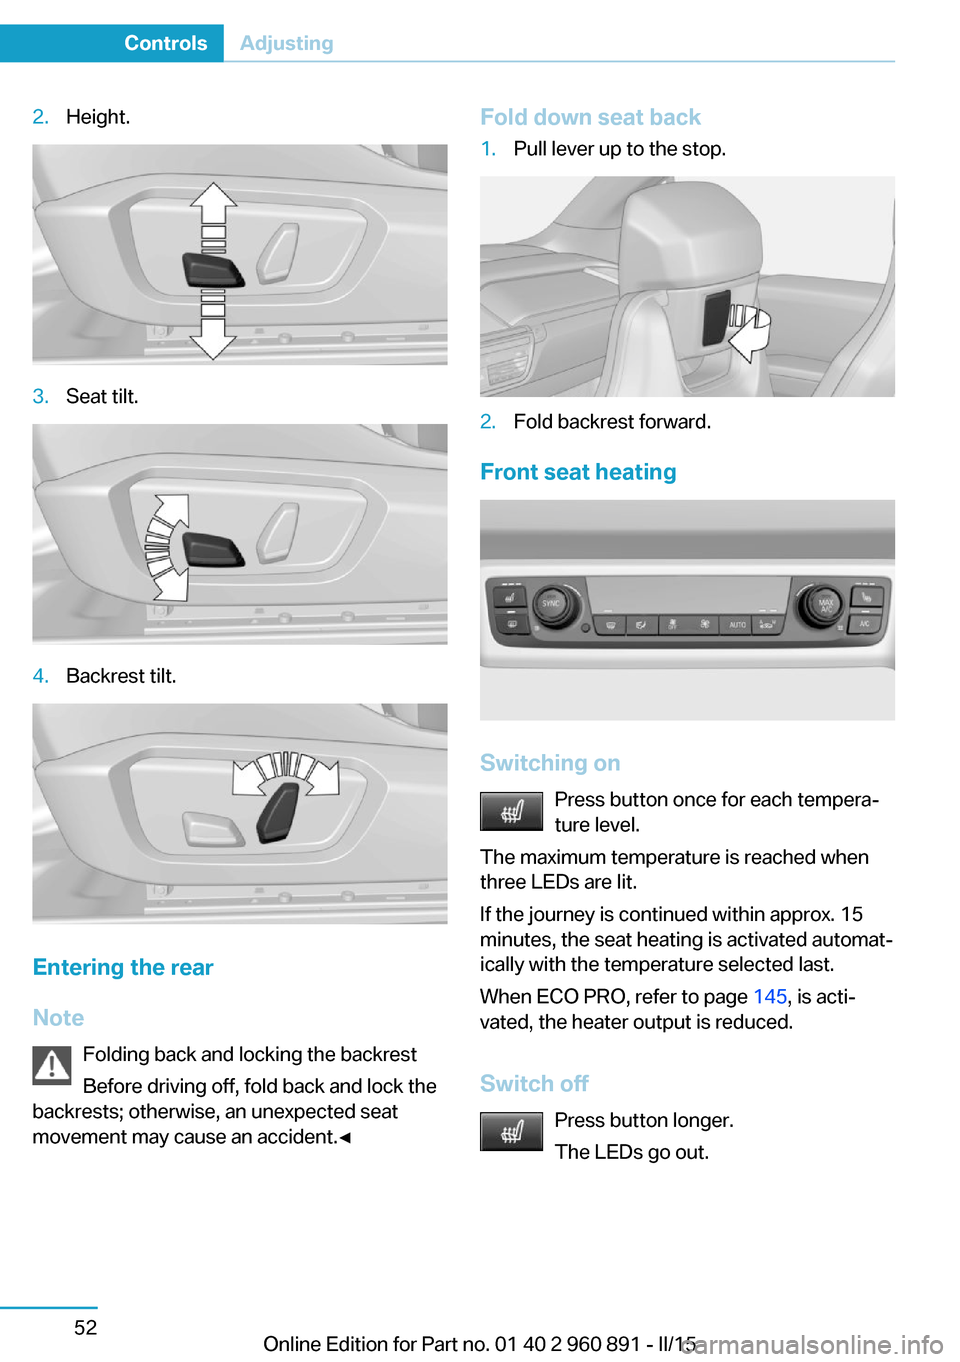
2.Height.3.Seat tilt.4.Backrest tilt.
Entering the rear
Note Folding back and locking the backrest
Before driving off, fold back and lock the
backrests; otherwise, an unexpected seat
movement may cause an accident.◀
Fold down seat back1.Pull lever up to the stop.2.Fold backrest forward.
Front seat heating
Switching on
Press button once for each tempera‐
ture level.
The maximum temperature is reached when
three LEDs are lit.
If the journey is continued within approx. 15
minutes, the seat heating is activated automat‐
ically with the temperature selected last.
When ECO PRO, refer to page 145, is acti‐
vated, the heater output is reduced.
Switch off Press button longer.
The LEDs go out.
Seite 52ControlsAdjusting52
Online Edition for Part no. 01 40 2 960 891 - II/15
Page 71 of 224
Deactivating
Slide the switch to the passenger side mirror
position.
Fold in and out Press button.
Possible at speeds up to approx.
15 mph/20 km/h.
E. g. this is advantageous▷In car washes.▷In narrow streets.▷For folding mirrors back out that were
folded away manually.
Mirrors that were folded in are folded out auto‐
matically at a speed of approx.
25 mph/40 km/h.
Fold in the mirror in a car wash
Before washing the car in an automatic
car wash, fold in the exterior mirrors by hand or
with the button; otherwise, the mirrors could
be damaged, depending on the width of the
vehicle.◀
Automatic heating
Both exterior mirrors are automatically heated
whenever drive readiness is switched on.
Automatic dimming featureBoth exterior mirrors are automatically dim‐
med. Photocells are used to control the Interior
rearview mirror, refer to page 55.
Interior rearview mirror, manually
dimmable
Flip lever
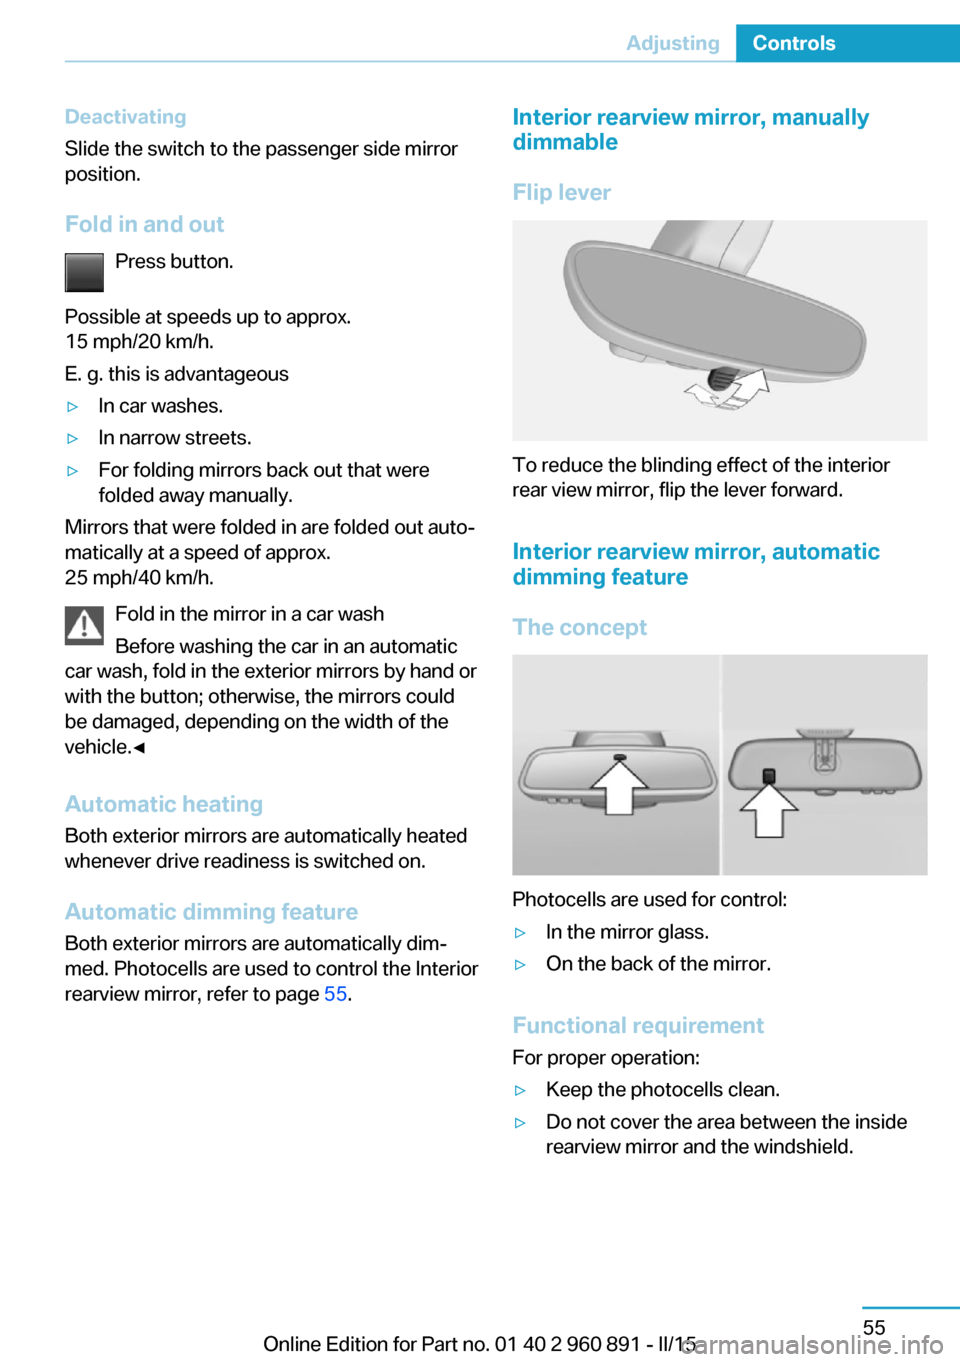
To reduce the blinding effect of the interior
rear view mirror, flip the lever forward.
Interior rearview mirror, automatic dimming feature
The concept
Photocells are used for control:
▷In the mirror glass.▷On the back of the mirror.
Functional requirement For proper operation:
▷Keep the photocells clean.▷Do not cover the area between the inside
rearview mirror and the windshield.Seite 55AdjustingControls55
Online Edition for Part no. 01 40 2 960 891 - II/15
Page 79 of 224
Lighting lights up steady blue
After drive readiness is switched on, light turns
blue. The vehicle is ready to drive. The READY
indicator lights up in the instrument cluster. In
addition, a signal sounds.
Lighting off
Drive readiness, operating readiness and
radio-ready state are turned off. The vehicle is
in the idle state. The charging cable may be
connected.
Activating drive readiness1.Close the driver's door.2.Depress the brake pedal.3.Press the Start/Stop button.
Drive readiness is active, electric driving, Silent
Start or Start of the combustion engine.
Electric drive readiness, Silent Start
The vehicle is ready for driving without starting
the combustion engine.
Silent Start is possible if the requirements for
Electric driving, refer to page 64, are met.
Display READY indicates drive readi‐
ness.
Starting the combustion engine Enclosed areas
Do not let the engine run in enclosed
areas, since breathing in exhaust fumes may
lead to loss of consciousness and death. The
exhaust gases contain carbon monoxide, an
odorless and colorless but highly toxic gas.◀
Unattended vehicle
Do not leave the vehicle unattended with
engine running or drive readiness switched on;
otherwise, it may pose a risk.
Before leaving the vehicle, engage lever in po‐
sition P P, and set the parking brake; other‐
wise, the vehicle is not secured against rolling
away.◀
Repeated starting in quick succession
Avoid trying to start the vehicle repeat‐
edly and in quick succession. Otherwise, the
fuel is not burned or is inadequately burned,
posing a risk of overheating and damage to the
catalytic converter.◀
The combustion engine is started with Acti‐
vate drive, refer to page 63, readiness under
the following conditions:▷The temperature of the hybrid system is
too high.▷The charge level or temperature of the
high-voltage battery is too low.
Driving away
1.Activate drive readiness.2.Apply the brake and engage lever in posi‐
tion P D, SPORT or R.3.Release the parking brake.4.Drive away.
Deactivating drive readiness
After parking the vehicle, you may hear noises due to operation of the hybrid system, such as
for cooling of the high-voltage battery.
After stopping the vehicle:
1.Depress the brake pedal.2.Set the parking brake.3.Press the Start/Stop button.
The READY indicator goes out and a signal
sounds. In case of longer idle times, follow the
instructions in the Care chapter, refer to
page 190.
Seite 63DrivingControls63
Online Edition for Part no. 01 40 2 960 891 - II/15
Page 140 of 224
Climate controlVehicle features and options
This chapter describes all standard, country-
specific and optional features offered with the
series. It also describes features that are not
necessarily available in your car, e. g., due tothe selected options or country versions. This
also applies to safety-related functions and
systems. The respectively applicable country
provisions must be observed when using the
respective features and systems.
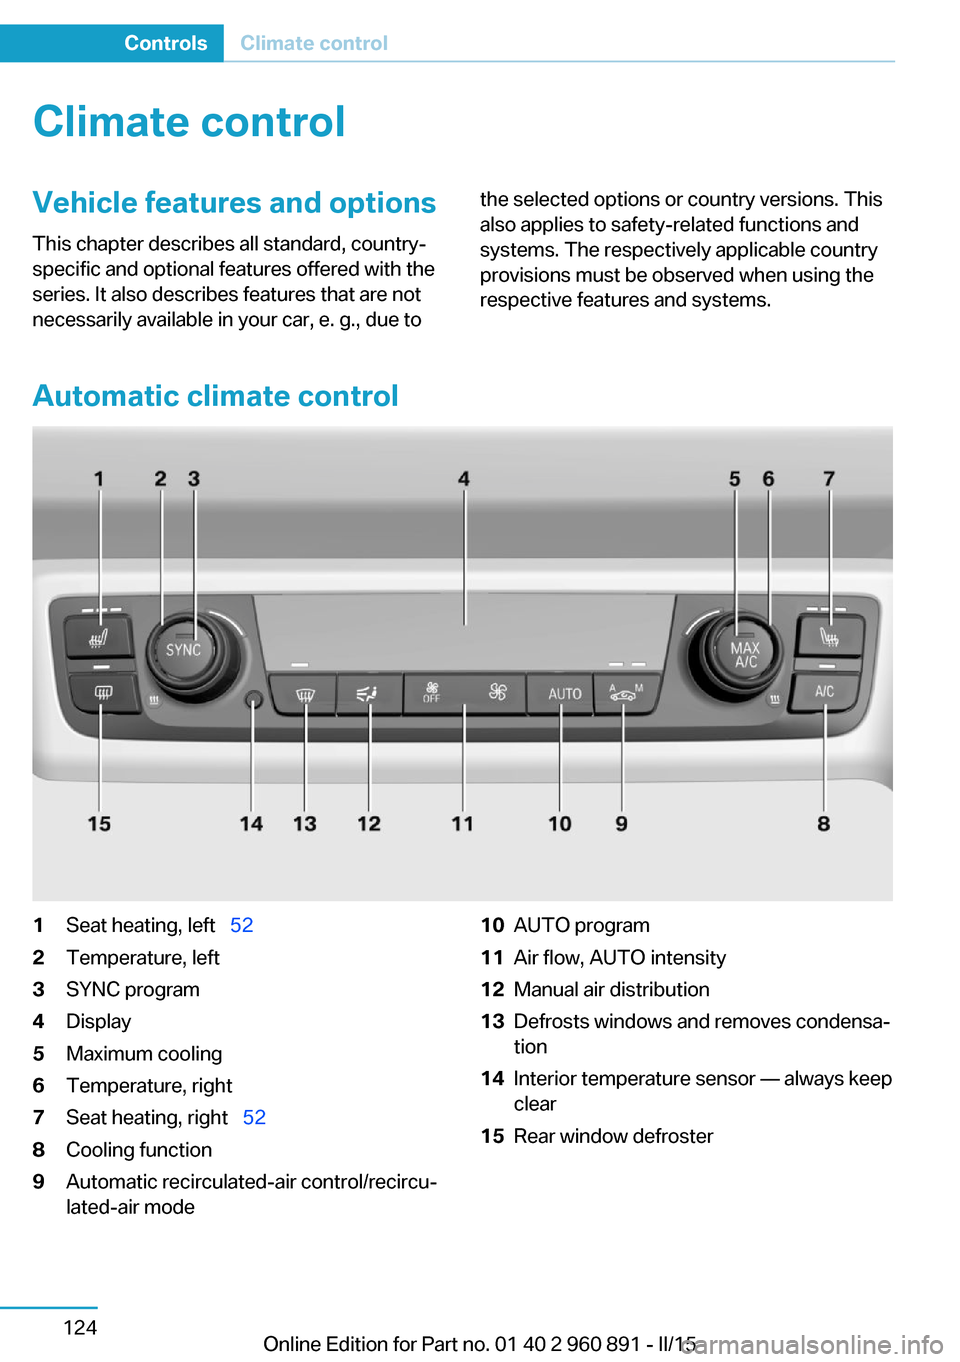
Automatic climate control
1Seat heating, left 522Temperature, left3SYNC program4Display5Maximum cooling6Temperature, right7Seat heating, right 528Cooling function9Automatic recirculated-air control/recircu‐
lated-air mode10AUTO program11Air flow, AUTO intensity12Manual air distribution13Defrosts windows and removes condensa‐
tion14Interior temperature sensor — always keep
clear15Rear window defrosterSeite 124ControlsClimate control124
Online Edition for Part no. 01 40 2 960 891 - II/15
Page 141 of 224
HintsSufficient ventilation
When remaining in the vehicle for an ex‐
tended period of time, ensure sufficient exter‐
nal ventilation. Do not continuously use recir‐
culated-air mode; otherwise the air quality in
the interior continuously deteriorates and win‐
dow condensation increases.◀
Climate control functions in detail
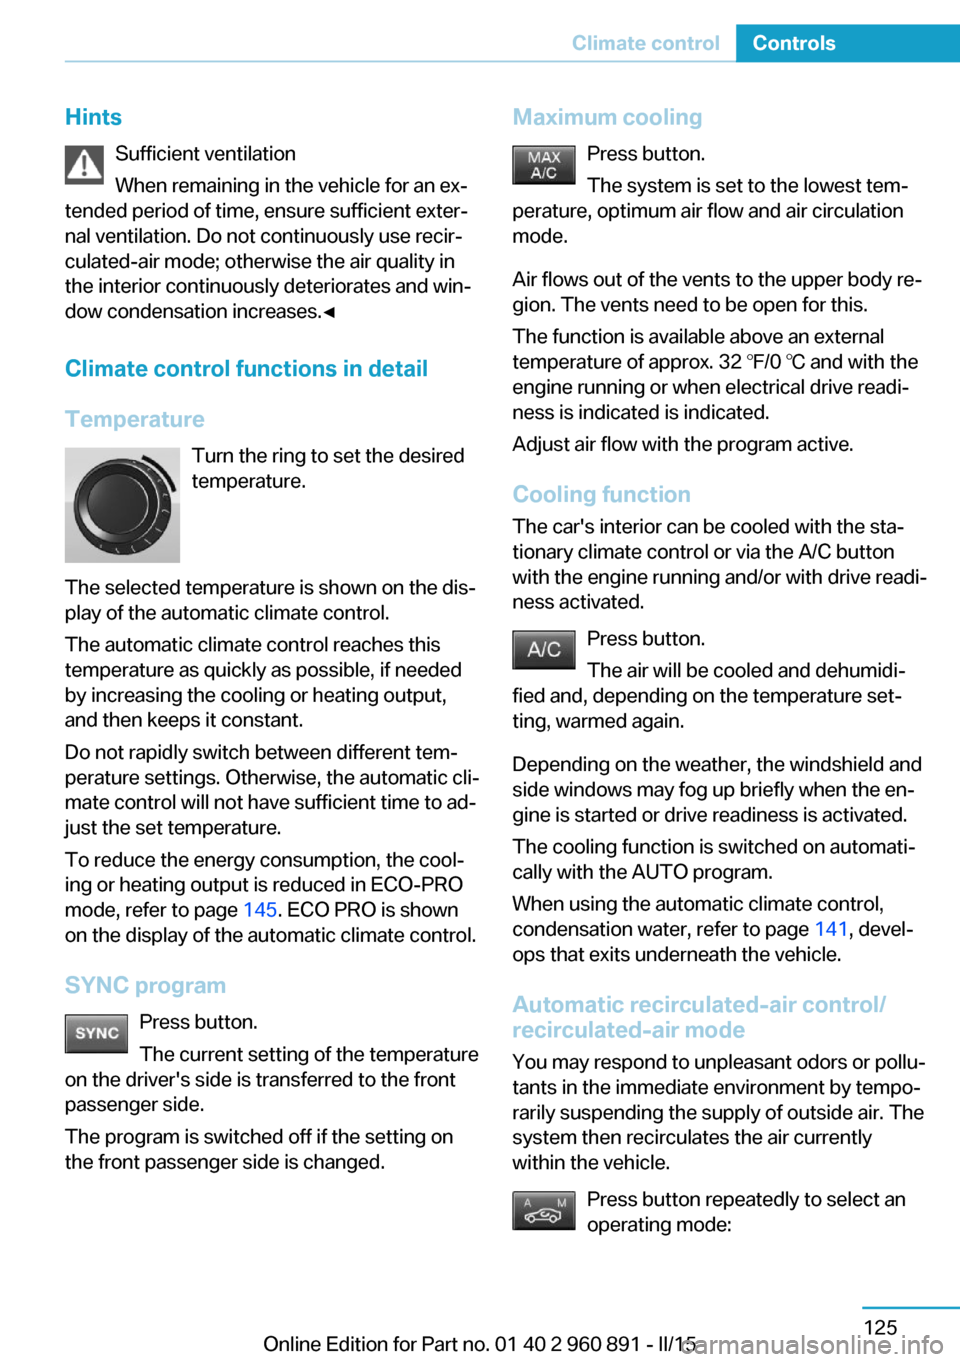
Temperature Turn the ring to set the desired
temperature.
The selected temperature is shown on the dis‐
play of the automatic climate control.
The automatic climate control reaches this
temperature as quickly as possible, if needed
by increasing the cooling or heating output,
and then keeps it constant.
Do not rapidly switch between different tem‐
perature settings. Otherwise, the automatic cli‐
mate control will not have sufficient time to ad‐
just the set temperature.
To reduce the energy consumption, the cool‐
ing or heating output is reduced in ECO-PRO
mode, refer to page 145. ECO PRO is shown
on the display of the automatic climate control.
SYNC program Press button.
The current setting of the temperature
on the driver's side is transferred to the front
passenger side.
The program is switched off if the setting on
the front passenger side is changed.Maximum cooling
Press button.
The system is set to the lowest tem‐
perature, optimum air flow and air circulation
mode.
Air flows out of the vents to the upper body re‐
gion. The vents need to be open for this.
The function is available above an external
temperature of approx. 32 ℉/0 ℃ and with the
engine running or when electrical drive readi‐
ness is indicated is indicated.
Adjust air flow with the program active.
Cooling function The car's interior can be cooled with the sta‐
tionary climate control or via the A/C button
with the engine running and/or with drive readi‐
ness activated.
Press button.
The air will be cooled and dehumidi‐
fied and, depending on the temperature set‐ ting, warmed again.
Depending on the weather, the windshield and
side windows may fog up briefly when the en‐
gine is started or drive readiness is activated.
The cooling function is switched on automati‐
cally with the AUTO program.
When using the automatic climate control,
condensation water, refer to page 141, devel‐
ops that exits underneath the vehicle.
Automatic recirculated-air control/
recirculated-air mode
You may respond to unpleasant odors or pollu‐tants in the immediate environment by tempo‐
rarily suspending the supply of outside air. The
system then recirculates the air currently
within the vehicle.
Press button repeatedly to select an
operating mode:Seite 125Climate controlControls125
Online Edition for Part no. 01 40 2 960 891 - II/15
Page 143 of 224
Defrosts windows and removes
condensation
Press button.
Ice and condensation are quickly re‐
moved from the windshield and the front side
windows.
For this purpose, point the side vents onto the
side windows as needed.
Adjust air flow with the program active.
If the windows are fogged over, you can also
switch on the cooling function or press the AUTO button to utilize the condensation sen‐
sor.
Rear window defroster Press button.
The rear window defroster switches
off automatically after a certain period of time.
Switching the system on/off
Switch off Press and hold the left button until the
control switches off.
Switching on
Press any button except▷Rear window defroster.▷Seat heating.
Microfilter/activated-charcoal filter
In external and recirculated air mode the mi‐
crofilter/activated charcoal filter filters dust,
pollen, and gaseous pollutants out of the air.
This filter should be replaced during scheduled
maintenance, refer to page 178, of your vehi‐
cle.
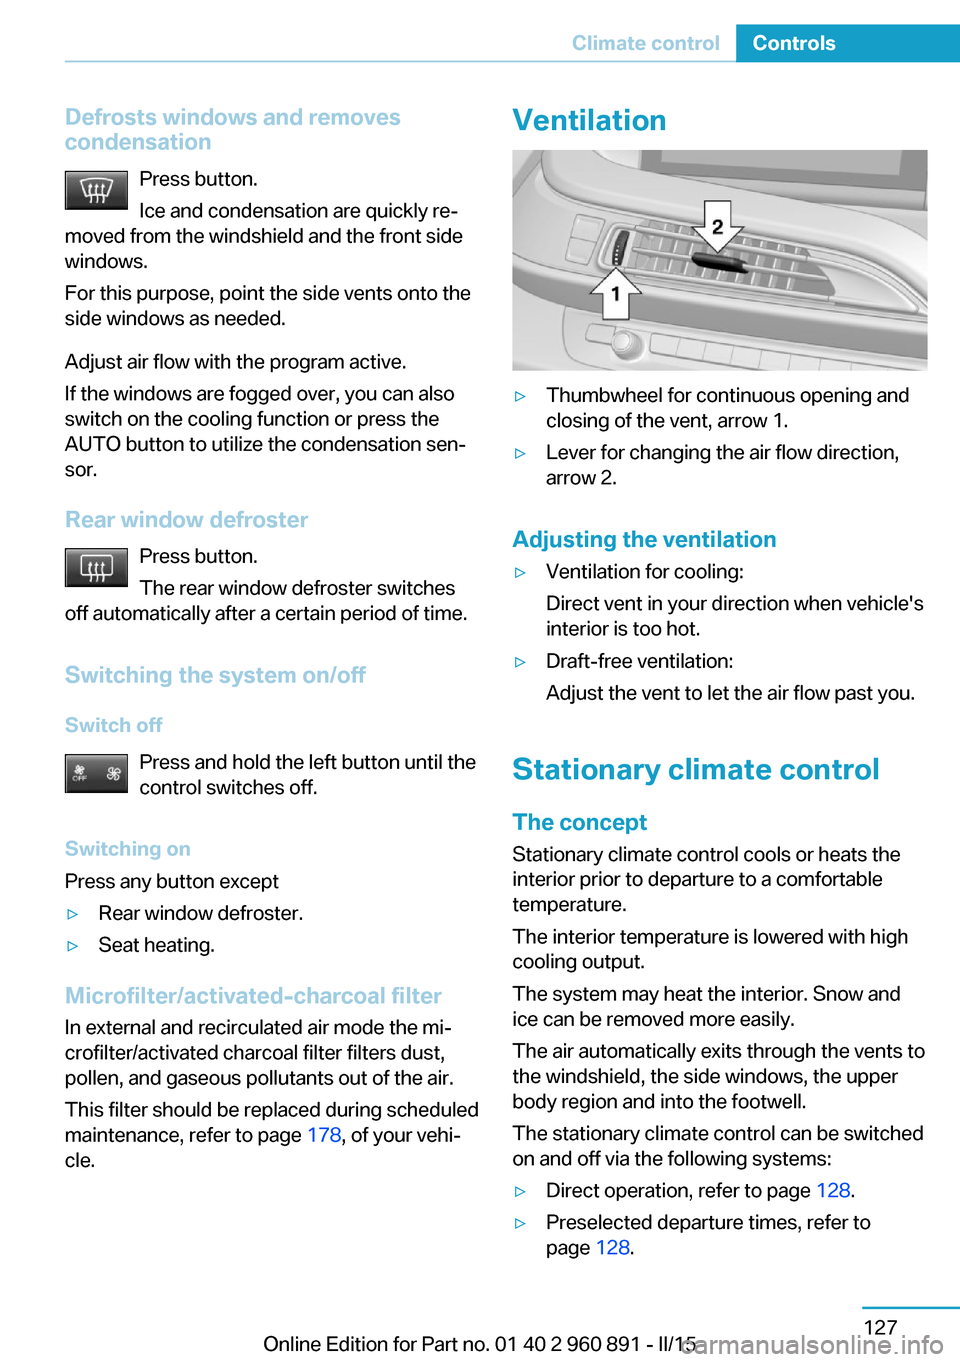
Ventilation▷Thumbwheel for continuous opening and
closing of the vent, arrow 1.▷Lever for changing the air flow direction,
arrow 2.
Adjusting the ventilation
▷Ventilation for cooling:
Direct vent in your direction when vehicle's
interior is too hot.▷Draft-free ventilation:
Adjust the vent to let the air flow past you.
Stationary climate control
The concept Stationary climate control cools or heats the
interior prior to departure to a comfortable
temperature.
The interior temperature is lowered with high
cooling output.
The system may heat the interior. Snow and
ice can be removed more easily.
The air automatically exits through the vents to
the windshield, the side windows, the upper
body region and into the footwell.
The stationary climate control can be switched
on and off via the following systems:
▷Direct operation, refer to page 128.▷Preselected departure times, refer to
page 128.Seite 127Climate controlControls127
Online Edition for Part no. 01 40 2 960 891 - II/15
Page 158 of 224
LoadingVehicle features and options
This chapter describes all standard, country-
specific and optional features offered with the
series. It also describes features that are not
necessarily available in your car, e. g., due to
the selected options or country versions. This
also applies to safety-related functions and
systems. The respectively applicable country
provisions must be observed when using the
respective features and systems.
Hints Overloading the vehicle
To avoid exceeding the approved ca‐
pacity of the tires, never overload the vehicle.
Overloading can lead to overheating and in‐
creases the rate at which damage develops in‐
side the tires. This could result in a sudden
loss of tire inflation pressure.◀
No fluids in the cargo area
Make sure that fluids do not leak into the
cargo area; otherwise, the vehicle may be dam‐
aged.◀
Heavy and hard objects
Do not stow any heavy and hard objects
in the car's interior without securing them; oth‐
erwise, they may present a danger to occu‐
pants, e.g., during braking and evasive maneu‐
vers.◀
Determining the load limit1.Locate the following statement on your ve‐
hicle’s placard:▷The combined weight of occupants
and cargo should never exceed XXX kg
or YYY lbs. Otherwise, damage to thevehicle and unstable driving situations
may result.2.Determine the combined weight of the
driver and passengers that will be riding in
your vehicle.3.Subtract the combined weight of the driver
and passengers from XXX kilograms or
YYY pounds.4.The resulting figure equals the available
amount of cargo and luggage load ca‐
pacity.
For example, if the YYY amount equals
1,000 lbs and there will be four 150 lbs
passengers in your vehicle, the amount of
available cargo and luggage load capacity
is 400 lbs: 1,000 lbs minus 600 lbs =
400 lbs.5.Determine the combined weight of lug‐
gage and cargo being loaded on the vehi‐
cle. That weight may not safely exceed the
available cargo and luggage load capacity
calculated in Step 4.Seite 142Driving tipsLoading142
Online Edition for Part no. 01 40 2 960 891 - II/15
Page 160 of 224
Increase rangeGeneral informationThe vehicle contains comprehensive technolo‐
gies for reducing the energy consumption and
for maximizing the range.
The range depends on a number of different
factors.
The implementation of certain measures, driv‐
ing style and regular maintenance can increase
range and thereby also reduce the environ‐
mental impact.
Remove unnecessary cargo
Additional weight increases fuel consumption.
Remove attached parts
following use
Attached parts on the vehicle impair the aero‐
dynamics and increase the energy consump‐
tion.
Closing the windows
Open windows increase air resistance and
therefore lead to greater fuel consumption.
Tires General information Tires can affect energy consumption in various
ways, for instance energy consumption can be
influenced by tire size.Check the tire inflation pressure
regularly
Check and, if needed, correct the tire inflationpressure at least twice a month and before
starting on a long trip.
Low tire inflation pressure increases rolling re‐
sistance and thus raises energy consumption
and tire wear.
Standing air conditioning Run advance climate control, refer to
page 127, in the vehicle during charging if pos‐
sible before driving off.
Heating and cooling operations are very en‐
ergy intensive and substantially reduce the
electric range.
Look well ahead when
driving
Avoid unnecessary acceleration and braking.
By maintaining a suitable distance to the vehi‐
cle driving ahead of you.
Driving smoothly and proactively reduces fuel
consumption.
Longer braking procedures result in more effi‐
cient charging of the high-voltage battery via
energy recovery from braking.
Use coasting
When approaching a red light, take your foot
off the accelerator and let the vehicle coast to
a halt.Seite 144Driving tipsIncrease range144
Online Edition for Part no. 01 40 2 960 891 - II/15
Page 161 of 224
Switch off any functions that
are not currently needed
Functions such as seat heating and the rear
window defroster require a lot of energy and
reduce the range, especially in city and stop-
and-go traffic.
Reel off these functions if they are not needed.
The ECO PRO driving program supports the
energy conserving use of comfort features.
These functions are automatically deactivated
partially or completely.
Have maintenance carried
out
Have vehicles maintained regularly to achieve
optimal vehicle efficiency and operating life.
The maintenance should be carried out by
your service center.
Also note the BMW Maintenance System, refer
to page 178.
ECO PRO
The concept
ECO PRO supports a driving style that saves
on fuel consumption. For this purpose, the en‐
gine control and comfort features, e. g. the cli‐
mate control output, are adjusted.
Under certain conditions the engine is auto‐
matically decoupled from the transmission in
the D selector lever position and the engine is
switched off. Selector lever position D remains
engaged.
At a glance
ECO PRO▷Reduce heat output or heating cycle for ex‐
terior mirror, rear window and seat heating.▷What reduces the the cooling and heating
output of the climate control system.
Activate ECO PRO
Press button repeatedly until ECO
PRO is displayed in the instrument
cluster.
Configuring ECO PRO
Via the Driving Dynamics Control
1.Activate ECO PRO.2."Configure ECO PRO"3.Configure the program.
Via the iDrive
1."Settings"2."ECO PRO mode"
Or
1."Settings"2."Driving mode"3."Configure ECO PRO"
Configure the program.
ECO PRO Tip
▷"Limit at:":
Adjust the ECO PRO speed.▷"ECO PRO speed warning":
The output is reduced once the set ECO
PRO speed is reached.
ECO PRO climate control
"ECO PRO climate control"
Climate control is set to be fuel-efficient.
By making a slight change to the set tempera‐
ture, or slowly adjusting the rate of heating or
cooling of the car's interior, fuel consumption
can be economized.
Seite 145Increase rangeDriving tips145
Online Edition for Part no. 01 40 2 960 891 - II/15
Page 162 of 224
The outputs of the seat heater and the Addi‐
tionally heat output to seats and exterior mirror
is reduced.
The mirror heating is made available when out‐
side temperatures are very cold.
ECO PRO potential Shows potential savings with the current set‐
tings in percentages.
Display in the instrument cluster
Efficiency display
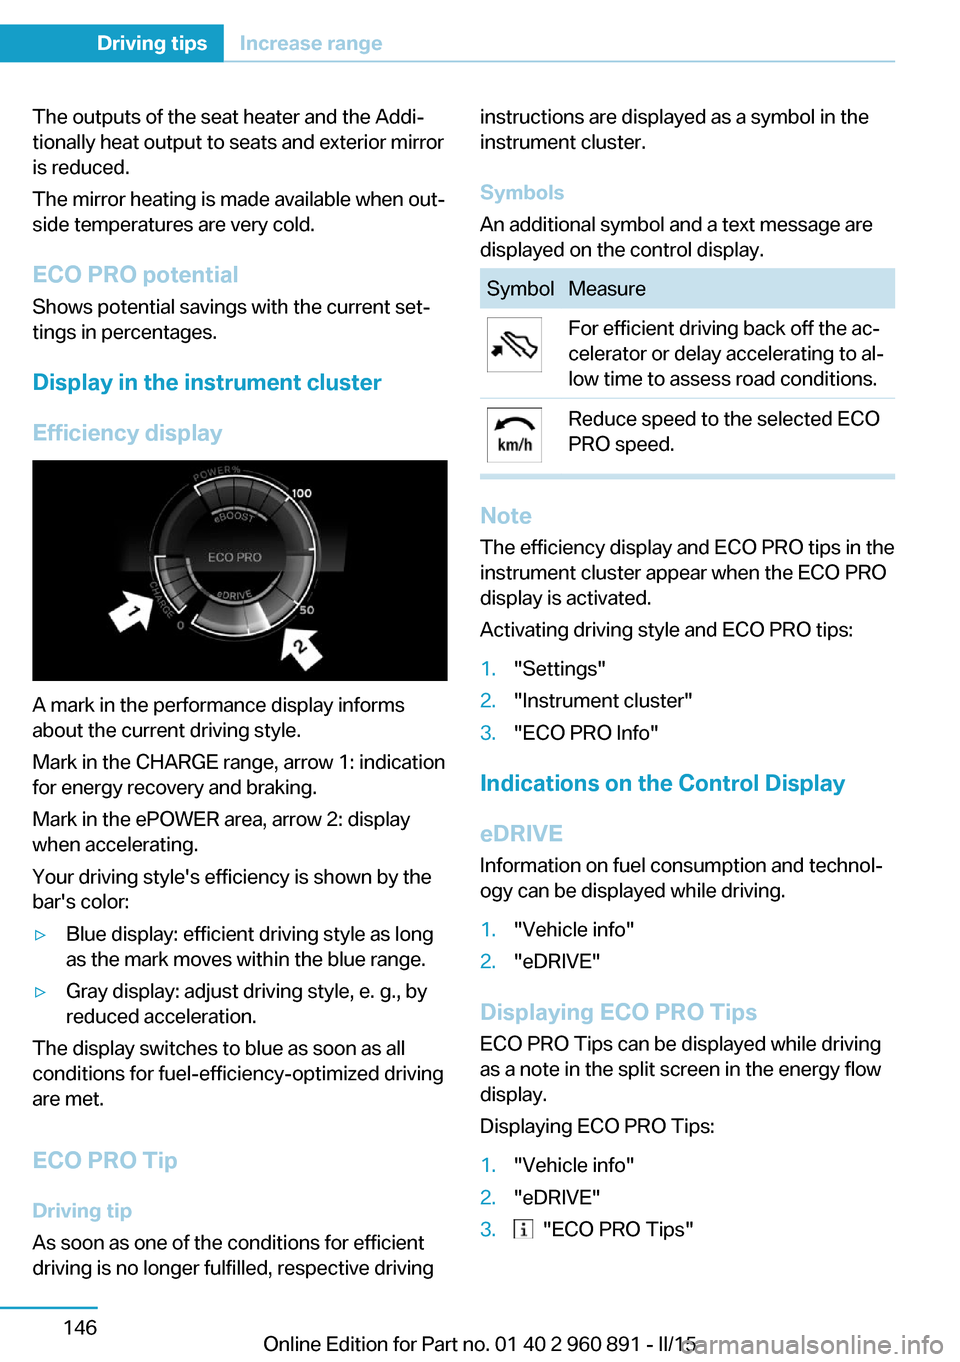
A mark in the performance display informs
about the current driving style.
Mark in the CHARGE range, arrow 1: indication
for energy recovery and braking.
Mark in the ePOWER area, arrow 2: display
when accelerating.
Your driving style's efficiency is shown by the
bar's color:
▷Blue display: efficient driving style as long
as the mark moves within the blue range.▷Gray display: adjust driving style, e. g., by
reduced acceleration.
The display switches to blue as soon as all
conditions for fuel-efficiency-optimized driving
are met.
ECO PRO Tip Driving tip
As soon as one of the conditions for efficient
driving is no longer fulfilled, respective driving
instructions are displayed as a symbol in the
instrument cluster.
Symbols
An additional symbol and a text message are
displayed on the control display.SymbolMeasureFor efficient driving back off the ac‐
celerator or delay accelerating to al‐
low time to assess road conditions.Reduce speed to the selected ECO
PRO speed.
Note
The efficiency display and ECO PRO tips in the
instrument cluster appear when the ECO PRO
display is activated.
Activating driving style and ECO PRO tips:
1."Settings"2."Instrument cluster"3."ECO PRO Info"
Indications on the Control Display
eDRIVE
Information on fuel consumption and technol‐
ogy can be displayed while driving.
1."Vehicle info"2."eDRIVE"
Displaying ECO PRO Tips
ECO PRO Tips can be displayed while driving
as a note in the split screen in the energy flow
display.
Displaying ECO PRO Tips:
1."Vehicle info"2."eDRIVE"3. "ECO PRO Tips"Seite 146Driving tipsIncrease range146
Online Edition for Part no. 01 40 2 960 891 - II/15