BMW M ROADSTER COUPE 2001 Owners Manual
Manufacturer: BMW, Model Year: 2001, Model line: M ROADSTER COUPE, Model: BMW M ROADSTER COUPE 2001Pages: 171, PDF Size: 1.98 MB
Page 141 of 171
141n
IndexDataTechnologyRepairsCar careControlsOverview
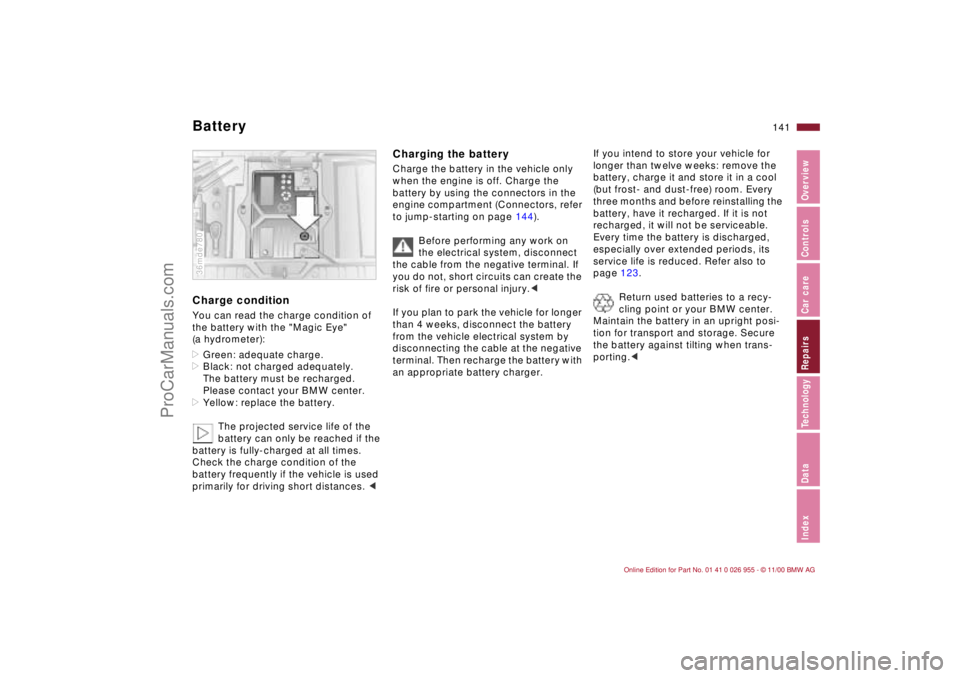
BatteryCharge condition You can read the charge condition of
the battery with the "Magic Eye"
(a hydrometer):
>Green: adequate charge.
>Black: not charged adequately.
The battery must be recharged.
Please contact your BMW center.
>Yellow: replace the battery.
The projected service life of the
battery can only be reached if the
battery is fully-charged at all times.
Check the charge condition of the
battery frequently if the vehicle is used
primarily for driving short distances. < 36mde780
Charging the batteryCharge the battery in the vehicle only
when the engine is off. Charge the
battery by using the connectors in the
engine compartment (Connectors, refer
to jump-starting on page 144).
Before performing any work on
the electrical system, disconnect
the cable from the negative terminal. If
you do not, short circuits can create the
risk of fire or personal injury.<
If you plan to park the vehicle for longer
than 4 weeks, disconnect the battery
from the vehicle electrical system by
disconnecting the cable at the negative
terminal. Then recharge the battery with
an appropriate battery charger.
If you intend to store your vehicle for
longer than twelve weeks: remove the
battery, charge it and store it in a cool
(but frost- and dust-free) room. Every
three months and before reinstalling the
battery, have it recharged. If it is not
recharged, it will not be serviceable.
Every time the battery is discharged,
especially over extended periods, its
service life is reduced. Refer also to
page 123.
Return used batteries to a recy-
cling point or your BMW center.
Maintain the battery in an upright posi-
tion for transport and storage. Secure
the battery against tilting when trans-
porting.<
ProCarManuals.com
Page 142 of 171
142n
Battery FusesRemoval and installation
Do not disconnect the battery
cables when the engine is running.
If you do so, the ensuing voltage surge
will damage the vehicle's onboard elec-
tronics.
Do not make any modifications in the
wires leading to the positive terminal. If
you do so, the battery safety terminal's
safety function will no longer be guaran-
teed. Repair and disposal must be
performed by trained technicians only.<
When removing the battery, disconnect
the cable on the negative terminal first,
then the cable on the positive terminal.
Unscrew the battery retaining clamp.
When installing the battery, connect the
positive terminal first, then connect the
negative terminal.
When installing a battery and
cover, be sure that they are
mounted properly. If this is not done,
the battery will not be adequately
secured in case of an accident.<
If an electrical accessory fails, switch it
off and check the fuse.
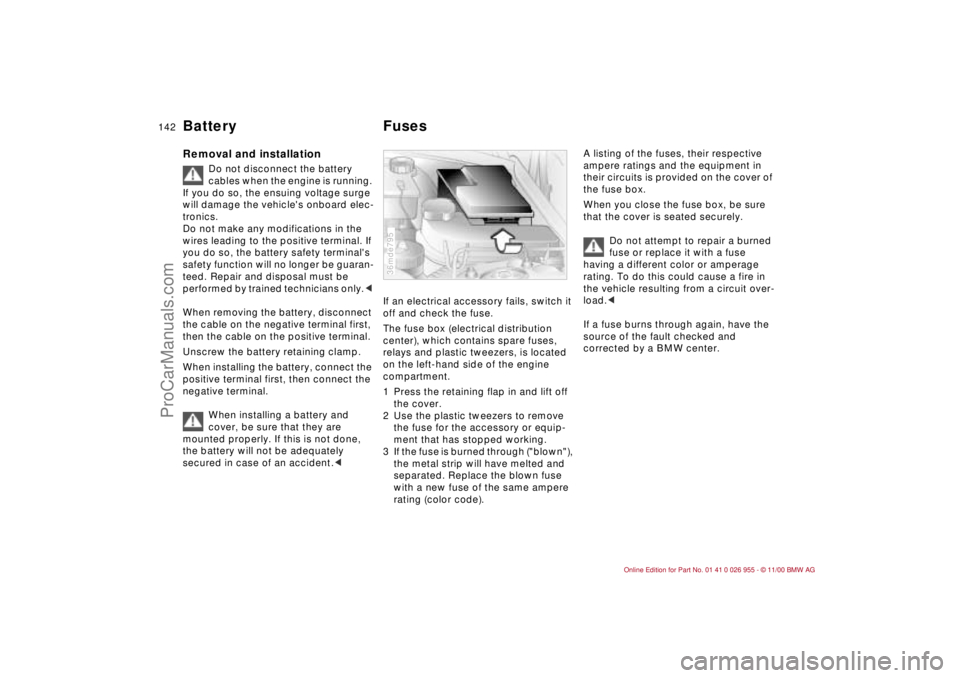
The fuse box (electrical distribution
center), which contains spare fuses,
relays and plastic tweezers, is located
on the left-hand side of the engine
compartment.
1 Press the retaining flap in and lift off
the cover.
2 Use the plastic tweezers to remove
the fuse for the accessory or equip-
ment that has stopped working.
3 If the fuse is burned through ("blown"),
the metal strip will have melted and
separated. Replace the blown fuse
with a new fuse of the same ampere
rating (color code).36mde795
A listing of the fuses, their respective
ampere ratings and the equipment in
their circuits is provided on the cover of
the fuse box.
When you close the fuse box, be sure
that the cover is seated securely.
Do not attempt to repair a burned
fuse or replace it with a fuse
having a different color or amperage
rating. To do this could cause a fire in
the vehicle resulting from a circuit over-
load.<
If a fuse burns through again, have the
source of the fault checked and
corrected by a BMW center.
ProCarManuals.com
Page 143 of 171
143n
IndexDataTechnologyRepairsCar careControlsOverview
Power convertible top
*
Fuel filler door
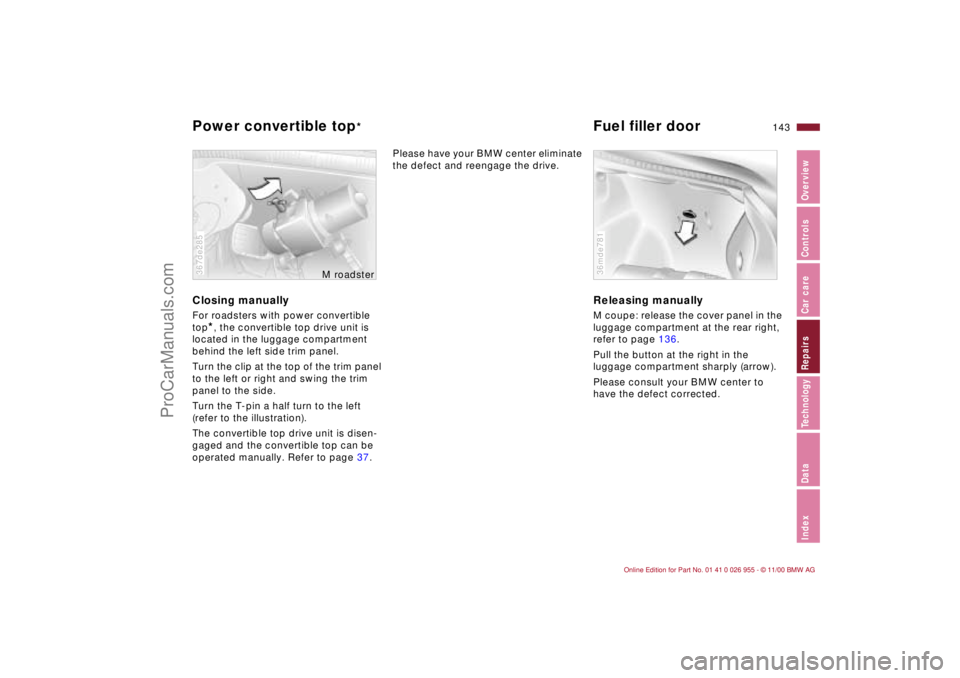
Closing manually For roadsters with power convertible
top
*, the convertible top drive unit is
located in the luggage compartment
behind the left side trim panel.
Turn the clip at the top of the trim panel
to the left or right and swing the trim
panel to the side.
Turn the T-pin a half turn to the left
(refer to the illustration).
The convertible top drive unit is disen-
gaged and the convertible top can be
operated manually. Refer to page 37.
367de285
M roadster
Please have your BMW center eliminate
the defect and reengage the drive.
Releasing manuallyM coupe: release the cover panel in the
luggage compartment at the rear right,
refer to page 136.
Pull the button at the right in the
luggage compartment sharply (arrow).
Please consult your BMW center to
have the defect corrected.36mde781
ProCarManuals.com
Page 144 of 171
144n
Jump-startingNever use spray starter fluids to start
the engine.
If the battery is discharged, the engine
can be started with the use of two
jumper cables and the battery of
another vehicle. Always use jumper
cables with fully insulated handles on
the terminal clamps.
Do not touch voltage-carrying
components when the engine is
running. To do so creates a risk of fatal
injury.<
Carefully comply with the following
instructions to avoid personal injury and
damage to one or both vehicles:
1 Ensure that the battery on the
support vehicle is also rated at
12 volts, and that the capacities of
the two batteries (Ah) are roughly
comparable (printed on casing).
2 Leave the discharged battery
connected to the vehicle electrical
system.
3 Make sure that there is no contact
between the bodywork of the two
vehicles. This creates the risk of
short-circuiting.
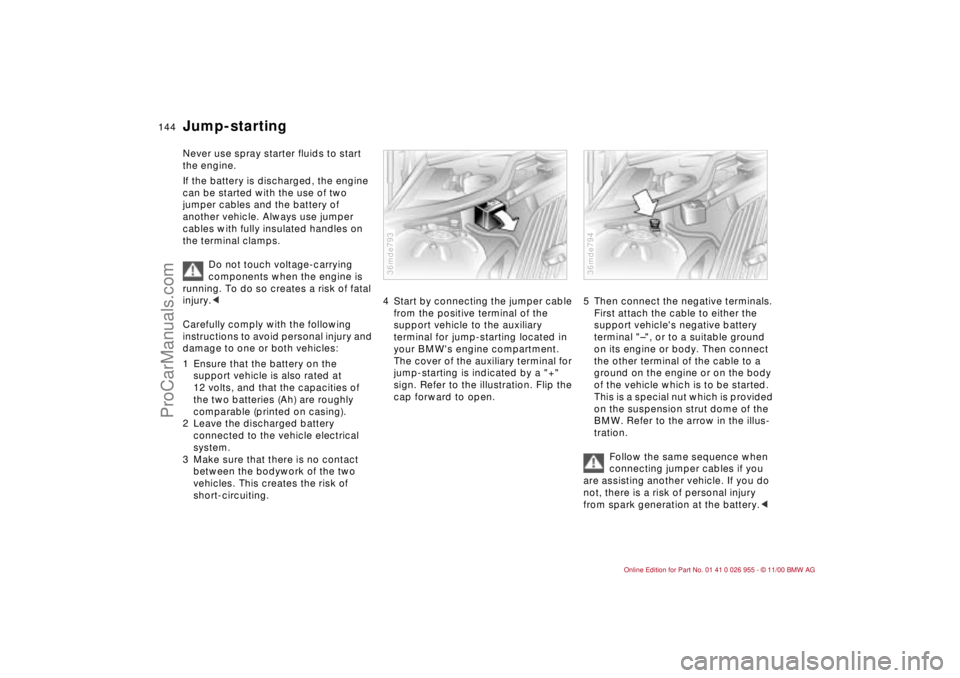
4 Start by connecting the jumper cable
from the positive terminal of the
support vehicle to the auxiliary
terminal for jump-starting located in
your BMW's engine compartment.
The cover of the auxiliary terminal for
jump-starting is indicated by a "+"
sign. Refer to the illustration. Flip the
cap forward to open.36mde793
5 Then connect the negative terminals.
First attach the cable to either the
support vehicle's negative battery
terminal "–", or to a suitable ground
on its engine or body. Then connect
the other terminal of the cable to a
ground on the engine or on the body
of the vehicle which is to be started.
This is a special nut which is provided
on the suspension strut dome of the
BMW. Refer to the arrow in the illus-
tration.
Follow the same sequence when
connecting jumper cables if you
are assisting another vehicle. If you do
not, there is a risk of personal injury
from spark generation at the battery.< 36mde794
ProCarManuals.com
Page 145 of 171
145n
IndexDataTechnologyRepairsCar careControlsOverview
Jump-starting Towing the vehicle6 Start the support vehicle's engine
and let it run.
7 Start the engine on the vehicle
needing the jump-start, and allow it
to run as usual. If the first start
attempt is not successful, wait a few
minutes before another attempt in
order to allow the discharged battery
to recharge.
8 Before disconnecting the jumper
cables from your BMW, turn on the
lamps, set the blower at the highest
speed and run the engine for at least
10 seconds. This will prevent a
voltage surge at the voltage regulator
to the electrical accessories.
9 Then disconnect the jumper cables in
reverse sequence.
If necessary recharge the battery.
Tow fittingThe screw-in tow fitting is stored in the
onboard tool kit; be sure that it remains
in the vehicle at all times. This fitting
is designed for installation in the tow
sockets located at the front and rear of
the vehicle, and is intended for towing
on paved road surfaces only.
It should not be used to pull a vehicle
out of deep snow, mud, sand, etc.
Comply with all applicable towing laws
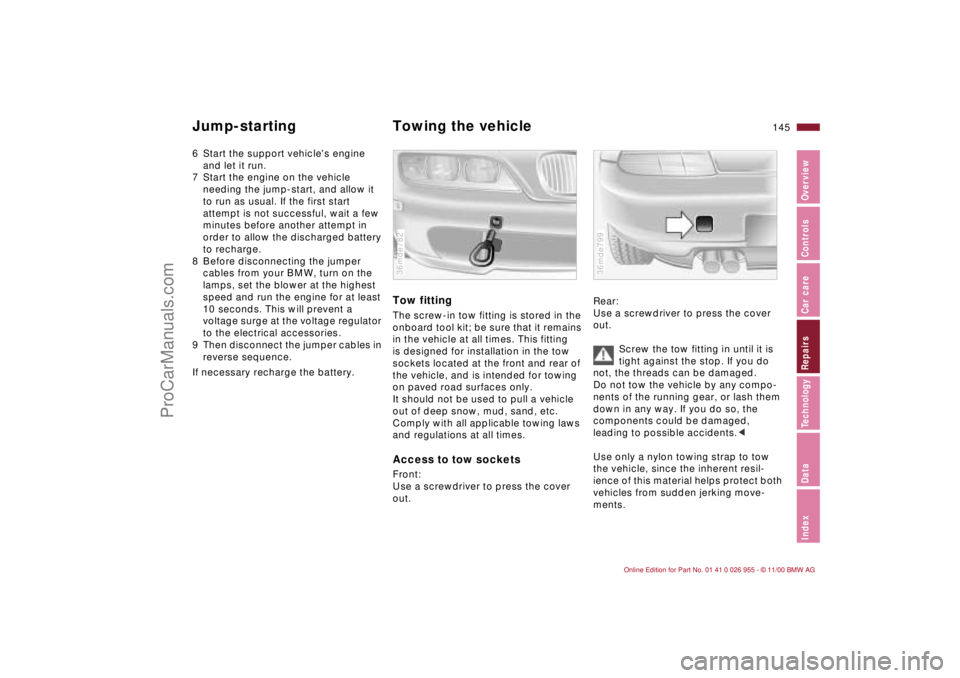
and regulations at all times.Access to tow socketsFront:
Use a screwdriver to press the cover
out.36mde782
Rear:
Use a screwdriver to press the cover
out.
Screw the tow fitting in until it is
tight against the stop. If you do
not, the threads can be damaged.
Do not tow the vehicle by any compo-
nents of the running gear, or lash them
down in any way. If you do so, the
components could be damaged,
leading to possible accidents.<
Use only a nylon towing strap to tow
the vehicle, since the inherent resil-
ience of this material helps protect both
vehicles from sudden jerking move-
ments.36mde799
ProCarManuals.com
Page 146 of 171
146n
Towing the vehicle
The towed vehicle should always
be the lighter of the two vehicles.
If this is not the case, it will not be
possible to control vehicle handling.<
Tow-startingFor instructions on jump-starting, refer
to page 144.
Never attempt to use your vehicle to
push another vehicle, since damage to
the energy-absorbing bumpers could
result.
Towing a vehicle 1 Put the manual-shift gear lever in
neutral.
2 Towing speed:
45 mph (70 km/h) maximum.
3 Towing distance:
95 miles (150 km) maximum.
4 Leave the ignition key at position 1 to
ensure that brake lamps, turn signal
indicators, horn and windshield
wipers remain operative, and to
prevent the steering lock from
engaging.
5 Switch on the hazard warning
flashers (observe applicable legal
regulations).
Find some means of identifying the
vehicle in tow, for instance, place a sign
or warning triangle in the rear window.
Make sure that the ignition key
remains in position 1 even when
the electrical system has failed to
prevent the steering lock from
engaging.
The steering and brakes are without
power assist when the engine is off.
This means that increased effort is
required for steering and braking.<
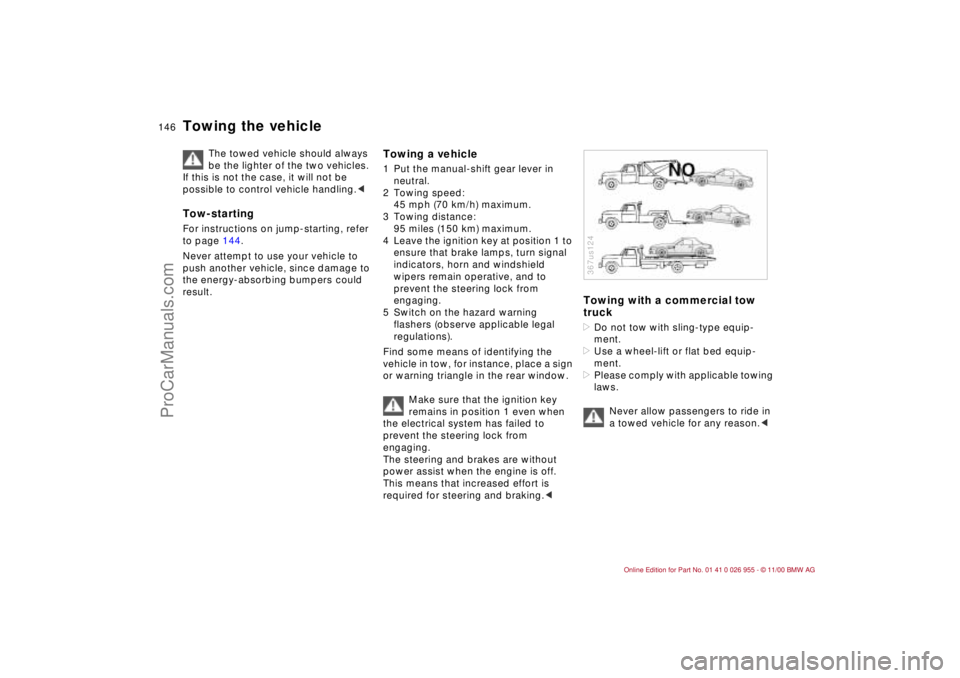
Towing with a commercial tow
truck>Do not tow with sling-type equip-
ment.
>Use a wheel-lift or flat bed equip-
ment.
>Please comply with applicable towing
laws.
Never allow passengers to ride in
a towed vehicle for any reason.< 367us124
ProCarManuals.com
Page 147 of 171
147n
IndexDataTechnologyRepairsCar careControlsOverview
ProCarManuals.com
Page 148 of 171
148n
ProCarManuals.com
Page 149 of 171
Overview
Controls and features
Operation, care
and maintenance
Owner service procedures
Technical data
Index Advanced technology
149n
IndexDataTechnologyRepairsCar careControlsOverview
Airbags150
Radio reception150
Dynamic Stability Control
(DSC)151
Safety belt tensioner151
Interior rearview mirror with
automatic dimming
feature152
Limited slip differential153
Technology
ProCarManuals.com
Page 150 of 171
150n
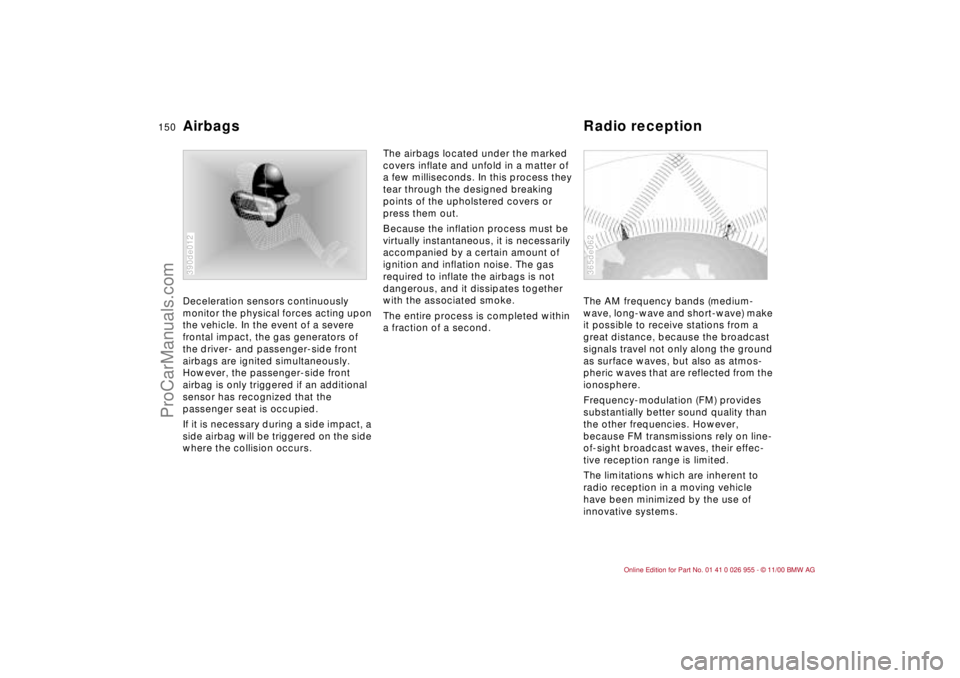
Deceleration sensors continuously
monitor the physical forces acting upon
the vehicle. In the event of a severe
frontal impact, the gas generators of
the driver- and passenger-side front
airbags are ignited simultaneously.
However, the passenger-side front
airbag is only triggered if an additional
sensor has recognized that the
passenger seat is occupied.
If it is necessary during a side impact, a
side airbag will be triggered on the side
where the collision occurs.
390de012
The airbags located under the marked
covers inflate and unfold in a matter of
a few milliseconds. In this process they
tear through the designed breaking
points of the upholstered covers or
press them out.
Because the inflation process must be
virtually instantaneous, it is necessarily
accompanied by a certain amount of
ignition and inflation noise. The gas
required to inflate the airbags is not
dangerous, and it dissipates together
with the associated smoke.
The entire process is completed within
a fraction of a second.The AM frequency bands (medium-
wave, long-wave and short-wave) make
it possible to receive stations from a
great distance, because the broadcast
signals travel not only along the ground
as surface waves, but also as atmos-
pheric waves that are reflected from the
ionosphere.
Frequency-modulation (FM) provides
substantially better sound quality than
the other frequencies. However,
because FM transmissions rely on line-
of-sight broadcast waves, their effec-
tive reception range is limited.
The limitations which are inherent to
radio reception in a moving vehicle
have been minimized by the use of
innovative systems.
365de062
Airbags Radio reception
ProCarManuals.com