fluid BMW M3 1998 E36 User Guide
[x] Cancel search | Manufacturer: BMW, Model Year: 1998, Model line: M3, Model: BMW M3 1998 E36Pages: 759
Page 29 of 759
d
a
d
_
L
G>
G1
a
N
.
G1
Ñ
N
N
O
.
r
d
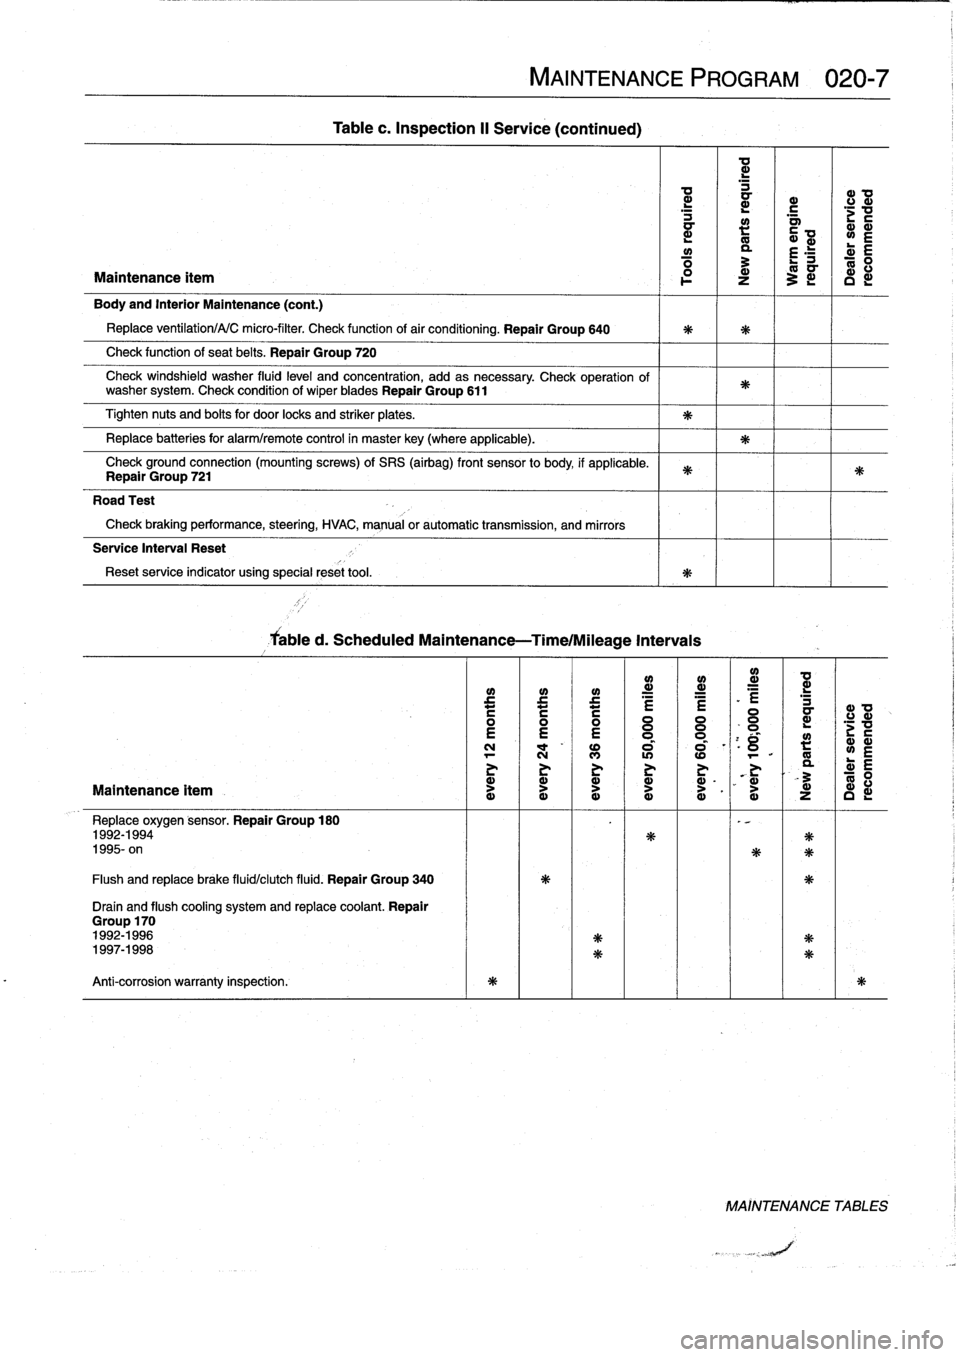
Maintenance
ítem
°
~
Z
~
i
I
D
i
Body
and
Interior
Maintenance
(cont
.)
Replace
ventilation/A/C
micro-filter
.
Check
function
of
air
conditioning
.
Repair
Group
640
Check
function
of
seat
belts
.
Repair
Group
720
Check
windshield
washer
fluid
level
and
concentration,
add
asnecessary
.
Check
operation
of
washer
system
.
Check
condition
of
wiperblades
Repair
Group
611
Tighten
nuts
and
belts
for
door
locks
and
striker
plates
.
Replace
batteries
for
alarm/remote
control
in
masterkey
(where
applicable)
.
Check
ground
connection
(mounting
screws)
of
SRS
(airbag)
front
sensor
to
body,
if
applicable
.
Repair
Group
721
Road
Test
Check
braking
performance,
steering,
HVAC,
manual
or
automatic
transmission,
and
mirrors
Service
Interval
Reset
Reset
service
indicator
using
specialreset
tool
.
Maintenance
ítem
Replace
oxygen
sensor
.
Repair
Group
180
1992-1994
1995-
on
Flush
and
replace
brake
fluid/clutch
fluid
.
Repair
Group
340
Drain
and
flush
cooling
system
and
replace
coolant
.
Repair
Group
170
1992-19961997-1998
Anti-corrosion
warranty
inspection
.
Tablec
.
Inspection
II
Service
(continued)
Cabled
.
Scheduled
Maintenance-Time/Mileage
Intervais
MAINTENANCE
PROGRAM
020-7
e
~
e
e
i
:
l=
N
l
"
NM
I
«)
al
aN
-
11
>
O
Ó
I
Ó
I`
Ó
d
Ny
.
0
°
_
VÑ
Ñ
Ñ
1
ZG
NN
MAÍNTENANCE
TABLES
Page 30 of 759
020-
8
MAINTENANCE
PROGRAM
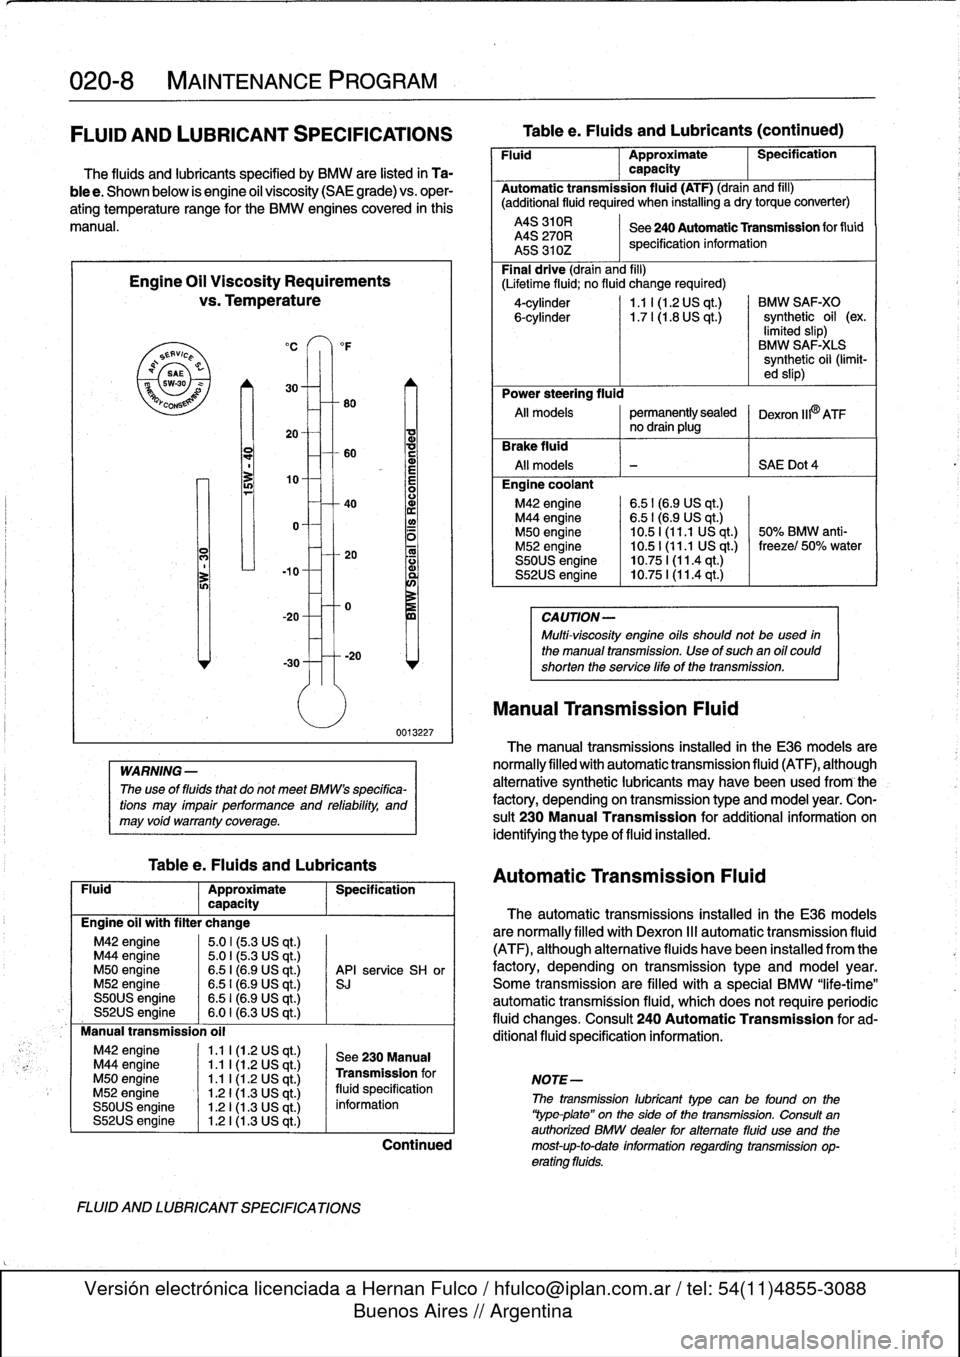
FLUID
AND
LUBRICANT
SPECIFICATIONS
The
fluids
and
lubricante
specified
by
BMW
are
listed
in
Ta-
ble
e
.
Shown
below
is
engine
oil
viscosity
(SAE
grade)
vs
.
oper-
ating
temperature
range
for
the
BMW
enginescovered
in
this
manual
.
Engine
Oil
Viscosity
Requirements
vs
.
Temperature
`S
EAVic
P
Q
SAE
swao
YCO
0
N
M42
engine
1
.1
I
(1
.2
US
qt
.)
M44
engine
1
.1
l(1.2
US
qt
.)
M50
engine
1
.1
1(1.2
US
qt
.)
M52
engine
1
.21(1.3
US
qt
.)
S50US
engine
1
.21(1.3
US
qt
.)
S52US
engine
1
.21(1.3
US
qt
.)
°F
80
-
1o-0
-
30
-----20
WARNING
-
The
use
of
fluids
that
do
not
meet
BMWs
specifica-
tions
may
impair
performance
and
refability,
and
may
void
warranty
coverage
.
Tablee
.
Fluids
and
Lubricants
0013227
Fluid
Approximate
Specification
capacity
Engine
oil
with
filter
change
M42
engine
5
.01
(5
.3
US
qt
.)
M44
engine
5
.0
I
(5
.3
US
qt
.)
M50
engine
6
.5
I
(6.9
US
qt
.)
API
service
SH
or
M52
engine
6
.51
(6.9
US
qt
.)
si
S50US
engine
6
.51
(6.9
US
qt
.)
S52US
engine
6.0
I
(6.3
US
qt
.)
Manual
transmission
oil
FLUID
AND
LUBRICANT
SPECIFICATIONS
See
230Manual
Transmission
for
NOTE-
fluid
specification
Tablee
.
Fluids
and
Lubricants
(continued)
Fluid
Approximate
Specification
capacity
Automatic
transmission
fluid
(ATF)
(drain
and
fill)
(additional
fluid
required
when
installing
a
drytorque
converter)
A4S
310R
See240
AutomaticTransmission
for
fluid
A4S
270R
specification
information
A5S
310Z
Final
drive
(drain
and
fill)
(Lifetime
fluid
;
no
fluid
change
required)
4-cylinder
1
.1
I
(1.2
US
qt
.)
BMW
SAF-XO
6-cylinder
1.7
l(1
.8
US
qt
.)
synthetic
oil
(ex
.
limited
slip)
BMW
SAF-X1-S
synthetic
oil
(limit-
ed
slip)
Power
steering
fluid
Al¡
modeis
permanentlysealed
Dexron
IIPATFno
drain
plug
rake
fluid
All
modeis
-
~
S
AE
Dot4
Engine
coolant
M42
engine
6
.51(6
.9
US
qt
.)
M44
engine
6
.51(6
.9
US
qt
.)
M50
engine
10
.51
(11
.1
US
qt
.)
50%
BMW
anti-
M52
engine
10
.5
1
(11
.1
US
qt
.)
freezel
50%
water
S50US
engine
10
.75
1(11
.4
qt
.)
S52US
engine
10
.75
I
(11
.4
qt
.)
CA
UTION-
Multi-viscosity
engine
oils
should
not
beused
in
the
manual
transmission
.
Use
of
such
an
oil
could
shorten
the
service
life
of
thetransmission
.
Manual
Transmission
Fluid
The
manual
transmissions
installed
in
the
E36
modeis
are
normallyfilled
with
automatic
transmission
fluid
(ATF),
although
alternative
synthetic
lubricants
may
havebeen
used
from
-
the
factory,
depending
on
transmission
type
and
model
year
.
Con-
sult
230
Manual
Transmission
for
additional
information
on
identifying
the
type
of
fluid
installed
.
Automatic
Transmission
Fluid
The
automatic
transmissions
installed
in
the
E36
modeis
are
normally
filled
with
Dexron
111
automatic
transmission
fluid
(ATF),
although
alternative
fluids
havebeen
installed
from
the
factory,
depending
on
transmission
type
and
model
year
.
Some
transmission
are
filled
with
a
special
BMW
"life-time"
automatic
transmission
fluid,
whích
does
not
requireperiodic
fluid
changes
.
Consult
240
Automatic
Transmission
for
ad-
ditional
fluid
specification
information
.
information
1
The
11-
11
lubrican
type
canbefound
on
ti
¡e
`Yype
plate"
on
the
side
of
the
transmission
.
Consult
an
authorized
BMW
dealer
foralternate
fluid
use
and
the
Continued
most-up-to-date
information
regarding
transmission
op-
erating
fluids
.
Page 31 of 759
Final
Drive
Gear
Oil
BMW
recommends
using
only
a
specially
formulatedsyn-
thetic
gear
oil
that
is
available
through
an
authorized
BMW
dealer
parts
department
.
For
additional
information
on
this
¡u-
bricant
andany
other
lubricants
that
may
be
compatible,
con-
tact
an
authorized
BMW
dealer
senrice
department
.
See
331
Final
Drive
.
Brake
Fluid
Brake
fluid
absorbs
moisture
easily,
and
moisture
in
the
fluid
affects
brake
performance
and
reliability
.
This
is
why
brake
fluid
should
be
flushed
from
the
system
every
two
years
.
When
re-
placing
or
adding
brake
fluid,
use
only
new
(luid
from
previously
unopened
containers
.
Do
not
use
brake
fluid
that
has
been
bled
from
the
system,
even
ifit
is
brand
new
.
Use
only
DOT
4
brake
fluid
.
See340
Brakes
for
more
information
.
Engine
Coolant
(Anti-freeze)
BMW
recommends
coolant
that
is
a
50/50
mixture
of
distilled
water
and
phosphate/nítrate
freeanti-freeze
containing
ethyl-
ene
glycol
.
Anti-freezeraises
the
boiling
point
and
lowersthe
freezingpoint
of
the
coolant
.
It
alsocontains
additives
that
help
prevent
cooling
system
corrosion
.
Power
Steering
Fluid
The
power
steering
fluid
is
Dexron
II]®
ATF,
or
equivalent
.
The
system
is
permanently
filled
and
does
not
have
a
drain
.
Routinely
adding
ATF
is
not
required
unlessthe
system
is
leak-
i
n
g,
WARNING
-
Be
sure
to
check
the
fluid
specifications
on
the
pow-
er
steering
reservoir
to
confirm
the
fluid
type
in-
stalled
in
the
system
.
In
some
instances,
the
power
steering
system
may
be
filled
with
an
alternative
hy-
draulic
fluid
designated
CHF
7
.1
.
MAINTENANCE
PROGRAM
020-
ENGINE
OIL
SERVICE
Engine
oil
and
fiiter,
changing
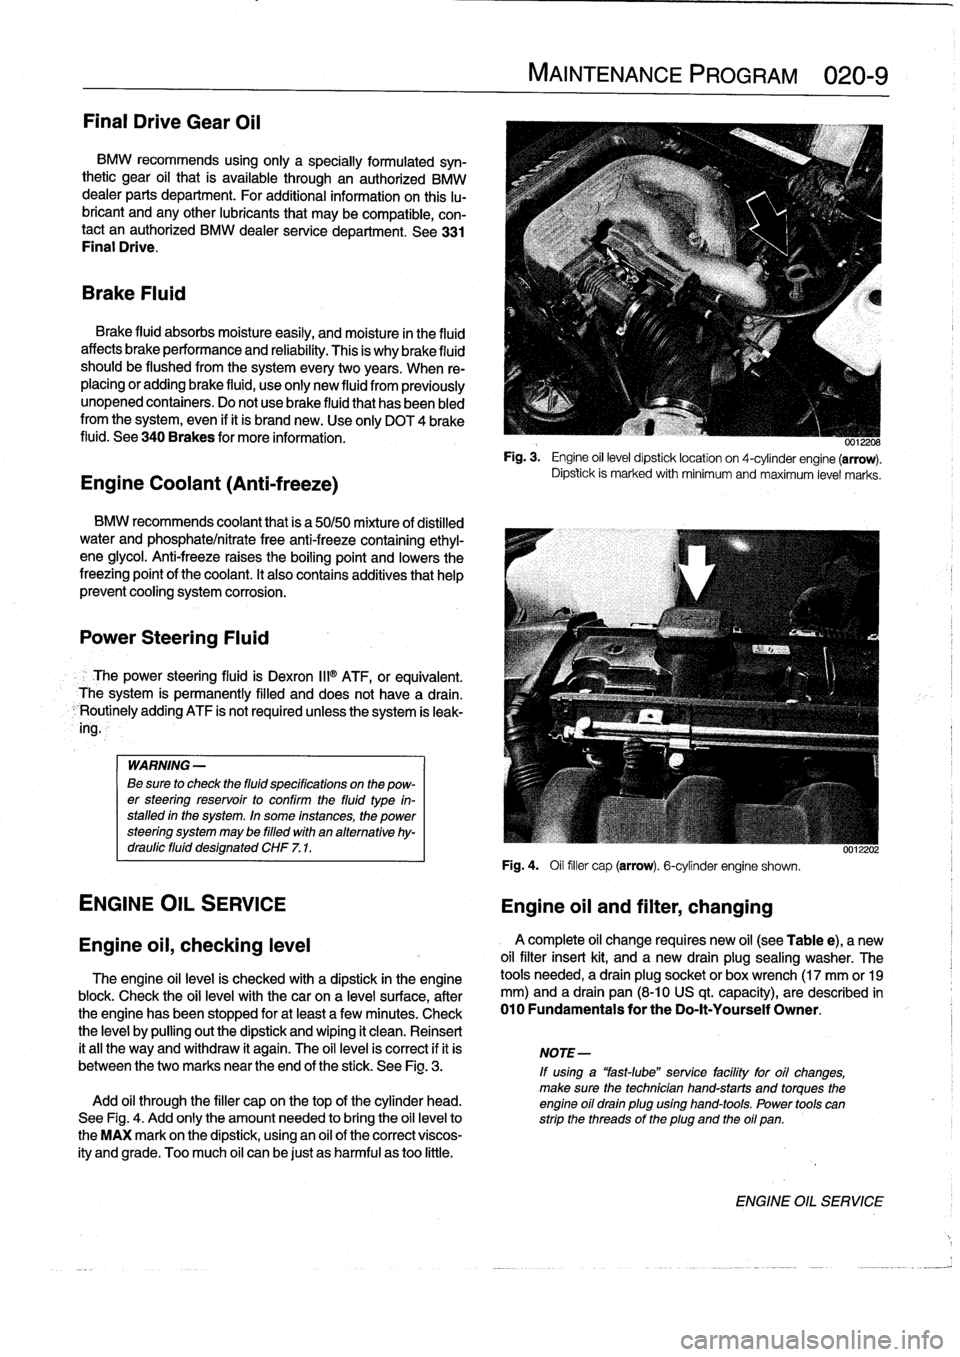
Fig
.
3
.
Engine
oil
level
dipsticklocation
on
4-cylinder
engine
(arrow)
.
Dipsfck
is
marked
with
mínimum
and
maximum
level
marks
.
Fig
.
4
.
Oil
filler
cap
(arrow)
.
6-cylinder
engine
shown
.
0012202
Engine
oii,
checking
leve¡
A
complete
oil
change
requires
new
oil
(see
Table
e),
a
new
oil
filter
insert
kit,
and
a
new
drain
plug
sealing
washer
.
The
The
engine
oil
leve]
is
checked
with
a
dipstick
in
the
engine
tools
needed,
a
drain
plug
socket
or
box
wrench
(17
mm
or19
block
.
Check
the
oii
leve¡
with
the
canon
a
level
surface,
after
mm)
and
a
drain
pan
(8-10
US
qt
.
capacity),
are
described
in
the
engine
has
been
stopped
for
atleast
a
few
minutes
.
Check
010
Fundamentals
for
the
Do-It-Yourself
Owner
.
the
leve¡
by
pulling
outthe
dipstick
and
wiping
it
clean
.
Reinsert
it
all
the
way
and
withdraw
it
again
.
The
oil
leve¡
is
correct
if
it
is
NOTE-
between
the
two
marks
near
the
end
of
the
stick
.
See
Fig
.
3
.
If
using
a
"fast-lube"
service
facility
for
oil
changes,
make
sure
the
technician
hand-starts
and
torques
the
Add
oil
through
the
filler
cap
on
thetop
of
the
cylinder
head
.
engine
oil
drain
plug
using
hand-tools
.
Power
tools
can
See
Fig
.
4
.
Add
only
the
amount
needed
to
bring
the
oil
leve¡to
strip
the
threads
of
the
plug
and
the
oil
pan
.
the
MAX
mark
on
the
dipstick,
using
an
oil
of
the
correctviscos-
ity
andgrade
.
Too
much
oil
canbe
just
as
harmful
as
too
little
.
ENGINE
OIL
SERVICE
Page 36 of 759
020-
1
4
MAINTENANCE
PROGRAM
uu11989
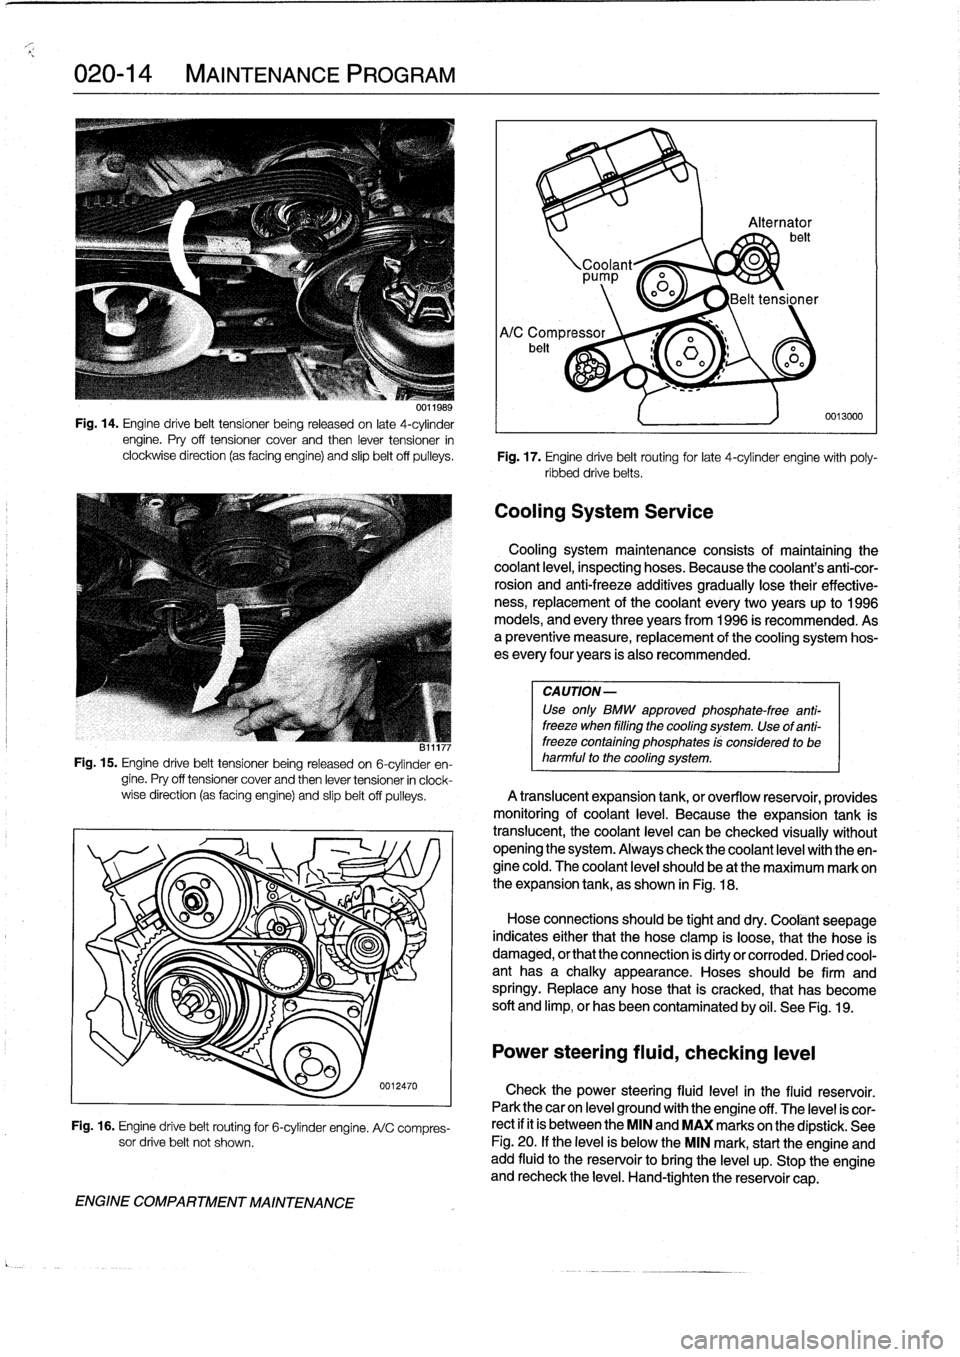
Fig
.
14
.
Engine
drive
belt
tensíoner
being
released
on
late
4-cylinder
engine
.
Pry
off
tensioner
cover
and
then
lever
tensioner
in
clockwise
direction
(as
facing
engine)
and
slip
beltoff
pulleys
.
Fig
.
17
.
Engine
drive
belt
routing
for
late
4-cylinder
engine
with
poly-
ribbed
drivebelts
.
CA
UTION-
Use
only
BMW
approved
phosphate-free
anti-
freeze
when
filling
the
cooling
system
.
Use
of
anti-
B11177
freeze
containing
phosphates
!s
considerad
to
be
Fig
.
15
.
Engine
drive
belt
tensioner
being
released
on
6-cylinder
en-
harmful
to
the
cooling
system
.
gine
.
Pry
off
tensioner
cover
and
then
lever
tensioner
in
clock-
wise
direction
(as
facing
engine)
and
slipbelt
off
pulleys
.
A
translucent
expansion
tank,
or
overflow
resenroir,
providesmonitóring
of
coolant
leve¡
.
Because
the
expansion
tank
is
translucent,
thecoolant
level
can
be
checked
visually
without
opening
the
system
.
Always
check
thecoolant
leve¡
with
theen-gine
cold
.
The
coolant
leve¡
should
be
at
the
maximum
mark
on
O
o
'~
I
the
expansion
tank,
as
shown
in
Fig
.
18
.
OO
Hose
connectionhld
b
tiht
s
soueg
an
ddry
.
Coolánt
seepage
indicates
either
that
the
hose
clamp
is
loose,
that
the
pose
is
ENGINE
COMPARTMENT
MAINTENANCE
0012470
Fig
.
16
.
Engine
drive
belt
routing
for
6-cylinder
engine
.
A/C
compres-
sor
drive
belt
not
shown
.
'92
irá
Alternator
belt
Coolant~
0
pp
o0o
Belt
tensioner
Cooling
System
Service
0013000
Cooling
system
maintenance
consists
of
maíntaining
thecoolant
leve¡,
inspecting
hoses
.
Because
the
coolant's
anti-cor-
rosion
and
anti-freeze
additives
gradually
lose
their
effective-
ness,
replacement
of
thecoolant
every
two
years
up
to
1996
models,
and
every
three
years
from
1996
is
recommended
.
Asa
preventive
measure,
replacement
of
the
cooling
system
hos-
es
every
four
years
is
also
recommended
.
damaged,
or
that
the
connection
is
dirty
or
corroded
.
Dried
cool-
ant
has
a
chalky
appearance
.
Hoses
should
be
firm
and
springy
.
Replace
any
hose
that
is
cracked,
that
has
become
soft
and
limp,
or
has
been
contaminated
by
oil
.
See
Fig
.
19
.
Power
steering
fluid,
checking
leve¡
Check
the
power
steering
fluid
level
in
the
fluid
reservoir
.
Park
thecar
on
leve¡
ground
with
the
engine
off
.
The
level
is
cor-
rect
if
it
is
between
the
MIN
and
MAX
marks
on
the
dipstick
.
See
Fig
.
20
.
If
the
leve¡
is
below
the
MIN
mark,
start
the
engine
andadd
fluid
to
the
reservoir
to
bríng
the
leve¡
up
.
Stop
the
engine
and
recheck
the
leve¡
.
Hand-tighten
the
reservoir
cap
.
Page 37 of 759
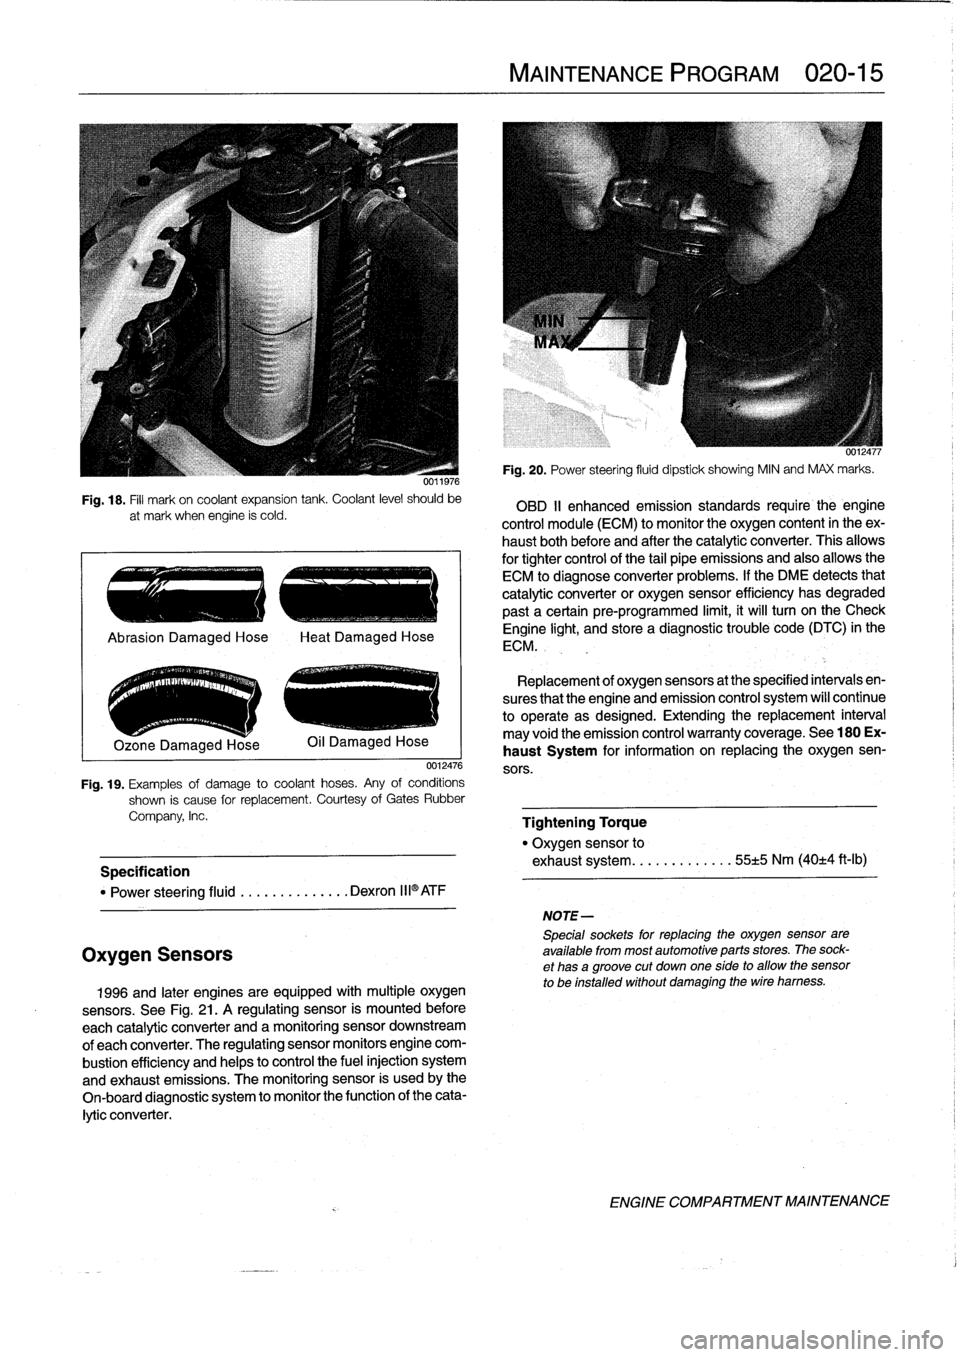
Fig
.
18
.
Fill
mark
on
coolant
expansion
tank
.
Coolant
level
should
be
at
mark
when
engine
ís
cold
.
.
..
e
..
.-
..
~
..
.-
.
Ozone
Damaged
Hose
0012476
Fig
.
19
.
Examples
of
damage
to
coolant
hoses
.
Any
of
conditions
shown
is
cause
for
replacement
.
Courtesy
of
Gates
Rubber
Company,
Inc
.
Specification
"
Power
steering
fluid
..........
.
...
Dexron
III®ATF
Oxygen
Sensors
1996
and
later
engines
are
equipped
withmultiple
oxygen
sensors
.
See
Fig
.
21
.
A
regulating
sensor
is
mounted
before
each
catalytic
converter
and
amonitoring
sensor
downstream
of
each
converter
.
The
regulating
sensor
monitors
engine
com-
bustion
efficiency
and
helps
to
control
the
fuel
injection
system
and
exhaust
emissions
.
The
monitoring
sensor
is
usedby
the
On-board
diagnostic
system
to
monitor
the
function
of
the
cata-
lytic
converter
.
MAINTENANCE
PROGRAM
020-
1
5
NOTE-
5pecialsockets
for
replacingthe
oxygen
sensor
are
available
from
most
automotive
parts
stores
.
The
sock-
et
has
agroove
cut
down
one
side
to
allow
the
sensor
to
be
installed
without
damaging
the
wire
hamess
.
Fig
.
20
.
Power
steering
fluid
dipstick
showing
MIN
and
MAX
marks
.
OBD
II
enhanced
emission
standards
require
the
engine
control
module
(ECM)
to
monitor
the
oxygen
content
in
theex-
haust
bothbefore
and
after
the
catalytic
converter
.
This
allows
for
tightercontrol
of
the
tail
pipe
emissions
and
also
allowsthe
ECM
to
diagnose
converter
problems
.
lf
the
DME
detects
that
catalytic
converter
or
oxygen
sensor
efficiency
has
degraded
past
a
certain
pre-programmed
limit,
it
will
turn
on
the
Check
Engine
light,
and
store
a
diagnostic
trouble
code
(DTC)
in
the
ECM
.
Replacement
of
oxygen
sensors
at
the
specified
intervals
en-
sures
that
the
engine
and
emission
control
system
wíll
continue
to
operate
as
designed
.
Extending
the
replacement
interval
may
void
the
emission
control
warranty
coverage
.
See
180
Ex-
haust
System
for
information
on
replacing
the
oxygen
sen-
sors
.
Tightening
Torque
"
Oxygen
sensor
to
exhaust
system
........
.
.
.
..
55±5
Nm
(40±4
ft-Ib)
ENGINE
COMPARTMENT
MAINTENANCE
Page 39 of 759
Tires,
checking
inflation
pressure
Brake
pad/rotor
wear,
checking
Correct
tire
pressuresare
important
to
handling
and
stability,
Al¡
E36
cars
are
fitted
withdisc
brakes
at
al¡
four
wheels
.
See
fuel
economy,
and
tire
wear
.
Tire
pressures
change
with
temper-
Fig
.
24
.
Although
thebrakesare
equipped
with
a
brake
pad
ature
.
Pressures
should
be
checked
often
during
seasonal
tem-
warning
system,
the
system
only
monitors
one
wheel
per
axle
.
perature
changes
.
Correct
inflation
pressures
canbe
found
on
It
is
recommended
that
pad
thickness
should
be
checked
the
driver's
door
pillar
and
in
the
owner's
manual
.
Note
that
tire
whenever
the
wheels
are
off
or
brakework
is
beggg
done
.
pressuresshould
be
higher
when
thecar
is
more
heavily
loaded
.
WARNING
-
Do
not
inflate
any
tire
to
a
higher
pressure
than
the
tiress
maximum
ínflation
pressure
listed
on
the
side-
wall
.
Use
cara
when
addlng
air
to
warm
tires
.
Warm
tire
pressures
can
increase
as
much
as4
psi
(0.3
bar)
over
their
cold
pressures
.
Tires,
rotating
BMW
does
not
recommend
tire
rotation
.
Due
to
the
cars
sus-
pension
design,
the
fronttires
begin
to
wear
first
at
the
outer
shoulder
and
the
rear
tires
begin
to
wear
first
at
themiddle
of
the
tread
or
inner
shoulder
.
Rotating
the
tires
may
adversely
af-
fect
roadhandling
and
tire
grip
.
NOTE-
The
main
purpose
of
tire
rotation
isto
promote
even
wear
and
maximum
tire
life
.
Tire
life
may
be
decreased
slightly
if
the
tires
are
not
rotated
.
Wheels,
aligning
Routine
maintenance
of
the
brake
system
includes
maintain-
ing
the
brake
fluid
in
the
reservoir,
checking
brakepads
for
wear,
checking
hand
brake
functíon,
and
inspecting
the
system
for
fluid
leaks
or
other
damage
.
Check
that
brake
hoses
are
correctly
routed
to
avoidchafing
or
kinkíng
.
Inspect
unions
and
brake
calipers
for
signs
of
fluid
leaks
.
Inspect
rigid
fines
for
corrosion,
dents,
or
other
damage
.
Inspect
flexible
hoses
for
cracking
.
Replace
faulty
hoses
or
lines
as
described
in
340Brakes
.
WARNING
-
Incorrect
installation
or
overtightening
hoses,
fines,
and
unions
may
cause
chafing
or
leakage
.
This
can
lead
to
partíal
or
completebrake
system
failure
.
MAINTENANCE
PROGRAM
020-
1
7
B323
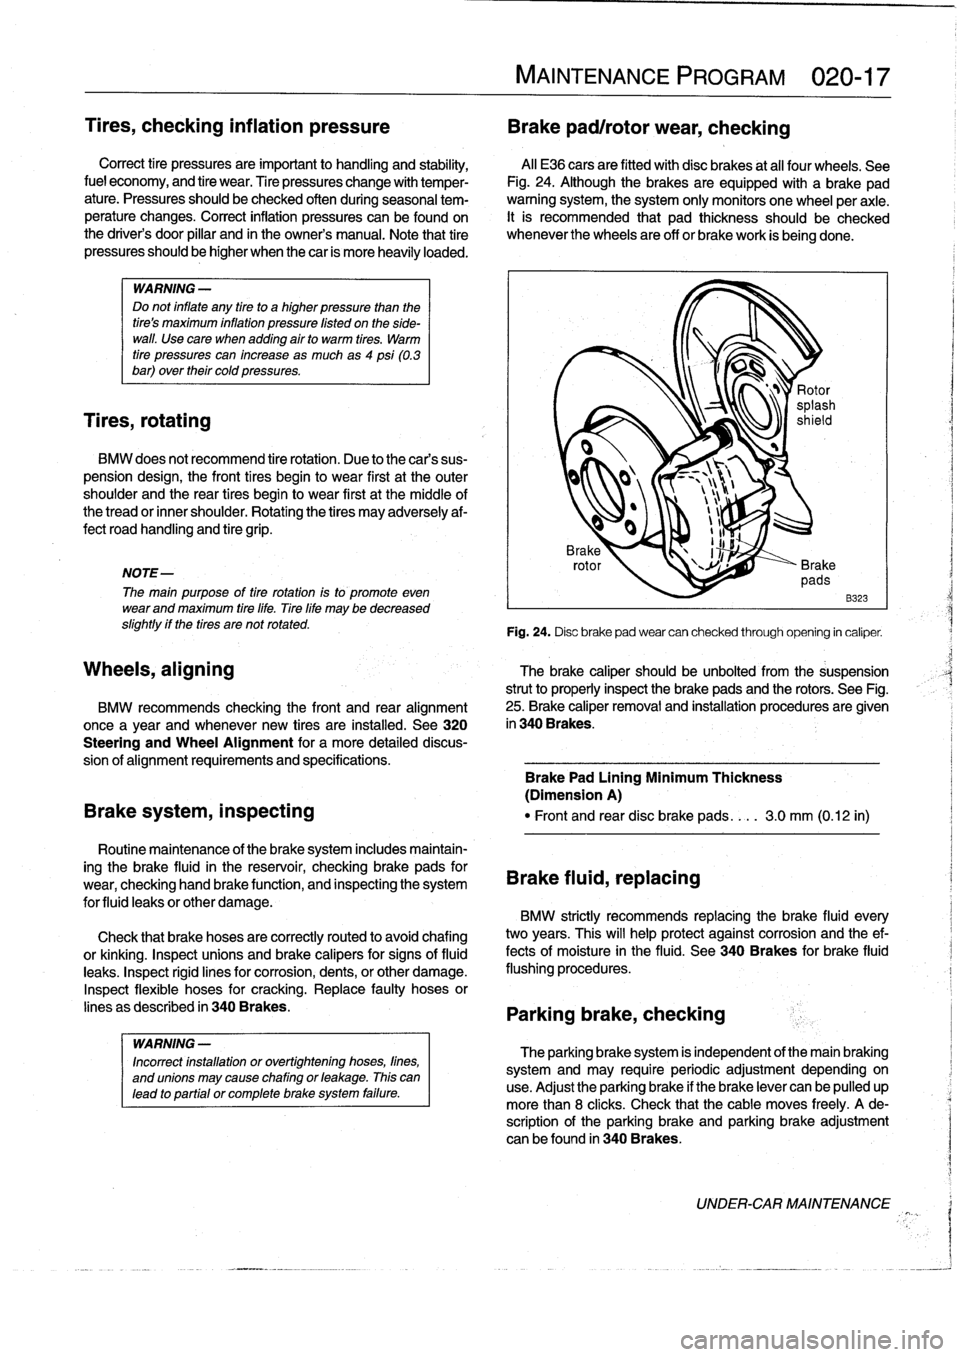
Fig
.
24
.
Disc
brake
pad
wear
can
checked
through
opening
in
caliper
.
The
brake
caliper
should
be
unbolted
from
the
suspension
strut
to
properly
inspect
the
brake
pads
and
the
rotors
.
See
Fig
.
25
.
Brake
caliper
removal
and
installation
procedures
are
given
in
340
Brakes
.
BMW
recommends
checking
the
front
and
rear
alignment
once
a
year
and
whenever
new
tires
are
installed
.
See320
Steering
and
Wheel
Alignment
for
a
more
detailed
discus-
sion
of
alignment
requirements
and
specifications
.
Brake
Pad
Lining
Minimum
Thickness
(Dimension
A)
Brake
system,
inspecting
"
Front
and
reardisc
brake
pads
....
3
.0
mm
(0
.12
in)
Brake
fluid,
replacing
BMW
strictly
recommends
replacing
the
brake
fluid
every
two
years
.
This
will
help
protect
against
corrosion
and
the
ef-
fects
of
moisture
in
the
(luid
.
See340
Brakes
for
brake
fluid
flushing
procedures
.
Parking
brake,
checking
The
parking
brakesystem
is
independent
of
the
main
braking
system
and
may
requireperiodic
adjustment
dependingon
use
.
Adjust
the
parking
brake
if
the
brake
lever
can
be
pulled
up
more
than
8
clicks
.
Check
that
the
cable
moves
freely
.
A
de-
scription
of
the
parking
brake
and
parking
brake
adjustment
can
be
found
in
340Brakes
.
UNDER-CARMAINTENANCE
Page 40 of 759
020-
1
8
MAINTENANCE
PROGRAM
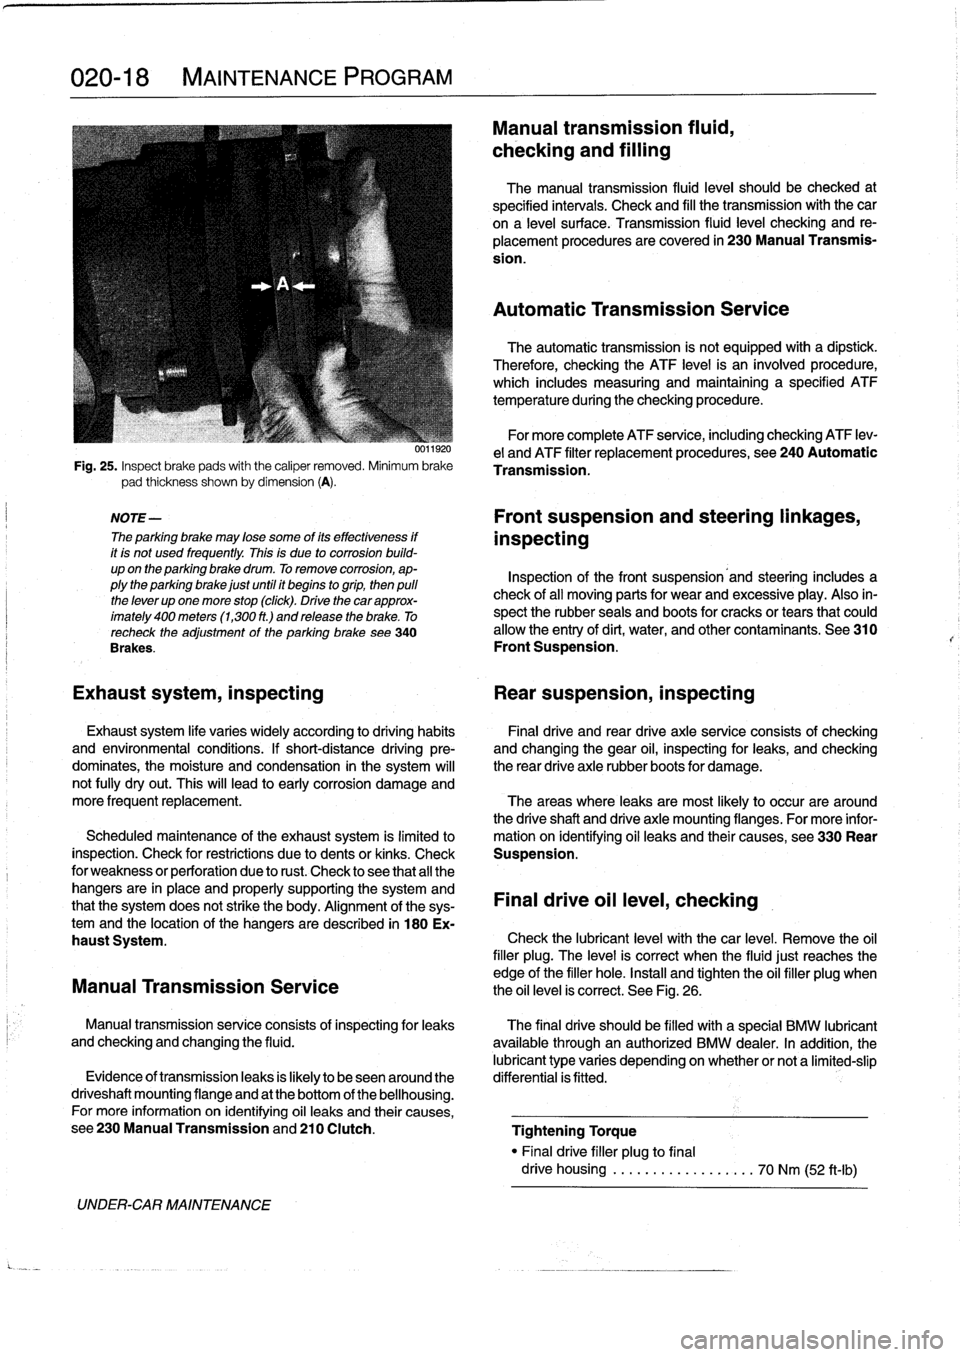
Fig
.
25
.
Inspect
brake
pads
with
the
caliper
removed
.
Minimum
brake
pad
thickness
shown
by
dimension
(A)
.
NOTE-
The
parking
brake
may
lose
some
of
its
effectiveness
if
it
is
not
used
frequently
.
This
is
due
to
corrosion
build-
up
on
the
parking
brake
drum
.
To
remove
corrosion,
ap-
plythe
parking
brake
just
until
it
begins
togrip,
then
pulí
the
lever
up
one
more
stop
(click)
.
Drive
thecar
approx-
imately
400
meters
(1,300
ft
.)
and
release
the
brake
.
To
recheck
the
adjustment
of
the
parking
brake
see340
Brakes
.
UNDER-CAR
MAINTENANCE
0011920
Manual
transmission
fluid,
checking
and
filling
The
manual
transmission
fluid
leve¡
should
be
checked
at
specified
intervals
.
Check
and
fill
the
transmission
with
the
car
ona
leve¡
surface
.
Transmission
(luid
leve¡
checking
and
re-
placement
procedures
are
covered
in
230
Manual
Transmis-
sion
.
Automatic
Transmission
Service
The
automatic
transmission
is
not
equipped
with
a
dipstíck
.
Therefore,
checking
the
ATF
level
is
an
ínvolved
procedure,
which
includes
measuring
and
maintaining
a
specified
ATF
temperature
during
the
checking
procedure
.
For
more
complete
ATF
service,
including
checking
ATF
lev-
e¡
and
ATF
filter
replacement
procedures,
see
240
Automatic
Transmission
.
Front
suspension
and
steering
linkages,
inspecting
Inspection
of
the
front
suspension'and
steering
includes
a
check
of
all
moving
parts
for
wear
and
excessive
play
.
Also
in-
spect
the
rubber
seals
and
boots
for
cracks
or
tears
that
could
allow
the
entry
of
dirt,
water,
and
other
contaminants
.
See
310
Front
Suspension
.
Exhaust
system,
inspecting
Rear
suspension,
inspecting
Exhaust
system
life
varies
widely
according
to
driving
habits
Final
drive
and
rear
drive
axle
service
consists
of
checking
and
environmental
conditions
.
If
short-distance
driving
pre-
and
changing
the
gear
oil,
inspecting
for
leaks,
and
checking
dominates,
the
moisture
and
condensation
in
the
system
will
the
rear
drive
axle
rubber
boots
for
damage
.
not
fully
dryout
.
This
will
lead
to
early
corrosion
damage
and
more
frequent
replacement
.
The
areas
where
leaks
are
most
likely
to
occur
are
around
the
driveshaft
and
drive
axle
mounting
flanges
.
For
more
infor
Scheduled
maintenance
of
the
exhaust
system
is
limitedlo
mation
on
ídentifying
oil
leaks
and
their
causes,
see330
Rear
inspection
.
Check
for
restrictions
due
to
dents
or
kinks
.
Check
Suspension
.
for
weakness
or
perforation
due
to
rust
.
Check
lo
see
that
all
the
hangers
are
in
place
and
properly
supporting
the
system
and
that
the
system
does
not
strike
the
body
.
Alignment
of
the
sys-
Final
drive
oil
leve¡,
checking
temand
the
location
of
the
hangers
aredescribed
in
180
Ex-
haust
System
.
Check
the
lubricant
leve¡
with
thecar
level
.
Remove
the
oil
filler
plug
.
The
leve¡
is
correct
when
the
fluidjust
reaches
the
edge
of
the
filler
hole
.
Install
and
tighten
the
oil
filler
plug
when
Manual
Transmission
Service
the
oil
level
is
correct
.
See
Fig
.
26
.
Manual
transmissionservice
consists
of
inspectingfor
leaks
The
final
drive
should
be
filled
with
a
special
BMW
lubricant
and
checking
and
changing
the
fluid
.
available
through
an
authorized
BMW
dealer
.
In
addition,
the
lubricant
type
varies
depending
onwhether
or
nota
limited-slip
Evidence
of
transmissionleaks
is
fkely
to
beseenaround
the
differential
is
fitted
.
driveshaft
mounting
flange
and
at
the
bottom
of
the
bellhousing
.
For
more
information
on
identifying
oil
leaks
and
their
causes,
see230ManualTransmissionand210
Clutch
.
Tightening
Torque
"
Finaldrive
filler
plug
to
final
drive
housing
..................
70
Nm
(52
ft-Ib)
Page 41 of 759
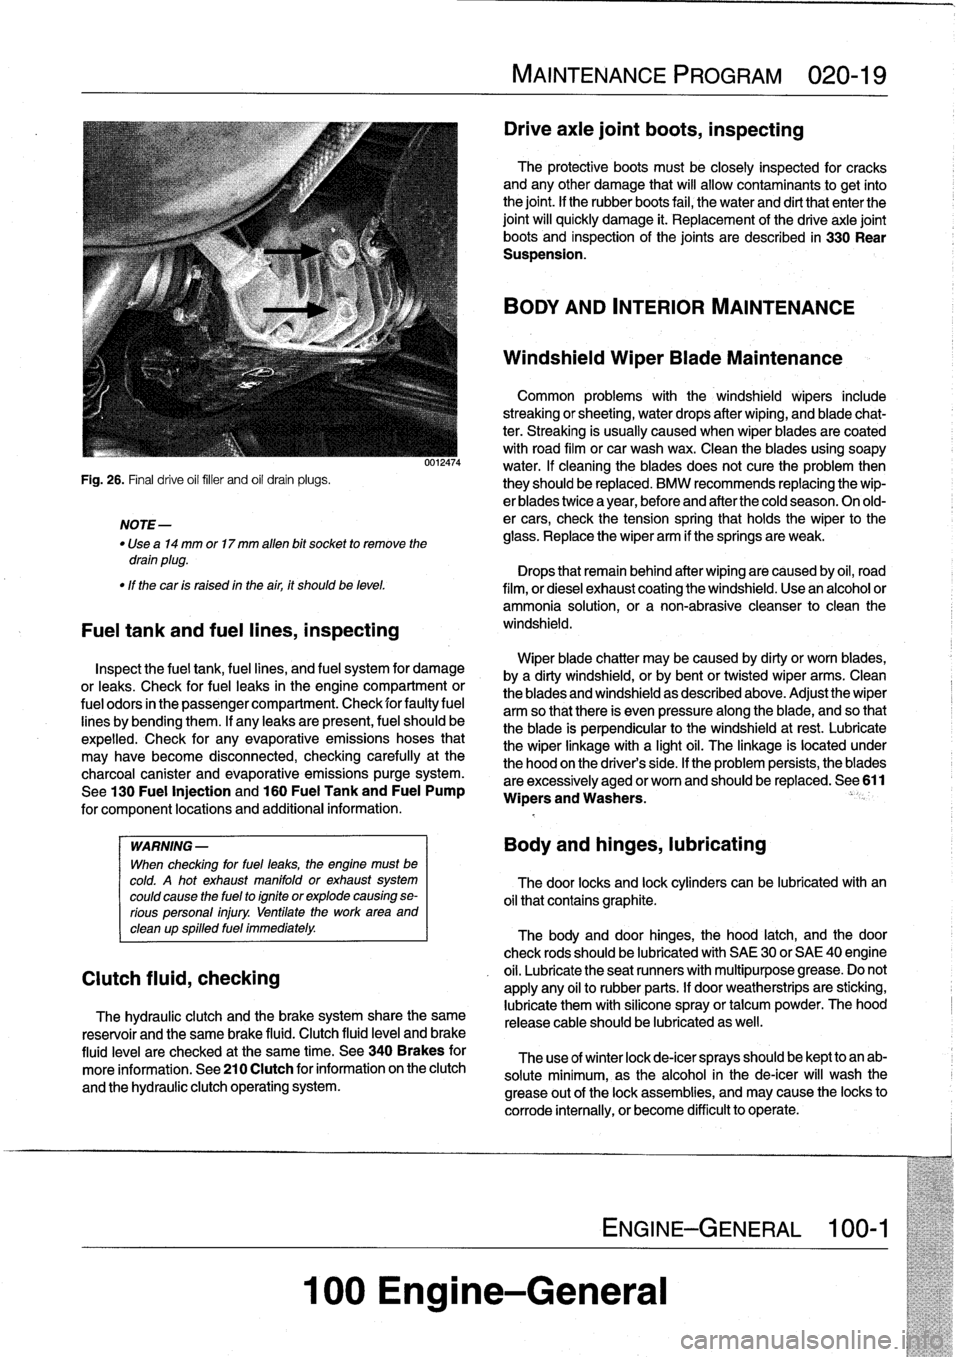
NOTE-
Use
a14
mm
or17
mm
alíen
bit
socket
to
remove
the
drain
plug
.
"
If
thecar
is
raised
in
the
air,
it
shouldbe
leve¡
.
Fuel
tank
and
fuel
fines,
inspecting
0012474
Inspect
the
fuel
tank,
fuel
lines,
and
fuel
system
for
damage
or
leaks
.
Check
for
fuel
leaks
in
the
engine
compartment
or
fuel
odors
in
the
passenger
compartment
.
Check
for
faultyfuel
lines
bybending
them
.
If
any
leaks
are
present,
fuel
should
be
expelled
.
Check
for
any
evaporative
emissions
hoses
that
may
have
become
disconnected,
checking
carefully
at
the
charcoal
canister
and
evaporative
emissionspurge
system
.
See130
Fuel
Injection
and
160
Fuel
Tank
and
Fuel
Pump
for
component
locations
and
additional
information
.
WARNING
-
When
checking
for
fuel
leaks,
the
engine
must
be
cold
.
A
hot
exhaust
manifold
or
exhaust
system
could
cause
the
fuel
to
ignite
or
explode
causing
se-
rious
personal
injury
.
Uentilate
the
workarea
and
clean
up
spilled
fuel
immediately
.
Clutch
fluid,
checking
The
hydraulic
clutch
and
the
brake
system
share
the
same
reservoir
and
the
same
brake
fluid
.
Clutch
fluid
leve¡
and
brake
fluid
level
are
checked
at
the
same
time
.
See340
Brakes
for
more
information
.
See210
Clutch
for
information
on
the
clutch
and
the
hydraulic
clutch
operating
system
.
MAINTENANCE
PROGRAM
020-19
Drive
axie
joint
boots,
inspecting
100
Engine-General
The
protective
boots
must
be
closely
inspected
for
cracks
andany
other
damage
that
will
allow
contaminants
to
get
ínto
the
joint
.
If
the
rubber
boots
faf
,
the
water
and
dirt
that
enter
the
joint
will
quickly
damage
¡t
.
Replacement
of
the
drive
axle
joint
boots
and
inspection
of
the
joints
are
described
in
330
Rear
Suspension
.
BODY
AND
INTERIOR
MAINTENANCE
Windshield
Wiper
Biade
Maintenance
Common
problems
with
the
windshield
wipers
include
streaking
or
sheeting,
water
drops
after
wiping,
and
blade
chat-
ter
.
Streaking
is
usually
caused
when
wiper
blades
are
coated
with
road
film
or
car
wash
wax
.
Clean
the
blades
using
soapy
water
.
If
cleaning
theblades
does
not
cure
the
problem
then
they
should
be
replaced
.
BMW
recommends
replacing
the
wip-
er
blades
twice
a
year,
before
and
after
the
cold
season
.
Onold-
er
cars,
check
the
tension
spring
that
holds
the
wiper
to
the
glass
.
Replace
the
wiper
arm
if
the
springs
are
weak
.
Drops
that
remainbehind
after
wipingare
caused
by
oil,
road
film,
or
diesel
exhaust
coating
the
windshield
.
Use
an
alcohol
or
ammonia
solution,
or
a
non-abrasive
cleanser
to
clean
the
windshield
.
Wiper
blade
chatter
may
be
caused
by
dirty
or
worn
blades,
bya
dirty
windshield,
or
by
bentor
twisted
wiper
arms
.
Clean
the
blades
and
windshield
as
described
above
.
Adjust
the
wiper
arm
so
that
there
is
even
pressure
along
the
blade,
and
so
that
the
blade
is
perpendicular
to
the
windshield
atrest
.
Lubricate
the
wiper
linkage
with
a
light
oil
.
The
linkage
is
located
under
the
hood
on
the
drivers
side
.
If
the
problem
persists,
theblades
are
excessively
aged
or
worn
and
should
be
replaced
.
See
611
Wipers
and
Washers
.
Body
and
hinges,
lubricating
The
door
locks
and
lock
cylinders
canbe
lubricated
with
an
oil
that
contains
graphite
.
The
body
and
door
hinges,
the
hood
latch,
and
the
door
check
rods
should
be
lubricated
with
SAE
30
or
SAE
40
engine
oil
.
Lubricate
the
seat
runners
with
multipurpose
grease
.
Do
not
apply
any
oil
to
rubber
parts
.
If
door
weatherstrips
are
sticking,
lubricate
them
with
silicone
spray
or
talcum
powder
.
The
hood
release
cable
should
be
lubricated
as
well
.
The
use
of
winter
lock
de-icer
spraysshould
be
kept
to
an
ab-
solute
minimum,
as
the
alcohol
in
the
de-icer
will
wash
the
grease
out
of
the
lock
assemblies,
and
may
cause
the
locks
to
corrode
internally,
or
become
difficult
to
operate
.
ENGINE-GENERAL
100-1
Page 61 of 759
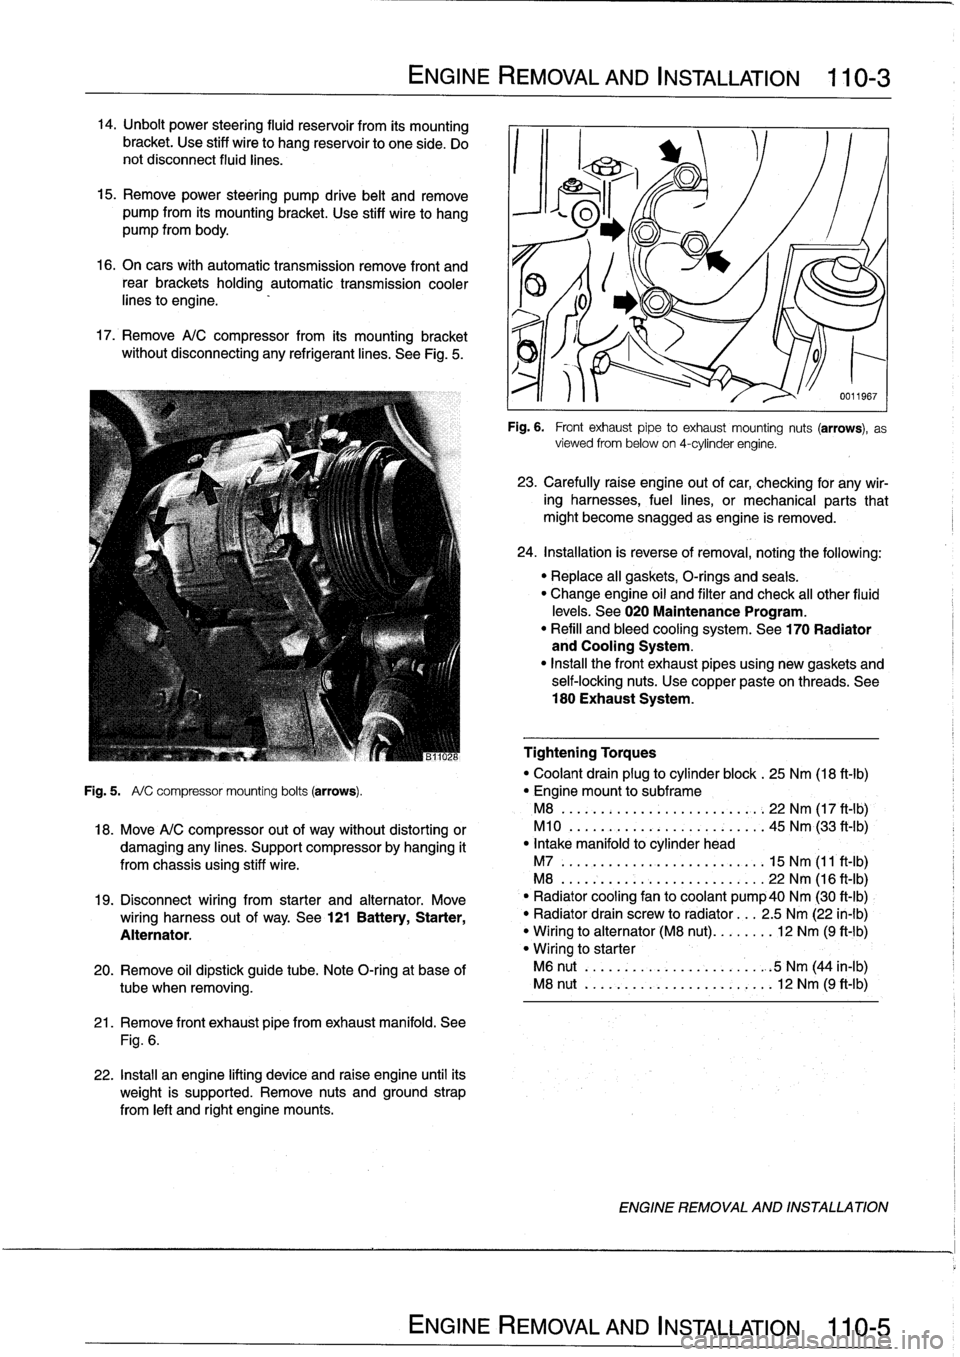
14
.
Unbolt
power
steering
fluid
reservoir
from
íts
mounting
bracket
.
Use
stiff
wire
to
hang
reservoir
to
one
side
.
Do
not
disconnect
fluid
lines
.
15
.
Remove
power
steering
pump
drive
belt
and
remove
pump
from
its
mounting
bracket
.
Use
stiff
wire
to
hang
pump
from
body
.
16
.
On
cars
with
automatic
transmission
remove
front
and
rear
brackets
holding
automatic
transmission
cooler
linesto
engine
.
17
.
Remove
A/C
compressor
from
its
mounting
bracket
without
disconnecting
any
refrigerantlines
.
See
Fig
.
5
.
ENGINE
REMOVAL
AND
INSTALLATION
110-
3
21
.
Remove
front
exhaust
pipefrom
exhaust
manifold
.
See
Fig
.
6
.
22
.
Install
an
engine
lifting
device
and
raise
engine
until
its
weight
is
supported
.
Remove
nuts
and
ground
strap
from
left
and
right
engine
mounts
.
0011967
Fig
.
6
.
Front
exhaustpipe
to
exhaust
mounting
nuts
(arrows),
as
viewed
from
below
on
4-cylinder
engine
.
23
.
Carefully
raíse
engine
out
of
car,
checking
for
any
wir-
ing
harnesses,
fuel
lines,
or
mechanical
parts
that
might
become
snagged
as
engine
is
removed
.
24
.
Installation
is
reverse
of
removal,
noting
the
following
:
"
Replace
all
gaskets,
O-rings
and
seals
.
"
Change
engine
oil
and
filter
and
check
al¡
other
fluid
levels
.
See020
Maintenance
Program
.
"
Refill
and
bleed
cooling
system
.
See
170
Radiator
and
Cooling
System
.
"
Insta¡¡
the
front
exhaust
pipes
using
new
gaskets
and
self-locking
nuts
.
Use
copper
pasteon
threads
.
See
180
Exhaust
System
.
Tightening
Torques
"
Coolant
drain
plug
to
cylinder
block
.
25
Nm
(18
ft-Ib)
Fig
.
5
.
A/
C
compressor
mounting
bolts
(arrows)
.
"
Engine
mount
to
subframe
M8
......:...
..
..
..
......,:..
22
Nm
(17
ft
-
1b)
,
18
.
Move
A/C
compressor
out
of
way
without
distorting
or
M10
.
...
.
..
...
.
.
...........
45
Nm
(33
ft'-Ib)
damaging
any
lines
.
Support
compressor
by
hanging
it
"
Intake
manifold
to
cylinder
head
from
chassis
using
stiff
wire
.
M7
.....
.
..
...
..
..
...........
15
Nm
(11
ft-Ib)
M8
...
.
.
.
..
..
...
..
...........
22
Nm
(16
ft-Ib)
19
.
Disconnect
wiring
from
starter
and
alternator
.
Move
`
"
Radiator
cooling
fan
to
coolant
pump40
Nm
(30
ft-Ib)
wiring
harness
out
of
way
.
See
121
Battery,
Starter,
"
Radiator
drain
screw
to
radiator
...
2
.5
Nm
(22
in-lb)
Alternator
.
"
Wiring
to
alternator
(M8
nut)
........
12
Nm
(9
ft-1b)
"
Wiring
to
starter
20
.
Remove
oil
dipstick
guide
tube
.
Note
O-ring
at
base
of
M6
nut
..
.
..
..
...
..
...........
.
:5
Nm
(44
in-lb)
tube
when
removing
.
M8
nut
..
.
..
..
...
..
............
12
Nm
(9
ft-Ib)
ENGINE
REMOVAL
AND
INSTALLATION
Page 63 of 759
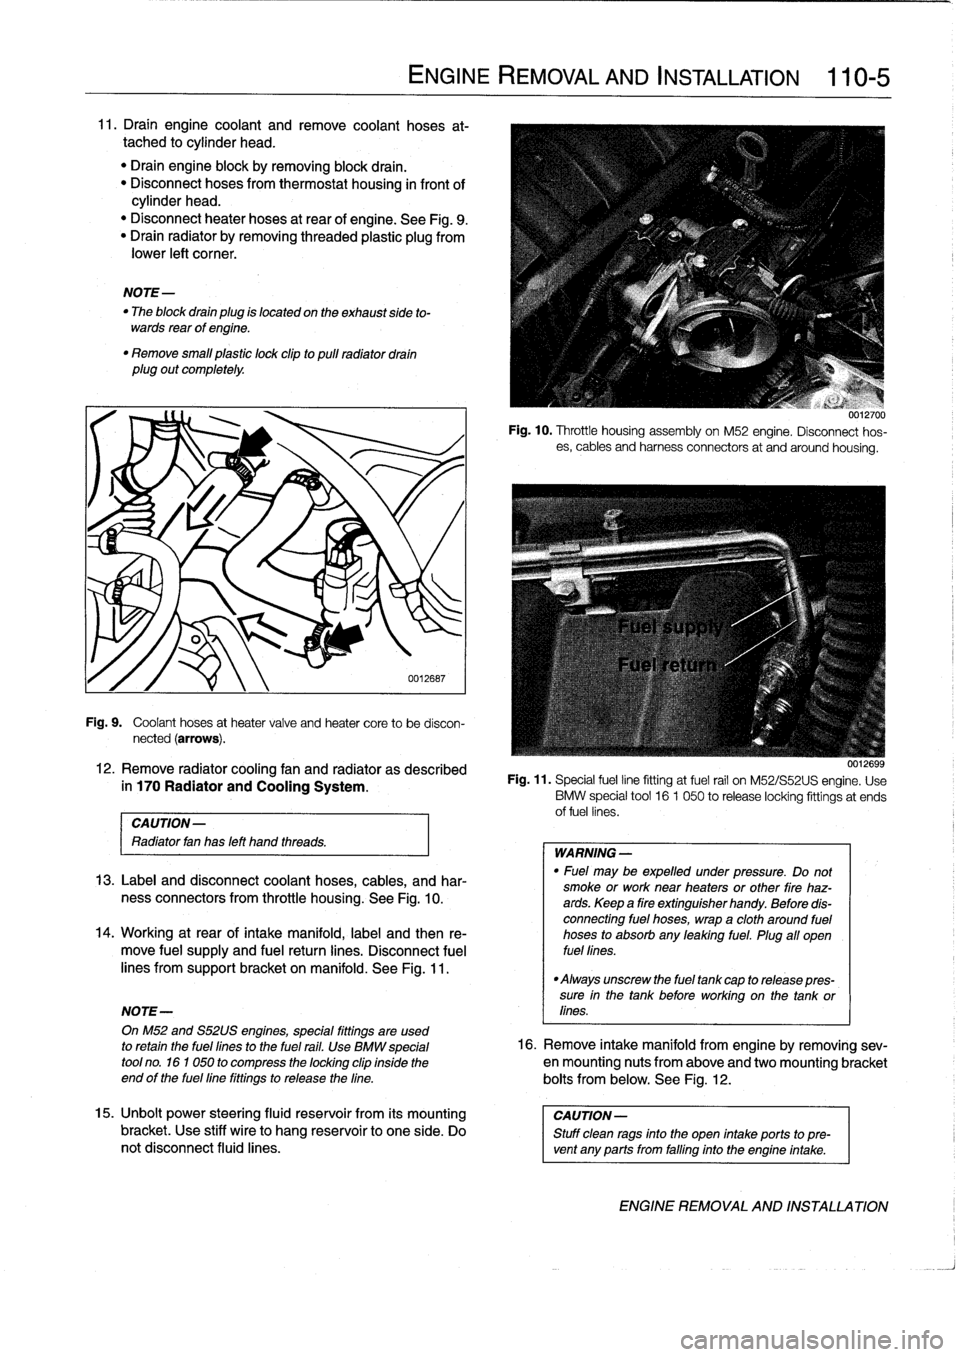
11
.
Draín
engine
coolant
and
Rmove
coolant
hoses
at-
tached
to
cylinder
head
.
"
Drain
engine
block
byremoving
block
drain
.
"
Disconnect
hoses
from
thermostat
housing
in
front
of
cylinder
head
.
"
Disconnect
heater
hoses
at
rear
of
engine
.
See
Fig
.
9
.
"
Drain
radiator
by
removingthreaded
plastic
plug
from
lower
left
comer
.
NOTE-
"
The
block
drain
plug
is
located
oh
the
exhaust
side
to-
wards
rear
ofengine
.
"
Remove
small
plastic
lock
clipto
pulíradiator
draín
plug
out
completely
.
NOTE-
CAUTION-
Radiatorfan
has
left
hand
threads
.
ENGINE
REMOVAL
AND
INSTALLATION
110-
5
Fig
.
9
.
Coolant
hoses
at
heater
valve
and
heater
core
to
be
discon-
nected
(arrows)
.
12
.
Remove
radiator
cooling
fan
and
radiator
as
described
in
170
Radiator
and
Cooling
System
.
13
.
Label
and
disconnectcoolant
hoses,
cables,
and
har-
ness
connectors
from
throttle
housing
.
See
Fig
.
10
.
14
.
Working
atrearof
intake
manifold,
label
and
then
re-
move
fuel
supply
and
fuel
retum
lines
.
Disconnect
fuel
lines
from
support
bracket
on
manifold
.
See
Fig
.
11
.
uu12ivu
Fig
.
10
.
Throttle
housing
assemblyon
M52
engine
.
Disconnect
hos-
es,
cables
and
harness
connectors
at
and
around
housing
.
0012699
Fig
.
11
.
Special
fuelline
fitting
at
fuel
rail
on
M52/S52US
engine
.
Use
BMW
special
tool
16
1
050
to
releaselocking
fittings
at
ends
offuel
lines
.
WARNING
-
"
Fuel
may
be
expelled
under
pressure
.
Do
not
smoke
or
work
near
heaters
or
other
fire
haz-ards
.
Keep
a
fire
extinguísher
handy
.
Before
dis-
connecting
fuel
hoses,
wrapa
cloth
around
fuel
hoses
to
absorb
any
leaking
fuel
.
Plug
all
oyen
fuel
fines
.
"
Always
unscrew
the
fuel
tank
cap
to
release
pres-
sure
ín
the
tank
before
working
on
the
tank
or
lines
.
OnM52
and
S52US
engines,
special
fittings
are
used
to
retain
the
fuel
lines
to
the
fuel
rail
.
Use
BMW
special
16
.
Remove
intake
manifold
from
engine
byremoving
sev-
tool
no
.
161050
to
compress
the
locking
clip
insidethe
en
mounting
nuts
from
above
andtwo
mounting
bracket
end
of
the
fuel
line
fittings
to
release
the
fine
.
boits
from
below
.
See
Fig
.
12
.
15
.
Unbolt
power
steering
fluid
reservoir
from
its
mounting
CAllTION-
bracket
.
Use
stiff
wire
to
hang
reservoir
to
one
side
.
Do
Stuff
clean
rags
into
the
open
intake
ports
to
pre-
not
disconnect
fluid
fines
.
vent
any
parts
from
falling
into
the
engine
intake
.
ENGINE
REMOVAL
AND
INSTALLATION