jacking BMW M3 1998 E36 Workshop Manual
[x] Cancel search | Manufacturer: BMW, Model Year: 1998, Model line: M3, Model: BMW M3 1998 E36Pages: 759
Page 11 of 759

WARNING
-
"
Never
work
under
a
lifted
car
unless
it
is
solidly
supported
on
jack
stands
that
are
intended
for
that
purpose
.
Do
not
support
a
car
on
cinder
blocks,
bricks,
or
other
objects
that
may
shift
orcrumble
under
continuous
load
.
Never
work
un-
dera
car
that
is
supported
only
by
the
lifting
jack
.
"
Fuel
is
highly
flammable
.
When
working
around
fuel,
do
not
smoke
or
worknear
heaters
or
other
fire
hazards
.
Keepan
approved
fire
extinguisher
handy
.
"
llluminate
the
work
area
adequately
and
safely
.
Use
a
portable
safety
light
for
working
inside
or
under
thecar
.
A
fluorescent
type
lightis
best
be-
cause
it
gives
off
less
heat
.
If
using
a
light
with
anormal
incandescent
butb,
use
rough
service
bulbs
to
avoid
breakage
.
The
hot
filamentof
an
accidentallybroken
bulb
can
ignite
spilled
fuel
or
oil
"
Keep
sparks,
lighted
matches,
and
any
open
llame
away
from
thetop
of
the
battery
.
Hydrogen
gas
emitted
by
the
battery
is
highly
flammable
.
Any
nearby
source
of
ignition
may
cause
the
battery
to
explode
.
"
Never
¡ay
tools
or
parts
in
the
engine
compart-
ment
or
on
top
of
the
battery
.
They
may
fall
into
confined
spaces
and
be
difficult
toretrieve,
be-
come
caught
in
beits
or
other
rotating
parts
when
the
engine
is
started,
or
cause
electrical
shorts
anddamage
to
the
electrical
system
.
"
The
fuel
system
is
designed
to
retain
pressure
even
when
the
ignition
is
off
.
When
working
with
the
fuel
system,
loosen
the
fuel
fines
slowly
to
al-
low
the
residual
pressure
to
dissipate
gradually
.
Take
precautions
to
avoid
spraying
fuel
.
Lifting
the
Car
FUNDAMENTALS
FOR
THE
DO-ITYOURSELF
OWNER
010-
3
For
those
repairs
that
require
raising
the
car,
theproper
jack-
ing
points
should
beused
to
raise
thecar
safely
and
avoid
dam-
age
.
There
are
four
jacking
points
from
which
thecar
can
be
safely
raised
.
The
jacksupplied
with
thecar
by
BMW
can
only
be
used
at
the
fourside
points
just
behindthe
front
wheel
or
just
in
frontof
the
rear
wheel
.
See
Fig
.
1.
WARNING
-
"
When
raising
the
car
using
a
floor
jack
ora
hy-
draulic
lift,
carefully
position
the
jack
pad
topre-
vent
damaging
the
car
body
.
A
suitable
liner
(wood,
rubber,
etc
.)
should
be
placed
between
the
jack
and
the
car
to
prevent
body
damage
.
"
Watch
the
jack
closely
.
Make
sure
ft
stays
stable
and
does
not
shift
or
tilt
.
As
the
car
is
raised,
the
car
may
rol¡
slightly
and
the
jack
may
shift
.
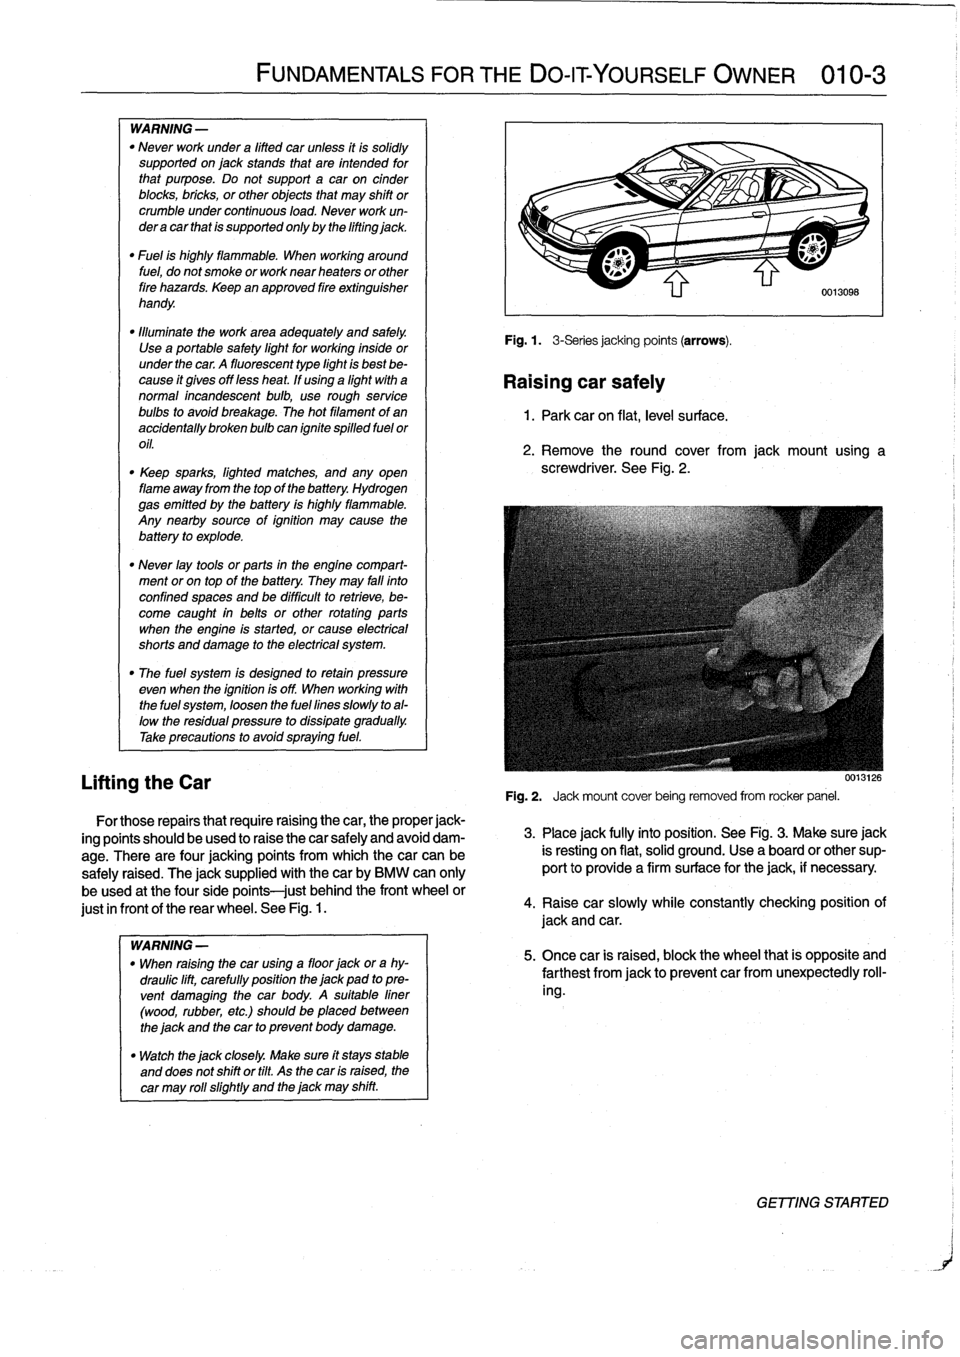
Fig
.
1
.
3-Seriesjacking
points
(arrows)
.
Raising
car
safely
1
.
Park
car
on
flat,
leve¡
su
rface
.
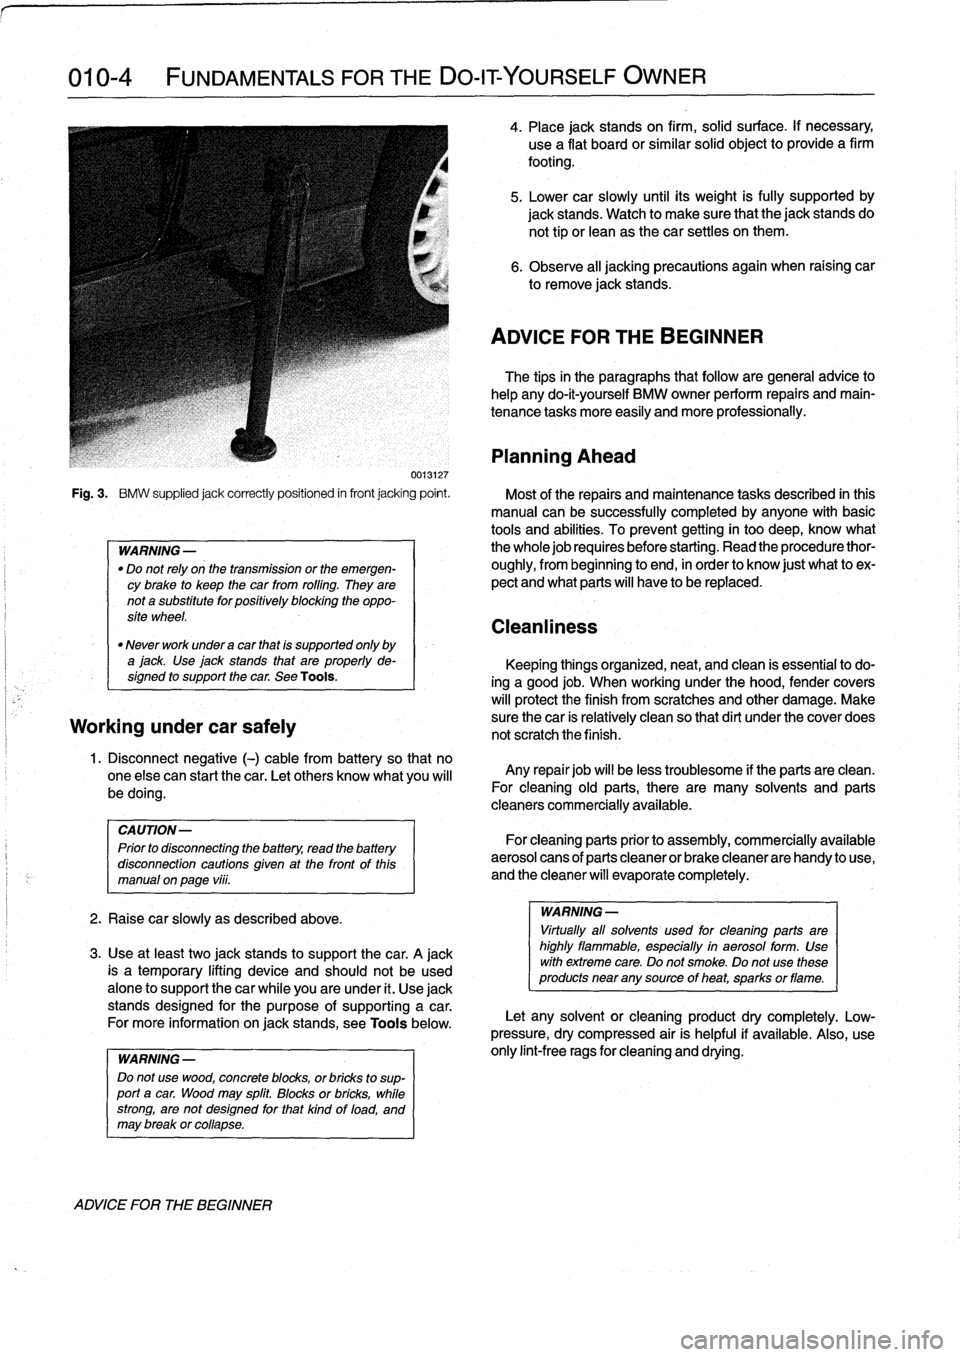
2
.
Remove
the
round
cover
from
jack
mount
using
a
screwdriver
.
See
Fig
.
2
.
0013126
Fig
.
2
.
Jack
mount
cover
being
removed
from
rocker
panel
.
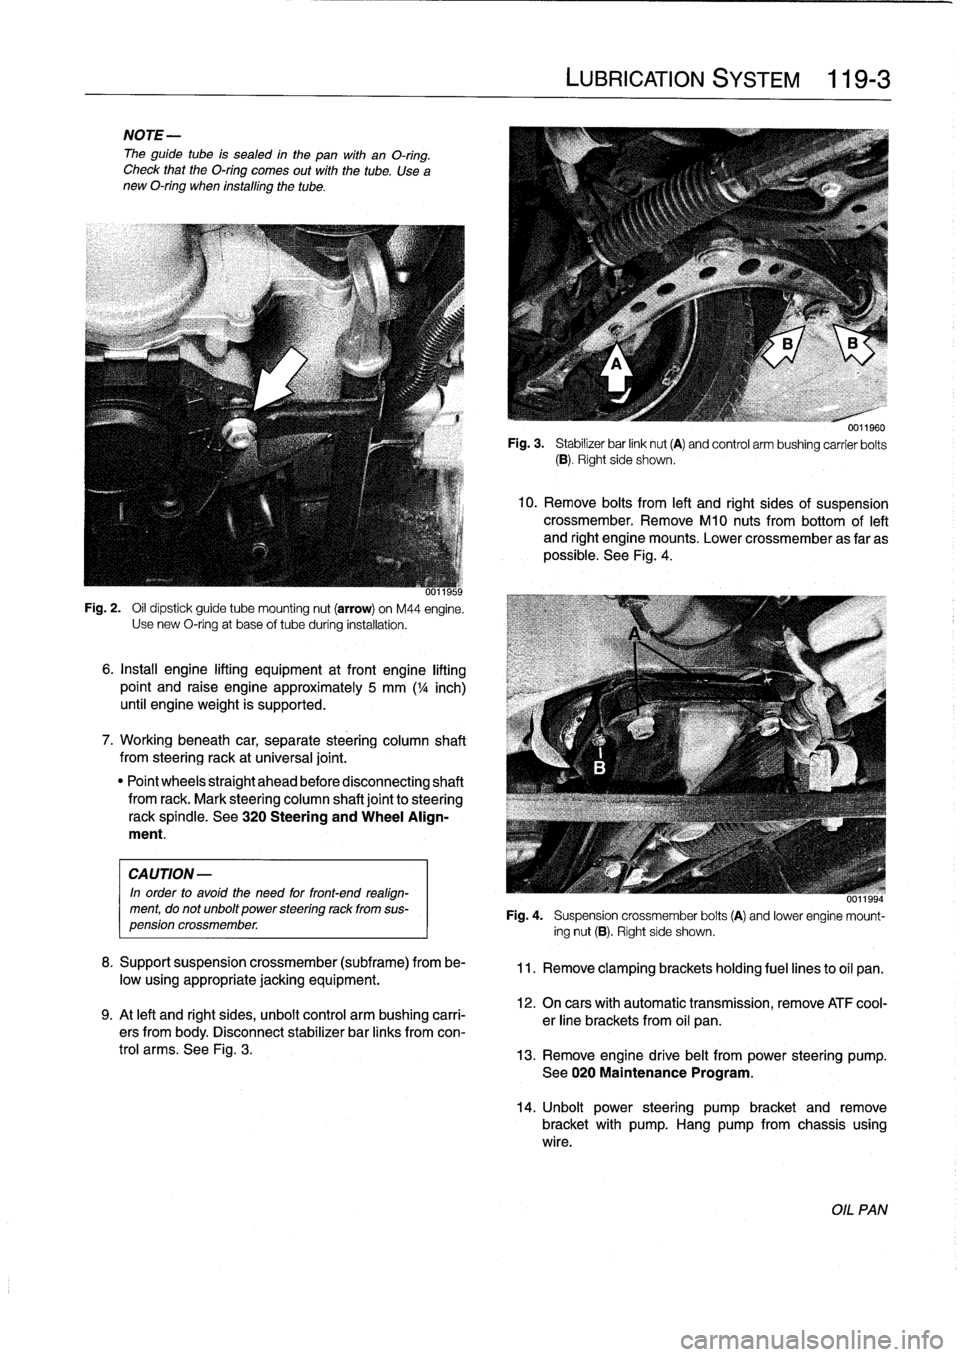
3
.
Place
jack
fully
into
position
.
See
Fig
.
3
.
Make
sure
jack
is
resting
on
flat,
solid
ground
.
Use
a
board
or
other
sup-
port
to
provide
a
firm
surface
for
the
jack,
if
necessary
.
4
.
Raisecar
slowly
while
constantly
checking
position
of
jack
and
car
.
5
.
Once
car
is
raised,
block
the
wheel
that
is
opposite
and
farthest
from
jackto
prevent
car
fromunexpectedly
roll-
ing
.
GET77NG
STARTER
Page 12 of 759

010-
4
FUNDAMENTALS
FOR
THE
DO-ITYOURSELF
OWNER
Fig
.
3
.
BMW
supplied
jack
correctly
positioned
in
front
jacking
point
.
Most
of
the
repairs
and
maintenance
tasks
described
in
this
manual
can
be
successfully
completedby
anyone
with
basic
tools
and
abilities
.
To
prevent
getting
in
too
deep,
know
what
WARNING-
the
wholejob
requires
before
starting
.
Read
the
procedure
thor-
"
Do
not
rely
on
thetransmission
or
the
emergen-
oughly,
from
beginning
to
end,
in
order
to
know
just
what
to
ex
cybrake
to
keep
thecar
from
rolling
.
They
are
pect
and
what
parts
will
have
to
be
replaced
.
nota
substitute
for
positively
blocking
the
oppo-
site
wheel
.
"
Never
work
undera
car
that
is
supported
only
by
ajack
Use
jack
stands
that
are
properly
de-
signed
to
support
the
car
.
See
Tools
.
Working
under
car
safely
1
.
Disconnect
negative
(-)
cable
from
battery
so
that
no
one
else
can
start
thecar
.
Let
others
know
what
you
will
be
doing
.
CAUTION-
Prior
to
disconnecting
the
battery
read
the
battery
disconnection
cautions
given
at
the
front
of
this
manual
on
page
vüi
.
2
.
Raisecar
slowly
as
described
above
.
3
.
Use
at
least
two
jack
stands
to
support
thecar
.
A
jack
is
atemporary
lifting
device
and
should
not
be
used
alone
to
support
the
car
while
you
are
under
it
.
Use
jack
stands
designed
for
the
purpose
of
supporting
a
car
.
For
more
information
on
jack
stands,
see
Toolsbelow
.
WARNING
-
Do
notusewood,
concrete
blocks,
orbricks
to
sup-
port
acar
.
Woodmay
split
.
Blocks
or
bricks,
while
strong,
are
not
designed
for
that
kind
of
load,
and
may
brakkor
collapse
.
ADVICE
FOR
THE
BEGINNER
4
.
Place
jack
stands
on
firm,
solid
surface
.
If
necessary,
use
a
flat
board
or
similar
solid
object
to
provide
a
firm
footing
.
5
.
Lower
car
slowly
until
its
weight
is
fully
supportedby
jack
stands
.
Watch
to
make
sure
that
the
jack
stands
do
not
tip
orlean
as
thecar
settles
on
them
.
6
.
Observe
all
jacking
precautions
again
when
raising
car
to
remove
jack
stands
.
ADVICE
FORTHE
BEGINNER
The
tips
in
the
paragraphs
that
follow
are
general
advice
to
help
any
do-it-yourself
BMW
owner
perform
repairs
and
main-
tenance
tasks
more
easily
and
more
professionally
.
Planning
Ahead
Cleanliness
Keeping
things
organized,
neat,
and
clean
is
essential
to
do-
ing
a
good
job
.
When
working
under
the
hood,
fender
covers
will
protect
the
finish
from
scratches
and
other
damage
.
Make
sure
the
car
is
relatively
clean
so
thatdi
rt
under
the
cover
does
not
scratch
the
finish
.
Any
repair
job
will
be
less
troublesome
if
the
parts
are
clean
.
For
cleaning
old
parts,
there
are
many
solvents
and
parts
cleaners
commercially
available
.
For
cleaning
parts
priorto
assembly,
commercially
available
aerosol
cans
of
parts
cleaner
or
brake
cleaner
are
handy
to
use,
and
the
cleaner
will
evaporate
completely
.
WARNING
-
Virtually
all
solvents
used
for
cleaning
parts
are
highly
flammable,
especially
in
aerosol
form
.
Use
wíth
extreme
care
.
Do
not
smoke
.
Do
not
use
these
products
near
any
source
of
heat,
sparksor
flame
.
Let
any
solvent
orcleaning
product
dry
completely
.
Low-
pressure,
dry
compressed
air
is
helpful
if
available
.
Also,
use
only
lint-free
rags
for
cleaning
and
drying
.
Page 117 of 759

NOTE
-
The
guide
tube
is
sealed
in
the
pan
with
an
O-ring
.
Check
that
theO-ring
comes
out
with
the
tube
.
Use
a
new
O-ring
when
installing
the
tube
.
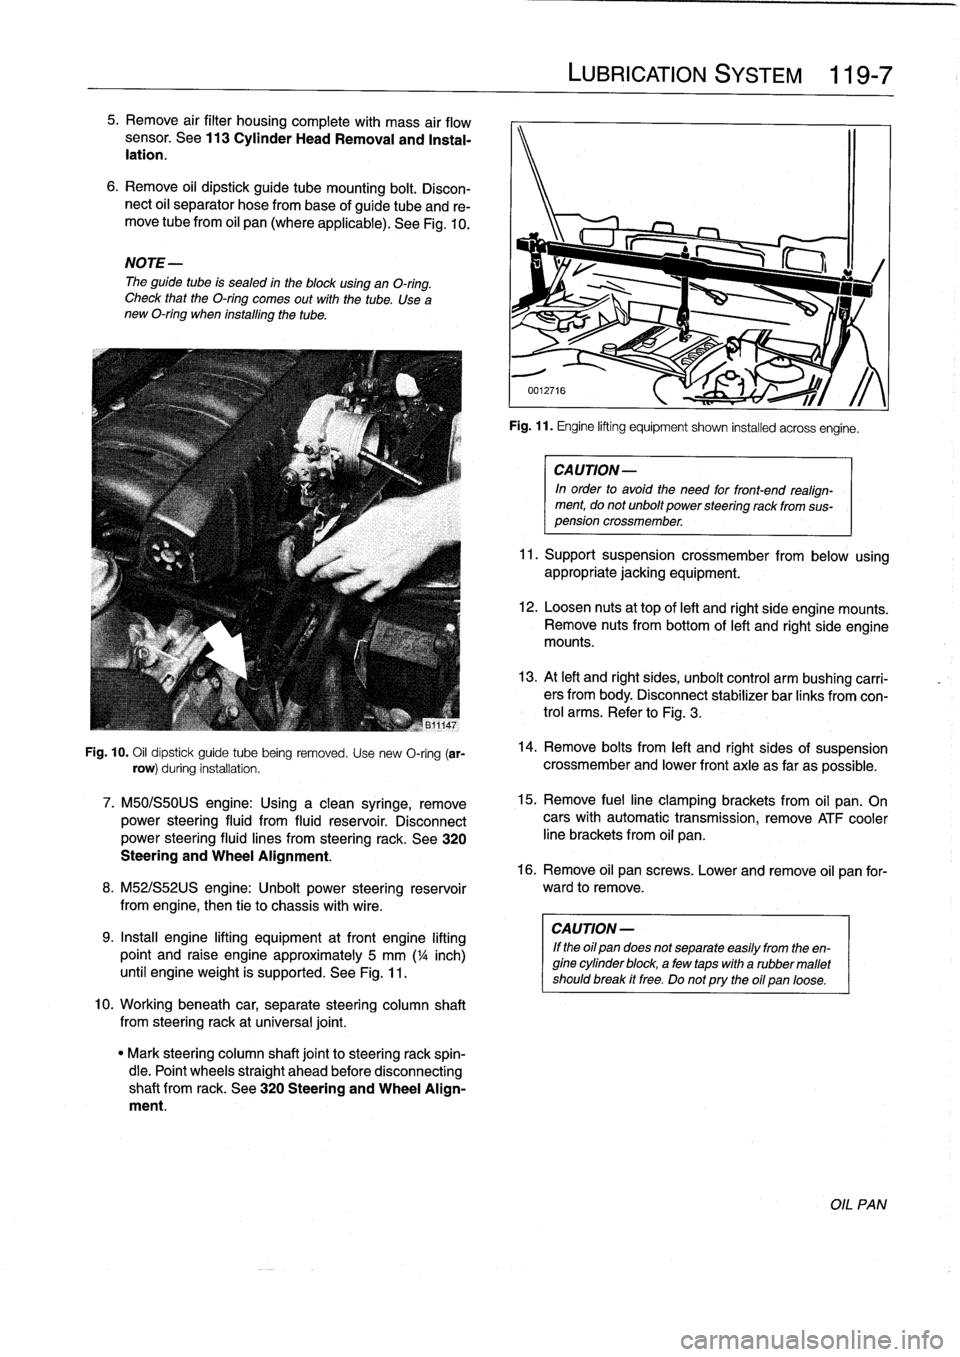
Fig
.
2
.
Oil
dipstick
guide
tube
mounting
nut
(arrow)
on
M44
engine
.
Use
new
O-ring
at
base
of
tube
during
installatidn
.
6
.
Install
engine
lifting
equipment
at
front
engine
lifting
point
and
raise
engine
approximately
5
mm
(
1
/4
inch)
until
engineweight
is
supported
.
7
.
Workingbeneath
car,
separate
steering
column
shaft
from
steeringrack
at
universal
joint
.
"
Point
wheels
straight
ahead
before
disconnecting
shaft
from
rack
.
Mark
steering
column
shaft
joint
to
steering
rackspíndle
.
See
320
Steering
and
Wheel
Align-
ment
.
CAUTION
-
In
order
to
avoíd
the
need
for
front-end
realign-
ment,
do
notunbolt
power
steering
rack
from
sus-
pension
crossmember
.
8
.
Supportsuspension
crossmember
(subframe)
from
be-
low
usingappropriate
jacking
equipment
.
9
.
At
left
and
right
sides,
unbolt
control
arm
bushing
carri-
ers
from
body
.
Disconnect
stabilizer
bar
links
fromcon-
trol
arms
.
See
Fig
.
3
.
LUBRICATION
SYSTEM
119-
3
0011960
Fig
.
3
.
Stabilizer
bar
link
nut
(A)
and
control
arm
bushing
carrier
bolts
(B)
.
Right
side
shows
.
10
.
Remove
bolts
from
left
and
right
sides
of
suspension
crossmember
.
RemoveM10
nuts
from
bottom
of
left
and
right
engine
mounts
.
Lower
crossmember
as
far
as
possible
.
See
Fig
.
4
.
uu1ibb4
Fig
.
4
.
Suspension
crossmember
bolts
(A)
and
lower
engine
mount-
ing
nut
(B)
.
Right
side
shows
.
11
.
Remove
clamping
brackets
holding
fuel
lines
to
oil
pan
.
12
.
On
cars
with
automatic
transmission,
remove
ATF
cool-
er
line
brackets
from
oil
pan
.
13
.
Remove
engine
drive
belt
from
power
steering
pump
.
See020
Maintenance
Program
.
14
.
Unbolt
power
steering
pumpbracket
andremove
bracket
with
pump
.
Hang
pump
from
chassis
using
wire
.
OIL
PAN
Page 121 of 759

5
.
Remove
air
filter
housingcomplete
with
mass
air
flow
sensor
.
See113
Cylinder
HeadRemoval
and
Instal-
lation
.
6
.
Remove
oil
dipstick
guide
tube
mounting
bolt
.
Discon-
nect
oil
separator
hose
frombase
of
guide
tube
and
re-
move
tubefrom
oil
pan
(where
applicable)
.
See
Fig
.
10
.
NOTE-
The
guide
tube
is
sealed
in
the
blockusing
an
O-ring
.
Check
that
the
O-ring
comes
out
with
the
tube
.
Use
a
new
O-ring
when
installing
the
tube
.
Fig
.
10
.
Oil
dipstick
guide
tube
being
removed
.
Use
new
O-ring
(ar-
row)
during
installation
.
7
.
M50/S50US
engine
:
Using
a
clean
syringe,
remove
power
steering
fluid
from
fluid
reservoir
.
Disconnect
power
steering
fluid
lines
from
steering
rack
.
See
320
Steering
and
Wheel
Alignment
.
8
.
M52/S52US
engine
:
Unbolt
power
steering
reservoir
from
engíne,
then
tie
to
chassis
with
wire
.
9
.
Insta¡¡
engine
lifting
equipment
atfront
engine
lifting
point
and
raise
engine
approximately
5
mm
('/a
inch)
until
engineweight
is
supported
.
See
Fig
.
11
.
10
.
Workingbeneath
car,
separate
steering
column
shaft
from
steeringrack
at
universal
joint
.
"
Mark
steering
column
shaft
jointto
steering
rack
spin-
dle
.
Point
wheels
straight
ahead
before
disconnecting
shaft
from
rack
.
See
320
Steering
and
Wheel
Align-
ment
.
LUBRICATION
SYSTEM
119
Fig
.
11
.
Engine
lifting
equipment
shown
installed
acrossengíne
.
CA
UTION-
In
order
to
avoid
the
need
for
front-end
realign-
ment,
donot
unbolt
power
steering
rack
from
sus-
pension
crossmember
.
11
.
Support
suspension
crossmember
from
below
using
appropriate
jacking
equipment
.
12
.
Loosen
nuts
at
top
of
left
and
right
side
engine
mounts
.
Remove
nuts
from
bottom
of
left
and
right
side
engine
mounts
.
13
.
At
left
and
right
sides,
unbolt
control
arm
bushíng
carri-
ers
from
body
.
Disconnect
stabilizer
bar
links
fromcon-
trol
arms
.
Refer
to
Fig
.
3
.
14
.
Remove
bolts
from
left
and
right
sides
of
suspension
crossmember
and
lower
front
axle
as
far
as
possible
.
15
.
Remove
fuelline
clamping
brackets
from
oil
pan
.
On
cars
with
automatic
transmission,
remove
ATF
cooler
line
brackets
from
oil
pan
.
16
.
Remove
oil
pan
screws
.
Lower
and
remove
oil
pan
for-
ward
to
remove
.
CA
UTION-
If
the
oil
pan
does
not
separate
easily
from
the
en-
gine
cylinder
block,
a
few
taps
with
a
rubber
mallet
shouldbreak
it
free
.
Do
notpry
the
oil
pan
loose
.
OIL
PAN