turn signal BMW M3 CONVERTIBLE 2006 E46 User Guide
[x] Cancel search | Manufacturer: BMW, Model Year: 2006, Model line: M3 CONVERTIBLE, Model: BMW M3 CONVERTIBLE 2006 E46Pages: 174, PDF Size: 2.68 MB
Page 81 of 174
81
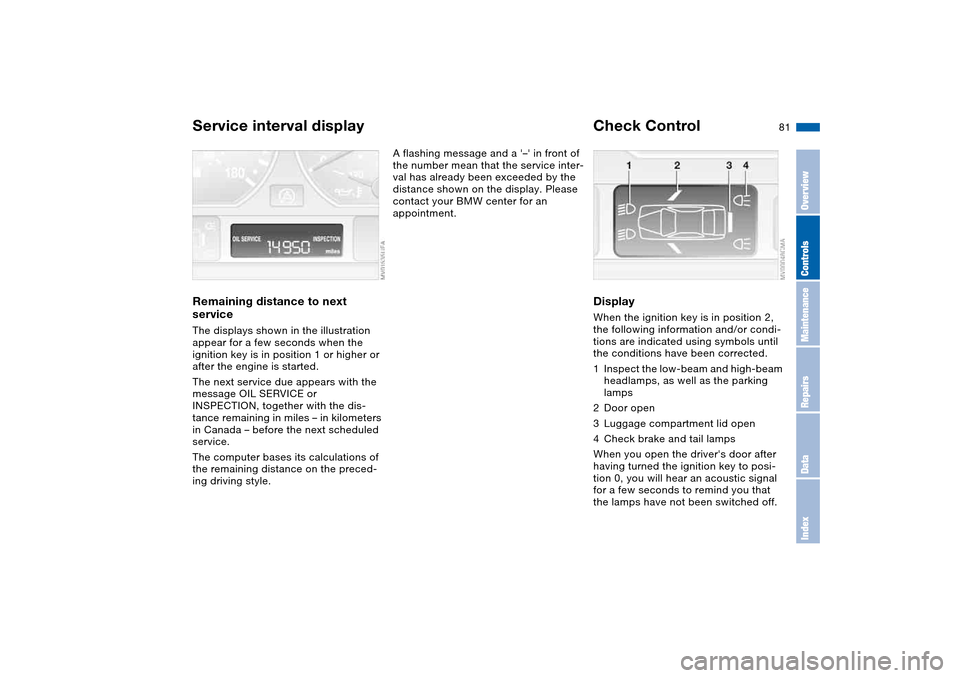
Service interval displayRemaining distance to next
serviceThe displays shown in the illustration
appear for a few seconds when the
ignition key is in position 1 or higher or
after the engine is started.
The next service due appears with the
message OIL SERVICE or
INSPECTION, together with the dis-
tance remaining in miles – in kilometers
in Canada – before the next scheduled
service.
The computer bases its calculations of
the remaining distance on the preced-
ing driving style.
A flashing message and a '–' in front of
the number mean that the service inter-
val has already been exceeded by the
distance shown on the display. Please
contact your BMW center for an
appointment.
Check ControlDisplayWhen the ignition key is in position 2,
the following information and/or condi-
tions are indicated using symbols until
the conditions have been corrected.
1Inspect the low-beam and high-beam
headlamps, as well as the parking
lamps
2Door open
3Luggage compartment lid open
4Check brake and tail lamps
When you open the driver's door after
having turned the ignition key to posi-
tion 0, you will hear an acoustic signal
for a few seconds to remind you that
the lamps have not been switched off.
OverviewControlsMaintenanceRepairsDataIndex
Page 83 of 174
83
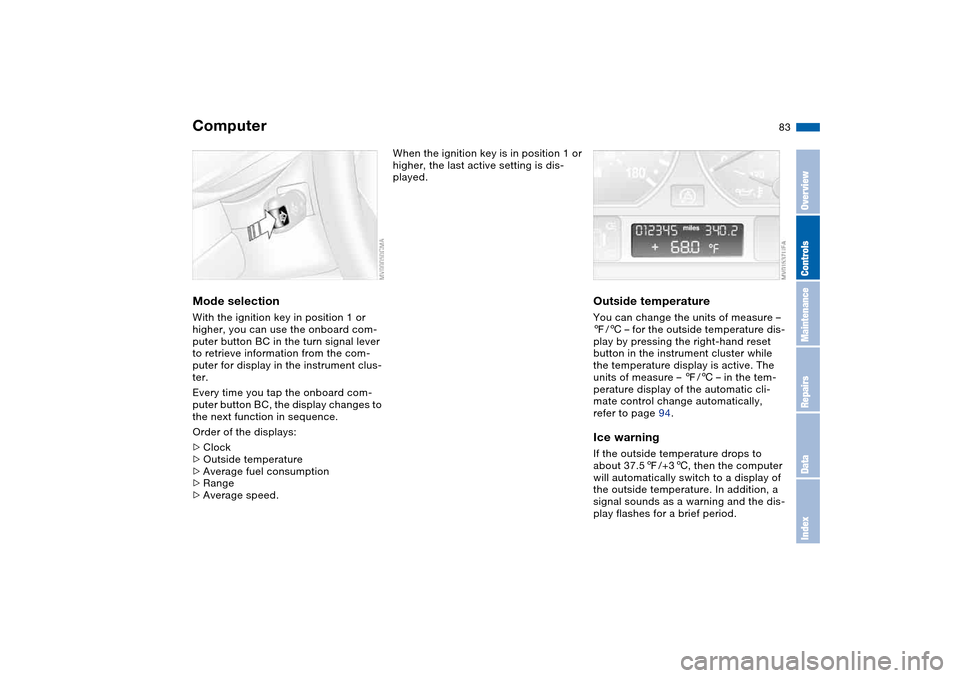
ComputerMode selectionWith the ignition key in position 1 or
higher, you can use the onboard com-
puter button BC in the turn signal lever
to retrieve information from the com-
puter for display in the instrument clus-
ter.
Every time you tap the onboard com-
puter button BC, the display changes to
the next function in sequence.
Order of the displays:
>Clock
>Outside temperature
>Average fuel consumption
>Range
>Average speed.
When the ignition key is in position 1 or
higher, the last active setting is dis-
played.
Outside temperatureYou can change the units of measure –
7/6 – for the outside temperature dis-
play by pressing the right-hand reset
button in the instrument cluster while
the temperature display is active. The
units of measure – 7/6 – in the tem-
perature display of the automatic cli-
mate control change automatically,
refer to page 94.Ice warningIf the outside temperature drops to
about 37.57/+36, then the computer
will automatically switch to a display of
the outside temperature. In addition, a
signal sounds as a warning and the dis-
play flashes for a brief period.
OverviewControlsMaintenanceRepairsDataIndex
Page 84 of 174
84
After giving an ice warning, the
display returns to the previous
setting.<
The ice warning does not alter the
fact that surface ice can form at
temperatures above 37.57/+36, on
bridges or shaded road surfaces, for
instance.<
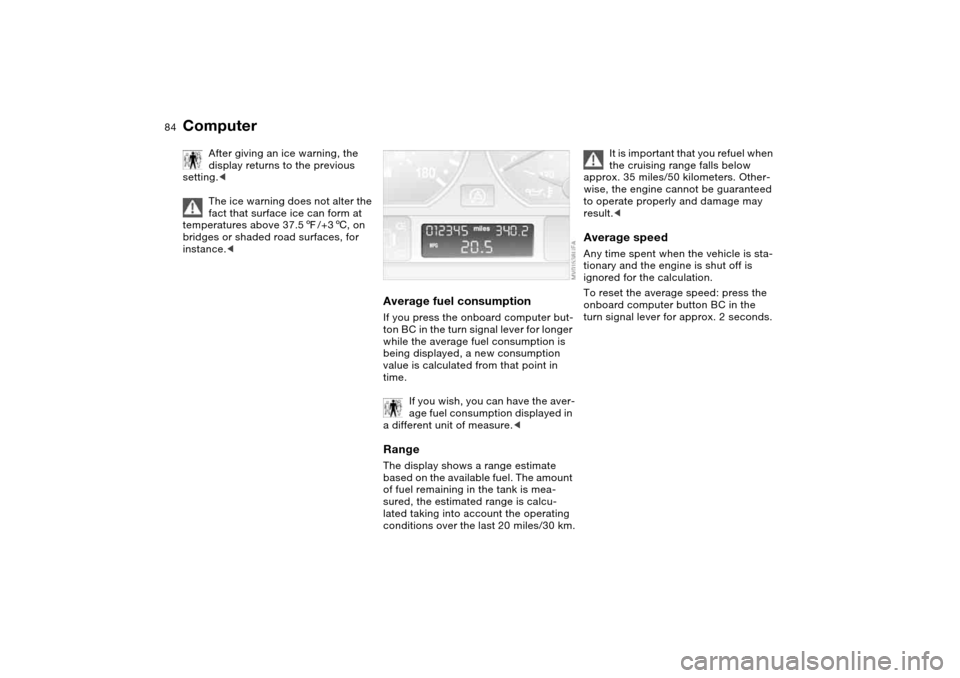
Average fuel consumptionIf you press the onboard computer but-
ton BC in the turn signal lever for longer
while the average fuel consumption is
being displayed, a new consumption
value is calculated from that point in
time.
If you wish, you can have the aver-
age fuel consumption displayed in
a different unit of measure.
of fuel remaining in the tank is mea-
sured, the estimated range is calcu-
lated taking into account the operating
conditions over the last 20 miles/30 km.
It is important that you refuel when
the cruising range falls below
approx. 35 miles/50 kilometers. Other-
wise, the engine cannot be guaranteed
to operate properly and damage may
result.<
Average speedAny time spent when the vehicle is sta-
tionary and the engine is shut off is
ignored for the calculation.
To reset the average speed: press the
onboard computer button BC in the
turn signal lever for approx. 2 seconds.
Computer
Page 90 of 174
90Lamps
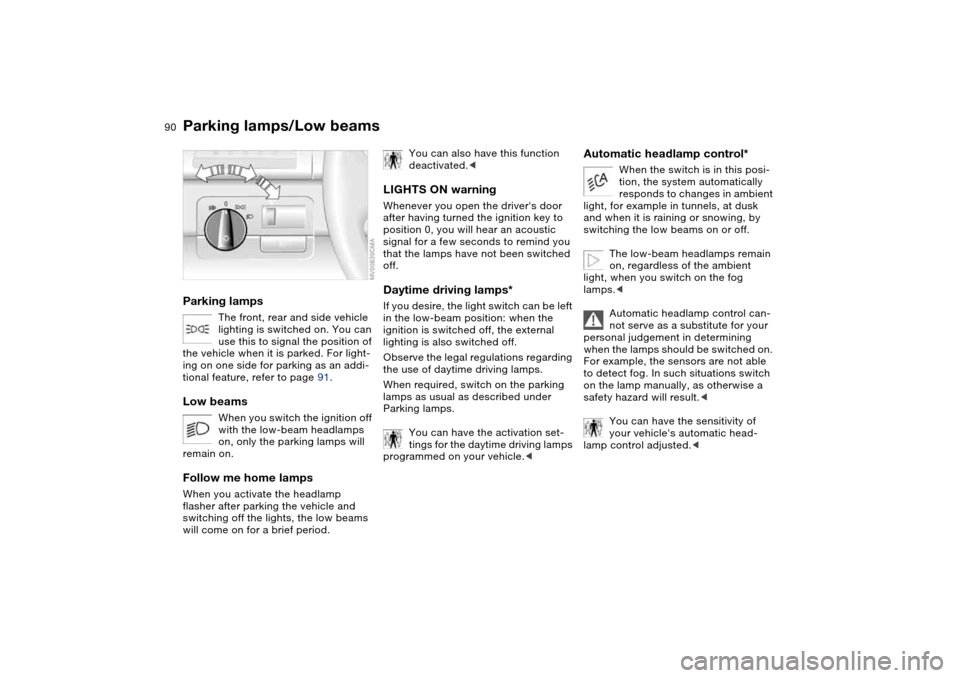
Parking lamps/Low beamsParking lamps
The front, rear and side vehicle
lighting is switched on. You can
use this to signal the position of
the vehicle when it is parked. For light-
ing on one side for parking as an addi-
tional feature, refer to page 91.
Low beams
When you switch the ignition off
with the low-beam headlamps
on, only the parking lamps will
remain on.
Follow me home lampsWhen you activate the headlamp
flasher after parking the vehicle and
switching off the lights, the low beams
will come on for a brief period.
You can also have this function
deactivated.<
LIGHTS ON warningWhenever you open the driver's door
after having turned the ignition key to
position 0, you will hear an acoustic
signal for a few seconds to remind you
that the lamps have not been switched
off.Daytime driving lamps*If you desire, the light switch can be left
in the low-beam position: when the
ignition is switched off, the external
lighting is also switched off.
Observe the legal regulations regarding
the use of daytime driving lamps.
When required, switch on the parking
lamps as usual as described under
Parking lamps.
You can have the activation set-
tings for the daytime driving lamps
programmed on your vehicle.<
Automatic headlamp control*
When the switch is in this posi-
tion, the system automatically
responds to changes in ambient
light, for example in tunnels, at dusk
and when it is raining or snowing, by
switching the low beams on or off.
The low-beam headlamps remain
on, regardless of the ambient
light, when you switch on the fog
lamps.<
Automatic headlamp control can-
not serve as a substitute for your
personal judgement in determining
when the lamps should be switched on.
For example, the sensors are not able
to detect fog. In such situations switch
on the lamp manually, as otherwise a
safety hazard will result.<
You can have the sensitivity of
your vehicle's automatic head-
lamp control adjusted.<
Page 91 of 174
91
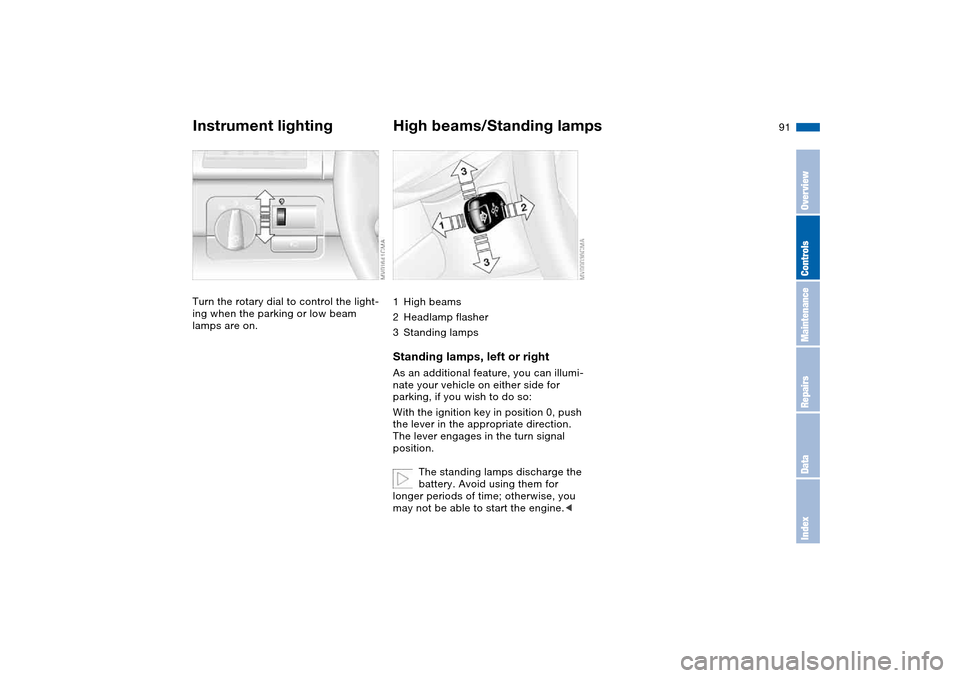
Instrument lightingTurn the rotary dial to control the light-
ing when the parking or low beam
lamps are on.
High beams/Standing lamps1High beams
2Headlamp flasher
3Standing lampsStanding lamps, left or rightAs an additional feature, you can illumi-
nate your vehicle on either side for
parking, if you wish to do so:
With the ignition key in position 0, push
the lever in the appropriate direction.
The lever engages in the turn signal
position.
The standing lamps discharge the
battery. Avoid using them for
longer periods of time; otherwise, you
may not be able to start the engine.<
OverviewControlsMaintenanceRepairsDataIndex
Page 138 of 174
138
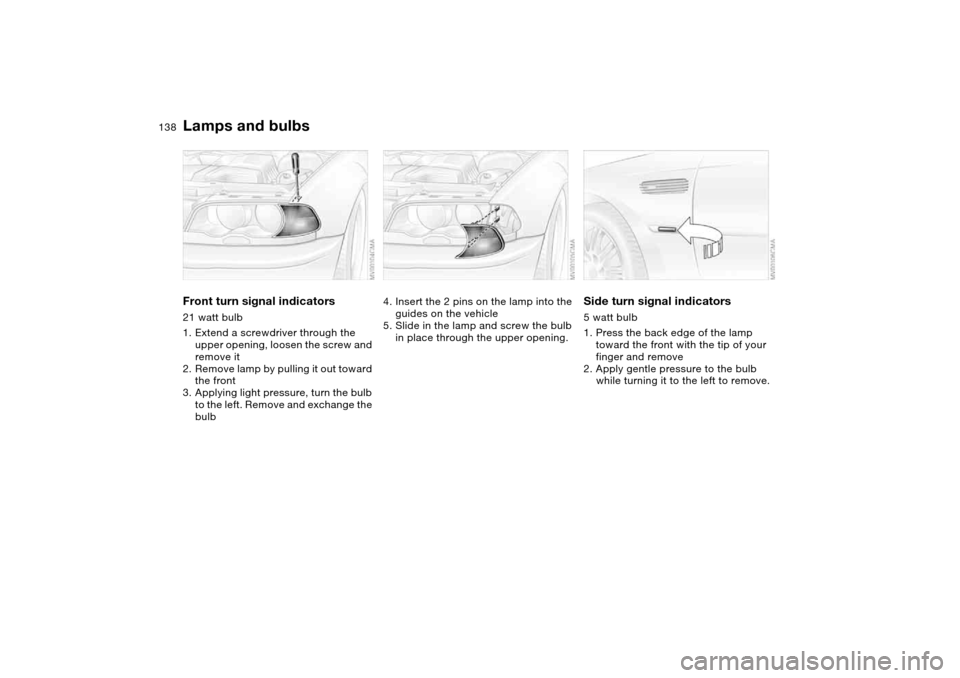
Front turn signal indicators21 watt bulb
1. Extend a screwdriver through the
upper opening, loosen the screw and
remove it
2. Remove lamp by pulling it out toward
the front
3. Applying light pressure, turn the bulb
to the left. Remove and exchange the
bulb
4. Insert the 2 pins on the lamp into the
guides on the vehicle
5. Slide in the lamp and screw the bulb
in place through the upper opening.
Side turn signal indicators5 watt bulb
1. Press the back edge of the lamp
toward the front with the tip of your
finger and remove
2. Apply gentle pressure to the bulb
while turning it to the left to remove.
Lamps and bulbs
Page 139 of 174
139
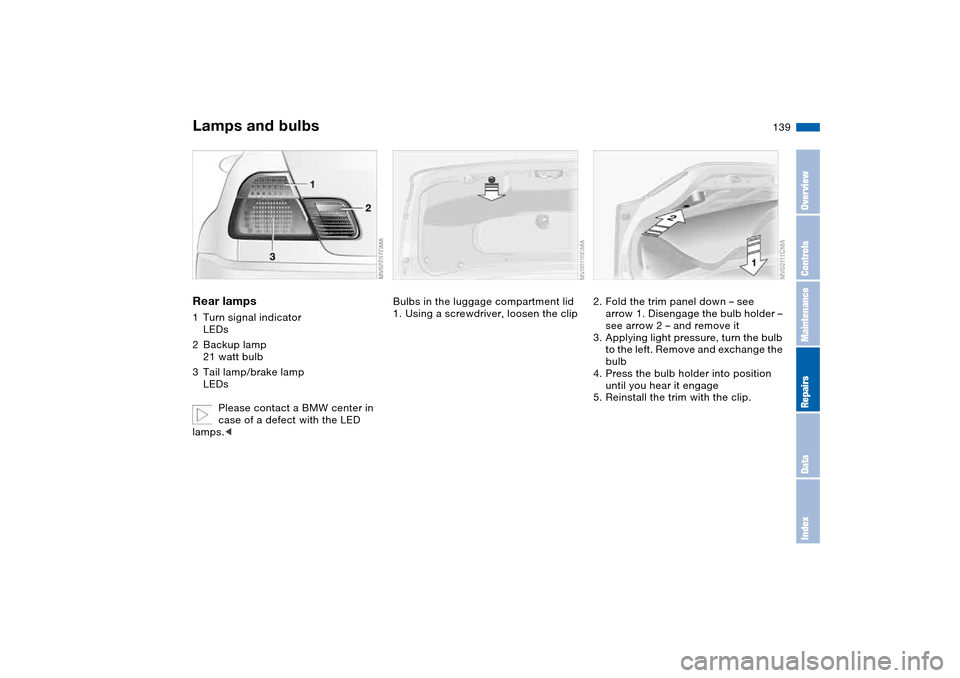
Rear lamps1Turn signal indicator
LEDs
2Backup lamp
21 watt bulb
3Tail lamp/brake lamp
LEDs
Please contact a BMW center in
case of a defect with the LED
lamps.<
Bulbs in the luggage compartment lid
1. Using a screwdriver, loosen the clip
2. Fold the trim panel down – see
arrow 1. Disengage the bulb holder –
see arrow 2 – and remove it
3. Applying light pressure, turn the bulb
to the left. Remove and exchange the
bulb
4. Press the bulb holder into position
until you hear it engage
5. Reinstall the trim with the clip.
Lamps and bulbs
OverviewControlsMaintenanceRepairsDataIndex
Page 166 of 174
Everything from A to ZManual transmission 69
Master keys
with remote control 28
MC operation, refer to the
Owner's Manual for
Radio/Onboard Computer
MD operation, refer to the
Owner's Manual for
Radio/Onboard Computer
Memory, refer to Seat and
mirror memory 51
Memory, refer to Vehicle
Memory, Key Memory 64
Microfilter
automatic climate
control 98
Microphone 100
Mini disc operation, refer to
the Owner's Manual for
Radio/Onboard Computer
Mirrors 53
automatic curb monitor 52
heated 53
memory, refer to Seat and
mirror memory 51
Mobile Service 147
Modifications, technical,
refer to For your own
safety 6
Multifunction steering
wheel 22Multifunction switch
turn signal indicator/head-
lamp flasher 75
washer/wiper system 76
N
Navigation system, refer to
the Owner's Manual for
Radio/Onboard Computer
Neck restraints, refer to
Head restraints 48
Nets 99
Nozzles, refer to
Ventilation 94
Nylon rope, refer to Towing
and tow-starting the vehi-
cle 149
O
OBD interface socket 132
Odometer 79
Oil
additives, refer to Adding
engine oil 127
alternative oils 127
capacity 157
dipstick 126
quality 127
specified engine oils 127
Oil change interval, refer to
Service interval
display 130Oil change intervals, refer to
the Service and Warranty
Information Booklet for US
models / Warranty and
Service Guide Booklet for
Canadian models
Oil filter change 157
Oil level
checking 126
indicator lamp 18
Oil pressure
indicator lamp 18
OIL SERVICE 81
Oil temperature 79
Oil types 127
Old batteries, refer to Dis-
posal 145
Onboard computer 83
Onboard computer, refer
also to the Owner's Man-
ual for Onboard Computer
Onboard tool kit 136
Opening and closing
from inside 32
from outside 29
via door lock 31
via remote control 29
Outlets, ventilation 94
Outside temperature dis-
play 83
changing unit of
measure 83P
Paintwork care, refer to the
Caring for your vehicle
brochure
Panic mode, trigger
alarm 30
Park Distance Control
(PDC) 85
Parking aid, refer to Park
Distance Control (PDC) 85
Parking brake 68
indicator lamp 18
Parking lamps 90
bulb replacement 137
Parking lamps/Low
beams 90
Parts and accessories, refer
to Your individual vehicle 5
Passenger-side exterior mir-
ror tilt function 52
PDC Park Distance
Control 85
Placing a telephone call,
refer to the Owner's Man-
ual for the telephone
Plastic, refer to the Caring
for your vehicle brochure
Pollen, refer to Microfilter/
activated-charcoal filter 98
Power loss
electric power windows 39
Page 168 of 174
Everything from A to ZSequential M gearbox with
Drivelogic 70
indicator lamp 19, 74
tow-starting 150
Service and Warranty Infor-
mation Booklet 130
Service Engine Soon
warning lamp 19
Service interval display
81, 130
Shift lights 74
Shift paddles 71
Side airbags 55
Side turn signal indicators
bulb replacement 138
Size 155
Ski bag 102
Slipstream deflector, refer to
Wind deflector 44
SMG Drivelogic 70
Smokers' package, refer to
Ashtray 100
Snow chains 122
SOS, refer to Emergency
call 146
Spare key 28
Special oils 127
Special oils, refer to Speci-
fied engine oils 127
Specified engine oils 127
Specified oils 127Speed gauge, refer to
Speedometer 16
Speedometer 16
Sport mode 89
Sports seat 47
Stability control, refer to
Dynamic Stability Control
(DSC) 86
Standing lamps 91
bulb replacement 137
Starting difficulties
jump-starting 147
temperature 66
Starting the engine 66
Starting, refer to Starting the
engine 66
Starting-off assistance
DSC 86
gradient assistance 73
Status of the Owner's Man-
ual 5
Steering wheel lock 65
Steering wheel, adjusting 54
Storage compartments 99
Storage nets 99
Storing seat positions,
refer to Seat and mirror
memory 51
Storing tires 121
Stroke, refer to Engine
data 154Surface ice, refer to Ice
warning 83
Switches, refer to
Cockpit 14
Switching off
engine 68
Symbols 4
T
Tachometer 79
Tail lamps
bulb replacement 139
Tail lamps, refer to Rear
lamps 139
Tank capacity, refer to Fuel
tank capacity 157
Tank indicator, refer to Fuel
gauge 80
Technical data 154
Technical modifications 6
Technical modifications,
refer to For your own
safety 6
Telephone hookup
microphone 100
Telephone, refer to the sep-
arate Owner's Manual
Television, refer to the
Owner's Manual for
Onboard ComputerTemperature
automatic climate
control 96
Temperature adjustment 96
Temperature display
engine coolant 80
ice warning 83
outside temperature 83
setting units 83
Temperature layering 97
Tempomat, refer to Cruise
control 77
Thigh support area, adjust-
ing 47
Third brake lamp, refer to
Center high-mount brake
lamp 140
Threaded socket for towing
eyelet 149
Three-point safety belt 50
Tilt alarm sensor 37
switching off 37
Tilting passenger-side exte-
rior mirror 52
Time 82
Tire inflation pressure 116
Tire pressure monitoring,
refer to Flat Tire
Monitor 87
Page 169 of 174
Everything from A to Z
169
Tires
age 118
breaking in 110
condition 119
damage 119
flat 141
inflation pressure 116
storing 121
tread 119, 120
tread wear indicators,
refer to Tire tread 120
winter tires 120
Tools, refer to Onboard tool
kit 136
Torque
engine 154
Tow bar 149
Tow rope 149
Towing 149
Towing eyelet 149
Towing the vehicle 149
Tow-starting 149
Track width, refer to Dimen-
sions 155
Transmission
breaking in 110
Transport securing devices,
refer to Securing
cargo 106
Transporting children
safely 58Trap protection
electric power windows 38
Tread depth, refer to Tire
tread 120
Tread wear indicators in the
tires, refer to Tire
tread 120
Tread wear, tires 120
Trip distance recorder, refer
to Trip odometer 79
Trip meter, refer to Trip
odometer 79
Trip odometer 79
Trunk lid, refer to Luggage
compartment lid 33
Trunk lighting, refer to Lug-
gage compartment light-
ing 33
Turn signal indicator 75
bulb replacement 138
indicator lamp 20
Turn signal indicator, side
bulb replacement 138
Turning circle, refer to
Dimensions 155
TV function, refer to the
Owner's Manual for
Onboard ComputerU
Underbody protection, refer
to the Caring for your vehi-
cle brochure
Units
average fuel
consumption 84
temperature 83
Unlocking
from inside 32
from outside 29, 31
Upshift indicator, refer to
Shift Lights 74
Using antifreeze 128
V
Vehicle
battery 144
break-in procedures 110
dimensions 155
leaving the vehicle 68
loading 104
starting 66
washing, refer to the Car-
ing for your vehicle bro-
chure 76
weight 156
Vehicle Memory 64
Vehicle weight 156
Ventilation 94
draft-free 97
Viscosity 127Voice command system 22
microphone 100
Voice control, refer to sepa-
rate Owner's Manual
Volume
luggage compartment 156
W
Warning and indicator
lamps 18
Warning lamp 'Please fas-
ten safety belts' 18
Warning messages 81
Warranty and Service Guide
Booklet 130
Warranty, refer also to sepa-
rate booklet 7
Washer fluid
adding 126, 157
Washer fluid reservoir 126
volume 126
Washer jets, refer to Wind-
shield washer jets 77
Washer/wiper system 76, 77
washer fluid 126
Waste tray, refer to
Ashtray 100
Weights 156
Wheelbase, refer to Dimen-
sions 155
Wheels and tires 116
Wheelslip control DSC 86
OverviewControlsMaintenanceRepairsDataIndex