BMW M3 CONVERTIBLE 2011 Repair Manual
Manufacturer: BMW, Model Year: 2011, Model line: M3 CONVERTIBLE, Model: BMW M3 CONVERTIBLE 2011Pages: 174, PDF Size: 2.68 MB
Page 61 of 174
61
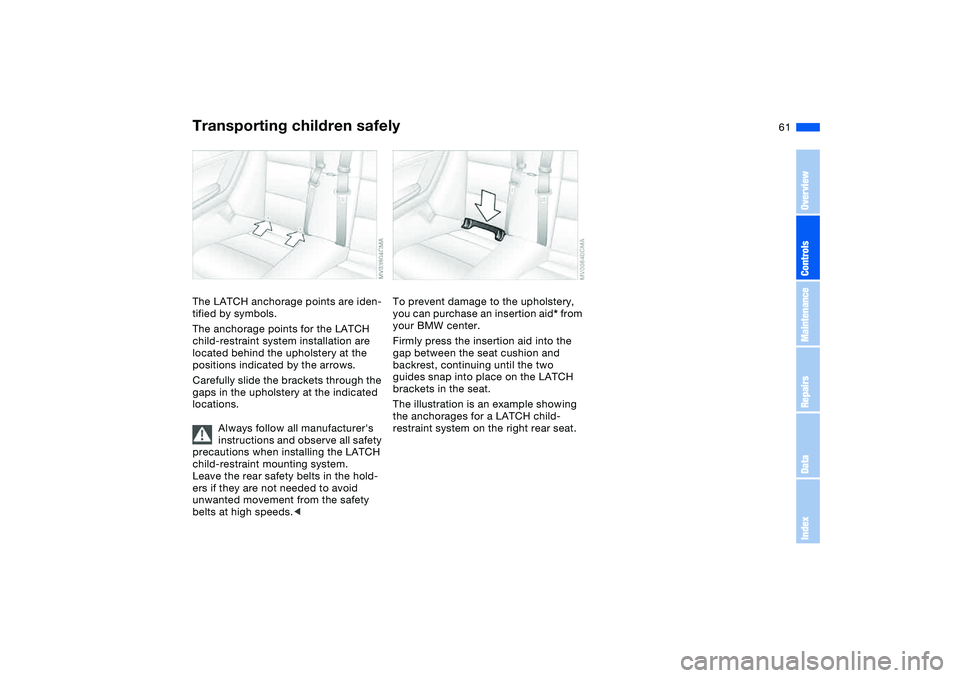
The LATCH anchorage points are iden-
tified by symbols.
The anchorage points for the LATCH
child-restraint system installation are
located behind the upholstery at the
positions indicated by the arrows.
Carefully slide the brackets through the
gaps in the upholstery at the indicated
locations.
Always follow all manufacturer's
instructions and observe all safety
precautions when installing the LATCH
child-restraint mounting system.
Leave the rear safety belts in the hold-
ers if they are not needed to avoid
unwanted movement from the safety
belts at high speeds.<
To prevent damage to the upholstery,
you can purchase an insertion aid* from
your BMW center.
Firmly press the insertion aid into the
gap between the seat cushion and
backrest, continuing until the two
guides snap into place on the LATCH
brackets in the seat.
The illustration is an example showing
the anchorages for a LATCH child-
restraint system on the right rear seat.
Transporting children safely
OverviewControlsMaintenanceRepairsDataIndex
Page 62 of 174
62
Rollover protection systemIn the event of an accident or some
other critical driving situation – extreme
tilting in the longitudinal or transverse
axis, loss of contact with the ground –
the rollover protection system will be
automatically activated. The protective
bars located in the rear head restraints
extend within fractions of a second.
In addition to the integrated rollover bar
in the windshield frame, the rollover
protection system affords all the vehicle
occupants necessary headroom.
Always keep the travel path for the
rollover protection system free
and clear. Under no circumstances
should you cover the head restraints.
In the event of less serious accidents,
the safety belt will protect you and,
depending on the severity of the acci-
dent, so will the safety belt tensioner
and the multi-stage airbag restraint sys-
tem as well.<
If, after being automatically triggered,
the protective function is not needed,
then the rollover protection system can
be lowered back into place. No special
tool is needed for this.
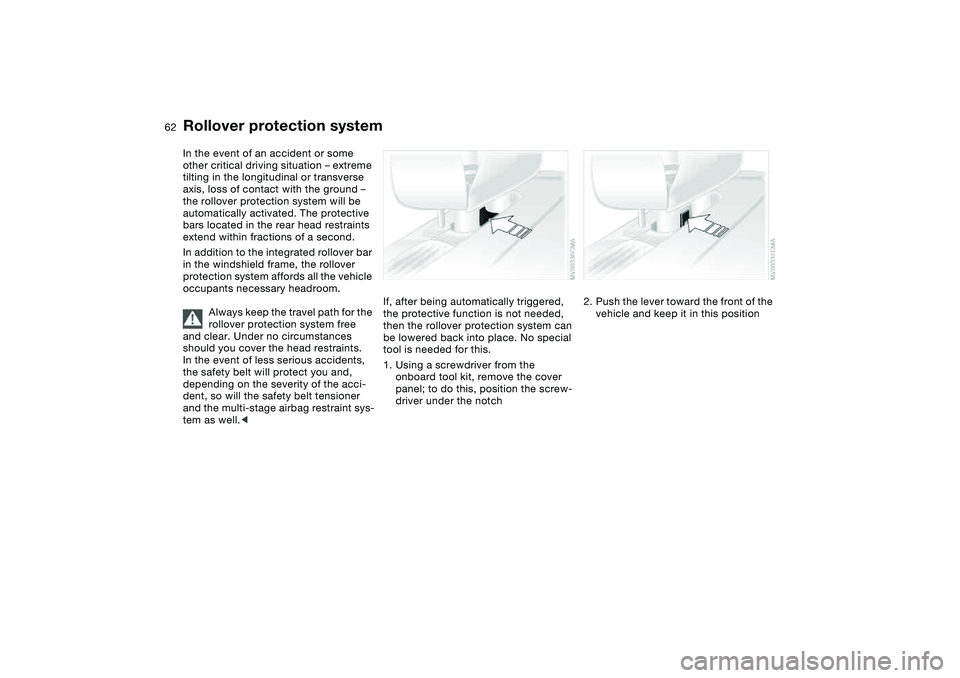
1. Using a screwdriver from the
onboard tool kit, remove the cover
panel; to do this, position the screw-
driver under the notch
2. Push the lever toward the front of the
vehicle and keep it in this position
Page 63 of 174
63
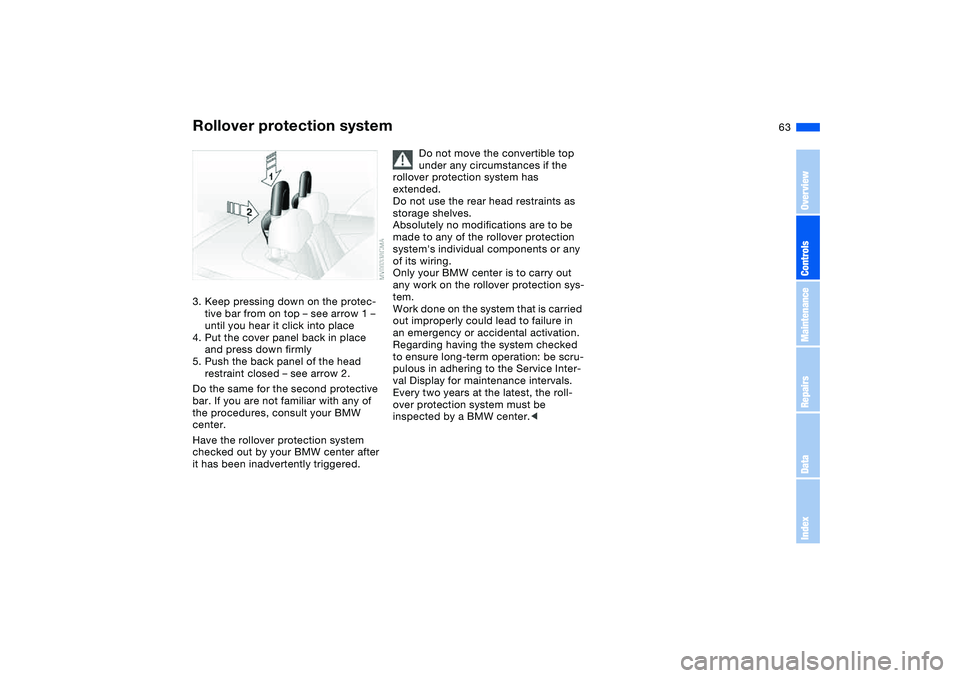
3. Keep pressing down on the protec-
tive bar from on top – see arrow 1 –
until you hear it click into place
4. Put the cover panel back in place
and press down firmly
5. Push the back panel of the head
restraint closed – see arrow 2.
Do the same for the second protective
bar. If you are not familiar with any of
the procedures, consult your BMW
center.
Have the rollover protection system
checked out by your BMW center after
it has been inadvertently triggered.
Do not move the convertible top
under any circumstances if the
rollover protection system has
extended.
Do not use the rear head restraints as
storage shelves.
Absolutely no modifications are to be
made to any of the rollover protection
system's individual components or any
of its wiring.
Only your BMW center is to carry out
any work on the rollover protection sys-
tem.
Work done on the system that is carried
out improperly could lead to failure in
an emergency or accidental activation.
Regarding having the system checked
to ensure long-term operation: be scru-
pulous in adhering to the Service Inter-
val Display for maintenance intervals.
Every two years at the latest, the roll-
over protection system must be
inspected by a BMW center.<
Rollover protection system
OverviewControlsMaintenanceRepairsDataIndex
Page 64 of 174
64
Vehicle Memory, Key MemoryHow the system functionsYou have probably frequently wished
that you could configure individual
functions of your vehicles to reflect your
own personal requirements. In engi-
neering your vehicle, BMW has pro-
vided for a number of options for per-
sonal adjustment that can be
programmed into your vehicle at your
BMW center.
The available configuration data fall into
two categories, according to whether
their primary orientation is the vehicle –
Vehicle Memory – or the individual –
Key Memory. You can have up to four
different basic settings adjusted for four
different persons. The only require-
ment is that each person uses his or her
own remote control key.
When your vehicle is unlocked with the
remote control, the vehicle recognizes
the individual user by means of a data
exchange with the key, and makes
adjustments accordingly.
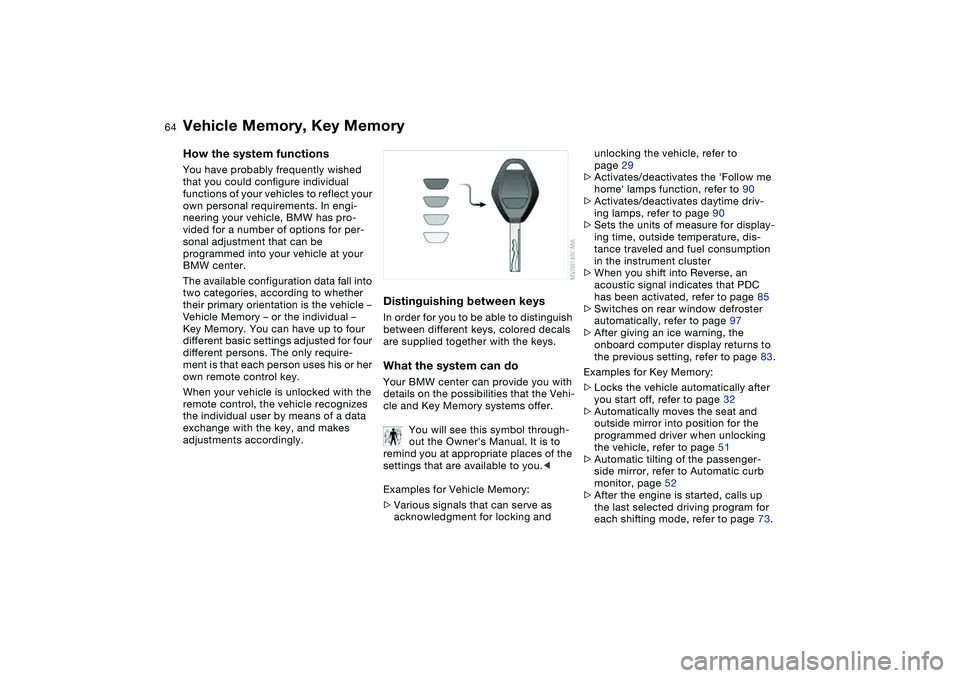
Distinguishing between keysIn order for you to be able to distinguish
between different keys, colored decals
are supplied together with the keys.What the system can doYour BMW center can provide you with
details on the possibilities that the Vehi-
cle and Key Memory systems offer.
You will see this symbol through-
out the Owner's Manual. It is to
remind you at appropriate places of the
settings that are available to you.<
Examples for Vehicle Memory:
>Various signals that can serve as
acknowledgment for locking and
unlocking the vehicle, refer to
page 29
>Activates/deactivates the 'Follow me
home' lamps function, refer to 90
>Activates/deactivates daytime driv-
ing lamps, refer to page 90
>Sets the units of measure for display-
ing time, outside temperature, dis-
tance traveled and fuel consumption
in the instrument cluster
>When you shift into Reverse, an
acoustic signal indicates that PDC
has been activated, refer to page 85
>Switches on rear window defroster
automatically, refer to page 97
>After giving an ice warning, the
onboard computer display returns to
the previous setting, refer to page 83.
Examples for Key Memory:
>Locks the vehicle automatically after
you start off, refer to page 32
>Automatically moves the seat and
outside mirror into position for the
programmed driver when unlocking
the vehicle, refer to page 51
>Automatic tilting of the passenger-
side mirror, refer to Automatic curb
monitor, page 52
>After the engine is started, calls up
the last selected driving program for
each shifting mode, refer to page 73.
Page 65 of 174
65 Driving
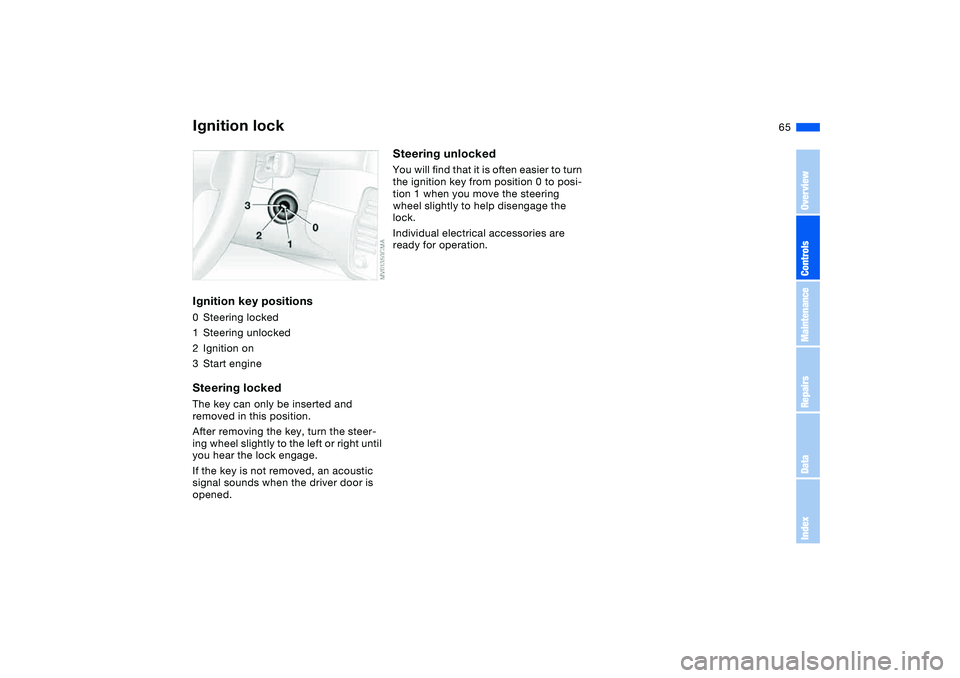
Ignition lockIgnition key positions0Steering locked
1Steering unlocked
2Ignition on
3Start engineSteering lockedThe key can only be inserted and
removed in this position.
After removing the key, turn the steer-
ing wheel slightly to the left or right until
you hear the lock engage.
If the key is not removed, an acoustic
signal sounds when the driver door is
opened.
Steering unlockedYou will find that it is often easier to turn
the ignition key from position 0 to posi-
tion 1 when you move the steering
wheel slightly to help disengage the
lock.
Individual electrical accessories are
ready for operation.
OverviewControlsMaintenanceRepairsDataIndex
Page 66 of 174
66
Starting the engine and driving off
Do not allow the engine to warm
up by leaving it running while the
vehicle remains stationary. Instead,
drive off immediately at a moderate
engine speed.<
Do not allow the engine to run in
enclosed spaces. Otherwise,
breathing the exhaust fumes can lead
to unconsciousness and death. The
exhaust gases contain carbon monox-
ide, an odorless and colorless, but
highly toxic gas. Do not leave the vehi-
cle unattended with the engine running.
An unattended vehicle with a running
engine represents a safety hazard.
If you leave the vehicle with the engine
running, move the gearshift lever into
the idling position or the selector lever
into position N, as applicable, and
apply the parking brake. If you fail to do
this, the vehicle could move.<
>Do not press the accelerator pedal
while starting the engine
>Do not end the starting procedure too
early, but do not continue it for more
than 20 seconds
>Release the ignition key immediately
when the engine starts
>Do not let the engine warm up in
idling position. Instead, begin to drive
at moderate engine speeds.
If the engine does not start on the first
attempt – if it is very hot or cold, for
instance:
Press the accelerator pedal halfway
down while engaging the starter.
Cold starts at very low temperatures
below about +5 7/–156 and at high
altitudes above 3,300 ft/1,000 m:
>On the first attempt, engage the
starter for approx. 10 seconds
>Press the accelerator pedal halfway
down while engaging the starter.
Extended starting attempts, char-
acterized by excessively frequent
or long periods with the starter
engaged, can damage the catalytic
converter.<
When driving, standing at idle or
parking the vehicle, take care to
avoid contact between the hot exhaust
system and flammable materials –
grass, hay, leaves, etc. Such contact
could lead to a fire, resulting in serious
personal injury and property damage.<
Manual transmission1. Engage the parking brake
2. Gearshift lever in idling position
3. Depress the clutch pedal.
If the clutch pedal is not depressed,
the engine cannot be started
4. Start the engine. Do not press the
accelerator pedal. Do not actuate the
starter for too short a time. Do not
turn it for more than approx.
20 seconds. Release the ignition key
immediately when the engine starts.Sequential M gearbox with
Drivelogic1. Depress footbrake
2. Move selector lever into position N
3. Start the engine. Do not actuate the
starter for too short a time. Do not
turn it for more than approx.
20 seconds. Release the ignition key
immediately when the engine starts
4. Engage a driving position
5. Release footbrake and slowly
depress accelerator pedal.
Page 67 of 174
67
With the engine running, the gear
indicator in the SMG Drivelogic
display flashes to indicate that a driving
position is engaged with the driver's
door open or if the hood is not closed
properly, refer to page 71.
If neither the pedals, the shift paddles,
nor the selector lever are actuated, then
the gearbox is automatically taken out
of gear after approx. four seconds. It
will then be necessary to move the
selector lever back to position N before
engaging the desired driving position.
Driving off is not possible with the hood
open.<
Before exiting the vehicle with the
engine running, move the selector
lever into position N and apply the
parking brake.
Never leave the vehicle unattended
with the engine running. An unat-
tended vehicle with a running engine
represents a safety hazard.<
Engine idle speed is controlled by the
engine computer system. Increased
speeds at start-up are normal and
should decrease as the engine warms
up. If engine speed does not decrease,
service is required.
To prevent the battery from discharg-
ing, always deactivate electrical
devices that are not in use. Switch the
ignition off when the vehicle is not
being driven.
Starting the engine and driving off
OverviewControlsMaintenanceRepairsDataIndex
Page 68 of 174
68
Switching off the engine
You should never remove the igni-
tion key when the vehicle is in
motion, as the steering lock could
engage.
When you leave the vehicle, always
remove the ignition key and engage the
steering lock.<
Always engage the parking brake
when parking on downhill roads.
Engaging a gear may not provide ade-
quate resistance to rolling.<
Manual transmissionTurn the ignition key to position 1 or 0.Sequential M gearbox with
DrivelogicIf you turn the ignition key to position 1
or 0 with the selector lever in the for-
ward or reverse position, a gear auto-
matically remains engaged.
If you turn the ignition key to position 1
or 0 with the selector lever in
position N, a warning tone and the
flashing gear indicator in the SMG
Drivelogic display remind you that no
gear is engaged to secure the vehicle
against rolling.
The warning stops after approx. ten
seconds. If you move the selector lever
into a forward or reverse position dur-
ing this time, a gear is automatically
engaged.
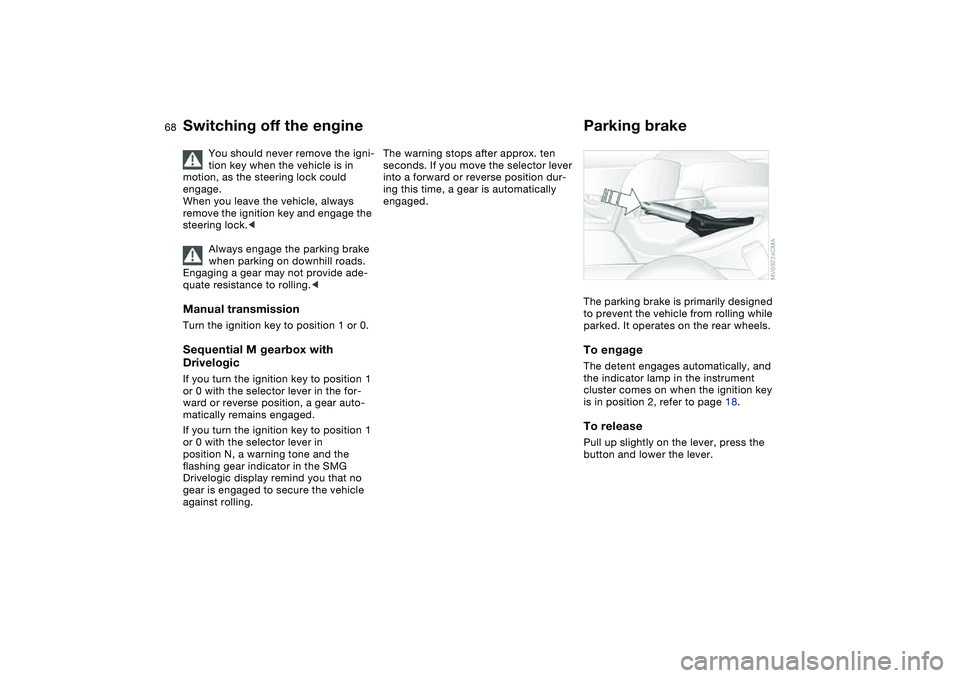
Parking brakeThe parking brake is primarily designed
to prevent the vehicle from rolling while
parked. It operates on the rear wheels.To engageThe detent engages automatically, and
the indicator lamp in the instrument
cluster comes on when the ignition key
is in position 2, refer to page 18.To releasePull up slightly on the lever, press the
button and lower the lever.
Page 69 of 174
69
If exceptional circumstances
make it necessary to engage the
parking brake while the vehicle is in
motion, do not pull it with excessive
pressure. Keep your thumb pressed
against the release button while care-
fully pulling the lever up.
Excessive pressure can lead to over-
braking and loss of traction – fishtailing
– at the rear axle.
The brake lamps do not come on when
the parking brake is engaged.
Always engage the parking brake when
parking on slopes and inclined sur-
faces. Engaging a gear may not provide
adequate resistance to rolling.<
To avoid corrosion and one-sided
braking, apply the parking brake
lightly from time to time when coasting
to a standstill – at a traffic light, for
example – provided that it is safe to do
so.<
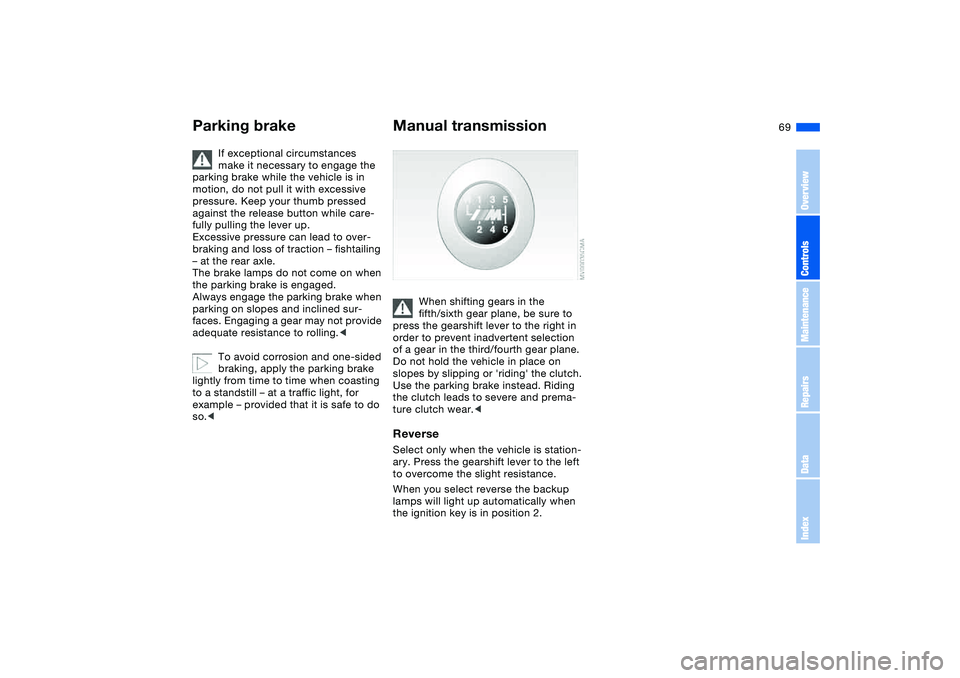
Manual transmission
When shifting gears in the
fifth/sixth gear plane, be sure to
press the gearshift lever to the right in
order to prevent inadvertent selection
of a gear in the third/fourth gear plane.
Do not hold the vehicle in place on
slopes by slipping or 'riding' the clutch.
Use the parking brake instead. Riding
the clutch leads to severe and prema-
ture clutch wear.<
ReverseSelect only when the vehicle is station-
ary. Press the gearshift lever to the left
to overcome the slight resistance.
When you select reverse the backup
lamps will light up automatically when
the ignition key is in position 2.
Parking brake
OverviewControlsMaintenanceRepairsDataIndex
Page 70 of 174
70
Sequential M gearbox with Drivelogic*The conceptThe sequential M gearbox with
Drivelogic is an automated manual
gearbox with which clutching and shift-
ing is assumed by an electro-hydraulic
system.
The SMG Drivelogic is operated via two
shift paddles on the steering wheel and
the selector lever in the center console.
It offers the following functions:
>Sequential and automated shifting
mode
>Ability to choose between different
driving programs – Drivelogic
>Gradient assistance, refer to page 73
>Upshift display and shift lights, refer
to page 74
>RPM matching on downshifts
>Driving dependent functions:
The respective driving situation, e.g.
cornering, mountain driving or brak-
ing, is detected by sensors and taken
into account for shifting, e.g. to
achieve optimum gear selection dur-
ing deceleration and subsequent
acceleration
>Slip recognition at the rear axle for
increasing driving stability, e.g. dur-
ing downshifting on slippery road
surfaces>Operating safety through protection
against misshifting.
Under normal operating conditions, fuel
consumption is lowest when driving in
the first driving program of the auto-
mated shifting mode.
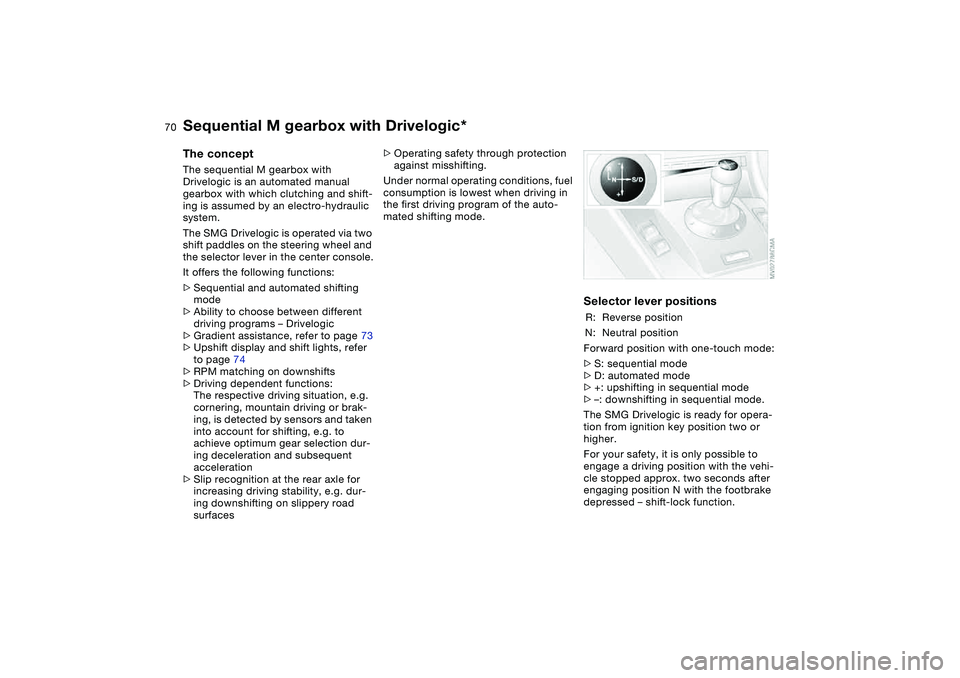
Selector lever positionsR: Reverse position
N: Neutral position
Forward position with one-touch mode:
>S: sequential mode
>D: automated mode
>+: upshifting in sequential mode
>–: downshifting in sequential mode.
The SMG Drivelogic is ready for opera-
tion from ignition key position two or
higher.
For your safety, it is only possible to
engage a driving position with the vehi-
cle stopped approx. two seconds after
engaging position N with the footbrake
depressed – shift-lock function.