BMW M3 COUPE 2001 E46 Owner's Manual
Manufacturer: BMW, Model Year: 2001, Model line: M3 COUPE, Model: BMW M3 COUPE 2001 E46Pages: 183, PDF Size: 1.65 MB
Page 131 of 183

131n
IndexDataTechnologyRepairsCar careControlsOverview
Caring for your vehicleCaring for other vehicle
components and materials Light-alloy wheels should be treated
with alloy wheel cleaner, especially
during the winter months. However, do
not use aggressive products contain-
ing acids, strong alkalis or abrasives.
Do not use steam cleaners operating at
temperatures above 140 7 (+60 6).
Follow the manufacturer's instructions.
If your vehicle has chrome parts
* such
as window moldings, door handles or
similar items, clean these parts carefully
with ample clean water, and possibly a
shampoo additive, especially if there is
an accumulation of road salt. Use
chrome polish as an additional treat-
ment.
Plastic components, vinyl upholstery,
headliners, lamp lenses, the clear cover
of the instrument cluster and compon-
ents with a sprayed dull black surface
can be cleaned with water (add plastic
shampoo as required). Do not allow
moisture to soak through the seats or
headliner. Never use solvents such as
lacquer thinner, heavy-duty grease
remover, fuels, or similar substances.
Rubber components should be cleaned
with water only; a rubber treatment or
silicone spray may also be applied. The safety belts should be cleaned with
a mild soap and water solution without
being removed from the vehicle. Never
attempt chemical or dry cleaning, as
damage to the belt fabric could result.
After cleaning, never allow the inertia
reel to retract the belts until they are
completely dry. Dirty safety belts pre-
vent the inertia reel mechanism from
retracting the strap properly, and thus
constitute a safety hazard.
Heavily soiled floor carpets and mats
*
can be cleaned with an interior cleaner.
The floor mats can be removed from
the vehicle for cleaning.
Use only a damp cloth to clean trim
panels made of real wood
* and other
parts constructed of real wood
*. Follow
up by drying with a soft cloth.
Use the cleaning and car-care
products that you can obtain at
your BMW center.<
Care of upholstery materials Depressions in the upholstery that
result from everyday use can be
brushed smooth by brushing against
the nap with a lightly dampened brush.
The tendency of the pile to lie in a par-
ticular direction on velour upholstery is
not a quality defect. Just as with home
textiles or clothing, this cannot be
avoided.
Lint on upholstery materials, textile or
leather remnants that have been worn
into the upholstery may be removed
with a lint brush or a Velcro brush. A
cleaning glove is available for particu-
larly "stubborn" lint. Stains and fairly
large areas of dirt should be cleaned off
without delay, using lukewarm water
and an interior cleaner, stain remover or
appropriate cleaning fluid. Brush the
fabric afterwards to restore its appear-
ance.
If the vehicle will be stored for an
extended period or if it is exposed to
intense sunlight, cover all the seats or
the windows to prevent fading.
Use the cleaning and car-care
products that you can obtain at
your BMW center.<
Page 132 of 183

132n
Caring for your vehicleThe buildup of an electrostatic charge
on the seat covers, particularly if atmo-
spheric humidity is low, can give the
occupants an unpleasant electric shock
if they touch metal body parts after
leaving the vehicle. Although this is not
dangerous in any way, it can be
avoided by touching a bare or polished
metal part of the vehicle while getting
out.Alcantara
*
Clean using a gentle detergent, taking
care not to rub or scratch. Then finish
off by wiping it with a wet cloth.Leather care The leather upholstery
* used by BMW
is a natural product of the highest qual-
ity, processed using state-of-the-art
methods to ensure that it will maintain
its high quality for years to come, pro-
vided that it is properly cared for.
Because this product is manufactured
using natural materials, you must make
allowance for its special characteristics
as well as for the peculiarities of its use
and care.
Regular periodic cleaning and care are
essential, as dust and road dirt act as
abrasives in the pores and creases of the material. This leads to wear spots
and premature brittleness on the sur-
face of the leather. We therefore sug-
gest that you clean the leather with a
vacuum cleaner or cloth at frequent
intervals.
For cleaning, use BMW leather cleaning
foam.
Since dirt and grease gradually attack
the protective layer of the leather, the
cleaned surfaces should be treated
with BMW leather care agent. This also
acts as an antistatic agent.
For protection against dampness or
moisture, treat the leather with a
BMW impregnating agent.
We recommend that you perform this
procedure twice a year on leather
exposed to normal use.
Spills should be wiped up immediately.
Remove grease and oil stains without
rubbing, but rather by dabbing with
spot remover.
If the upholstery is exposed to intense
sunlight or if the vehicle is going to be
left parked for an extended period of
time, cover all leather surfaces or all the
windows to prevent fading.Use the cleaning and car-care
products that you can obtain at
your BMW center.<
Cleaning agents can contain sub-
stances that are dangerous or
pose health risks. Therefore, always
comply with the warnings and danger
notices on the package.
Open the doors or windows on your
vehicle when cleaning the interior.
Never clean your vehicle with solvents
or other materials not specifically
intended for this purpose.<
Page 133 of 183

133n
IndexDataTechnologyRepairsCar careControlsOverview
Airbags Vehicle storageImportant safety notices
Don't remove the airbag restraint
system's gas generator. Have
testing and service procedures per-
formed by specially-qualified techni-
cians only. In the event of any faults, if
the airbag stops working, or in the
event of function-oriented use (deploy-
ment) of the airbag restraint system,
entrust your BMW center alone with
repair or disassembly.
No modifications may be made to either
the wiring or to individual components.
These include the padded steering
wheel hub, the instrument panel, the
side trim panels of the front or rear
doors and the roof pillars or the sides of
the headliner. Do not apply adhesive
materials to these components, cover
or modify them in any way. Do not
remove or dismantle the steering wheel
yourself.
To ensure compliance with official
safety regulations, entrust disposal of
airbag generators to a BMW center.
Unprofessional attempts to service the
system could lead to failure in an emer-
gency or undesired airbag activation,
either of which could result in personal
injury.<
Consult your BMW center regarding
special procedures if you intend to
store the vehicle for more than three
months.
Page 134 of 183

134n
Technical modifications California Proposition 65 WarningAny BMW center will be happy to
advise you concerning the advisability,
legal implications and factory recom-
mendations for technical modifications
to the vehicle. For this purpose, the
BMW center will require the Vehicle
Identification Number and, in some
cases, the engine number as well. Light-Emitting Diodes (LEDs)Light-emitting diodes installed behind
translucent lenses serve as the light
source for many of the controls and
displays in your vehicle. The concept
behind their operation is related to that
employed for lasers, and they are offi-
cially designated as Class 1 light-emit-
ting diodes.
Do not remove the protective lens
and avoid staring directly at the
unfiltered beam for extended periods
(several hours). To do so could result in
inflammation of the iris.<
California laws require us to state the
following warning:
Engine exhaust, some of its
constituents, and certain vehicle
components contain or emit chemicals
known to the State of California to
cause cancer and birth defects or other
reproductive harm.<
Page 135 of 183
135n
IndexDataTechnologyRepairsCar careControlsOverview
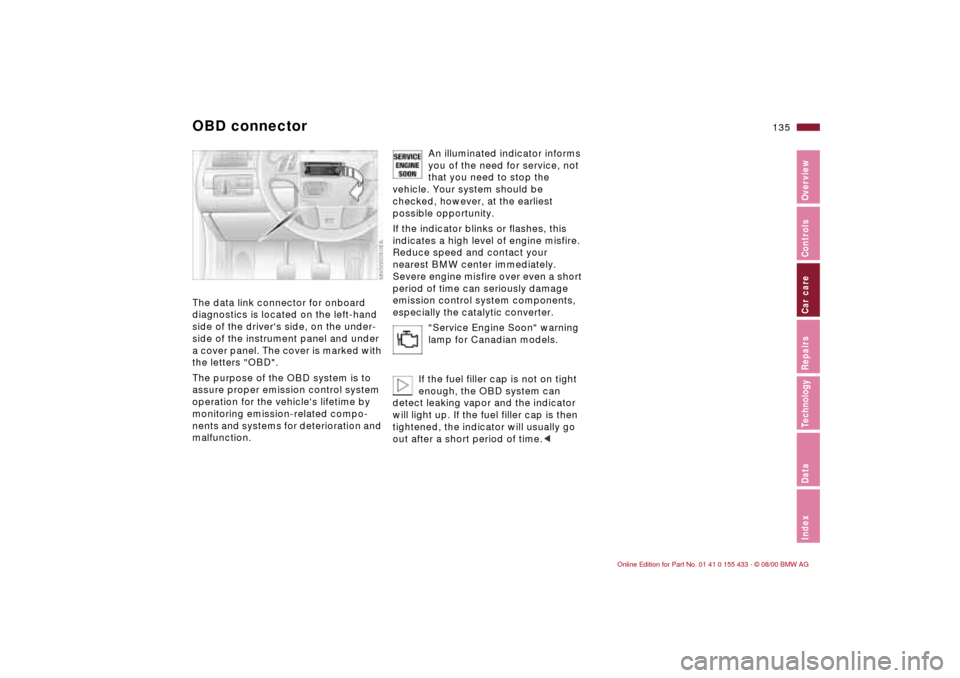
OBD connector The data link connector for onboard
diagnostics is located on the left-hand
side of the driver's side, on the under-
side of the instrument panel and under
a cover panel. The cover is marked with
the letters "OBD".
The purpose of the OBD system is to
assure proper emission control system
operation for the vehicle's lifetime by
monitoring emission-related compo-
nents and systems for deterioration and
malfunction.
An illuminated indicator informs
you of the need for service, not
that you need to stop the
vehicle. Your system should be
checked, however, at the earliest
possible opportunity.
If the indicator blinks or flashes, this
indicates a high level of engine misfire.
Reduce speed and contact your
nearest BMW center immediately.
Severe engine misfire over even a short
period of time can seriously damage
emission control system components,
especially the catalytic converter.
"Service Engine Soon" warning
lamp for Canadian models.
If the fuel filler cap is not on tight
enough, the OBD system can
detect leaking vapor and the indicator
will light up. If the fuel filler cap is then
tightened, the indicator will usually go
out after a short period of time.<
Page 136 of 183
136n
Page 137 of 183
Overview
Controls and features
Operation, care
and maintenance
Owner service procedures
Technical data
Index Advanced technology
IndexDataTechnologyRepairsCar careControlsOverview
137n
Replacement procedures:
Onboard tool kit138
Windshield wiper blades138
Lamps and bulbs138
Repairing a flat tire145
Battery148
Fuses151
Microfilter/Activated charcoal
filter 152
In case of
electrical malfunction:
Fuel filler door152
Sliding/tilt sunroof153
Giving and receiving
assistance:
Jump-starting154
Towing the vehicle155
Repairs
Page 138 of 183
138n
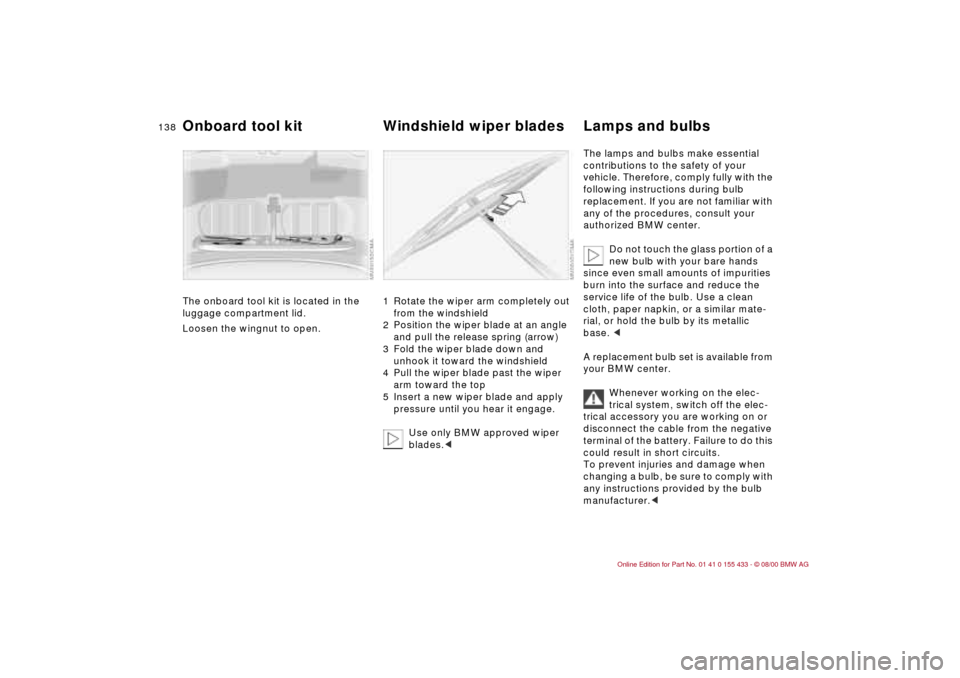
The onboard tool kit is located in the
luggage compartment lid.
Loosen the wingnut to open.
1 Rotate the wiper arm completely out
from the windshield
2 Position the wiper blade at an angle
and pull the release spring (arrow)
3 Fold the wiper blade down and
unhook it toward the windshield
4 Pull the wiper blade past the wiper
arm toward the top
5 Insert a new wiper blade and apply
pressure until you hear it engage.
Use only BMW approved wiper
blades.<
The lamps and bulbs make essential
contributions to the safety of your
vehicle. Therefore, comply fully with the
following instructions during bulb
replacement. If you are not familiar with
any of the procedures, consult your
authorized BMW center.
Do not touch the glass portion of a
new bulb with your bare hands
since even small amounts of impurities
burn into the surface and reduce the
service life of the bulb. Use a clean
cloth, paper napkin, or a similar mate-
rial, or hold the bulb by its metallic
base. <
A replacement bulb set is available from
your BMW center.
Whenever working on the elec-
trical system, switch off the elec-
trical accessory you are working on or
disconnect the cable from the negative
terminal of the battery. Failure to do this
could result in short circuits.
To prevent injuries and damage when
changing a bulb, be sure to comply with
any instructions provided by the bulb
manufacturer.<
Onboard tool kit Windshield wiper blades Lamps and bulbs
Page 139 of 183

IndexDataTechnologyRepairsCar careControlsOverview
139n
Lamps and bulbsLow/high beam headlamps>Low beams: H7 bulb, 55 watts
>High beams: H7 bulb, 55 watts
The H7 bulb is pressurized. There-
fore, wear safety glasses and
protective gloves. Failure to comply
with this precaution could lead to injury
if the bulb is damaged during replace-
ment.<
Please contact a BMW center in case of
a malfunction.Parking lamps5-watt bulb
Please contact a BMW center in case of
a malfunction.
When cleaning the headlamps,
please observe the following: do
not wipe dry with a cloth (this causes
scratches). Never use abrasives or
strong solvents to clean the covers.
Remove dirt and contamination (such
as insects) by soaking with BMW Car
Shampoo and then rinsing with ample
water. Always use a deicer spray to
remove accumulated ice and snow Ð
never use a scraper.<
Xenon lamps
*
The service life of these bulbs is very
long and the probability of a failure is
very low, provided that they are not
switched on and off an unusual number
of times. If one of these bulbs should
nevertheless fail, it is possible to
continue driving with great caution
using the fog lamps, provided traffic
laws in your area do not prohibit this.
Because of the extremely high
voltages involved, any work on the
xenon lighting system including bulb
replacement should be carried out by
technically-qualified personnel only.
Otherwise, there is a risk of fatal
injury.<
Page 140 of 183
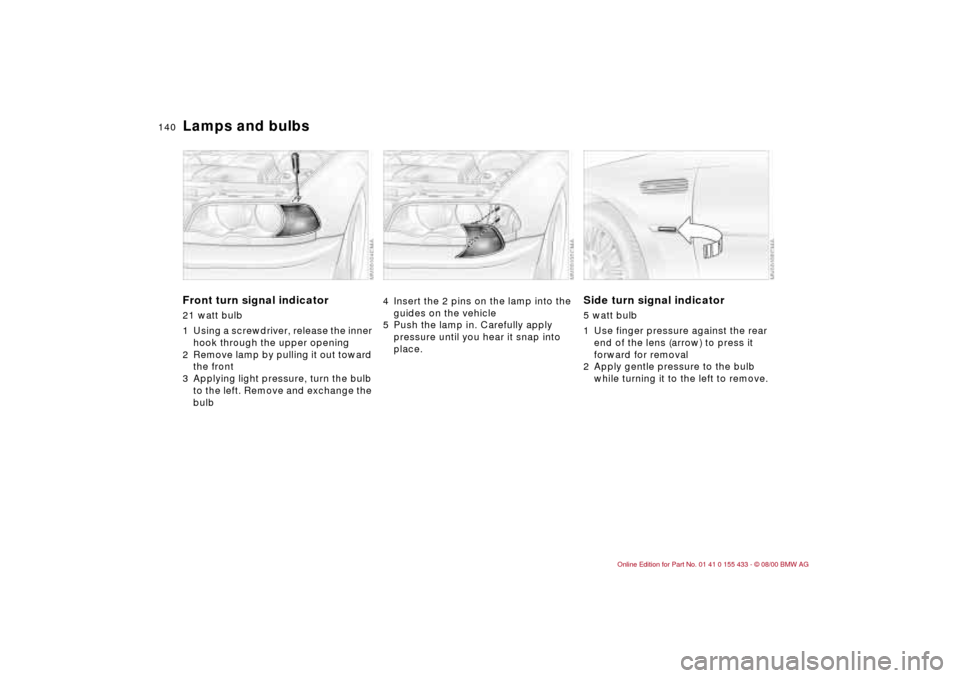
140n
Lamps and bulbsFront turn signal indicator 21 watt bulb
1 Using a screwdriver, release the inner
hook through the upper opening
2 Remove lamp by pulling it out toward
the front
3 Applying light pressure, turn the bulb
to the left. Remove and exchange the
bulb
4 Insert the 2 pins on the lamp into the
guides on the vehicle
5 Push the lamp in. Carefully apply
pressure until you hear it snap into
place.
Side turn signal indicator5 watt bulb
1 Use finger pressure against the rear
end of the lens (arrow) to press it
forward for removal
2 Apply gentle pressure to the bulb
while turning it to the left to remove.