BMW M5 2013 F10 Owner's Manual
Manufacturer: BMW, Model Year: 2013, Model line: M5, Model: BMW M5 2013 F10Pages: 230, PDF Size: 6.34 MB
Page 151 of 230
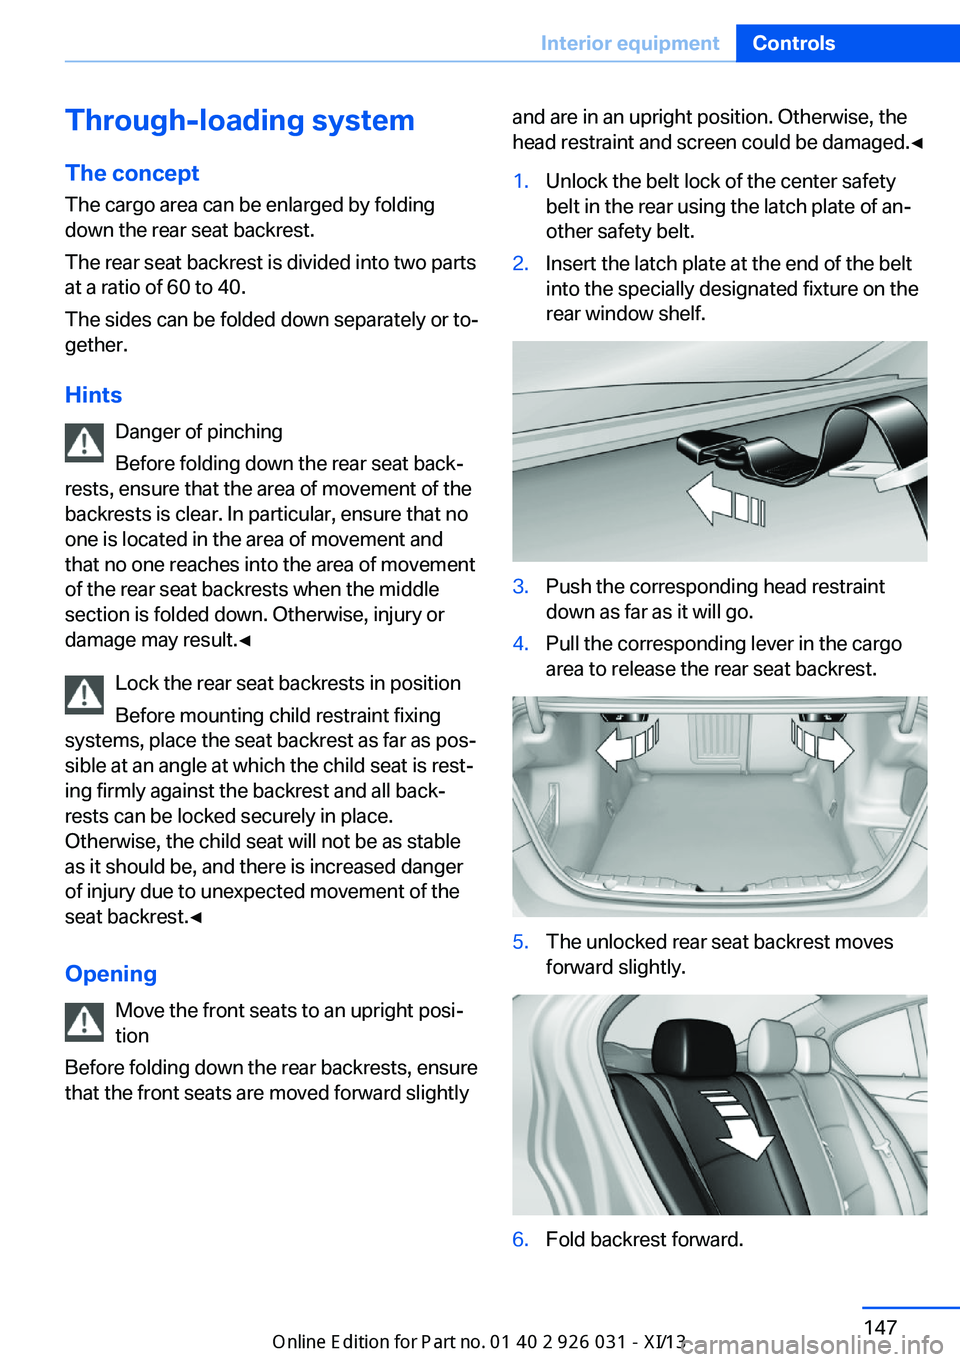
Through-loading systemThe concept The cargo area can be enlarged by folding
down the rear seat backrest.
The rear seat backrest is divided into two parts at a ratio of 60 to 40.
The sides can be folded down separately or to‐
gether.
Hints Danger of pinching
Before folding down the rear seat back‐
rests, ensure that the area of movement of the
backrests is clear. In particular, ensure that no
one is located in the area of movement and
that no one reaches into the area of movement
of the rear seat backrests when the middle
section is folded down. Otherwise, injury or
damage may result.◀
Lock the rear seat backrests in position
Before mounting child restraint fixing
systems, place the seat backrest as far as pos‐
sible at an angle at which the child seat is rest‐
ing firmly against the backrest and all back‐
rests can be locked securely in place.
Otherwise, the child seat will not be as stable
as it should be, and there is increased danger
of injury due to unexpected movement of the
seat backrest.◀
Opening Move the front seats to an upright posi‐
tion
Before folding down the rear backrests, ensure
that the front seats are moved forward slightlyand are in an upright position. Otherwise, the
head restraint and screen could be damaged.◀1.Unlock the belt lock of the center safety
belt in the rear using the latch plate of an‐
other safety belt.2.Insert the latch plate at the end of the belt
into the specially designated fixture on the
rear window shelf.3.Push the corresponding head restraint
down as far as it will go.4.Pull the corresponding lever in the cargo
area to release the rear seat backrest.5.The unlocked rear seat backrest moves
forward slightly.6.Fold backrest forward.Seite 147Interior equipmentControls147
Online Edition for Part no. 01 40 2 909 953 - VI/13
Page 152 of 230
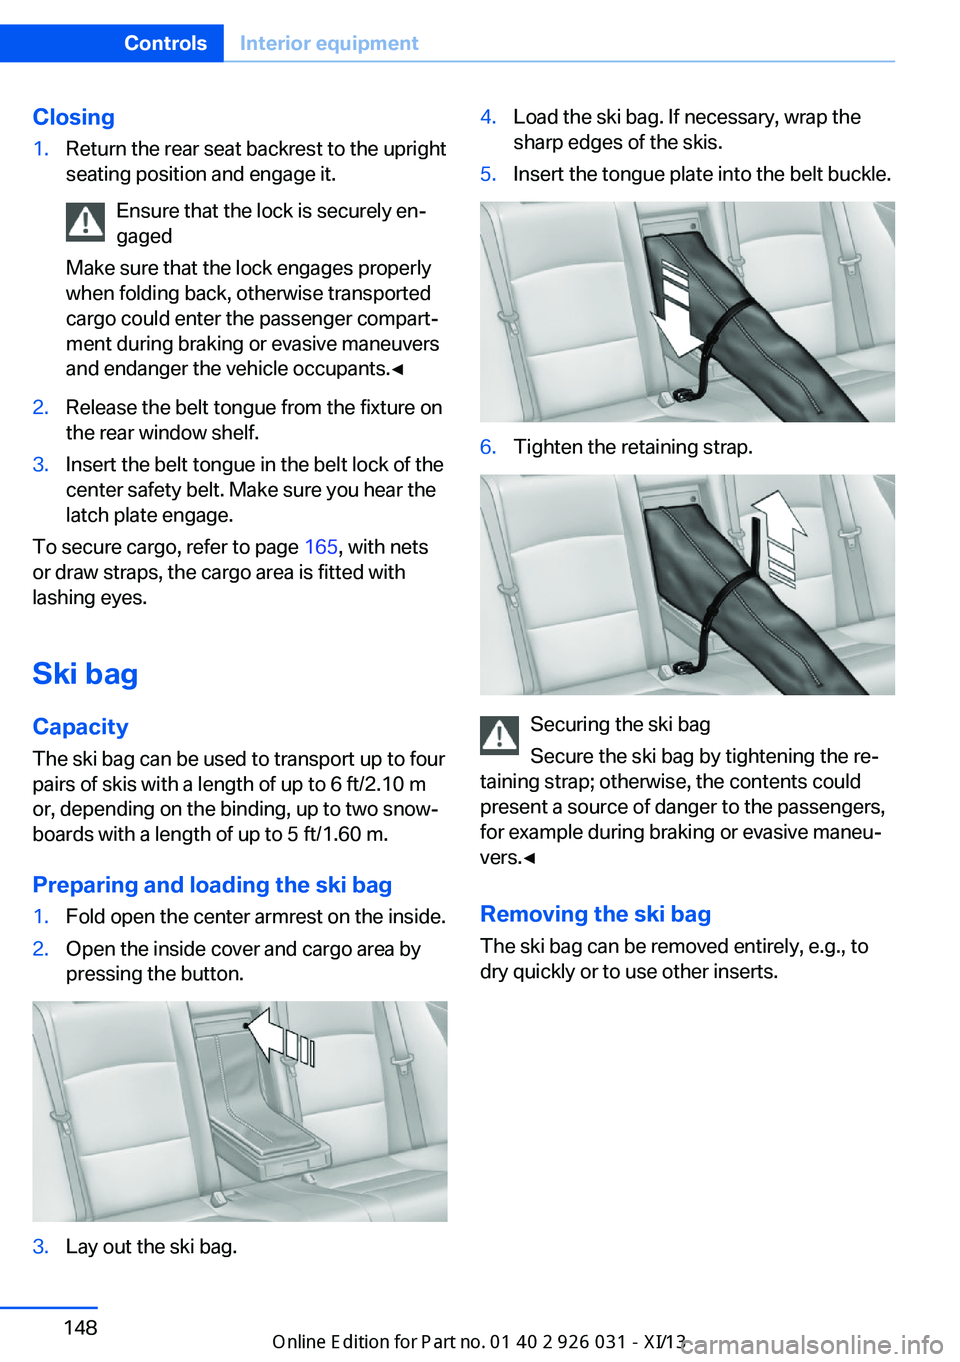
Closing1.Return the rear seat backrest to the upright
seating position and engage it.
Ensure that the lock is securely en‐
gaged
Make sure that the lock engages properly
when folding back, otherwise transported
cargo could enter the passenger compart‐
ment during braking or evasive maneuvers
and endanger the vehicle occupants.◀2.Release the belt tongue from the fixture on
the rear window shelf.3.Insert the belt tongue in the belt lock of the
center safety belt. Make sure you hear the
latch plate engage.
To secure cargo, refer to page 165, with nets
or draw straps, the cargo area is fitted with
lashing eyes.
Ski bag
Capacity
The ski bag can be used to transport up to four
pairs of skis with a length of up to 6 ft/2.10 m
or, depending on the binding, up to two snow‐
boards with a length of up to 5 ft/1.60 m.
Preparing and loading the ski bag
1.Fold open the center armrest on the inside.2.Open the inside cover and cargo area by
pressing the button.3.Lay out the ski bag.4.Load the ski bag. If necessary, wrap the
sharp edges of the skis.5.Insert the tongue plate into the belt buckle.6.Tighten the retaining strap.
Securing the ski bag
Secure the ski bag by tightening the re‐
taining strap; otherwise, the contents could
present a source of danger to the passengers,
for example during braking or evasive maneu‐
vers.◀
Removing the ski bag The ski bag can be removed entirely, e.g., to
dry quickly or to use other inserts.
Seite 148ControlsInterior equipment148
Online Edition for Part no. 01 40 2 909 953 - VI/13
Page 153 of 230
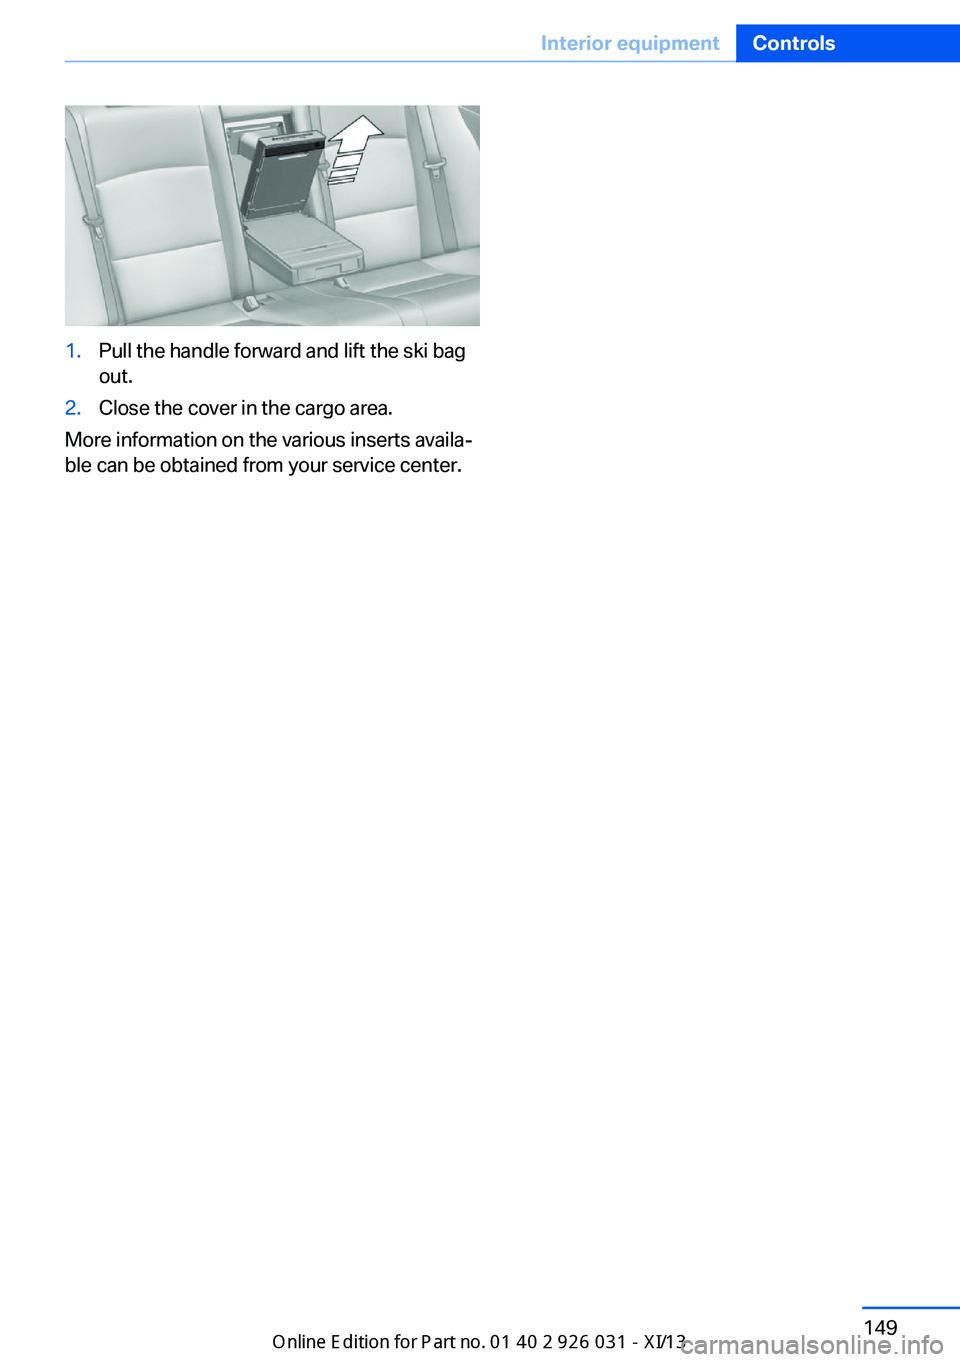
1.Pull the handle forward and lift the ski bag
out.2.Close the cover in the cargo area.
More information on the various inserts availa‐
ble can be obtained from your service center.
Seite 149Interior equipmentControls149
Online Edition for Part no. 01 40 2 909 953 - VI/13
Page 154 of 230
Storage compartmentsVehicle equipmentAll standard, country-specific and optional
equipment that is offered in the model series is
described in this chapter. Therefore, equip‐
ment is also described that is not available in a
vehicle, e. g., because of the selected optional
equipment or country variant. This also applies
for safety-related functions and systems.
Notes No loose objects in the passenger com‐
partment
Do not stow any objects in the passenger
compartment without securing them; other‐
wise, they may present a danger to occupants
for instance during braking and avoidance ma‐
neuvers.◀
Do not place anti-slip mats on the dash‐
board
Do not place anti-slip mats on the dashboard.
The mat materials could damage the dash‐
board.◀
Storage compartments
The following storage compartments are avail‐
able in the vehicle interior:▷Glove compartment on the driver's and
front passenger side, refer to page 150.▷Storage compartment, refer to page 153,
in the center console for remote control.▷Storage compartment in the center arm‐
rest, refer to page 151, in the front and
rear.▷Compartments in the doors.▷Pockets on the backrests of the front
seats.▷Net in the front passenger footwell.
Glove compartment
Front passenger side
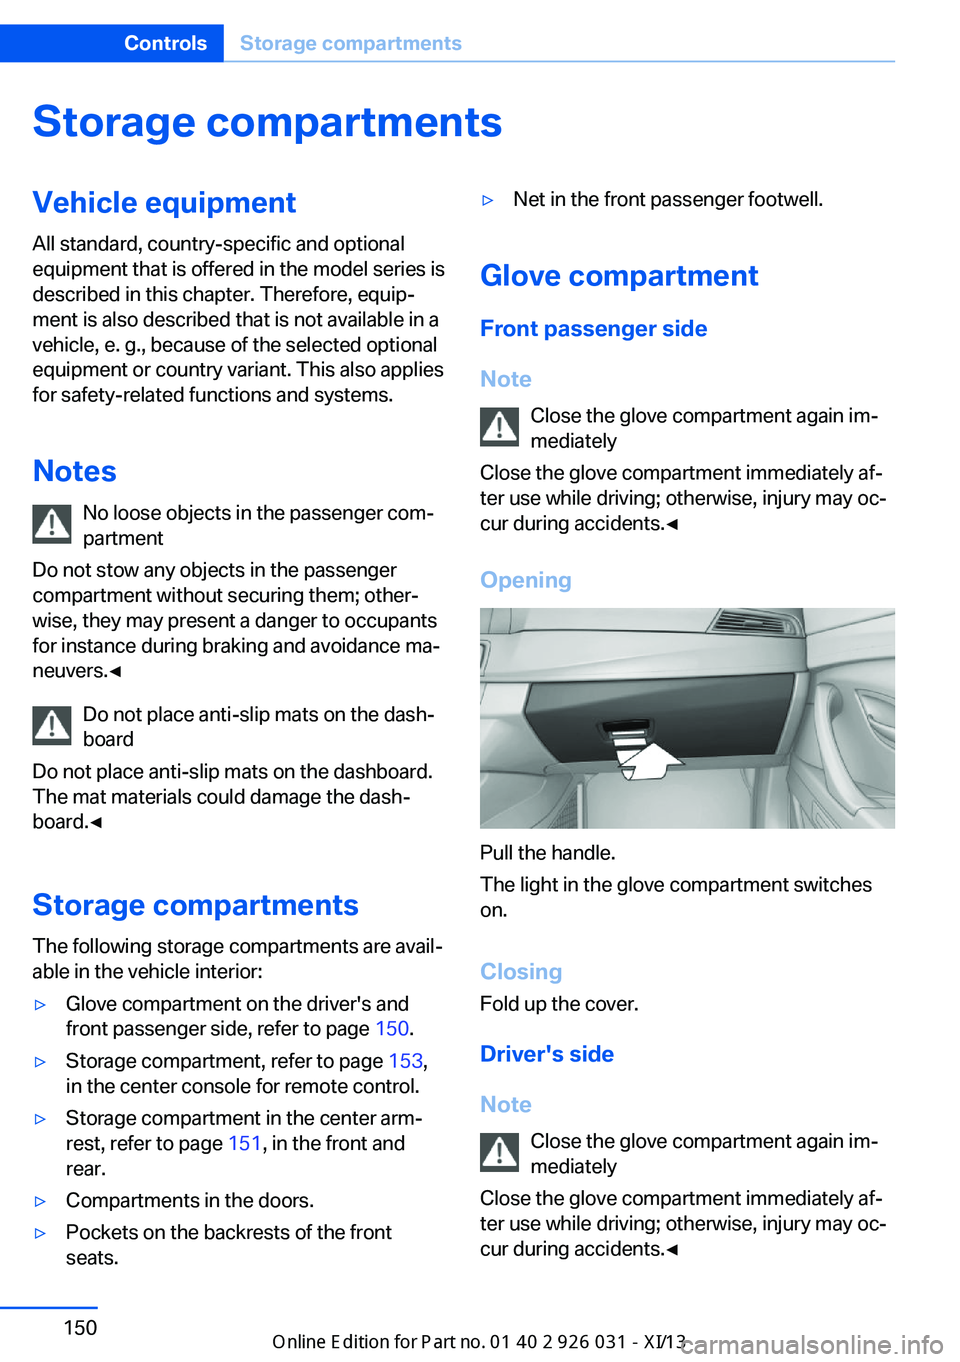
Note Close the glove compartment again im‐
mediately
Close the glove compartment immediately af‐
ter use while driving; otherwise, injury may oc‐
cur during accidents.◀
Opening
Pull the handle.
The light in the glove compartment switches
on.
ClosingFold up the cover.
Driver's side
Note Close the glove compartment again im‐
mediately
Close the glove compartment immediately af‐ ter use while driving; otherwise, injury may oc‐ cur during accidents.◀
Seite 150ControlsStorage compartments150
Online Edition for Part no. 01 40 2 909 953 - VI/13
Page 155 of 230
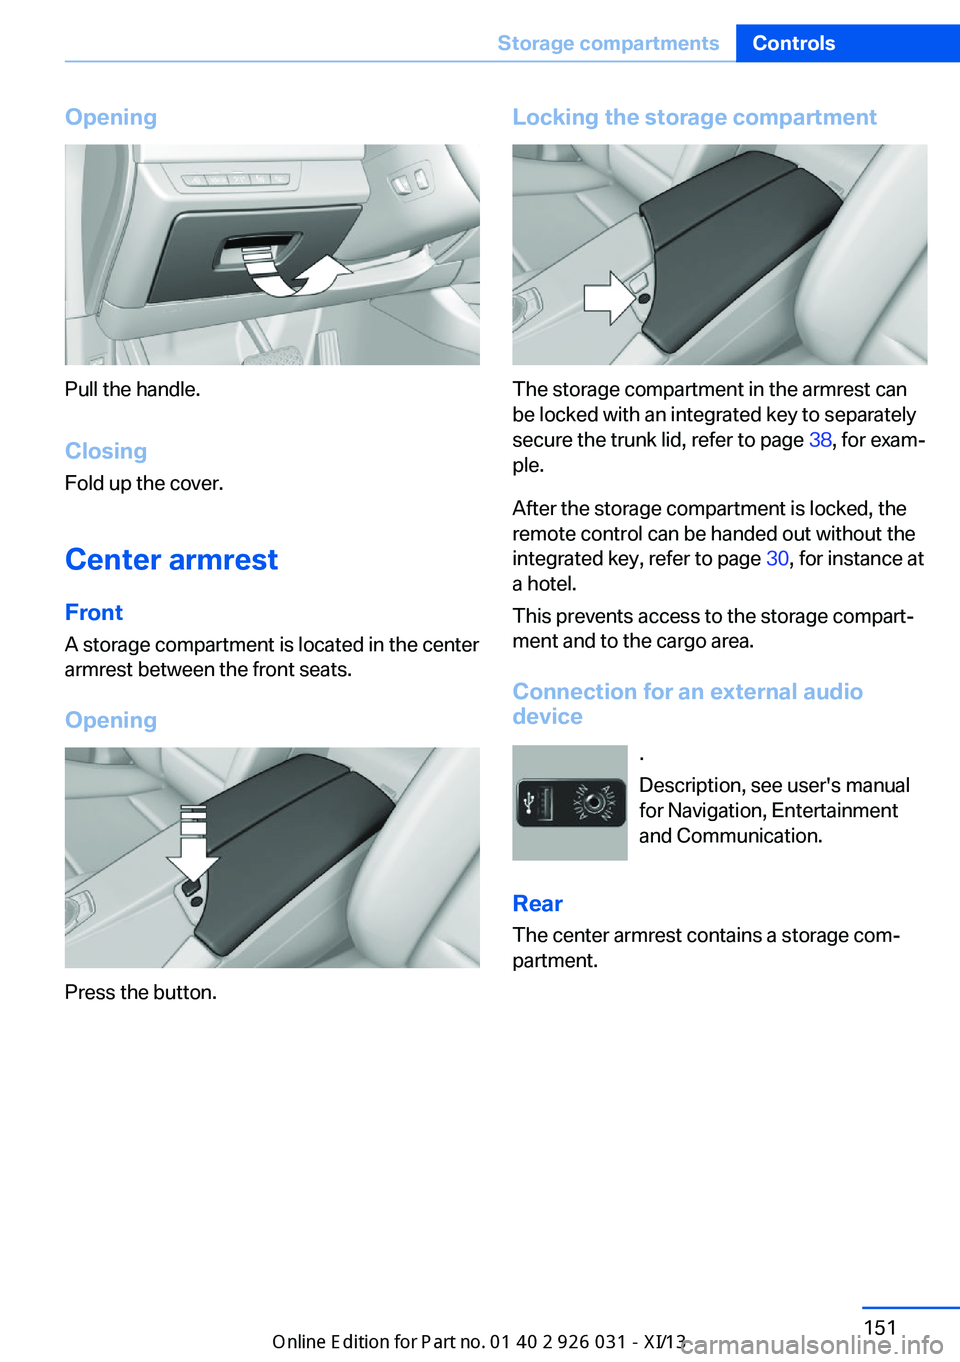
Opening
Pull the handle.ClosingFold up the cover.
Center armrest
Front A storage compartment is located in the center
armrest between the front seats.
Opening
Press the button.
Locking the storage compartment
The storage compartment in the armrest can
be locked with an integrated key to separately
secure the trunk lid, refer to page 38, for exam‐
ple.
After the storage compartment is locked, the
remote control can be handed out without the
integrated key, refer to page 30, for instance at
a hotel.
This prevents access to the storage compart‐
ment and to the cargo area.
Connection for an external audio
device
.
Description, see user's manual
for Navigation, Entertainment
and Communication.
Rear The center armrest contains a storage com‐
partment.
Seite 151Storage compartmentsControls151
Online Edition for Part no. 01 40 2 909 953 - VI/13
Page 156 of 230
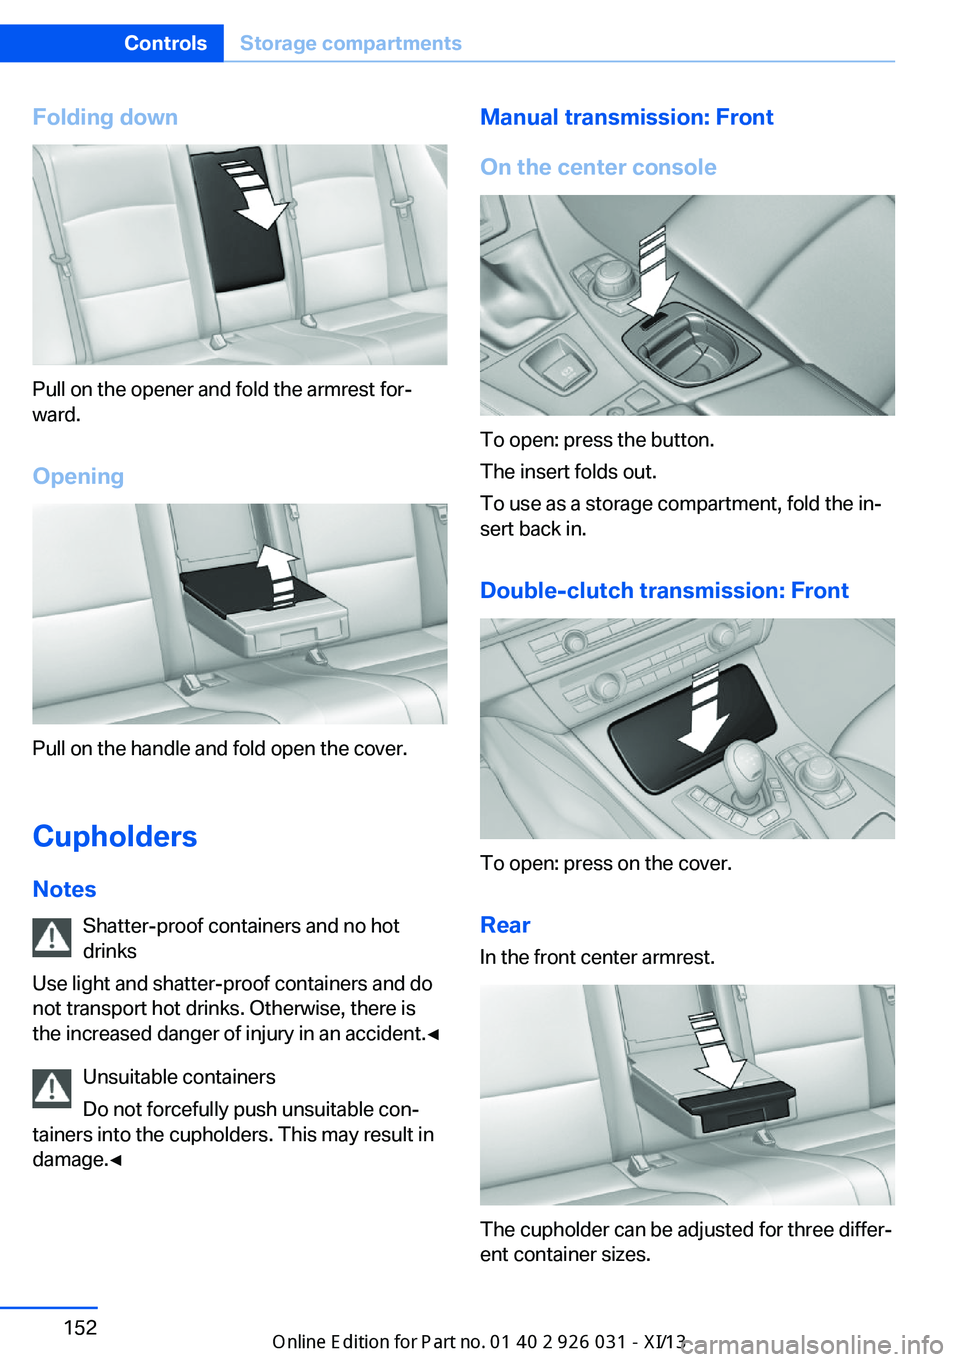
Folding down
Pull on the opener and fold the armrest for‐
ward.
Opening
Pull on the handle and fold open the cover.
Cupholders Notes Shatter-proof containers and no hot
drinks
Use light and shatter-proof containers and do
not transport hot drinks. Otherwise, there is
the increased danger of injury in an accident.◀
Unsuitable containers
Do not forcefully push unsuitable con‐
tainers into the cupholders. This may result in
damage.◀
Manual transmission: Front
On the center console
To open: press the button.
The insert folds out.
To use as a storage compartment, fold the in‐
sert back in.
Double-clutch transmission: Front
To open: press on the cover.Rear In the front center armrest.
The cupholder can be adjusted for three differ‐
ent container sizes.
Seite 152ControlsStorage compartments152
Online Edition for Part no. 01 40 2 909 953 - VI/13
Page 157 of 230
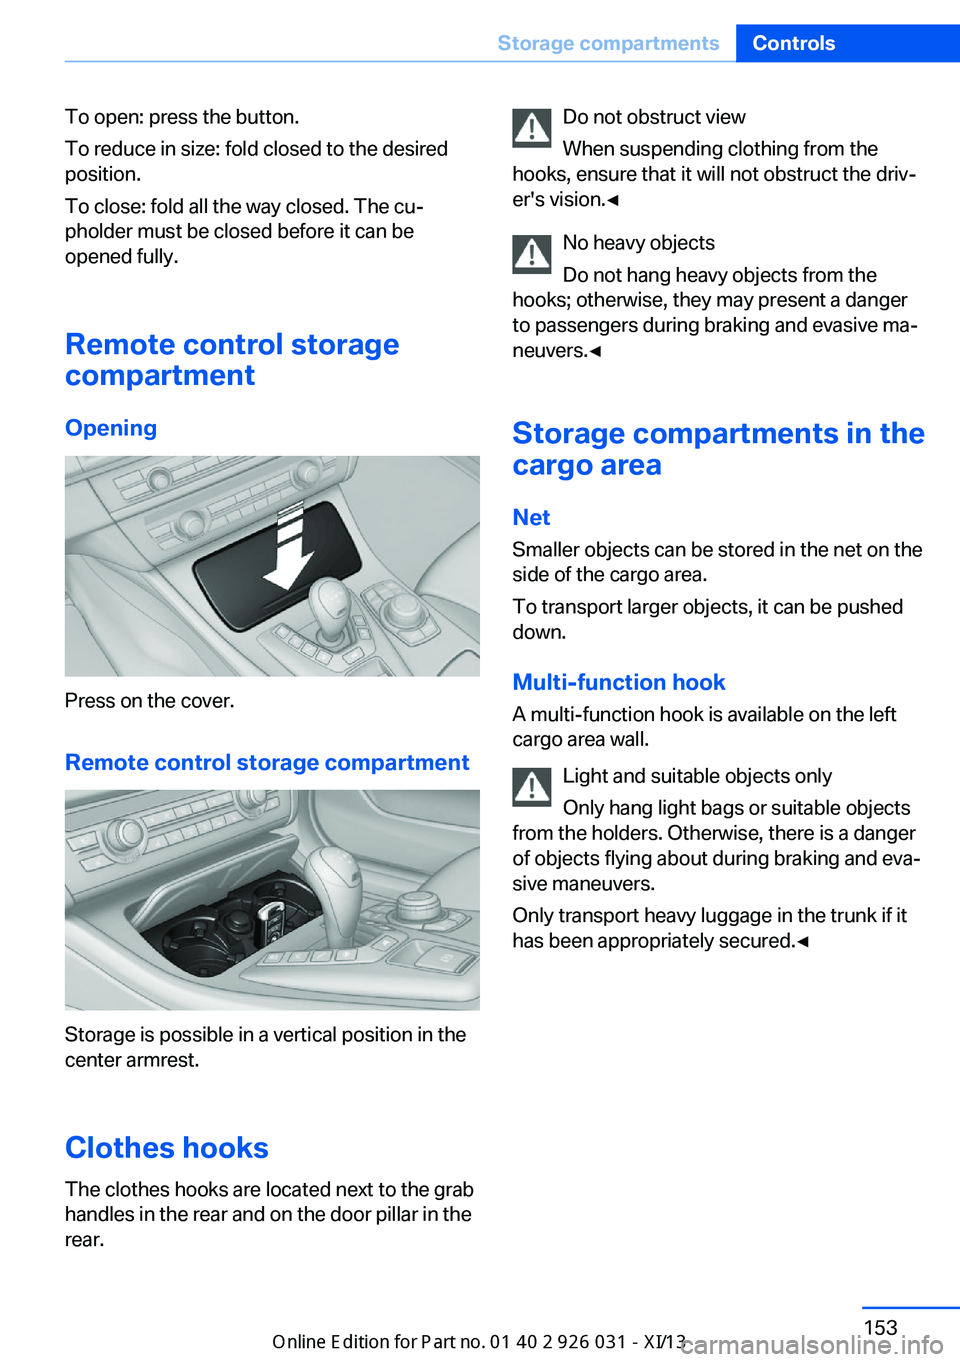
To open: press the button.
To reduce in size: fold closed to the desired
position.
To close: fold all the way closed. The cu‐
pholder must be closed before it can be
opened fully.
Remote control storage
compartment
Opening
Press on the cover.
Remote control storage compartment
Storage is possible in a vertical position in the
center armrest.
Clothes hooks
The clothes hooks are located next to the grab
handles in the rear and on the door pillar in the
rear.
Do not obstruct view
When suspending clothing from the
hooks, ensure that it will not obstruct the driv‐
er's vision.◀
No heavy objects
Do not hang heavy objects from the
hooks; otherwise, they may present a danger
to passengers during braking and evasive ma‐
neuvers.◀
Storage compartments in the
cargo area
Net
Smaller objects can be stored in the net on the
side of the cargo area.
To transport larger objects, it can be pushed
down.
Multi-function hook
A multi-function hook is available on the left
cargo area wall.
Light and suitable objects only
Only hang light bags or suitable objects
from the holders. Otherwise, there is a danger
of objects flying about during braking and eva‐
sive maneuvers.
Only transport heavy luggage in the trunk if it
has been appropriately secured.◀Seite 153Storage compartmentsControls153
Online Edition for Part no. 01 40 2 909 953 - VI/13
Page 158 of 230
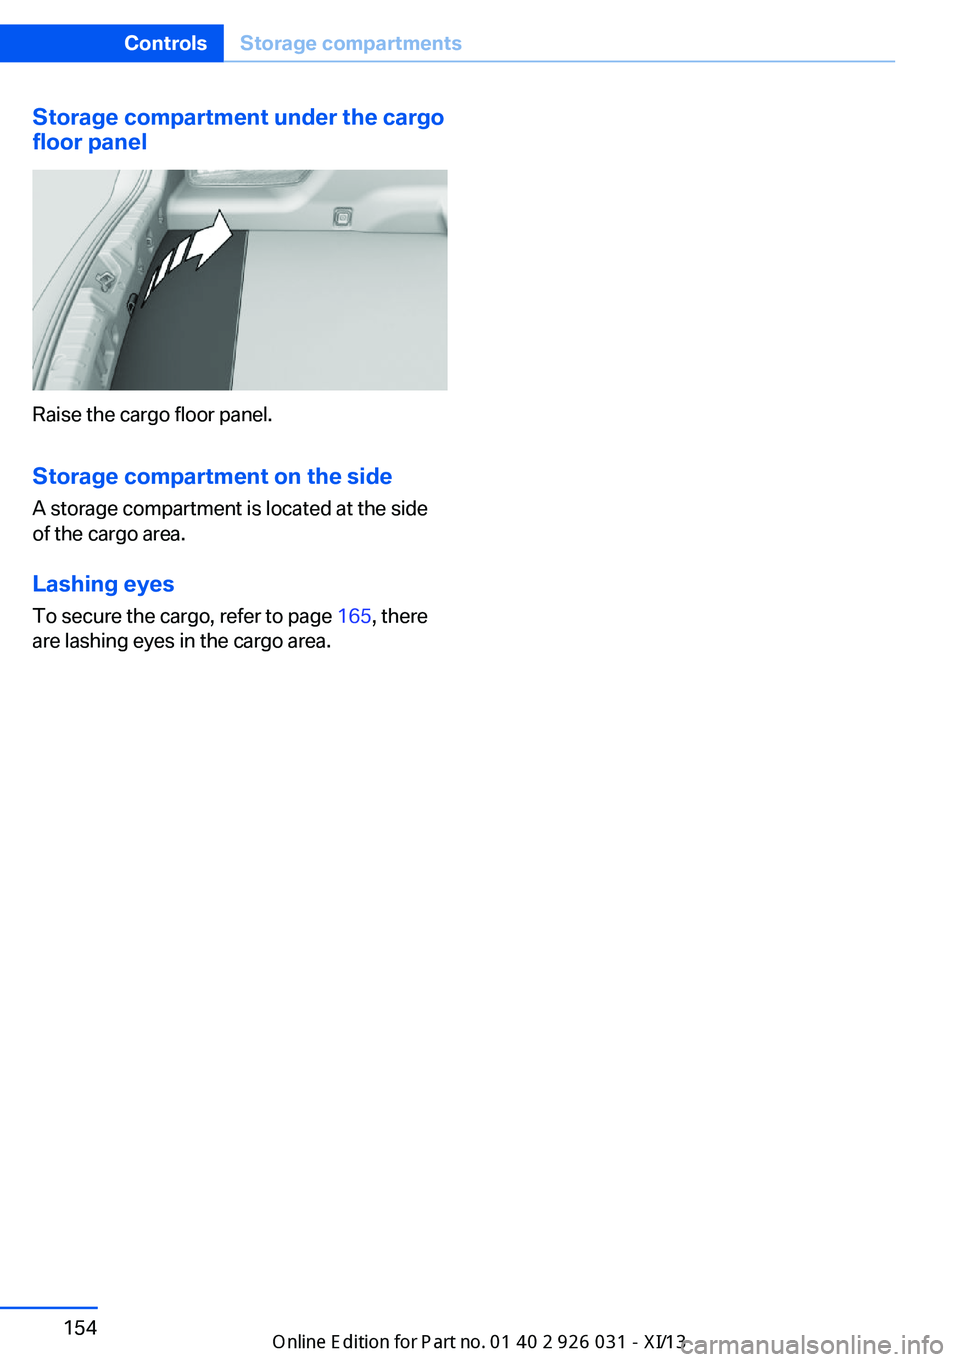
Storage compartment under the cargofloor panel
Raise the cargo floor panel.
Storage compartment on the side
A storage compartment is located at the side
of the cargo area.
Lashing eyesTo secure the cargo, refer to page 165, there
are lashing eyes in the cargo area.
Seite 154ControlsStorage compartments154
Online Edition for Part no. 01 40 2 909 953 - VI/13
Page 159 of 230

Seite 155Storage compartmentsControls155
Online Edition for Part no. 01 40 2 909 953 - VI/13
Page 160 of 230

Online Edition for Part no. 01 40 2 909 953 - VI/13