check engine BMW M6 CONVERTIBLE 2002 User Guide
[x] Cancel search | Manufacturer: BMW, Model Year: 2002, Model line: M6 CONVERTIBLE, Model: BMW M6 CONVERTIBLE 2002Pages: 186, PDF Size: 2.77 MB
Page 86 of 186
86n
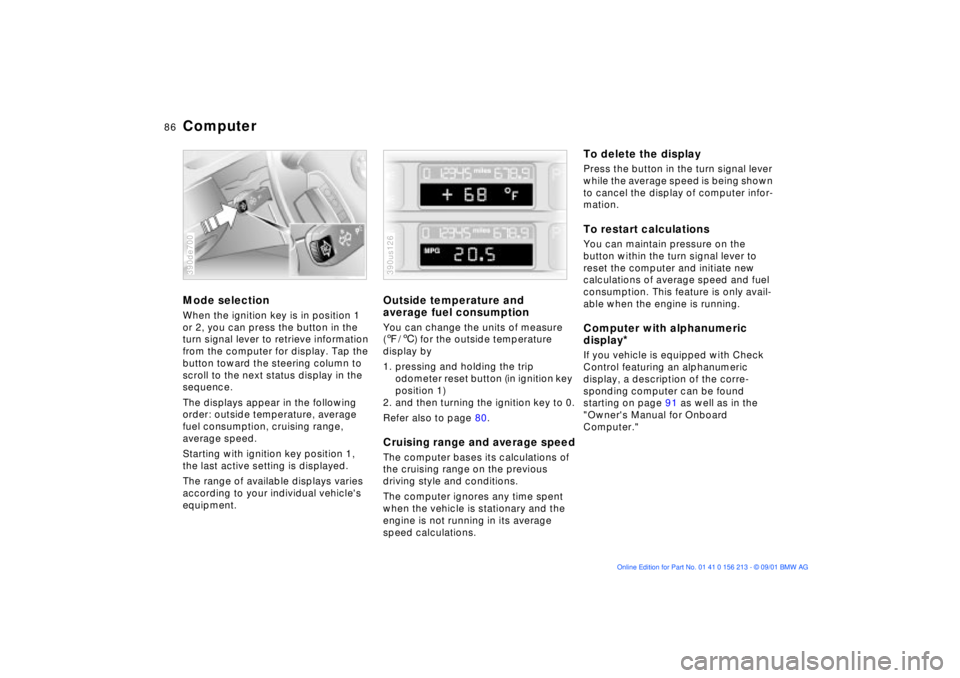
ComputerMode selectionWhen the ignition key is in position 1
or 2, you can press the button in the
turn signal lever to retrieve information
from the computer for display. Tap the
button toward the steering column to
scroll to the next status display in the
sequence.
The displays appear in the following
order: outside temperature, average
fuel consumption, cruising range,
average speed.
Starting with ignition key position 1,
the last active setting is displayed.
The range of available displays varies
according to your individual vehicle's
equipment.390de700
Outside temperature and
average fuel consumptionYou can change the units of measure
(7/6) for the outside temperature
display by
1. pressing and holding the trip
odometer reset button (in ignition key
position 1)
2. and then turning the ignition key to 0.
Refer also to page 80.Cruising range and average speedThe computer bases its calculations of
the cruising range on the previous
driving style and conditions.
The computer ignores any time spent
when the vehicle is stationary and the
engine is not running in its average
speed calculations.390us126
To delete the displayPress the button in the turn signal lever
while the average speed is being shown
to cancel the display of computer infor-
mation.To restart calculationsYou can maintain pressure on the
button within the turn signal lever to
reset the computer and initiate new
calculations of average speed and fuel
consumption. This feature is only avail-
able when the engine is running.Computer with alphanumeric
display
*
If you vehicle is equipped with Check
Control featuring an alphanumeric
display, a description of the corre-
sponding computer can be found
starting on page 91 as well as in the
"Owner's Manual for Onboard
Computer."
Page 99 of 186
99n
OverviewControlsMaintenanceRepairsDataIndex
Level control system
*
Tire Pressure Monitor (RDC)
*
The warning lamp for the level
control system comes on, or the
message "SELFLEVEL
SUSP.INACT" appears in the Check
Control: there is a malfunction in the
self-level control system.
Stop and inspect the vehicle. If it is
riding significantly lower in the rear than
in the front, or if it is sitting at an incline
(left rear compared to right rear),
consult the nearest BMW center. Drive
with appropriate caution in the mean-
time. The vehicle has reduced ground
clearance or driving comfort is notice-
ably reduced.
Even if the attitude of the vehicle is
normal, you should consult the nearest
BMW center if the warning lamp indi-
cates a system fault.
The conceptRDC monitors the tire pressures at all
four wheels, even when the vehicle is
moving. The system provides an alert
whenever the inflation pressure drops
significantly below the specified pres-
sure in one or more tires.
In order for the system to "learn" the
correct tire inflation pressure, check the
inflation pressure in all tires. Refer to
the table of "Tire inflation pressures"
beginning on page 27 and make any
necessary corrections. Then activate
the system.
This indicator lamp in the instru-
ment cluster or the Check
Control will inform you if the tire
pressure is not correct.
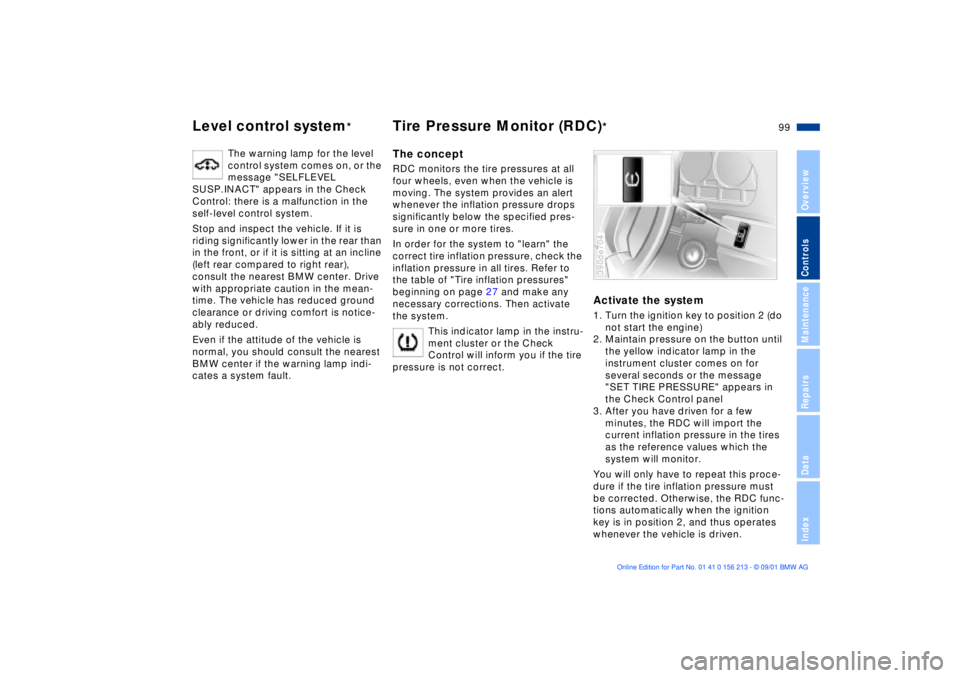
Activate the system1. Turn the ignition key to position 2 (do
not start the engine)
2. Maintain pressure on the button until
the yellow indicator lamp in the
instrument cluster comes on for
several seconds or the message
"SET TIRE PRESSURE" appears in
the Check Control panel
3. After you have driven for a few
minutes, the RDC will import the
current inflation pressure in the tires
as the reference values which the
system will monitor.
You will only have to repeat this proce-
dure if the tire inflation pressure must
be corrected. Otherwise, the RDC func-
tions automatically when the ignition
key is in position 2, and thus operates
whenever the vehicle is driven.390de704
Page 140 of 186
140n
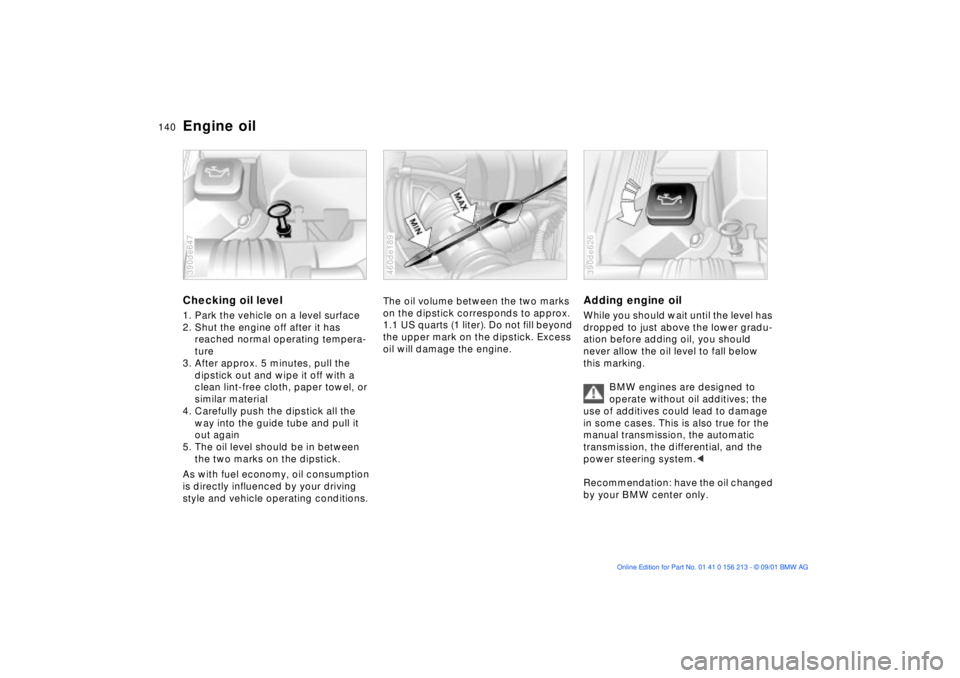
Engine oilChecking oil level1. Park the vehicle on a level surface
2. Shut the engine off after it has
reached normal operating tempera-
ture
3. After approx. 5 minutes, pull the
dipstick out and wipe it off with a
clean lint-free cloth, paper towel, or
similar material
4. Carefully push the dipstick all the
way into the guide tube and pull it
out again
5. The oil level should be in between
the two marks on the dipstick.
As with fuel economy, oil consumption
is directly influenced by your driving
style and vehicle operating conditions.390de647
The oil volume between the two marks
on the dipstick corresponds to approx.
1.1 US quarts (1 liter). Do not fill beyond
the upper mark on the dipstick. Excess
oil will damage the engine.460de189
Adding engine oilWhile you should wait until the level has
dropped to just above the lower gradu-
ation before adding oil, you should
never allow the oil level to fall below
this marking.
BMW engines are designed to
operate without oil additives; the
use of additives could lead to damage
in some cases. This is also true for the
manual transmission, the automatic
transmission, the differential, and the
power steering system.<
Recommendation: have the oil changed
by your BMW center only.390de626
Page 142 of 186

142n
Coolant
Do not add coolant to the cooling
system when the engine is hot. If
you attempt to do so, escaping coolant
can cause burns.
To avoid the possibility of damage later
on, never use anything other than
factory-approved, nitrite and amino-
free extended-duty antifreeze with
corrosion inhibitor. Your BMW center is
familiar with the factory specifications.
Antifreeze and anti-corrosion agents
are hazardous to health. You should
always store it in its original container
and in a location which is out of reach
of children.
Extended-duty antifreeze with corro-
sion inhibitor contains the flammable
substance ethyleneÐglycol. For this
reason, do not spill antifreeze with
corrosion inhibitor on hot engine parts.
It could catch fire and cause burns.<
Checking coolant level and
adding coolantCorrect coolant level when the engine
is cold (approx. 687/206):
Unscrew the cap from the expansion
tank.
The coolant level is correct when the
upper end of the red float is at least
even with the upper edge of the filler
neck (refer to the arrow in the illustra-
tion), but no more than 0.8 in (2 cm)
above it Ð that is, up to the second mark
on the float (refer also to the schematic
diagram next to the filler neck).380de081
1. Start by turning the cap counter-
clockwise. Pause to allow any accu-
mulated pressure to escape, then
open
2. If the coolant is low, slowly add
coolant until the correct level is
reached Ñ do not overfill.
Comply with the applicable envi-
ronmental laws regulating the
disposal of extended-duty antifreeze
with corrosion inhibitor.<
Page 143 of 186

143n
OverviewControlsMaintenanceRepairsDataIndex
Brake fluid
The warning lamp for the brake
system's hydraulic circuits
comes on/the message
"CHECK BRAKE FLUID"
appears in the Check Control
display panel: Brake fluid level
too low.
To add brake fluidThe brake fluid reservoir is located
under the microfilter housing on the
driver's side of the vehicle. For adding
brake fluid or for determining and
correcting the cause of brake fluid loss,
consult your BMW center. Your BMW
center is familiar with the specifications
for factory-approved brake fluids
(DOT 4).
Brake fluid loss may result in extended
brake pedal travel. Should this occur,
refer to the notes on page 132.
Brake fluid is hygroscopic, that is,
it absorbs moisture from the air
over time.
In order to ensure the safety and reli-
ability of the brake system, have
the brake fluid changed every two years
by a BMW center. Refer also to the
Service and Warranty Information
Booklet (US models) or to the Warranty
and Service Guide Booklet (Canadian
models).
Brake fluid is toxic and damages the
vehicle's paint. You should always store
it in its original container and in a loca-
tion which is out of reach of children.
Do not spill the fluid and do not fill the
brake fluid reservoir beyond the MAX
mark. The brake fluid could ignite upon
contact with hot engine parts and
cause serious burns.<
Comply with the applicable envi-
ronmental laws regulating the
disposal of brake fluid.<
Page 144 of 186

144n
The BMW Maintenance System has
been designed as a reliable means of
providing maximum driving and oper-
ating safety Ð and as cost-effectively as
possible for you.
Please keep in mind that regular main-
tenance is not only necessary for the
safety of your vehicle, but also plays a
significant role in maintaining its resale
value.
390us702
Service Interval DisplayWhile conventional systems rely on
distance traveled alone to determine
when service is due, the BMW Mainte-
nance System has for years considered
the actual conditions under which the
vehicle operates, because mileage can
be accumulated in very different ways.
From a maintenance standpoint,
62,000 miles (100,000 km) accumulated
in short-distance urban driving are not
the equivalent of the same distance
covered at moderate speeds in long-
distance highway travel.
The BMW Maintenance System
includes the Engine Oil Service and
Inspections I and II.
Determining the maintenance intervals
according to the actual loads on the
vehicle covers every kind of operating
situation. However, even those who
drive only short distances Ð significantly
less than 6,000 miles (10,000 km) annu-
ally Ð should have the engine oil
changed at least every 2 years since oil
deteriorates over time, regardless of
use.
Service and Warranty Information
Booklet (US models) or Warranty
and Service Guide Booklet
(Canadian models)For additional information on mainte-
nance intervals and procedures, please
refer to the Service and Warranty Infor-
mation Booklet (US models) or the
Warranty and Service Guide Booklet
(Canadian models).
As a precaution against corrosion, it is
advisable to have the body checked for
damage from rocks or gravel at the
same time, depending upon operating
conditions.
Have your BMW center do the
maintenance and repair.
Be sure that all maintenance work is
confirmed in the Service and Warranty
Information Booklet (US models) or in
the Warranty and Service Guide
Booklet (Canadian models).
These entries will constitute your proof
that the vehicle has received regular
maintenance. They are also required in
the event of a warranty claim.<
The BMW Maintenance System
Page 146 of 186
146n
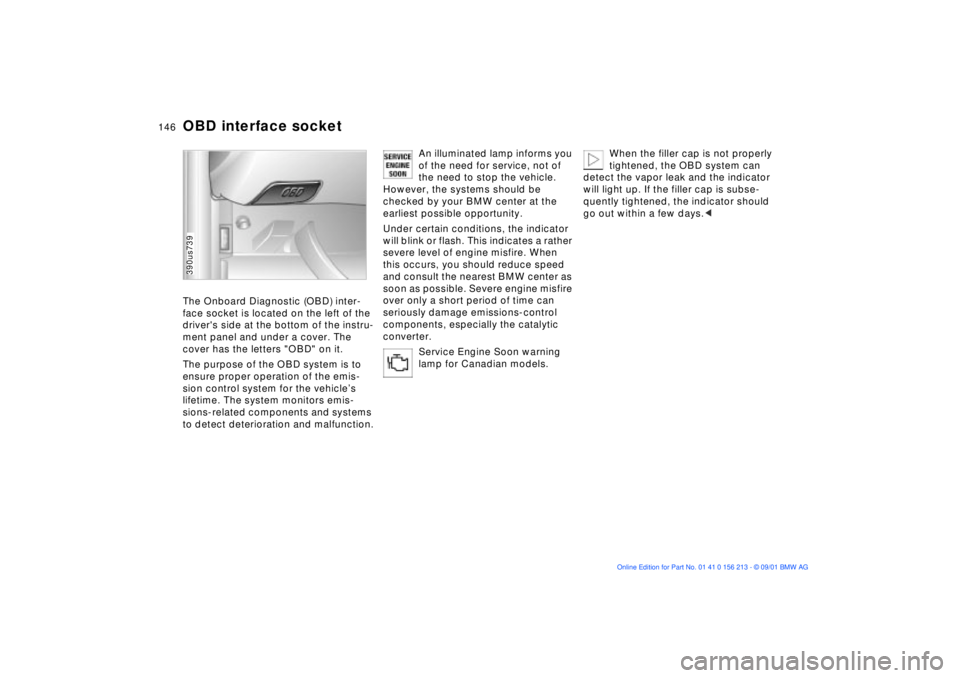
OBD interface socketThe Onboard Diagnostic (OBD) inter-
face socket is located on the left of the
driver's side at the bottom of the instru-
ment panel and under a cover. The
cover has the letters "OBD" on it.
The purpose of the OBD system is to
ensure proper operation of the emis-
sion control system for the vehicleÕs
lifetime. The system monitors emis-
sions-related components and systems
to detect deterioration and malfunction.390us739
An illuminated lamp informs you
of the need for service, not of
the need to stop the vehicle.
However, the systems should be
checked by your BMW center at the
earliest possible opportunity.
Under certain conditions, the indicator
will blink or flash. This indicates a rather
severe level of engine misfire. When
this occurs, you should reduce speed
and consult the nearest BMW center as
soon as possible. Severe engine misfire
over only a short period of time can
seriously damage emissions-control
components, especially the catalytic
converter.
Service Engine Soon warning
lamp for Canadian models.
When the filler cap is not properly
tightened, the OBD system can
detect the vapor leak and the indicator
will light up. If the filler cap is subse-
quently tightened, the indicator should
go out within a few days.<
Page 151 of 186
151n
OverviewControlsMaintenanceRepairsDataIndex
Lamps and bulbsThe lamps and bulbs are essential
factors contributing to the safety of your
vehicle. For this reason, you should
follow the instructions below carefully
when replacing a bulb. If you are not
familiar with any of the procedures,
consult your BMW center.
Do not touch the glass portion of a
new bulb with your bare hands
since even small amounts of impurities
burn into the surface and reduce the
service life of the bulb. Use a clean
cloth, paper napkin, or a similar mate-
rial, or hold the bulb by its metallic
base.<
A replacement bulb set is available from
your BMW center.
Whenever working on the elec-
trical system, switch off the elec-
trical accessory you are working on or
disconnect the cable from the negative
terminal of the battery. Failure to do this
could result in short circuits.
To prevent injuries and damage,
comply with any instructions provided
by the bulb manufacturer.<
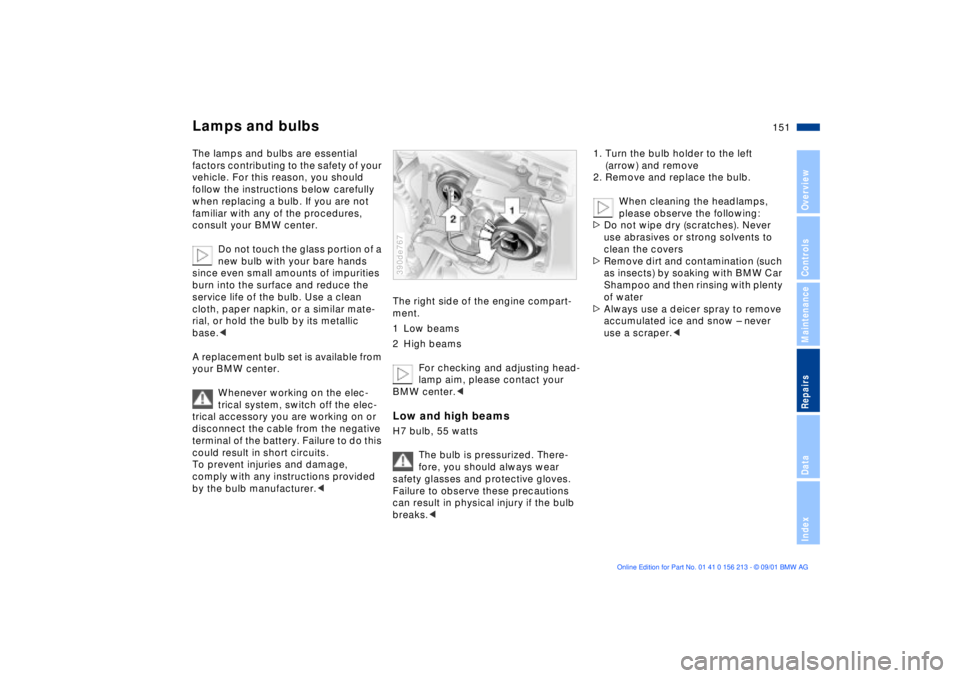
The right side of the engine compart-
ment.
1 Low beams
2 High beams
For checking and adjusting head-
lamp aim, please contact your
BMW center.< Low and high beamsH7 bulb, 55 watts
The bulb is pressurized. There-
fore, you should always wear
safety glasses and protective gloves.
Failure to observe these precautions
can result in physical injury if the bulb
breaks.< 390de767
1. Turn the bulb holder to the left
(arrow) and remove
2. Remove and replace the bulb.
When cleaning the headlamps,
please observe the following:
>Do not wipe dry (scratches). Never
use abrasives or strong solvents to
clean the covers
>Remove dirt and contamination (such
as insects) by soaking with BMW Car
Shampoo and then rinsing with plenty
of water
>Always use a deicer spray to remove
accumulated ice and snow Ð never
use a scraper.<
Page 177 of 186
Everything from A to Z
177n
OverviewControlsMaintenanceRepairsDataIndex
Brake system132
brake fluid level132
brake pads20, 132
disc brakes132
malfunctions132
Break-in procedures130
Bulbs and lamps151t C
California Proposition
65 Warning145
Capacities173
Car care, refer to the "Caring
for your vehicle" manual
Car wash systems, refer to
the "Caring for your
vehicle" manual
Care of paintwork, refer to
the "Caring for your
vehicle" manual
Care of upholstery materials,
refer to the "Caring for your
vehicle" manual
Cargo area
lamps103
opening from the
inside40
Cargo loading126
Cellular phone117 Center (high-mount) brake
lamp155
Central locking
system32, 37
Changing a wheel/
tire157t
Charge indicator lamp19
CHECK button83
Check Control83t
Check engine oil
level140t
Child seat safety62
Child seats61
Child-restraint systems61
Child-safety locks64
Cigarette lighter118
Clean rear window77
Cleaning windshield77
Climate control, refer to
Automatic climate
control107
Clock88
for additional information
refer to the "Owner's
Manual for Onboard
Computer"
Cockpit14
Code, refer to immoblizer
function94
Cold start67
Combination switch76 Comfort seat51
Compartments116
Computer86
for additional information
refer to the "Owner's
Manual for Onboard
Computer"
remote control95
Computer in the MID91
Configuring personal
adjustments, Vehicle and
Key Memory64
Consumption display81
Consumption, fuel86, 93
Convenience operation of
windows and sliding/tilt
sunroof33
Convenience starting
feature67
Coolant142
Coolant temperature
gauge82
Copyright4
Cover, sun blinds112
Cruising range86, 93
Cup holder117
Cup holder, refer to
beverage holder117
Curb monitor55
D
Data link connector for
Onboard Diagnostics146
Date
calling up88
changing88
Daytime driving lamps101
DBC (Dynamic Brake
Control)20
Deactivating95
alarm system tilt
sensor43
interior motion sensor43
Deep water131
Defrost windows106, 109
Defroster mode106, 109
Digital clock in the MID88
Dimensions169
Dipstick, engine oil140t
Displacement168
Display lighting102
Displays16, 17
Disposal
antifreeze with corrosion
inhibitor142t
used batteries160t
used oils141t