BMW M6 CONVERTIBLE 2002 Manual Online
Manufacturer: BMW, Model Year: 2002, Model line: M6 CONVERTIBLE, Model: BMW M6 CONVERTIBLE 2002Pages: 186, PDF Size: 2.77 MB
Page 81 of 186

81n
OverviewControlsMaintenanceRepairsDataIndex
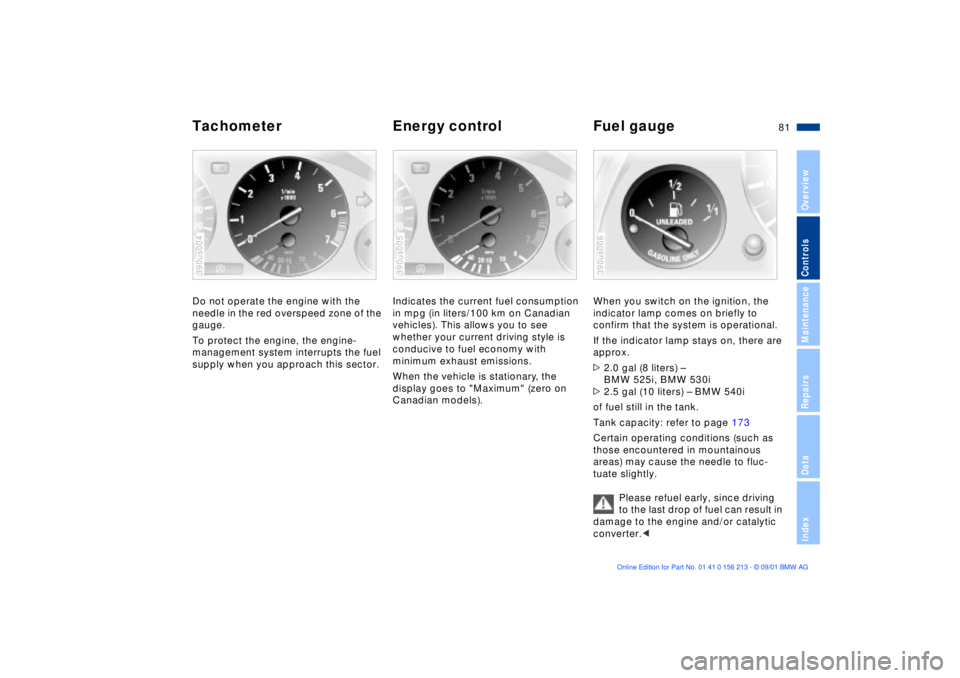
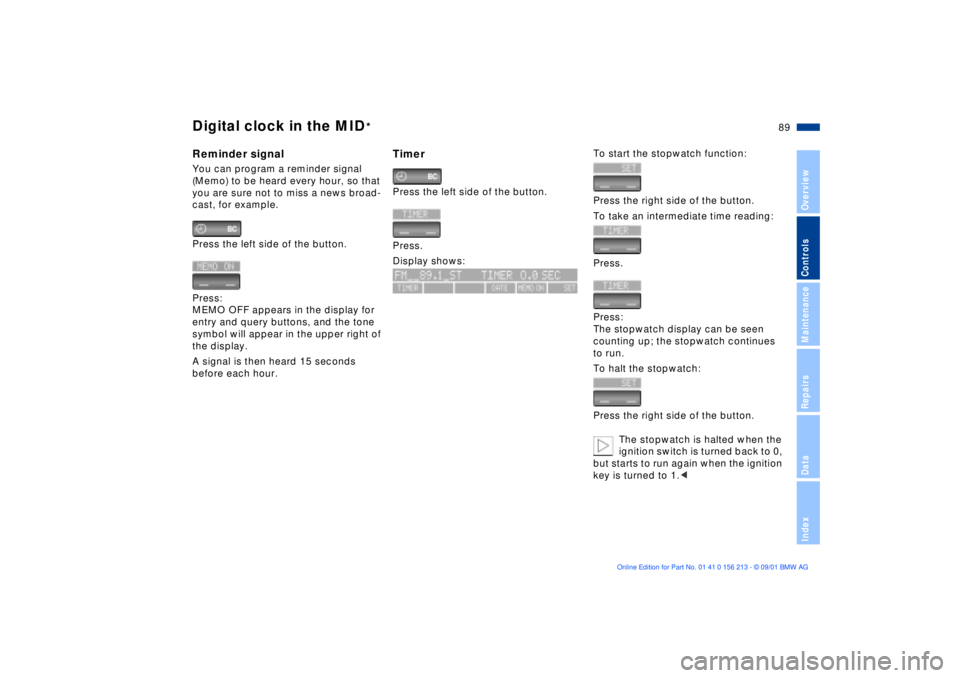
Tachometer Energy control Fuel gaugeDo not operate the engine with the
needle in the red overspeed zone of the
gauge.
To protect the engine, the engine-
management system interrupts the fuel
supply when you approach this sector.390us004
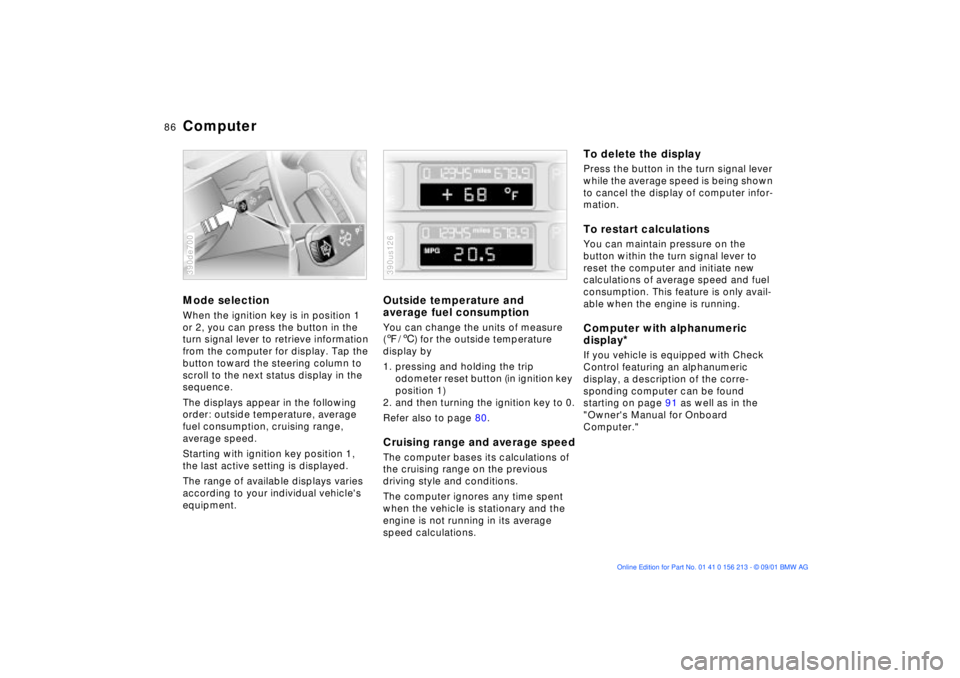
Indicates the current fuel consumption
in mpg (in liters/100 km on Canadian
vehicles). This allows you to see
whether your current driving style is
conducive to fuel economy with
minimum exhaust emissions.
When the vehicle is stationary, the
display goes to "Maximum" (zero on
Canadian models).390us005
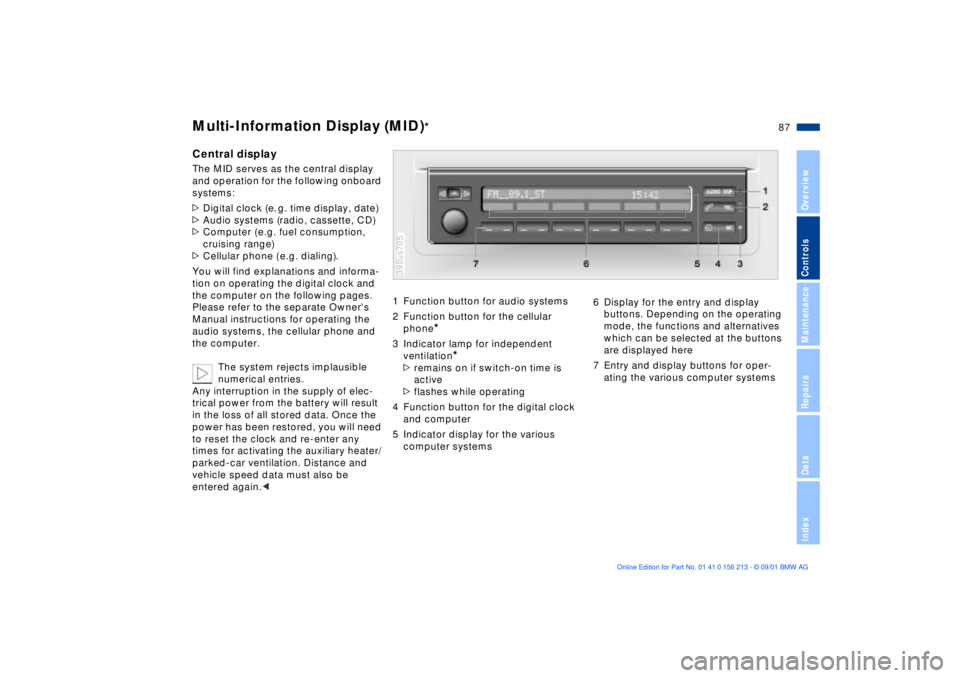
When you switch on the ignition, the
indicator lamp comes on briefly to
confirm that the system is operational.
If the indicator lamp stays on, there are
approx.
>2.0 gal (8 liters) Ð
BMW 525i, BMW 530i
>2.5 gal (10 liters) Ð BMW 540i
of fuel still in the tank.
Tank capacity: refer to page 173
Certain operating conditions (such as
those encountered in mountainous
areas) may cause the needle to fluc-
tuate slightly.
Please refuel early, since driving
to the last drop of fuel can result in
damage to the engine and/or catalytic
converter.< 390us006
Page 82 of 186

82n
Coolant temperature gauge Service Interval DisplayBlueThe engine is still cold. Drive at
moderate engine and vehicle speeds.RedWhen you switch on the ignition, the
warning lamp
* comes on briefly to
confirm that the system is operational.
If the warning lamp lights up during
normal vehicle operation, or the
message "COOLANT TEMPERATURE"
appears in the Check Control
*, the
engine is overheated. Shut off the
engine immediately and allow it to cool
down.
390de007
Between the blue and red zonesNormal operating range. The needle
may rise as far as the edge of the red
sector in normal operation.
Checking coolant level: refer to
page 142.
The range of available displays varies
according to your individual vehicle's
equipment.
Green lampsThe number of illuminated lamps
decreases as the time for your next
maintenance visit approaches.Yellow lampThis field appears together with
OILSERVICE or INSPECTION.
Maintenance is due. Please contact
your BMW center for an appointment.Red lampThe maintenance deadline has been
passed.390us702
Page 83 of 186

83n
OverviewControlsMaintenanceRepairsDataIndex
Check ControlGraphic display
*
The following alerts and status
messages are displayed with icons from
ignition key position 2 and remain in the
display until the defects are corrected:
1 Check low beams
2 Add washer fluid (goes out after
approx. 1 minute)
3 Door open
4 Luggage compartment lid/tailgate
open
5 Check brake and tail lamps.
A defective center brake lamp is indi-
cated by the upper symbol
When you open the door after stopping,
a warning signal sounds without a
visual indicator for:
>"LIGHTS ON" and
>"KEY IN IGNITION LOCK."390de121
Alphanumeric display
*
Text messages are used to alert the
driver to system malfunctions when the
ignition key is turned to position 2. The
alert is accompanied by a gong.
1 Status report symbol
2 Display
3 CHECK button
Messages warning of system malfunc-
tions are assigned one of two priority
levels:390us111
Priority 1
These defects are immediately indi-
cated by a gong and a flashing warning
symbol 1. Simultaneous defects will be
displayed consecutively. These status
messages remain in the display until the
defects are corrected. They cannot be
deleted by pressing the CHECK
button 3.
Page 84 of 186

84n
Check Control>"RELEASE PARKINGBRAKE"
>"COOLANT TEMPERATURE"
The coolant is overheated. Stop the
vehicle immediately and switch off
the engine. Refer to pages 82
and 142
>"STOP! ENGINE OILPRESS"
The oil pressure is too low. Stop the
vehicle immediately and switch off
the engine. Refer to pages 19, 140
>"CHECK BRAKE FLUID"
Indicates that brake fluid is down to
roughly minimum level. Have the
reservoir topped up at the earliest
opportunity, refer to page 143. Have
the source of the brake fluid loss
repaired at your BMW center
>"TIRE DEFECT"
*
Reduce vehicle speed immediately
and stop the vehicle. Avoid hard
brake applications. Do not oversteer.
Refer to page 100
>"SELFLEVEL SUSP.INACT"
Please consult the nearest BMW
center. Refer to page 99
>"SPEED LIMIT"
*
Display if the programmed speed
limit has been exceeded, refer to
page 91Priority 2
These displays appear for 20 seconds
when the ignition key is turned to posi-
tion 2. The warning symbols remain
after the message disappears. You can
display the messages again by pressing
the CHECK button 3:
>"TRUNKLID OPEN"
Message appears only when the
vehicle is initially set in motion
>"DOOR OPEN"
This message appears after a defined
road speed has been exceeded
>"FASTEN SEAT BELTS"
*
In addition to this message, a
warning lamp with the safety belt icon
appears and an acoustic signal
sounds
>"WASHER FLUID LOW"
Too low; top up fluid at the next
opportunity. Refer to page 139
>"CHECK ENGINE OIL LEV"
The engine oil level is at the absolute
minimum. You should respond by
topping up the oil as soon as
possible, refer to page 140. Do not
continue for more than approximately
30 miles (50 km) before adding oil>"CHECK FILLER CAP"
Inspect the cap to make sure that it is
closed properly, refer to page 24. If
the cap is not closed securely it will
trigger the "Service Engine Soon"
lamp
>"OUTSIDE TEMP. +20 7 (Ð5 6)"
This display is only an example. The
current temperature is displayed at
outside temperatures of +37.5 7
(+3 6) and below. Refer also to
page 80
>"SET TIRE PRESSURE"
*
The RDC has imported the current
inflation pressure in the tires as the
target values which the system will
monitor.
Refer to page 99
>"CHECK TIRE PRESSURE"
*
Check and correct the tire inflation
pressure to specifications at the
earliest opportunity (next stop for
fuel).
Refer to page 99
>"TIRECONTROL INACTIVE"
*
A temporary interference of the RDC
or a system fault. Refer to page 100
>"CHECK BRAKE LIGHTS"
A lamp has failed or the electrical
circuit has a fault. Refer to pages 154
and 160 or consult a BMW center
Page 85 of 186

85n
OverviewControlsMaintenanceRepairsDataIndex
Check Control>"CHECK LOWBEAM LIGHTS"
"CHECK SIDE LIGHTS"
"CHECK REAR LIGHTS"
"CHECK FRONT FOGLAMPS"
"CHECK LICPLATE LIGHT"
"CHECK HIGHBEAM LIGHT"
"CHECK BACK UP LIGHTS"
Defective bulb or circuit. Refer to
pages 151 and following, page 160
or consult your BMW center.
>"TRANS. FAILSAFE PROG"
Please consult the nearest BMW
center. Refer to pages 72 and 75
>"CHECK BRAKE LININGS"
Have the brake pads inspected by
your BMW center. Refer to page 132
>"CHECK COOLANT LEVEL"
Coolant too low, top up at the next
opportunity. Refer to page 142
>"ENGINE FAILSAFE PROG"
*
Indicates a malfunction in the elec-
tronic engine-management system,
which then reverts to an emergency
default program allowing continued
operation at reduced power and
lower engine speeds.
Please have the system inspected at
your BMW center.
Displays after completion of tripAll of the malfunctions registered during
the trip appear consecutively when the
ignition key is turned to position 0.
The following displays will appear when
appropriate:
>"LIGHTS ON"
>"KEY IN IGNITION LOCK"
>"CHECK ENGINE OIL LEV"
Add engine oil at the next opportunity
(next stop for fuel). Refer to
page 140.
This display appears when you open
the driver's door after parking the
vehicle. A supplementary gong is also
heard.
Status reports remain available for a
period of approx. three minutes after
the display goes out and the key is
removed from the ignition. Press the
CHECK button 3. If there were multiple
reports, press the CHECK button
repeatedly to view them all in
sequence.
To check the Check ControlPress the CHECK button 3 with the
ignition key in position 2:
CHECK CONTROL OK appears in the
display.
No malfunctions are present in the
monitored systems.ComputerYou can find a description of the
computer on pages 86 and 91 as well
as in the "Owner's Manual for Onboard
Computer."
You can select the language in
which the Check Control displays
and the status reports from the
computer will appear.<
Page 86 of 186

86n
ComputerMode selectionWhen the ignition key is in position 1
or 2, you can press the button in the
turn signal lever to retrieve information
from the computer for display. Tap the
button toward the steering column to
scroll to the next status display in the
sequence.
The displays appear in the following
order: outside temperature, average
fuel consumption, cruising range,
average speed.
Starting with ignition key position 1,
the last active setting is displayed.
The range of available displays varies
according to your individual vehicle's
equipment.390de700
Outside temperature and
average fuel consumptionYou can change the units of measure
(7/6) for the outside temperature
display by
1. pressing and holding the trip
odometer reset button (in ignition key
position 1)
2. and then turning the ignition key to 0.
Refer also to page 80.Cruising range and average speedThe computer bases its calculations of
the cruising range on the previous
driving style and conditions.
The computer ignores any time spent
when the vehicle is stationary and the
engine is not running in its average
speed calculations.390us126
To delete the displayPress the button in the turn signal lever
while the average speed is being shown
to cancel the display of computer infor-
mation.To restart calculationsYou can maintain pressure on the
button within the turn signal lever to
reset the computer and initiate new
calculations of average speed and fuel
consumption. This feature is only avail-
able when the engine is running.Computer with alphanumeric
display
*
If you vehicle is equipped with Check
Control featuring an alphanumeric
display, a description of the corre-
sponding computer can be found
starting on page 91 as well as in the
"Owner's Manual for Onboard
Computer."
Page 87 of 186

87n
OverviewControlsMaintenanceRepairsDataIndex
Multi-Information Display (MID)
*
Central displayThe MID serves as the central display
and operation for the following onboard
systems:
>Digital clock (e. g. time display, date)
>Audio systems (radio, cassette, CD)
>Computer ( e.g. fuel consumption,
cruising range)
>Cellular phone ( e.g. dialing).
You will find explanations and informa-
tion on operating the digital clock and
the computer on the following pages.
Please refer to the separate Owner's
Manual instructions for operating the
audio systems, the cellular phone and
the computer.
The system rejects implausible
numerical entries.
Any interruption in the supply of elec-
trical power from the battery will result
in the loss of all stored data. Once the
power has been restored, you will need
to reset the clock and re-enter any
times for activating the auxiliary heater/
parked-car ventilation. Distance and
vehicle speed data must also be
entered again.<
1 Function button for audio systems
2 Function button for the cellular
phone
*
3 Indicator lamp for independent
ventilation
*
>remains on if switch-on time is
active
>flashes while operating
4 Function button for the digital clock
and computer
5 Indicator display for the various
computer systems390us705
6 Display for the entry and display
buttons. Depending on the operating
mode, the functions and alternatives
which can be selected at the buttons
are displayed here
7 Entry and display buttons for oper-
ating the various computer systems
Page 88 of 186

88n
Multi-Information Display (MID)
*
Only make entries when the
vehicle is standing still Ð to avoid
endangering yourself or other road
users.<
To call up time or datePress the left side of the button.
Display shows:
You can have the time displayed in
12 or 24 hours.
To change the display:
Press the left side of the button.
If the 12-hour time display is in use, AM
or PM appear after the time.
To change the time displayPress the left side of the button.
Press the right side of the button:
The dots flash in the display.
To alter the setting:
Press on the left or right, or hold the
button down.
To store the entry:
Press the right side of the button.
To change the datePress the left side of the button.
Press.
Press the right side of the button:
The dots and the DATE display flash.
To alter the setting:
Press on the left or right, or hold the
button down.
To store the entry:
Press the right side of the button.
The clock takes leap years into account
and therefore does not have to be reset
manually.
Page 89 of 186

89n
OverviewControlsMaintenanceRepairsDataIndex
Digital clock in the MID
*
Reminder signalYou can program a reminder signal
(Memo) to be heard every hour, so that
you are sure not to miss a news broad-
cast, for example.
Press the left side of the button.
Press:
MEMO OFF appears in the display for
entry and query buttons, and the tone
symbol will appear in the upper right of
the display.
A signal is then heard 15 seconds
before each hour.
TimerPress the left side of the button.
Press.
Display shows:
To start the stopwatch function:
Press the right side of the button.
To take an intermediate time reading:
Press.
Press:
The stopwatch display can be seen
counting up; the stopwatch continues
to run.
To halt the stopwatch:
Press the right side of the button.
The stopwatch is halted when the
ignition switch is turned back to 0,
but starts to run again when the ignition
key is turned to 1.<
Page 90 of 186

90n
Digital clock in the MID
*
Enter the switch-on times for the
parked-car ventilation
*
You can enter two different activation
times.
The ventilation will shut off automati-
cally after 30 minutes.
To use the parked-car ventilation
system, please refer to the infor-
mation provided starting on page 112.<
Press the left side of the button.
Press on the left or right.
Display shows:
Press the right side of the button:
Display flashes, e. g. TIMER 1.
To enter the time:
Press on the left or right, or hold the
button down.
To confirm the entry:
Press the right side of the button.
The activated time is marked with an
asterisk.
The activation times remain stored until
new entries are made.
You can change switch-on times that
have already been memorized by
making a new time entry as described
above.
When the switch-on time is active, the
LED comes on in the MID. During actual
operation of the ventilation, the LED
flashes. The LED goes out when the
system is switched off.
To activate/deactivate the time:
Press twice.Directly switching the parked-car
ventilation
* on and off
The parked-car ventilation func-
tion is only available in ignition key
position 1.<
Press the left side of the button.
Press.
Or
Press.