headlamp BMW M6 CONVERTIBLE 2002 Owners Manual
[x] Cancel search | Manufacturer: BMW, Model Year: 2002, Model line: M6 CONVERTIBLE, Model: BMW M6 CONVERTIBLE 2002Pages: 186, PDF Size: 2.77 MB
Page 4 of 186
Contents
© 2001 Bayerische Motoren Werke
Aktiengesellschaft
Munich, Germany
Reprinting, including excerpts, only with the
written consent of BMW AG, Munich.
Order No. 01 41 0 156 213
US English VIII/2001
Printed in Germany
Printed on environmentally friendly paper
(bleached without chlorine, suitable for recycling).
Overview
Controls and features
Cockpit14
Instrument cluster15
Indicator and warning lamps19
Steering wheel with multifunction
buttons22
Warning triangle23
First-aid kit23
Refueling24
Fuel specifications25
Tire inflation pressure26
Locks and security systems:
Keys32
Central locking system32
Opening and closing Ð via the
door lock33
Opening and closing Ð via the
remote control34
Opening and closing Ð from the
inside37
Luggage compartment lid/
Tailgate38
Rear window40
Luggage compartment42
Alarm system42
Electric power windows44
Sliding/tilt sunroof46
Adjustments:
Correct sitting posture48
Seats48
Manually-adjusted seat49
Electric power seats50
Head restraints52
BMW actice seat52
Safety belts53
Seat, mirror and steering wheel
memory54
Seat heating55
Adjusting steering wheel56
Heated steering wheel56
Mirrors57
Passenger safety systems:
Airbags58
Transporting children safely61
Vehicle Memory, Key
Memory64
Driving:
Steering/Ignition lock66
Starting the engine66
Switching off the engine68
Parking brake68
Manual transmission69
Automatic transmission70
Automatic transmission with
Steptronic73
Indicator/Headlamp flasher76
Washer/Wiper system/Rain
sensor76
Cruise control78
Everything under control:
Odometer, outside temperature
display80
Tachometer81
Energy control81
Fuel gauge81
Coolant temperature gauge82
Service Interval Display82
Check Control83
Computer86
Multi-Information Display
(MID)87
Digital clock in the MID89
Computer in the MID91
Contents
Page 14 of 186
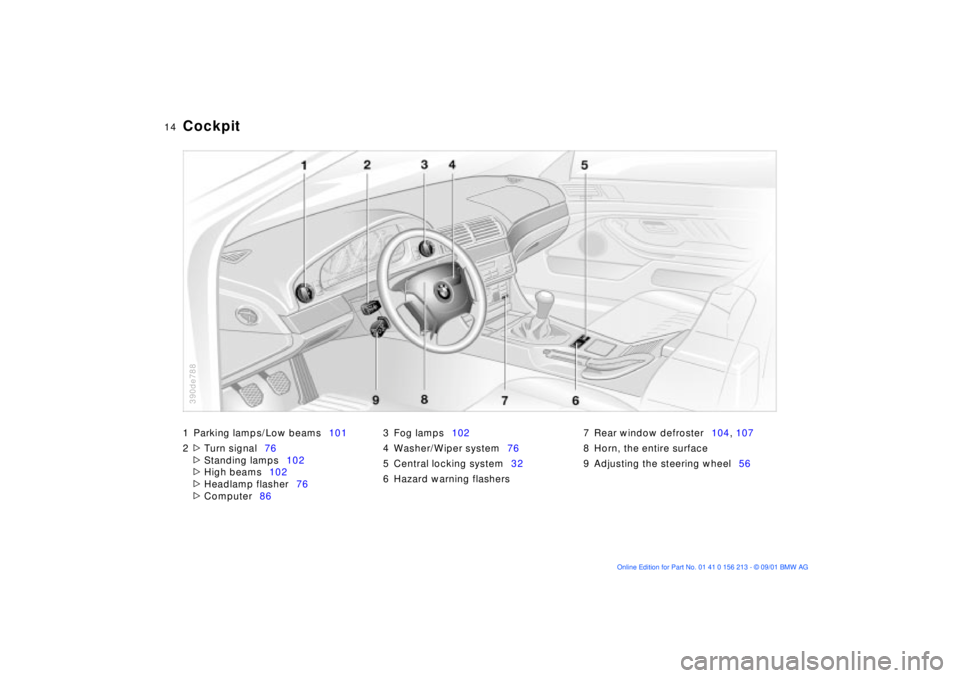
14n
1 Parking lamps/Low beams101
2
>
Turn signal76
>
Standing lamps102
>
High beams102
>
Headlamp flasher76
>
Computer863 Fog lamps102
4 Washer/Wiper system76
5 Central locking system32
6 Hazard warning flashers7 Rear window defroster104, 107
8 Horn, the entire surface
9 Adjusting the steering wheel56
Cockpit
390de788
Page 21 of 186
21n
OverviewControlsMaintenanceRepairsDataIndex
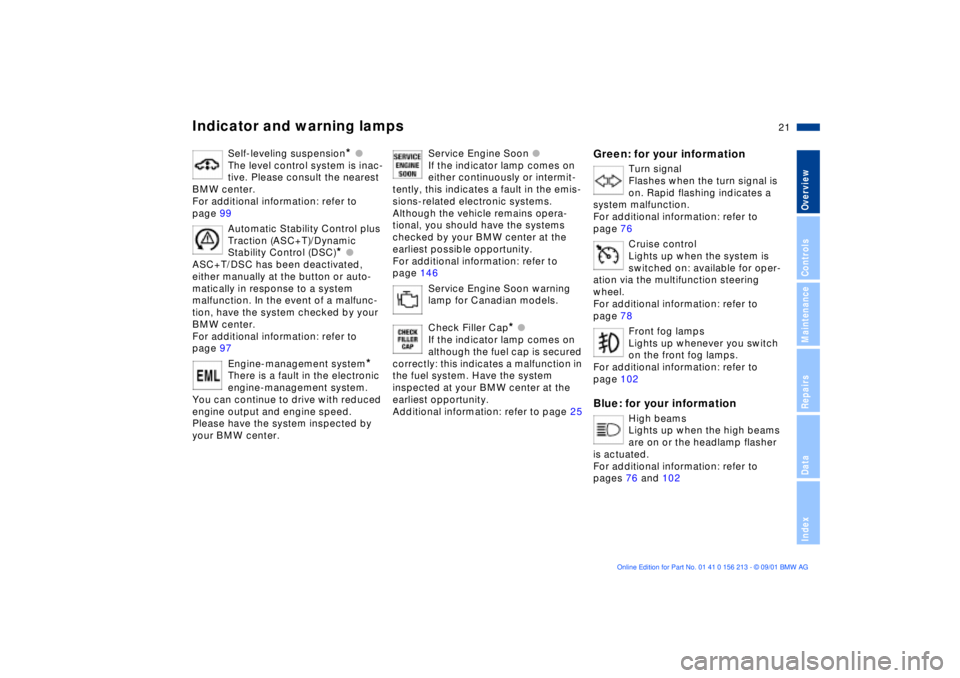
Indicator and warning lamps
Self-leveling suspension
*
l
The level control system is inac-
tive. Please consult the nearest
BMW center.
For additional information: refer to
page 99
Automatic Stability Control plus
Traction (ASC+T)/Dynamic
Stability Control (DSC)
*
l
ASC+T/DSC has been deactivated,
either manually at the button or auto-
matically in response to a system
malfunction. In the event of a malfunc-
tion, have the system checked by your
BMW center.
For additional information: refer to
page 97
Engine-management system
*
There is a fault in the electronic
engine-management system.
You can continue to drive with reduced
engine output and engine speed.
Please have the system inspected by
your BMW center.
Service Engine Soon
l
If the indicator lamp comes on
either continuously or intermit-
tently, this indicates a fault in the emis-
sions-related electronic systems.
Although the vehicle remains opera-
tional, you should have the systems
checked by your BMW center at the
earliest possible opportunity.
For additional information: refer to
page 146
Service Engine Soon warning
lamp for Canadian models.
Check Filler Cap
*
l
If the indicator lamp comes on
although the fuel cap is secured
correctly: this indicates a malfunction in
the fuel system. Have the system
inspected at your BMW center at the
earliest opportunity.
Additional information: refer to page 25
Green: for your information
Turn signal
Flashes when the turn signal is
on. Rapid flashing indicates a
system malfunction.
For additional information: refer to
page 76
Cruise control
Lights up when the system is
switched on: available for oper-
ation via the multifunction steering
wheel.
For additional information: refer to
page 78
Front fog lamps
Lights up whenever you switch
on the front fog lamps.
For additional information: refer to
page 102
Blue: for your information
High beams
Lights up when the high beams
are on or the headlamp flasher
is actuated.
For additional information: refer to
pages 76 and 102
Page 76 of 186

76n
Indicator/Headlamp flasher
Washer/Wiper system
1 High beams (blue indicator lamp)
2 Headlamp flasher
(blue indicator lamp)
3 Turn signal indicator
(green indicator lamp accompanied
by periodic clicking sound from the
relay)To signal brieflyPress the lever up to but not beyond
the detent. It then returns to the center
position when released.
If the indicator lamp and the
clicking from the relay are both
faster than normal, one of the turn
signal indicators has failed.<390de722
0 Wipers retracted
1 Intermittent mode or rain sensor
*
2 Normal wipe
3 Fast wipe
4 Brief wipe
5 Clean the windshield
6 Intensive cleaning
*
7 Rotary dial for controlling sweep
intervals in the intermittent mode and
for setting the rain sensor's sensitivity
level
*
394de730
Intermittent mode or rain sensor
*
Intermittent mode:
You can set the wipe interval to four
stages with rotary dial 7.
In addition, the wipe interval is varied
automatically depending on road
speed.
Rain sensor:
The rain sensor is positioned on the
windshield, directly ahead of the inte-
rior rearview mirror.
To activate the rain sensor:
Move the lever to position 1 with the
ignition key in position 1 or higher. The
wipers travel once across the wind-
shield, regardless of the weather
conditions.
You can leave the lever permanently in
position 1. Whenever the ignition key is
in position 1 or 2, all you then need to
do to activate the rain sensor is briefly
turn the rotary dial 7.
To adjust the sensitivity of the rain
sensor:
Turn rotary dial 7.
Deactivating the rain sensor:
Move lever to position 0.
Page 101 of 186
101n
OverviewControlsMaintenanceRepairsDataIndex
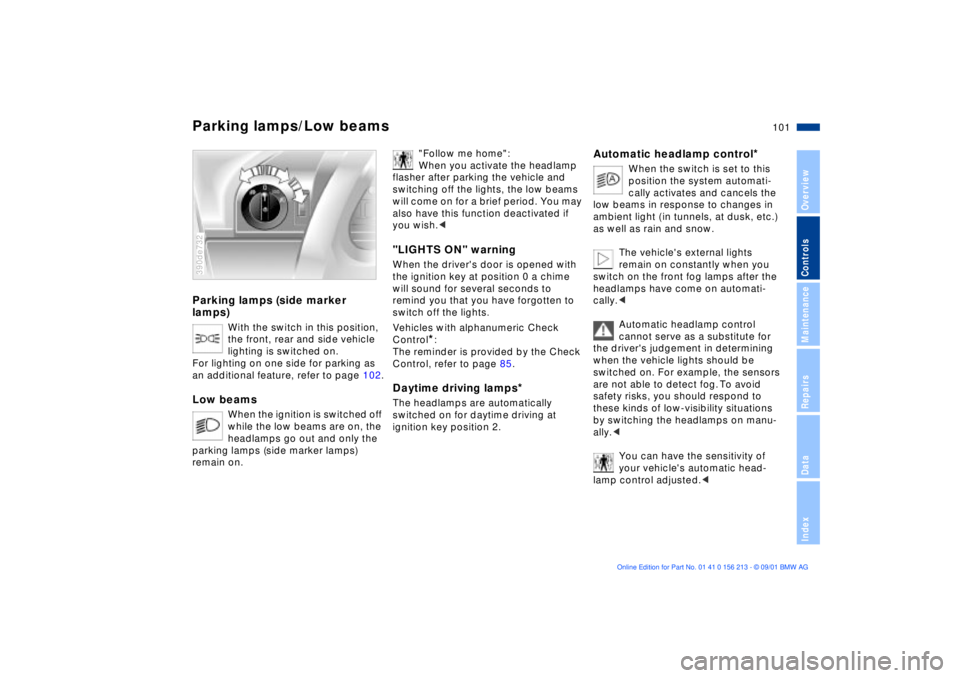
Parking lamps (side marker
lamps)
With the switch in this position,
the front, rear and side vehicle
lighting is switched on.
For lighting on one side for parking as
an additional feature, refer to page 102.
Low beams
When the ignition is switched off
while the low beams are on, the
headlamps go out and only the
parking lamps (side marker lamps)
remain on.
390de732
"Follow me home":
When you activate the headlamp
flasher after parking the vehicle and
switching off the lights, the low beams
will come on for a brief period. You may
also have this function deactivated if
you wish.<
"LIGHTS ON" warningWhen the driver's door is opened with
the ignition key at position 0 a chime
will sound for several seconds to
remind you that you have forgotten to
switch off the lights
.
Vehicles with alphanumeric Check
Control
*:
The reminder is provided by the Check
Control, refer to page 85.
Daytime driving lamps
*
The headlamps are automatically
switched on for daytime driving at
ignition key position 2.
Automatic headlamp control
*
When the switch is set to this
position the system automati-
cally activates and cancels the
low beams in response to changes in
ambient light ( in tunnels, at dusk, etc.)
as well as rain and snow.
The vehicle's external lights
remain on constantly when you
switch on the front fog lamps after the
headlamps have come on automati-
cally.<
Automatic headlamp control
cannot serve as a substitute for
the driver's judgement in determining
when the vehicle lights should be
switched on. For example, the sensors
are not able to detect fog. To avoid
safety risks, you should respond to
these kinds of low-visibility situations
by switching the headlamps on manu-
ally.<
You can have the sensitivity of
your vehicle's automatic head-
lamp control adjusted.<
Parking lamps/Low beams
Page 102 of 186
102n
Instrument lighting
High beams/Standing lamps
Fog lamps
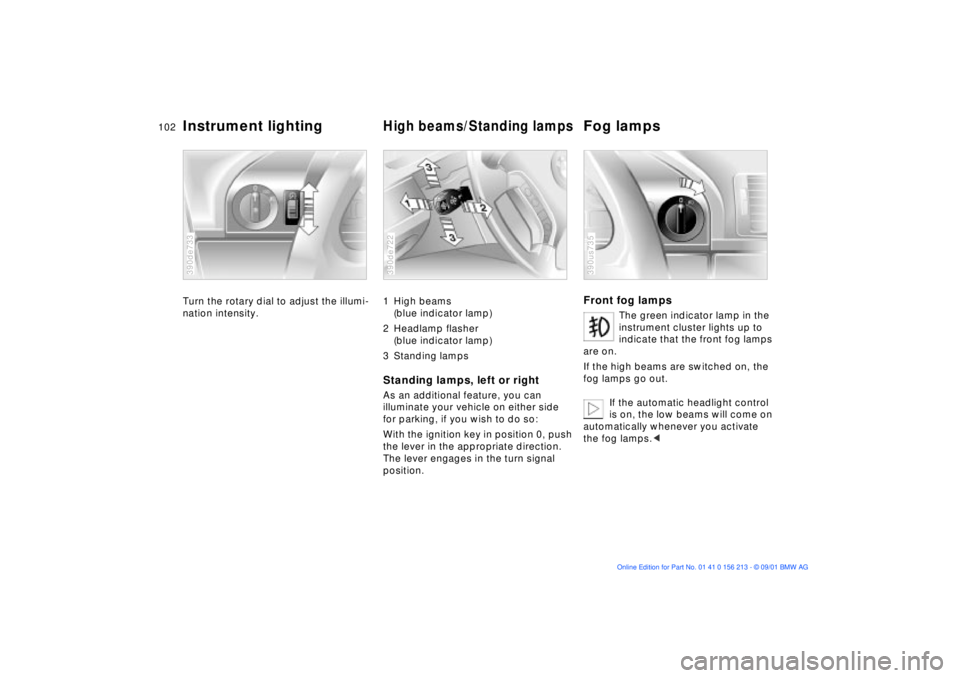
Turn the rotary dial to adjust the illumi-
nation intensity.390de733
1 High beams
(blue indicator lamp)
2 Headlamp flasher
(blue indicator lamp)
3 Standing lampsStanding lamps, left or rightAs an additional feature, you can
illuminate your vehicle on either side
for parking, if you wish to do so:
With the ignition key in position 0, push
the lever in the appropriate direction.
The lever engages in the turn signal
position.390de722
Front fog lamps
The green indicator lamp in the
instrument cluster lights up to
indicate that the front fog lamps
are on.
If the high beams are switched on, the
fog lamps go out.
If the automatic headlight control
is on, the low beams will come on
automatically whenever you activate
the fog lamps.<
390us735
Page 138 of 186
138n
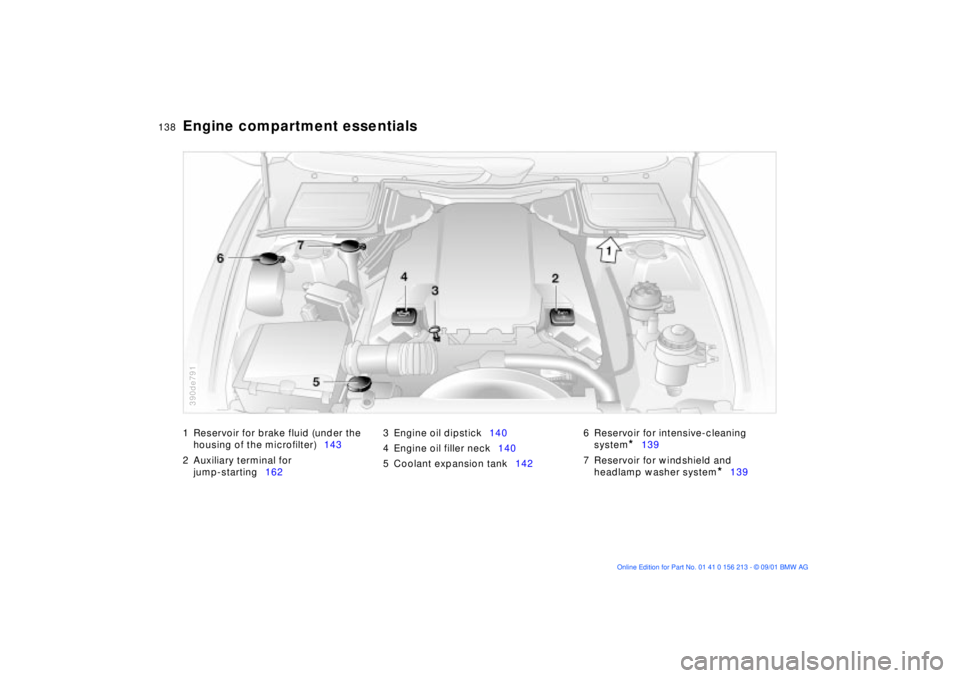
1 Reservoir for brake fluid (under the
housing of the microfilter)143
2 Auxiliary terminal for
jump-starting1623 Engine oil dipstick140
4 Engine oil filler neck140
5 Coolant expansion tank1426 Reservoir for intensive-cleaning
system
*
139
7 Reservoir for windshield and
headlamp washer system
*
139
Engine compartment essentials
390de791
Page 139 of 186
139n
OverviewControlsMaintenanceRepairsDataIndex
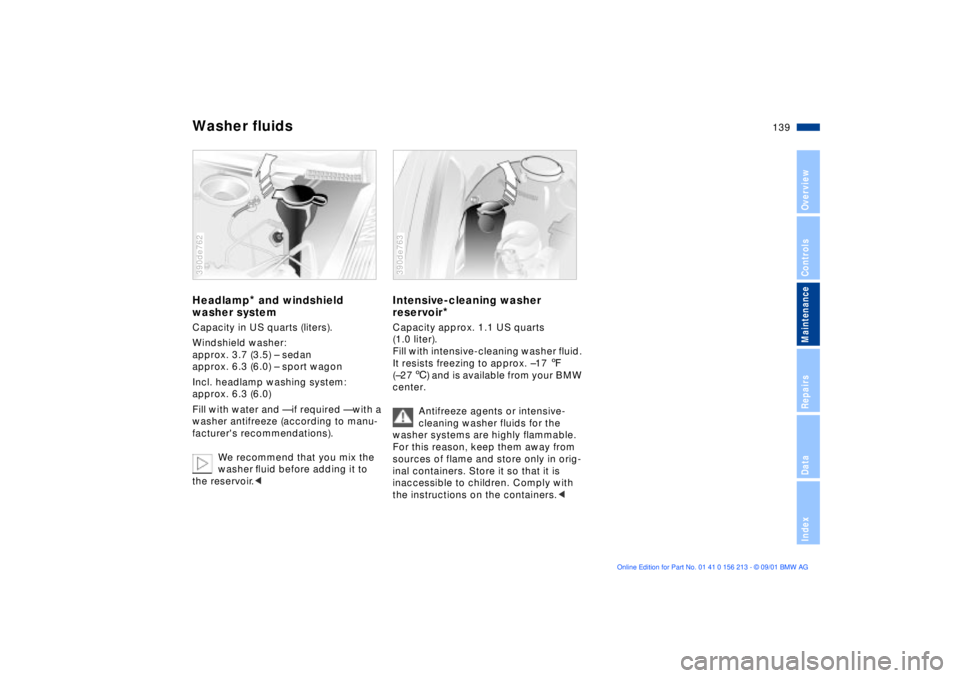
Washer fluidsHeadlamp
* and windshield
washer system
Capacity in US quarts (liters).
Windshield washer:
approx. 3.7 (3.5) Ð sedan
approx. 6.3 (6.0) Ð sport wagon
Incl. headlamp washing system:
approx. 6.3 (6.0)
Fill with water and Ñ if required Ñ with a
washer antifreeze (according to manu-
facturer's recommendations).
We recommend that you mix the
washer ßuid before adding it to
the reservoir.< 390de762
Intensive-cleaning washer
reservoir
*
Capacity approx. 1.1 US quarts
(1.0 liter).
Fill with intensive-cleaning washer fluid.
It resists freezing to approx. Ð177
(Ð276) and is available from your BMW
center.
Antifreeze agents or intensive-
cleaning washer fluids for the
washer systems are highly flammable.
For this reason, keep them away from
sources of flame and store only in orig-
inal containers. Store it so that it is
inaccessible to children. Comply with
the instructions on the containers.< 390de763
Page 151 of 186
151n
OverviewControlsMaintenanceRepairsDataIndex
Lamps and bulbsThe lamps and bulbs are essential
factors contributing to the safety of your
vehicle. For this reason, you should
follow the instructions below carefully
when replacing a bulb. If you are not
familiar with any of the procedures,
consult your BMW center.
Do not touch the glass portion of a
new bulb with your bare hands
since even small amounts of impurities
burn into the surface and reduce the
service life of the bulb. Use a clean
cloth, paper napkin, or a similar mate-
rial, or hold the bulb by its metallic
base.<
A replacement bulb set is available from
your BMW center.
Whenever working on the elec-
trical system, switch off the elec-
trical accessory you are working on or
disconnect the cable from the negative
terminal of the battery. Failure to do this
could result in short circuits.
To prevent injuries and damage,
comply with any instructions provided
by the bulb manufacturer.<
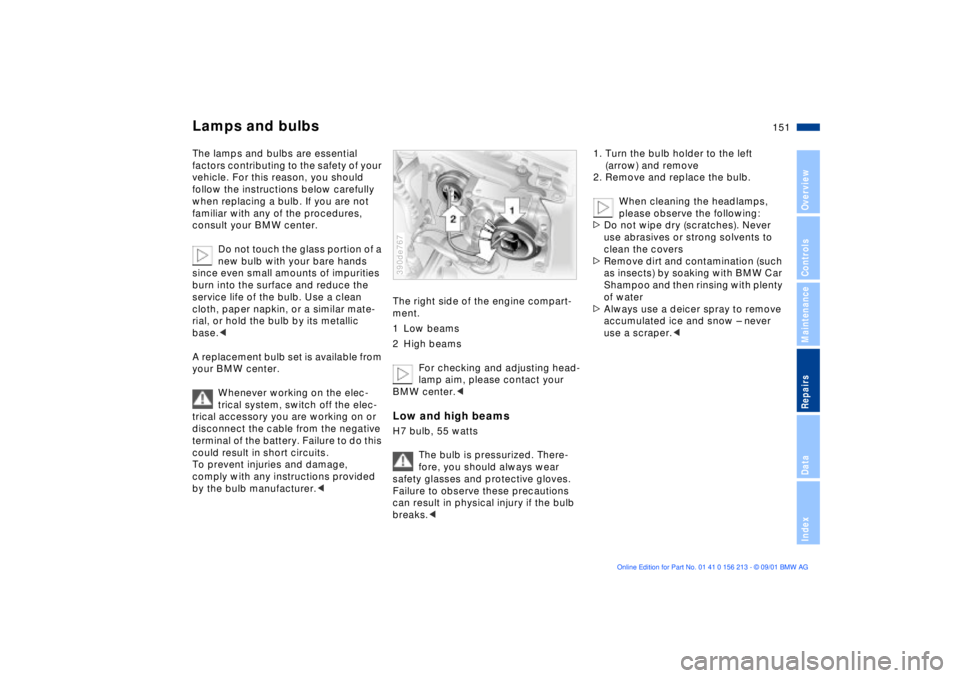
The right side of the engine compart-
ment.
1 Low beams
2 High beams
For checking and adjusting head-
lamp aim, please contact your
BMW center.< Low and high beamsH7 bulb, 55 watts
The bulb is pressurized. There-
fore, you should always wear
safety glasses and protective gloves.
Failure to observe these precautions
can result in physical injury if the bulb
breaks.< 390de767
1. Turn the bulb holder to the left
(arrow) and remove
2. Remove and replace the bulb.
When cleaning the headlamps,
please observe the following:
>Do not wipe dry (scratches). Never
use abrasives or strong solvents to
clean the covers
>Remove dirt and contamination (such
as insects) by soaking with BMW Car
Shampoo and then rinsing with plenty
of water
>Always use a deicer spray to remove
accumulated ice and snow Ð never
use a scraper.<
Page 153 of 186
153n
OverviewControlsMaintenanceRepairsDataIndex
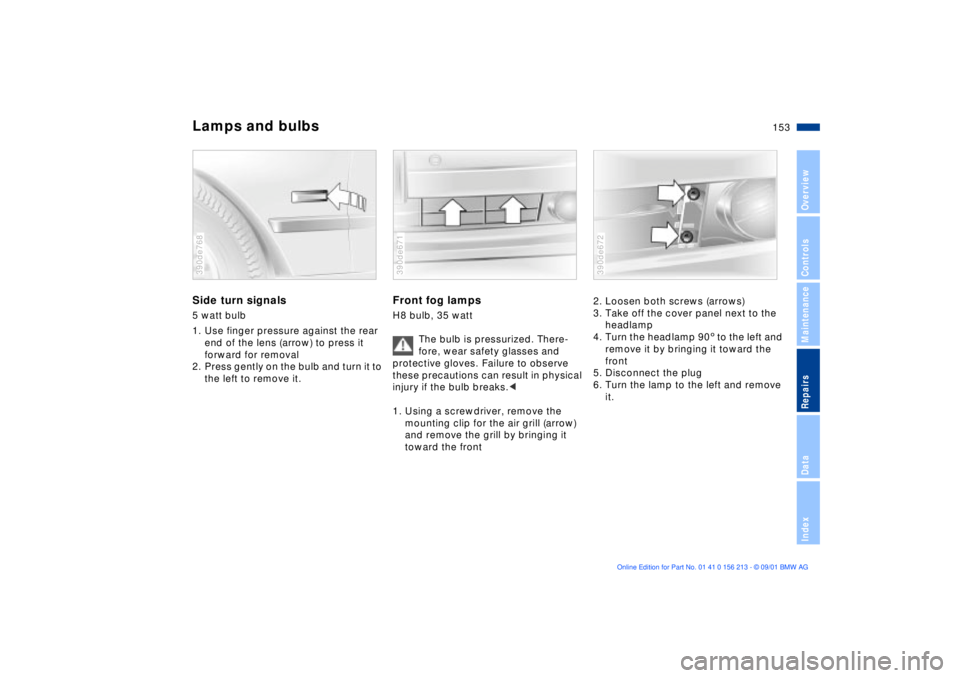
Lamps and bulbsSide turn signals5 watt bulb
1. Use finger pressure against the rear
end of the lens (arrow) to press it
forward for removal
2. Press gently on the bulb and turn it to
the left to remove it.390de768
Front fog lampsH8 bulb, 35 watt
The bulb is pressurized. There-
fore, wear safety glasses and
protective gloves. Failure to observe
these precautions can result in physical
injury if the bulb breaks.<
1. Using a screwdriver, remove the
mounting clip for the air grill (arrow)
and remove the grill by bringing it
toward the front390de671
2. Loosen both screws (arrows)
3. Take off the cover panel next to the
headlamp
4. Turn the headlamp 903 to the left and
remove it by bringing it toward the
front
5. Disconnect the plug
6. Turn the lamp to the left and remove
it.390de672