navigation system BMW M6 CONVERTIBLE 2010 E64 Owner's Guide
[x] Cancel search | Manufacturer: BMW, Model Year: 2010, Model line: M6 CONVERTIBLE, Model: BMW M6 CONVERTIBLE 2010 E64Pages: 250, PDF Size: 8.4 MB
Page 89 of 250
Controls
87Reference
At a glance
Driving tips
Communications
Navigation
Entertainment
Mobility
view appears on the Control Display in gray and
cannot be selected.
"M View": the default view is displayed.
The M view for the Head-up Display can also be
selected with the button on the steering
wheel, refer to MDrive on page50.
The settings are stored for the remote control
currently in use.
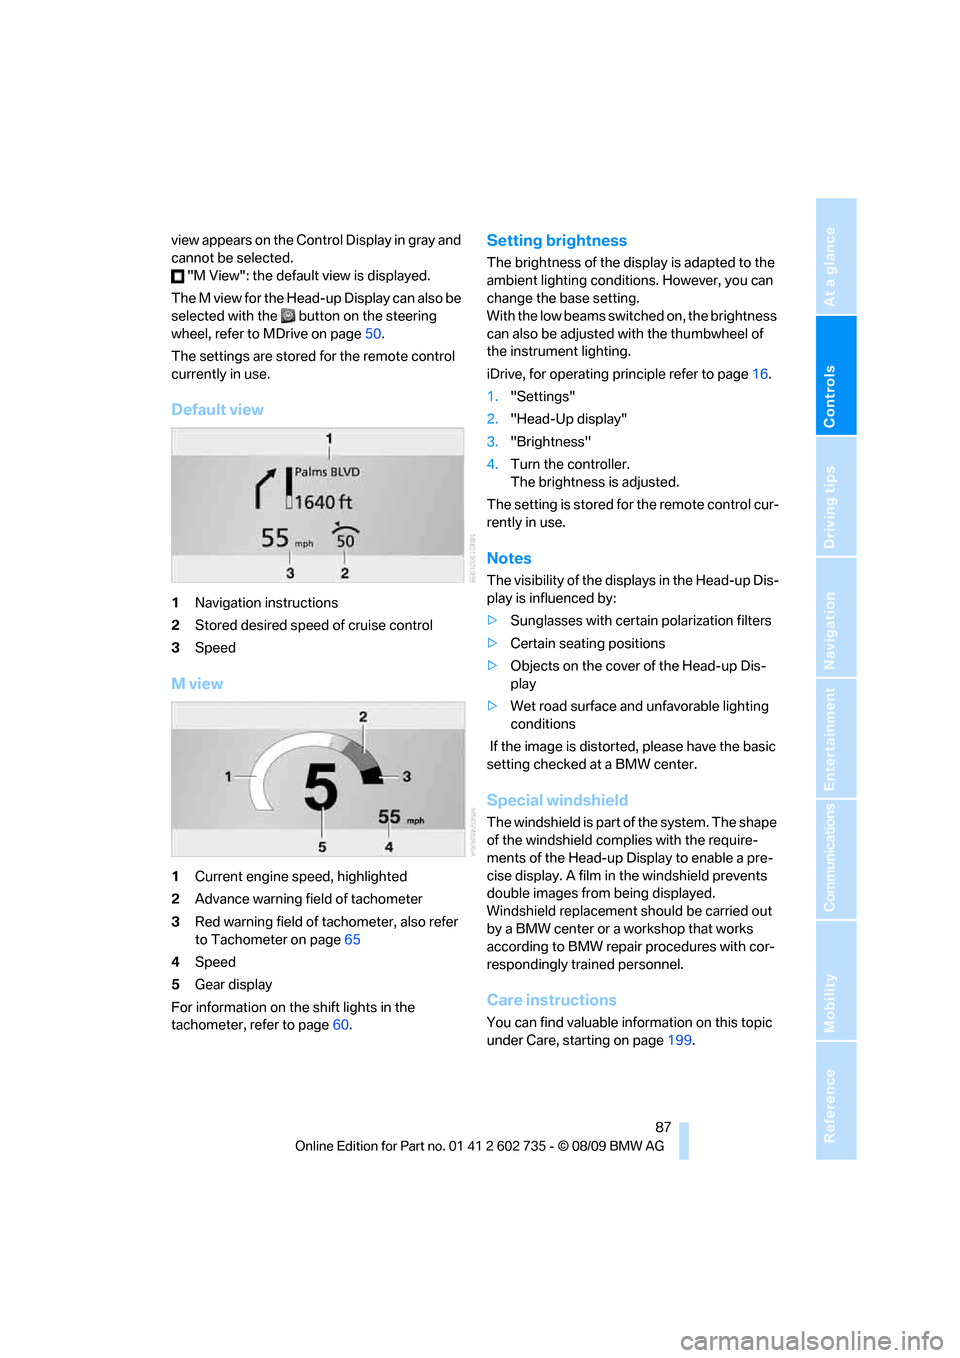
Default view
1Navigation instructions
2Stored desired speed of cruise control
3Speed
M view
1Current engine speed, highlighted
2Advance warning field of tachometer
3Red warning field of tachometer, also refer
to Tachometer on page65
4Speed
5Gear display
For information on the shift lights in the
tachometer, refer to page60.
Setting brightness
The brightness of the display is adapted to the
ambient lighting conditions. However, you can
change the base setting.
With the low beams switched on, the brightness
can also be adjusted with the thumbwheel of
the instrument lighting.
iDrive, for operating principle refer to page16.
1."Settings"
2."Head-Up display"
3."Brightness"
4.Turn the controller.
The brightness is adjusted.
The setting is stored for the remote control cur-
rently in use.
Notes
The visibility of the displays in the Head-up Dis-
play is influenced by:
>Sunglasses with certain polarization filters
>Certain seating positions
>Objects on the cover of the Head-up Dis-
play
>Wet road surface and unfavorable lighting
conditions
If the image is distorted, please have the basic
setting checked at a BMW center.
Special windshield
The windshield is part of the system. The shape
of the windshield complies with the require-
ments of the Head-up Display to enable a pre-
cise display. A film in the windshield prevents
double images from being displayed.
Windshield replacement should be carried out
by a BMW center or a workshop that works
according to BMW repair procedures with cor-
respondingly trained personnel.
Care instructions
You can find valuable information on this topic
under Care, starting on page199.
Page 91 of 250
Controls
89Reference
At a glance
Driving tips
Communications
Navigation
Entertainment
Mobility
Lamps
Parking lamps/low beams
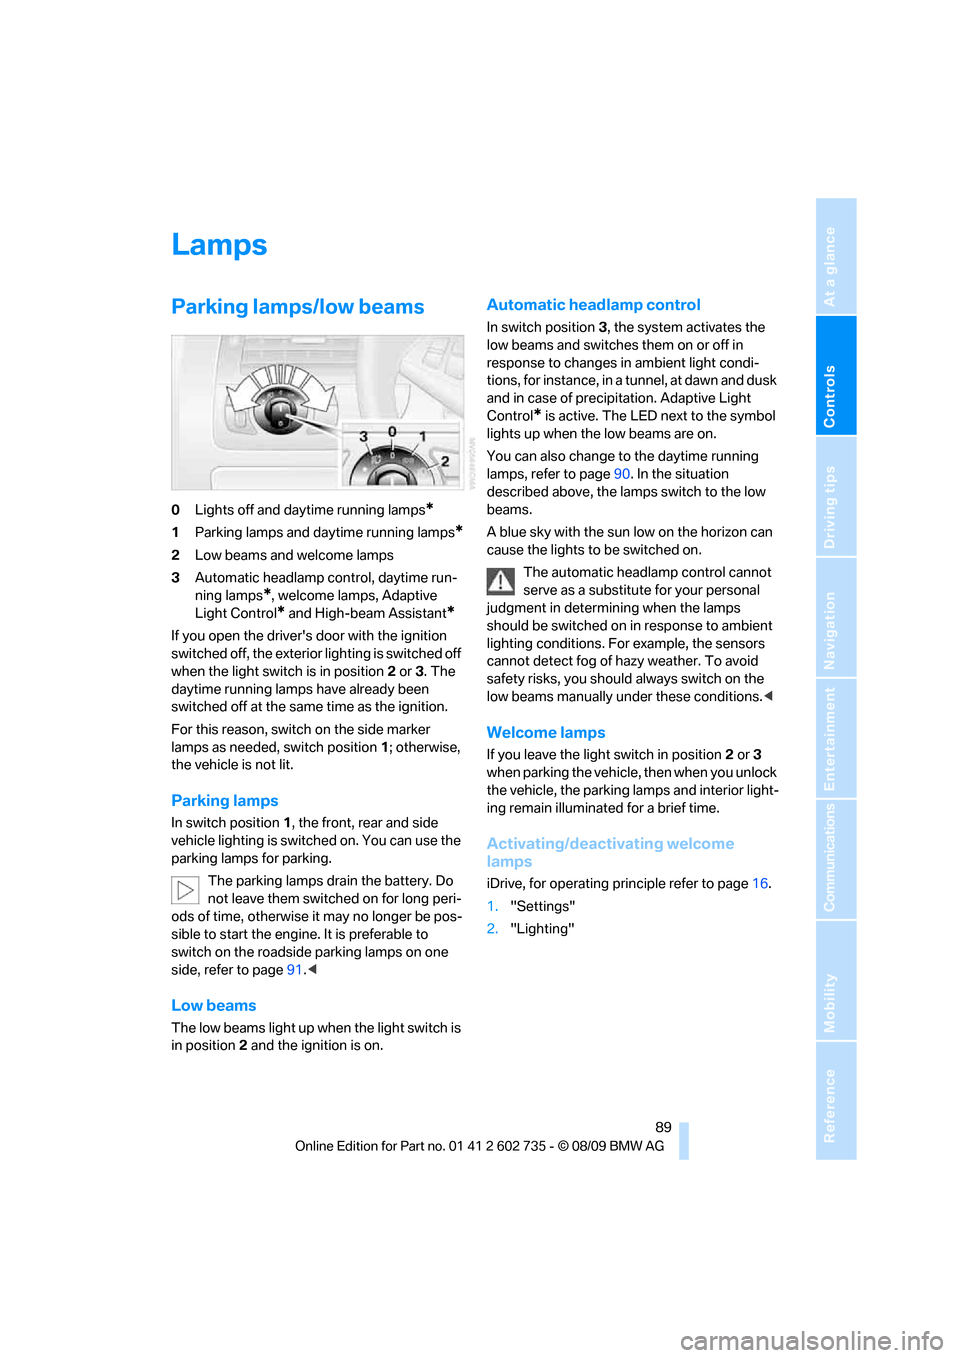
0Lights off and daytime running lamps*
1Parking lamps and daytime running lamps*
2Low beams and welcome lamps
3Automatic headlamp control, daytime run-
ning lamps
*, welcome lamps, Adaptive
Light Control
* and High-beam Assistant*
If you open the driver's door with the ignition
switched off, the exterior lighting is switched off
when the light switch is in position2 or 3. The
daytime running lamps have already been
switched off at the same time as the ignition.
For this reason, switch on the side marker
lamps as needed, switch position1; otherwise,
the vehicle is not lit.
Parking lamps
In switch position1, the front, rear and side
vehicle lighting is switched on. You can use the
parking lamps for parking.
The parking lamps drain the battery. Do
not leave them switched on for long peri-
ods of time, otherwise it may no longer be pos-
sible to start the engine. It is preferable to
switch on the roadside parking lamps on one
side, refer to page91.<
Low beams
The low beams light up when the light switch is
in position 2 and the ignition is on.
Automatic headlamp control
In switch position3, the system activates the
low beams and switches them on or off in
response to changes in ambient light condi-
tions, for instance, in a tunnel, at dawn and dusk
and in case of precipitation. Adaptive Light
Control
* is active. The LED next to the symbol
lights up when the low beams are on.
You can also change to the daytime running
lamps, refer to page90. In the situation
described above, the lamps switch to the low
beams.
A blue sky with the sun low on the horizon can
cause the lights to be switched on.
The automatic headlamp control cannot
serve as a substitute for your personal
judgment in determining when the lamps
should be switched on in response to ambient
lighting conditions. For example, the sensors
cannot detect fog of hazy weather. To avoid
safety risks, you should always switch on the
low beams manually under these conditions.<
Welcome lamps
If you leave the light switch in position2 or 3
when parking the vehicle, then when you unlock
the vehicle, the parking lamps and interior light-
ing remain illuminated for a brief time.
Activating/deactivating welcome
lamps
iDrive, for operating principle refer to page16.
1."Settings"
2."Lighting"
Page 93 of 250
Controls
91Reference
At a glance
Driving tips
Communications
Navigation
Entertainment
Mobility
High beams/
roadside parking lamps
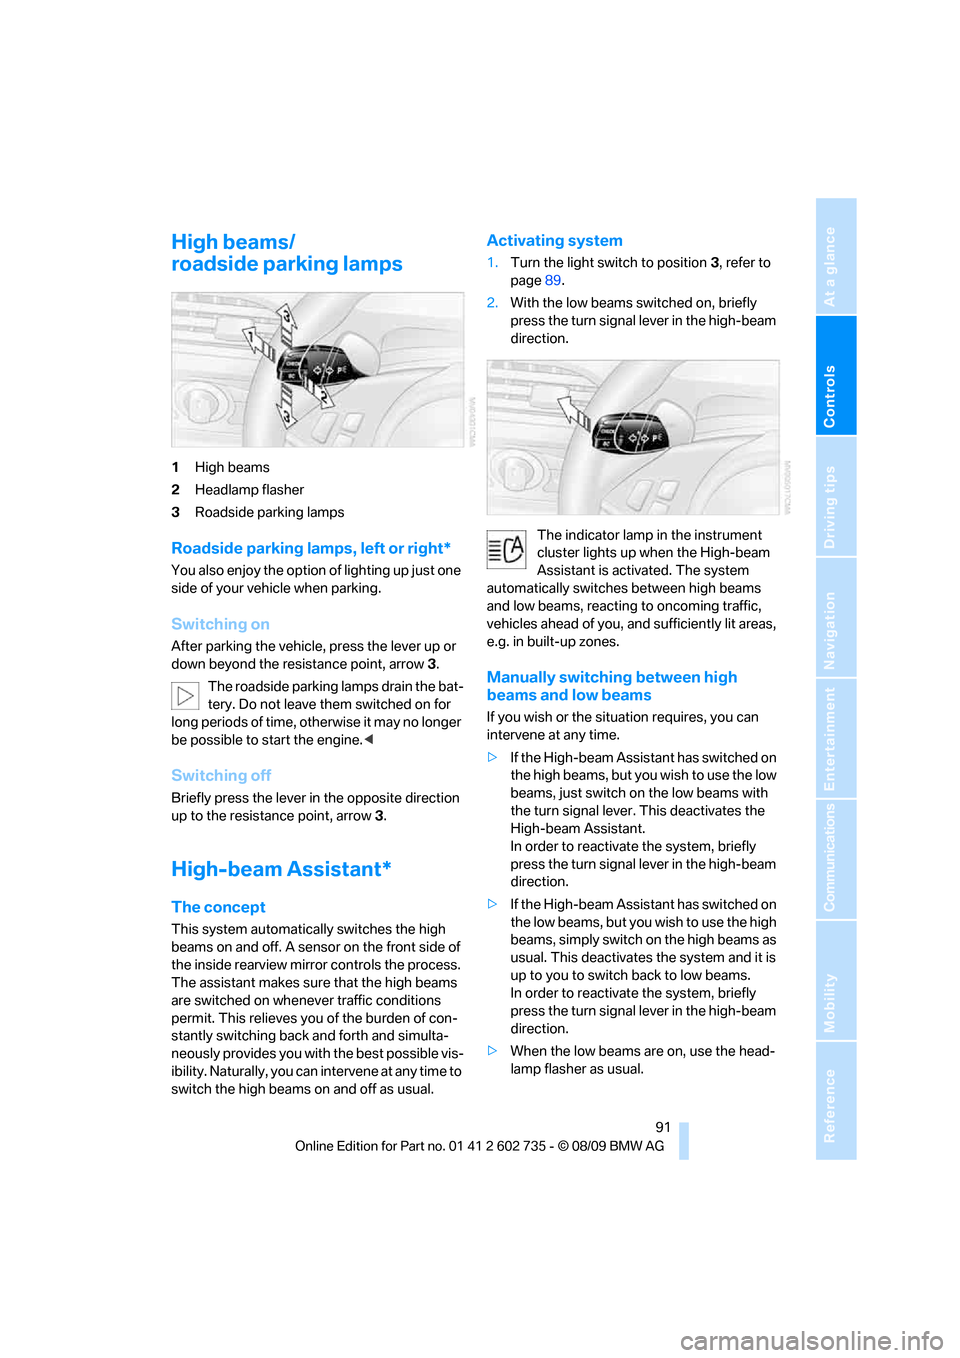
1High beams
2Headlamp flasher
3Roadside parking lamps
Roadside parking lamps, left or right*
You also enjoy the option of lighting up just one
side of your vehicle when parking.
Switching on
After parking the vehicle, press the lever up or
down beyond the resistance point, arrow 3.
The roadside parking lamps drain the bat-
tery. Do not leave them switched on for
long periods of time, otherwise it may no longer
be possible to start the engine.<
Switching off
Briefly press the lever in the opposite direction
up to the resistance point, arrow3.
High-beam Assistant*
The concept
This system automatically switches the high
beams on and off. A sensor on the front side of
the inside rearview mirror controls the process.
The assistant makes sure that the high beams
are switched on whenever traffic conditions
permit. This relieves you of the burden of con-
stantly switching back and forth and simulta-
neously provides you with the best possible vis-
ibility. Naturally, you can intervene at any time to
switch the high beams on and off as usual.
Activating system
1.Turn the light switch to position3, refer to
page89.
2.With the low beams switched on, briefly
press the turn signal lever in the high-beam
direction.
The indicator lamp in the instrument
cluster lights up when the High-beam
Assistant is activated. The system
automatically switches between high beams
and low beams, reacting to oncoming traffic,
vehicles ahead of you, and sufficiently lit areas,
e.g. in built-up zones.
Manually switching between high
beams and low beams
If you wish or the situation requires, you can
intervene at any time.
>If the High-beam Assistant has switched on
the high beams, but you wish to use the low
beams, just switch on the low beams with
the turn signal lever. This deactivates the
High-beam Assistant.
In order to reactivate the system, briefly
press the turn signal lever in the high-beam
direction.
>If the High-beam Assistant has switched on
the low beams, but you wish to use the high
beams, simply switch on the high beams as
usual. This deactivates the system and it is
up to you to switch back to low beams.
In order to reactivate the system, briefly
press the turn signal lever in the high-beam
direction.
>When the low beams are on, use the head-
lamp flasher as usual.
Page 99 of 250
Controls
97Reference
At a glance
Driving tips
Communications
Navigation
Entertainment
Mobility
ity inside the vehicle deteriorates continu-
ously.<
Residual heat
The heat stored in the engine is
used to heat the passenger com-
partment, e.g. while stopped at a
school to pick up a child.
1.Switch off the engine.
2.Turn to the right, refer to arrow.
The function can be switched on when the fol-
lowing conditions are met:
>up to 15 minutes after switching off the
engine
>with engine at operating temperature
>with sufficient battery voltage
>at an outside temperature below 777/
256
From radio readiness the interior temperature,
the air volume and the air distribution can be
set.
Switching automatic climate control on
and off
1.Turn to the left to minimum air volume.
2.After approx. 1 second, turn to the left
again.
You switch on the system again by pressing any
button of the automatic climate control.
Ventilation
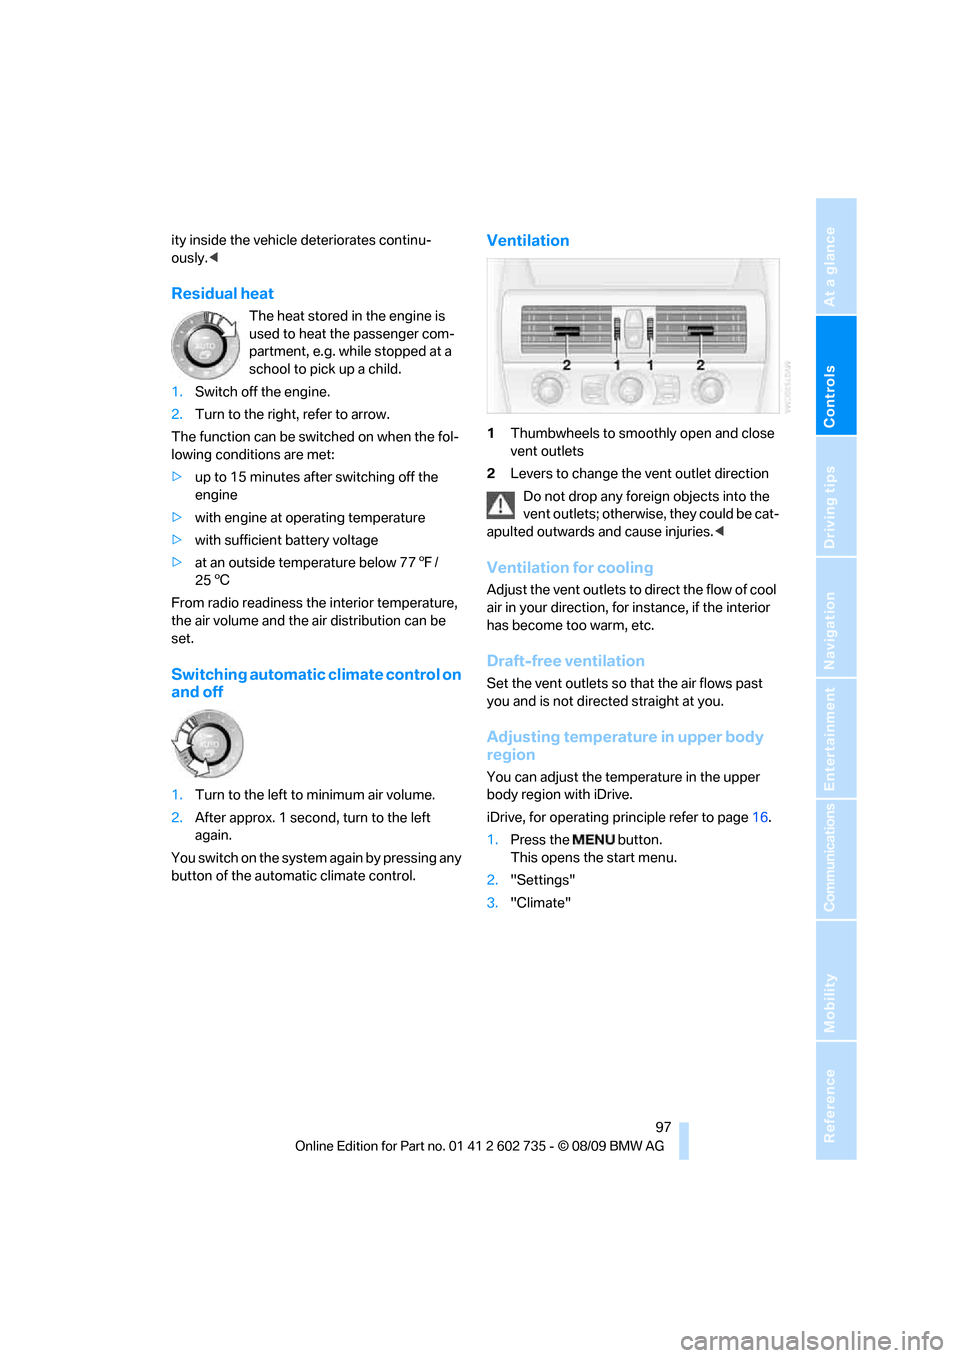
1Thumbwheels to smoothly open and close
vent outlets
2Levers to change the vent outlet direction
Do not drop any foreign objects into the
vent outlets; otherwise, they could be cat-
apulted outwards and cause injuries.<
Ventilation for cooling
Adjust the vent outlets to direct the flow of cool
air in your direction, for instance, if the interior
has become too warm, etc.
Draft-free ventilation
Set the vent outlets so that the air flows past
you and is not directed straight at you.
Adjusting temperature in upper body
region
You can adjust the temperature in the upper
body region with iDrive.
iDrive, for operating principle refer to page16.
1.Press the button.
This opens the start menu.
2."Settings"
3."Climate"
Page 101 of 250

Controls
99Reference
At a glance
Driving tips
Communications
Navigation
Entertainment
Mobility
The symbol on the automatic climate control
display flashes when the system has switched
on.
The respective system is switched on
within the next 24 hours only. Please
reactivated it after this time.<
Page 103 of 250
Controls
101Reference
At a glance
Driving tips
Communications
Navigation
Entertainment
Mobility
You can operate the device when the engine is
running or when the ignition is switched on.
If the device fails to function even after
repeated programming, check whether
the original hand-held transmitter uses an alter-
nating-code system. To do so, either read the
instructions for the original hand-held transmit-
ter or hold down the programmed memory
button1 of the integrated universal remote
control. If the LED2 on the integrated universal
remote control flashes rapidly for a short time
and then remains lit for approx. 2 seconds, this
indicates that the original hand-held transmitter
uses an alternating-code system. In the case of
an alternating-code system, program the mem-
ory buttons1 as described at Alternating-code
hand-held transmitters.<
Alternating-code hand-held
transmitters
To program the integrated universal remote
control, consult the operating instructions for
the equipment to be set. You will find informa-
tion there on the possibilities for synchroniza-
tion.
When programming hand-held transmitters
that employ an alternating code, please observe
the following supplementary instructions:
P r o g ra m m in g w i ll b e ea s i er w it h t h e a i d o f
a second person.<
1.Park your vehicle within the range of the
remote-controlled device.
2.Program the integrated universal remote
control as described above in the section
Fixed-code hand-held transmitters.
3.Locate the button on the receiver of the
device to be set, e. g. on the drive unit.
4.Press the button on the receiver of the
device to be set. After step 4, you have
approx. 30 seconds for step 5.
5.Press the programmed memory button1
of the integrated universal remote control
three times.
The corresponding memory button 1 is now
programmed with the signal of the original
hand-held transmitter.If you have any additional questions,
please contact your BMW center.<
Deleting all stored programs
Press the left and right-hand memory button1
for approx. 20 seconds until the LED2 flashes.
All stored programs are deleted.
Individual programs cannot be deleted.
Rememorizing individual programs
1.Hold the original hand-held remote control
approx. 4 in/10 cm to 12 in/30 cm away
from the memory buttons1.
The required distance between the
hand-held transmitter and the mem-
ory buttons1 depends on the relevant sys-
tem of the original hand-held transmitter
used.<
2.Press the desired memory button1 of the
integrated universal remote.
3.If the LED2 flashes slowly after approx.
20 seconds, press the command button of
the original hand-held transmitter. As soon
as the LED2 flashes rapidly, release both
buttons. If the LED2 does not flash rapidly
after approx. 15 seconds, alter the distance
and repeat the step.
Glove compartment
Opening
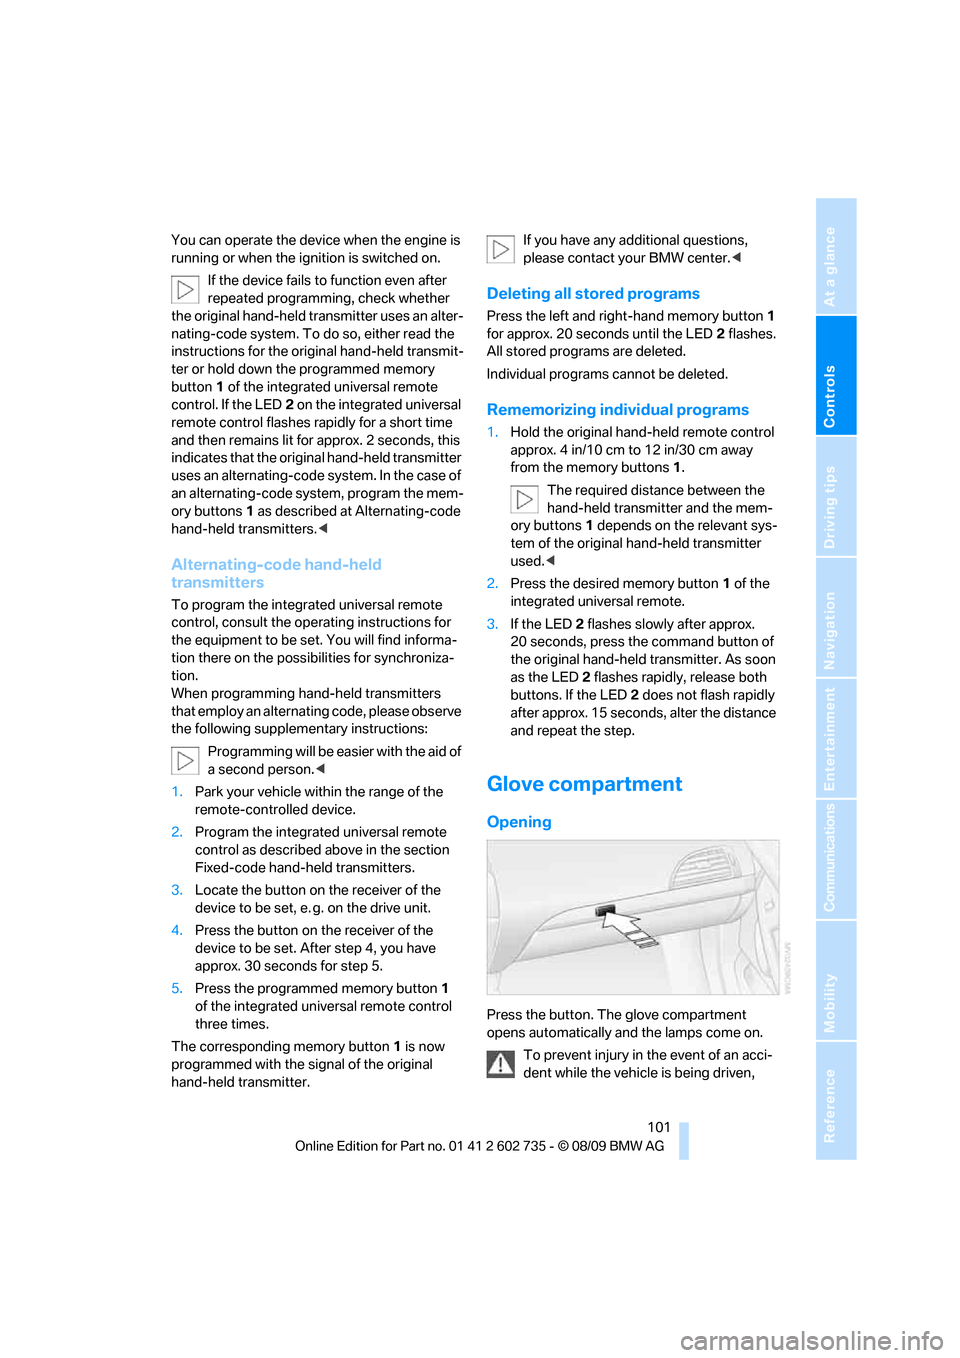
Press the button. The glove compartment
opens automatically and the lamps come on.
To prevent injury in the event of an acci-
dent while the vehicle is being driven,
Page 111 of 250
Driving tips
109Reference
At a glance
Controls
Communications
Navigation
Entertainment
Mobility
Hot exhaust system
As in all vehicles, extremely high temper-
atures are generated on the exhaust sys-
tem. Do not remove the heat shields installed
adjacent to it, and never apply undercoating to
them. When driving, standing at idle and while
parking take care to avoid possible contact
between the hot exhaust system and any highly
flammable materials such as hay, leaves, grass,
etc. Such contact could lead to a fire, and with it
the risk of serious property damage as well as
personal injury. Do not touch hot exhaust tail
pipes. Otherwise there is a risk of burns.<
Hydroplaning
When driving on wet or slushy roads,
reduce road speed. If you do not, a wedge
of water can form between tires and road sur-
face. This phenomenon is referred to as hydro-
planing, and is characterized by a partial or
complete loss of contact between the tires and
the road surface, ultimately undermining your
ability to steer and brake the vehicle.<
The risk of hydroplaning increases as the tread
depth of the tires decreases, refer also to Mini-
mum tire tread on page189.
Driving through water
Do not drive through water on the road if it
is deeper than 1 ft/30 cm, and then only at
walking speed at the most. Otherwise, the vehi-
cle's engine, the electrical systems and the
transmission may be damaged.<
Braking safely
Your BMW is equipped with ABS as a standard
feature. In situations that require it, it is best to
brake with full force. Since the vehicle maintains
steering responsiveness, you can still avoid
possible obstacles with a minimum of steering
effort.
The pulsing of he brake pedal indicates that the
ABS is controlling braking.
In certain braking situations the perforated
brake rotors can cause operating noises which,
however, have not effect on the performance
and operating safety of the brake system.Do not drive with your foot resting on the
brake pedal. Even light but consistent
pedal pressure can lead to high temperatures,
brake wear and possibly even brake failure.<
Driving in wet conditions
When roads are wet or there is heavy rain,
briefly exert gentle pressure on the brake pedal
every few miles. Monitor traffic conditions to
ensure that this maneuver does not endanger
other road users. The heat generated in this
process helps dry the pads and rotors to ensure
that full braking efficiency will then be available
when you need it.
Hills
To prevent overheating and thus reduced
efficiency of the brake system, downshift
to a gear in which only minimal brake applica-
tions are needed when descending long or
steep downhill stretches. Even light but consis-
tent pressure on the brake can lead to high tem-
peratures, brake wear and possibly even brake
failure.<
Sequential Manual Transmission: do not
drive in idle or with the engine switched
off, otherwise there will be no engine braking
action or support of the braking force and steer-
ing.
Manual transmission: do not drive with the
clutch depressed, in idle or with the engine
switched off, otherwise there will be no engine
braking action or support of the braking force
and steering.
Never allow floor mats, carpets or any other
objects to protrude into the area of movement
of the pedals and impair their operation.<
Corrosion on brake rotors
When the vehicle is driven only occasionally,
during extended periods when the vehicle is not
used at all, and in operating conditions where
brake applications are less frequent, there is an
increased tendency for corrosion to form on
rotors, while contaminants accumulate on the
brake pads. This occurs because the minimum
pressure which must be exerted by the pads
Page 117 of 250
Navigation
This chapter describes how you can enter
destinations and specify your route so that your
navigation system guides you reliably to your
destination.
Navigation
Page 118 of 250
Navigation system
116
Navigation system
General information
With the help of satellites, the navigation sys-
tem is able to ascertain the precise position of
the vehicle and guide you reliably to any desti-
nation you enter.
Enter data only when the vehicle is sta-
tionary, and always give priority to the
applicable traffic regulations in the event of any
contradiction between traffic and road condi-
tions and the instructions issued by the naviga-
tion system. Failure to take to this precaution
can place you in violation of the law and put
vehicle occupants and other road users in dan-
ger.<
Navigation data
General information
Navigation data are stored in the vehicle and
can be updated.
Navigation data and authorization codes are
available from your BMW center.
Depending on the data volume, a data update
may take several hours.
>The data are updated while you are driving.
>The update is resumed automatically when
a trip is continued after an interruption.
>All functions are available during the trip.
>The data are stored in the vehicle.
>After the update, the system restarts.
>The medium that holds the navigation data
can be removed after the update is com-
pleted.
Updating the navigation data
Inserting the navigation DVD
1.Insert the navigation DVD into the DVD
player with the labeled side facing up.
2.Follow the instructions on the Control Dis-
play.3.Enter the authorization code of the naviga-
tion DVD and change the DVD if needed.
Removing the navigation DVD
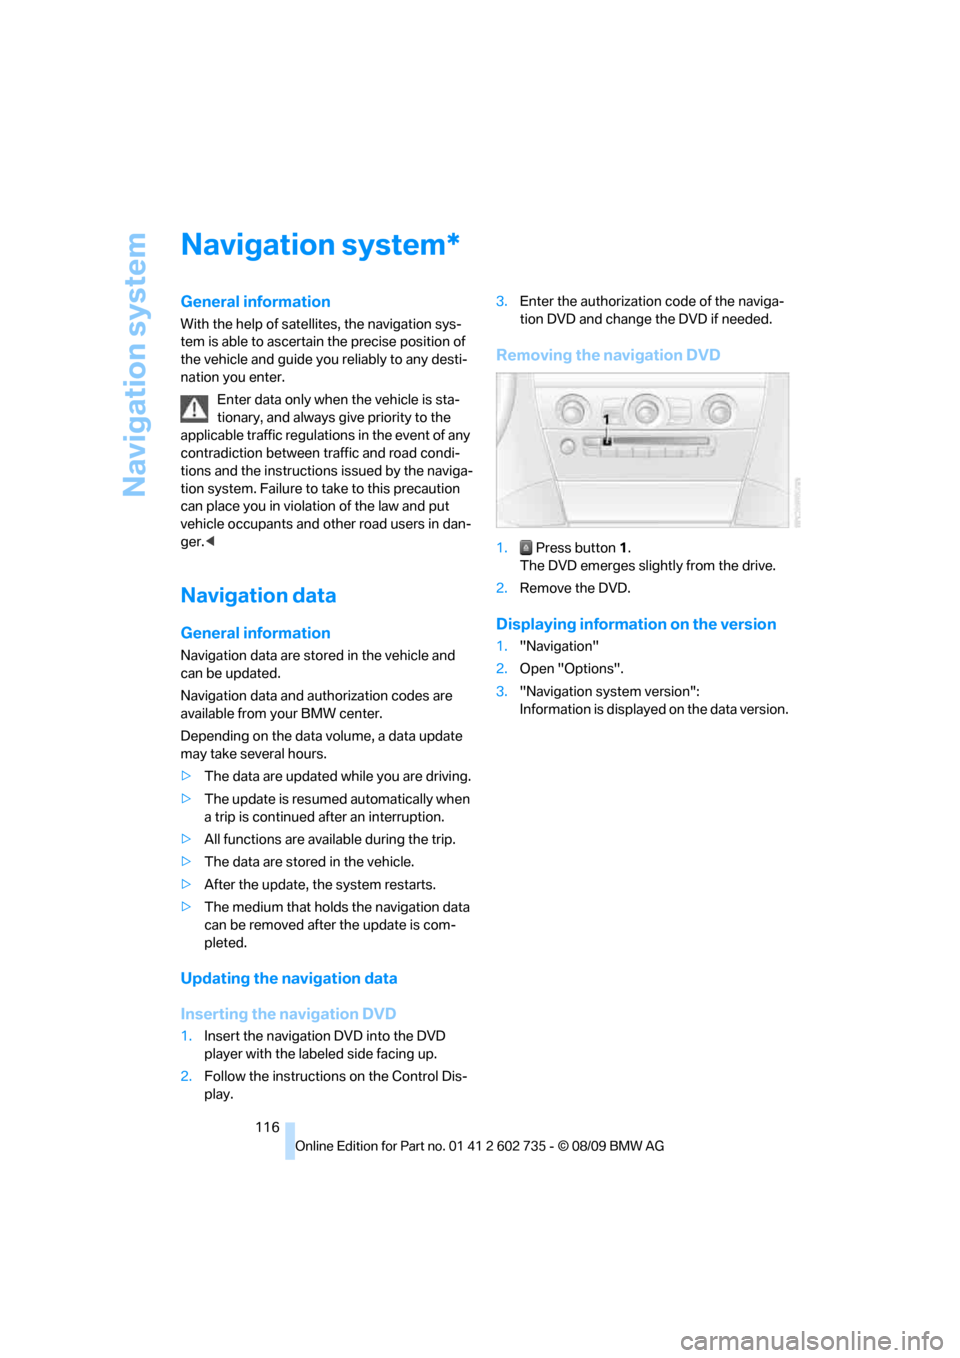
1. Press button 1.
The DVD emerges slightly from the drive.
2.Remove the DVD.
Displaying information on the version
1."Navigation"
2.Open "Options".
3."Navigation system version":
Information is displayed on the data version.
*
Page 119 of 250
Navigation
Driving tips
117Reference
At a glance
Controls
Communications
Entertainment
Mobility
Destination entry
In entering your destination you can select from
among the following options:
>Entering a destination manually, see below
>Selecting destination from address book,
refer to page119
>Last destinations, refer to page120
>Special destinations, refer to page120
>Entering a destination on the map, refer to
page122
>Selecting home address, refer to page120
>Entering a destination by voice com-
mands*, refer to page123
>Destination entry via BMW Assist
*, refer to
page121
You can also store a navigation destination on
the programmable memory buttons, refer to
page20.
Enter data only when the vehicle is sta-
tionary, and always give priority to the
applicable traffic regulations in the event of any
contradiction between traffic and road condi-
tions and the instructions issued by the naviga-
tion system. If you do not observe this precau-
tion, you can endanger the vehicle occupants
and other road users.<
Entering a destination
manually
The system's word-matching principle makes it
easier for you to enter the names of streets or
towns, refer to page125. This allows you to
enter different spellings and completes your
entry automatically so that stored names can be
called up quickly.
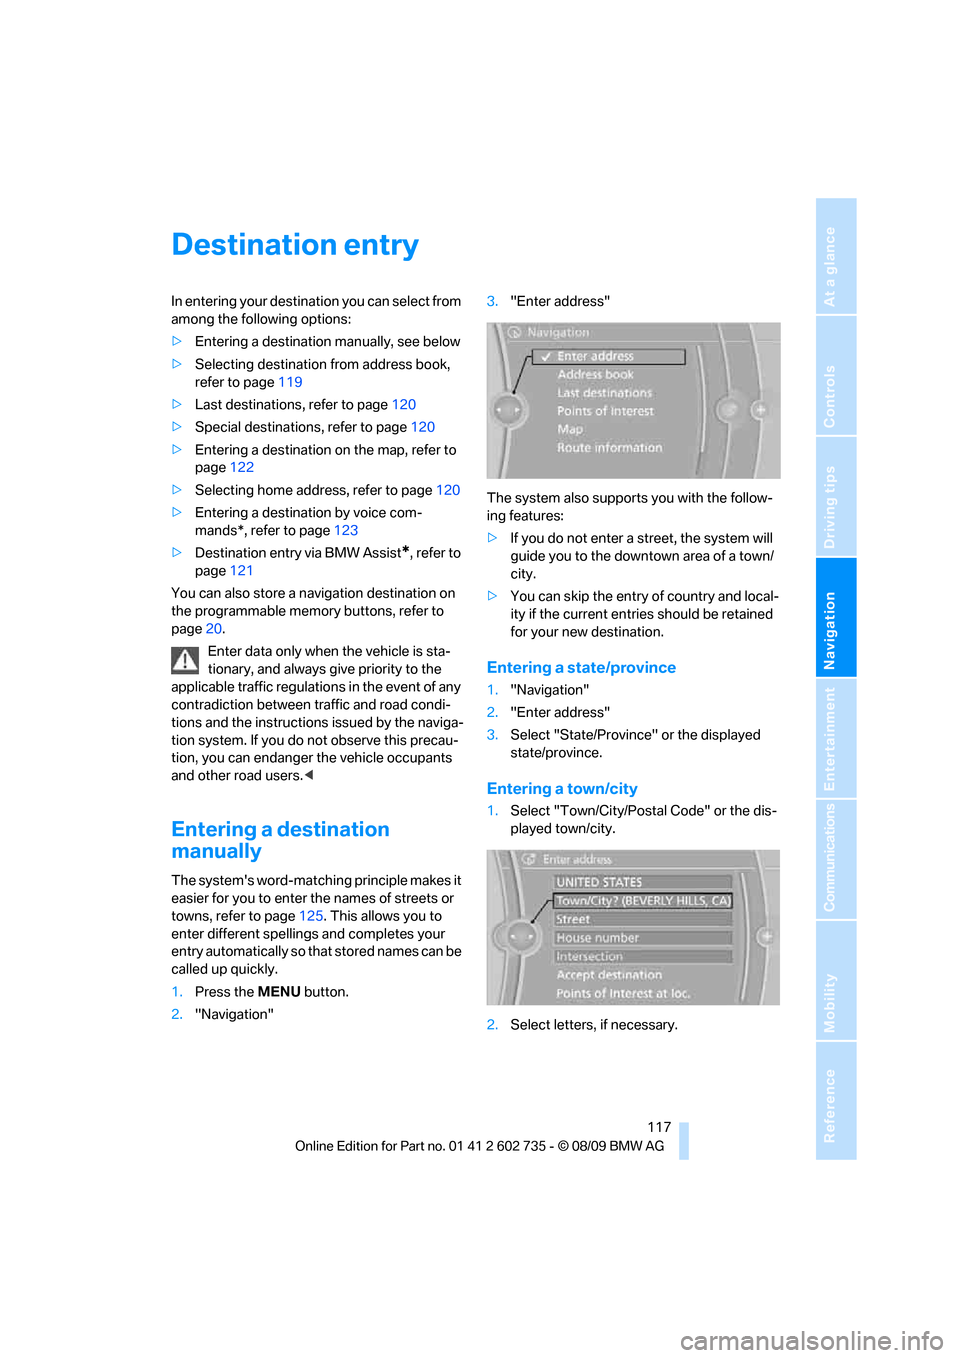
1.Press the MENU button.
2."Navigation"3."Enter address"
The system also supports you with the follow-
ing features:
>If you do not enter a street, the system will
guide you to the downtown area of a town/
city.
>You can skip the entry of country and local-
ity if the current entries should be retained
for your new destination.
Entering a state/province
1."Navigation"
2."Enter address"
3.Select "State/Province" or the displayed
state/province.
Entering a town/city
1.Select "Town/City/Postal Code" or the dis-
played town/city.
2.Select letters, if necessary.