height BMW M6 CONVERTIBLE 2010 E64 Owner's Manual
[x] Cancel search | Manufacturer: BMW, Model Year: 2010, Model line: M6 CONVERTIBLE, Model: BMW M6 CONVERTIBLE 2010 E64Pages: 250, PDF Size: 8.4 MB
Page 36 of 250
Opening and closing
34
Tilt alarm sensor
The tilt of the vehicle is monitored. The alarm
system reacts, e.g. in case of an attempted
wheel theft or towing.
Interior motion sensor
Coupe:
The condition for proper operation of the inte-
rior motion sensor is closed windows.
Convertible:
Monitors the interior up to the height of the seat
cushions. This means that the alarm system,
including the interior motion sensor, is armed
even if the convertible top is open. Falling
objects, e.g. leaves, can trigger false alarms,
refer to Avoiding unintentional alarms.
Avoiding unintentional alarms
The tilt alarm sensor and interior motion sensor
may be switched off at the same time. This pre-
vents unintentional alarms, e.g. in the following
situations:
>In two-level garages
>When transporting on car-carrying trains,
by sea or on a trailer
>When animals are to remain in the vehicle
Switching off tilt alarm sensor and
interior motion sensor
Press the button on the remote control
again as soon as the vehicle is locked.
The indicator lamp lights up briefly and then
flashes continuously. The tilt alarm sensor and
the interior motion sensor are switched off until
the next time the vehicle is unlocked and subse-
quently locked again.
Comfort Access*
Comfort Access allows you to access your vehi-
cle without having to hold the remote control in
your hand. It is sufficient to carry the remote
control with you, e.g. in your jacket pocket. The
vehicle automatically detects the associated
remote control in the immediate vicinity or in
the interior.Comfort Access supports the following func-
tions:
>Unlocking/locking vehicle
>Convenient closing with Coupe
>Opening luggage compartment lid sepa-
rately
>Starting engine
Functional requirement
>The vehicle or the luggage compartment lid
can only be locked if the vehicle detects that
the remote control you are carrying is out-
side the vehicle.
>The next unlocking and locking cycle is not
possible until after approx. 2 seconds.
>The engine can only be started if the vehicle
detects that the remote control is located in
the vehicle.
Comparison with ordinary remote
control
You can control the functions mentioned previ-
ously with the Comfort Access or by pressing
the buttons on the remote control. Therefore,
please familiarize yourself with the information
on opening and closing beginning on page26
beforehand.
The special features when using Comfort
Access are described in the following.
Should a short delay occur when opening
or closing the windows or the convertible
top, the system is checking whether a remote
control is located in the vehicle. Please repeat
opening or closing if necessary.<
Page 46 of 250
Adjusting
44 ensuing loss of vehicle control could lead to an
accident.
Also on the passenger side, do not incline the
backrest too far to the rear while the vehicle is
being driven, otherwise there is a danger in the
event of an accident of sliding under the safety
belt, eliminating the protection normally pro-
vided by the belt.<
Please follow the instructions on damage to
safety belts provided on page48 and the infor-
mation on the active front head restraints on
page46.
Convertible: with the wind deflector fitted,
do not incline the front seat backrests too
far backward if the seat is to be moved back to
the end position. Otherwise, the wind deflector
will be damaged.<
Adjusting seat
To ensure that the safety systems con-
tinue to provide optimized protection,
please observe the adjustment instructions on
page43.<
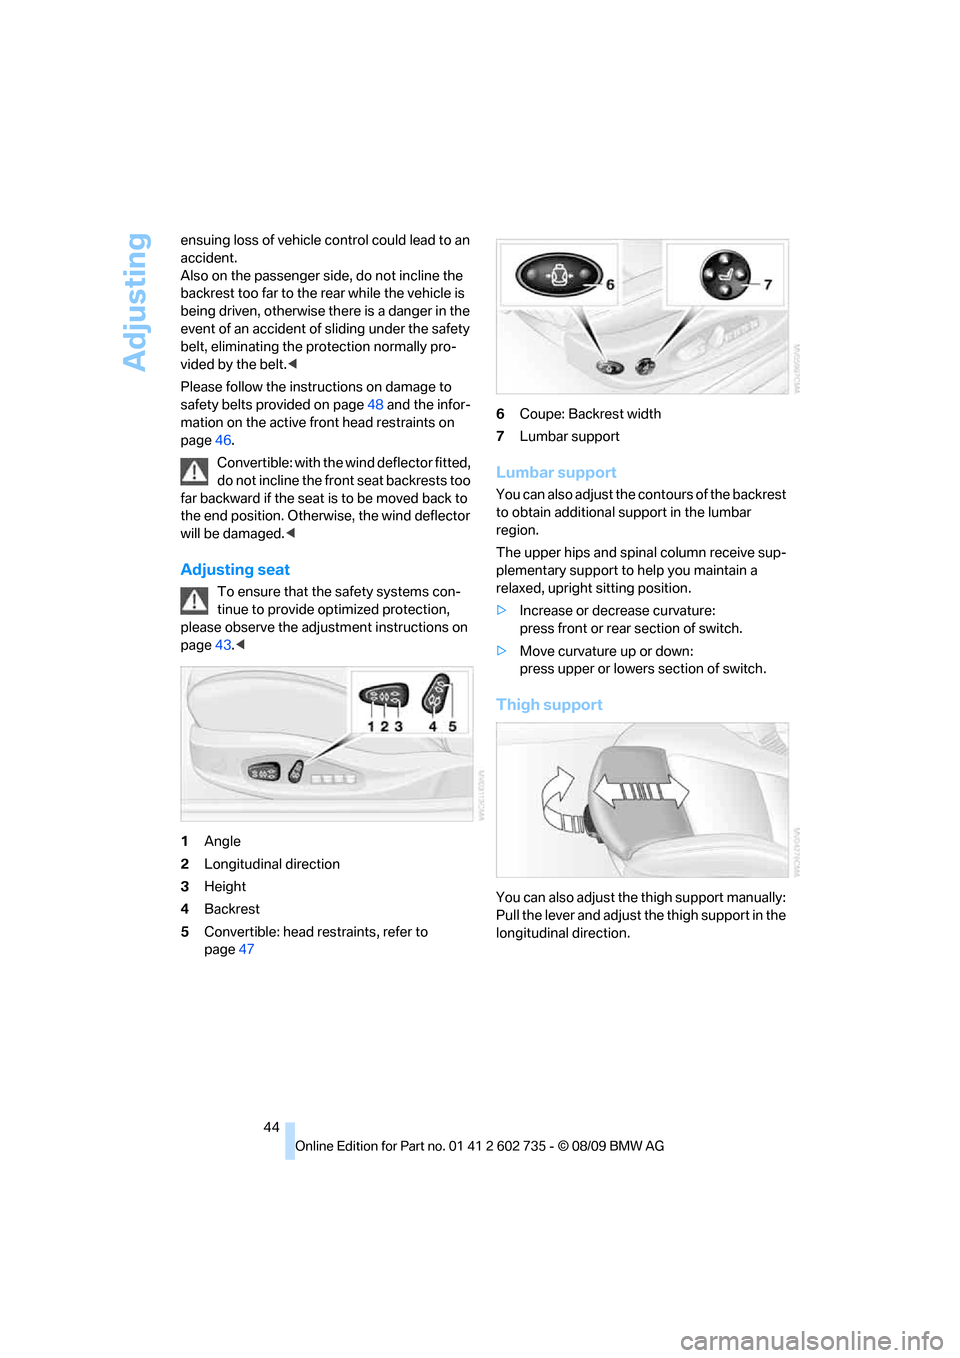
1Angle
2Longitudinal direction
3Height
4Backrest
5Convertible: head restraints, refer to
page476Coupe: Backrest width
7Lumbar support
Lumbar support
You can also adjust the contours of the backrest
to obtain additional support in the lumbar
region.
The upper hips and spinal column receive sup-
plementary support to help you maintain a
relaxed, upright sitting position.
>Increase or decrease curvature:
press front or rear section of switch.
>Move curvature up or down:
press upper or lowers section of switch.
Thigh support
You can also adjust the thigh support manually:
Pull the lever and adjust the thigh support in the
longitudinal direction.
Page 48 of 250
Adjusting
46 The function for automatically calling up
the last seat position is switched on and is
stored for the remote control currently in use.
Switching off automatic call-up
Deactivate "Last seat position auto.".
Front head restraints
A correctly adjusted head restraint reduces the
risk of spinal injury in the event of an accident.
Adjust the head restraint so that its center
is approximately at ear level. Otherwise
there is increased danger of injury in the event
of an accident.Only remove the head restraints
if no one will be sitting on the seat in question.
Reinstall the head restraints before transport-
ing passengers, as otherwise the head restraint
cannot provide its protective function.<
Active front head restraints
In the event of a rear-end collision of sufficient
severity, the active head restraint reduces the
distance to the head.
Do not use seat covers or head restraint
covers that could impede the proper
functioning of the active head restraint. Other-
wise, there is no assurance that the active head
restraint will perform its protective function and
it is not possible to take advantage of its injury-
reducing potential in the event of a rear-end
collision.
Have the active head restraints reset after they
are triggered in a rear-end collision. Only have
this work carried out by a BMW center or a
workshop that works according to BMW repair
procedures with correspondingly trained per-
sonnel. Otherwise, this safety equipment will
not function properly.<
Please contact a BMW center if you wish
to have the front head restraints removed
and installed.<
Coupe
Height adjustment
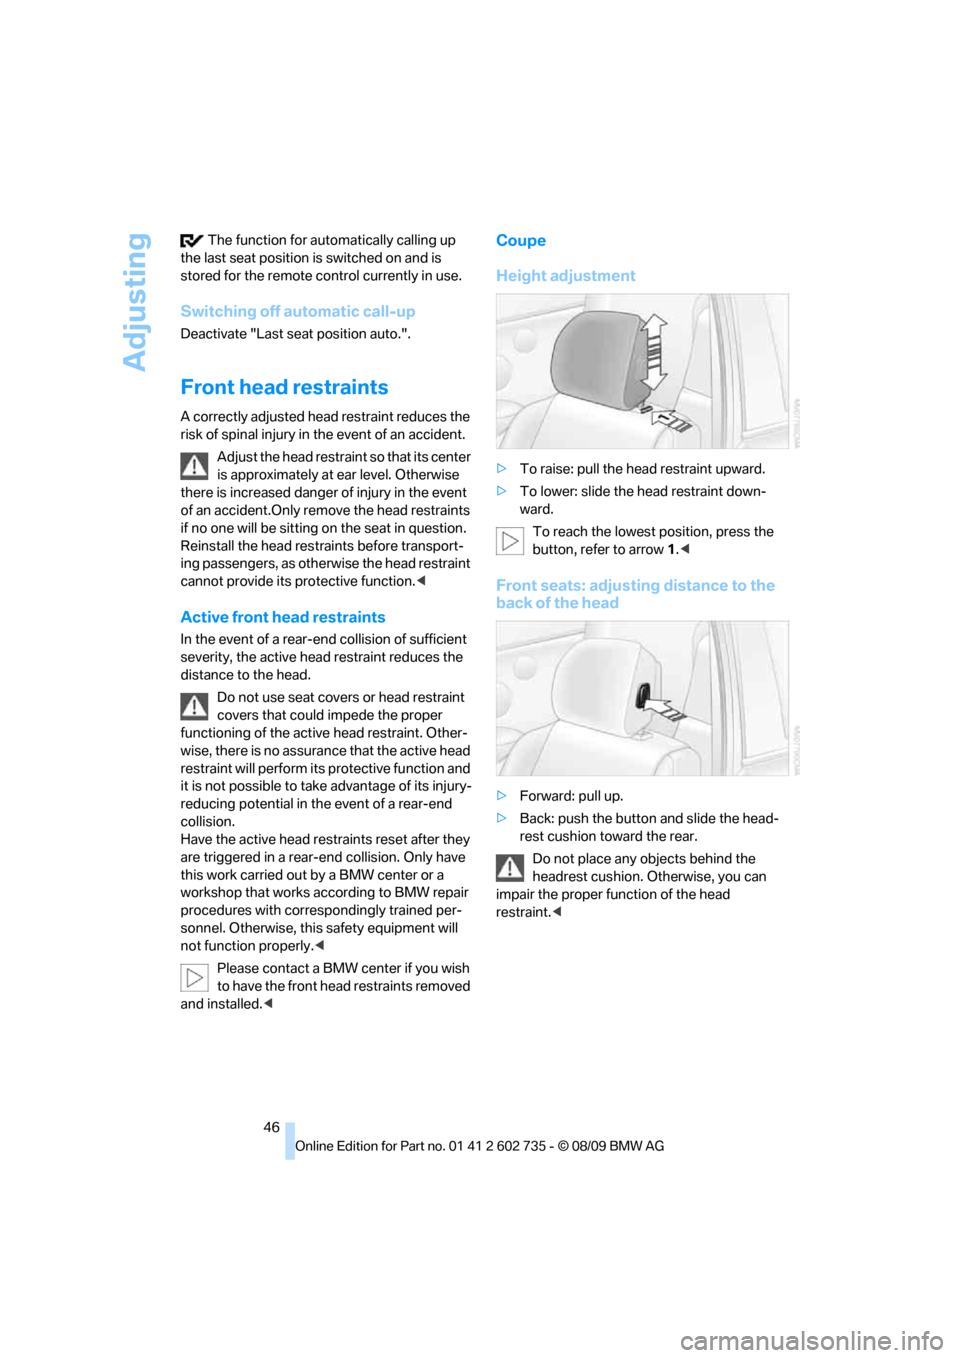
>To raise: pull the head restraint upward.
>To lower: slide the head restraint down-
ward.
To reach the lowest position, press the
button, refer to arrow 1.<
Front seats: adjusting distance to the
back of the head
>Forward: pull up.
>Back: push the button and slide the head-
rest cushion toward the rear.
Do not place any objects behind the
headrest cushion. Otherwise, you can
impair the proper function of the head
restraint.<
Page 49 of 250
Controls
47Reference
At a glance
Driving tips
Communications
Navigation
Entertainment
Mobility
Convertible
Adjusting height
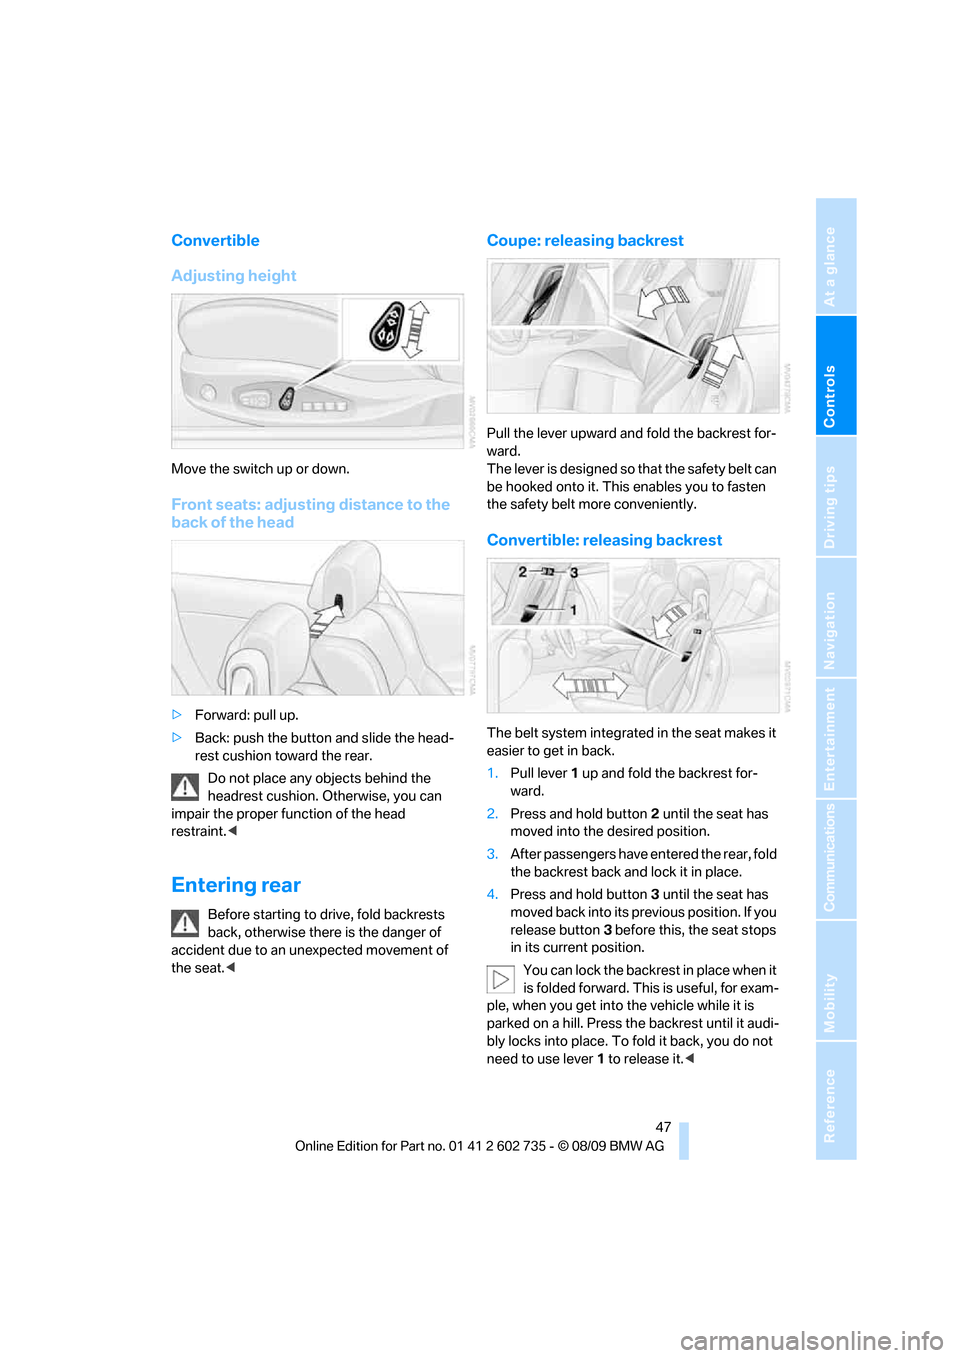
Move the switch up or down.
Front seats: adjusting distance to the
back of the head
>Forward: pull up.
>Back: push the button and slide the head-
rest cushion toward the rear.
Do not place any objects behind the
headrest cushion. Otherwise, you can
impair the proper function of the head
restraint.<
Entering rear
Before starting to drive, fold backrests
back, otherwise there is the danger of
accident due to an unexpected movement of
the seat.<
Coupe: releasing backrest
Pull the lever upward and fold the backrest for-
ward.
The lever is designed so that the safety belt can
be hooked onto it. This enables you to fasten
the safety belt more conveniently.
Convertible: releasing backrest
The belt system integrated in the seat makes it
easier to get in back.
1.Pull lever 1 up and fold the backrest for-
ward.
2.Press and hold button 2 until the seat has
moved into the desired position.
3.After passengers have entered the rear, fold
the backrest back and lock it in place.
4.Press and hold button 3 until the seat has
moved back into its previous position. If you
release button3 before this, the seat stops
in its current position.
You can lock the backrest in place when it
is folded forward. This is useful, for exam-
ple, when you get into the vehicle while it is
parked on a hill. Press the backrest until it audi-
bly locks into place. To fold it back, you do not
need to use lever 1 to release it.<
Page 54 of 250
Transporting children safely
52
Transporting children safely
The right place for children
Do not leave children unattended in the
vehicle, otherwise they could endanger
themselves and other persons, e.g. by opening
the doors.<
Children always in the rear
Accident research shows that the safest place
for children is on the rear seat.
Children younger than 13 years of age or
with a height under 5 ft/150 cm may only
be transported in the rear in child restraint sys-
tems which correspond to the age, weight and
height of the child. Otherwise there is an
increased danger of injury in an accident.<
Children 13 years of age or older must wear a
safety belt as soon as a suitable child restraint
system can no longer be used due to their age,
size and weight.
Exception for front passenger seat
Should it be necessary to use a child
restraint system on the front passenger
seat, the front and side airbags for the front pas-
senger must be deactivated. Otherwise, a child
traveling on that seat will face a significant risk
of injury if the airbags are deployed, even with a
child restraint system. Before installing a child
restraint system, move the front passenger seat
a s f a r b a c k a n d up a s p o s s i b le t o o b t a i n t h e b e s t
possible position for the belt. Do not change the
seat position after this.<
For more information on automatic deactivation
of the front passenger airbags, refer to page84.
Installing child restraint
systems
Follow child restraint system manufac-
turer's instructions for the selection,
installation and use of child restraint systems. Otherwise, the degree of protection they offer
may be reduced.<
On front passenger seat
After mounting a child restraint system on
the front passenger seat, make sure that
the front and side airbags on the front passen-
ger side are deactivated, as otherwise there is
an increased risk of injury if the airbags are trig-
gered.<
Seat position
Before installing a child restraint system, move
the front passenger seat as far back and up as
possible to obtain the best possible position for
the belt. Do not change the seat position after
this.
Backrest width
Before mounting a child restraint system
on the front passenger seat, the backrest
width adjustment must be completely open.<
1.Adjust the backrest width to the fully open
position, refer to page44.
2.Install child seat.
Child seat security
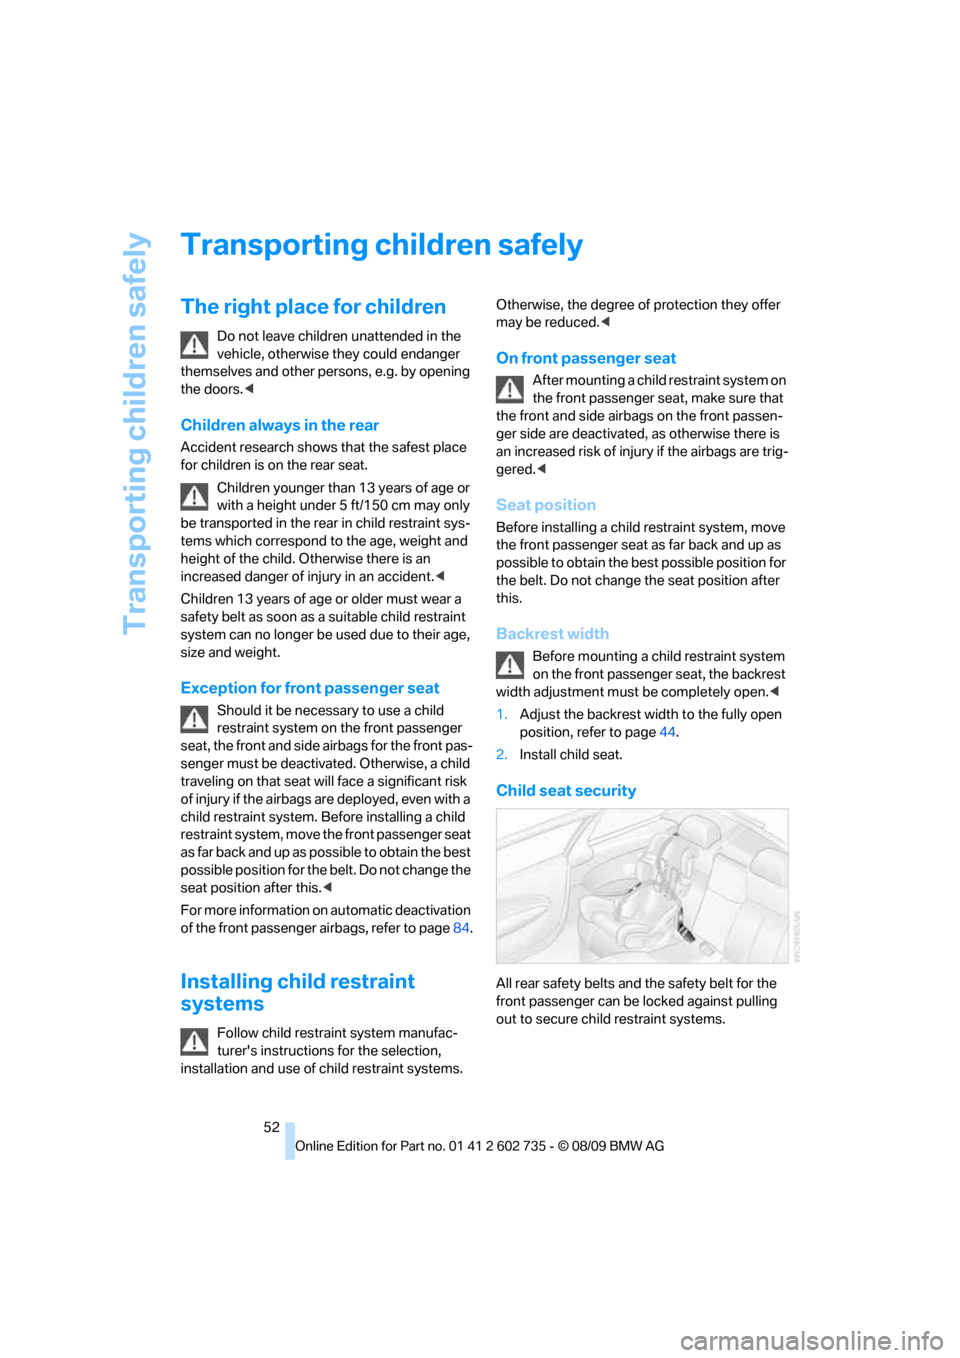
All rear safety belts and the safety belt for the
front passenger can be locked against pulling
out to secure child restraint systems.
Page 104 of 250
Practical interior accessories
102 close the glove compartment immediately after
use.<
Closing
Raise the lid into the closed position.
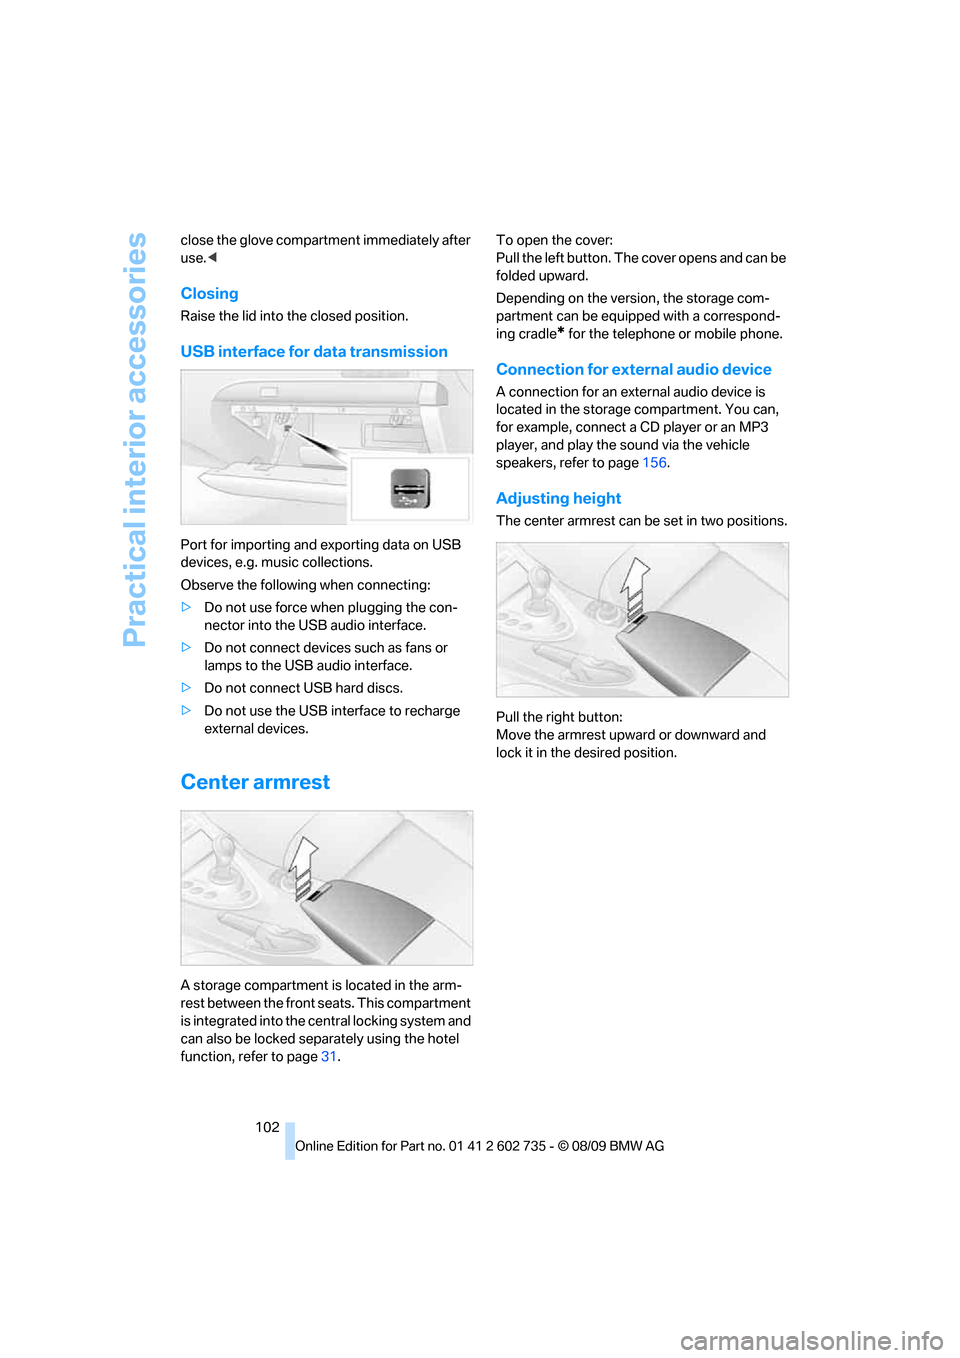
USB interface for data transmission
Port for importing and exporting data on USB
devices, e.g. music collections.
Observe the following when connecting:
>Do not use force when plugging the con-
nector into the USB audio interface.
>Do not connect devices such as fans or
lamps to the USB audio interface.
>Do not connect USB hard discs.
>Do not use the USB interface to recharge
external devices.
Center armrest
A storage compartment is located in the arm-
rest between the front seats. This compartment
is integrated into the central locking system and
can also be locked separately using the hotel
function, refer to page31.To open the cover:
Pull the left button. The cover opens and can be
folded upward.
Depending on the version, the storage com-
partment can be equipped with a correspond-
ing cradle
* for the telephone or mobile phone.
Connection for external audio device
A connection for an external audio device is
located in the storage compartment. You can,
for example, connect a CD player or an MP3
player, and play the sound via the vehicle
speakers, refer to page156.
Adjusting height
The center armrest can be set in two positions.
Pull the right button:
Move the armrest upward or downward and
lock it in the desired position.
Page 194 of 250
Under the hood
192
Under the hood
Never attempt to perform any service or
repair operations on your vehicle without
the required professional technical training.
If you do not know what repair procedures to
follow, have work on your vehicle done only by
your BMW center or a workshop that works
according to BMW repair procedures with cor-
respondingly trained personnel. If this work is
not carried out properly, there is a danger of
subsequent damage and related safety haz-
ards.<
Hood
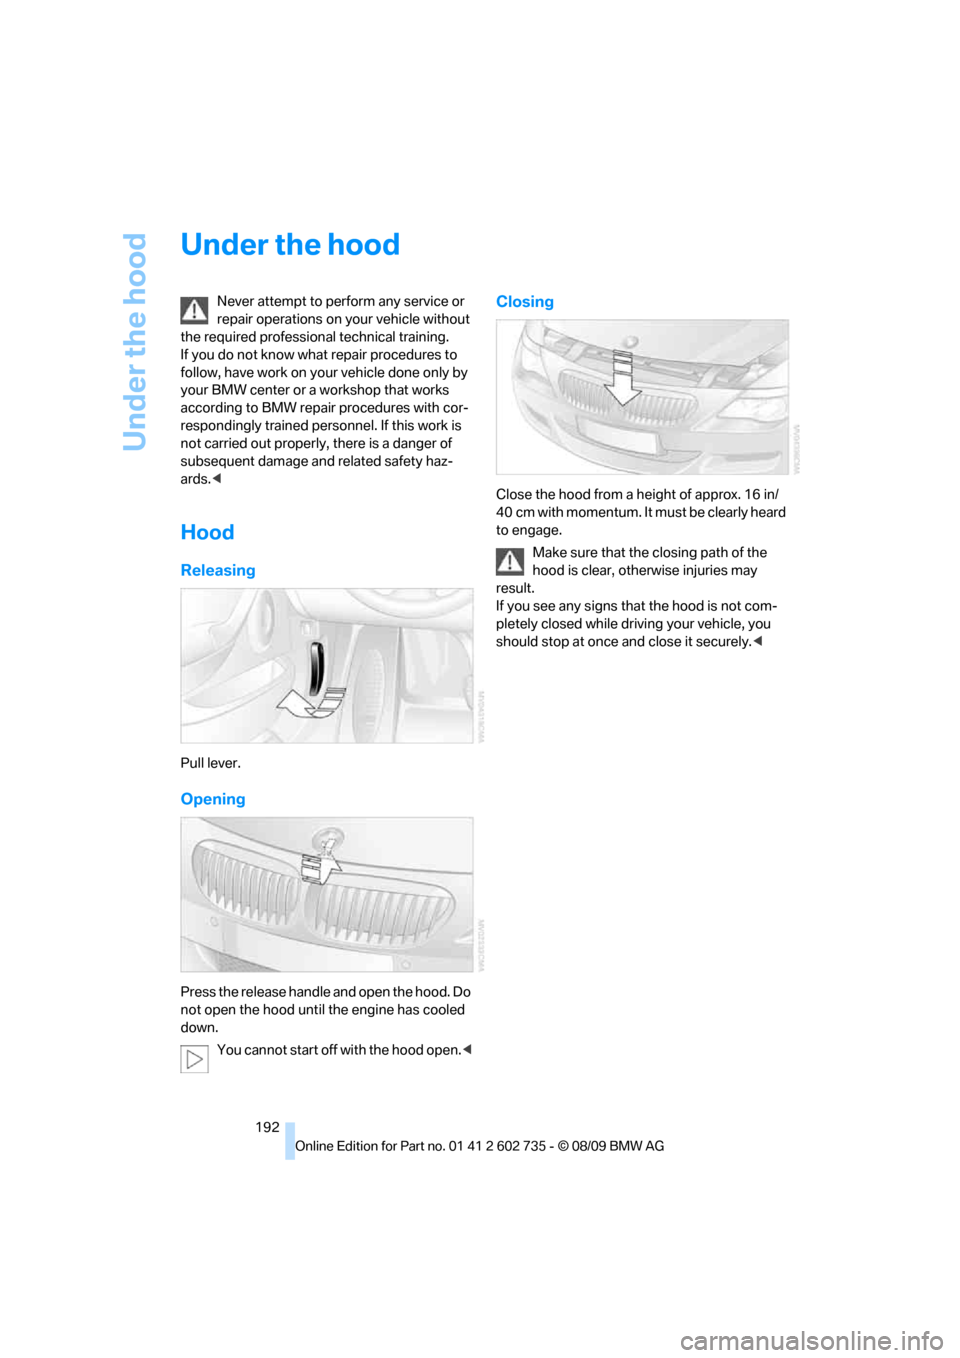
Releasing
Pull lever.
Opening
Press the release handle and open the hood. Do
not open the hood until the engine has cooled
down.
You cannot start off with the hood open.<
Closing
Close the hood from a height of approx. 16 in/
40 cm with momentum. It must be clearly heard
to engage.
Make sure that the closing path of the
hood is clear, otherwise injuries may
result.
If you see any signs that the hood is not com-
pletely closed while driving your vehicle, you
should stop at once and close it securely.<
Page 198 of 250
Under the hood
196
Alternative oil grades
If BMW High Performance Synthetic Oil is
unavailable, you can add small quantities of
other synthetic oils between oil changes.
Only use oils with the following specifications:
>Viscosity
preferred: SAE 10W-60;
alternative: SAE 10W-40, SAE 5W-50 or
SAE 10W-50
>Specification
API SJ/CF, API SK/CF or higher
Low temperatures
The oils used by BMW from the factory for your
M6 can be used at virtually any ambient tem-
perature. However, if the vehicle is operated for
a longer period at temperatures below –47/
–206, your BMW center will be happy to rec-
ommend a suitable oil.
Coolant
Do not open the cooling system when the
engine is hot. Escaping coolant can cause
burns.<
Coolant is composed of equal parts water and a
coolant additive. Not all commercially available
additives are suitable for your BMW. Ask your
BMW center for suitable additives.
Only use suitable additives, otherwise
engine damage may result. The additives
present a health hazard.<
Always observe all applicable environ-
mental laws and regulations when dis-
posing of used coolant additives.<
Checking coolant level
1.Do not open the hood until the engine has
cooled down.
2.Turn the cap of the expansion tank counter-
clockwise to allow any accumulated pres-
sure to escape, then continue turning to
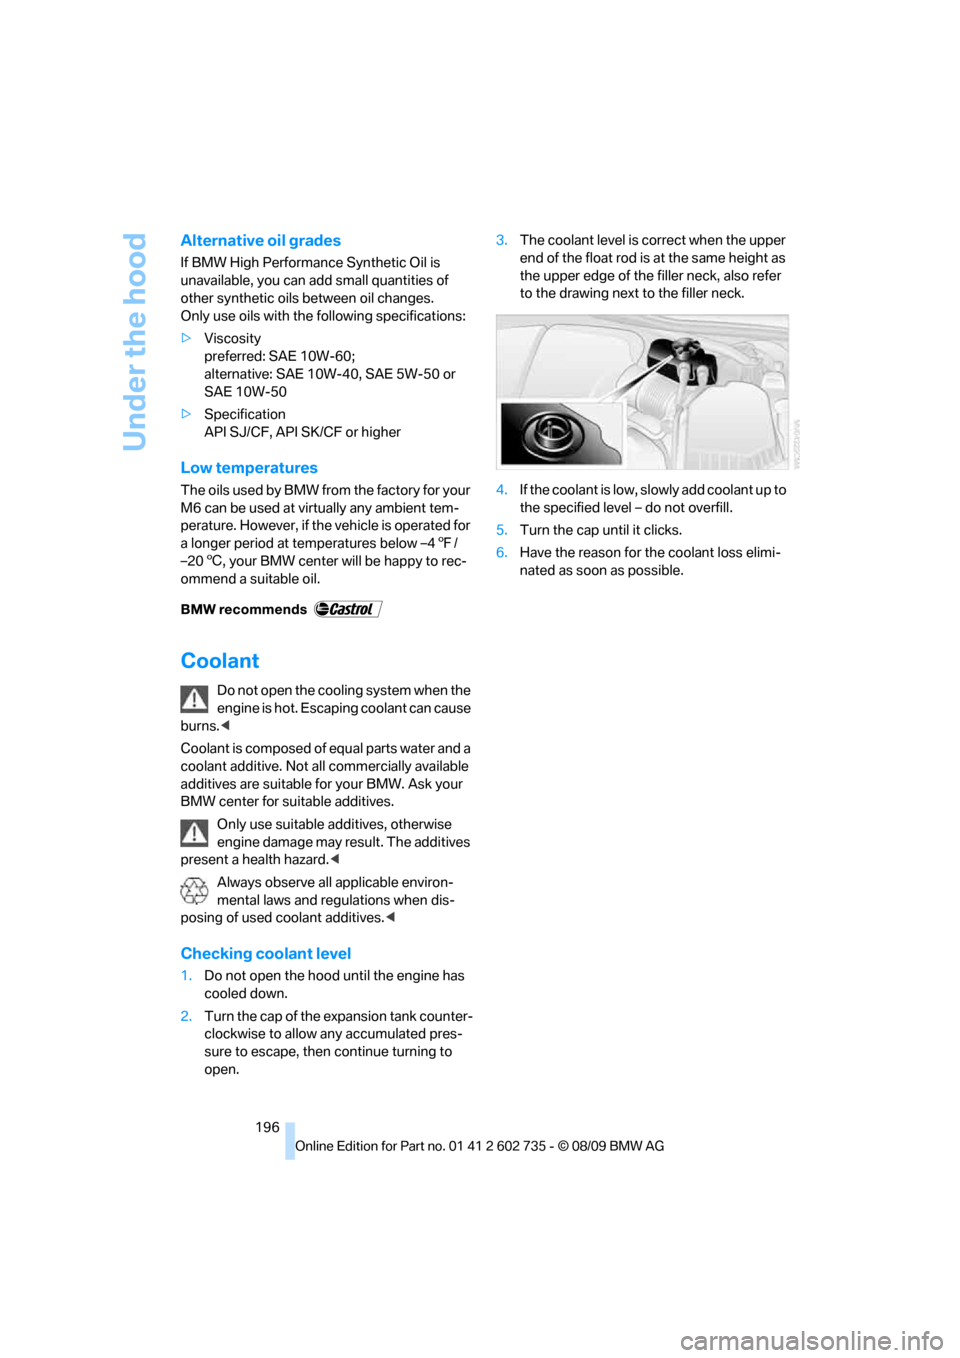
open.3.The coolant level is correct when the upper
end of the float rod is at the same height as
the upper edge of the filler neck, also refer
to the drawing next to the filler neck.
4.If the coolant is low, slowly add coolant up to
the specified level – do not overfill.
5.Turn the cap until it clicks.
6.Have the reason for the coolant loss elimi-
nated as soon as possible.
Page 201 of 250
Mobility
199Reference
At a glance
Controls
Driving tips
Communications
Navigation
Entertainment
Care
Car-care products
Regular cleaning and care make a significant
contribution to retaining your BMW's value.
For the cleaning and care of your vehicle, BMW
recommends using only products that BMW
has approved for this purpose.
Your BMW center will be glad to advise you
about products and services for the cleaning
and care of your BMW.
Original BMW Care Products are materi-
als tested, laboratory tested, and tested in
actual use. They offer optimum care and pro-
tection for your vehicle.<
Do not use cleaners that contain alcohol
or solvents; they can damage your vehi-
cle.<
Cleaning agents can contain substances
that are dangerous or pose health risks.
You should therefore heed the warnings and
hazard indications on the packaging. Open the
doors or windows on your vehicle whenever
cleaning the interior. Make sure there is suffi-
cient ventilation in enclosed spaces. Use only
products that are formulated for vehicle clean-
ing.<
Exterior care
Washing your vehicle
In the winter months, it is especially
important to ensure that the vehicle is
washed on a regular basis. Otherwise, signifi-
cant soiling and road salt can cause damage to
the vehicle.<
After washing the vehicle, apply the
brakes briefly to dry them. Failure to do so
may lead to a reduction in braking efficiency and
also to corrosion of the brake rotors.<
Car washes
Give preference to cloth car washes.Do not use high-pressure car washes
because they can cause drops of water to
penetrate in the vicinity of the windshield.<
Before driving into the car wash, make sure that
it is suitable for your BMW. Pay attention to the
following points:
>Dimensions of your vehicle, refer to
page221.
>If necessary, fold in the outside rearview
mirrors, refer to page49.
>Maximum permissible tire width.
>The convertible top must not be treated
with wax. Make sure that a program without
wax or a special convertible program is
available.
Avoid car washes with guide rail heights
over 4 in/10 cm; otherwise, there is a dan-
ger of damaging chassis parts.<
Preparations for driving into the car wash:
>Deactivate rain sensor to prevent unwanted
wiper activation.
>Remove additional add-on parts, e.g. spoil-
ers or phone antennas, if they could be
damaged.
Sequential Manual Transmission
Before driving into the car wash, make sure the
vehicle is able to roll by making sure to:
1.Insert the remote control into the ignition
lock, even with Comfort Access.
2.Shift into transmission position N.
3.Release the parking brake.
4.Switch off the engine.
5.Leave the remote control in the ignition lock
so that the vehicle can roll.
Steam jets/high-pressure washers
When using steam jets or high-pressure
washers, ensure that you maintain suffi-
cient clearance to the vehicle and do not exceed
a temperature of 140 °F/606.
Page 209 of 250
Mobility
207Reference
At a glance
Controls
Driving tips
Communications
Navigation
Entertainment
Switch on the device and allow to run for
approx. 3 minutes to fill wheel with sealant.
It is not important what inflation pressure
the tire has after filling.
9.Switch off device.
10.Remove connecting hose from connection
of sealant bottle and tire valve.
Stow the M Mobility System in the vehicle
again.
Distributing sealant
Immediately drive approx. 2 miles/3 km so that
sealant is evenly distributed in tire.
Do not exceed a maximum speed of
35 mph/60 km/h. Do not drop below
12 mph/20 km/h if possible.<
Producing tire inflation pressure
1.After approx. 2 miles/3 km, stop at suitable
location.
2.Screw compressor hose9 directly onto tire
valve.
3.Insert connector 3 in lighter socket in vehi-
cle interior.
4.Correct tire inflation pressure to 29 psi/
200 kPa. With the ignition switched on:
>Increase inflation pressure: switch on
device, position I. To check currently set
inflation pressure, briefly switch off
device.
Do not allow compressor to run
longer than 10 minutes, otherwise
the device will overheat and may be dam-
aged.<
>Reduce inflation pressure: press
button8 or turn screw8 on pressure
gauge.
If the inflation pressure is not held, drive
the vehicle again, refer to Distributing
sealant. Then repeat steps 1 to 4 once.
Using the M Mobility System can be ineffective
with tire damage from a size of approx. 0.16 in/
4 mm. Please contact the nearest BMW center,
refer to page213, or a workshop that works
according to BMW repair procedures with cor-respondingly trained personnel if the tire can-
not be made ready for driving with the
M Mobility System.<
The tire inflation pressure must be at least
29 psi/200 kPa. Otherwise do not con-
tinue driving.<
Continue driving
Do not exceed the permissible maximum
speed of 50 mph/80 km/h, otherwise
accidents can occur.<
Reinitialize the Flat Tire Monitor.
For details, refer to page80.
Have the defective tire and the sealant bottle of
the M Mobility System replaced as soon as
possible.<
Changing wheels*
Safety precautions in the event of a flat
tire or wheel change: Park the vehicle as
far as possible from passing traffic and on solid
ground. Switch on the hazard warning flashers.
Apply the parking brake and shift into first gear
or reverse with the manual transmission, or
move the selector lever into a drive position with
the sequential transmission.
Have all vehicle occupants get out of the vehicle
and ensure that they remain outside the imme-
diate area in a safe place, such as behind a
guardrail.
If a warning triangle
* or portable hazard warning
lamp
* is required, set it up on the roadside at an
appropriate distance from the rear of the vehi-
cle. Comply with all safety guidelines and regu-
lations.
Change the wheel only on a level, firm surface
which is not slippery. The vehicle or the jack
could slip to the side if you attempt to raise the
vehicle on a soft or slippery surface such as
snow, ice, tiles, etc.
Position the jack on a firm support surface.
Do not use a wooden block or similar object as a
support base for the jack, as this would prevent
it from extending to its full support height and
reduce its load-carrying capacity.
To avoid serious or fatal injury: never lie under