ECO mode BMW M6 CONVERTIBLE 2012 Owners Manual
[x] Cancel search | Manufacturer: BMW, Model Year: 2012, Model line: M6 CONVERTIBLE, Model: BMW M6 CONVERTIBLE 2012Pages: 297, PDF Size: 12.09 MB
Page 7 of 297
quires suitable maintenance and repair meth‐
ods.
Therefore, have this work performed only by a
BMW center or a workshop that works accord‐
ing to BMW repair procedures with appropri‐
ately trained personnel.
If this work is not carried out properly, there is
the danger of subsequent damage and related
safety hazards.
Parts and Accessories
For your own safety, use genuine parts and ac‐
cessories approved by BMW. When you pur‐
chase accessories tested and approved by
BMW and Genuine BMW Parts, you simultane‐
ously acquire the assurance that they have been
thoroughly tested by BMW to ensure optimum
performance when installed on your vehicle.
BMW warrants these parts to be free from de‐
fects in material and workmanship. BMW will not
accept any liability for damage resulting from in‐
stallation of parts and accessories not approved
by BMW. BMW cannot test every product made
by other manufacturers to verify if it can be used
on a BMW safely and without risk to either the
vehicle, its operation, or its occupants. Genuine
BMW Parts, BMW Accessories and other prod‐
ucts approved by BMW, together with profes‐
sional advice on using these items, are available
from all BMW centers. Installation and operation
of non-BMW approved accessories such as
alarms, radios, amplifiers, radar detectors,
wheels, suspension components, brake dust
shields, telephones, including operation of any
mobile phone from within the vehicle without
using an externally mounted antenna, or trans‐
ceiver equipment, for instance, CBs, walkie-
talkies, ham radios or similar accessories, may
cause extensive damage to the vehicle, com‐
promise its safety, interfere with the vehicle's
electrical system or affect the validity of the
BMW Limited Warranty. See your BMW center
for additional information. Maintenance, re‐
placement, or repair of the emission control de‐
vices and systems may be performed by any au‐tomotive repair establishment or individual
using any certified automotive part.
California Proposition 65 Warning
California laws require us to state the following
warning:
Engine exhaust and a wide variety of automobile
components and parts, including components
found in the interior furnishings in a vehicle, con‐
tain or emit chemicals known to the State of Cal‐
ifornia to cause cancer and birth defects and re‐
productive harm. In addition, certain fluids
contained in vehicles and certain products of
component wear contain or emit chemicals
known to the State of California to cause cancer
and birth defects or other reproductive harm.
Battery posts, terminals and related accessories
contain lead and lead compounds. Wash your
hands after handling. Used engine oil contains
chemicals that have caused cancer in laboratory
animals. Always protect your skin by washing
thoroughly with soap and water.
Service and warranty
We recommend that you read this publication
thoroughly. Your vehicle is covered by the fol‐
lowing warranties:▷New Vehicle Limited Warranty.▷Rust Perforation Limited Warranty.▷Federal Emissions System Defect Warranty.▷Federal Emissions Performance Warranty.▷California Emission Control System Limited
Warranty.
Detailed information about these warranties is
listed in the Service and Warranty Information
Booklet for US models or in the Warranty and
Service Guide Booklet for Canadian models.
Your vehicle has been specifically adapted and
designed to meet the particular operating con‐
ditions and homologation requirements in your
country and continental region in order to deliver
the full driving pleasure while the vehicle is op‐
erated under those conditions. If you wish to op‐
erate your vehicle in another country or region,
Seite 7Notes7
Online Edition for Part no. 01 40 2 900 735 - 03 12 490
Page 8 of 297
you may be required to adapt your vehicle to
meet different prevailing operating conditions
and homologation requirements. You should
also be aware of any applicable warranty limita‐
tions or exclusions for such country or region. In
such case, please contact Customer Relations
for further information.
Maintenance
Maintain the vehicle regularly to sustain the road
safety, operational reliability and the New Vehi‐
cle Limited Warranty.
Specifications for required maintenance meas‐
ures:▷BMW Maintenance system▷Service and Warranty Information Booklet
for US models▷Warranty and Service Guide Booklet for
Canadian models
If the vehicle is not maintained according to
these specifications, this could result in serious
damage to the vehicle. Such damage is not cov‐
ered by the BMW New Vehicle Limited War‐
ranty.
Reporting safety defects
For US customers
The following only applies to vehicles owned
and operated in the US.
If you believe that your vehicle has a defect
which could cause a crash or could cause injury
or death, you should immediately inform the Na‐
tional Highway Traffic Safety Administration
NHTSA, in addition to notifying BMW of North
America, LLC, P.O. Box 1227, Westwood, New
Jersey 07675-1227, Telephone
1-800-831-1117.
If NHTSA receives similar complaints, it may
open an investigation, and if it finds that a safety
defect exists in a group of vehicles, it may order
a recall and remedy campaign.
However, NHTSA cannot become involved in
individual problems between you, your dealer,
or BMW of North America, LLC.
To contact NHTSA, you may call the Vehicle
Safety Hotline toll-free at 1-888-327-4236
(TTY: 1-800-424-9153); go to http://www.safe‐
rcar.gov; or write to: Administrator, NHTSA, 400
Seventh Street, SW., Washington, DC 20590.
You can also obtain other information about mo‐
tor vehicle safety from http://www.safercar.gov
For Canadian customers
Canadian customers who wish to report a
safety-related defect to Transport Canada, De‐
fect Investigations and Recalls, may telephone
the toll-free hotline 1-800-333-0510. You can
also obtain other information about motor vehi‐
cle safety from http://www.tc.gc.ca/roadsafety.Seite 8Notes8
Online Edition for Part no. 01 40 2 900 735 - 03 12 490
Page 12 of 297
CockpitVehicle equipment
All standard, country-specific and optional
equipment that is offered in the model series is
described in this chapter. Therefore, equipmentis also described that is not available in a vehicle,
e. g., because of the selected optional equip‐
ment or country variant. This also applies for
safety-related functions and systems.
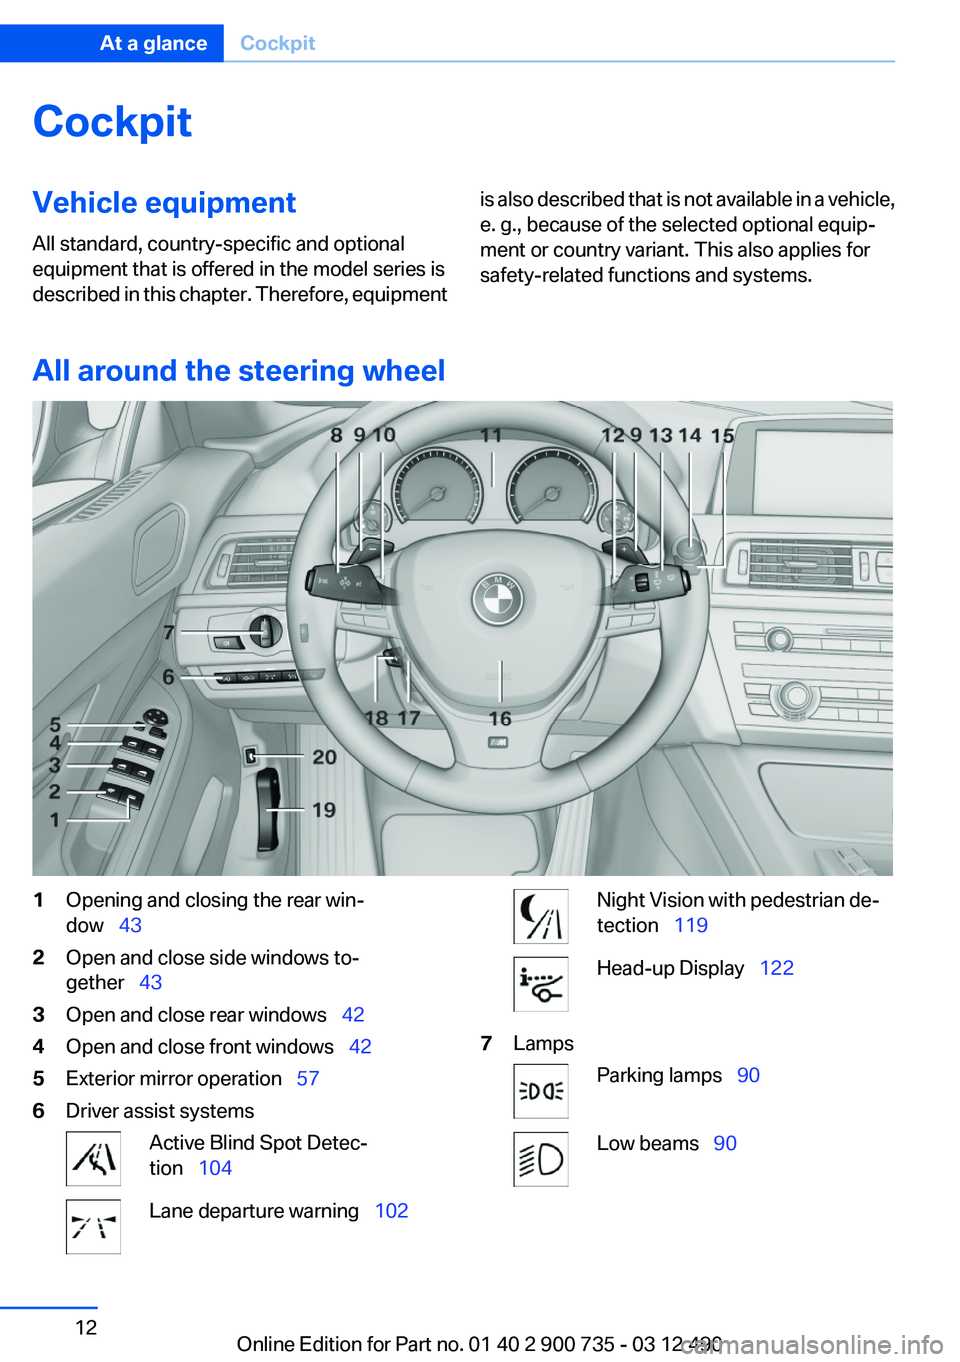
All around the steering wheel
1Opening and closing the rear win‐
dow 432Open and close side windows to‐
gether 433Open and close rear windows 424Open and close front windows 425Exterior mirror operation 576Driver assist systemsActive Blind Spot Detec‐
tion 104Lane departure warning 102Night Vision with pedestrian de‐
tection 119Head-up Display 1227LampsParking lamps 90Low beams 90Seite 12At a glanceCockpit12
Online Edition for Part no. 01 40 2 900 735 - 03 12 490
Page 16 of 297
iDriveVehicle equipment
All standard, country-specific and optional
equipment that is offered in the model series is
described in this chapter. Therefore, equipment
is also described that is not available in a vehicle,
e. g., because of the selected optional equip‐
ment or country variant. This also applies for
safety-related functions and systems.
The concept
The iDrive combines the functions of a multitude
of switches. Thus, these functions can be oper‐
ated from a central location.
Using the iDrive during a trip
To avoid becoming distracted and posing
an unnecessary hazard to your vehicle's occu‐
pants and to other road users, never attempt to
use the controls or enter information unless traf‐
fic and road conditions allow this.◀
Controls at a glance
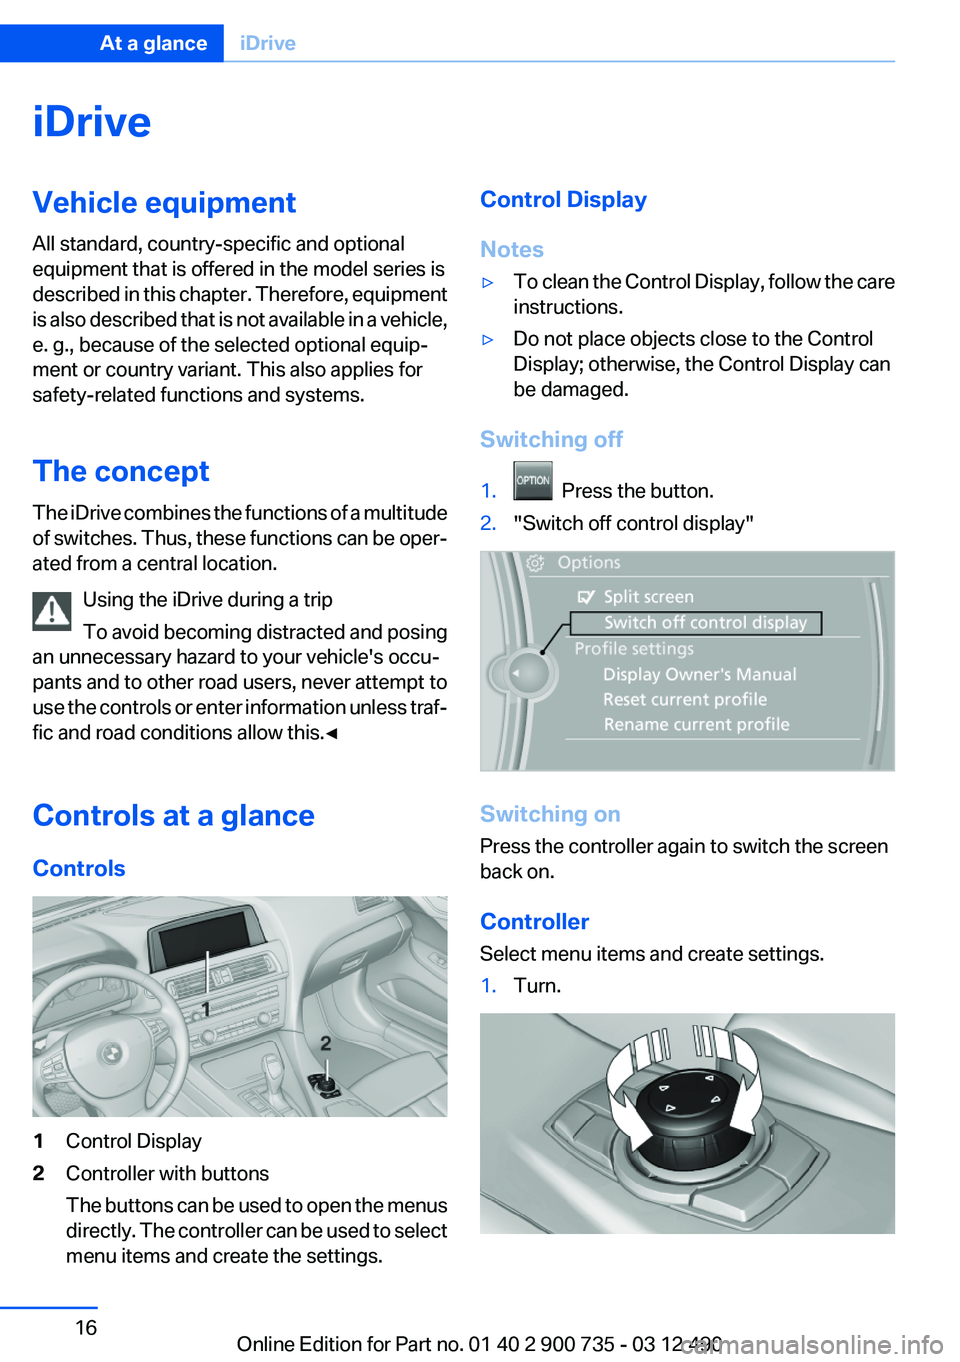
Controls1Control Display2Controller with buttons
The buttons can be used to open the menus
directly. The controller can be used to select
menu items and create the settings.Control Display
Notes▷To clean the Control Display, follow the care
instructions.▷Do not place objects close to the Control
Display; otherwise, the Control Display can
be damaged.
Switching off
1. Press the button.2."Switch off control display"
Switching on
Press the controller again to switch the screen
back on.
Controller
Select menu items and create settings.
1.Turn.Seite 16At a glanceiDrive16
Online Edition for Part no. 01 40 2 900 735 - 03 12 490
Page 35 of 297
Convenient openingPress and hold the button on the re‐
mote control.
The side windows and the rear window are fully
opened.
With Comfort Access, the remote control can be
used to open the convertible top when in the vi‐
cinity of the vehicle.
Press and hold the button on the re‐
mote control until the convertible top is
fully opened and the convertible top well storage
cover is fully closed.
Danger of pinching
Monitor the opening process to ensure
that no one becomes trapped; otherwise, inju‐
ries may result.◀
Releasing the button stops the motion.
Leaving the vicinity of the vehicle stops the mo‐
tion of the convertible top.
After a short period, the convertible top and the
convertible top well storage cover are lowered
slowly. The convertible top and the convertible
top well storage cover are not locked. Press the
button again until the convertible top operation
is completed.
Locking Press the button on the remote control.
Locking from the outside
Do not lock the vehicle from the outside if
there are people in it, as the vehicle cannot be
unlocked from inside without special knowl‐
edge.◀
Convenient closing
With Comfort Access, the remote control can be
used to close the convertible top, the side win‐
dows, and the rear window when in the vicinity
of the vehicle.Hold down the remote control button until
the closing operation is completed.
The convertible top, the side windows, and the
rear window close.
Monitor the closing process
Monitor the closing process to ensure that
no one becomes trapped.◀
Releasing the button or leaving the vicinity of the
vehicle stops the motion.
After a short period, the convertible top and the
convertible top well storage cover are lowered
slowly. The convertible top and the convertible
top well storage cover are not locked. Press the
button again until the convertible top operation
is completed.
Switching on interior lamps and
courtesy lamps
Press the button on the remote control
with the vehicle locked.
Panic mode
You can trigger the alarm system if you find
yourself in a dangerous situation.
Press the button on the remote control
for at least 3 seconds.
To switch off the alarm: press any button.
Switching on the headlamp courtesy
delay feature
Briefly press the button on the remote
control.
The duration can be set in the Control Display.
Opening the trunk lid Press the button on the remote control
for approx. 1 second.
The trunk lid opens, regardless of whether it was
previously locked or unlocked.Seite 35Opening and closingControls35
Online Edition for Part no. 01 40 2 900 735 - 03 12 490
Page 41 of 297
Alarm system
The concept
The vehicle alarm system responds to:▷Opening of a door, the hood or the trunk lid.▷Movements in the vehicle.▷Changes in the vehicle tilt, e.g., during at‐
tempts to steal a wheel or when towing the
car.▷Interruptions in battery voltage.
The alarm system briefly indicates tampering:
▷By sounding an acoustic alarm.▷By switching on the hazard warning system.▷By flashing the high beams.
Arming and disarming the alarm
system
General information
When you lock or unlock the vehicle, either with
the remote control, Comfort Access or at the
door lock the alarm system is armed or disarmed
at the same time.
Door lock and armed alarm system
Unlocking via the door lock will trigger the alarm
on some country-specific versions.
In order to terminate this alarm, unlock vehicle
with the remote control or switch on the ignition,
if necessary, by emergency detection of the re‐
mote control.
Trunk lid and armed alarm system
The trunk lid can be opened using the remote
control, even if the alarm system is armed.
Press the button on the remote control
for approx. 1 second.
After the trunk lid is closed, it is locked and
monitored again by the alarm system. The haz‐
ard warning system flashes once.
In some vehicle equipment variants, the trunk lid
can only be opened using the remote control if
the vehicle was unlocked first.
Panic mode Press the button on the remote control
for at least 3 seconds.
Switching off the alarm▷Unlock the vehicle using the remote control.▷With Comfort Access: if you are carrying the
remote control with you, pull on the door
handle.
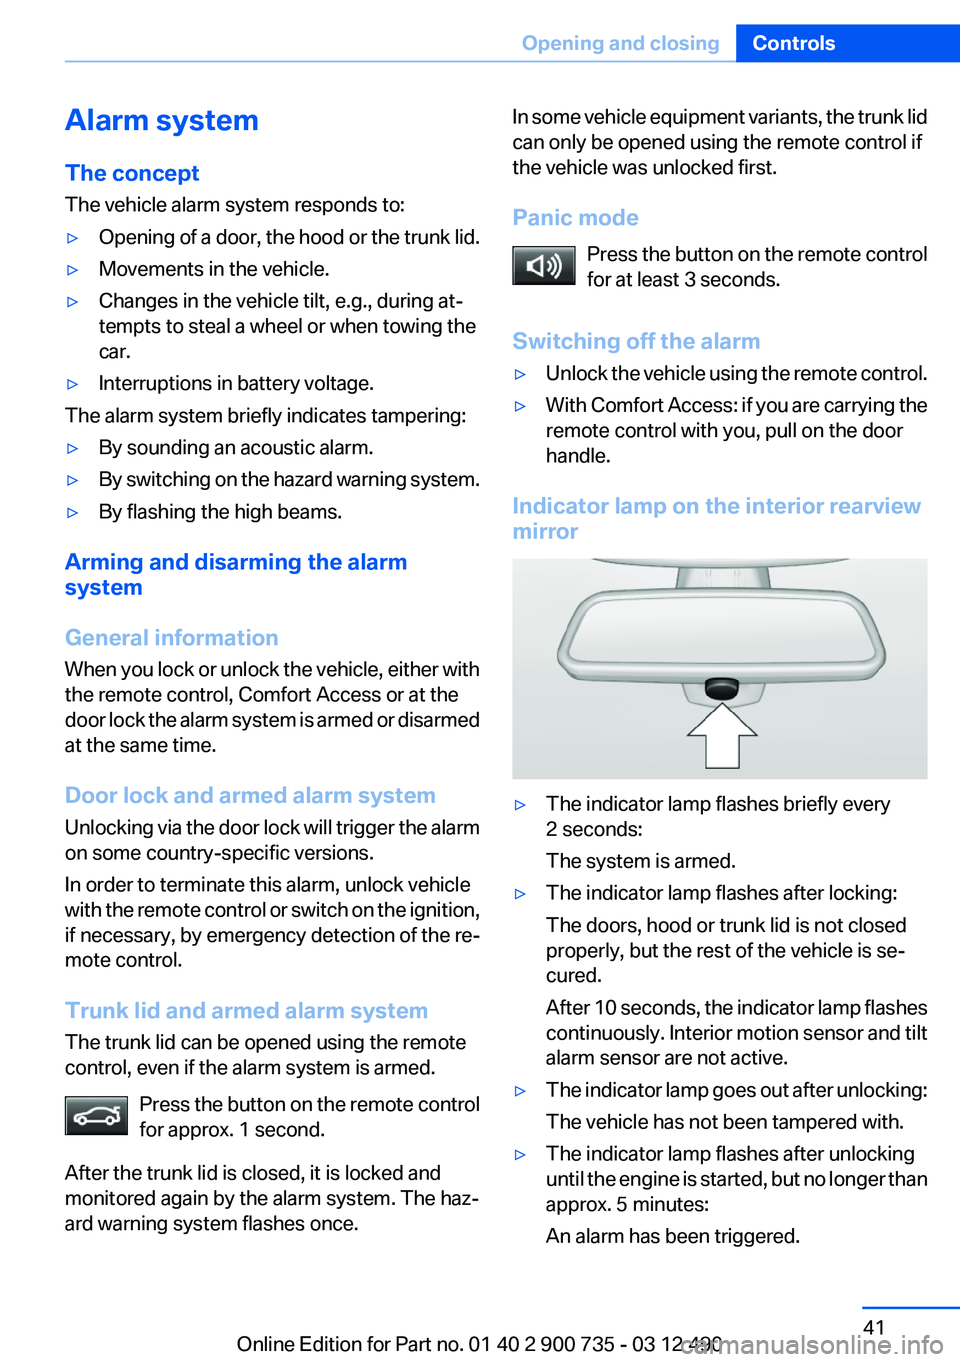
Indicator lamp on the interior rearview
mirror
▷The indicator lamp flashes briefly every
2 seconds:
The system is armed.▷The indicator lamp flashes after locking:
The doors, hood or trunk lid is not closed
properly, but the rest of the vehicle is se‐
cured.
After 10 seconds, the indicator lamp flashes
continuously. Interior motion sensor and tilt
alarm sensor are not active.▷The indicator lamp goes out after unlocking:
The vehicle has not been tampered with.▷The indicator lamp flashes after unlocking
until the engine is started, but no longer than
approx. 5 minutes:
An alarm has been triggered.Seite 41Opening and closingControls41
Online Edition for Part no. 01 40 2 900 735 - 03 12 490
Page 67 of 297
Preventing an engine stop using the
brake pedal
The engine stop can be actively prevented
within one second after the vehicle comes to a
standstill.▷Immediately after the vehicle comes to a
standstill, briefly press the brake pedal
forcefully.▷Then press the brake pedal with normal
braking force.
Activating/deactivating the system
manually
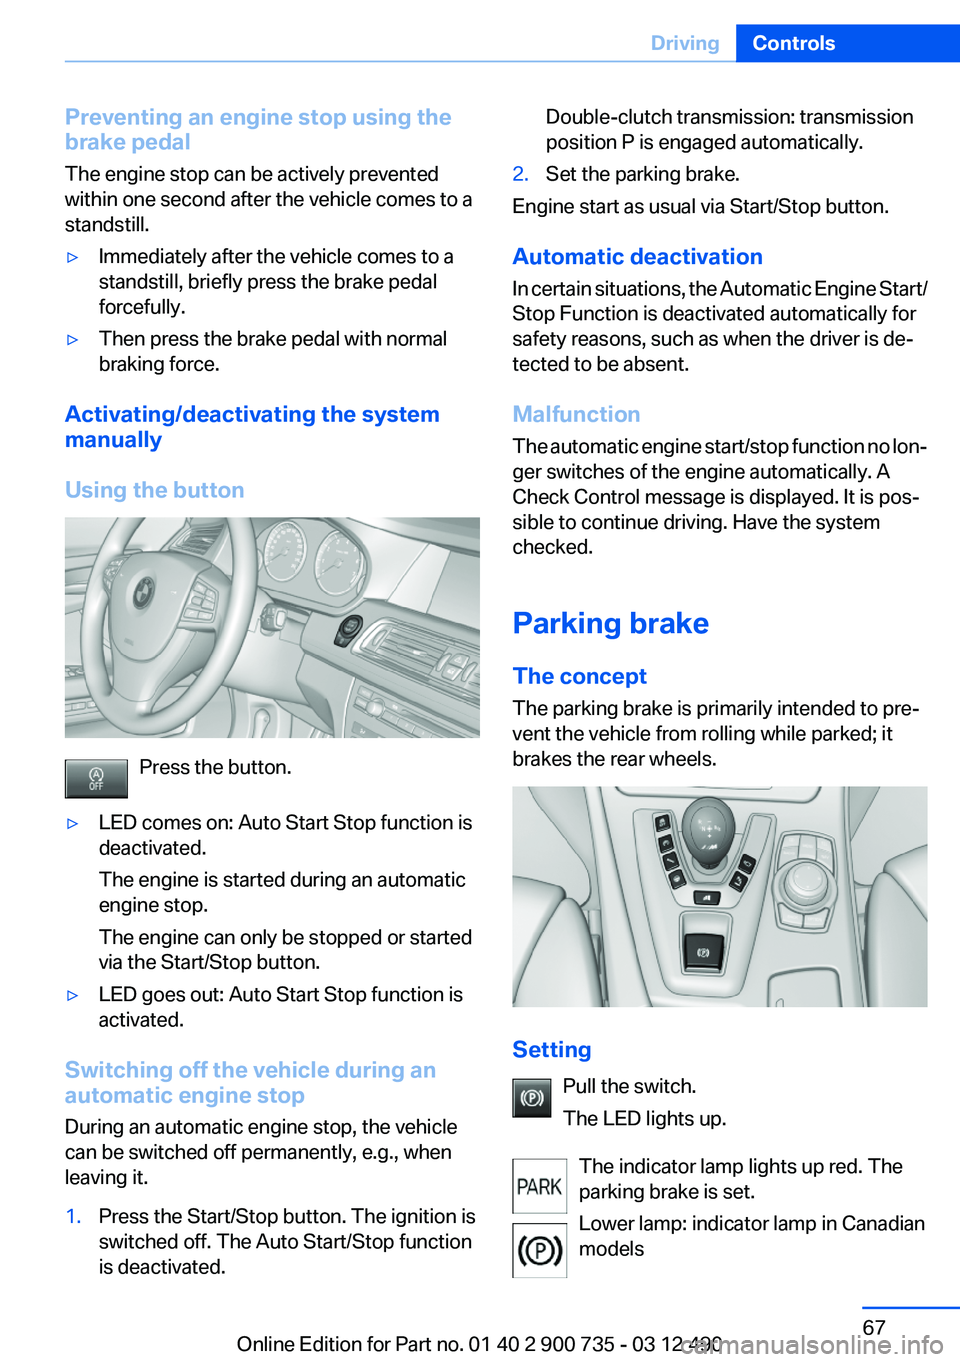
Using the button
Press the button.
▷LED comes on: Auto Start Stop function is
deactivated.
The engine is started during an automatic
engine stop.
The engine can only be stopped or started
via the Start/Stop button.▷LED goes out: Auto Start Stop function is
activated.
Switching off the vehicle during an
automatic engine stop
During an automatic engine stop, the vehicle
can be switched off permanently, e.g., when
leaving it.
1.Press the Start/Stop button. The ignition is
switched off. The Auto Start/Stop function
is deactivated.Double-clutch transmission: transmission
position P is engaged automatically.2.Set the parking brake.
Engine start as usual via Start/Stop button.
Automatic deactivation
In certain situations, the Automatic Engine Start/
Stop Function is deactivated automatically for
safety reasons, such as when the driver is de‐
tected to be absent.
Malfunction
The automatic engine start/stop function no lon‐
ger switches of the engine automatically. A
Check Control message is displayed. It is pos‐
sible to continue driving. Have the system
checked.
Parking brake
The concept
The parking brake is primarily intended to pre‐
vent the vehicle from rolling while parked; it
brakes the rear wheels.
Setting
Pull the switch.
The LED lights up.
The indicator lamp lights up red. The
parking brake is set.
Lower lamp: indicator lamp in Canadian
models
Seite 67DrivingControls67
Online Edition for Part no. 01 40 2 900 735 - 03 12 490
Page 70 of 297
pressed while the vehicle is stationary and
transmission position R or D is engaged.
Displays in the instrument cluster
Sequential mode
▷Engaged gear, arrow 1.▷Selected driving program,
Drivelogic, refer to
page 70, arrow 2.
Drive mode
▷Engaged gear together with a
D, arrow 1.▷Selected driving program,
Drivelogic, refer to
page 70, arrow 2.
Note
When the external temperature is very low, the
display may not work. Current driving direction
is recognizable at the engaged selector lever
position.
Gear change
Shifting in Sequential mode possible.
A shift in Drive mode causes a switch to Se‐
quential mode.
Using the selector lever
▷To shift up: pull the selector lever rearwards.▷To shift down: press the selector lever for‐
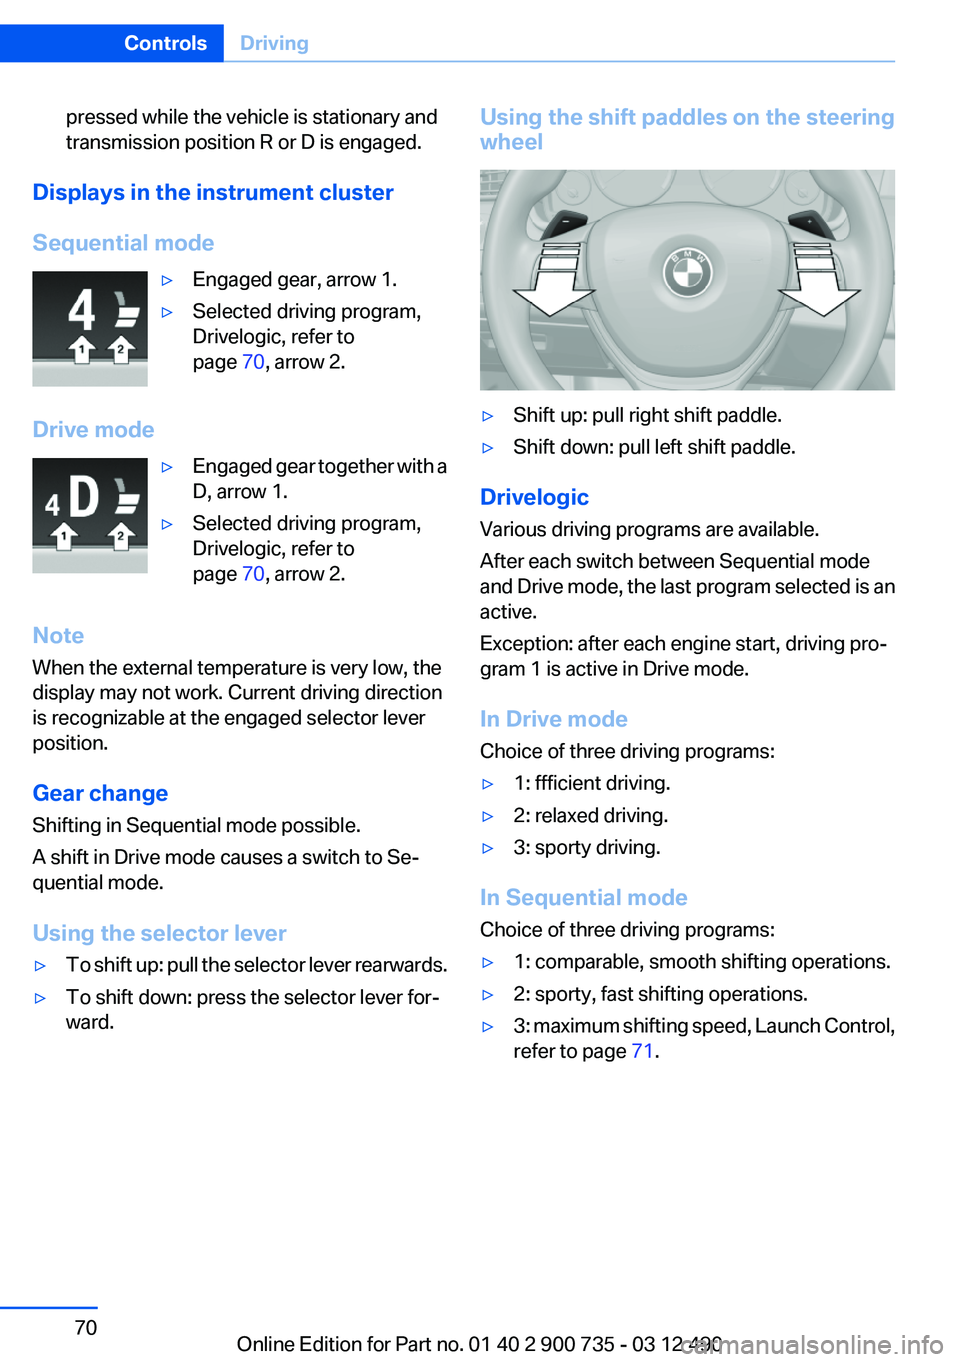
ward.Using the shift paddles on the steering
wheel▷Shift up: pull right shift paddle.▷Shift down: pull left shift paddle.
Drivelogic
Various driving programs are available.
After each switch between Sequential mode
and Drive mode, the last program selected is an
active.
Exception: after each engine start, driving pro‐
gram 1 is active in Drive mode.
In Drive mode
Choice of three driving programs:
▷1: ffficient driving.▷2: relaxed driving.▷3: sporty driving.
In Sequential mode
Choice of three driving programs:
▷1: comparable, smooth shifting operations.▷2: sporty, fast shifting operations.▷3: maximum shifting speed, Launch Control,
refer to page 71.Seite 70ControlsDriving70
Online Edition for Part no. 01 40 2 900 735 - 03 12 490
Page 80 of 297
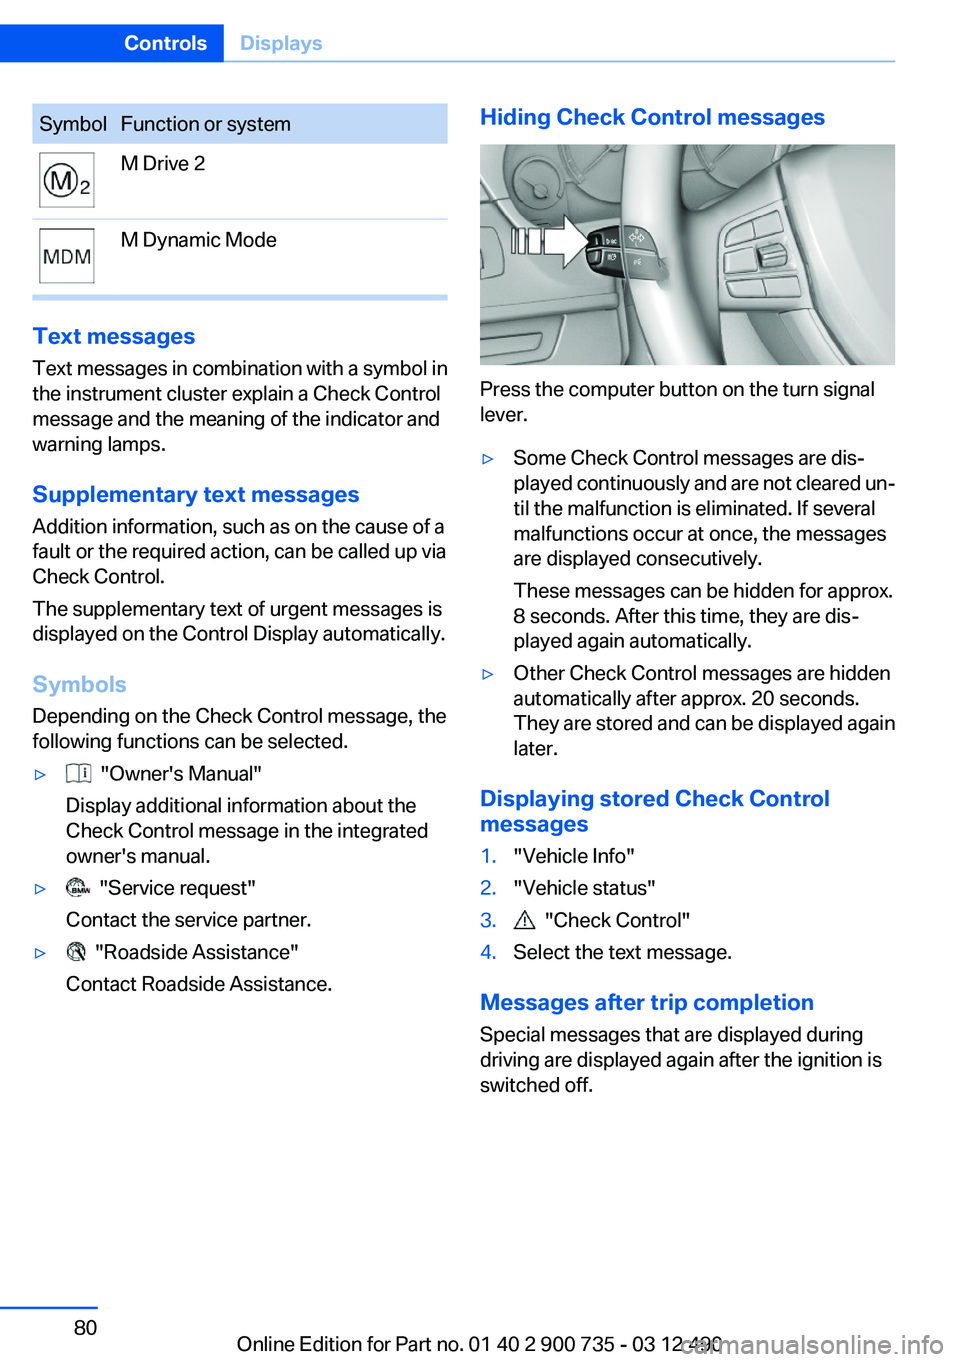
SymbolFunction or systemM Drive 2M Dynamic Mode
Text messages
Text messages in combination with a symbol in
the instrument cluster explain a Check Control
message and the meaning of the indicator and
warning lamps.
Supplementary text messages
Addition information, such as on the cause of a
fault or the required action, can be called up via
Check Control.
The supplementary text of urgent messages is
displayed on the Control Display automatically.
Symbols
Depending on the Check Control message, the
following functions can be selected.
▷ "Owner's Manual"
Display additional information about the
Check Control message in the integrated
owner's manual.▷ "Service request"
Contact the service partner.▷ "Roadside Assistance"
Contact Roadside Assistance.Hiding Check Control messages
Press the computer button on the turn signal
lever.
▷Some Check Control messages are dis‐
played continuously and are not cleared un‐
til the malfunction is eliminated. If several
malfunctions occur at once, the messages
are displayed consecutively.
These messages can be hidden for approx.
8 seconds. After this time, they are dis‐
played again automatically.▷Other Check Control messages are hidden
automatically after approx. 20 seconds.
They are stored and can be displayed again
later.
Displaying stored Check Control
messages
1."Vehicle Info"2."Vehicle status"3. "Check Control"4.Select the text message.
Messages after trip completion
Special messages that are displayed during
driving are displayed again after the ignition is
switched off.
Seite 80ControlsDisplays80
Online Edition for Part no. 01 40 2 900 735 - 03 12 490
Page 90 of 297
LampsVehicle equipment
All standard, country-specific and optional
equipment that is offered in the model series is
described in this chapter. Therefore, equipment
is also described that is not available in a vehicle,
e. g., because of the selected optional equip‐
ment or country variant. This also applies for
safety-related functions and systems.
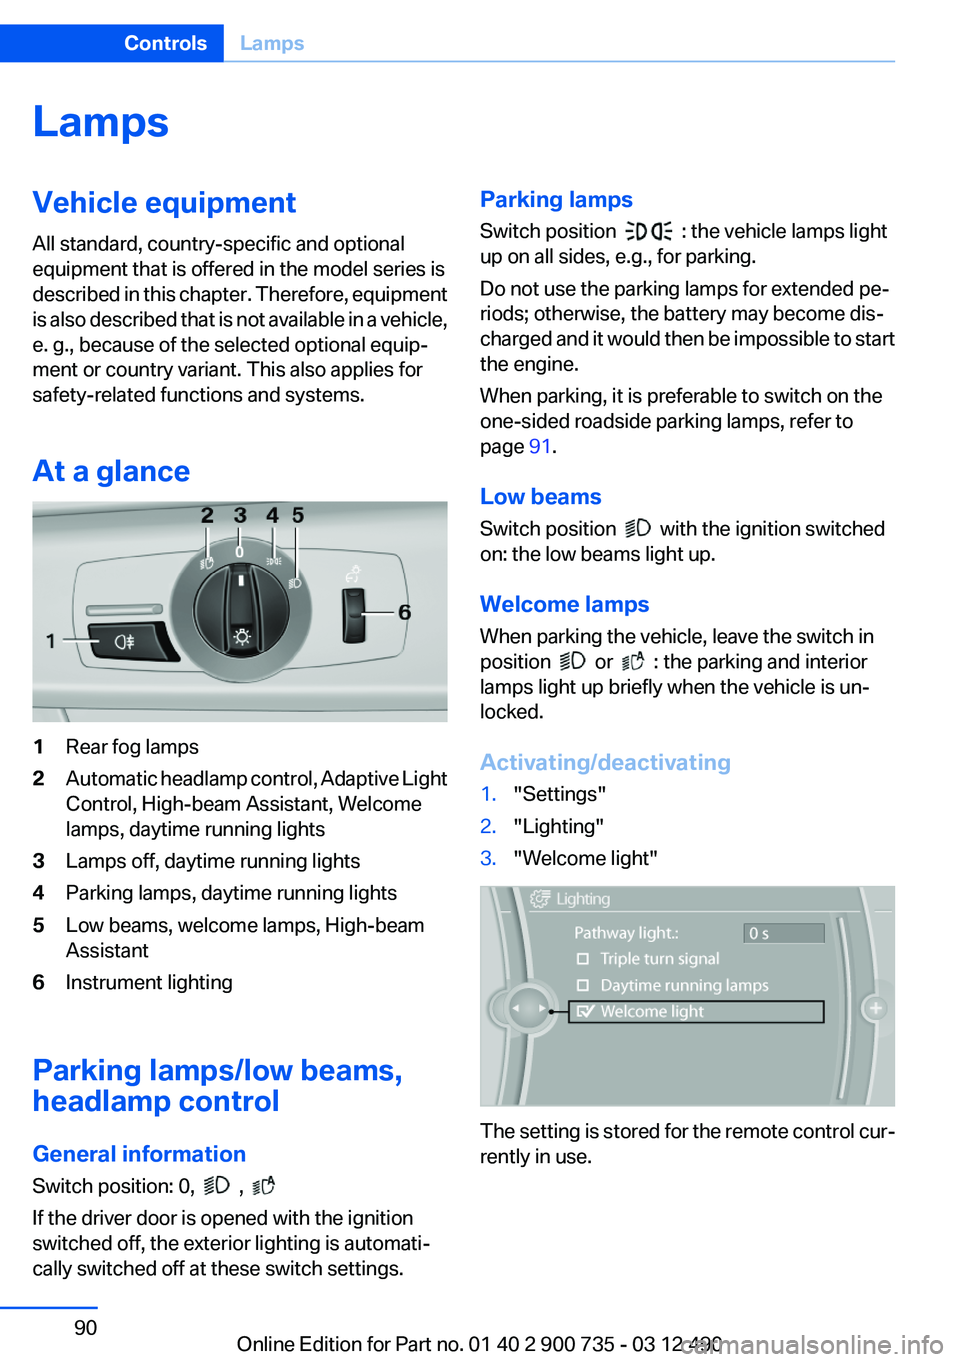
At a glance1Rear fog lamps2Automatic headlamp control, Adaptive Light
Control, High-beam Assistant, Welcome
lamps, daytime running lights3Lamps off, daytime running lights4Parking lamps, daytime running lights5Low beams, welcome lamps, High-beam
Assistant6Instrument lighting
Parking lamps/low beams,
headlamp control
General information
Switch position: 0,
,
If the driver door is opened with the ignition
switched off, the exterior lighting is automati‐
cally switched off at these switch settings.
Parking lamps
Switch position
: the vehicle lamps light
up on all sides, e.g., for parking.
Do not use the parking lamps for extended pe‐
riods; otherwise, the battery may become dis‐
charged and it would then be impossible to start
the engine.
When parking, it is preferable to switch on the
one-sided roadside parking lamps, refer to
page 91.
Low beams
Switch position
with the ignition switched
on: the low beams light up.
Welcome lamps
When parking the vehicle, leave the switch in
position
or : the parking and interior
lamps light up briefly when the vehicle is un‐
locked.
Activating/deactivating
1."Settings"2."Lighting"3."Welcome light"
The setting is stored for the remote control cur‐
rently in use.
Seite 90ControlsLamps90
Online Edition for Part no. 01 40 2 900 735 - 03 12 490