change wheel BMW M6 COUPE 2007 E63 Owner's Manual
[x] Cancel search | Manufacturer: BMW, Model Year: 2007, Model line: M6 COUPE, Model: BMW M6 COUPE 2007 E63Pages: 256, PDF Size: 8.11 MB
Page 5 of 256
Reference
At a glance
Controls
Driving tips
Communications
Navigation
Entertainment
Mobility
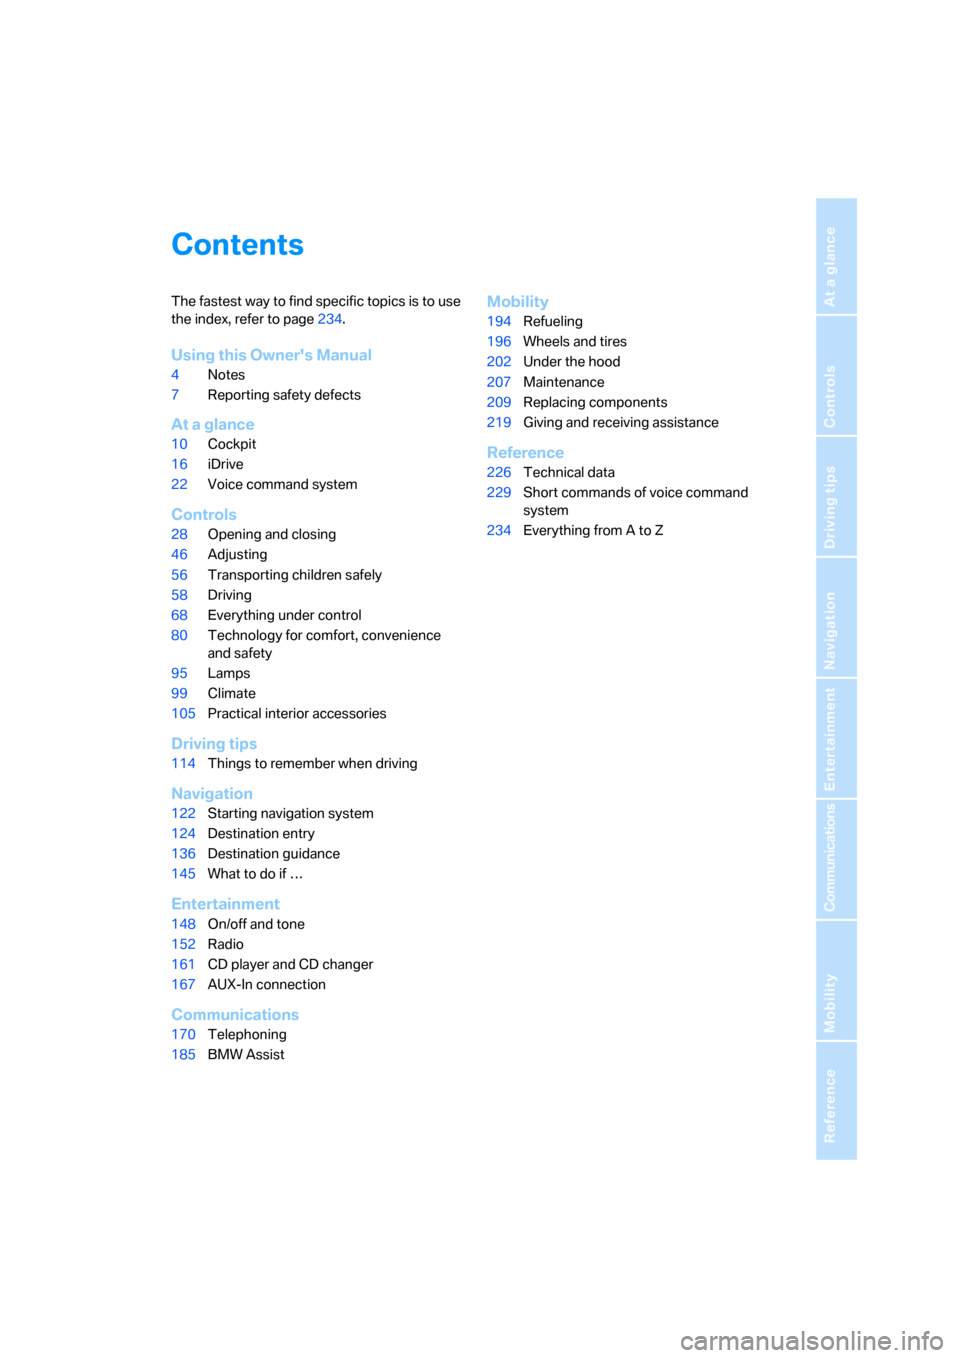
Contents
The fastest way to find specific topics is to use
the index, refer to page234.
Using this Owner's Manual
4Notes
7Reporting safety defects
At a glance
10Cockpit
16iDrive
22Voice command system
Controls
28Opening and closing
46Adjusting
56Transporting children safely
58Driving
68Everything under control
80Technology for comfort, convenience
and safety
95Lamps
99Climate
105Practical interior accessories
Driving tips
114Things to remember when driving
Navigation
122Starting navigation system
124Destination entry
136Destination guidance
145What to do if …
Entertainment
148On/off and tone
152Radio
161CD player and CD changer
167AUX-In connection
Communications
170Telephoning
185BMW Assist
Mobility
194Refueling
196Wheels and tires
202Under the hood
207Maintenance
209Replacing components
219Giving and receiving assistance
Reference
226Technical data
229Short commands of voice command
system
234Everything from A to Z
Page 25 of 256
At a glance
23Reference
Controls
Driving tips
Communications
Navigation
Entertainment
Mobility
If no other commands are possible, then oper-
ate the equipment using iDrive.
Terminating or canceling voice
command
Press the button on the steering wheel or in
the center console
or
Commands
Having possible commands read aloud
You can have the system read aloud the possi-
ble commands related to the selected menu
item on the Control Display.
To have the system list the possible com-
mands:
For example, if you have selected "CD", the
system will read aloud the possible commands
for operating the CD player and the CD
changer
*.
Opening help
Using alternative commands
There are often several commands for running
a function, e.g.:
Running functions directly with short
commands
With short commands you can run certain func-
tions directly, regardless of which menu item is
selected, refer to page229.
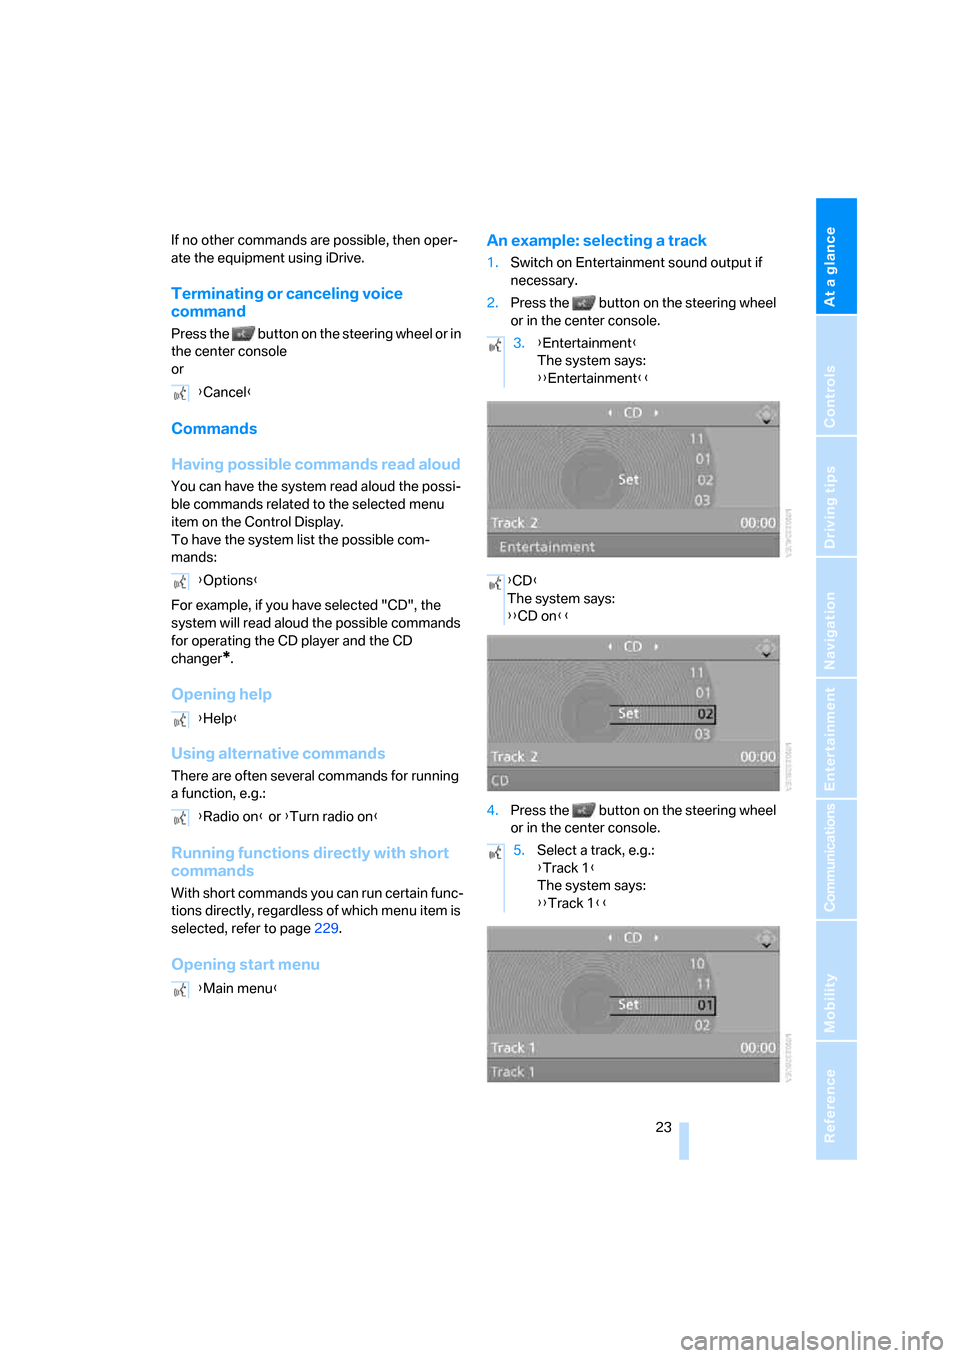
Opening start menuAn example: selecting a track
1.Switch on Entertainment sound output if
necessary.
2.Press the button on the steering wheel
or in the center console.
4.Press the button on the steering wheel
or in the center console. {Cancel}
{Options}
{Help}
{Radio on} or {Turn radio on}
{Main menu}
3.{Entertainment}
The system says:
{{Entertainment}}
{CD}
The system says:
{{CD on}}
5.Select a track, e.g.:
{Track 1}
The system says:
{{Track 1}}
Page 37 of 256
Controls
35Reference
At a glance
Driving tips
Communications
Navigation
Entertainment
Mobility
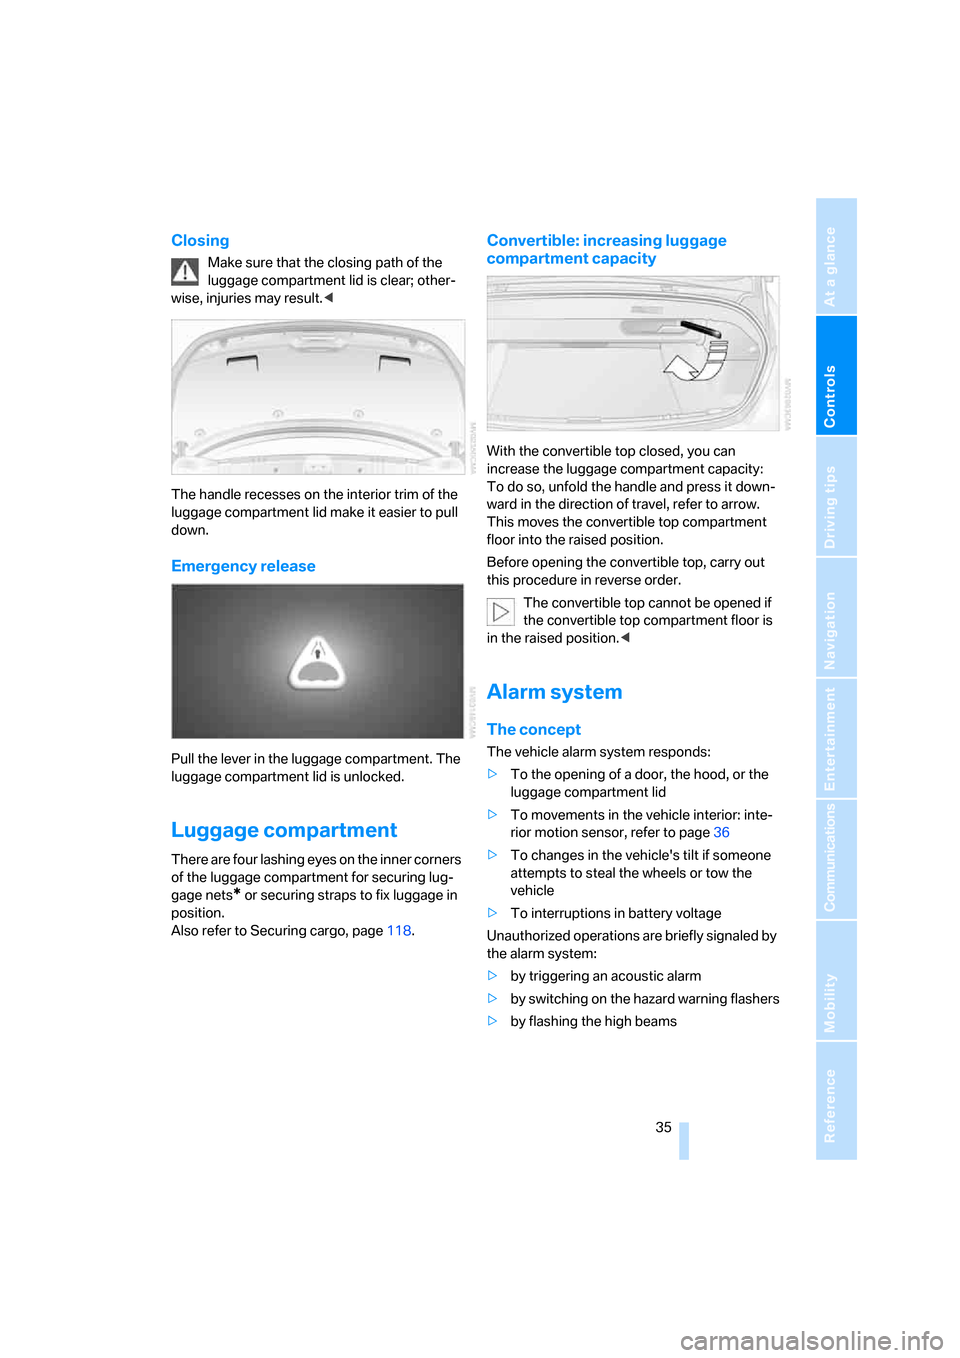
Closing
Make sure that the closing path of the
luggage compartment lid is clear; other-
wise, injuries may result.<
The handle recesses on the interior trim of the
luggage compartment lid make it easier to pull
down.
Emergency release
Pull the lever in the luggage compartment. The
luggage compartment lid is unlocked.
Luggage compartment
There are four lashing eyes on the inner corners
of the luggage compartment for securing lug-
gage nets
* or securing straps to fix luggage in
position.
Also refer to Securing cargo, page118.
Convertible: increasing luggage
compartment capacity
With the convertible top closed, you can
increase the luggage compartment capacity:
To do so, unfold the handle and press it down-
ward in the direction of travel, refer to arrow.
This moves the convertible top compartment
floor into the raised position.
Before opening the convertible top, carry out
this procedure in reverse order.
The convertible top cannot be opened if
the convertible top compartment floor is
in the raised position.<
Alarm system
The concept
The vehicle alarm system responds:
>To the opening of a door, the hood, or the
luggage compartment lid
>To movements in the vehicle interior: inte-
rior motion sensor, refer to page36
>To changes in the vehicle's tilt if someone
attempts to steal the wheels or tow the
vehicle
>To interruptions in battery voltage
Unauthorized operations are briefly signaled by
the alarm system:
>by triggering an acoustic alarm
>by switching on
the hazard warning flashers
>by flashing the high beams
Page 50 of 256
Adjusting
48
Seat, mirror and steering
wheel memory
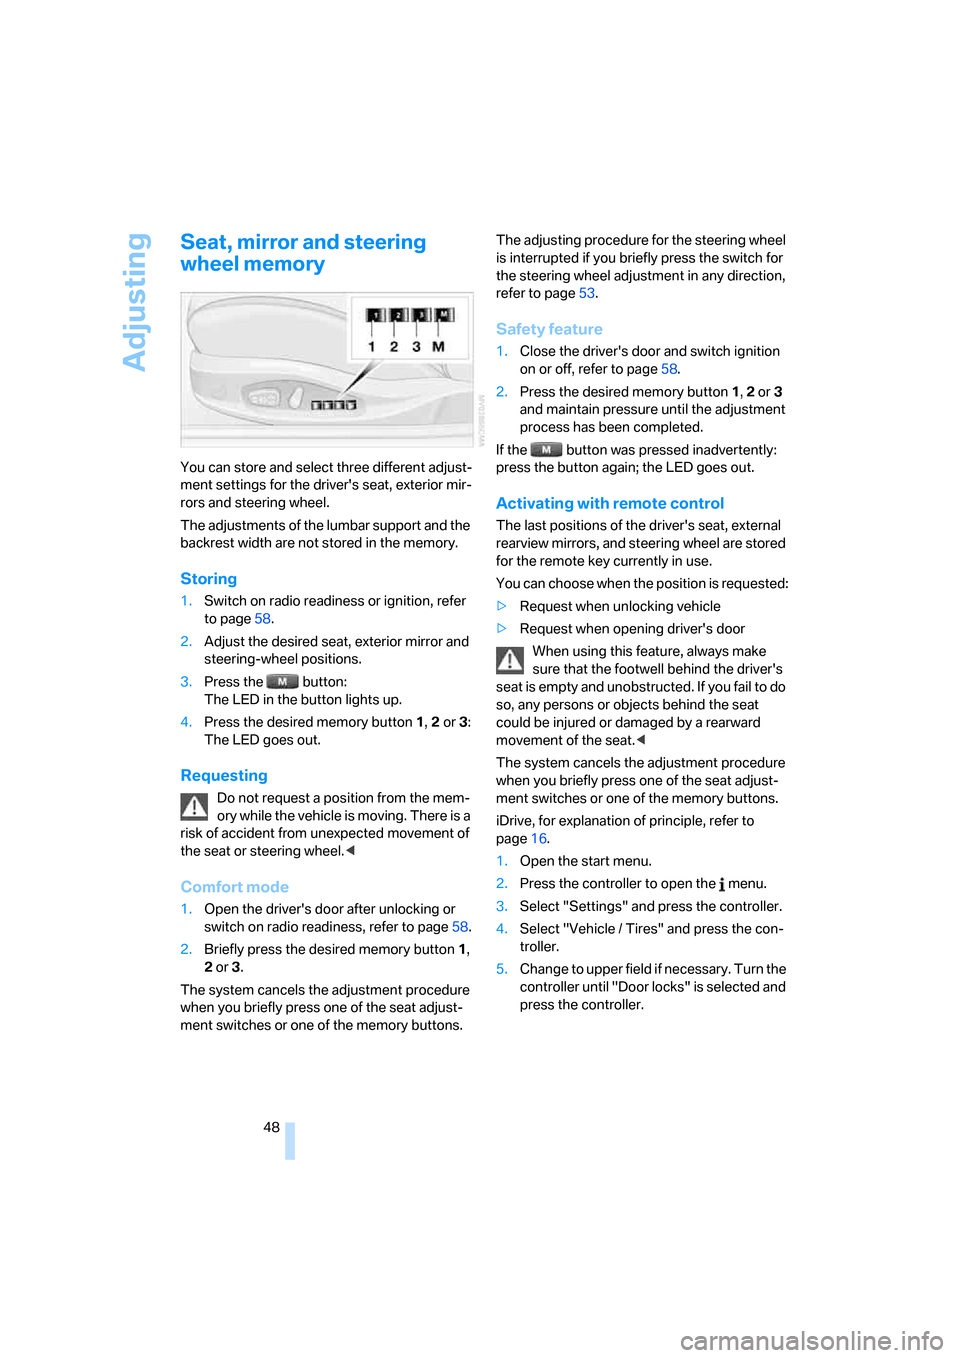
You can store and select three different adjust-
ment settings for the driver's seat, exterior mir-
rors and steering wheel.
The adjustments of the lumbar support and the
backrest width are not stored in the memory.
Storing
1.Switch on radio readiness or ignition, refer
to page58.
2.Adjust the desired seat, exterior mirror and
steering-wheel positions.
3.Press the button:
The LED in the button lights up.
4.Press the desired memory button 1, 2 or3:
The LED goes out.
Requesting
Do not request a position from the mem-
ory while the vehicle is moving. There is a
risk of accident from unexpected movement of
the seat or steering wheel.<
Comfort mode
1.Open the driver's door after unlocking or
switch on radio readiness, refer to page58.
2.Briefly press the desired memory button1,
2 or3.
The system cancels the adjustment procedure
when you briefly press one of the seat adjust-
ment switches or one of the memory buttons.The adjusting procedure for the steering wheel
is interrupted if you briefly press the switch for
the steering wheel adjustment in any direction,
refer to page53.
Safety feature
1.Close the driver's door and switch ignition
on or off, refer to page58.
2.Press the desired memory button 1, 2 or3
and maintain pressure until the adjustment
process has been completed.
If the button was pressed inadvertently:
press the button again; the LED goes out.
Activating with remote control
The last positions of the driver's seat, external
rearview mirrors, and steering wheel are stored
for the remote key currently in use.
You can choose when the position is requested:
>Request when unlocking vehicle
>Request when opening driver's door
When using this feature, always make
sure that the footwell behind the driver's
seat is empty and unobstructed. If you fail to do
so, any persons or objects behind the seat
could be injured or damaged by a rearward
movement of the seat.<
The system cancels the adjustment procedure
when you briefly press one of the seat adjust-
ment switches or one of the memory buttons.
iDrive, for explanation of principle, refer to
page16.
1.Open the start menu.
2.Press the controller to open the menu.
3.Select "Settings" and press the controller.
4.Select "Vehicle / Tires" and press the con-
troller.
5.Change to upper field if necessary. Turn the
controller until "Door locks" is selected and
press the controller.
Page 55 of 256
Controls
53Reference
At a glance
Driving tips
Communications
Navigation
Entertainment
Mobility
Also do not attach stickers to the windshield in
front of the mirror.
Steering wheel
Adjusting
Do not adjust the steering wheel while the
vehicle is moving. There is a risk of acci-
dent as the result of unexpected movement.<
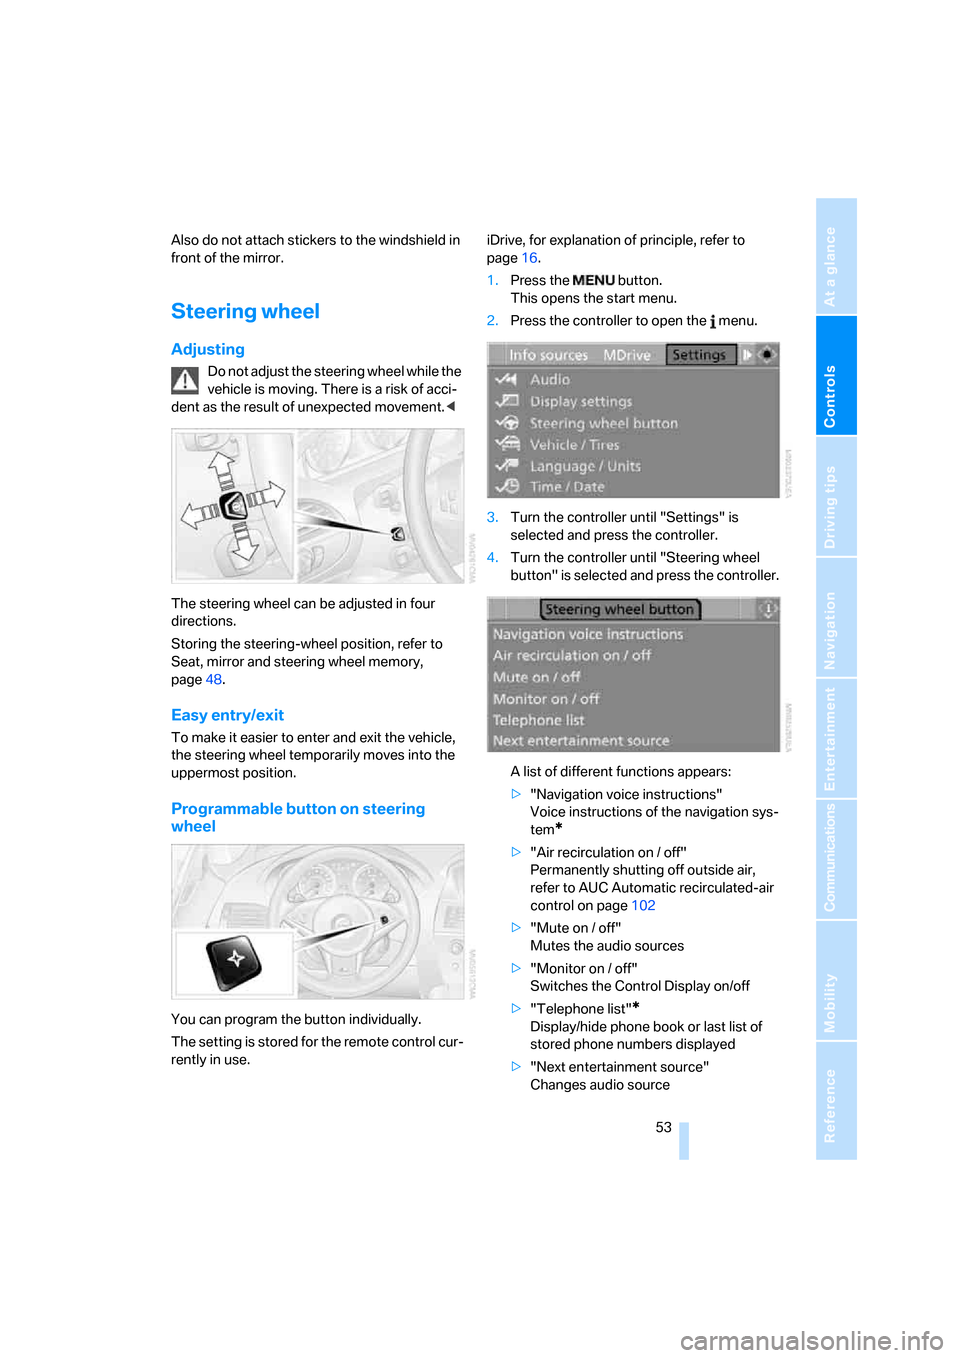
The steering wheel can be adjusted in four
directions.
Storing the steering-wheel position, refer to
Seat, mirror and steering wheel memory,
page48.
Easy entry/exit
To make it easier to enter and exit the vehicle,
the steering wheel temporarily moves into the
uppermost position.
Programmable button on steering
wheel
You can program the button individually.
The setting is stored for the remote control cur-
rently in use.iDrive, for explanation of principle, refer to
page16.
1.Press the button.
This opens the start menu.
2.Press the controller to open the menu.
3.Turn the controller until "Settings" is
selected and press the controller.
4.Turn the controller until "Steering wheel
button" is selected and press the controller.
A list of different functions appears:
>"Navigation voice instructions"
Voice instructions of the navigation sys-
tem
*
>"Air recirculation on / off"
Permanently shutting off outside air,
refer to AUC Automatic recirculated-air
control on page102
>"Mute on / off"
Mutes the audio sources
>"Monitor on / off"
Switches the Control Display on/off
>"Telephone list"
*
Display/hide phone book or last list of
stored phone numbers displayed
>"Next entertainment source"
Changes audio source
Page 56 of 256
Adjusting
54 5.Select the desired function unit and press
the controller.
Operating function
Press the button on the steering wheel.
If you have programmed "Navigation voice
instructions" for the button:
>To switch voice instructions on/off:
Press the button longer.
>To repeat the last voice instruction:
Press the button.
MDrive
With MDrive you can configure several individ-
ual settings for your vehicle on the Control Dis-
play and activate them simultaneously with the
button on the steering wheel.
Configuring settings
With the ignition switched on you can change
the settings of MDrive on the Control Display.
iDrive, for explanation of principle, refer to
page16.
1.Press the button.
This opens the start menu.
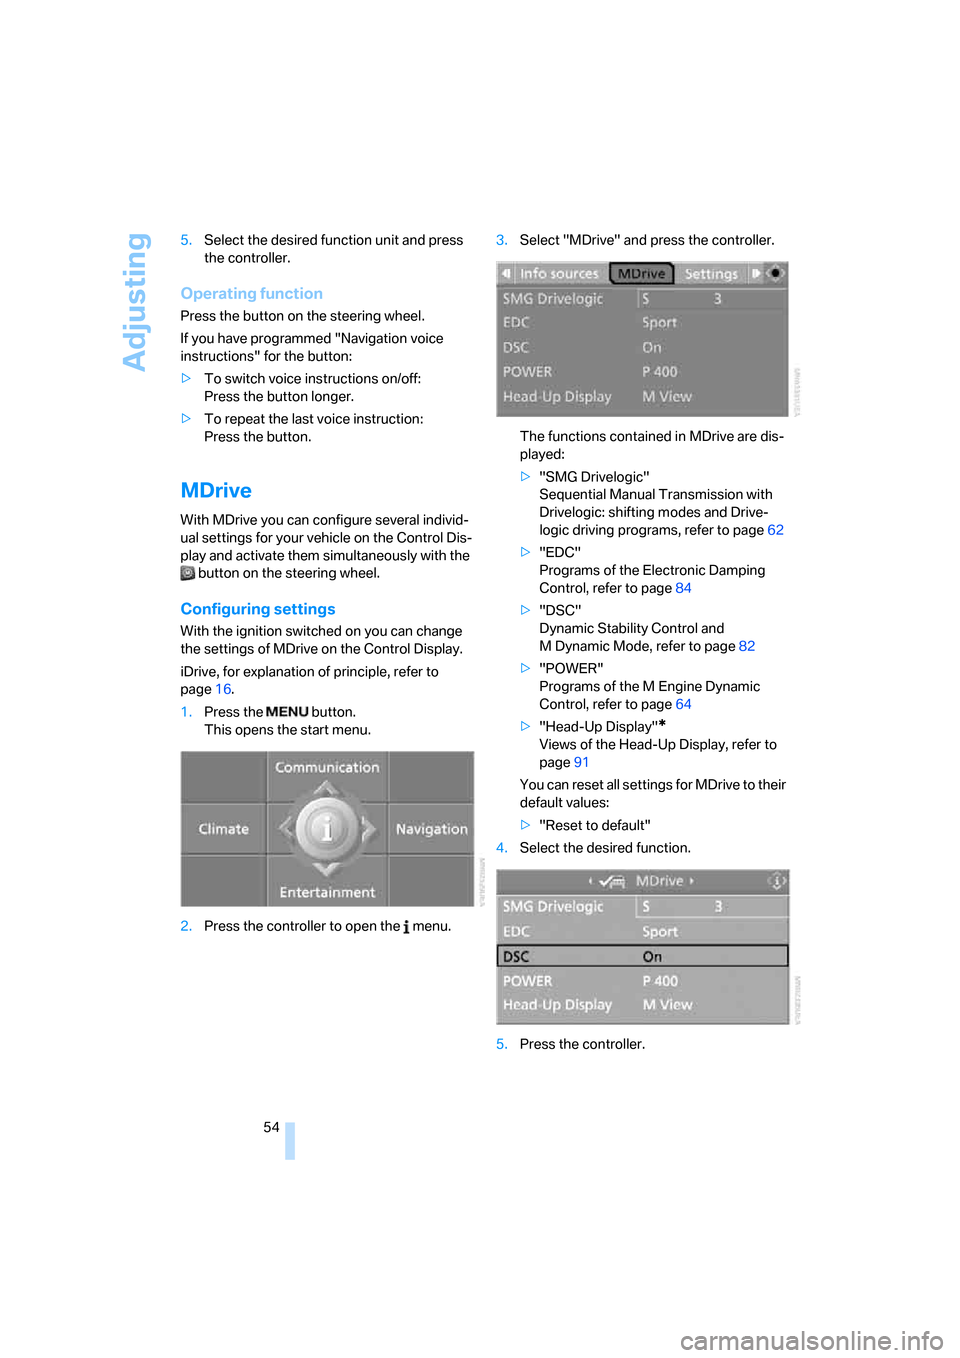
2.Press the controller to open the menu.3.Select "MDrive" and press the controller.
The functions contained in MDrive are dis-
played:
>"SMG Drivelogic"
Sequential Manual Transmission with
Drivelogic: shifting modes and Drive-
logic driving programs, refer to page62
>"EDC"
Programs of the Electronic Damping
Control, refer to page84
>"DSC"
Dynamic Stability Control and
M Dynamic Mode, refer to page82
>"POWER"
Programs of the M Engine Dynamic
Control, refer to page64
>"Head-Up Display"
*
Views of the Head-Up Display, refer to
page91
You can reset all settings for MDrive to their
default values:
>"Reset to default"
4.Select the desired function.
5.Press the controller.
Page 57 of 256
Controls
55Reference
At a glance
Driving tips
Communications
Navigation
Entertainment
Mobility
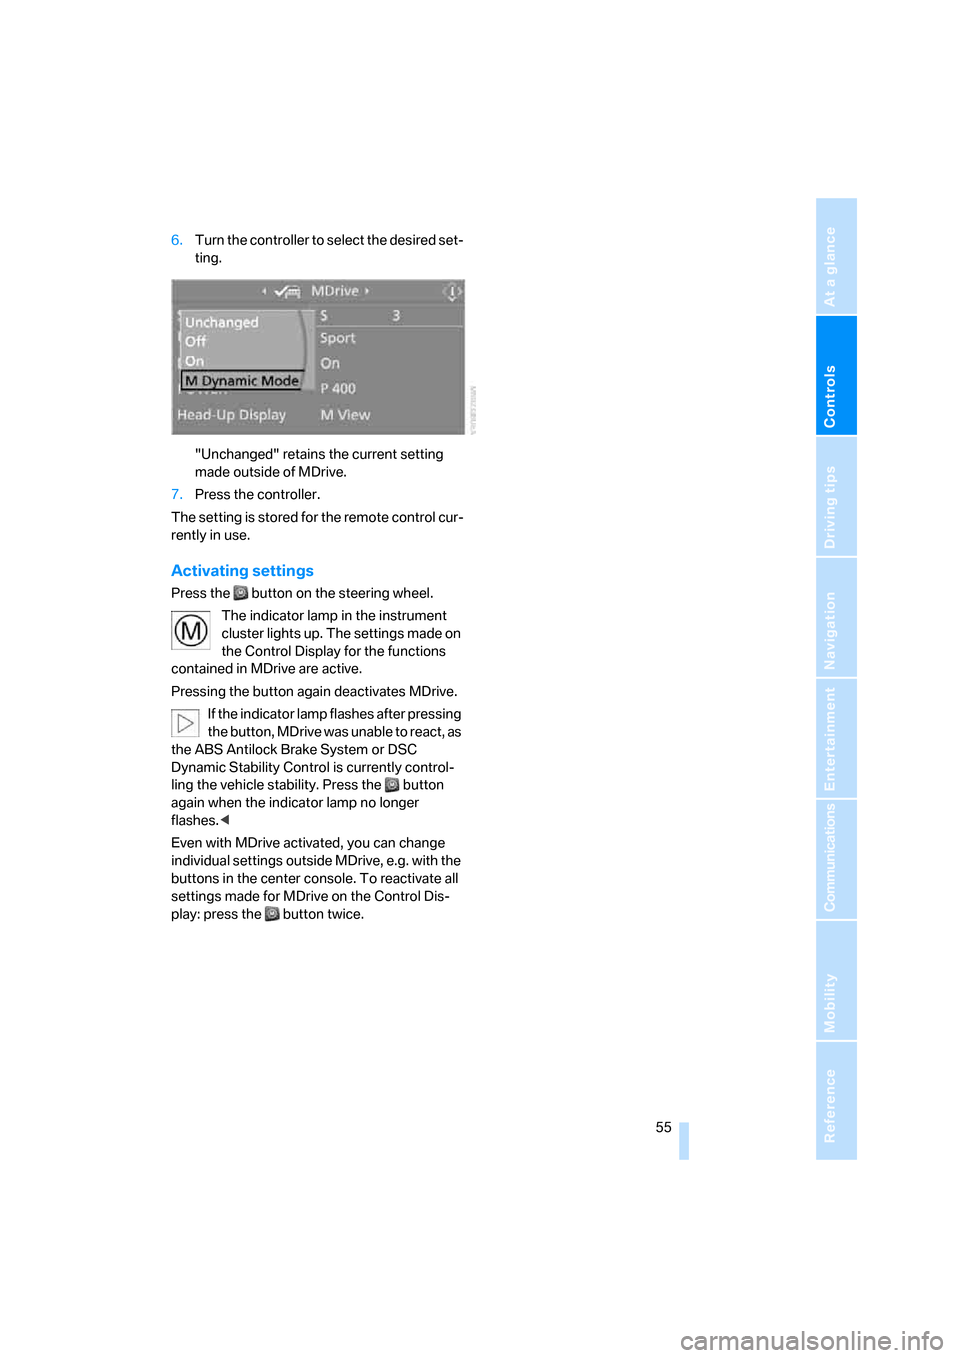
6.Turn the controller to select the desired set-
ting.
"Unchanged" retains the current setting
made outside of MDrive.
7.Press the controller.
The setting is stored for the remote control cur-
rently in use.
Activating settings
Press the button on the steering wheel.
The indicator lamp in the instrument
cluster lights up. The settings made on
the Control Display for the functions
contained in MDrive are active.
Pressing the button again deactivates MDrive.
If the indicator lamp flashes after pressing
the button, MDrive was unable to react, as
the ABS Antilock Brake System or DSC
Dynamic Stability Control is currently control-
ling the vehicle stability. Press the button
again when the indicator lamp no longer
flashes.<
Even with MDrive activated, you can change
individual settings outside MDrive, e.g. with the
buttons in the center console. To reactivate all
settings made for MDrive on the Control Dis-
play: press the button twice.
Page 63 of 256
Controls
61Reference
At a glance
Driving tips
Communications
Navigation
Entertainment
Mobility
Sequential Manual
Transmission with Drivelogic
The concept
The SMG Sequential Manual Transmission
with Drivelogic is an automated manual trans-
mission in which an electrohydraulic system
handles the clutching and gear changes.
The Sequential Manual Transmission is oper-
ated with the selector lever and two shift pad-
dles on the steering wheel.
It offers the following functions:
>Choice of manual or automatic mode:
Sequential mode or Drive mode
>Selection option between different driving
programs, Drivelogic, refer to page62
>Upshift display, shift lights, refer to page63
>Automatic downshifting and prevention of
incorrect shifting even in sequential opera-
tion
>Automatic double clutching
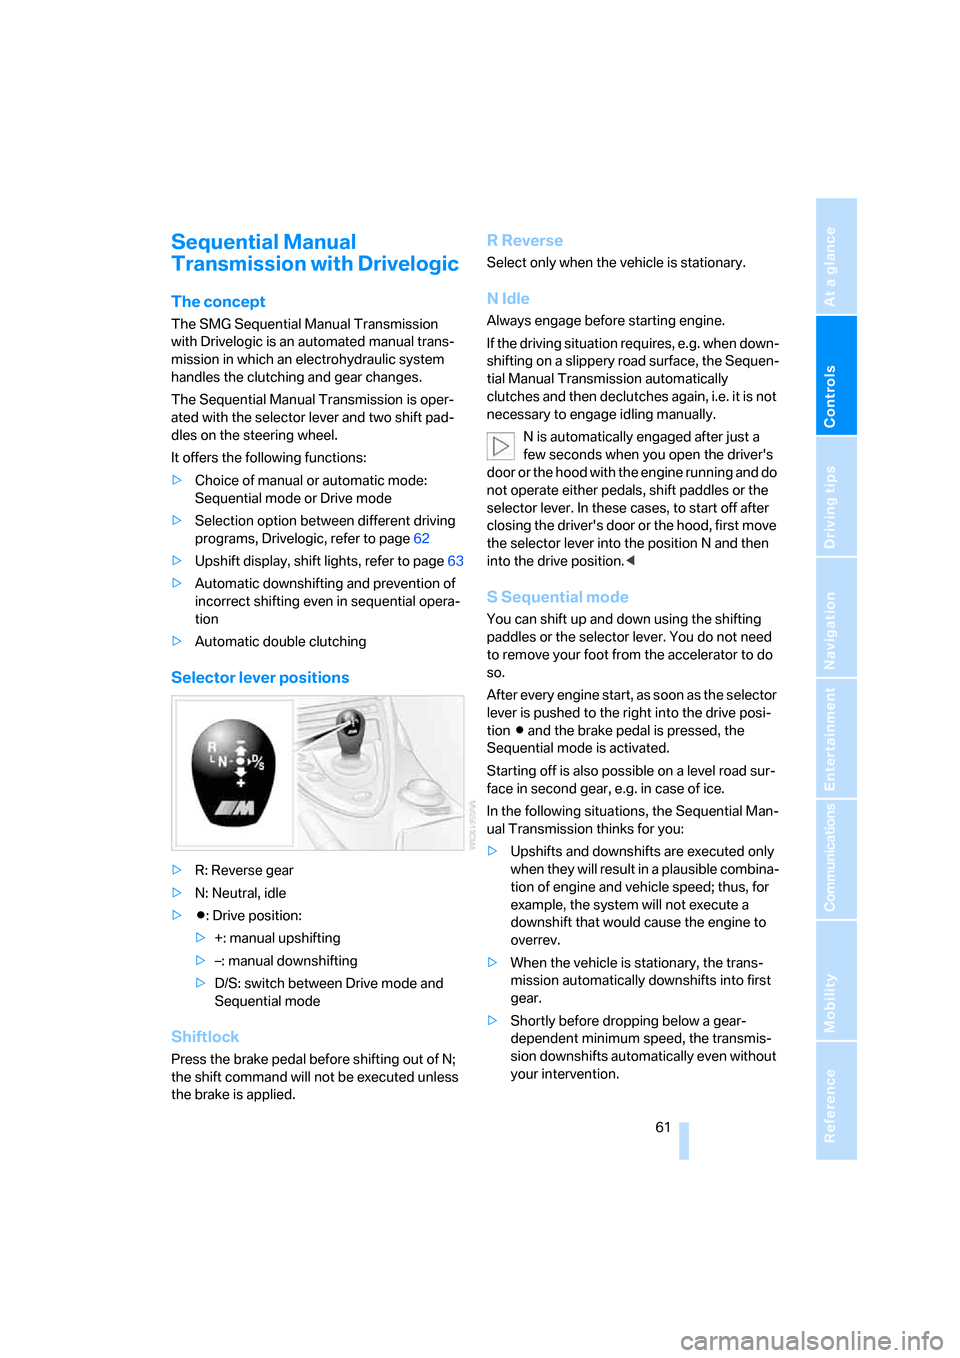
Selector lever positions
>R: Reverse gear
>N: Neutral, idle
>Β: Drive position:
>+: manual upshifting
>–: manual downshifting
>D/S: switch between Drive mode and
Sequential mode
Shiftlock
Press the brake pedal before shifting out of N;
the shift command will not be executed unless
the brake is applied.
R Reverse
Select only when the vehicle is stationary.
N Idle
Always engage before starting engine.
If the driving situation requires, e.g. when down-
shifting on a slippery road surface, the Sequen-
tial Manual Transmission automatically
clutches and then declutches again, i.e. it is not
necessary to engage idling manually.
N is automatically engaged after just a
few seconds when you open the driver's
door or the hood with the engine running and do
not operate either pedals, shift paddles or the
selector lever. In these cases, to start off after
closing the driver's door or the hood, first move
the selector lever into the position N and then
into the drive position.<
S Sequential mode
You can shift up and down using the shifting
paddles or the selector lever. You do not need
to remove your foot from the accelerator to do
so.
After every engine start, as soon as the selector
lever is pushed to the right into the drive posi-
tion Β and the brake pedal is pressed, the
Sequential mode is activated.
Starting off is also possible on a level road sur-
face in second gear, e.g. in case of ice.
In the following situations, the Sequential Man-
ual Transmission thinks for you:
>Upshifts and downshifts are executed only
when they will res ult in a plausible combina-
tion of engine and vehicle speed; thus, for
example, the system will not execute a
downshift that would cause the engine to
overrev.
>When the vehicle is stationary, the trans-
mission automatically downshifts into first
gear.
>Shortly before dropping below a gear-
dependent minimum speed, the transmis-
sion downshifts automatically even without
your intervention.
Page 64 of 256
Driving
62
D Drive mode
In the Drive mode, all forward gears are shifted
automatically.
Shifting from Sequential mode to Drive mode:
press selector lever to the right toward D/S.
To switch back into the Sequential mode: press
the selector lever to the right again toward D/S
or shift using the shift paddles or the selector
lever.
Kick-down: for rapid acceleration, e.g. passing,
press the accelerator pedal as far down as it will
go. You achieve maximum acceleration.
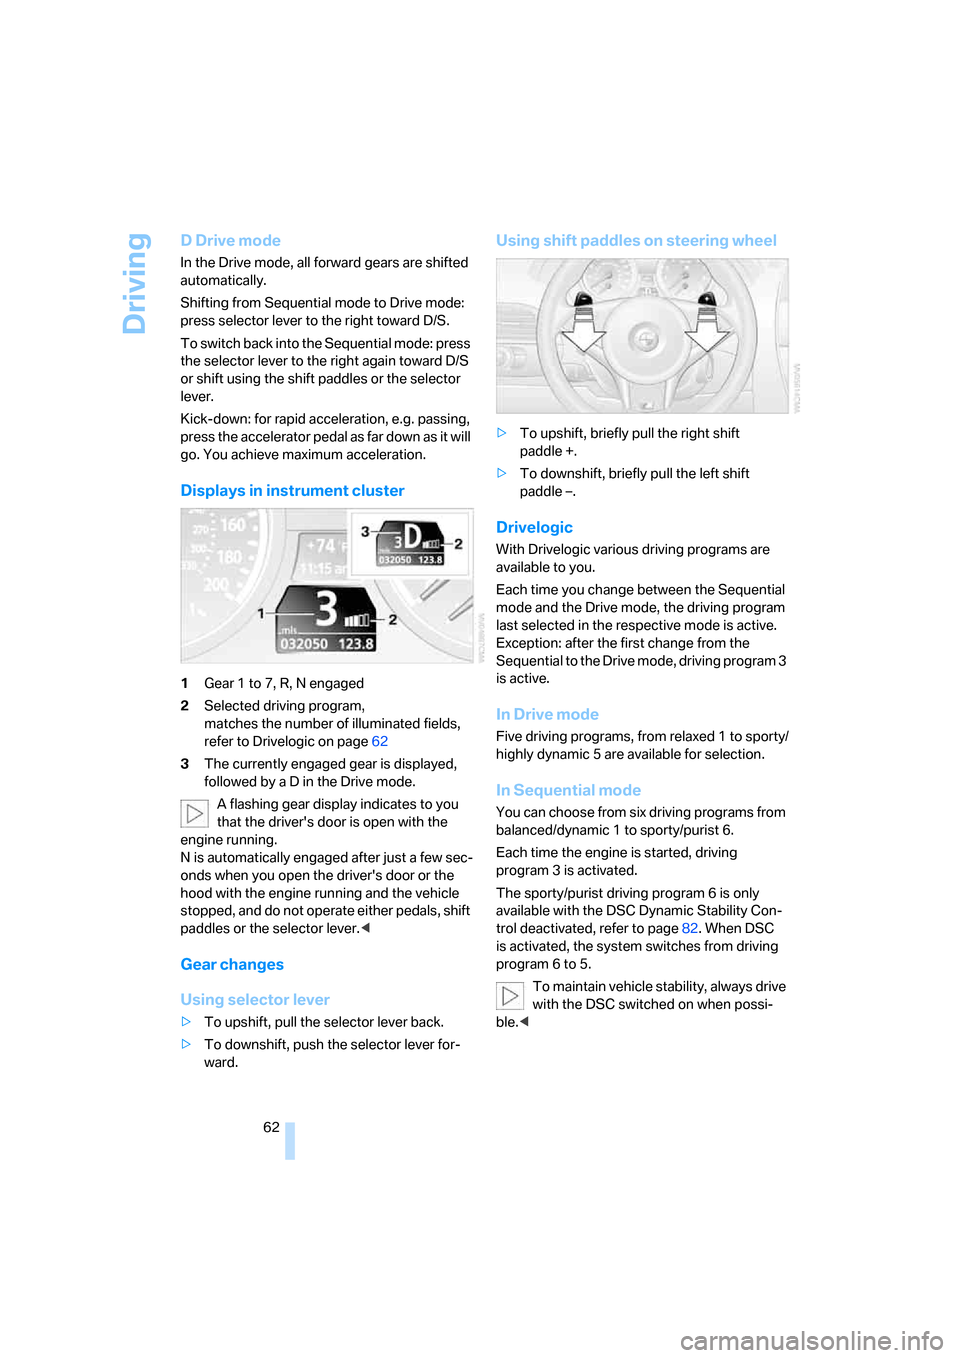
Displays in instrument cluster
1Gear 1 to 7, R, N engaged
2Selected driving program,
matches the number of illuminated fields,
refer to Drivelogic on page62
3The currently engaged gear is displayed,
followed by a D in the Drive mode.
A flashing gear display indicates to you
that the driver's door is open with the
engine running.
N is automatically engaged after just a few sec-
onds when you open the driver's door or the
hood with the engine running and the vehicle
stopped, and do not operate either pedals, shift
paddles or the selector lever.<
Gear changes
Using selector lever
>To upshift, pull the selector lever back.
>To downshift, push the selector lever for-
ward.
Using shift paddles on steering wheel
>To upshift, briefly pull the right shift
paddle +.
>To downshift, briefly pull the left shift
paddle –.
Drivelogic
With Drivelogic various driving programs are
available to you.
Each time you change between the Sequential
mode and the Drive mode, the driving program
last selected in the respective mode is active.
Exception: after the first change from the
Sequential to the Drive mode, driving program 3
is active.
In Drive mode
Five driving programs, from relaxed 1 to sporty/
highly dynamic 5 are available for selection.
In Sequential mode
You can choose from six driving programs from
balanced/dynamic 1 to sporty/purist 6.
Each time the engine is started, driving
program 3 is activated.
The sporty/purist driving program 6 is only
available with the DSC Dynamic Stability Con-
trol deactivated, refer to page82. When DSC
is activated, the system switches from driving
program 6 to 5.
To maintain vehicle stability, always drive
with the DSC switched on when possi-
ble.<
Page 65 of 256
Controls
63Reference
At a glance
Driving tips
Communications
Navigation
Entertainment
Mobility
Selecting driving program with button
in center console
Press the button repeatedly until the desired
driving program is displayed in the instrument
cluster, refer to page62.
Selecting driving program via button
on steering wheel
You can also activate your preferred driving pro-
gram with the button on the steering wheel,
refer to MDrive on page54.
With the ignition switched on you can change
the settings of MDrive on the Control Display.
iDrive, for explanation of principle, refer to
page16.
1.Open the start menu.
2.Press the controller to open the menu.
3.Select "MDrive" and press the controller.
4.Select "SMG Drivelogic" and press the con-
troller. The first setting is selected.
5.Turn the controller to set Drive mode or
Sequential mode.
"Unchanged" retains the current settings
made outside of MDrive.6.Press the controller to select driving pro-
grams.
7.Turn the controller to set the driving pro-
gram.
8.Press the controller.
Shift lights
To achieve the best vehicle acceleration with
a sporty driving style in the Sequential mode,
shift lights in the Head-Up Display
* indicate the
optimum shifting point briefly before reaching
the maximum rpm.
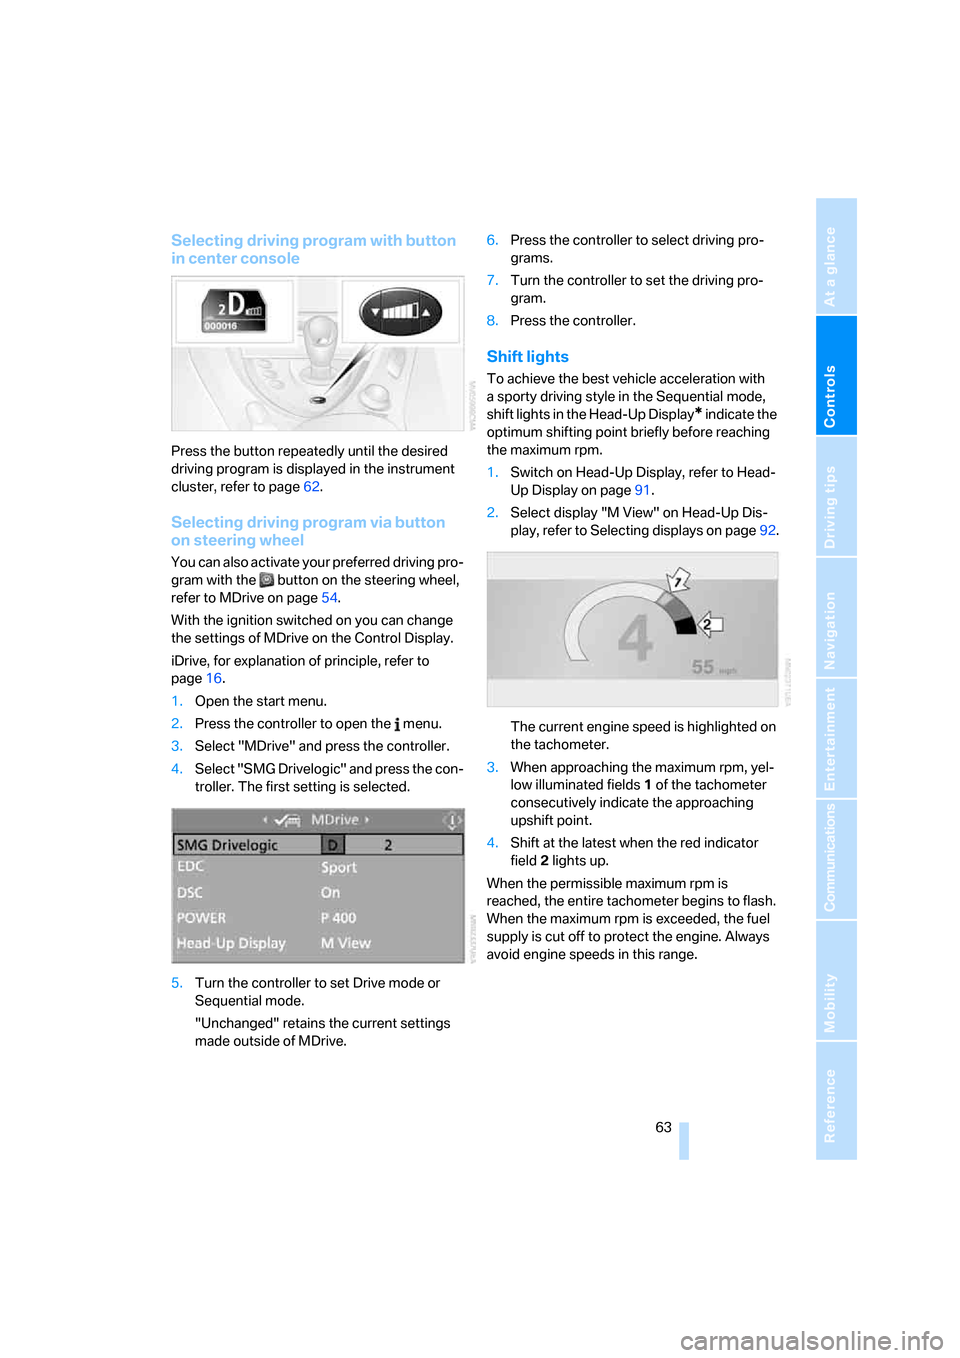
1.Switch on Head-Up Display, refer to Head-
Up Display on page91.
2.Select display "M View" on Head-Up Dis-
play, refer to Selecting displays on page92.
The current engine speed is highlighted on
the tachometer.
3.When approaching the maximum rpm, yel-
low illuminated fields1 of the tachometer
consecutively indicate the approaching
upshift point.
4.Shift at the latest when the red indicator
field2 lights up.
When the permissible maximum rpm is
reached, the entire tachometer begins to flash.
When the maximum rpm is exceeded, the fuel
supply is cut off to protect the engine. Always
avoid engine speeds in this range.