ESP BMW M6 COUPE 2010 E63 Owner's Guide
[x] Cancel search | Manufacturer: BMW, Model Year: 2010, Model line: M6 COUPE, Model: BMW M6 COUPE 2010 E63Pages: 250, PDF Size: 8.4 MB
Page 101 of 250

Controls
99Reference
At a glance
Driving tips
Communications
Navigation
Entertainment
Mobility
The symbol on the automatic climate control
display flashes when the system has switched
on.
The respective system is switched on
within the next 24 hours only. Please
reactivated it after this time.<
Page 102 of 250
Practical interior accessories
100
Practical interior accessories
Integrated universal remote
control*
The concept
The integrated universal remote control can
replace as many as three hand-held transmit-
ters for various remote-controlled accessories,
such as garage and gate or lighting systems.
The integrated universal remote control regis-
ters and stores signals from the original hand-
held transmitters.
The signal of an original hand-held transmitter
can be programmed on one of the three mem-
ory buttons1. After this, the programmed
memory button1 will operate the system in
question. The LED2 flashes to confirm trans-
mission of the signal.
Should you sell your vehicle one day, be sure to
delete the stored programs beforehand for your
safety, refer to page101.
To prevent possible damage or injury,
before programming or using the inte-
grated universal remote control, always inspect
the immediate area to make certain that no peo-
ple, animals or objects are within the travel
range of the device. Also, comply with the
safety precautions of the original hand-held
transmitter.<
Checking compatibility
If you see this symbol on the packaging
or in the manual supplied with the orig-
inal hand-held transmitter, it is safe to
assume that it is compatible with the integrated
universal remote control.
If you have additional questions, please
contact your BMW center or call:
1-800-355-3515.
Information is also provided on the Internet at:
www.bmwusa.com or
www.homelink.com.
HomeLink is a registered trademark of Johnson
Controls, Inc.<
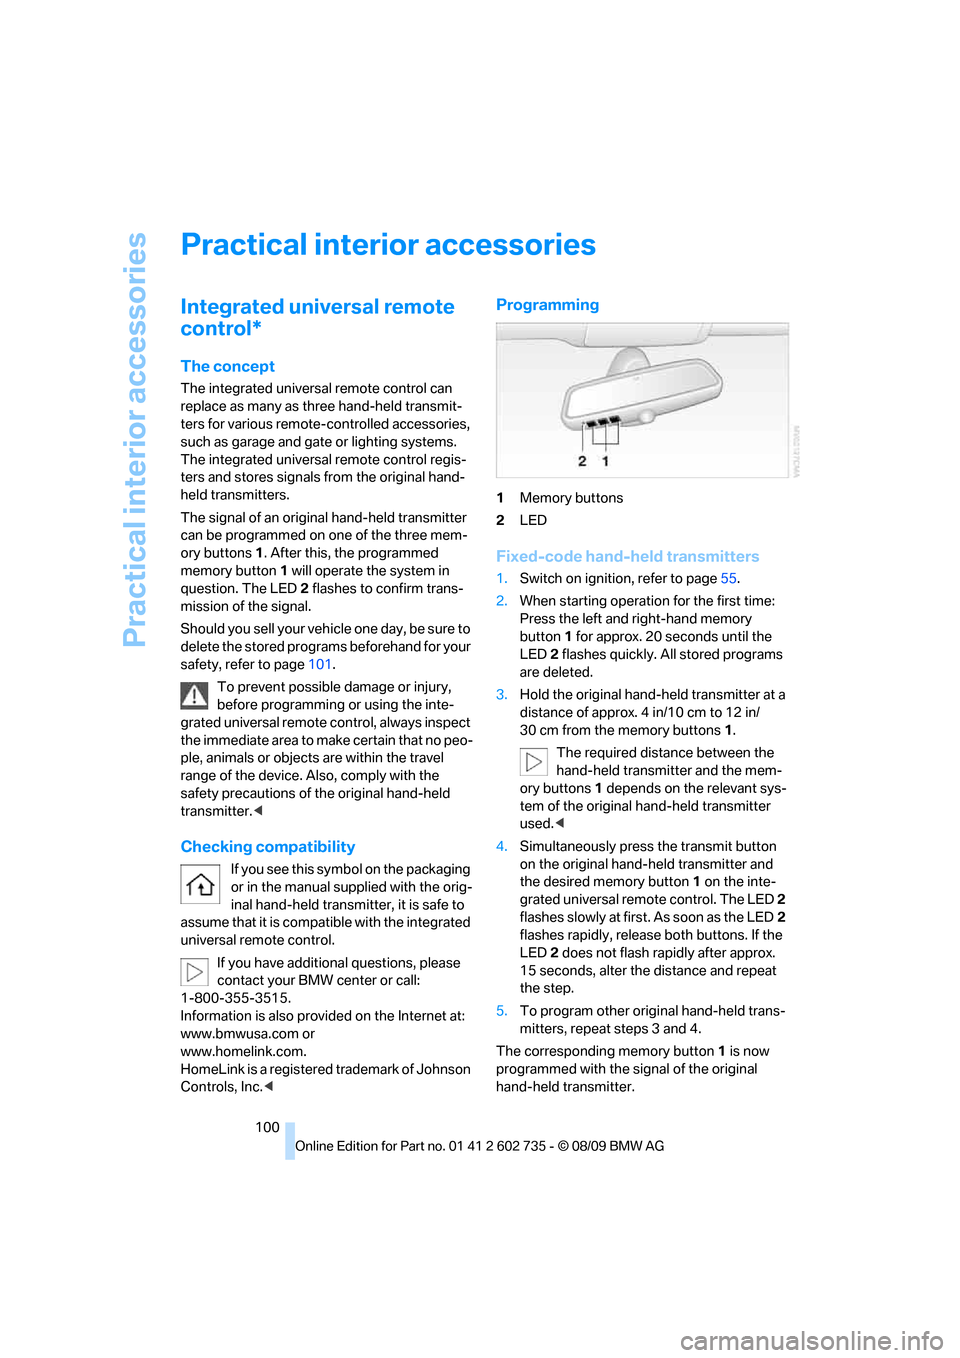
Programming
1Memory buttons
2LED
Fixed-code hand-held transmitters
1.Switch on ignition, refer to page55.
2.When starting operation for the first time:
Press the left and right-hand memory
button1 for approx. 20 seconds until the
LED2 flashes quickly. All stored programs
are deleted.
3.Hold the original hand-held transmitter at a
distance of approx. 4 in/10 cm to 12 in/
30 cm from the memory buttons1.
The required distance between the
hand-held transmitter and the mem-
ory buttons1 depends on the relevant sys-
tem of the original hand-held transmitter
used.<
4.Simultaneously press the transmit button
on the original hand-held transmitter and
the desired memory button 1 on the inte-
grated universal remote control. The LED 2
flashes slowly at first. As soon as the LED2
flashes rapidly, release both buttons. If the
LED2 does not flash rapidly after approx.
15 seconds, alter the distance and repeat
the step.
5.To program other original hand-held trans-
mitters, repeat steps 3 and 4.
The corresponding memory button 1 is now
programmed with the signal of the original
hand-held transmitter.
Page 103 of 250
Controls
101Reference
At a glance
Driving tips
Communications
Navigation
Entertainment
Mobility
You can operate the device when the engine is
running or when the ignition is switched on.
If the device fails to function even after
repeated programming, check whether
the original hand-held transmitter uses an alter-
nating-code system. To do so, either read the
instructions for the original hand-held transmit-
ter or hold down the programmed memory
button1 of the integrated universal remote
control. If the LED2 on the integrated universal
remote control flashes rapidly for a short time
and then remains lit for approx. 2 seconds, this
indicates that the original hand-held transmitter
uses an alternating-code system. In the case of
an alternating-code system, program the mem-
ory buttons1 as described at Alternating-code
hand-held transmitters.<
Alternating-code hand-held
transmitters
To program the integrated universal remote
control, consult the operating instructions for
the equipment to be set. You will find informa-
tion there on the possibilities for synchroniza-
tion.
When programming hand-held transmitters
that employ an alternating code, please observe
the following supplementary instructions:
P r o g ra m m in g w i ll b e ea s i er w it h t h e a i d o f
a second person.<
1.Park your vehicle within the range of the
remote-controlled device.
2.Program the integrated universal remote
control as described above in the section
Fixed-code hand-held transmitters.
3.Locate the button on the receiver of the
device to be set, e. g. on the drive unit.
4.Press the button on the receiver of the
device to be set. After step 4, you have
approx. 30 seconds for step 5.
5.Press the programmed memory button1
of the integrated universal remote control
three times.
The corresponding memory button 1 is now
programmed with the signal of the original
hand-held transmitter.If you have any additional questions,
please contact your BMW center.<
Deleting all stored programs
Press the left and right-hand memory button1
for approx. 20 seconds until the LED2 flashes.
All stored programs are deleted.
Individual programs cannot be deleted.
Rememorizing individual programs
1.Hold the original hand-held remote control
approx. 4 in/10 cm to 12 in/30 cm away
from the memory buttons1.
The required distance between the
hand-held transmitter and the mem-
ory buttons1 depends on the relevant sys-
tem of the original hand-held transmitter
used.<
2.Press the desired memory button1 of the
integrated universal remote.
3.If the LED2 flashes slowly after approx.
20 seconds, press the command button of
the original hand-held transmitter. As soon
as the LED2 flashes rapidly, release both
buttons. If the LED2 does not flash rapidly
after approx. 15 seconds, alter the distance
and repeat the step.
Glove compartment
Opening
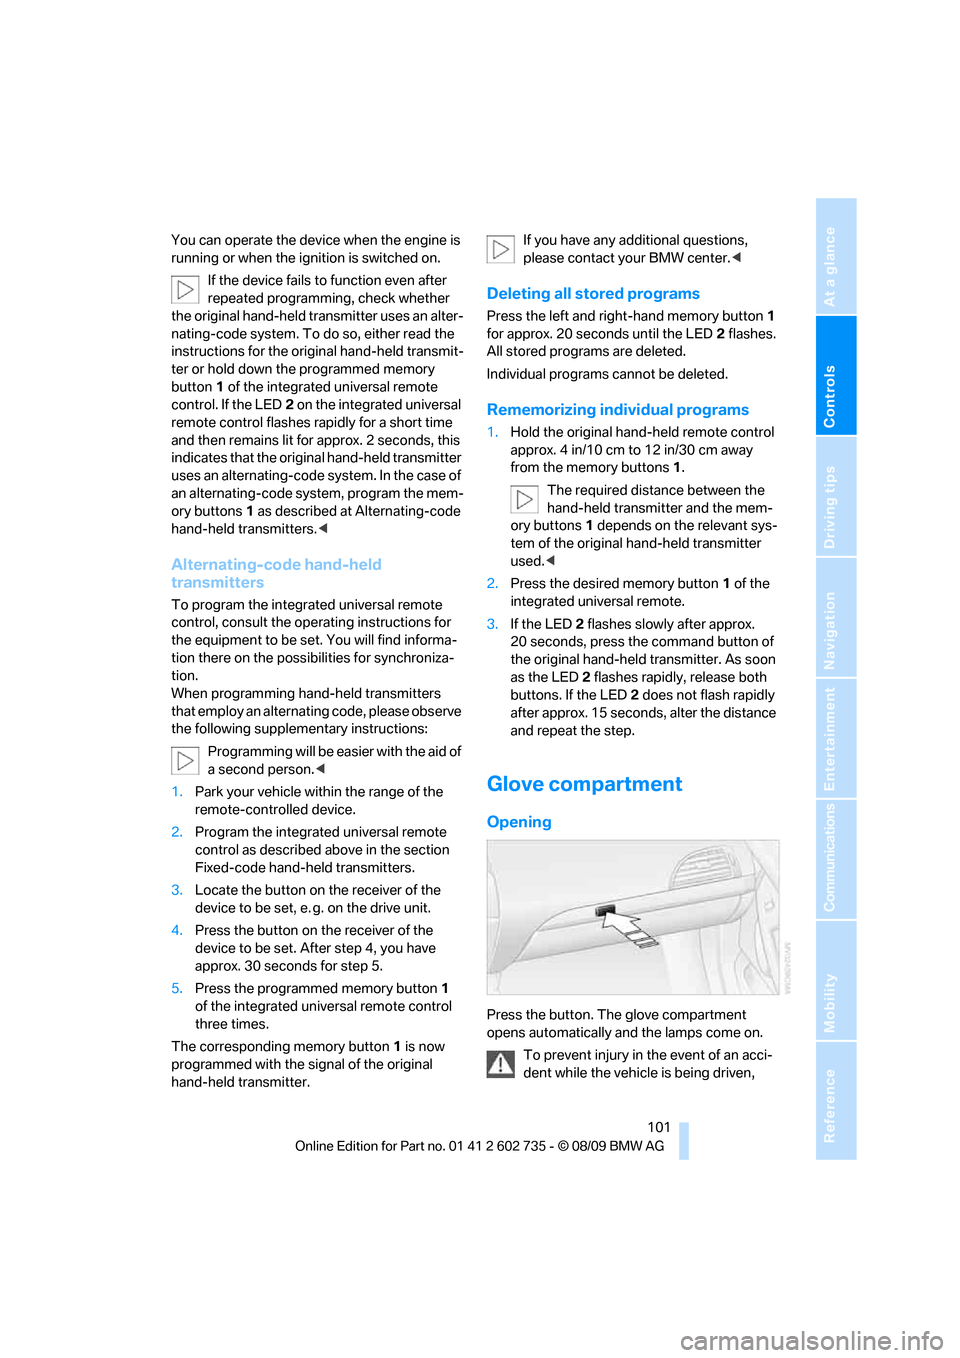
Press the button. The glove compartment
opens automatically and the lamps come on.
To prevent injury in the event of an acci-
dent while the vehicle is being driven,
Page 104 of 250
Practical interior accessories
102 close the glove compartment immediately after
use.<
Closing
Raise the lid into the closed position.
USB interface for data transmission
Port for importing and exporting data on USB
devices, e.g. music collections.
Observe the following when connecting:
>Do not use force when plugging the con-
nector into the USB audio interface.
>Do not connect devices such as fans or
lamps to the USB audio interface.
>Do not connect USB hard discs.
>Do not use the USB interface to recharge
external devices.
Center armrest
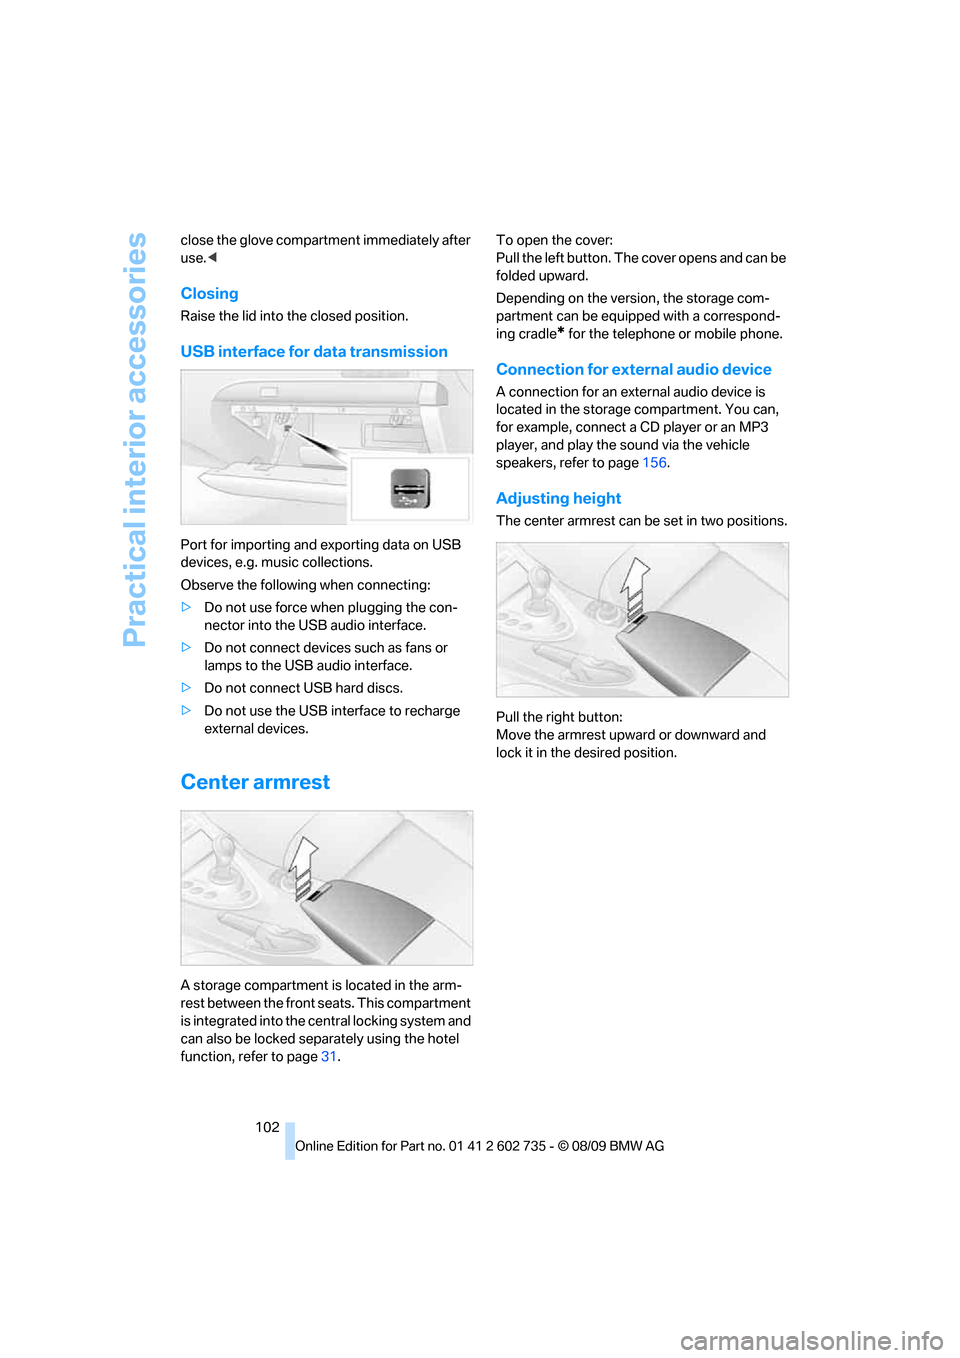
A storage compartment is located in the arm-
rest between the front seats. This compartment
is integrated into the central locking system and
can also be locked separately using the hotel
function, refer to page31.To open the cover:
Pull the left button. The cover opens and can be
folded upward.
Depending on the version, the storage com-
partment can be equipped with a correspond-
ing cradle
* for the telephone or mobile phone.
Connection for external audio device
A connection for an external audio device is
located in the storage compartment. You can,
for example, connect a CD player or an MP3
player, and play the sound via the vehicle
speakers, refer to page156.
Adjusting height
The center armrest can be set in two positions.
Pull the right button:
Move the armrest upward or downward and
lock it in the desired position.
Page 111 of 250
Driving tips
109Reference
At a glance
Controls
Communications
Navigation
Entertainment
Mobility
Hot exhaust system
As in all vehicles, extremely high temper-
atures are generated on the exhaust sys-
tem. Do not remove the heat shields installed
adjacent to it, and never apply undercoating to
them. When driving, standing at idle and while
parking take care to avoid possible contact
between the hot exhaust system and any highly
flammable materials such as hay, leaves, grass,
etc. Such contact could lead to a fire, and with it
the risk of serious property damage as well as
personal injury. Do not touch hot exhaust tail
pipes. Otherwise there is a risk of burns.<
Hydroplaning
When driving on wet or slushy roads,
reduce road speed. If you do not, a wedge
of water can form between tires and road sur-
face. This phenomenon is referred to as hydro-
planing, and is characterized by a partial or
complete loss of contact between the tires and
the road surface, ultimately undermining your
ability to steer and brake the vehicle.<
The risk of hydroplaning increases as the tread
depth of the tires decreases, refer also to Mini-
mum tire tread on page189.
Driving through water
Do not drive through water on the road if it
is deeper than 1 ft/30 cm, and then only at
walking speed at the most. Otherwise, the vehi-
cle's engine, the electrical systems and the
transmission may be damaged.<
Braking safely
Your BMW is equipped with ABS as a standard
feature. In situations that require it, it is best to
brake with full force. Since the vehicle maintains
steering responsiveness, you can still avoid
possible obstacles with a minimum of steering
effort.
The pulsing of he brake pedal indicates that the
ABS is controlling braking.
In certain braking situations the perforated
brake rotors can cause operating noises which,
however, have not effect on the performance
and operating safety of the brake system.Do not drive with your foot resting on the
brake pedal. Even light but consistent
pedal pressure can lead to high temperatures,
brake wear and possibly even brake failure.<
Driving in wet conditions
When roads are wet or there is heavy rain,
briefly exert gentle pressure on the brake pedal
every few miles. Monitor traffic conditions to
ensure that this maneuver does not endanger
other road users. The heat generated in this
process helps dry the pads and rotors to ensure
that full braking efficiency will then be available
when you need it.
Hills
To prevent overheating and thus reduced
efficiency of the brake system, downshift
to a gear in which only minimal brake applica-
tions are needed when descending long or
steep downhill stretches. Even light but consis-
tent pressure on the brake can lead to high tem-
peratures, brake wear and possibly even brake
failure.<
Sequential Manual Transmission: do not
drive in idle or with the engine switched
off, otherwise there will be no engine braking
action or support of the braking force and steer-
ing.
Manual transmission: do not drive with the
clutch depressed, in idle or with the engine
switched off, otherwise there will be no engine
braking action or support of the braking force
and steering.
Never allow floor mats, carpets or any other
objects to protrude into the area of movement
of the pedals and impair their operation.<
Corrosion on brake rotors
When the vehicle is driven only occasionally,
during extended periods when the vehicle is not
used at all, and in operating conditions where
brake applications are less frequent, there is an
increased tendency for corrosion to form on
rotors, while contaminants accumulate on the
brake pads. This occurs because the minimum
pressure which must be exerted by the pads
Page 112 of 250
Things to remember when driving
110 during brake applications to clean the rotors is
not reached.
This can also lead to long-lasting decreases in
comfort and squeaking noise during braking.
These decreases in comfort can also be pro-
duced by long braking maneuvers with a low
pedal pressure.
Should corrosion form on the brake rotors, the
brakes will tend to respond with a pulsating
effect that even extended application will fail to
cure.
For technical information about the brake sys-
tem, refer to page112.
When vehicle is parked
Condensation forms in the air conditioner sys-
tem during operation, and then exits under the
vehicle. Traces of condensed water under the
vehicle are therefore normal.
Cargo loading
To avoid loading the tires beyond their
approved carrying capacity, never over-
load the vehicle. Overloading can lead to over-
heating and increases the rate at which damage
develops inside the tires. The ultimate result
can assume the form of a sudden blowout.<
Make sure that no fluids leak in the cargo
area; otherwise the vehicle could be dam-
aged.<
Determining loading limit
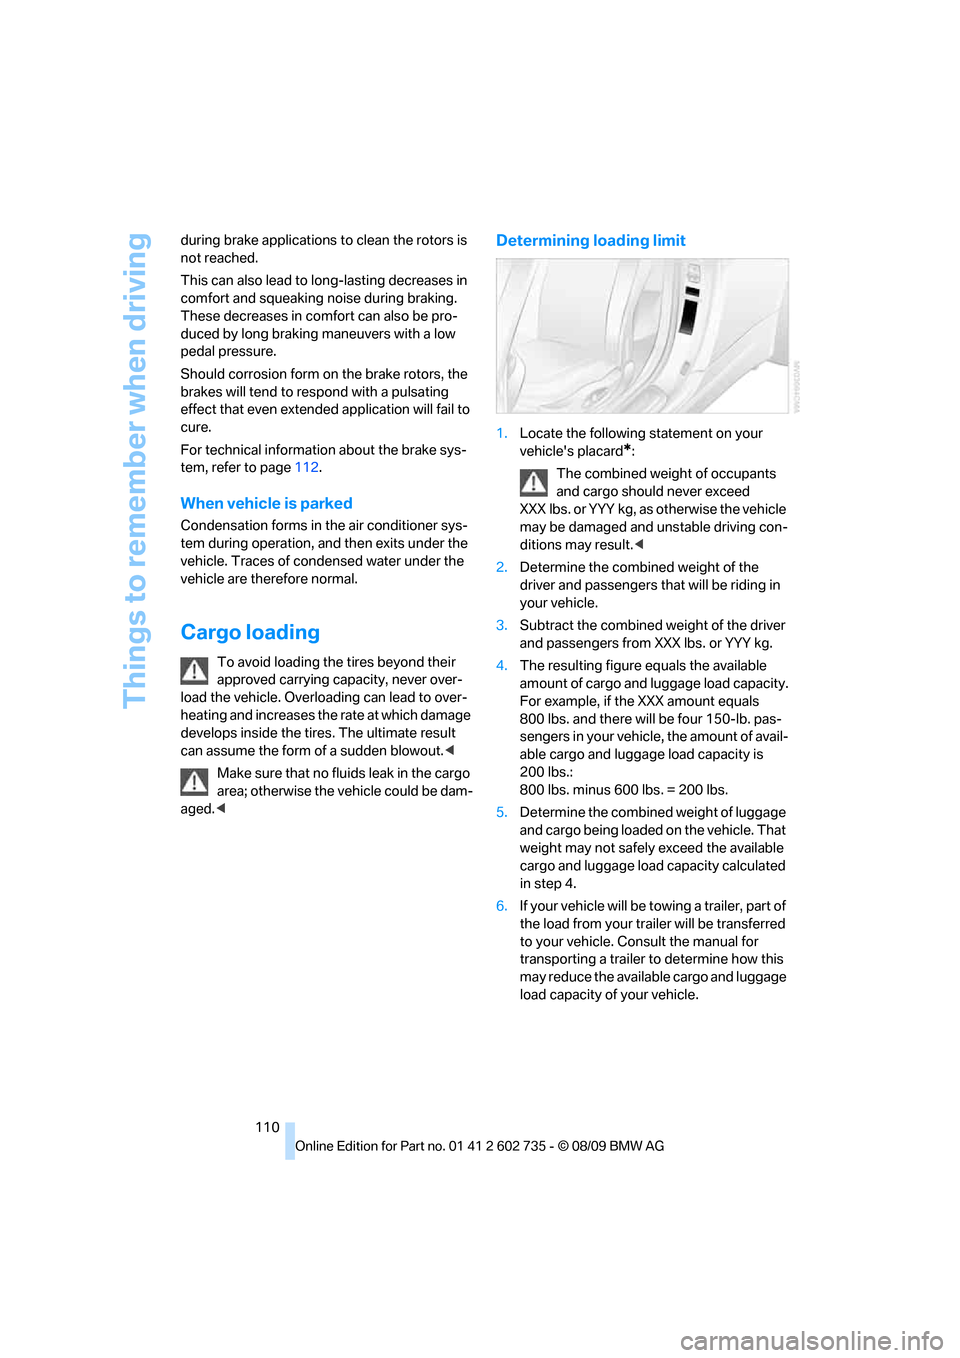
1.Locate the following statement on your
vehicle's placard
*:
The combined weight of occupants
and cargo should never exceed
XXX lbs. or YYY kg, as otherwise the vehicle
may be damaged and unstable driving con-
ditions may result.<
2.Determine the combined weight of the
driver and passengers that will be riding in
your vehicle.
3.Subtract the combined weight of the driver
and passengers from XXX lbs. or YYY kg.
4.The resulting figure equals the available
amount of cargo and luggage load capacity.
For example, if the XXX amount equals
800 lbs. and there will be four 150-lb. pas-
sengers in your vehicle, the amount of avail-
able cargo and luggage load capacity is
200 lbs.:
800 lbs. minus 600 lbs. = 200 lbs.
5.Determine the combined weight of luggage
and cargo being loaded on the vehicle. That
weight may not safely exceed the available
cargo and luggage load capacity calculated
in step 4.
6.If your vehicle will be towing a trailer, part of
the load from your trailer will be transferred
to your vehicle. Consult the manual for
transporting a trailer to determine how this
may reduce the available cargo and luggage
load capacity of your vehicle.
Page 114 of 250
BMW M6 Engineering
112
BMW M6 Engineering
V10 High Output Engine
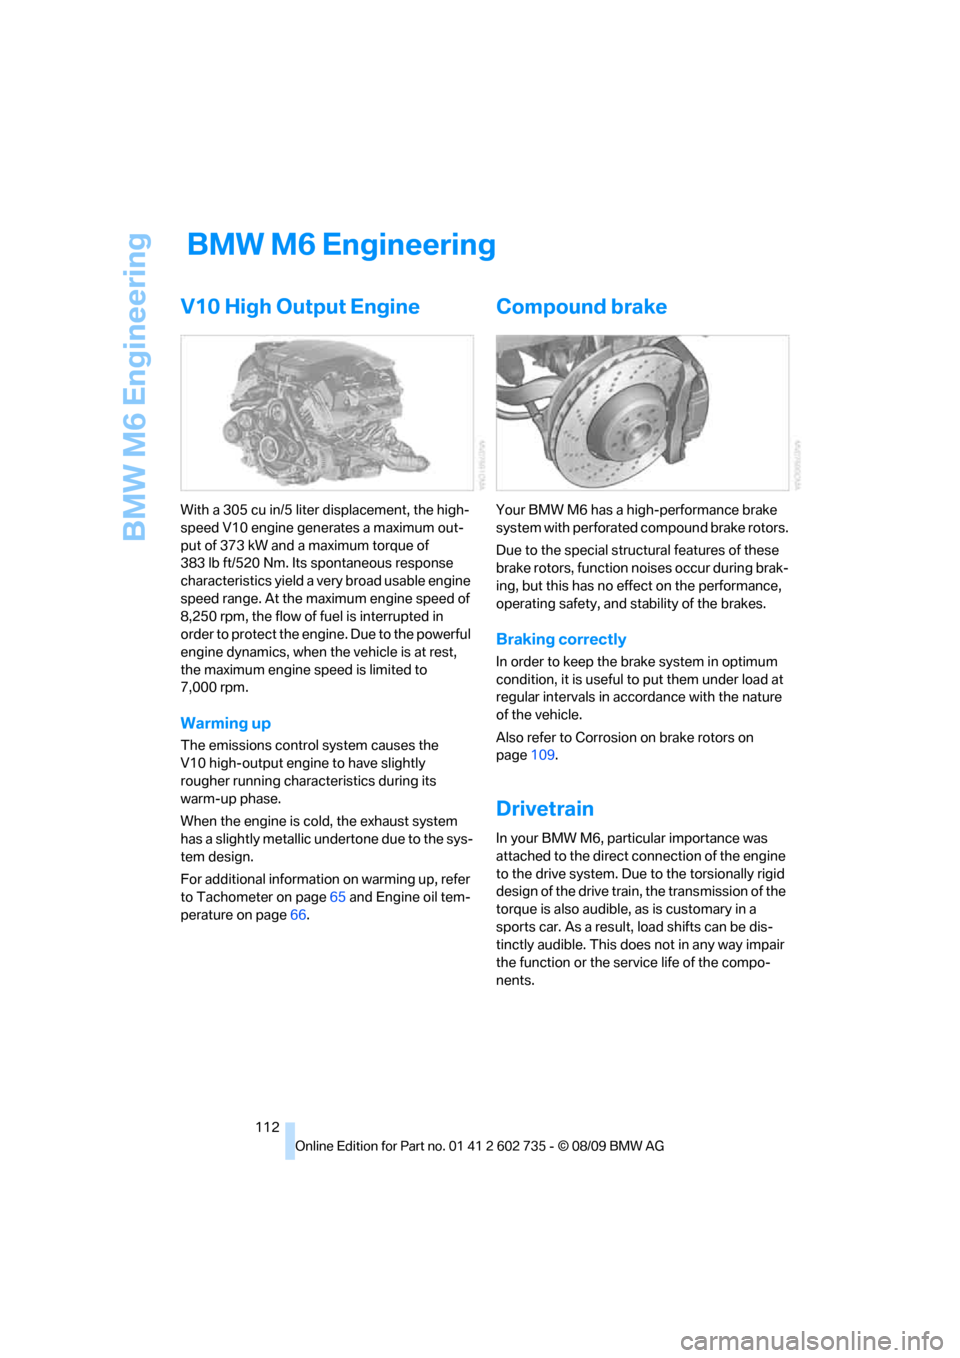
With a 305 cu in/5 liter displacement, the high-
speed V10 engine generates a maximum out-
put of 373 kW and a maximum torque of
383 lb ft/520 Nm. Its spontaneous response
characteristics yield a very broad usable engine
speed range. At the maximum engine speed of
8,250 rpm, the flow of fuel is interrupted in
order to protect the engine. Due to the powerful
engine dynamics, when the vehicle is at rest,
the maximum engine speed is limited to
7,000 rpm.
Warming up
The emissions control system causes the
V10 high-output engine to have slightly
rougher running characteristics during its
warm-up phase.
When the engine is cold, the exhaust system
has a slightly metallic undertone due to the sys-
tem design.
For additional information on warming up, refer
to Tachometer on page65 and Engine oil tem-
perature on page66.
Compound brake
Your BMW M6 has a high-performance brake
system with perforated compound brake rotors.
Due to the special structural features of these
brake rotors, function noises occur during brak-
ing, but this has no effect on the performance,
operating safety, and stability of the brakes.
Braking correctly
In order to keep the brake system in optimum
condition, it is useful to put them under load at
regular intervals in accordance with the nature
of the vehicle.
Also refer to Corrosion on brake rotors on
page109.
Drivetrain
In your BMW M6, particular importance was
attached to the direct connection of the engine
to the drive system. Due to the torsionally rigid
design of the drive train, the transmission of the
torque is also audible, as is customary in a
sports car. As a result, load shifts can be dis-
tinctly audible. This does not in any way impair
the function or the service life of the compo-
nents.
Page 127 of 250
Navigation
Driving tips
125Reference
At a glance
Controls
Communications
Entertainment
Mobility
3.Enter the letters.
4."OK"
The trip is stored in the trip list under the
entered name.
Starting a stored trip
1."Navigation"
2."Stored trips"
3.Select the desired trip.
4."Start guidance"
Changing trips
Changing the trip direction
Intermediate destinations can be displayed in
reverse order after destination guidance is
started.
1."Map"
2."Guidance"
3.Open "Options".
4."Reverse order of trip dest."
Rearranging the intermediate
destinations
1."Map"
2."Guidance"
3."Display all trip dest."
4.Select an intermediate destination.
5."Reposition dest. in the trip"
Deleting an intermediate destination
1."Map"
2."Guidance"
3."Display all trip dest."
4.Select an intermediate destination.
5."Delete dest. in the trip"
Deleting a trip
1."Navigation"
2."Stored trips"
3.Select the desired trip.
4.Open "Options".5."Delete all trips" or "Delete trip".
Word-matching principle
The system supports the word matching princi-
ple to make it easier for you to enter the names
of streets or towns. The system runs ongoing
checks, comparing your destination entries
with the data stored in the vehicle as the basis
for instant response. The user benefits include:
>Names of specific locations can also vary
from the official versions if you are using a
spelling that is customary in another coun-
try.
Example:
Instead of the German spelling "München"
you can also enter the English spelling
"Munich" or the Italian spelling "Monaco".
>When you are entering the names of towns
and streets the system will complete them
automatically as soon as enough letters are
available to ensure unambiguous identifica-
tion.
>The system offers only those letters for
selection of name entries that are stored in
the vehicle. The system will not accept non
existent names and addresses.
Page 128 of 250
Destination guidance
126
Destination guidance
Starting destination
guidance
1."Navigation"
2."Enter address"
3.Select the destination.
4."Accept destination"
5."Start guidance"
The route is displayed on the Control Display
after it is calculated.
Terminating destination
guidance
1."Navigation"
2."Map"
3.Select the symbol.
4."Stop guidance"
Continuing destination
guidance
If the destination was not reached during the
last trip, destination guidance can be resumed.
"Resume guidance"
Route criteria
General information
You can influence the calculated route by
choosing certain route criteria. You can change
the route criteria as often as you like while
entering the destination and whenever the des-
tination guidance is active.
The route is planned according to fixed rules.
The type of road is taken into account, e.g.
whether it is a highway or a winding road. As a
result, the routes recommended by the naviga-
tion system may not always be the same ones that you would choose based on personal expe-
rience.
The settings are stored for the remote control
currently in use.
Changing route criteria
1."Navigation"
2."Map"
3."Route preference"
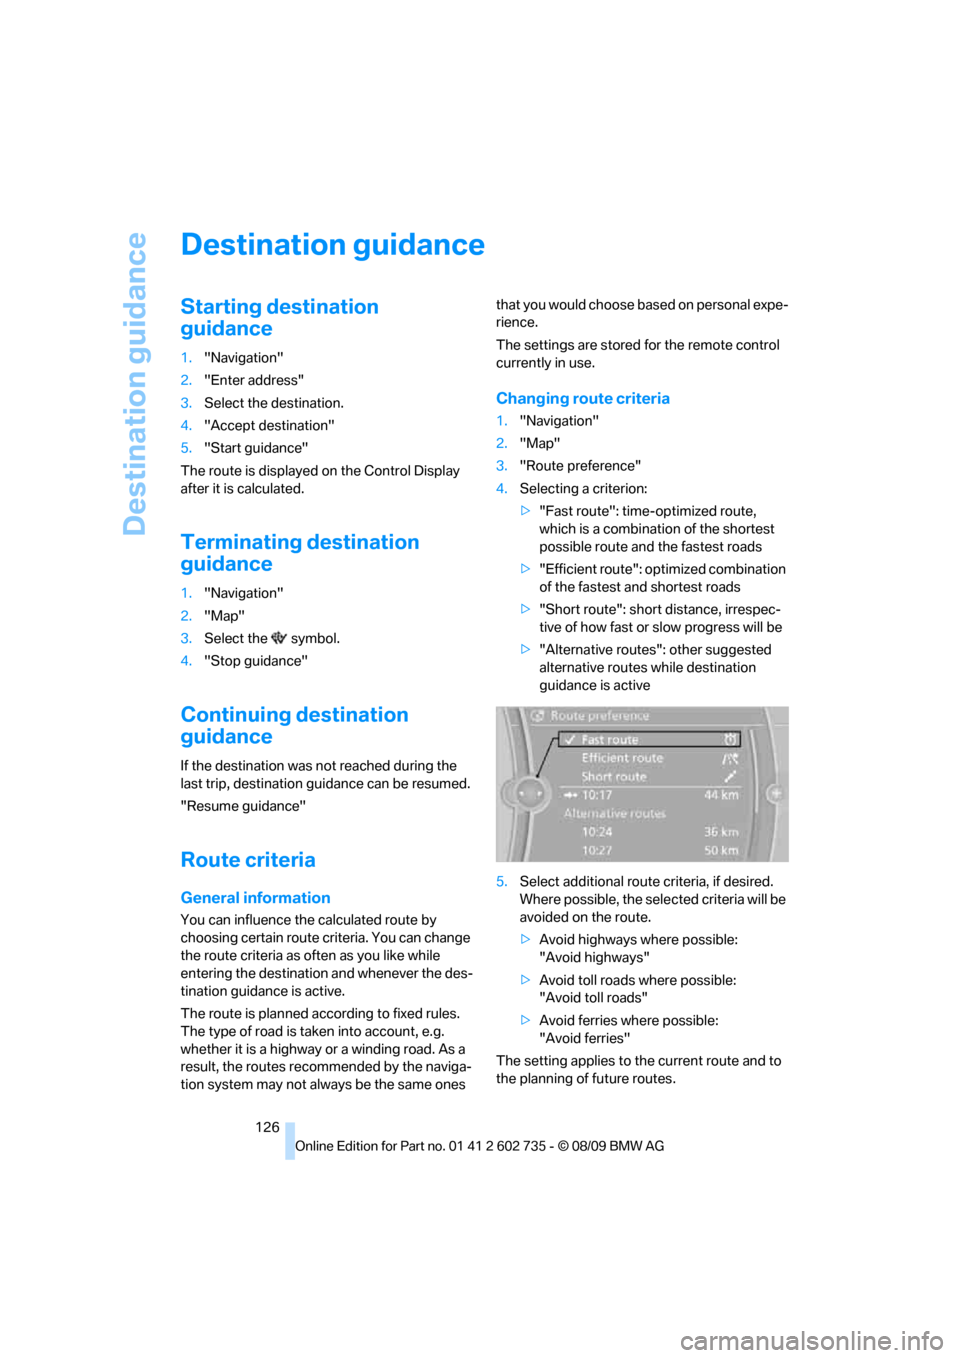
4.Selecting a criterion:
>"Fast route": time-optimized route,
which is a combination of the shortest
possible route and the fastest roads
>"Efficient route": optimized combination
of the fastest and shortest roads
>"Short route": short distance, irrespec-
tive of how fast or slow progress will be
>"Alternative routes": other suggested
alternative routes while destination
guidance is active
5.Select additional route criteria, if desired.
Where possible, the selected criteria will be
avoided on the route.
>Avoid highways where possible:
"Avoid highways"
>Avoid toll roads where possible:
"Avoid toll roads"
>Avoid ferries where possible:
"Avoid ferries"
The setting applies to the current route and to
the planning of future routes.
Page 132 of 250
Destination guidance
130 A. Total Traffic Network, a division of Clear
Channel Broadcasting, Inc. ("Total Traffic Net-
work") holds the rights to the traffic incident
data and RDS-TMC network through which it is
delivered. You may not modify, copy, scan or
use any other method to reproduce, duplicate,
republish, transmit or distribute in any way any
portion of traffic incident data. You agree to
indemnify, defend and hold harmless BMW of
North America, LLC. ("BMW NA") and Total
Traffic Network, Inrix, Inc (and their affiliates)
against any and all claims, damages, costs or
other expenses that arise directly or indirectly
out of (a) your unauthorized use of the traffic
incident data or the RDS-TMC network, (b) your
violation of this directive and/or (c) any unautho-
rized or unlawful activities by you in connection
herewith.
B. Total Traffic Network traffic data is informa-
tional only. User assumes all risk of use. Total
Traffic Network, BMW NA, and their suppliers
make no representations about content, traffic
and road conditions, route usability, or speed.
C. The licensed material is provided to license
"as is," and "where is". Total Traffic Network,
including, but not limited to, any and all third
party providers of any of the licensed material,
expressly disclaims, to the fullest extent permit-
ted by law, all warranties or representations
with respect to the licensed material (including,
without limitation, that the licensed material will
be error-free, will operate without interruption
or that the traffic data will be accurate), express,
implied or statutory, including, without limita-
tion, the implied warranties of merchantability,
non-infringement fitness for a particular pur-
pose, or those arising from a course of dealing
or usage of trade.
D. Neither Total Traffic Network, Inrix, Inc. nor
BMW NA will be liable to you for any indirect,
special, consequential, exemplary, or incidental
damages (including, without limitation, lost rev-
enues, anticipated revenues, or profits relating
to the same) arising from any claim relating
directly or indirectly to use of the traffic data,
and even if Total Traffic Network, Inrix, Inc., or
BMW NA are aware of the possibility of such
damages. These limitations apply to all claims, including, without limitation, claims in contract
and tort (such as negligence, product liability
and strict liability). Some states do not allow the
exclusion or limitation of incidental or conse-
quential damages, so those particular limita-
tions may not apply to you.
Activating/deactivating reception
1."Navigation"
2.Open "Options".
3.Activate/deactivate "Receive Traffic Info".
In many metropolitan areas you can receive
traffic information broadcast by radio stations.
The traffic conditions are monitored by traffic
management centers and the traffic information
is periodically updated.
During destination guidance, the traffic infor-
mation relevant to your planned route is auto-
matically displayed. Whether destination guid-
ance is active or not, you can have the traffic
bulletins displayed in the map view or in the traf-
fic info list.
Traffic bulletins in a list
A list of the traffic bulletins can be opened via
the menu or map view.
Opening the traffic bulletins
1."Navigation"
2."Map"
3.Move the controller to the left, if necessary.
4.Select the symbol: "Traffic Info"
First, the traffic bulletins on the planned
route are displayed. The traffic bulletins are
sorted in the order of their distance from the
current vehicle position.
5.Select a traffic bulletin.
Additional information can be displayed for
some traffic bulletins:
1.Select the symbol.
2.Additional information is displayed.
3.Exit from the menu:
Move the controller to the left.