BMW MOTORRAD F 650 GS DAKAR 2003 Rider's Manual (in English)
Manufacturer: BMW MOTORRAD, Model Year: 2003, Model line: F 650 GS DAKAR, Model: BMW MOTORRAD F 650 GS DAKAR 2003Pages: 88, PDF Size: 6.89 MB
Page 31 of 88
1
29
Safety check
2
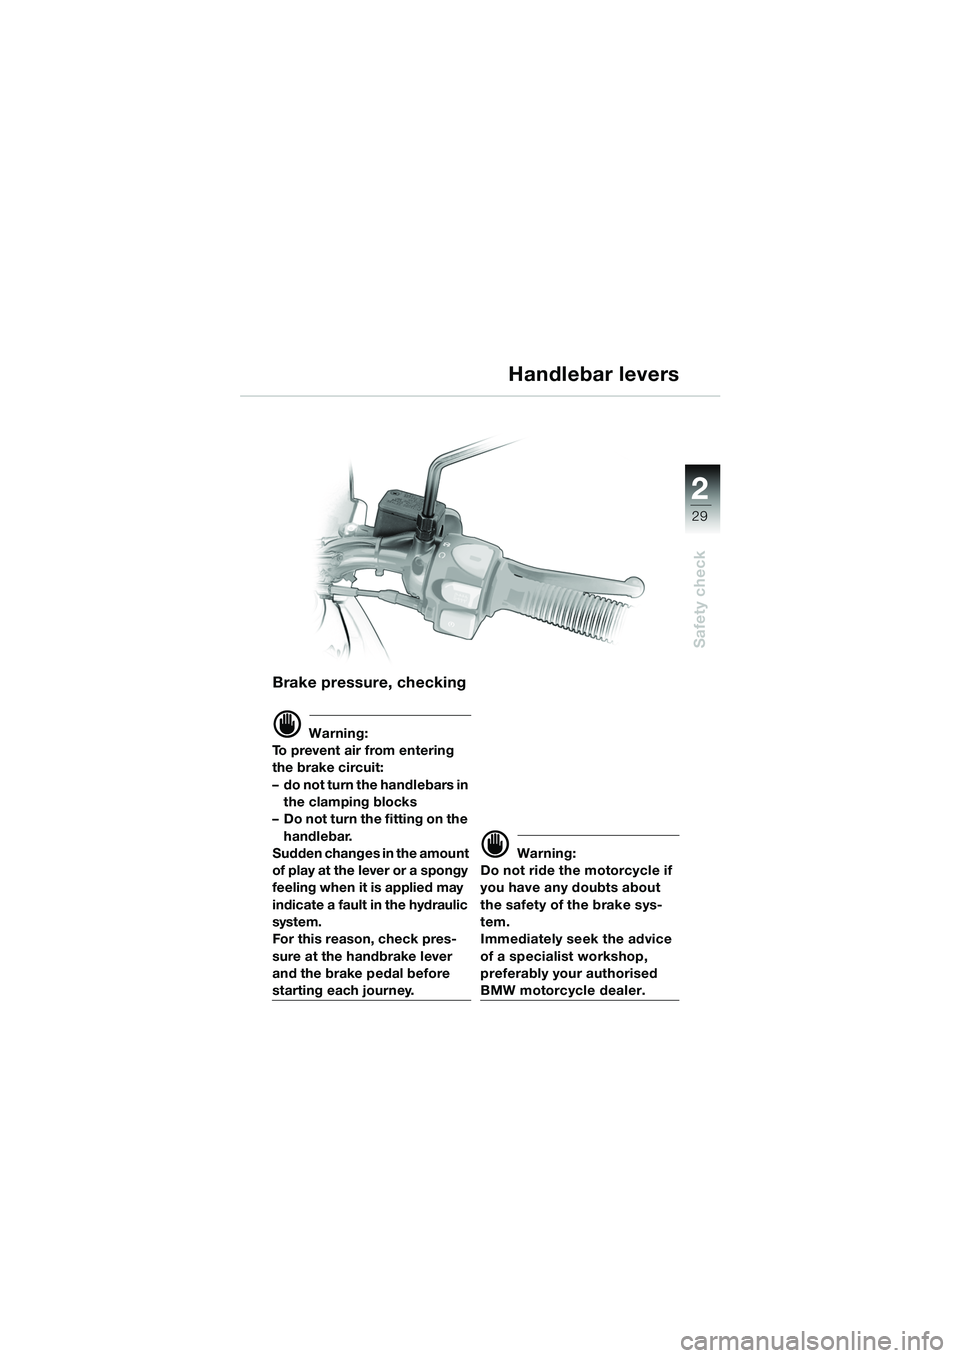
Brake pressure, checking
d Warning:
To prevent air from entering
the brake circuit:
– do not turn the handlebars in the clamping blocks
– Do not turn the fitting on the
handlebar.
Sudden changes in the amount
of play at the lever or a spongy
feeling when it is applied may
indicate a fault in the hydraulic
system.
For this reason, check pres-
sure at the handbrake lever
and the brake pedal before
starting each journey.
d Warning:
Do not ride the motorcycle if
you have any doubts about
the safety of the brake sys-
tem.
Immediately seek the advice
of a specialist workshop,
preferably your authorised
BMW motorcycle dealer.
Handlebar levers
10R13bkg4.book Seite 29 Montag, 22. September 2003 4:26 16
Page 32 of 88
30
Safety check
2
Work on the brake system
d Warning:
To ensure reliability have all
work on the brake systems
carried out by a specialist
workshop, preferably an au-
thorised BMW motorcycle
dealer.
Checking the brake sys-
tem
d Warning:
Sudden changes in play or
spongy action of the brake le-
ver indicate a fault in the
brake system.
Before riding off, therefore,
always check the resistance
of the front and rear brake le-
vers and test operation of the
brakes.
Do not ride the motorcycle if
you have any doubts about
the safety of the brake sys-
tem.
Immediately seek the advice
of a specialist workshop,
preferably an authorised
BMW motorcycle dealer.
Brakes
10R13bkg4.book Seite 30 Montag, 22. September 2003 4:26 16
Page 33 of 88
1
31
Safety check
2
Brakes
Checking brake pads
d Warning:
Have the brake pads replaced
before they wear to the mini-
mum permissible thickness:
have the work performed by a
specialist workshop, prefera-
bly an authorised
BMW motorcycle dealer. Brake pad wear depends on
your personal style of riding.
10R13bkg4.book Seite 31 Montag, 22. September 2003 4:26 16
Page 34 of 88
32
Safety check
2
Brakes
Checking brake fluid levelGradual wear of the brake pads
causes the brake fluid level in
the reservoir to drop.
d Warning:
If brake fluid level in the fluid
reservoirs for the front or rear
brakes has dropped below
the MIN mark (
b 33, 34) have
the brake system checked
without delay by a specialist
workshop, preferably an au-
thorised BMW motorcycle
dealer.
Changing the brake fluid
d Warning:
Brake fluid is exposed to
severe thermal loads, and
absorbs moisture from the
atmosphere.
Consequently, the brake fluid
must be changed regularly by
a specialist workshop, prefer-
ably an authorised
BMW motorcycle dealer.
10R13bkg4.book Seite 32 Montag, 22. September 2003 4:26 16
Page 35 of 88
1
33
Safety check
2
Brakes
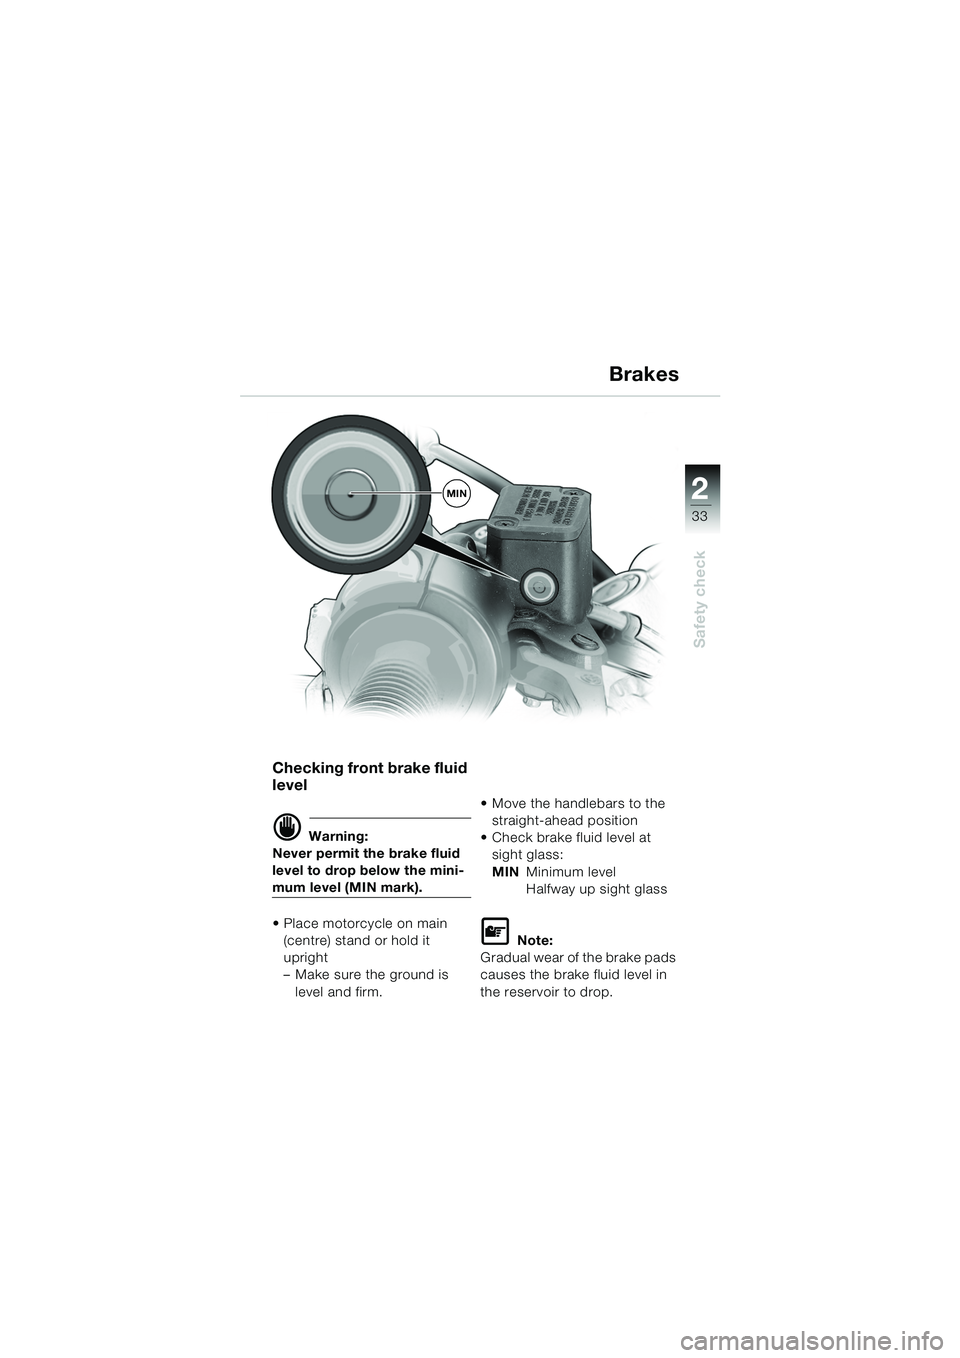
Checking front brake fluid
level
d Warning:
Never permit the brake fluid
level to drop below the mini-
mum level (MIN mark).
• Place motorcycle on main (centre) stand or hold it
upright
– Make sure the ground is
level and firm. Move the handlebars to the
straight-ahead position
Check brake fluid level at sight glass:
MIN Minimum level
Halfway up sight glass
L Note:
Gradual wear of the brake pads
causes the brake fluid level in
the reservoir to drop.
MIN
10r1302g4.fm Seite 33 Dienstag, 30. September 2003 1:48 13
Page 36 of 88
34
Safety check
2
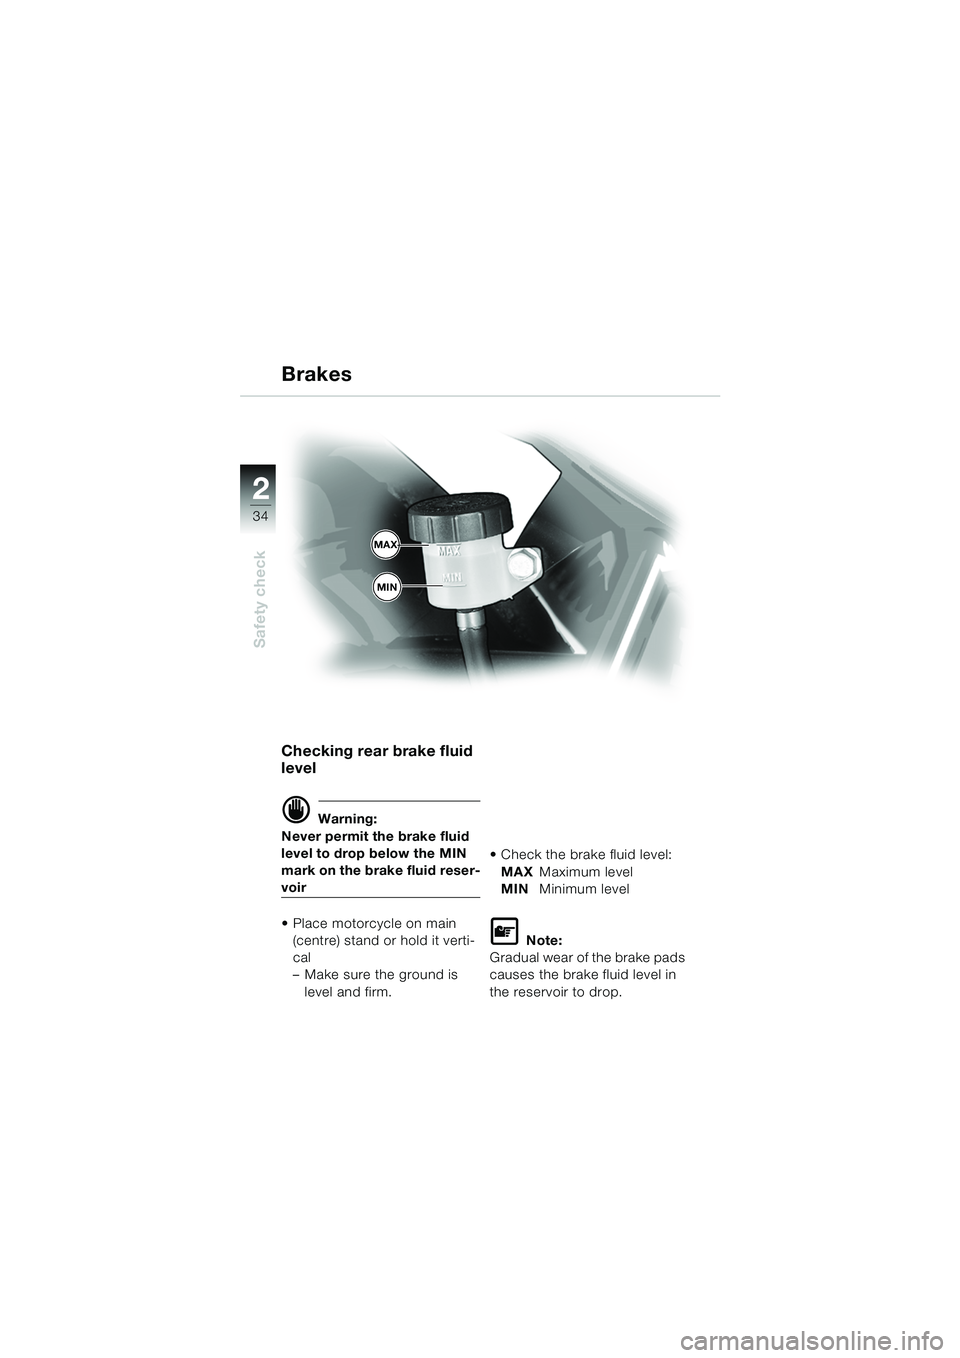
Checking rear brake fluid
level
d Warning:
Never permit the brake fluid
level to drop below the MIN
mark on the brake fluid reser-
voir
Place motorcycle on main (centre) stand or hold it verti-
cal
– Make sure the ground is
level and firm. Check the brake fluid level:
MAX Maximum level
MIN Minimum level
L Note:
Gradual wear of the brake pads
causes the brake fluid level in
the reservoir to drop.
Brakes
MAX
MIN
10R13bkg4.book Seite 34 Montag, 22. September 2003 4:26 16
Page 37 of 88
1
35
Safety check
2
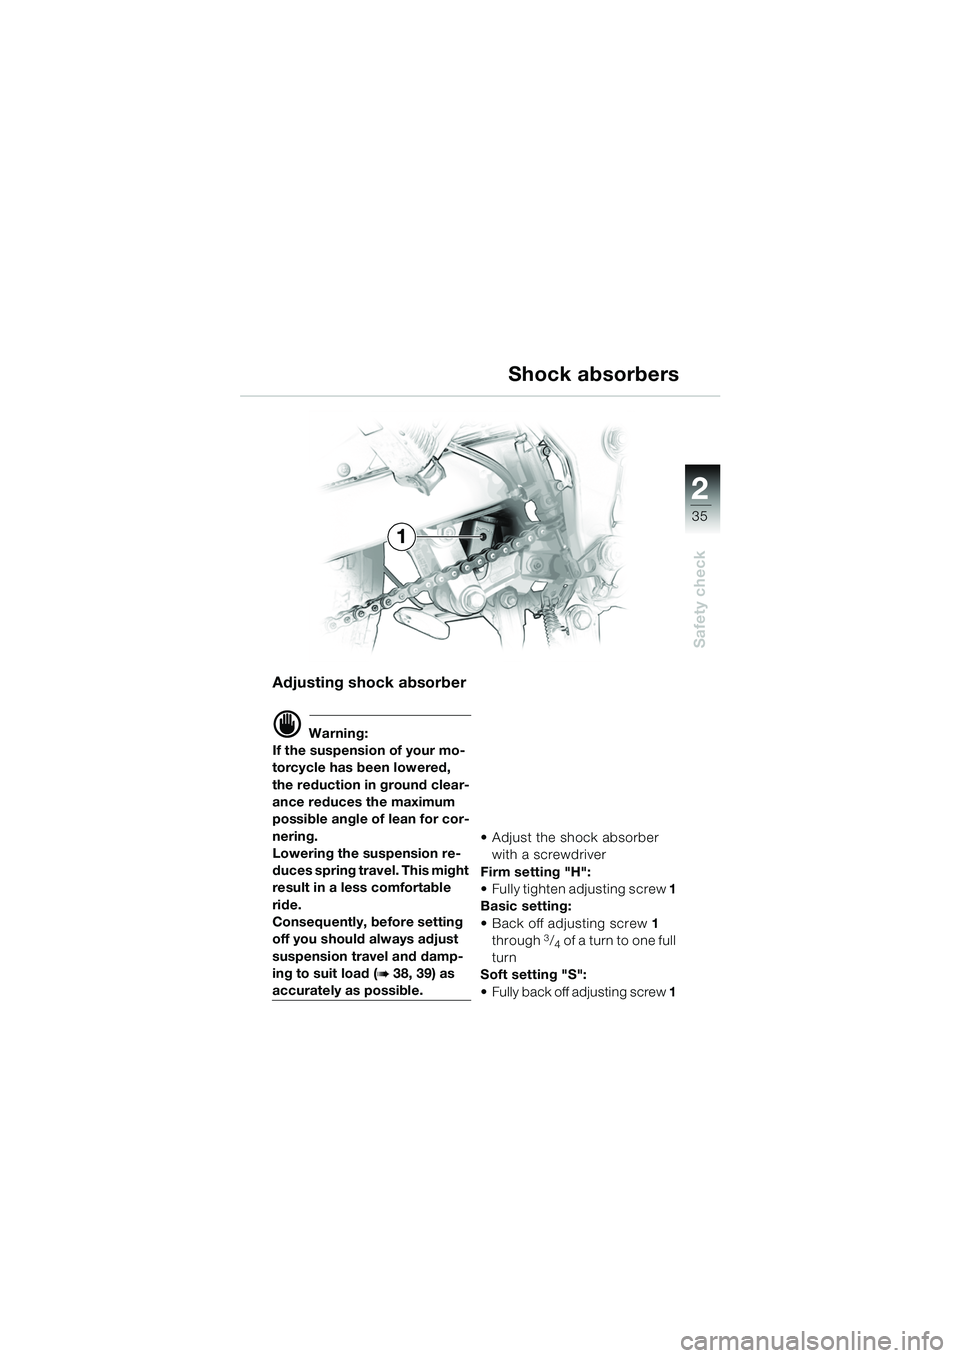
Adjusting shock absorber
d Warning:
If the suspension of your mo-
torcycle has been lowered,
the reduction in ground clear-
ance reduces the maximum
possible angle of lean for cor-
nering.
Lowering the suspension re-
duces spring travel. This might
result in a less comfortable
ride.
Consequently, before setting
off you should always adjust
suspension travel and damp-
ing to suit load (
b 38, 39) as
accurately as possible. • Adjust the shock absorber
with a screwdriver
Firm setting "H":
Fully tighten adjusting screw 1
Basic setting:
Back off adjusting screw 1
through
3/4 of a turn to one full
turn
Soft setting "S":
Fully back off adjusting screw 1
Shock absorbers
1
10r1302g4.fm Seite 35 Dienstag, 30. September 2003 1:49 13
Page 38 of 88
36
Safety check
2
Spring preload
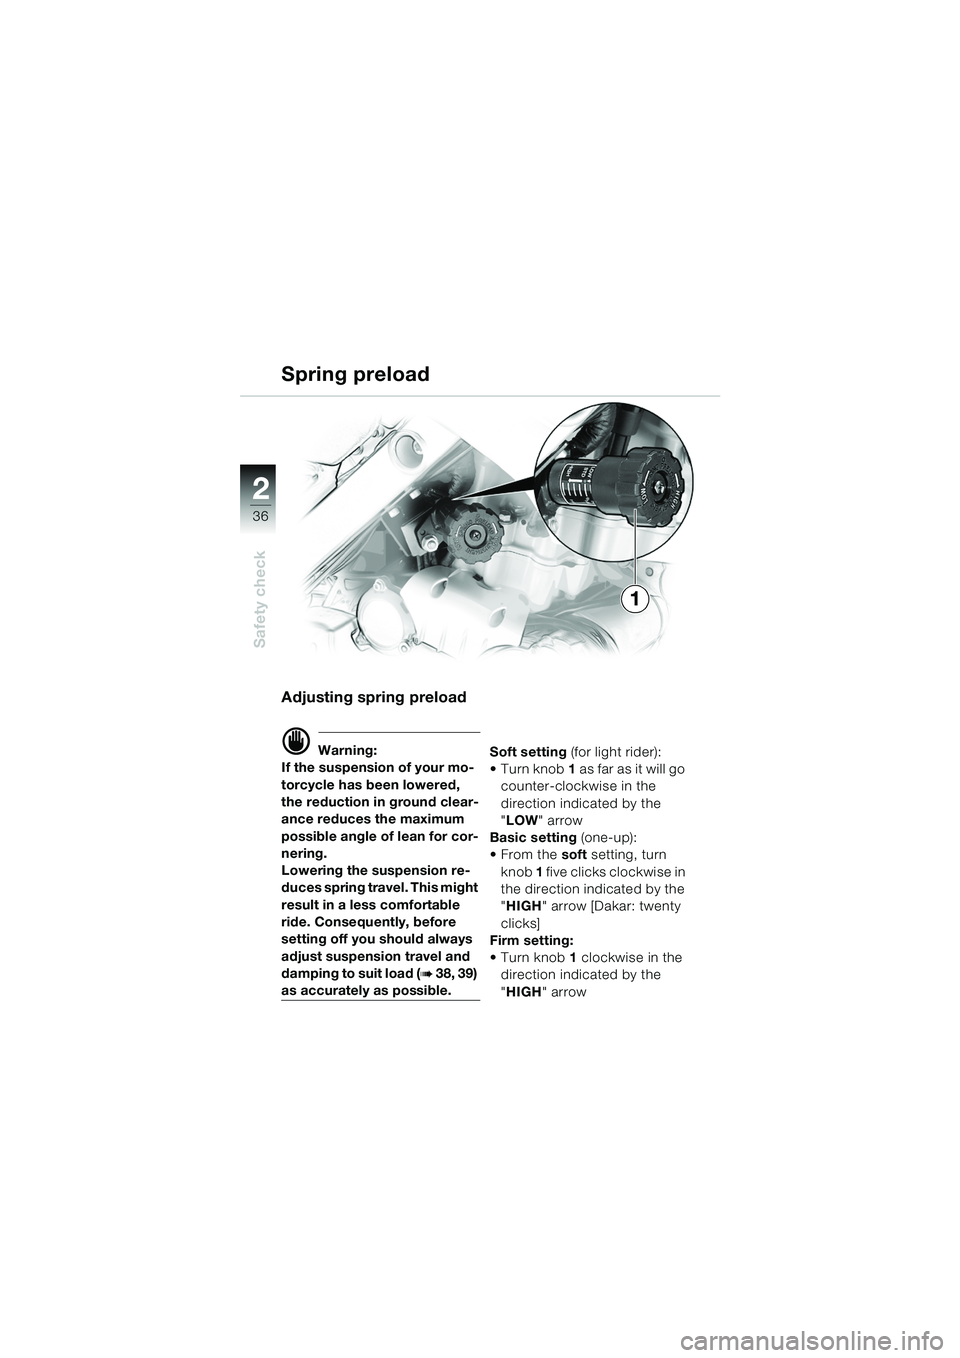
Adjusting spring preload
d Warning:
If the suspension of your mo-
torcycle has been lowered,
the reduction in ground clear-
ance reduces the maximum
possible angle of lean for cor-
nering.
Lowering the suspension re-
duces spring travel. This might
result in a less comfortable
ride. Consequently, before
setting off you should always
adjust suspension travel and
damping to suit load (
b 38, 39)
as accurately as possible. Soft setting
(for light rider):
Turn knob 1 as far as it will go
counter-clockwise in the
direction indicated by the
" LOW " arrow
Basic setting (one-up):
From the soft setting, turn
knob 1 five clicks clockwise in
the direction indicated by the
" HIGH " arrow [Dakar: twenty
clicks]
Firm setting:
Turn knob 1 clockwise in the
direction indicated by the
" HIGH " arrow
1
10R13bkg4.book Seite 36 Montag, 22. September 2003 4:26 16
Page 39 of 88
1
37
Safety check
2
Drive chain
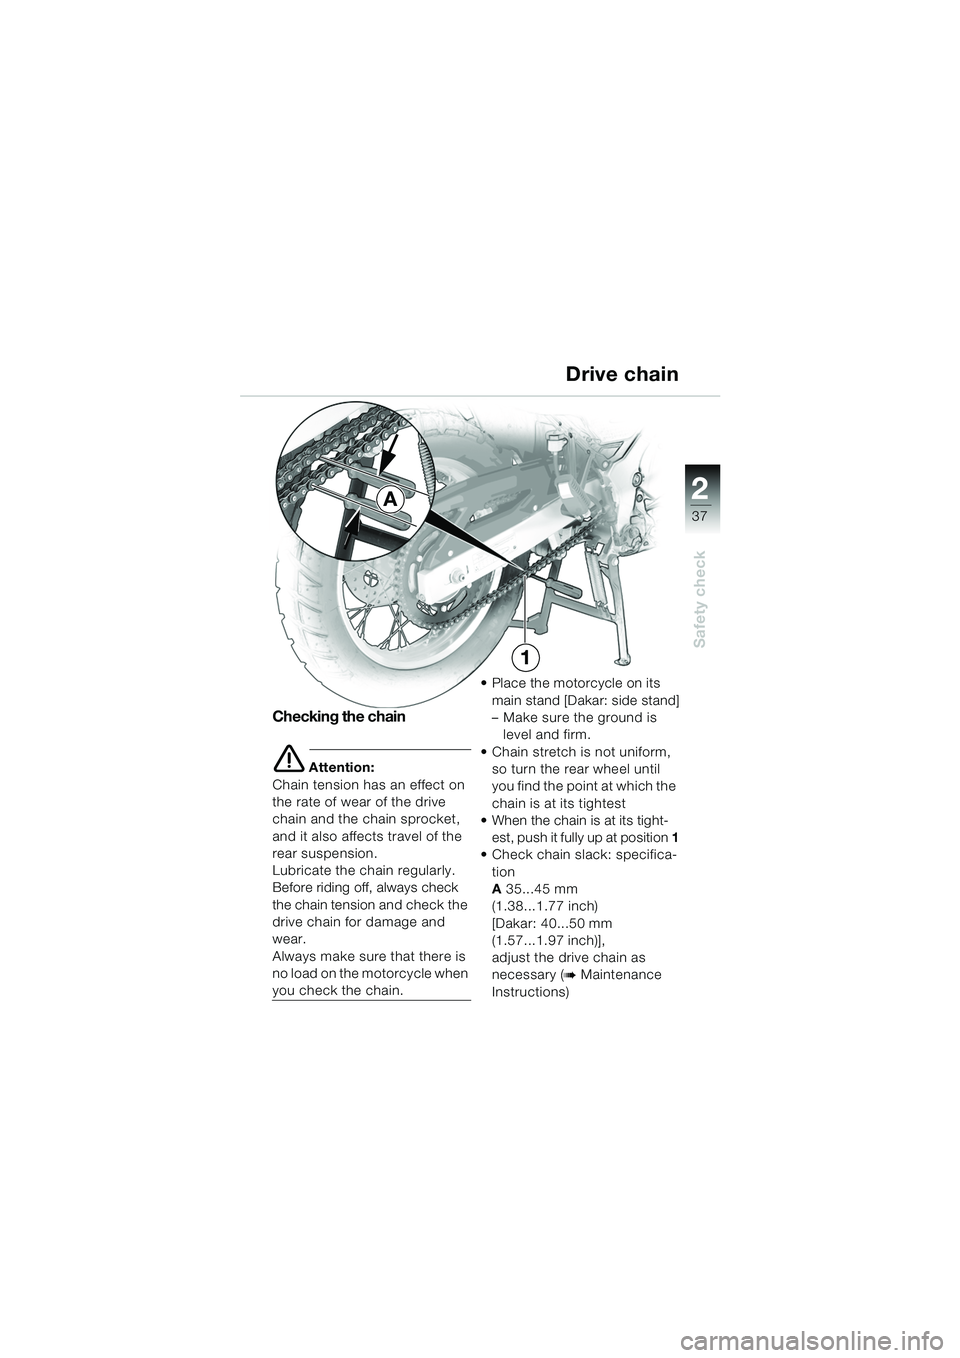
Checking the chain
e Attention:
Chain tension has an effect on
the rate of wear of the drive
chain and the chain sprocket,
and it also affects travel of the
rear suspension.
Lubricate the chain regularly.
Before riding off, always check
the chain tension and check the
drive chain for damage and
wear.
Always make sure that there is
no load on the motorcycle when
you check the chain. Place the motorcycle on its
main stand [Dakar: side stand]
– Make sure the ground is level and firm.
Chain stretch is not uniform, so turn the rear wheel until
you find the point at which the
chain is at its tightest
When the chain is at its tight-
e s t , p u sh it f u l ly u p a t po s it i o n 1
Check chain slack: specifica-
tion
A 35...45 mm
(1.38...1.77 inch)
[Dakar: 40...50 mm
(1.57...1.97 inch)],
adjust the drive chain as
necessary (b Maintenance
Instructions)
A
1
10R13bkg4.book Seite 37 Montag, 22. September 2003 4:26 16
Page 40 of 88
38
Safety check
2
Accessories and loads
d Warning:
BMW cannot examine or test
each product of outside origin
on the accessories and tyres
market to ensure that it can
be used on or in connection
with BMW motorcycles with-
out constituting a safety haz-
ard. Even approval by an
official inspection authority or
an official permit (General Op-
erating Permit) cannot always
provide this guarantee. Tests
conducted by these instanc-
es cannot make provision for
all operating conditions expe-
rienced by BMW motorcycles
and consequently, they are
not sufficient in some circum-
stances.
L Note:
BMW accessories and other
products approved by BMW
can be obtained from your
BMW motorcycle dealer.
Correct loading
d Warning:
Overloading can impair the
handling of your motorcycle.
Make sure that the weight is uniformly distributed between
right and left
Pack heavy items at the bot-
tom and toward the inboard
side
Max. load in each case
OA (left
and right): 5 kg (approx.
11 lbs)
Max. load in topcase
OA and in
tank-top rucksackOA 5kg
(approx. 11 lbs) each
Check that fastenings are correctly positioned and tight
d Warning:
With cases installed, it is ad-
visable not to exceed 130 km/
h (80 mph).
OAOptional accessory
10R13bkg4.book Seite 38 Montag, 22. September 2003 4:26 16