tow BMW MOTORRAD G 650 XCOUNTRY 2007 Rider's Manual (in English)
[x] Cancel search | Manufacturer: BMW MOTORRAD, Model Year: 2007, Model line: G 650 XCOUNTRY, Model: BMW MOTORRAD G 650 XCOUNTRY 2007Pages: 126, PDF Size: 2.64 MB
Page 37 of 126

Allow the silencer to cool.Adjust spring preload by turn-
ing knob 1.
If you want to increase spring
preload, turn the knob toward
HARD.
If you want to reduce spring
preload, turn the knob toward
SOFT.
Basic setting of spring
preload, rear
Turn the knob as far as it
will go in the "SOFT" direc-
tion and then turn it 10 full
turns in the "HARD" direc-
tion. (Full load of fuel, with
rider 85 kg)
DampingAdjustment for rear
suspensionDamping must be adapted to suit
spring preload and the surface on
which the motorcycle is ridden.
An increase in spring preload re-
quires firmer damping, a reduc-
tion in spring preload requires
softer damping.
The harder the setting, the more
the movement that the spring
strut can make to absorb sur-
face irregularities is damped.
When you choose a soft setting
the spring strut responds all the
more rapidly to surface irregularit-
ies.Adjusting damping for
rear wheelMake sure the ground is level
and firm and place the motor-
cycle on its stand. There is a risk of injury
by burns if you adjust the
damping characteristic while the
silencer is hot.
Use a screwdriver extension and
wear protective gloves.
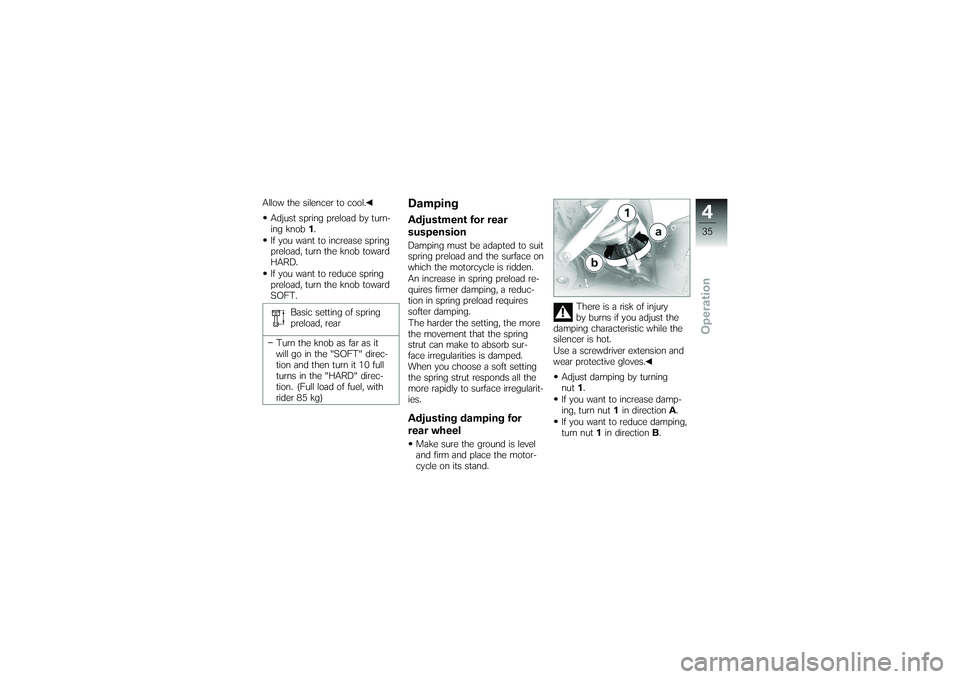
Adjust damping by turning
nut 1.
If you want to increase damp-
ing, turn nut 1in direction A.
If you want to reduce damping,
turn nut 1in direction B.
435zOperation
Page 64 of 126

Checking operation of
brakesPull the handbrake lever.
The pressure point must be
clearly perceptible.
Press the footbrake lever.
The pressure point must be
clearly perceptible.
If pressure points are not clearly
perceptible: Have the brakes checked by a
specialist workshop, preferably
an authorised BMW Motorrad
dealer.Brake padsChecking front brake pad
thicknessMake sure the ground is level
and firm and place the motor-
cycle on its stand. Brake pads worn past
the minimum permissible
brake-pad thickness can cause
a reduction in braking efficiency
and under certain circumstances
they can cause damage to the
brake system.
In order to ensure the dependab-
ility of the brake system, do not
permit the brake pads to wear
past the minimum permissible
brake-pad thickness.
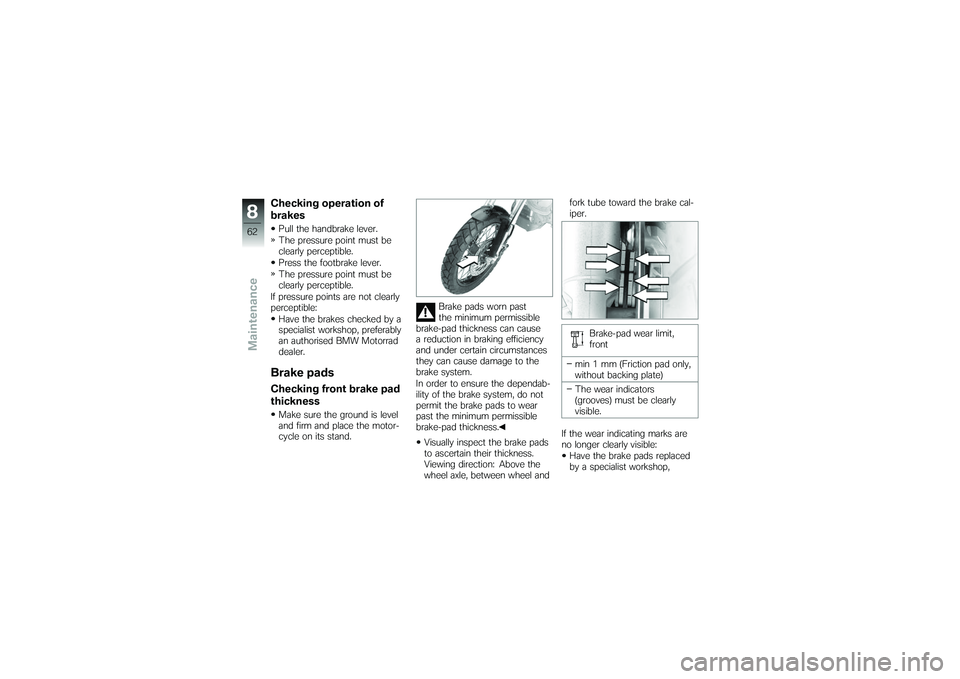
Visually inspect the brake pads
to ascertain their thickness.
Viewing direction: Above the
wheel axle, between wheel and fork tube toward the brake cal-
iper.
Brake-pad wear limit,
front
min 1 mm (Friction pad only,
without backing plate)
The wear indicators
(grooves) must be clearly
visible.
If the wear indicating marks are
no longer clearly visible: Have the brake pads replaced
by a specialist workshop,
862zMaintenance
Page 123 of 126

K
Keys, 28
L
Laying up, 96
LightsHigh-beam headlight, 31
Low-beam headlight, 31
Side light, 31
Luggage Correct loading, 55
M
Maintenance, 111 Notes, 58
Mirrors Adjusting, 33
Motorcycle Care, 93
Laying up, 96
Overview, 11, 13
Parking, 47
Restoring to use, 96
Multifunction display See display, 17 O
Odometer and tripmeters, 20
Resetting, 17, 29
P
Power socket, 11, 54
Pre-ride check, 43
R
Rear-wheel drive Technical data, 103
Refuelling, 48
Restoring to use, 96
Rider's Manual Stowage, 14
Running gear Technical data, 103
Running in, 44
S
Safety instructions, 40
Seat Lock, 13
Removing and installing, 37
Service, 110
Service Card, 110 Spark plugs
Technical data, 106
Speedometer, 20
Spring preload Adjusting, 11, 34
Standards, 7
Starter, 16
Starting, 42
Status indicators Overview, 20
Steering lock, 28 Locking, 28
T
Technical data Battery, 106
Brakes, 104
Bulbs, 106
Clutch, 102
Dimensions, 107
Electrics, 105
Engine, 100
Engine oil, 101
Frame, 107
Fuel, 4, 101
12121zIndex