brake BMW MOTORRAD G650 XMOTO 2007 Rider's Manual (in English)
[x] Cancel search | Manufacturer: BMW MOTORRAD, Model Year: 2007, Model line: G650 XMOTO, Model: BMW MOTORRAD G650 XMOTO 2007Pages: 132, PDF Size: 2.83 MB
Page 54 of 132
Brake system with
BMW Motorrad ABS
OE
How does ABS work?The amount of braking force that
can be transferred to the road
depends on factors hat include
the coefficient of friction of the
road surface. Loose stones, ice
and snow or a wet road all have
much lower coefficients of fric-
tion than a clean, dry asphalt sur-
face. The lower the coefficient
of friction, the longer the braking
distance.
If the rider increases braking
pressure to the extent that brak-
ing force exceeds the maxim-
um transferrable limit, the wheels
start to lock and the motorcycle
loses its directional stability; a fall
is imminent. Before this situation
can occur, ABS intervenes and
adapts braking pressure to the
maximum transferrable braking
force, so the wheels continueto turn and directional stability
is maintained irrespective of the
condition of the road surface.
What are the effects of
surface irregularities?Humps and surface irregularit-
ies can cause the wheels to lose
contact temporarily with the road
surface; if this happens the brak-
ing force that can be transmit-
ted to the road can drop to zero.
If the brakes are applied under
these circumstances the ABS
has to reduce braking force to
ensure that directional stability
is maintained when the wheels
regain contact with the road sur-
face. At this instant the BMW
Motorrad ABS must assume an
extremely low coefficient of fric-
tion, so that the wheels will con-
tinue to rotate under all imagin-
able circumstances, because this
is the precondition for ensuring
directional stability. As soon as
is registers the actual circum-
stances, the system reacts in-
stantly and adjusts braking force
accordingly to achieve optimum
braking.
Rear wheel liftEven under severe braking, a
high level of tyre grip can mean
that the front wheel does not
lock up until very late, if at all.
Consequently, ABS does not in-
tervene until very late, if at all.
Under these circumstances the
rear wheel can lift off the ground,
and the outcome can be a high-
siding situation in which the mo-
torcycle can flip over.
Severe braking can cause
the rear wheel to lift off the
ground.
When you brake, bear in mind
that ABS control cannot be relied
on in all circumstances to prevent
the rear wheel from lifting clear of
the ground.
652zEngineering details
Page 55 of 132
What is the design
baseline for BMW
Motorrad ABS?Within the limits imposed by
physics, BMW Motorrad ABS en-
sures directional stability on any
surface. The system is not op-
timised for special requirements
that apply under extreme com-
petitive situations off-road or on
the track.Special situationsThe speeds of the front and rear
wheels are compared as one
means of detecting a wheel's
incipient tendency to lock. If the
system registers implausible val-
ues for a lengthy period the ABS
function is deactivated for safety
reasons and an ABS fault mes-
sage is issued. Self-diagnos-
is has to complete before fault
messages can be issued.
In addition to problems with the
BMW Motorrad ABS, exceptionalriding conditions can lead to a
fault message being issued.
Exceptional riding
conditions:
Riding for a lengthy period with
the front wheel lifted off the
ground (wheelie).
Rear wheel rotating with the
motorcycle held stationary by
applying the front brake (burn-
out).
Heating up with the motorcycle
on the centre stand or an auxil-
iary stand, engine idling or with
a gear engaged.
Rear wheel locked for a lengthy
period, for example while des-
cending off-road.
If a fault message is issued on
account of exceptional riding
conditions as outlined above, you
can reactivate the ABS function
by switching the ignition off and
on again.
What significance
devolves on regular
maintenance?
Invariably, a technical sys-
tem cannot perform beyond
the abilities dictated by its level
of maintenance.
In order to ensure that the BMW
Motorrad ABS is always main-
tained in optimum condition, it
is essential for you to comply
strictly with the specified inspec-
tion intervals.
Reserves for safetyThe potentially shorter braking
distances which BMW Motorrad
ABS permits must not be used
as an excuse for careless riding.
ABS is primarily a means of en-
suring a safety margin in genuine
emergencies.
Take care when cornering. When
you apply the brakes on a corner,
the motorcycle's weight and
653zEngineering details
Page 61 of 132
Maintenance
Maintenance
Notes................................ 60
Toolkit . . . ............................ 60
Engine oil ............................ 61
Brake system . ....................... 63
Brake pads . . . ....................... 64
Brake fluid ........................... 65
Coolant . . ............................ 67
Clutch . . . ............................ 68
Tyres ................................ 69
Rims ................................. 69
Chain ................................ 69
Wheels . . ............................ 71
BMW Motorrad auxiliary stand ....... 78
BMW Motorrad front-wheel
stand ................................ 79 Fuses . . .
............................. 81
Bulbs . . . ............................. 82
Jump starting . ....................... 90
Battery . . ............................. 91
Number-plate carrier ................. 95
859zMaintenance
Page 65 of 132
If the oil level is above the MAX
mark:Have the oil level corrected by
a specialist workshop, prefer-
ably an authorised BMW Mo-
torrad dealer.Topping up engine oil
Damage to the engine
can result if it is operated
without enough oil, but the same
also applies if the oil level is too
high.
Always make sure that the oil
level is correct.
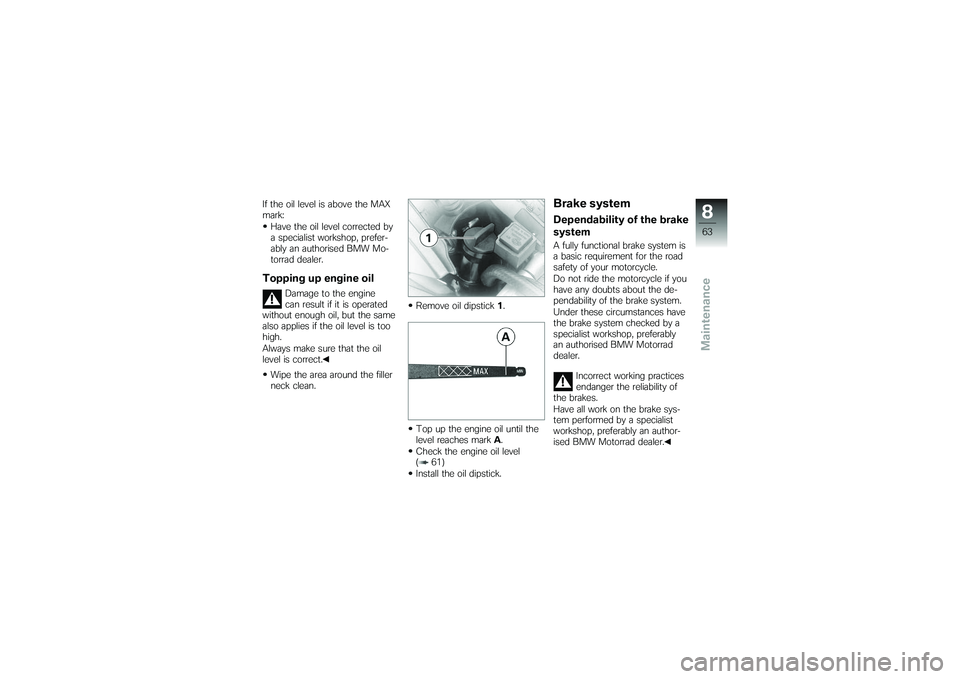
Wipe the area around the filler
neck clean. Remove oil dipstick
1.
Top up the engine oil until the
level reaches mark A.
Check the engine oil level
( 61)
Install the oil dipstick.
Brake systemDependability of the brake
systemA fully functional brake system is
a basic requirement for the road
safety of your motorcycle.
Do not ride the motorcycle if you
have any doubts about the de-
pendability of the brake system.
Under these circumstances have
the brake system checked by a
specialist workshop, preferably
an authorised BMW Motorrad
dealer.
Incorrect working practices
endanger the reliability of
the brakes.
Have all work on the brake sys-
tem performed by a specialist
workshop, preferably an author-
ised BMW Motorrad dealer.
863zMaintenance
Page 66 of 132
Checking operation of
brakesPull the handbrake lever.
The pressure point must be
clearly perceptible.
Press the footbrake lever.
The pressure point must be
clearly perceptible.
If pressure points are not clearly
perceptible: Have the brakes checked by a
specialist workshop, preferably
an authorised BMW Motorrad
dealer.Brake padsChecking brake-pad
thickness, front brakesMake sure the ground is level
and firm and place the motor-
cycle on its stand. Brake pads worn past
the minimum permissible
brake-pad thickness can cause
a reduction in braking efficiency
and under certain circumstances
they can cause damage to the
brake system.
In order to ensure the dependab-
ility of the brake system, do not
permit the brake pads to wear
past the minimum permissible
brake-pad thickness.
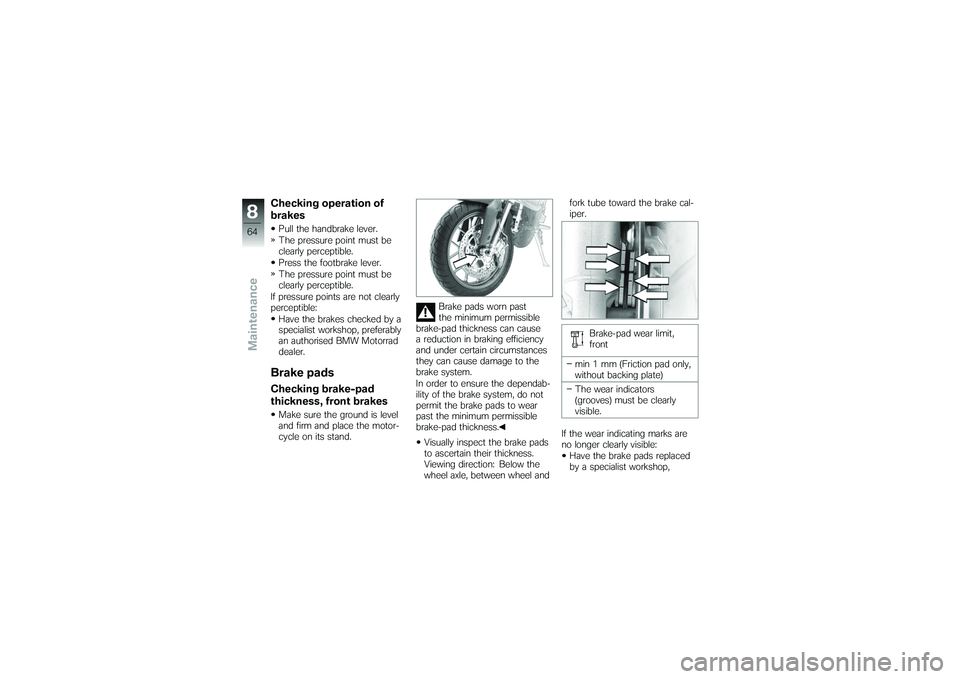
Visually inspect the brake pads
to ascertain their thickness.
Viewing direction: Below the
wheel axle, between wheel and fork tube toward the brake cal-
iper.
Brake-pad wear limit,
front
min 1 mm (Friction pad only,
without backing plate)
The wear indicators
(grooves) must be clearly
visible.
If the wear indicating marks are
no longer clearly visible: Have the brake pads replaced
by a specialist workshop,
864zMaintenance
Page 67 of 132
preferably an authorised BMW
Motorrad dealer.Checking rear brake pad
thicknessMake sure the ground is level
and firm and place the motor-
cycle on its stand.Brake pads worn past
the minimum permissible
brake-pad thickness can cause
a reduction in braking efficiency
and under certain circumstances
they can cause damage to the
brake system.
In order to ensure the dependab- ility of the brake system, do not
permit the brake pads to wear
past the minimum permissible
brake-pad thickness.
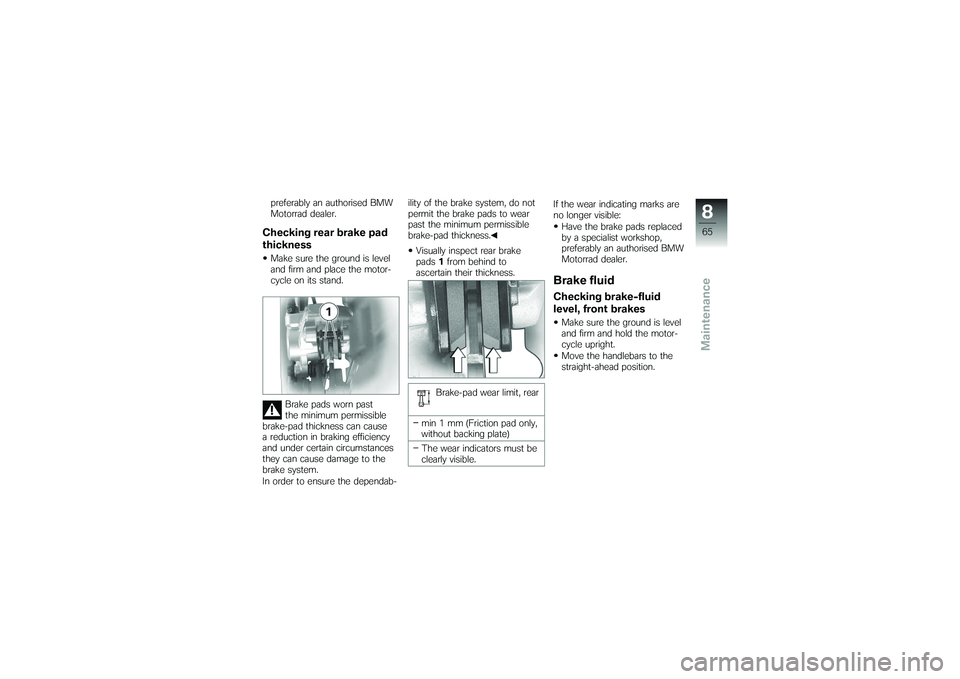
Visually inspect rear brake
pads 1from behind to
ascertain their thickness.
Brake-pad wear limit, rear
min 1 mm (Friction pad only,
without backing plate)
The wear indicators must be
clearly visible. If the wear indicating marks are
no longer visible:
Have the brake pads replaced
by a specialist workshop,
preferably an authorised BMW
Motorrad dealer.
Brake fluidChecking brake-fluid
level, front brakesMake sure the ground is level
and firm and hold the motor-
cycle upright.
Move the handlebars to the
straight-ahead position.
865zMaintenance
Page 68 of 132
A low fluid level in the
brake reservoir can allow air
to penetrate the brake system.
This significantly reduces braking
efficiency.
Check the brake-fluid level at
regular intervals.
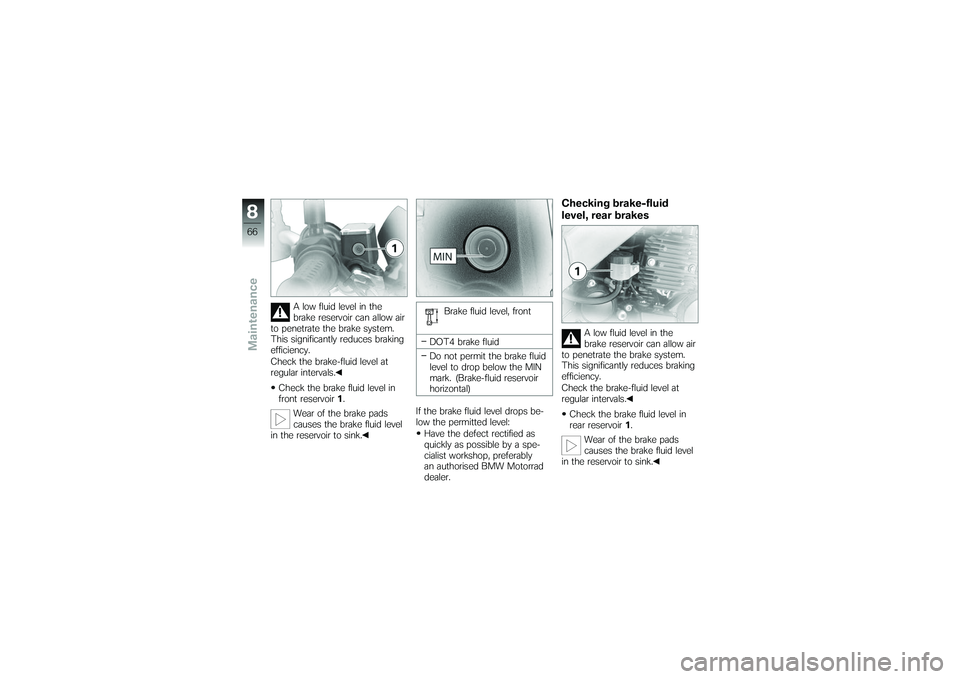
Check the brake fluid level in
front reservoir 1.
Wear of the brake pads
causes the brake fluid level
in the reservoir to sink. Brake fluid level, front
DOT4 brake fluid
Do not permit the brake fluid
level to drop below the MIN
mark. (Brake-fluid reservoir
horizontal)
If the brake fluid level drops be-
low the permitted level: Have the defect rectified as
quickly as possible by a spe-
cialist workshop, preferably
an authorised BMW Motorrad
dealer.
Checking brake-fluid
level, rear brakes
A low fluid level in the
brake reservoir can allow air
to penetrate the brake system.
This significantly reduces braking
efficiency.
Check the brake-fluid level at
regular intervals.
Check the brake fluid level in
rear reservoir 1.
Wear of the brake pads
causes the brake fluid level
in the reservoir to sink.
866zMaintenance
Page 69 of 132
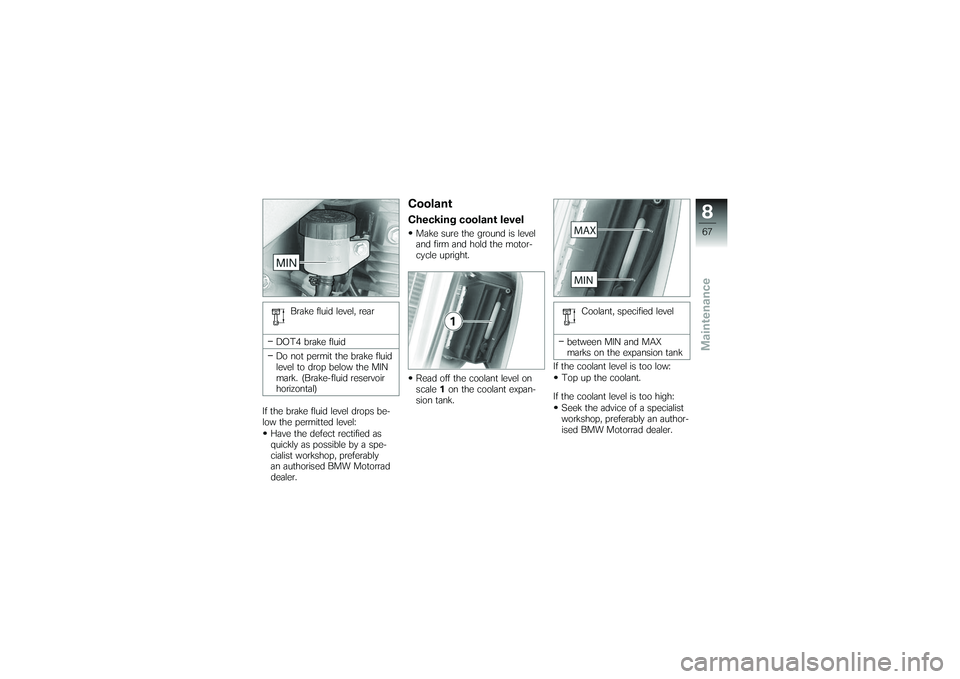
Brake fluid level, rear
DOT4 brake fluid
Do not permit the brake fluid
level to drop below the MIN
mark. (Brake-fluid reservoir
horizontal)
If the brake fluid level drops be-
low the permitted level: Have the defect rectified as
quickly as possible by a spe-
cialist workshop, preferably
an authorised BMW Motorrad
dealer.
CoolantChecking coolant levelMake sure the ground is level
and firm and hold the motor-
cycle upright.
Read off the coolant level on
scale 1on the coolant expan-
sion tank. Coolant, specified level
between MIN and MAX
marks on the expansion tank
If the coolant level is too low: Top up the coolant.
If the coolant level is too high: Seek the advice of a specialist
workshop, preferably an author-
ised BMW Motorrad dealer.
867zMaintenance
Page 74 of 132
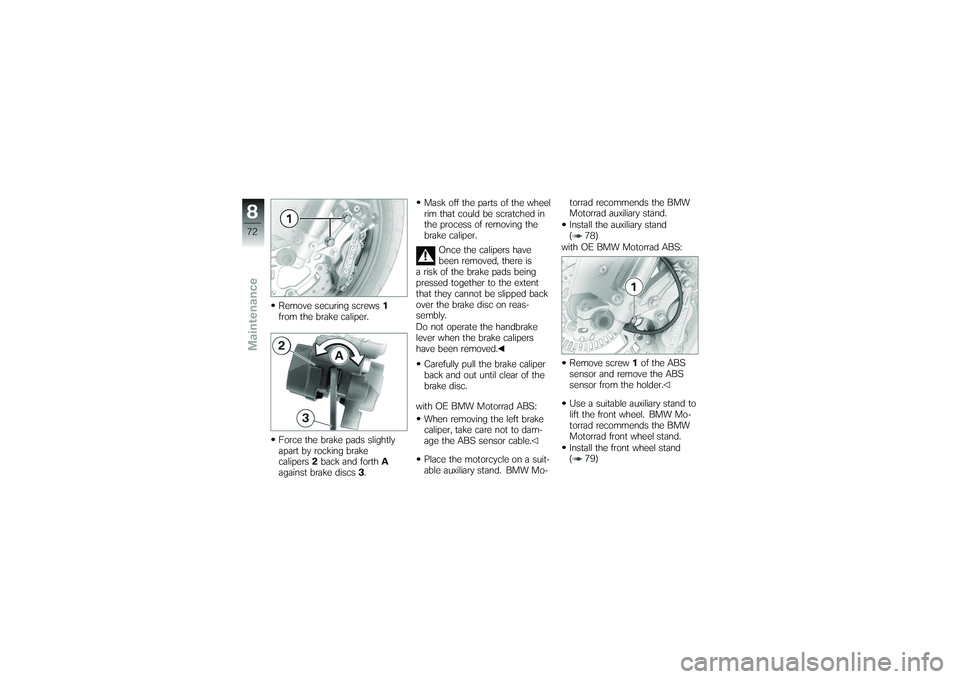
Remove securing screws1
from the brake caliper.
Force the brake pads slightly
apart by rocking brake
calipers 2back and forth A
against brake discs 3. Mask off the parts of the wheel
rim that could be scratched in
the process of removing the
brake caliper.
Once the calipers have
been removed, there is
a risk of the brake pads being
pressed together to the extent
that they cannot be slipped back
over the brake disc on reas-
sembly.
Do not operate the handbrake
lever when the brake calipers
have been removed.
Carefully pull the brake caliper
back and out until clear of the
brake disc.
with OE BMW Motorrad ABS: When removing the left brake
caliper, take care not to dam-
age the ABS sensor cable.
Place the motorcycle on a suit-
able auxiliary stand. BMW Mo- torrad recommends the BMW
Motorrad auxiliary stand.
Install the auxiliary stand
( 78)
with OE BMW Motorrad ABS:
Remove screw 1of the ABS
sensor and remove the ABS
sensor from the holder.
Use a suitable auxiliary stand to
lift the front wheel. BMW Mo-
torrad recommends the BMW
Motorrad front wheel stand.
Install the front wheel stand
( 79)
872zMaintenance
Page 76 of 132
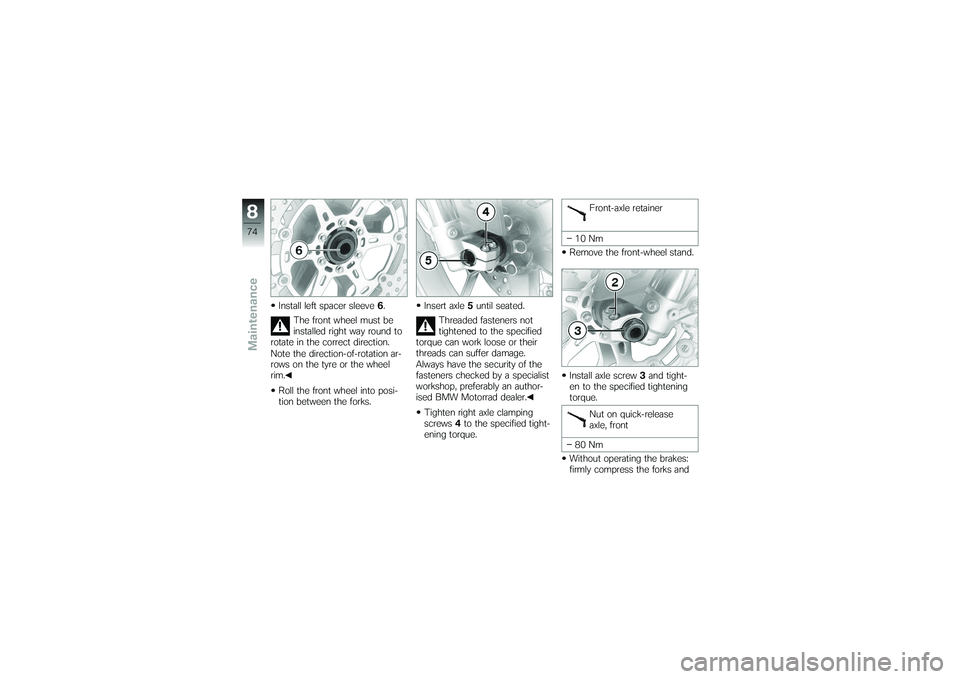
Install left spacer sleeve6.
The front wheel must be
installed right way round to
rotate in the correct direction.
Note the direction-of-rotation ar-
rows on the tyre or the wheel
rim.
Roll the front wheel into posi-
tion between the forks. Insert axle
5until seated.
Threaded fasteners not
tightened to the specified
torque can work loose or their
threads can suffer damage.
Always have the security of the
fasteners checked by a specialist
workshop, preferably an author-
ised BMW Motorrad dealer.
Tighten right axle clamping
screws 4to the specified tight-
ening torque. Front-axle retainer
10 Nm
Remove the front-wheel stand.
Install axle screw 3and tight-
en to the specified tightening
torque.
Nut on quick-release
axle, front
80 Nm
Without operating the brakes:
firmly compress the forks and
874zMaintenance