lock BMW MOTORRAD K 1200 GT 2007 Rider's Manual (in English)
[x] Cancel search | Manufacturer: BMW MOTORRAD, Model Year: 2007, Model line: K 1200 GT, Model: BMW MOTORRAD K 1200 GT 2007Pages: 173, PDF Size: 2.82 MB
Page 67 of 173
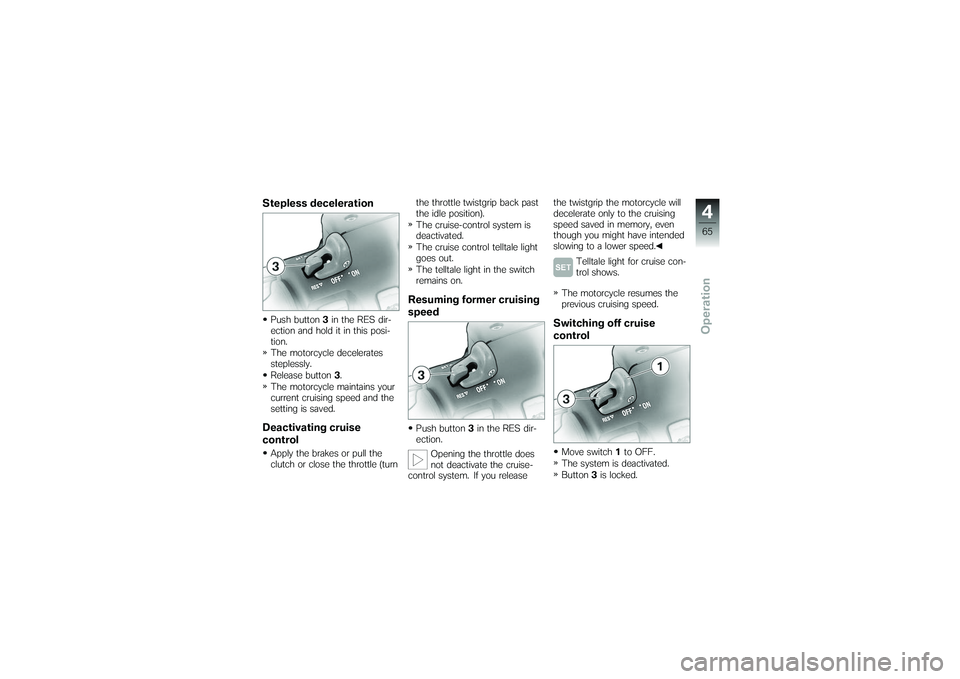
Stepless decelerationPush button3in the RES dir-
ection and hold it in this posi-
tion.
The motorcycle decelerates
steplessly.
Release button 3.
The motorcycle maintains your
current cruising speed and the
setting is saved.Deactivating cruise
controlApply the brakes or pull the
clutch or close the throttle (turn the throttle twistgrip back past
the idle position).
The cruise-control system is
deactivated.
The cruise control telltale light
goes out.
The telltale light in the switch
remains on.
Resuming former cruising
speedPush button
3in the RES dir-
ection.
Opening the throttle does
not deactivate the cruise-
control system. If you release the twistgrip the motorcycle will
decelerate only to the cruising
speed saved in memory, even
though you might have intended
slowing to a lower speed.
Telltale light for cruise con-
trol shows.
The motorcycle resumes the
previous cruising speed.
Switching off cruise
controlMove switch 1to OFF.
The system is deactivated.
Button 3is locked.
465zOperation
Page 68 of 173

Stowage compartmentOpening stowage
compartmentUse the ignition key to turn
lock barrel2to right angles
with the forward direction of
travel.
Lock of the stowage compart-
ment unlocked.
Push the lock barrel in.
Lid 1pops up.
Closing stowage
compartmentSnap lid 1closed and push it
down.
The lock engages with an aud-
ible click.
Use the ignition key to turn
lock barrel 2in line with the
forward direction of travel.
Lock of the stowage compart-
ment locked.
ClutchAdjusting clutch lever
If the position of the clutch
fluid reservoir is changed,
air can enter the clutch system.
Do not twist the handlebar fitting
or the handlebars.
Attempting to adjust the
clutch lever while riding the
motorcycle can lead to accidents.
Do not attempt to adjust the
clutch lever unless the motor-
cycle is at a standstill.
Turn adjuster Ato position 1:
466zOperation
Page 72 of 173
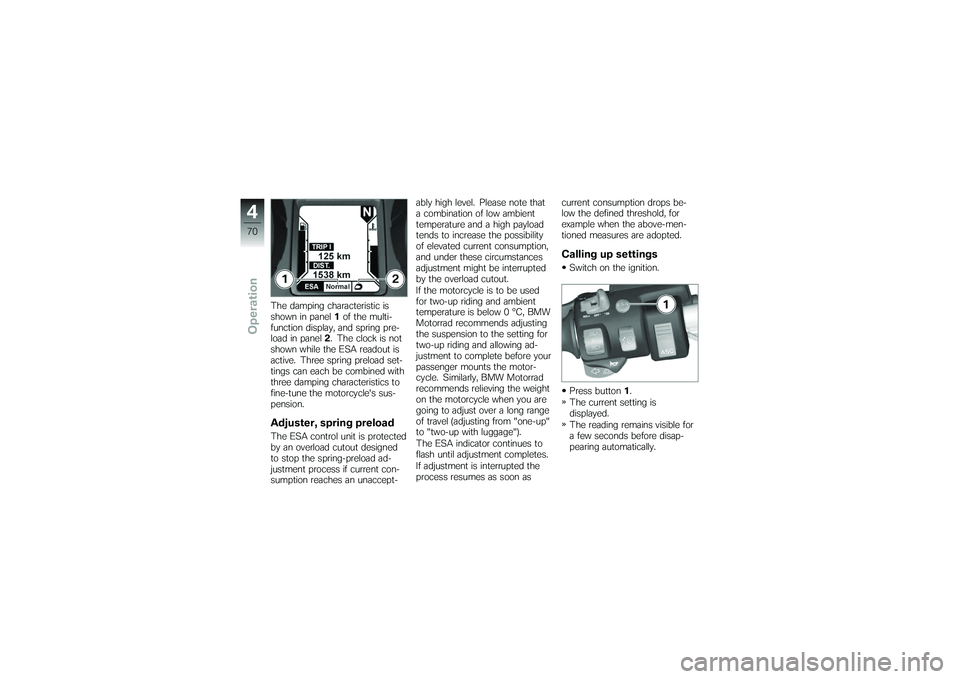
The damping characteristic is
shown in panel1of the multi-
function display, and spring pre-
load in panel 2. The clock is not
shown while the ESA readout is
active. Three spring preload set-
tings can each be combined with
three damping characteristics to
fine-tune the motorcycle's sus-
pension.Adjuster, spring preloadThe ESA control unit is protected
by an overload cutout designed
to stop the spring-preload ad-
justment process if current con-
sumption reaches an unaccept- ably high level. Please note that
a combination of low ambient
temperature and a high payload
tends to increase the possibility
of elevated current consumption,
and under these circumstances
adjustment might be interrupted
by the overload cutout.
If the motorcycle is to be used
for two-up riding and ambient
temperature is below 0 °C, BMW
Motorrad recommends adjusting
the suspension to the setting for
two-up riding and allowing ad-
justment to complete before your
passenger mounts the motor-
cycle. Similarly, BMW Motorrad
recommends relieving the weight
on the motorcycle when you are
going to adjust over a long range
of travel (adjusting from "one-up"
to "two-up with luggage").
The ESA indicator continues to
flash until adjustment completes.
If adjustment is interrupted the
process resumes as soon as
current consumption drops be-
low the defined threshold, for
example when the above-men-
tioned measures are adopted.
Calling up settingsSwitch on the ignition.
Press button
1.
The current setting is
displayed.
The reading remains visible for
a few seconds before disap-
pearing automatically.
470zOperation
Page 76 of 173
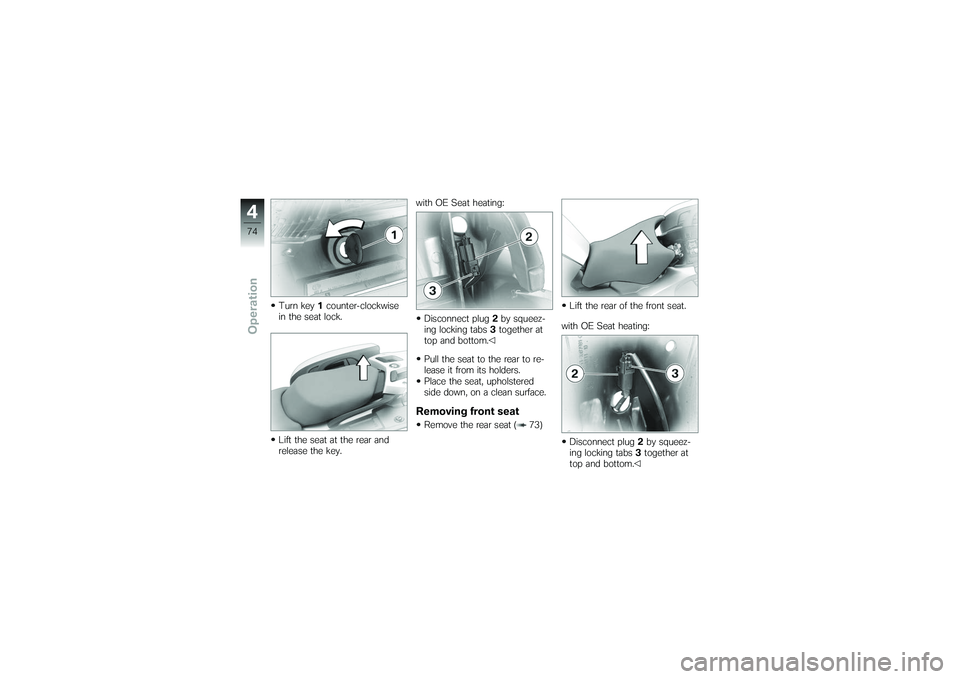
Turn key1counter-clockwise
in the seat lock.
Lift the seat at the rear and
release the key. with OE Seat heating:
Disconnect plug 2by squeez-
ing locking tabs 3together at
top and bottom.
Pull the seat to the rear to re-
lease it from its holders.
Place the seat, upholstered
side down, on a clean surface.
Removing front seatRemove the rear seat ( 73) Lift the rear of the front seat.
with OE Seat heating:
Disconnect plug 2by squeez-
ing locking tabs 3together at
top and bottom.
474zOperation
Page 78 of 173
If too much pressure is ap-
plied in the forward direc-
tion, there is a danger that the
motorcycle will be pushed off its
stand.
Always make sure that the
motorcycle is stable and firmly
supported.
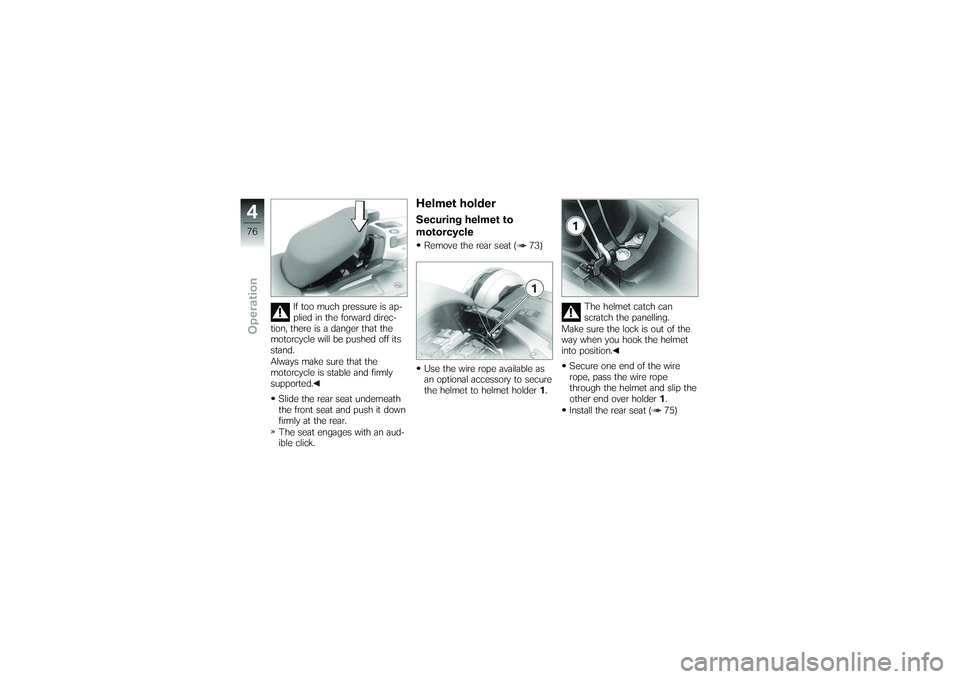
Slide the rear seat underneath
the front seat and push it down
firmly at the rear.
The seat engages with an aud-
ible click.
Helmet holderSecuring helmet to
motorcycleRemove the rear seat ( 73)
Use the wire rope available as
an optional accessory to secure
the helmet to helmet holder 1. The helmet catch can
scratch the panelling.
Make sure the lock is out of the
way when you hook the helmet
into position.
Secure one end of the wire
rope, pass the wire rope
through the helmet and slip the
other end over holder 1.
Install the rear seat ( 75)
476zOperation
Page 86 of 173
BrakesHow can stopping
distance be minimised?Each time the brakes are applied,
a load distribution shift takes
place with the load shifting for-
ward from the rear to the front
wheel. The sharper the motor-
cycle decelerates, the more load
is shifted to the front wheel. The
higher the wheel load, the more
braking force can be transmitted
without the wheel locking.
To optimise stopping distance,
apply the front brakes rapidly and
keep on increasing the force you
apply to the brake lever. This
makes the best possible use
of the dynamic increase in load
at the front wheel. Remember
to pull the clutch at the same
time. In the "panic braking situ-
ations" that are trained so fre-
quently braking force is applied
as rapidly as possible and withthe rider's full force applied to
the brake levers; under these cir-
cumstances the dynamic shift
in load distribution cannot keep
pace with the increase in de-
celeration and the tyres cannot
transmit the full braking force to
the surface of the road. ABS has
to intervene to keep the front
wheel from locking; this increases
stopping distance.
Descending mountain
passes
There is a danger of the
brakes fading if you use
only the rear brakes when des-
cending mountain passes. Under
extreme conditions, the brakes
could overheat and suffer severe
damage.
Use both front and rear brakes,
and make use of the engine's
braking effect as well.
Wet brakes
After the motorcycle has
been washed, ridden
through water or ridden in
the rain, the brake discs and
pads might be wet and the
brakes might not take effect
immediately.
Apply the brakes in good time
until the brakes have dried out.
Salt on brakes
The brakes may fail to take
effect immediately if the
motorcycle was ridden on salt-
covered roads and the brakes
were not applied for some time.
Apply the brakes in good time
until the salt layer on the brake
discs and brake pads has been
removed.
584zRiding
Page 87 of 173

Oil or grease on brakes
Oil and grease on the brake
discs and pads considerably
diminish braking efficiency.
Especially after repair and main-
tenance work, make sure that the
brake discs and brake pads are
free of oil and grease.
Dirt or mud on brakes
When riding on loose sur-
faces or muddy roads, the
brakes may fail to take effect
immediately because of dirt or
moisture on the discs or brake
pads.
Apply the brakes in good time
until the brakes have been
cleaned.
Parking your
motorcyclePlacing motorcycle on
side stand
If the ground is soft or un-
even, there is no guaran-
tee that the motorcycle will rest
firmly on the stand.
Always check that the ground
under the stand is level and
firm.
Switch off the engine.
Pull the handbrake lever.
Hold the motorcycle upright
and balanced.
Use your left foot to extend the
side stand fully. The side stand is designed
to support only the weight
of the motorcycle.
Do not lean or sit on the
motorcycle with the side stand
extended. Slowly lean the motorcycle to
the side until its weight is taken
by the stand and dismount to
the left.
If the motorcycle is on the
side stand, the surface of
the ground will determine wheth-
er it is better to turn the handle-
bars to the left or right. However,
the motorcycle is more stable on
a level surface with the handle-
bars turned to the left than with
the handlebars turned to the
right.
On level ground, always turn the
handlebars to the left to set the
steering lock.
Turn the handlebars to full left
or right lock.
Check that the motorcycle is
standing firmly. On a gradient, the motor-
cycle should always face
uphill; select 1st gear.
Lock the steering lock.
585zRiding
Page 88 of 173

Removing motorcycle
from side standUnlock the steering lock.
From the left, grip the handle-
bars with both hands.
Pull the handbrake lever.
Swing your right leg over the
seat and lift the motorcycle to
the upright position.
Hold the motorcycle upright
and balanced.An extended side stand can
catch on the ground when
the motorcycle is moving and
lead to a fall.
Retract the side stand before
moving the motorcycle.
Sit on the motorcycle and use
your left foot to retract the side
stand.
Placing motorcycle on
centre stand
If the ground is soft or un-
even, there is no guaran-
tee that the motorcycle will rest
firmly on the stand.
Always check that the ground
under the stand is level and
firm.
Switch off the engine.
Dismount and keep your left
hand on the left handlebar grip.
With your right hand, grip the
rear grab handle or the rear
frame.
Use your right foot on the pin
of the centre stand to press
the stand down until its curved
feet touch the ground.
Place your full body weight on
the centre stand and at the
same time pull the motorcycle
to the rear. Excessive movements
could cause the centre
stand to retract, and the
motorcycle would topple in
consequence.
Do not lean or sit on the mo-
torcycle with the centre stand
extended.
Check that the motorcycle is
standing firmly.
Lock the steering lock.
Removing motorcycle
from centre standUnlock the steering lock.
Place your left hand on the left
handlebar grip.
With your right hand, grip the
rear grab handle or the rear
frame.
Push the motorcycle forward
off the centre stand.
Check that the centre stand
has fully retracted.
586zRiding
Page 89 of 173

Refuelling
Fuel is highly flammable. A
naked flame close to the
fuel tank can cause a fire or ex-
plosion.
Do not smoke. Never bring a
naked flame near the fuel tank.
Fuel expands when hot.
Fuel escaping from an
overfilled tank could make its way
onto the rear tyre. This could
cause a fall.
Do not fill the tank past the bot-
tom edge of the filler neck.
Fuel attacks plastics, which
become dull or unsightly.
Wipe off plastic parts immediately
if they come into contact with
fuel.
Fuel can attack the material
of the windscreen and the
side slipstream deflectors, which
become dull or unsightly.
Wipe off the windscreen and slip- stream deflectors immediately
if they come into contact with
fuel.
Leaded fuel will destroy the
catalytic converter.
Use only unleaded fuel.
Make sure the ground is level
and firm and place the motor-
cycle on its stand.
Open the protective cap.
Open the fuel tank cap with
the ignition key by turning it
counter-clockwise.
Refuel with fuel of the grade
stated below; do not fill the tank past the bottom edge of
the filler neck.
Recommended fuel
grade
98 ROZ/RON (Premium plus
unleaded)
95 ROZ/RON (Premium
unleaded (fuel grade,
usable with power- and
consumption-related
restrictions)) Usable fuel capacity
24 l Reserve fuel
4l
Press the filler cap down firmly
to close.
Remove the key and close the
protective cap.
587zRiding
Page 92 of 173
Brake system with
BMW Motorrad Integral
ABSPartially integral brakesYour motorcycle is equipped with
partially integral brakes. Both
front and rear brakes are applied
when you pull the handbrake
lever. The footbrake lever acts
only on the rear brake.
While the brakes are slowing the
motorcycle, the BMW Motorrad
Integral ABS adapts braking-force
distribution between front and
rear brakes to suit the load on
the motorcycle.The integral braking func-
tion makes it very difficult
to spin the rear wheel by opening
the throttle with the front brake
applied to keep the motorcycle
stationary (burn-out). Attempted
burn-outs can result in damage
to the rear brake and the clutch.
Do not attempt burn-outs.
How does ABS work?The amount of braking force that
can be transferred to the road
depends on factors hat include
the coefficient of friction of the
road surface. Loose stones, ice
and snow or a wet road all have
much lower coefficients of fric-
tion than a clean, dry asphalt sur-
face. The lower the coefficient
of friction, the longer the braking
distance.
If the rider increases braking
pressure to the extent that brak-
ing force exceeds the maxim-
um transferrable limit, the wheels
start to lock and the motorcycle
loses its directional stability; a fall
is imminent. Before this situation
can occur, ABS intervenes and
adapts braking pressure to the
maximum transferrable braking
force, so the wheels continue
to turn and directional stability
is maintained irrespective of the
condition of the road surface.
What are the effects of
surface irregularities?Humps and surface irregular-
ities can cause the wheels to
lose contact temporarily with the
road surface; if this happens the
braking force that can be trans-
mitted to the road can drop to
zero. If the brakes are applied
under these circumstances the
ABS has to reduce braking force
to ensure that directional sta-
bility is maintained when the
wheels regain contact with the
road surface. At this instant the
BMW Motorrad Integral ABS
must assume an extremely low
coefficient of friction, so that the
wheels will continue to rotate un-
der all imaginable circumstances,
because this is the precondition
for ensuring directional stability.
As soon as is registers the ac-
tual circumstances, the system
reacts instantly and adjusts brak-
690zEngineering details