headlight bulb BMW MOTORRAD K 1200 GT 2007 Rider's Manual (in English)
[x] Cancel search | Manufacturer: BMW MOTORRAD, Model Year: 2007, Model line: K 1200 GT, Model: BMW MOTORRAD K 1200 GT 2007Pages: 173, PDF Size: 2.82 MB
Page 5 of 173
Brakes . . . . . .................. 67
Handlebars . . ................. 67
Mirrors . . . . . . ................. 68
Spring preload . . ............. 68
Damping . . . . ................. 69
Electronic Suspension Ad-
justment ESA
OE
............. 69
Tyres . ........................ 72
Headlight . . . . ................. 72
Front and rear seats . . . . ...... 73
Helmet holder . . . ............. 76
5 Riding . . . . ................ 77
Safety instructions . . . . . ...... 78
Checklist . . . . ................. 80
Starting . . . . . . ................. 80
Running in . . ................. 83
Brakes . . . . . . ................. 84
Parking your motorcycle . . . . . 85
Refuelling . . . ................. 87 6 Engineering details . . . . . 89
Brake system with BMW Mo-
torrad Integral ABS . . . . .
...... 90
Electronic engine manage-
ment with BMW Motorrad
ASC
OE
....................... 92
Tyre pressure monitoring
RDC
OE
....................... 94
7 Accessories . . . . . . . . . . . . . 97
General instructions . . . . ...... 98
Power socket . . . ............. 98
Luggage . . . . ................. 99
Case . ...................... 100
TopcaseOA
................. 102
8 Maintenance . . . . . . . . . . . 105
General instructions . . . . .... 106
Toolkit ...................... 106
Engine oil . . . ............... 107
Brake system, general . . .... 109
Brake pads . . ............... 109
Brake fluid . . . ............... 111
Clutch ...................... 113
Tyres . ...................... 113
Rims . ...................... 114
Wheels . . . . . . ............... 114 Front-wheel stand . . . . . .
.... 121
Bulbs . ...................... 123
Jump starting . . . ........... 131
Battery . . . . . . ............... 132
9 Care . . . . . . . . . . . . . . . . . . . . . 137
Care products . . . ........... 138
Washing motorcycle . . . . .... 138
Cleaning easily damaged
components . ............... 138
Paint care . . . ............... 139
Protective wax coating . .... 140
Laying up the motor-
cycle . ...................... 140
Restoring motorcycle to
use......................... 140
10 Technical data . . . . . . . 141
Troubleshooting chart . . .... 142
Threaded fasteners . . . . .... 143
Engine . . . . . . ............... 145
Fuel . . ...................... 146
Engine oil . . . ............... 146
Clutch ...................... 147
Transmission ............... 147
Rear-wheel drive ........... 148
Running gear ............... 148
Page 32 of 173
complete set of spare bulbs if
possible.
Low-beam headlight, high-beam
headlight, side-light or turn-indic-
ator bulb defective.Replacing low-beam and high-
beam headlight bulb ( 123)
Replacing parking-light bulbs
( 126)
Replacing front turn indicator
bulbs ( 129)
Bulbs defective General warning light shows
yellow.
Bulb symbol with two ar-
rows appears on the dis-
play.
A defective bulb places
your safety at risk because
it is easier for other users to
oversee the motorcycle.
Replace defective bulbs as
soon as possible; always carry a complete set of spare bulbs if
possible.
A combination of the bulb de-
fects described above has oc-
curred.
See the fault descriptions
above.
Warnings issued by the
on-board computer
OE
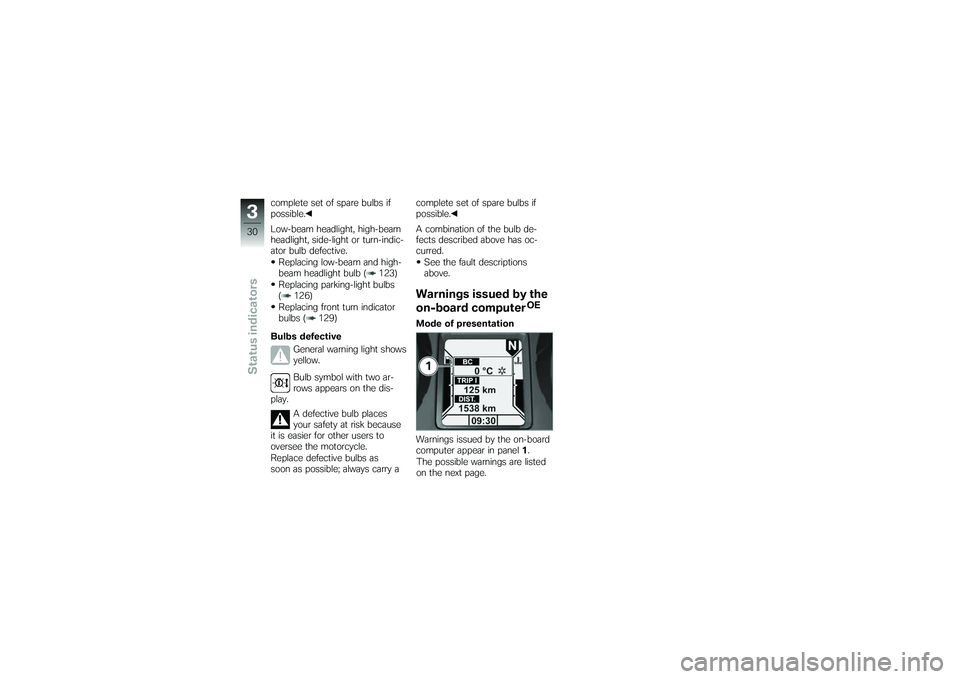
Mode of presentation
Warnings issued by the on-board
computer appear in panel 1.
The possible warnings are listed
on the next page.
330zStatus indicators
Page 125 of 173
BulbsGeneral instructionsThe failure of a bulb is signalled
in the display by the defect-
ive lamp symbol. The bulbs for
brake light and rear light are the
same; the brightness of the light
is regulated in accordance with
the application.A defective bulb places
your safety at risk because
it is easier for other users to
oversee the motorcycle.
Replace defective bulbs as
soon as possible; always carry a
complete set of spare bulbs if
possible.
The bulb is pressurised and
can cause injury if dam-
aged.
Wear protective goggles and
gloves when changing bulbs. The types of bulb fitted to
your motorcycle are listed
in the section entitled "Technical
data".
Do not touch the glass of
new bulbs with your fingers.
Use a clean, dry cloth to hold
the bulbs when handling them.
Dirt deposits, in particular oil and
grease, interfere with heat radi-
ation from the bulb. This leads
to overheating and shortens the
bulb's operating life.
Replacing low-beam and
high-beam headlight bulb
If it is not standing firmly,
the motorcycle could topple
in the course of the operations
described below.
Always make sure that the
motorcycle is stable and firmly
supported. with OE Xenon lights:
Xenon lights operate with
high voltage; incorrect
working procedures can result in
fatalities.
Have all work on the xenon light
system, including the work in-
volved in replacing bulbs, per-
formed by a specialist work-
shop, preferably by an authorised
BMW Motorrad dealer.
For the time being, ride with
the high-beam headlight
switched on.
In order not to dazzle oncom-
ing traffic, set the headlight
beam throw adjuster to the po-
sition for riding with maximum
payload.
Have the bulb replaced as
soon as possible by a specialist
workshop, preferably an author-
ised BMW Motorrad dealer.
8123zMaintenance
Page 126 of 173
Make sure the ground is level
and firm and place the motor-
cycle on its stand.
Switch off the ignition.
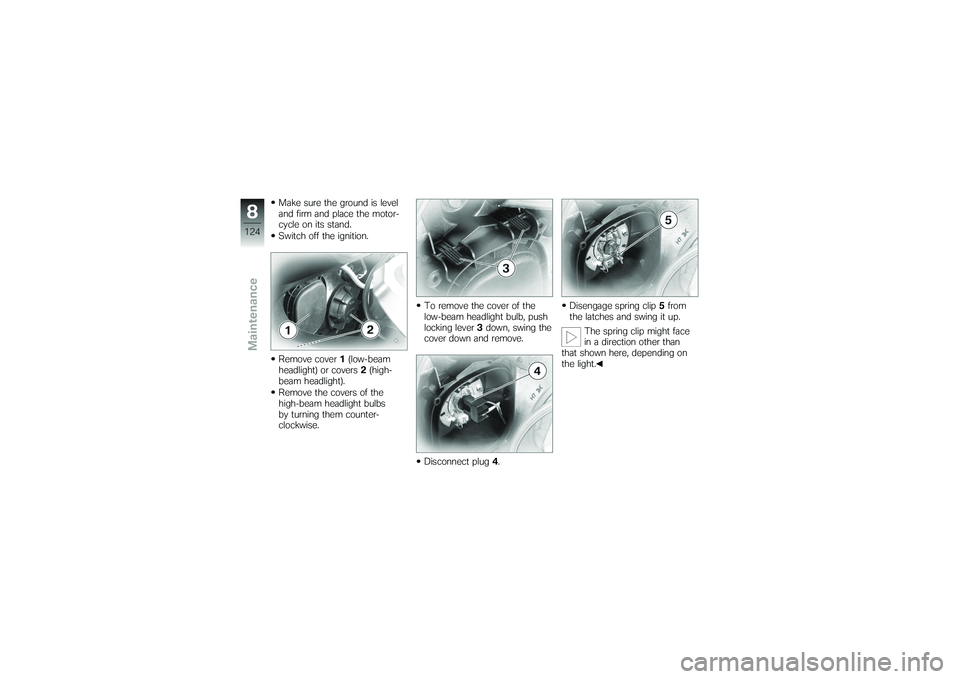
Remove cover1(low-beam
headlight) or covers 2(high-
beam headlight).
Remove the covers of the
high-beam headlight bulbs
by turning them counter-
clockwise. To remove the cover of the
low-beam headlight bulb, push
locking lever
3down, swing the
cover down and remove.
Disconnect plug 4. Disengage spring clip
5from
the latches and swing it up.
The spring clip might face
in a direction other than
that shown here, depending on
the light.
8124zMaintenance
Page 127 of 173
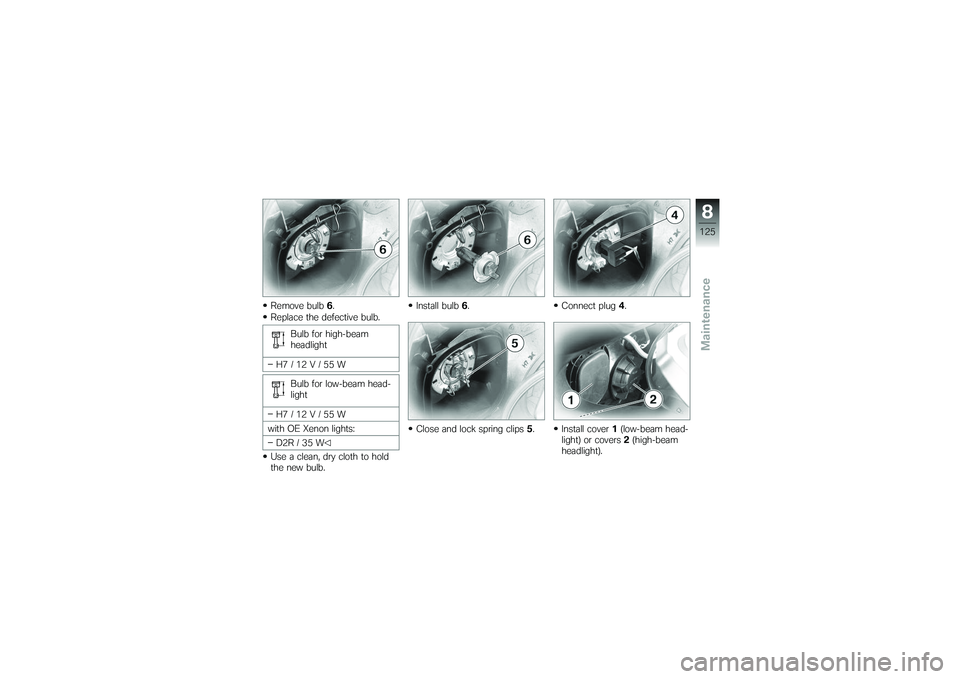
Remove bulb6.
Replace the defective bulb.
Bulb for high-beam
headlight
H7/12V/55W Bulb for low-beam head-
light
H7/12V/55W
with OE Xenon lights: D2R / 35 W
Use a clean, dry cloth to hold
the new bulb. Install bulb
6.
Close and lock spring clips 5. Connect plug
4.
Install cover 1(low-beam head-
light) or covers 2(high-beam
headlight).
8125zMaintenance
Page 153 of 173
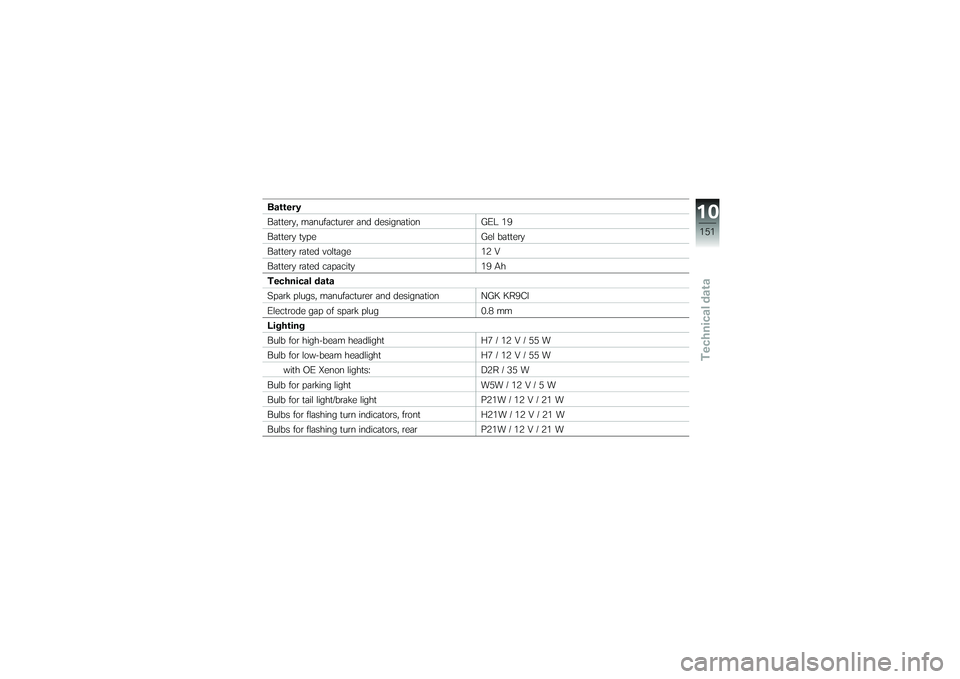
Battery
Battery, manufacturer and designationGEL 19
Battery type Gel battery
Battery rated voltage 12 V
Battery rated capacity 19 Ah
Technical data
Spark plugs, manufacturer and designation NGK KR9CI
Electrode gap of spark plug 0.8 mm
Lighting
Bulb for high-beam headlight H7 / 12 V / 55 W
Bulb for low-beam headlight H7 / 12 V / 55 W
with OE Xenon lights: D2R / 35 W
Bulb for parking light W5W / 12 V / 5 W
Bulb for tail light/brake light P21W / 12 V / 21 W
Bulbs for flashing turn indicators, front H21W / 12 V / 21 W
Bulbs for flashing turn indicators, rear P21W / 12 V / 21 W
10151zTechnical data
Page 167 of 173
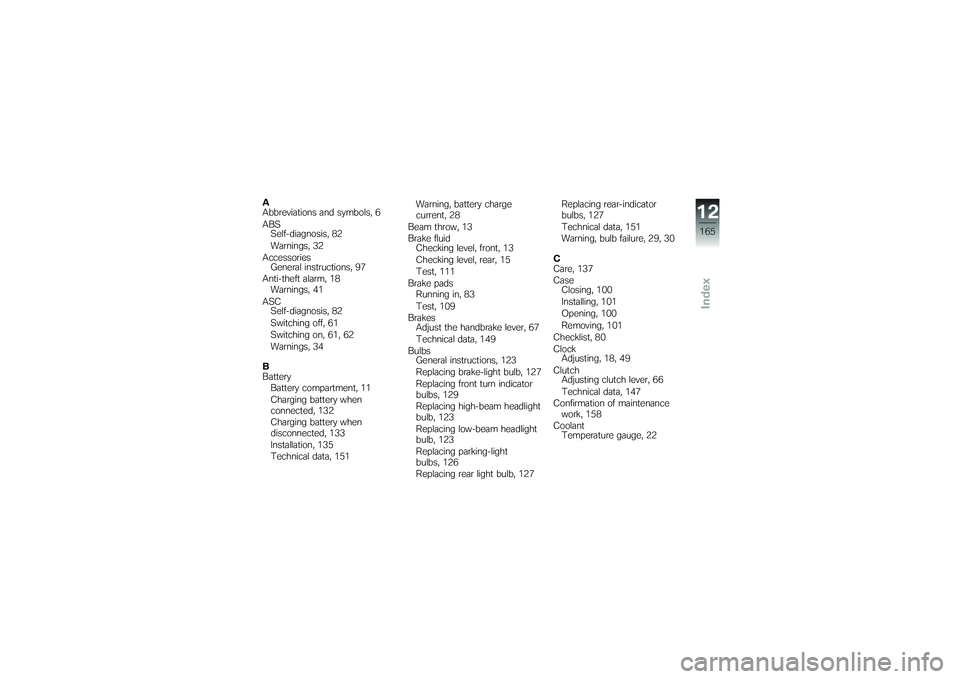
A
Abbreviations and symbols, 6
ABSSelf-diagnosis, 82
Warnings, 32
Accessories General instructions, 97
Anti-theft alarm, 18 Warnings, 41
ASC Self-diagnosis, 82
Switching off, 61
Switching on, 61, 62
Warnings, 34
B
Battery Battery compartment, 11
Charging battery when
connected, 132
Charging battery when
disconnected, 133
Installation, 135
Technical data, 151 Warning, battery charge
current, 28
Beam throw, 13
Brake fluid Checking level, front, 13
Checking level, rear, 15
Test, 111
Brake pads Running in, 83
Test, 109
Brakes Adjust the handbrake lever, 67
Technical data, 149
Bulbs General instructions, 123
Replacing brake-light bulb, 127
Replacing front turn indicator
bulbs, 129
Replacing high-beam headlight
bulb, 123
Replacing low-beam headlight
bulb, 123
Replacing parking-light
bulbs, 126
Replacing rear light bulb, 127 Replacing rear-indicator
bulbs, 127
Technical data, 151
Warning, bulb failure, 29, 30
C
Care, 137
Case Closing, 100
Installing, 101
Opening, 100
Removing, 101
Checklist, 80
Clock Adjusting, 18, 49
Clutch Adjusting clutch lever, 66
Technical data, 147
Confirmation of maintenance work, 158
Coolant Temperature gauge, 22
12165zIndex