brake BMW MOTORRAD K 1200 R 2006 Rider's Manual (in English)
[x] Cancel search | Manufacturer: BMW MOTORRAD, Model Year: 2006, Model line: K 1200 R, Model: BMW MOTORRAD K 1200 R 2006Pages: 160, PDF Size: 1.79 MB
Page 93 of 160

Checking brake pad
thickness, rear brakes
Brake pads worn past
the minimum permissible
thickness can cause a reduc-
tion in braking efficiency and
under certain circumstances
they can cause damage to
the brake system.
In order to ensure the de-
pendability of the brake sys-
tem, do not permit the brake
pads to wear past the minim-
um permissible thickness.
Make sure the ground is
level and firm and place the
motorcycle on its stand. Visually inspect the brake
pads from the right to as-
certain their thickness.
Rear brake pads, ma-
terial thickness
Wear limit Rear brake pads, ma-
terial thickness
1 mm (Friction pad only,
without backing plate)
Make sure that the brake
disc is not visible through
the bore in the inboard
brake block.
If the brake disc is visible: Have the brake pads re-
placed by a specialist work-
shop, preferably an author-
ised BMW Motorrad dealer.
Brake fluidCheck the brake-fluid
level, front brakes
A low fluid level in the
brake reservoir can al-
low air to penetrate the brake
system. This significantly re-
duces braking efficiency.
791zMaintenance
Page 94 of 160
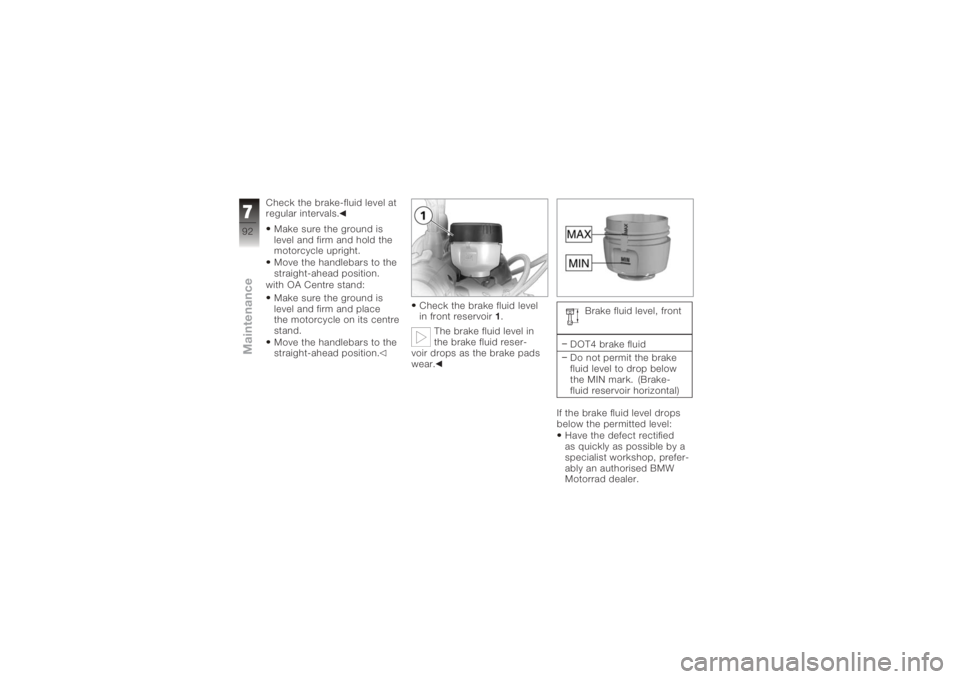
Check the brake-fluid level at
regular intervals.Make sure the ground is
level and firm and hold the
motorcycle upright.
Move the handlebars to the
straight-ahead position.
with OA Centre stand:
Make sure the ground is
level and firm and place
the motorcycle on its centre
stand.
Move the handlebars to the
straight-ahead position. Check the brake fluid level
in front reservoir
1.
The brake fluid level in
the brake fluid reser-
voir drops as the brake pads
wear. Brake fluid level, front
DOT4 brake fluid
Do not permit the brake
fluid level to drop below
the MIN mark. (Brake-
fluid reservoir horizontal)
If the brake fluid level drops
below the permitted level: Have the defect rectified
as quickly as possible by a
specialist workshop, prefer-
ably an authorised BMW
Motorrad dealer.
792zMaintenance
Page 95 of 160

Check the brake-fluid
level, rear brakes
A low fluid level in the
brake reservoir can al-
low air to penetrate the brake
system. This significantly re-
duces braking efficiency.
Check the brake-fluid level at
regular intervals.
Make sure the ground is
level and firm and hold the
motorcycle upright.
with OA Centre stand:
Make sure the ground is
level and firm and place
the motorcycle on its centre
stand. Check the brake fluid level
in brake fluid reservoir
1.
The brake fluid level in
the brake fluid reser-
voir drops as the brake pads
wear. Brake fluid level, rear
DOT4 brake fluid
Do not permit the brake
fluid level to drop below
the MIN mark. (Brake-
fluid reservoir horizontal)
If the brake fluid level drops
below the permitted level: Have the defect rectified
as quickly as possible by a
specialist workshop, prefer-
ably an authorised BMW
Motorrad dealer.
793zMaintenance
Page 99 of 160
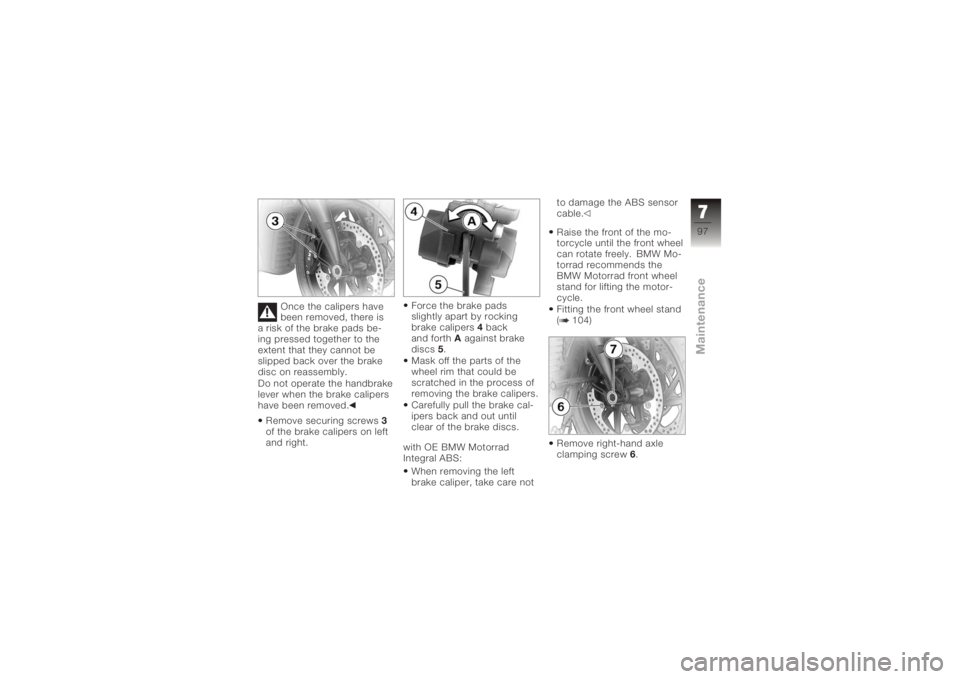
Once the calipers have
been removed, there is
a risk of the brake pads be-
ing pressed together to the
extent that they cannot be
slipped back over the brake
disc on reassembly.
Do not operate the handbrake
lever when the brake calipers
have been removed.
Remove securing screws 3
of the brake calipers on left
and right. Force the brake pads
slightly apart by rocking
brake calipers
4back
and forth Aagainst brake
discs 5.
Mask off the parts of the
wheel rim that could be
scratched in the process of
removing the brake calipers.
Carefully pull the brake cal-
ipers back and out until
clear of the brake discs.
with OE BMW Motorrad
Integral ABS: When removing the left
brake caliper, take care not to damage the ABS sensor
cable.
Raise the front of the mo-
torcycle until the front wheel
can rotate freely. BMW Mo-
torrad recommends the
BMW Motorrad front wheel
stand for lifting the motor-
cycle.
Fitting the front wheel stand
( 104)
Remove right-hand axle
clamping screw
6.
797zMaintenance
Page 101 of 160
with OE BMW Motorrad
Integral ABS:There is a risk of dam-
aging parts of the front
brake, particularly the BMW
Motorrad Integral ABS, in the
course of the procedure de-
scribed below.
Take care not to damage the
brake system, in particular the
ABS sensor with cable and
the ABS sensor ring.
Take care not to damage
the ABS sensor when
rolling in the front wheel.
Note the ABS sensor when
rolling in the front wheel.
Roll the front wheel into
position between the front
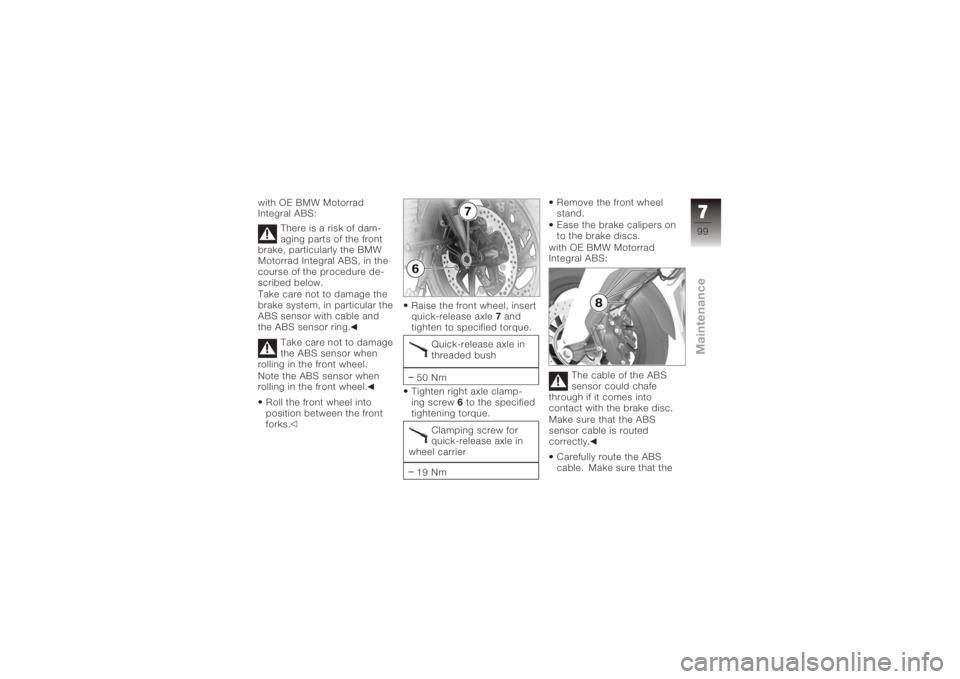
forks. Raise the front wheel, insert
quick-release axle
7and
tighten to specified torque.
Quick-release axle in
threaded bush
50 Nm
Tighten right axle clamp-
ing screw 6to the specified
tightening torque.
Clamping screw for
quick-release axle in
wheel carrier
19 Nm Remove the front wheel
stand.
Ease the brake calipers on
to the brake discs.
with OE BMW Motorrad
Integral ABS:
The cable of the ABS
sensor could chafe
through if it comes into
contact with the brake disc.
Make sure that the ABS
sensor cable is routed
correctly.
Carefully route the ABS
cable. Make sure that the
799zMaintenance
Page 102 of 160
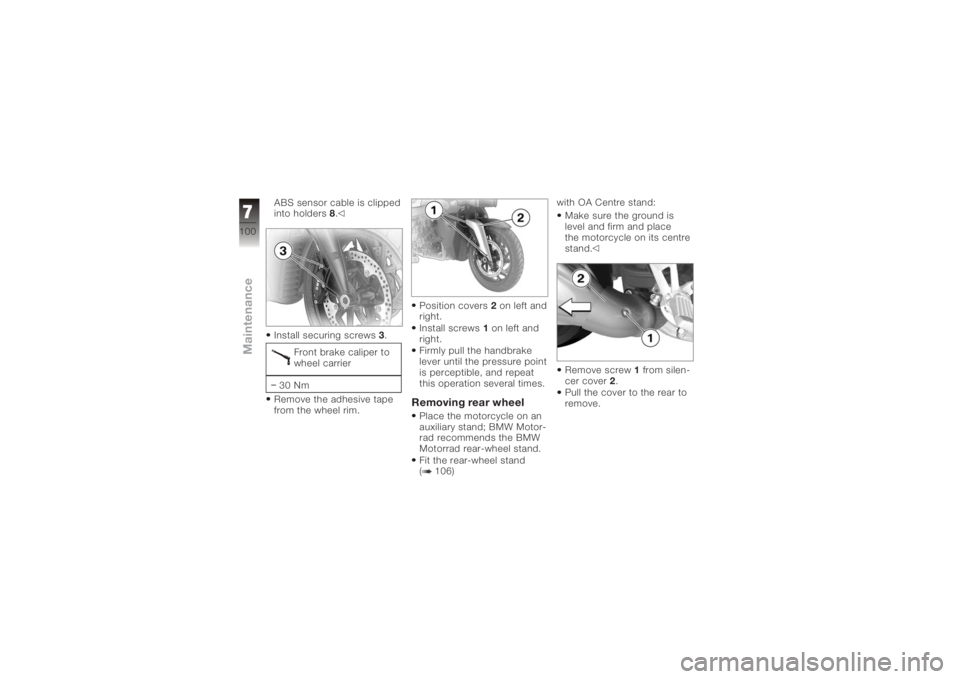
ABS sensor cable is clipped
into holders8.
Install securing screws 3.
Front brake caliper to
wheel carrier
30 Nm
Remove the adhesive tape
from the wheel rim. Position covers
2on left and
right.
Install screws 1on left and
right.
Firmly pull the handbrake
lever until the pressure point
is perceptible, and repeat
this operation several times.
Removing rear wheelPlace the motorcycle on an
auxiliary stand; BMW Motor-
rad recommends the BMW
Motorrad rear-wheel stand.
Fit the rear-wheel stand
( 106) with OA Centre stand:
Make sure the ground is
level and firm and place
the motorcycle on its centre
stand.
Remove screw 1from silen-
cer cover 2.
Pull the cover to the rear to
remove.
7100zMaintenance
Page 107 of 160
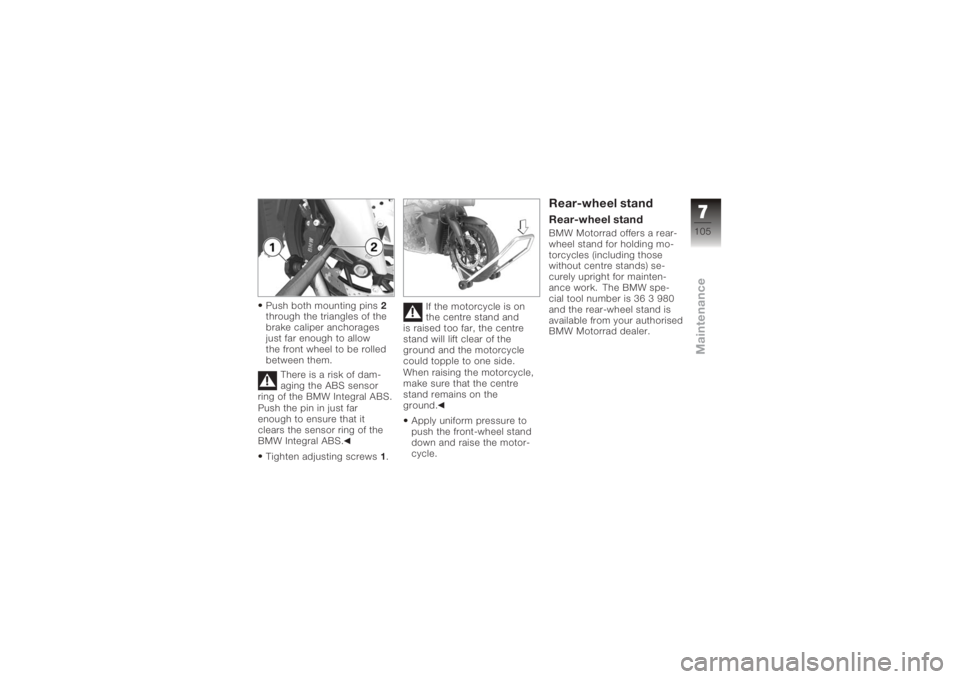
Push both mounting pins2
through the triangles of the
brake caliper anchorages
just far enough to allow
the front wheel to be rolled
between them.
There is a risk of dam-
aging the ABS sensor
ring of the BMW Integral ABS.
Push the pin in just far
enough to ensure that it
clears the sensor ring of the
BMW Integral ABS.
Tighten adjusting screws 1. If the motorcycle is on
the centre stand and
is raised too far, the centre
stand will lift clear of the
ground and the motorcycle
could topple to one side.
When raising the motorcycle,
make sure that the centre
stand remains on the
ground.
Apply uniform pressure to
push the front-wheel stand
down and raise the motor-
cycle.
Rear-wheel standRear-wheel standBMW Motorrad offers a rear-
wheel stand for holding mo-
torcycles (including those
without centre stands) se-
curely upright for mainten-
ance work. The BMW spe-
cial tool number is 36 3 980
and the rear-wheel stand is
available from your authorised
BMW Motorrad dealer.
7105zMaintenance
Page 109 of 160
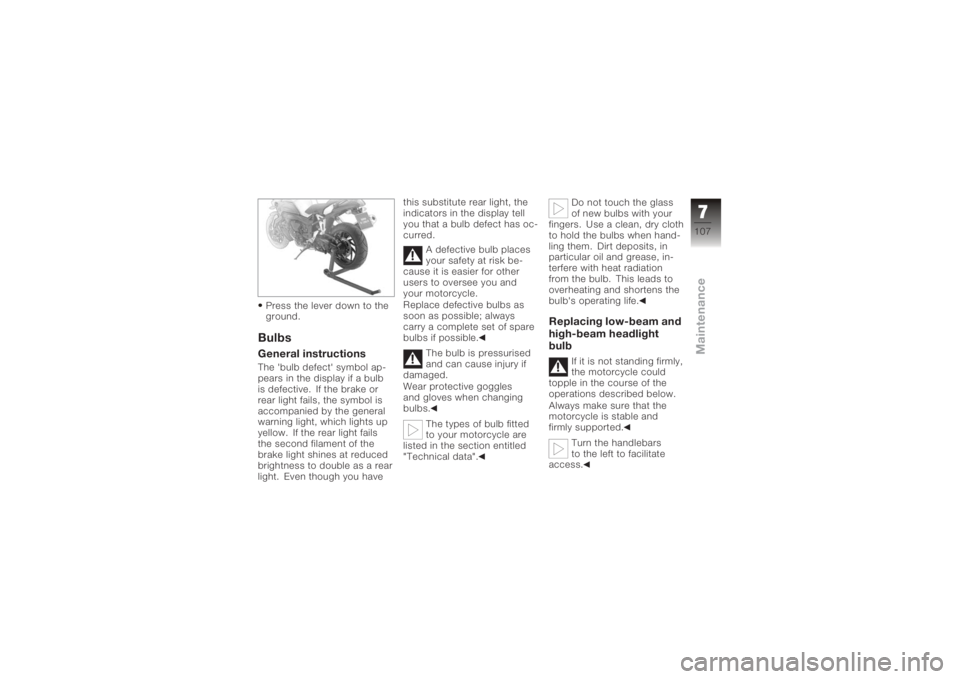
Press the lever down to the
ground.BulbsGeneral instructionsThe 'bulb defect' symbol ap-
pears in the display if a bulb
is defective. If the brake or
rear light fails, the symbol is
accompanied by the general
warning light, which lights up
yellow. If the rear light fails
the second filament of the
brake light shines at reduced
brightness to double as a rear
light. Even though you havethis substitute rear light, the
indicators in the display tell
you that a bulb defect has oc-
curred.
A defective bulb places
your safety at risk be-
cause it is easier for other
users to oversee you and
your motorcycle.
Replace defective bulbs as
soon as possible; always
carry a complete set of spare
bulbs if possible.
The bulb is pressurised
and can cause injury if
damaged.
Wear protective goggles
and gloves when changing
bulbs.
The types of bulb fitted
to your motorcycle are
listed in the section entitled
"Technical data". Do not touch the glass
of new bulbs with your
fingers. Use a clean, dry cloth
to hold the bulbs when hand-
ling them. Dirt deposits, in
particular oil and grease, in-
terfere with heat radiation
from the bulb. This leads to
overheating and shortens the
bulb's operating life.
Replacing low-beam and
high-beam headlight
bulb
If it is not standing firmly,
the motorcycle could
topple in the course of the
operations described below.
Always make sure that the
motorcycle is stable and
firmly supported.
Turn the handlebars
to the left to facilitate
access.
7107zMaintenance
Page 113 of 160
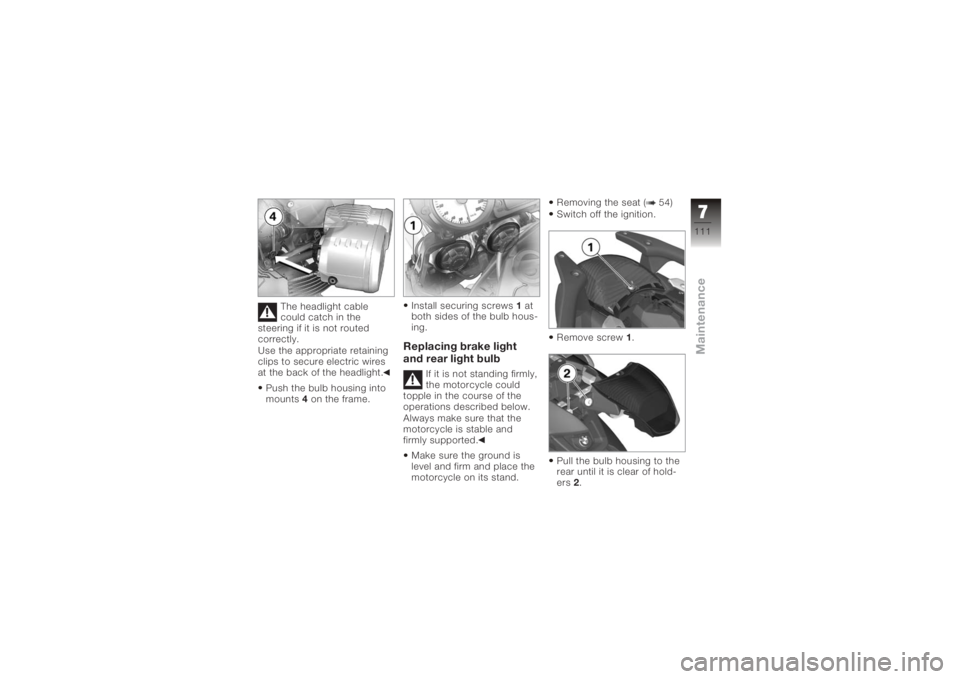
The headlight cable
could catch in the
steering if it is not routed
correctly.
Use the appropriate retaining
clips to secure electric wires
at the back of the headlight.
Push the bulb housing into
mounts 4on the frame. Install securing screws
1at
both sides of the bulb hous-
ing.
Replacing brake light
and rear light bulb
If it is not standing firmly,
the motorcycle could
topple in the course of the
operations described below.
Always make sure that the
motorcycle is stable and
firmly supported.
Make sure the ground is
level and firm and place the
motorcycle on its stand. Removing the seat ( 54)
Switch off the ignition.
Remove screw
1.
Pull the bulb housing to the
rear until it is clear of hold-
ers 2.
7111zMaintenance
Page 114 of 160

Turn bulb holder3counter-
clockwise to remove it from
the bulb housing.
Press bulb 4into socket 5
and remove by turning it
counter-clockwise. Replace the defective bulb.
Bulb of tail light/brake
light
P21W / 12 V / 21 W
Press bulb 4into socket 5
and turn it clockwise to in-
stall. Turn bulb socket
3clock-
wise to install it in the bulb
housing.
Seat the bulb housing in
holders 2.
7112zMaintenance