instrument cluster BMW MOTORRAD K 1200 R 2007 Rider's Manual (in English)
[x] Cancel search | Manufacturer: BMW MOTORRAD, Model Year: 2007, Model line: K 1200 R, Model: BMW MOTORRAD K 1200 R 2007Pages: 168, PDF Size: 2.85 MB
Page 4 of 168

Table of ContentsYou can also consult the index at
the end of this Rider's Manual if
you want to find a particular topic
or item of information.
1 General instructions . . . . . 5
Overview . . . . . . . . . . . . . . . . . . . . . . 6
Abbreviations and symbols . . . . 6
Equipment . . . . . . . . . . . . . . . . . . . . 7
Technical data . . . . . . . . . . . . . . . . 7
Currency . . . . . . . . . . . . . . . . . . . . . . 7
2 General views . . . . . . . . . . . . . 9
General view, left side . . . . . . . . 11
General view, right side . . . . . . 13
Underneath the seat . . . . . . . . . 15
Handlebar fitting, left . . . . . . . . . 16
Handlebar fitting, right . . . . . . . . 17
Instrument cluster . . . . . . . . . . . . 18
Headlight . . . . . . . . . . . . . . . . . . . . . 193 Status indicators . . . . . . . 21
Standard status
indicators . . . . . . . . . . . . . . . . . . . . . 22
Status indicators with on-
board computer
OE
........... 23
Status indicators with
tyre-pressure monitoring
(RDC)
OE...................... 24
Standard warnings . . . . . . . . . . . 24
Warnings issued by the on-
board computer
OE
........... 29
ABS warnings
OE
............. 31
ASC warnings
OE
............. 33
RDC warnings
OE
............. 35
Anti-theft alarm
warnings
OE................... 40
4 Operation . . . . . . . . . . . . . . . . 43
Ignition switch and steering
lock . . . . . . . . . . . . . . . . . . . . . . . . . . 44
Electronic immobiliser
(EWS) . . . . . . . . . . . . . . . . . . . . . . . . 45
Clock . . . . . . . . . . . . . . . . . . . . . . . . . 46
Odometer and tripmeters . . . . 47
On-board computer
OE
....... 50 Tyre pressure monitoring
RDC
OE
....................... 53
Lights . . . . . . . . . . . . . . . . . . . . . . . . 54
Turn indicators . . . . . . . . . . . . . . . 55
Hazard warning flashers . . . . . . 56
Emergency off switch (kill
switch) . . . . . . . . . . . . . . . . . . . . . . . 57
Grip heating
OE
............... 57
Automatic Stability Control
ASC
OE
....................... 58
Clutch . . . . . . . . . . . . . . . . . . . . . . . . 59
Brakes . . . . . . . . . . . . . . . . . . . . . . . 59
Mirrors . . . . . . . . . . . . . . . . . . . . . . . 60
Spring preload . . . . . . . . . . . . . . . 61
Damping . . . . . . . . . . . . . . . . . . . . . 61
Electronic Suspension Ad-
justment ESA
OE
............. 62
Tyres . . . . . . . . . . . . . . . . . . . . . . . . . 65
Headlight . . . . . . . . . . . . . . . . . . . . . 65
Seat . . . . . . . . . . . . . . . . . . . . . . . . . . 66
Helmet holder . . . . . . . . . . . . . . . . 67
Luggage loops . . . . . . . . . . . . . . . 68
Page 11 of 168

General views
General views
General view, left side................ 11
General view, right side . . ............ 13
Underneath the seat ................. 15
Handlebar fitting, left ................. 16
Handlebar fitting, right . . . ............ 17
Instrument cluster ................... 18
Headlight ............................ 19
29zGeneral views
Page 20 of 168
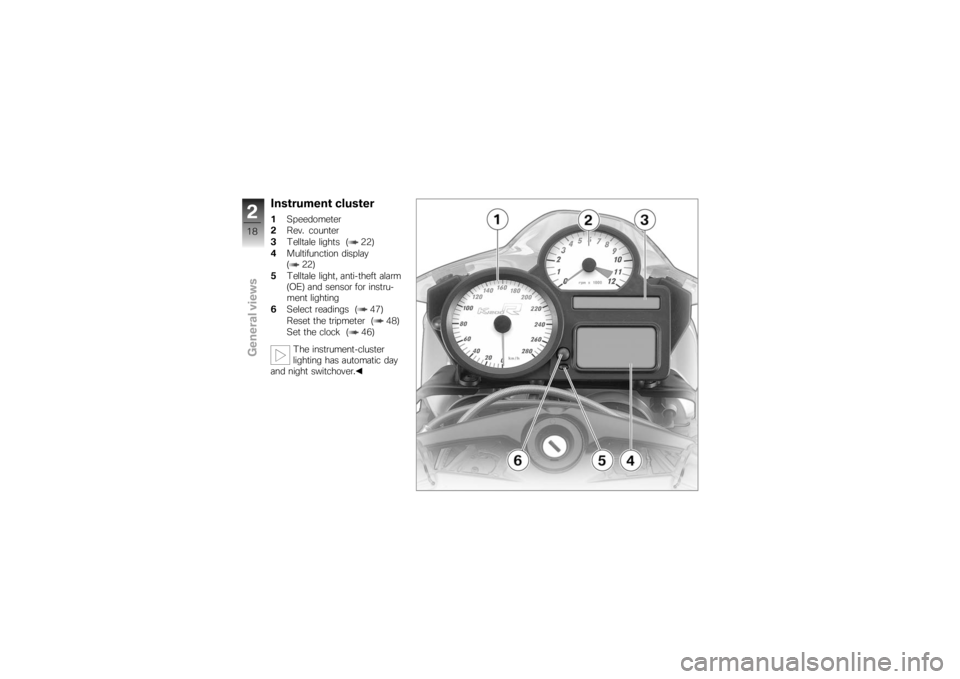
Instrument cluster1Speedometer
2 Rev. counter
3 Telltale lights ( 22)
4 Multifunction display
( 22)
5 Telltale light, anti-theft alarm
(OE) and sensor for instru-
ment lighting
6 Select readings ( 47)
Reset the tripmeter ( 48)
Set the clock ( 46)
The instrument-cluster
lighting has automatic day
and night switchover.
218zGeneral views
Page 49 of 168
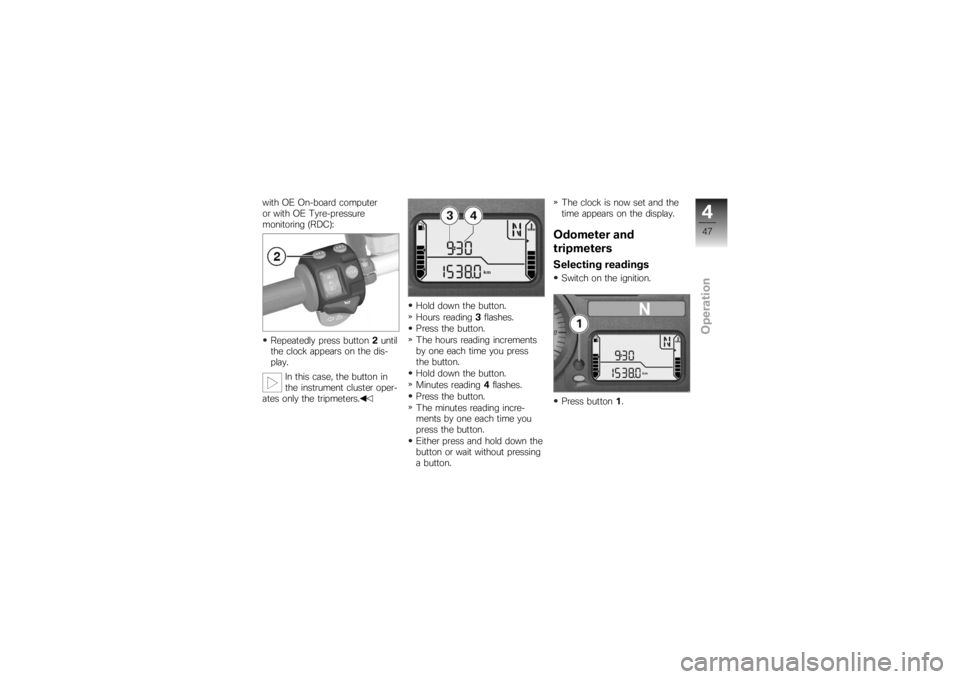
with OE On-board computer
or with OE Tyre-pressure
monitoring (RDC):Repeatedly press button 2until
the clock appears on the dis-
play.
In this case, the button in
the instrument cluster oper-
ates only the tripmeters. Hold down the button.
Hours reading
3flashes.
Press the button.
The hours reading increments
by one each time you press
the button.
Hold down the button.
Minutes reading 4flashes.
Press the button.
The minutes reading incre-
ments by one each time you
press the button.
Either press and hold down the
button or wait without pressing
a button. The clock is now set and the
time appears on the display.
Odometer and
tripmetersSelecting readingsSwitch on the ignition.
Press button
1.
447zOperation
Page 75 of 168
with OE Automatic Stability
Control (ASC):Switch on the ignition.
Pre-ride check is performed.
( 73)
ABS self-diagnosis is
performed. ( 74)
ASC self-diagnosis is per-
formed. ( 74)
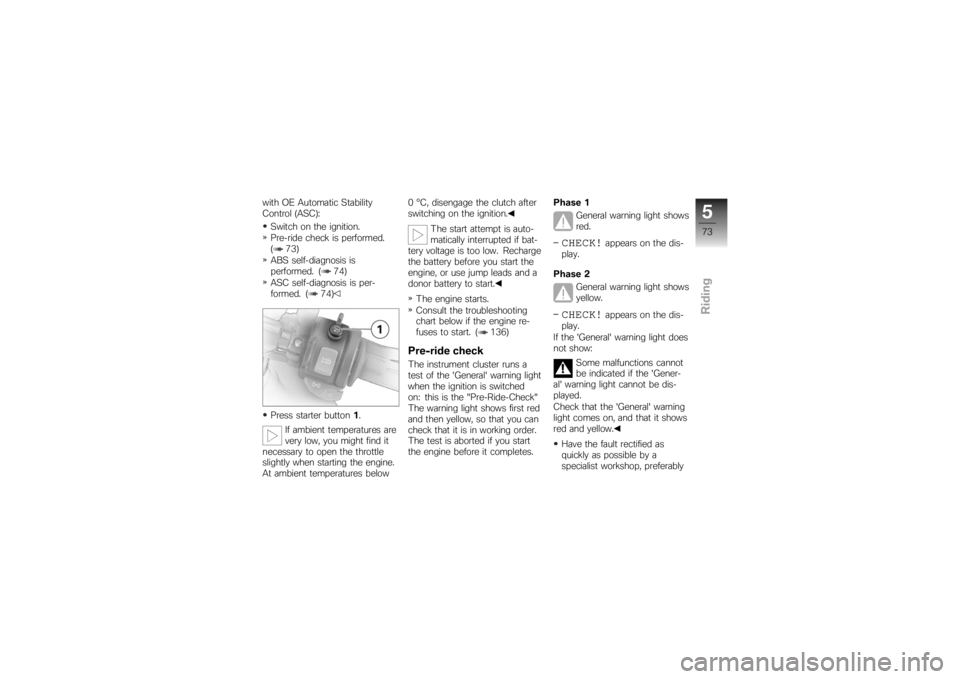
Press starter button 1.
If ambient temperatures are
very low, you might find it
necessary to open the throttle
slightly when starting the engine.
At ambient temperatures below 0 °C, disengage the clutch after
switching on the ignition.
The start attempt is auto-
matically interrupted if bat-
tery voltage is too low. Recharge
the battery before you start the
engine, or use jump leads and a
donor battery to start.
The engine starts.
Consult the troubleshooting
chart below if the engine re-
fuses to start. ( 136)
Pre-ride checkThe instrument cluster runs a
test of the 'General' warning light
when the ignition is switched
on: this is the "Pre-Ride-Check"
The warning light shows first red
and then yellow, so that you can
check that it is in working order.
The test is aborted if you start
the engine before it completes. Phase 1
General warning light shows
red.
CHECK!
appears on the dis-
play.
Phase 2 General warning light shows
yellow.
CHECK!
appears on the dis-
play.
If the 'General' warning light does
not show:
Some malfunctions cannot
be indicated if the 'Gener-
al' warning light cannot be dis-
played.
Check that the 'General' warning
light comes on, and that it shows
red and yellow.
Have the fault rectified as
quickly as possible by a
specialist workshop, preferably
573zRiding
Page 132 of 168
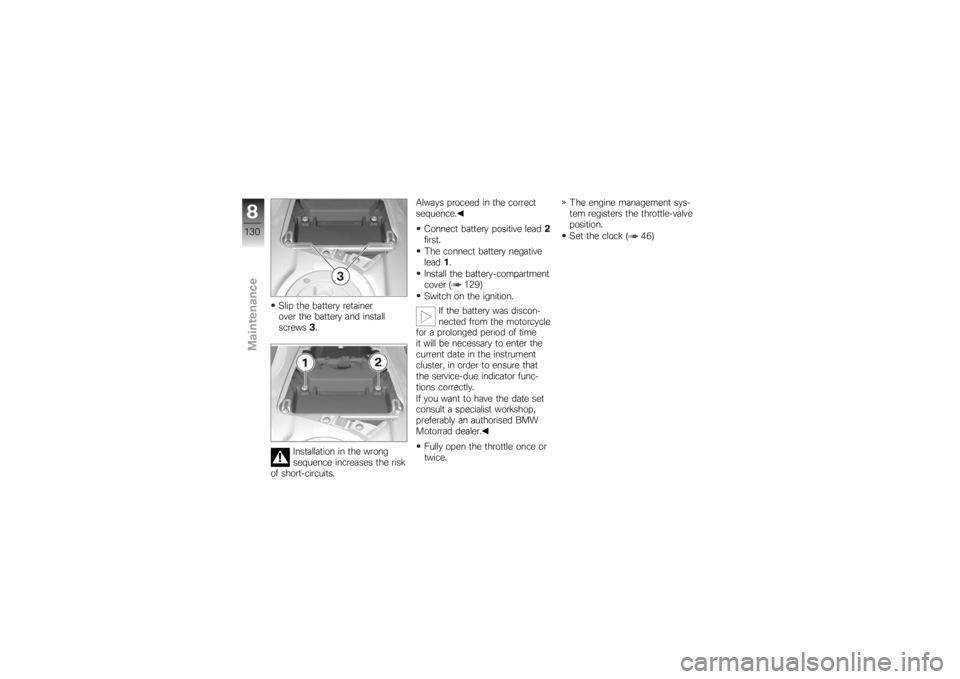
Slip the battery retainer
over the battery and install
screws3.
Installation in the wrong
sequence increases the risk
of short-circuits. Always proceed in the correct
sequence.
Connect battery positive lead 2
first.
The connect battery negative
lead 1.
Install the battery-compartment
cover ( 129)
Switch on the ignition.
If the battery was discon-
nected from the motorcycle
for a prolonged period of time
it will be necessary to enter the
current date in the instrument
cluster, in order to ensure that
the service-due indicator func-
tions correctly.
If you want to have the date set
consult a specialist workshop,
preferably an authorised BMW
Motorrad dealer.
Fully open the throttle once or
twice. The engine management sys-
tem registers the throttle-valve
position.
Set the clock ( 46)
8130zMaintenance
Page 134 of 168
Care productsBMW Motorrad recommends
that you use the cleaning and
care products you can obtain
from your authorised BMW Mo-
torrad dealer. The substances in
BMW Care Products have been
tested in laboratories and in prac-
tice; they provide optimised care
and protection for the materials
used in your vehicle.The use of unsuitable
cleaning and care products
can damage vehicle components.
Do not use solvents such as cel-
lulose thinners, cold cleaners,
fuel or the like, and do not use
cleaning products that contain
alcohol.Washing motorcycleBMW Motorrad recommends
that you use BMW insect re-
mover to soften and wash off
insects and stubborn dirt on painted parts prior to washing
the motorcycle.
To prevent stains, do not wash
the motorcycle immediately after
it has been exposed to strong
sunlight and do not wash it in the
sun.
Make sure that the motorcycle
is washed frequently, especially
during the winter months.
To remove road salt, clean the
motorcycle with cold water im-
mediately after every trip.
After the motorcycle has
been washed, ridden
through water or ridden in
the rain, the brake discs and
pads might be wet and the
brakes might not take effect
immediately.
Apply the brakes in good time
until the brakes have dried out.
Warm water intensifies the
effect of salt. Use only cold water to wash off
road salt.
The high pressure of steam
cleaners can damage seals,
the hydraulic brake system, the
electrical system, and the seat.
Do not use a steam jet or high-
pressure cleaning equipment.
Cleaning easily
damaged componentsPlasticsClean plastic parts with water
and BMW plastic care emulsion.
This includes in particular:
Windscreen and slipstream de-
flectors
Headlight lens made of plastic
Glass cover of the instrument
cluster
Black, unpainted parts
If plastic parts are cleaned
using unsuitable cleaning
9132zCare
Page 164 of 168

D
DampingAdjusting, 11, 61
E
Electrics Technical data, 146
Emergency off switch (kill switch), 17, 57
Engine Technical data, 139
Warning for engine
electronics, 26
Engine oil Checking level, 13, 99
Draining, 101
Topping up, 15, 100
Warning for engine oil level, 31
Warning for engine oil
pressure, 27
Equipment, 7
ESA, 16, 62
EWS, 45 Warning, 26 F
Frame
Technical data, 147
Front-wheel stand, 115
Fuel Quantity reading, 22
Refuelling, 13, 79
Technical data, 140
Warning for fuel down to
reserve, 26
Fuses, 146
G
Gear indicator, 22
Grip heating, 17, 57
H
Handlebar fittings General view, left side, 16
General view, right side, 17
Hazard warning flashers, 16, 17 Switching off, 56
Switching on, 56 Headlight
Adjustment for driving on left/
driving on right, 65
Beam throw, 66
High-beam headlight, 19
Low-beam headlight, 19
Side light, 19
Helmet holder, 15, 67
High-beam headlight, 16
Horn, 16
I
Ignition Switching off, 44
Switching on, 44
Immobiliser, 45 Warning, 26
Instrument cluster Overview, 18
Sensor for instrument-cluster
lighting, 18
J
Jump starting, 125
12162zIndex