bulb BMW MOTORRAD K 1200 S 2004 Rider's Manual (in English)
[x] Cancel search | Manufacturer: BMW MOTORRAD, Model Year: 2004, Model line: K 1200 S, Model: BMW MOTORRAD K 1200 S 2004Pages: 162, PDF Size: 2.99 MB
Page 5 of 162
i3Introduction
Maintenance .................. 83
Toolkit ........................... 85
Engine oil ...................... 86
Coolant ......................... 88
Brakes ........................... 89
Clutch ........................... 93
Wheels .......................... 94
Front-wheel stand ....... 103
Rear wheel stand ........ 104
Bulbs ........................... 105
Jump starting .............. 111
Battery ........................ 112
Splash guard ............... 116
Care .............................. 117
Cleaning and care ..... 118
Laying up .................... 120
Restoring to use .......... 121
Technical data ............. 123
Bolt connections ......... 124
Tyre pressures .......... 126
Engine ......................... 127
Power transmission ..... 128
Frame and
suspension .................. 129Wheels and tyres ......... 131
Fuel and lubricants ...... 132
Electrical system.......... 135
Dimensions and
weights ........................ 137
Riding specifications ... 138
Service .......................... 139
BMW Motorrad
service ........................ 140
Confirmation of
maintenance work ...... 143
Confirmation of
service ........................ 147
Index ........................... 149
Page 26 of 162
Status indicators224
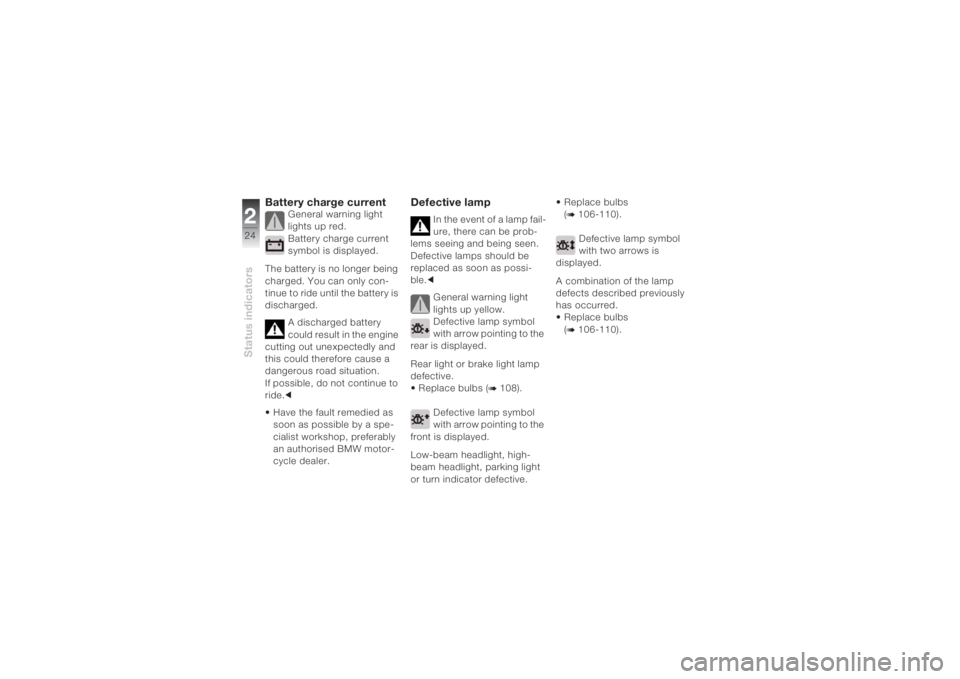
Battery charge current
General warning light
lights up red.
Battery charge current
symbol is displayed.
The battery is no longer being
charged. You can only con-
tinue to ride until the battery is
discharged.
A discharged battery
could result in the engine
cutting out unexpectedly and
this could therefore cause a
dangerous road situation.
If possible, do not continue to
ride.c
• Have the fault remedied as
soon as possible by a spe-
cialist workshop, preferably
an authorised BMW motor-
cycle dealer.
Defective lamp
In the event of a lamp fail-
ure, there can be prob-
lems seeing and being seen.
Defective lamps should be
replaced as soon as possi-
ble.c
General warning light
lights up yellow.
Defective lamp symbol
with arrow pointing to the
rear is displayed.
Rear light or brake light lamp
defective.
• Replace bulbs (
b 108).
Defective lamp symbol
with arrow pointing to the
front is displayed.
Low-beam headlight, high-
beam headlight, parking light
or turn indicator defective.• Replace bulbs
(
b 106-110).
Defective lamp symbol
with two arrows is
displayed.
A combination of the lamp
defects described previously
has occurred.
• Replace bulbs
(b 106-110).
Page 85 of 162
683Maintenance
Toolkit............................................. 85
Engine oil ....................................... 86
Coolant ........................................... 88
Brakes ............................................ 89
Clutch ............................................. 93
Wheels ............................................ 94
Front-wheel stand ....................... 103
Rear wheel stand ........................ 104
Bulbs............................................. 105
Jump starting............................... 111
Battery .......................................... 112
Splash guard................................ 116
Page 107 of 162
6105
Maintenance
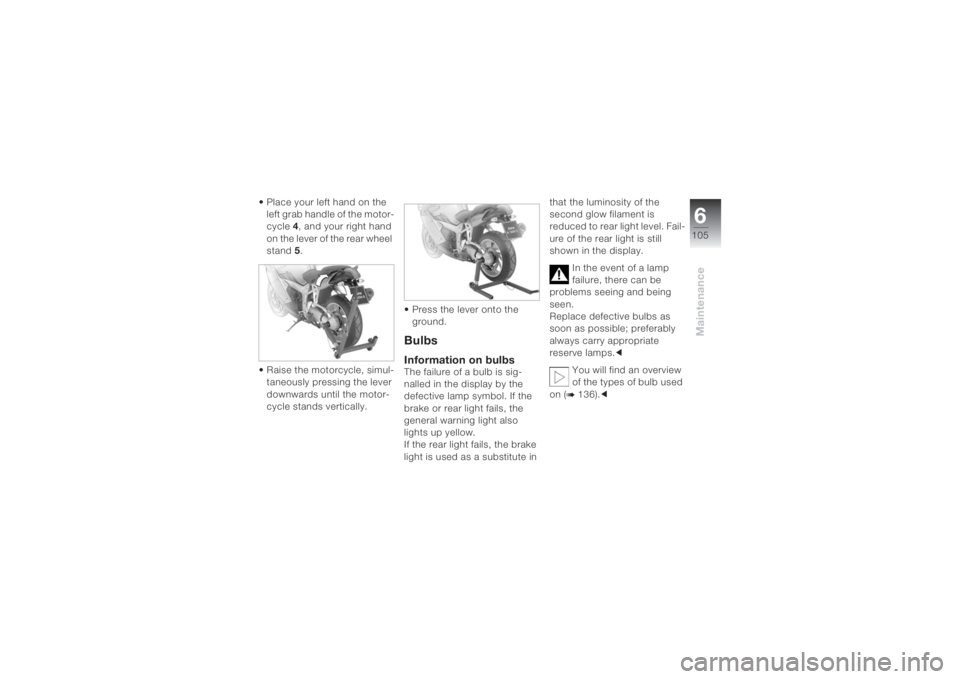
• Place your left hand on the
left grab handle of the motor-
cycle 4, and your right hand
on the lever of the rear wheel
stand 5.
• Raise the motorcycle, simul-
taneously pressing the lever
downwards until the motor-
cycle stands vertically.• Press the lever onto the
ground.
BulbsInformation on bulbsThe failure of a bulb is sig-
nalled in the display by the
defective lamp symbol. If the
brake or rear light fails, the
general warning light also
lights up yellow.
If the rear light fails, the brake
light is used as a substitute in that the luminosity of the
second glow filament is
reduced to rear light level. Fail-
ure of the rear light is still
shown in the display.
In the event of a lamp
failure, there can be
problems seeing and being
seen.
Replace defective bulbs as
soon as possible; preferably
always carry appropriate
reserve lamps.c
You will find an overview
of the types of bulb used
on (
b 136).c
Page 108 of 162
Maintenance6106
Do not touch the glass of
new bulbs with your
fingers. Use a clean, dry cloth
when fitting. Dirt deposits, in
particular oil and grease,
interfere with heat radiation
from the bulb. This will result in
overheating and therefore
shorten the service life of the
bulbs.c
You will find an overview
of the types of screw
used on (
b 124).c
Replacing the low-beam
headlight bulb
During the work
described below, a
motorcycle that has been
parked unsafely can fall over.
Make sure that the motorcycle
is parked securely.cThe bulb is pressurised,
injuries may result if the
bulb is damaged.
Wear protective goggles and
gloves when changing
bulbs.c
To achieve better acces-
sibility, turn the handle-
bars to the right.c
• If necessary, switch off the
ignition.
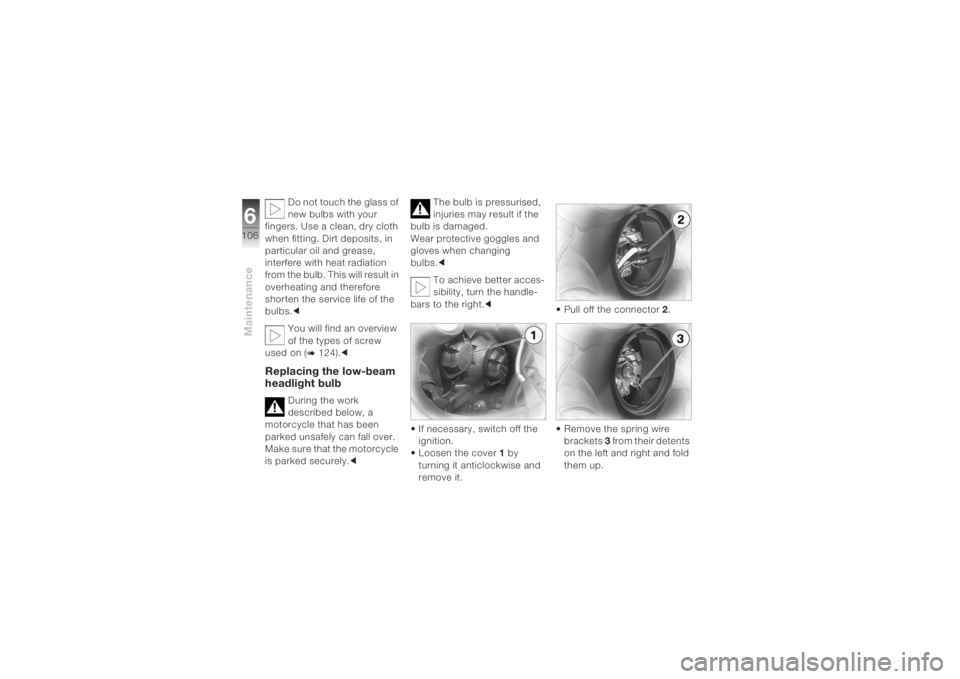
• Loosen the cover 1 by
turning it anticlockwise and
remove it.• Pull off the connector 2.
• Remove the spring wire
brackets 3 from their detents
on the left and right and fold
them up.
Page 109 of 162
6107
Maintenance
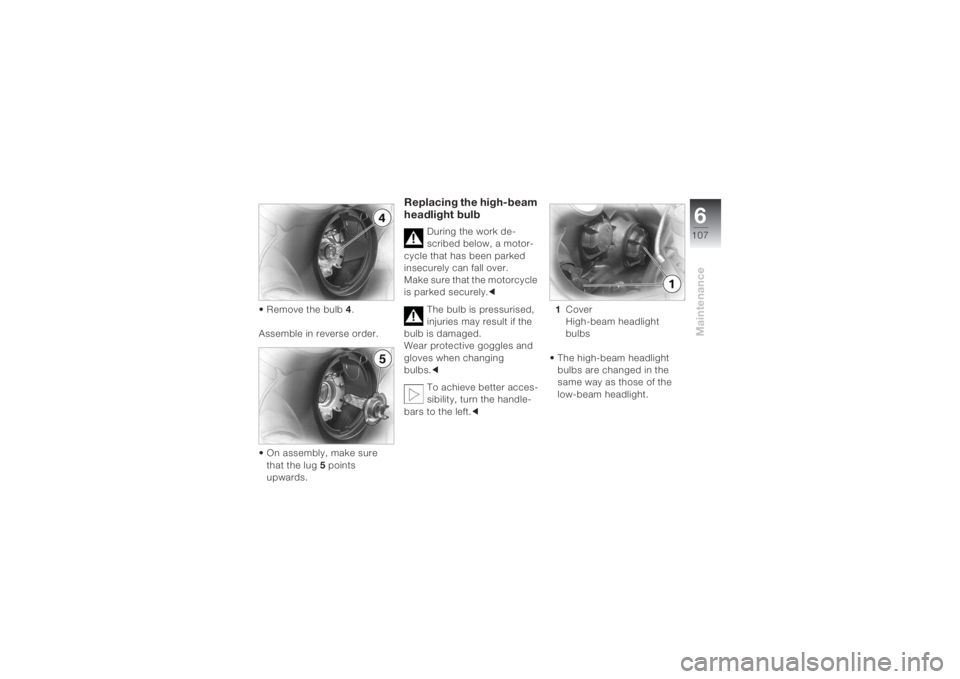
• Remove the bulb 4.
Assemble in reverse order.
• On assembly, make sure
that the lug 5 points
upwards.
Replacing the high-beam
headlight bulb
During the work de-
scribed below, a motor-
cycle that has been parked
insecurely can fall over.
Make sure that the motorcycle
is parked securely.c
The bulb is pressurised,
injuries may result if the
bulb is damaged.
Wear protective goggles and
gloves when changing
bulbs.c
To achieve better acces-
sibility, turn the handle-
bars to the left.c1Cover
High-beam headlight
bulbs
• The high-beam headlight
bulbs are changed in the
same way as those of the
low-beam headlight.
Page 110 of 162
Maintenance6108
Replacing the parking
light
During the work de-
scribed below, a motor-
cycle that has been parked
insecurely can fall over.
Make sure that the motorcycle
is parked securely.c
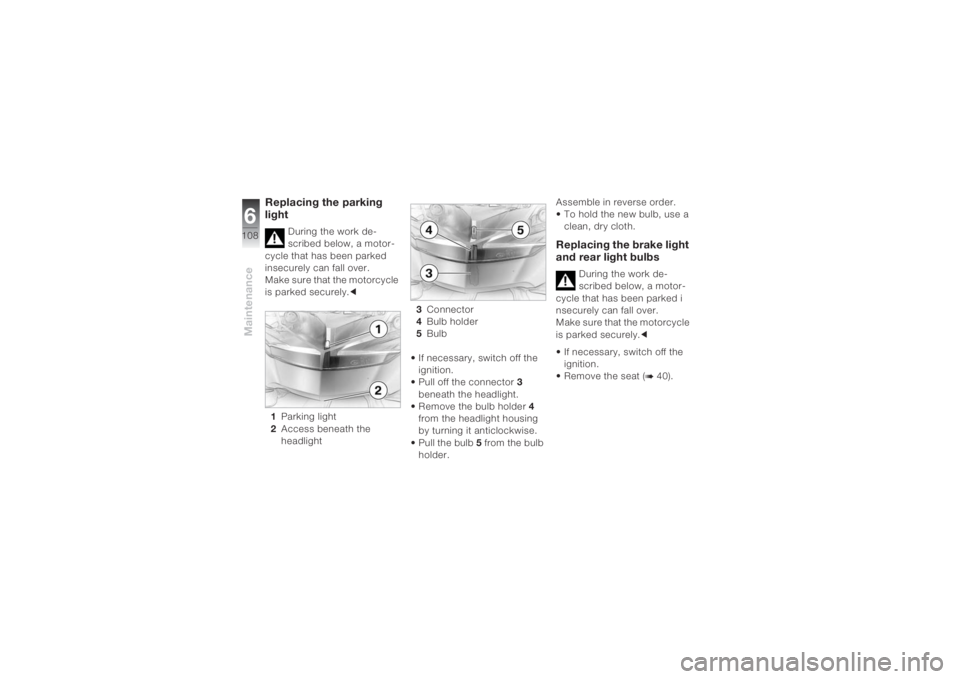
1Parking light
2Access beneath the
headlight3Connector
4Bulb holder
5Bulb
• If necessary, switch off the
ignition.
• Pull off the connector 3
beneath the headlight.
• Remove the bulb holder 4
from the headlight housing
by turning it anticlockwise.
• Pull the bulb 5 from the bulb
holder.Assemble in reverse order.
• To hold the new bulb, use a
clean, dry cloth.
Replacing the brake light
and rear light bulbs
During the work de-
scribed below, a motor-
cycle that has been parked i
nsecurely can fall over.
Make sure that the motorcycle
is parked securely.c
• If necessary, switch off the
ignition.
• Remove the seat (
b 40).
Page 111 of 162
6109
Maintenance
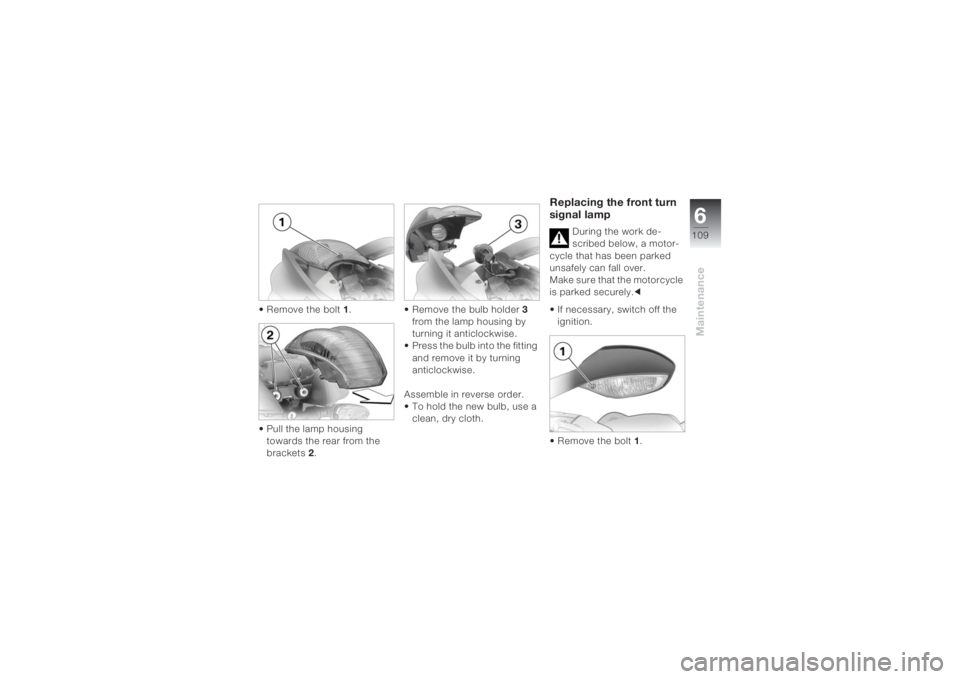
• Remove the bolt 1.
• Pull the lamp housing
towards the rear from the
brackets 2.• Remove the bulb holder 3
from the lamp housing by
turning it anticlockwise.
• Press the bulb into the fitting
and remove it by turning
anticlockwise.
Assemble in reverse order.
• To hold the new bulb, use a
clean, dry cloth.
Replacing the front turn
signal lamp
During the work de-
scribed below, a motor-
cycle that has been parked
unsafely can fall over.
Make sure that the motorcycle
is parked securely.c
• If necessary, switch off the
ignition.
• Remove the bolt 1.
Page 112 of 162
Maintenance6110
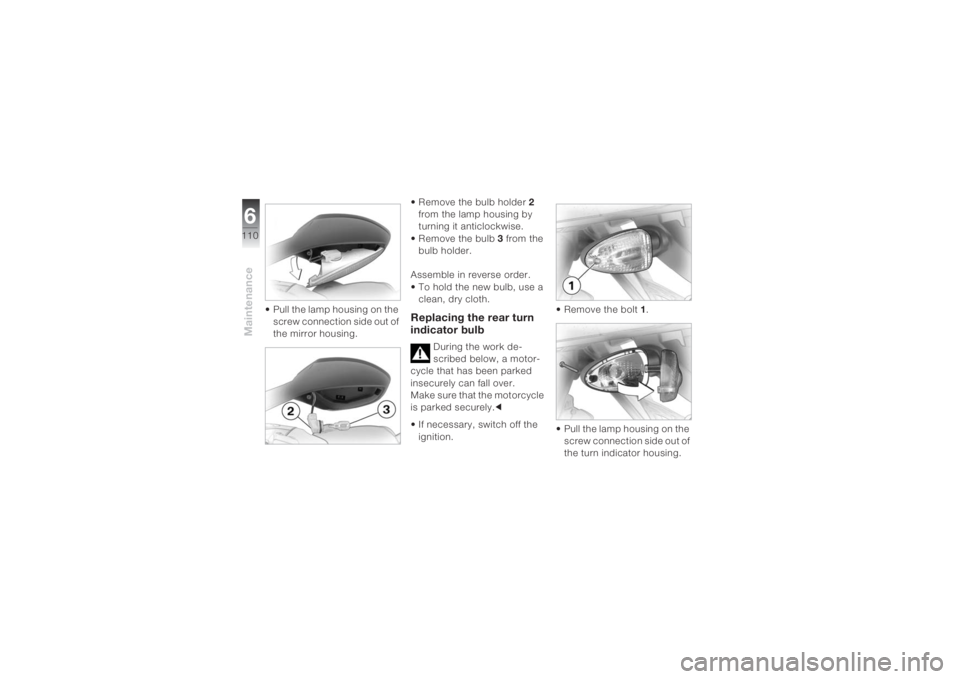
• Pull the lamp housing on the
screw connection side out of
the mirror housing.• Remove the bulb holder 2
from the lamp housing by
turning it anticlockwise.
• Remove the bulb 3 from the
bulb holder.
Assemble in reverse order.
• To hold the new bulb, use a
clean, dry cloth.
Replacing the rear turn
indicator bulb
During the work de-
scribed below, a motor-
cycle that has been parked
insecurely can fall over.
Make sure that the motorcycle
is parked securely.c
• If necessary, switch off the
ignition.• Remove the bolt 1.
• Pull the lamp housing on the
screw connection side out of
the turn indicator housing.
Page 113 of 162
6111
Maintenance
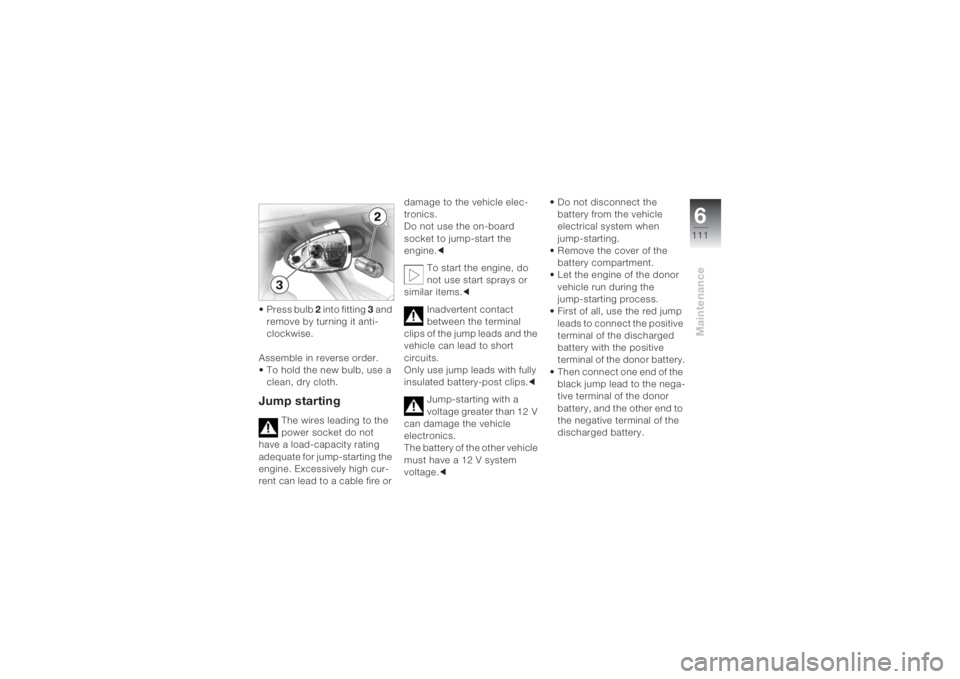
• Press bulb 2 into fitting 3 and
remove by turning it anti-
clockwise.
Assemble in reverse order.
• To hold the new bulb, use a
clean, dry cloth.Jump starting
The wires leading to the
power socket do not
have a load-capacity rating
adequate for jump-starting the
engine. Excessively high cur-
rent can lead to a cable fire or damage to the vehicle elec-
tronics.
Do not use the on-board
socket to jump-start the
engine.c
To start the engine, do
not use start sprays or
similar items.c
Inadvertent contact
between the terminal
clips of the jump leads and the
vehicle can lead to short
circuits.
Only use jump leads with fully
insulated battery-post clips.c
Jump-starting with a
voltage greater than 12 V
can damage the vehicle
electronics.
The battery of the other vehicle
must have a 12 V system
voltage.c• Do not disconnect the
battery from the vehicle
electrical system when
jump-starting.
• Remove the cover of the
battery compartment.
• Let the engine of the donor
vehicle run during the
jump-starting process.
• First of all, use the red jump
leads to connect the positive
terminal of the discharged
battery with the positive
terminal of the donor battery.
• Then connect one end of the
black jump lead to the nega-
tive terminal of the donor
battery, and the other end to
the negative terminal of the
discharged battery.