clock BMW MOTORRAD K 1200 S 2004 Rider's Manual (in English)
[x] Cancel search | Manufacturer: BMW MOTORRAD, Model Year: 2004, Model line: K 1200 S, Model: BMW MOTORRAD K 1200 S 2004Pages: 162, PDF Size: 2.99 MB
Page 4 of 162
Introductioni2
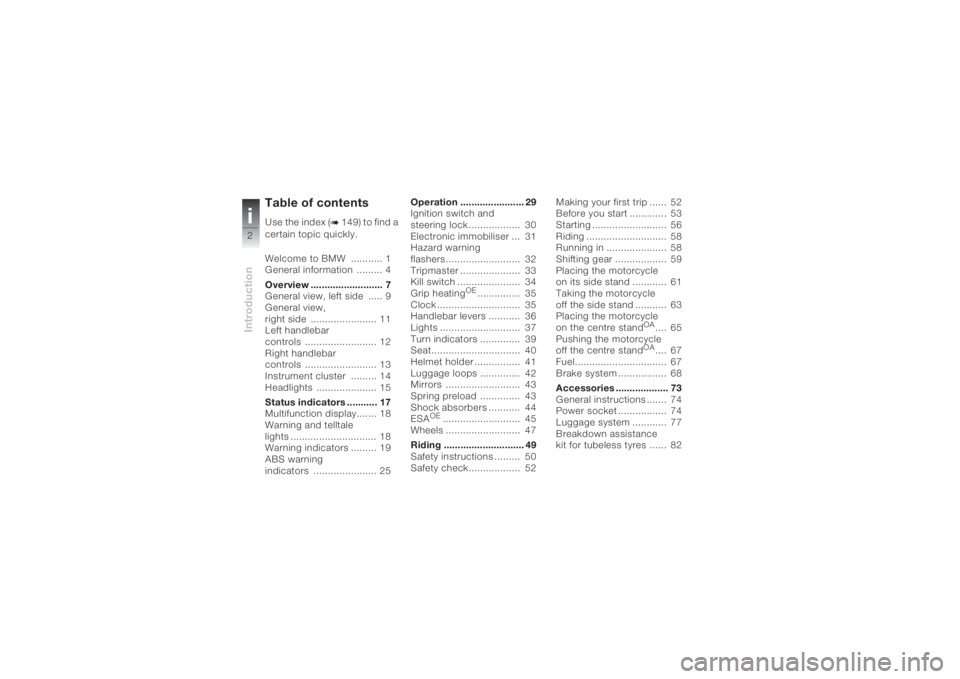
Table of contentsUse the index (
b 149) to find a
certain topic quickly.
Welcome to BMW ........... 1
General information ......... 4
Overview .......................... 7
General view, left side ..... 9
General view,
right side ....................... 11
Left handlebar
controls ......................... 12
Right handlebar
controls ......................... 13
Instrument cluster ......... 14
Headlights ..................... 15
Status indicators ........... 17
Multifunction display....... 18
Warning and telltale
lights .............................. 18
Warning indicators ......... 19
ABS warning
indicators ...................... 25Operation ....................... 29
Ignition switch and
steering lock .................. 30
Electronic immobiliser ... 31
Hazard warning
flashers.......................... 32
Tripmaster ..................... 33
Kill switch ...................... 34
Grip heating
OE
............... 35
Clock ............................. 35
Handlebar levers ........... 36
Lights ............................ 37
Turn indicators .............. 39
Seat............................... 40
Helmet holder ................ 41
Luggage loops .............. 42
Mirrors .......................... 43
Spring preload .............. 43
Shock absorbers ........... 44
ESA
OE
........................... 45
Wheels .......................... 47
Riding ............................. 49
Safety instructions ......... 50
Safety check.................. 52Making your first trip ...... 52
Before you start ............. 53
Starting .......................... 56
Riding ............................ 58
Running in ..................... 58
Shifting gear .................. 59
Placing the motorcycle
on its side stand ............ 61
Taking the motorcycle
off the side stand ........... 63
Placing the motorcycle
on the centre stand
OA
.... 65
Pushing the motorcycle
off the centre stand
OA
.... 67
Fuel................................ 67
Brake system ................. 68
Accessories ................... 73
General instructions ....... 74
Power socket ................. 74
Luggage system ............ 77
Breakdown assistance
kit for tubeless tyres ...... 82
Page 16 of 162
Overview114
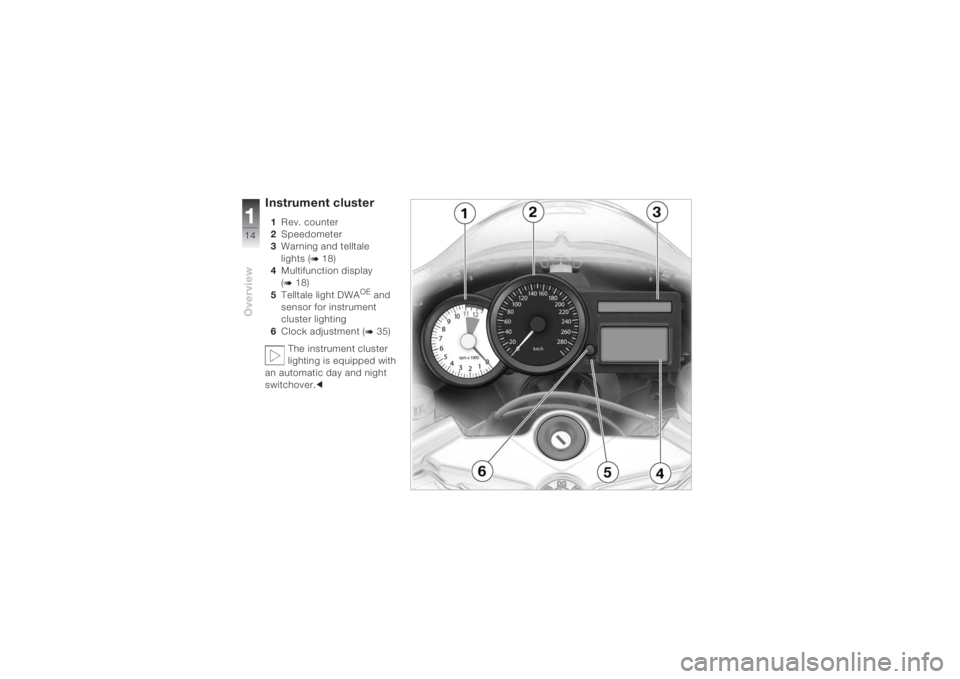
Instrument cluster1Rev. counter
2Speedometer
3Warning and telltale
lights (
b 18)
4Multifunction display
(
b 18)
5Telltale light DWA
OE and
sensor for instrument
cluster lighting
6Clock adjustment (b 35)
The instrument cluster
lighting is equipped with
an automatic day and night
switchover.c
Page 20 of 162
Status indicators218
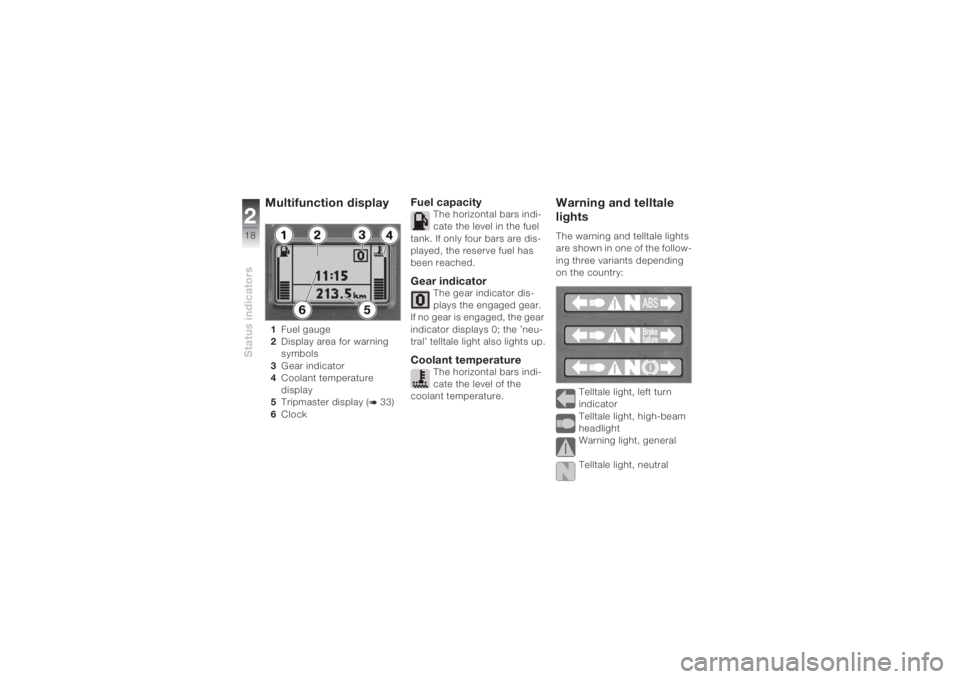
Multifunction display 1Fuel gauge
2Display area for warning
symbols
3Gear indicator
4Coolant temperature
display
5Tripmaster display (
b 33)
6Clock
Fuel capacity
The horizontal bars indi-
cate the level in the fuel
tank. If only four bars are dis-
played, the reserve fuel has
been reached.
Gear indicator
The gear indicator dis-
plays the engaged gear.
If no gear is engaged, the gear
indicator displays 0; the ’neu-
tral’ telltale light also lights up.
Coolant temperature
The horizontal bars indi-
cate the level of the
coolant temperature.
Warning and telltale
lightsThe warning and telltale lights
are shown in one of the follow-
ing three variants depending
on the country:
Telltale light, left turn
indicator
Telltale light, high-beam
headlight
Warning light, general
Telltale light, neutral
Page 31 of 162
329Operation
Ignition switch and
steering lock .................................. 30
Electronic immobiliser .................. 31
Hazard warning flashers............... 32
Tripmaster...................................... 33
Kill switch....................................... 34
Grip heating
OE
............................... 35
Clock .............................................. 35
Handlebar levers ........................... 36
Lights.............................................. 37
Turn indicators .............................. 39
Seat ................................................ 40
Helmet holder ................................ 41
Luggage loops ............................... 42
Mirrors ............................................ 43
Spring preload ............................... 43Shock absorbers ........................... 44
ESA
OE
............................................. 45
Wheels ............................................ 47
Page 37 of 162
335Operation
» The engine cannot be
started in this position.
If the kill switch is moved
to positionB when the
ignition is on, the BMW Inte-
gral ABS is still functioning
(b 50, 69).cGrip heating
OE
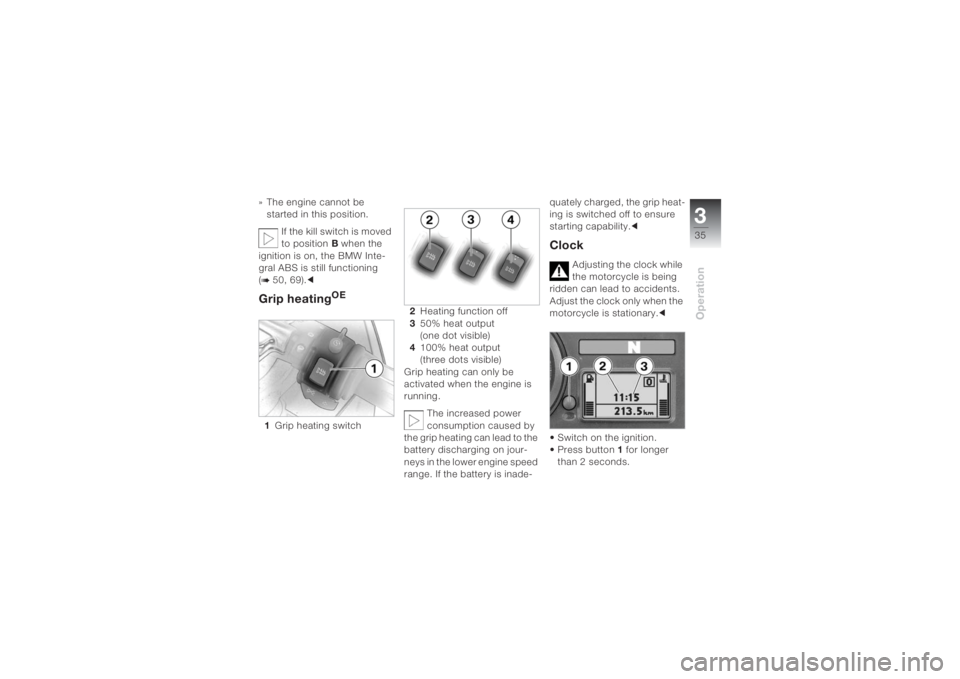
1Grip heating switch 2Heating function off
350% heat output
(one dot visible)
4100% heat output
(three dots visible)
Grip heating can only be
activated when the engine is
running.
The increased power
consumption caused by
the grip heating can lead to the
battery discharging on jour-
neys in the lower engine speed
range. If the battery is inade-quately charged, the grip heat-
ing is switched off to ensure
starting capability.c
Clock
Adjusting the clock while
the motorcycle is being
ridden can lead to accidents.
Adjust the clock only when the
motorcycle is stationary.c
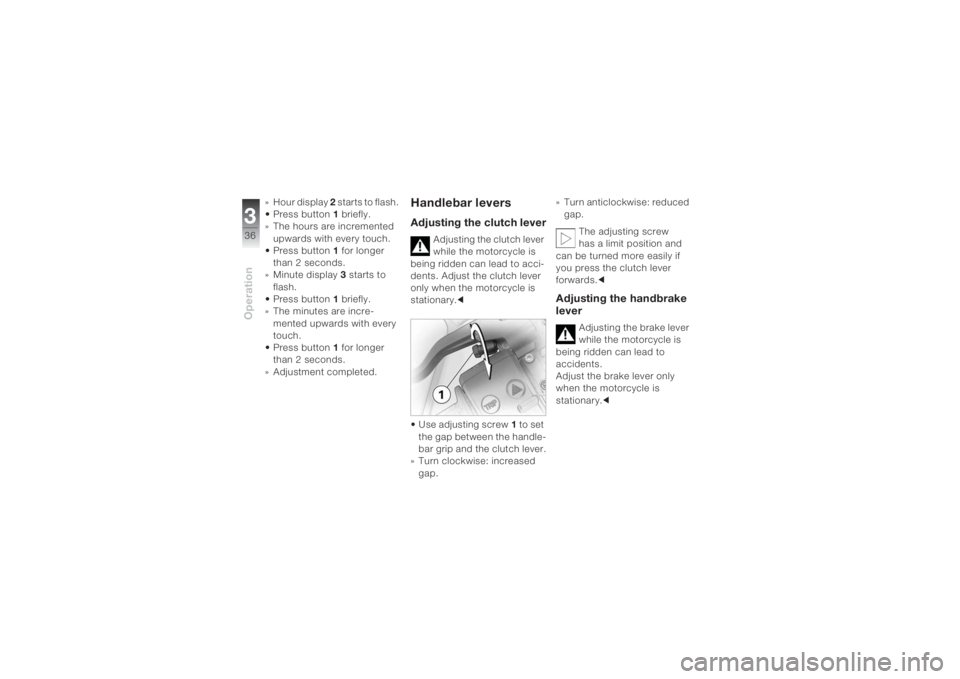
• Switch on the ignition.
• Press button1 for longer
than 2 seconds.
Page 38 of 162
Operation336
» Hour display 2 starts to flash.
• Press button1 briefly.
» The hours are incremented
upwards with every touch.
• Press button1 for longer
than 2 seconds.
»Minute display 3 starts to
flash.
• Press button1 briefly.
» The minutes are incre-
mented upwards with every
touch.
• Press button1 for longer
than 2 seconds.
» Adjustment completed.
Handlebar leversAdjusting the clutch lever
Adjusting the clutch lever
while the motorcycle is
being ridden can lead to acci-
dents. Adjust the clutch lever
only when the motorcycle is
stationary.c
• Use adjusting screw1 to set
the gap between the handle-
bar grip and the clutch lever.
» Turn clockwise: increased
gap.» Turn anticlockwise: reduced
gap.
The adjusting screw
has a limit position and
can be turned more easily if
you press the clutch lever
forwards.c
Adjusting the handbrake
lever
Adjusting the brake lever
while the motorcycle is
being ridden can lead to
accidents.
Adjust the brake lever only
when the motorcycle is
stationary.c
Page 39 of 162
337Operation
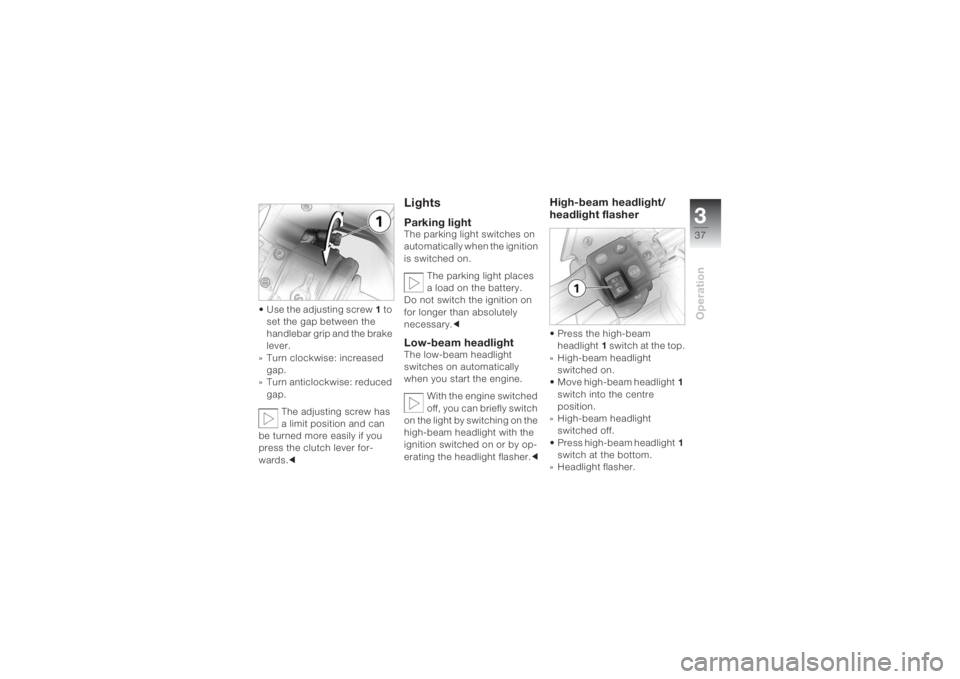
• Use the adjusting screw1 to
set the gap between the
handlebar grip and the brake
lever.
» Turn clockwise: increased
gap.
» Turn anticlockwise: reduced
gap.
The adjusting screw has
a limit position and can
be turned more easily if you
press the clutch lever for-
wards.c
LightsParking lightThe parking light switches on
automatically when the ignition
is switched on.
The parking light places
a load on the battery.
Do not switch the ignition on
for longer than absolutely
necessary.cLow-beam headlight The low-beam headlight
switches on automatically
when you start the engine.
With the engine switched
off, you can briefly switch
on the light by switching on the
high-beam headlight with the
ignition switched on or by op-
erating the headlight flasher.c
High-beam headlight/
headlight flasher • Press the high-beam
headlight1 s w i t c h a t t h e t o p .
» High-beam headlight
switched on.
• Move high-beam headlight1
switch into the centre
position.
» High-beam headlight
switched off.
• Press high-beam headlight1
switch at the bottom.
» Headlight flasher.
Page 42 of 162
Operation340
Switching off the turn
indicators• Press indicator button 3.
»Turn indicator off.
» Turn indicator telltale light is
off.
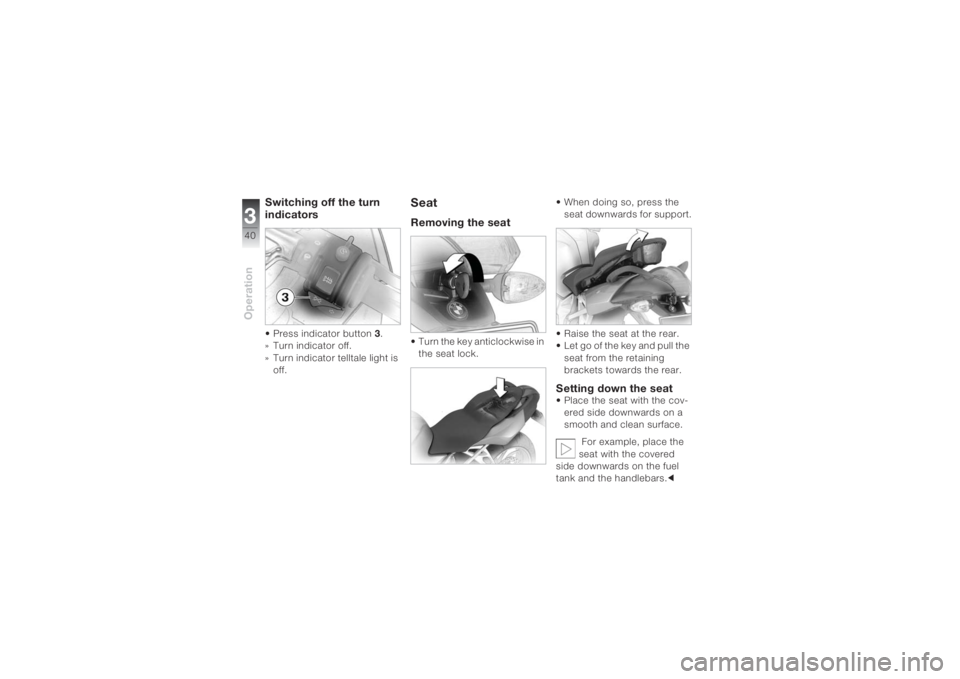
SeatRemoving the seat • Turn the key anticlockwise in
the seat lock. • When doing so, press the
seat downwards for support.
• Raise the seat at the rear.
• Let go of the key and pull the
seat from the retaining
brackets towards the rear.
Setting down the seat• Place the seat with the cov-
ered side downwards on a
smooth and clean surface.
For example, place the
seat with the covered
side downwards on the fuel
tank and the handlebars.c
Page 69 of 162
467Riding
Pushing the motorcycle
off the centre stand
OA
With the ignition switched
off, there is no braking
power assistance; the motor-
cycle can begin to roll.
Especially on inclines, switch
on the ignition and wait for the
ABS self-diagnosis (
b 54).c
• Unlock the ignition lock,
switch on the ignition.
•Wait for the ABS self-
diagnosis.
• Place your left hand on the
left handlebar grip.
• With your right hand, take
hold of the pillion passenger
grab handle.
• Push the motorcycle for-
wards off the centre stand.• Check whether the centre
stand has folded in fully.
Fuel Refuelling
Fuel is a fire hazard and
explosive!
Do not smoke and make sure
that there are no naked flames
during all activities at the fuel
tank.c
Fuel expands under the
influence of high temper-
atures and exposure to sun-
light.
Fill up only to the lower edge of
the filler neck.c
Fuel can damage plastic
parts.
Avoid fuel coming into contact
with body panels.c• Place the motorcycle on the
centre stand
OA or side
stand, ensuring that the
ground is firm and level.
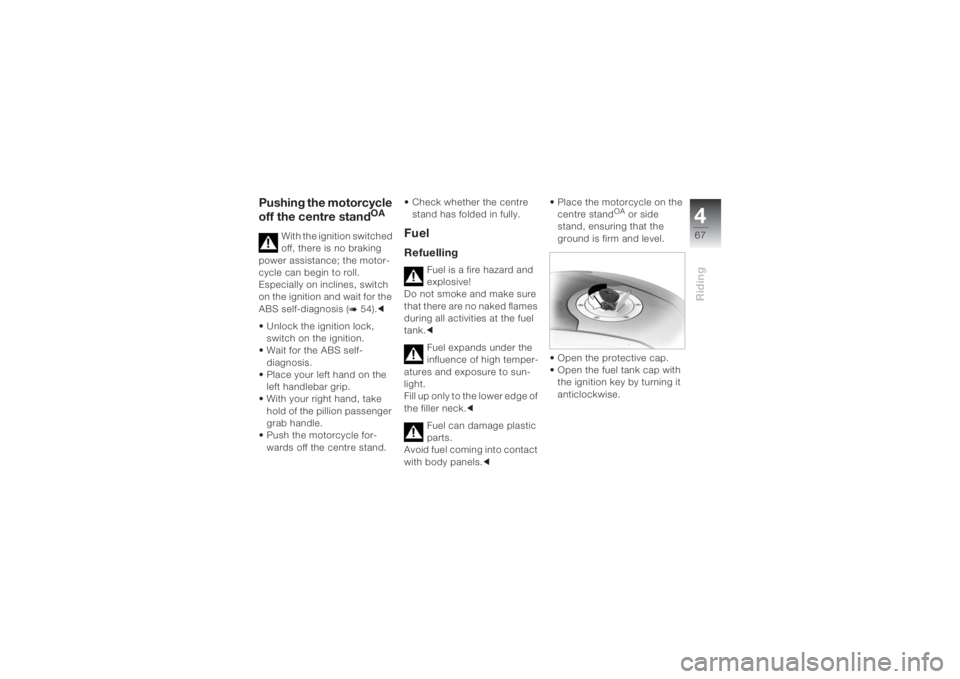
• Open the protective cap.
• Open the fuel tank cap with
the ignition key by turning it
anticlockwise.
Page 80 of 162
Accessories578
Cases not locked and
secured • Turn the lock on the right-
hand case by 90°
anticlockwise.
• Turn the lock on the left-
hand case by 90° clockwise.
» Case can be opened.
»Case secured.
»Key can be removed.Case unsecured
• Turn the lock on the right-
hand case by 45° clockwise.
• Turn the lock on the
left-hand case by 45°
anticlockwise.
» Cases locked.
» Cases can be removed.
» Key cannot be removed.
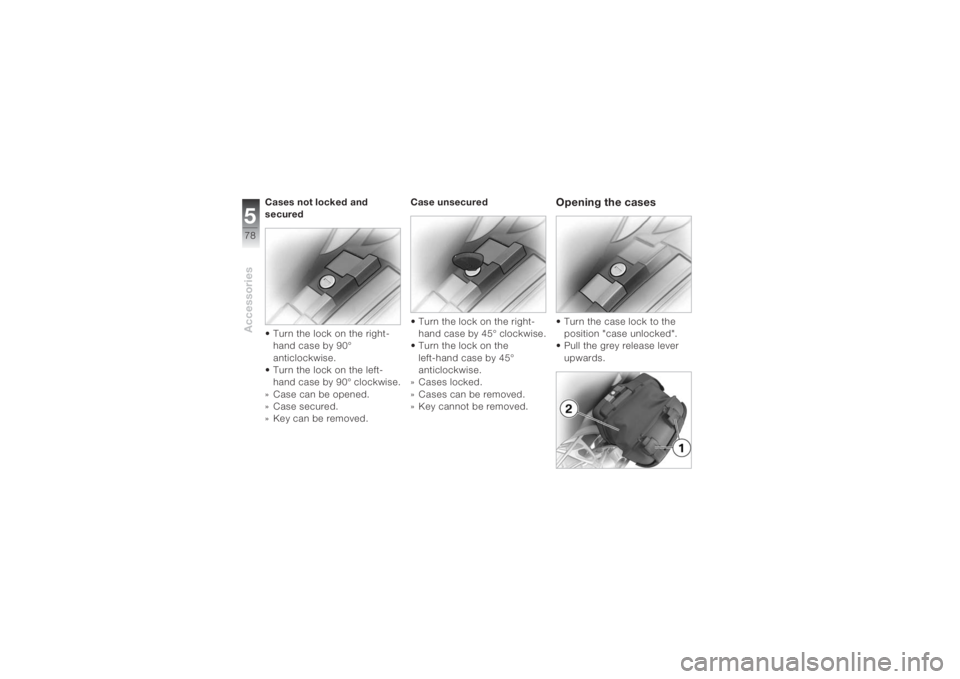
Opening the cases • Turn the case lock to the
position "case unlocked".
• Pull the grey release lever
upwards.