low beam BMW MOTORRAD K 1200 S 2004 Rider's Manual (in English)
[x] Cancel search | Manufacturer: BMW MOTORRAD, Model Year: 2004, Model line: K 1200 S, Model: BMW MOTORRAD K 1200 S 2004Pages: 162, PDF Size: 2.99 MB
Page 17 of 162
115Overview
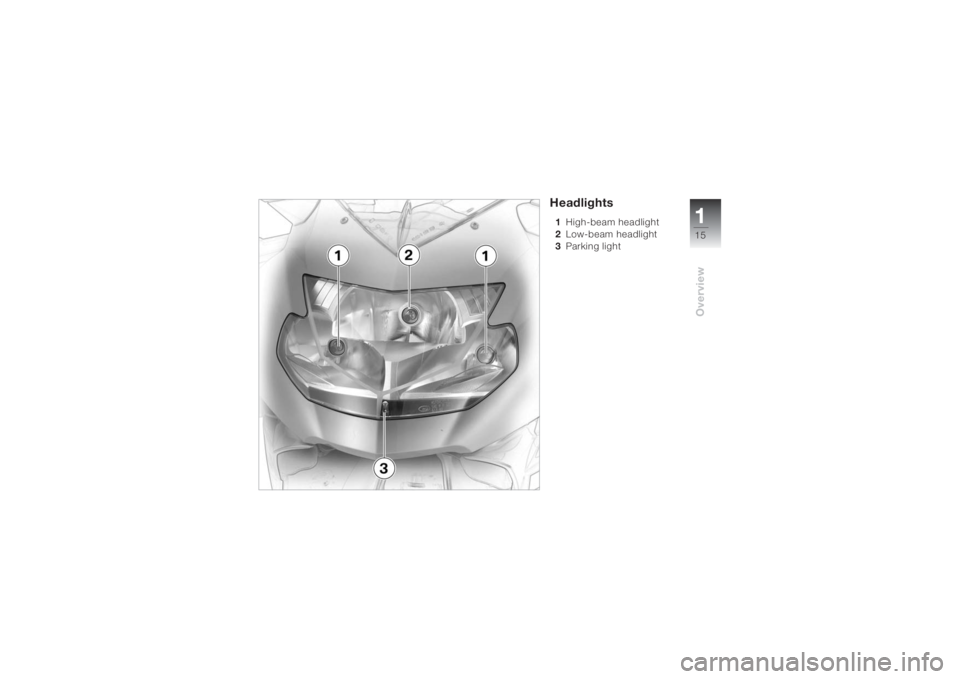
Headlights1High-beam headlight
2Low-beam headlight
3Parking light
Page 20 of 162
Status indicators218
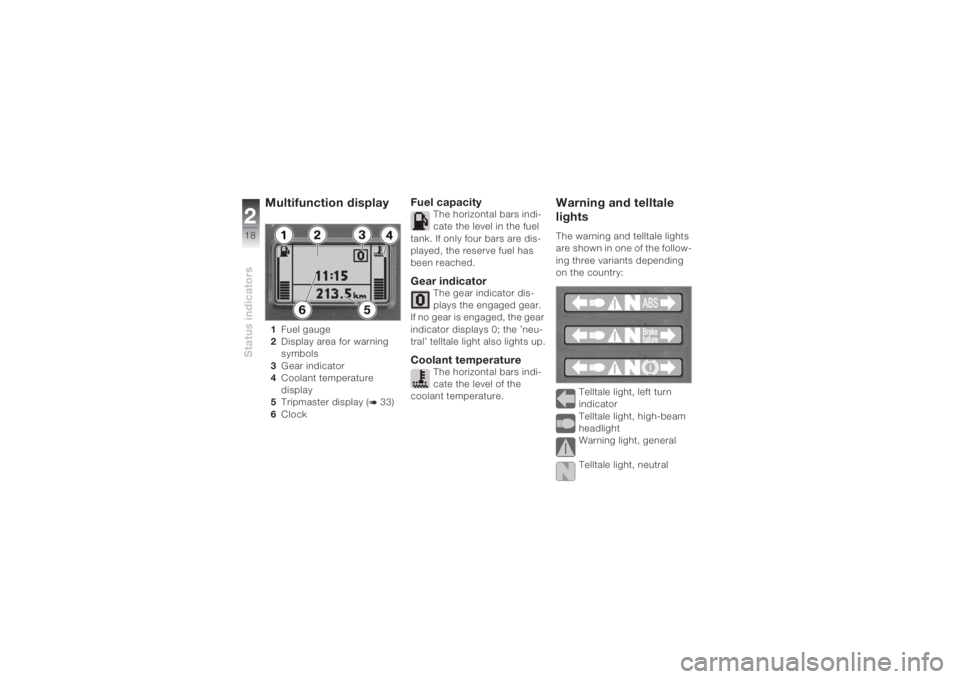
Multifunction display 1Fuel gauge
2Display area for warning
symbols
3Gear indicator
4Coolant temperature
display
5Tripmaster display (
b 33)
6Clock
Fuel capacity
The horizontal bars indi-
cate the level in the fuel
tank. If only four bars are dis-
played, the reserve fuel has
been reached.
Gear indicator
The gear indicator dis-
plays the engaged gear.
If no gear is engaged, the gear
indicator displays 0; the ’neu-
tral’ telltale light also lights up.
Coolant temperature
The horizontal bars indi-
cate the level of the
coolant temperature.
Warning and telltale
lightsThe warning and telltale lights
are shown in one of the follow-
ing three variants depending
on the country:
Telltale light, left turn
indicator
Telltale light, high-beam
headlight
Warning light, general
Telltale light, neutral
Page 22 of 162
Status indicators220
Overview
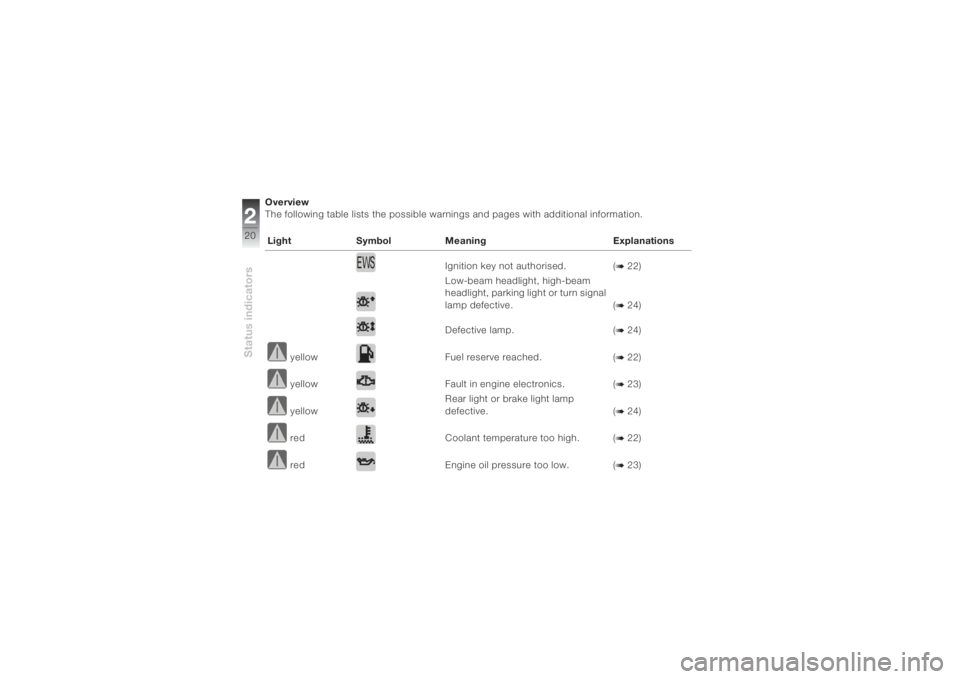
The following table lists the possible warnings and pages with additional information.
Light Symbol Meaning Explanations
Ignition key not authorised. (
b 22)
Low-beam headlight, high-beam
headlight, parking light or turn signal
lamp defective. (b 24)
Defective lamp. (b 24)
yellow Fuel reserve reached. (b 22)
yellow Fault in engine electronics. (b 23)
yellowRear light or brake light lamp
defective. (b 24)
red Coolant temperature too high. (b 22)
red Engine oil pressure too low. (b 23)
Page 26 of 162
Status indicators224
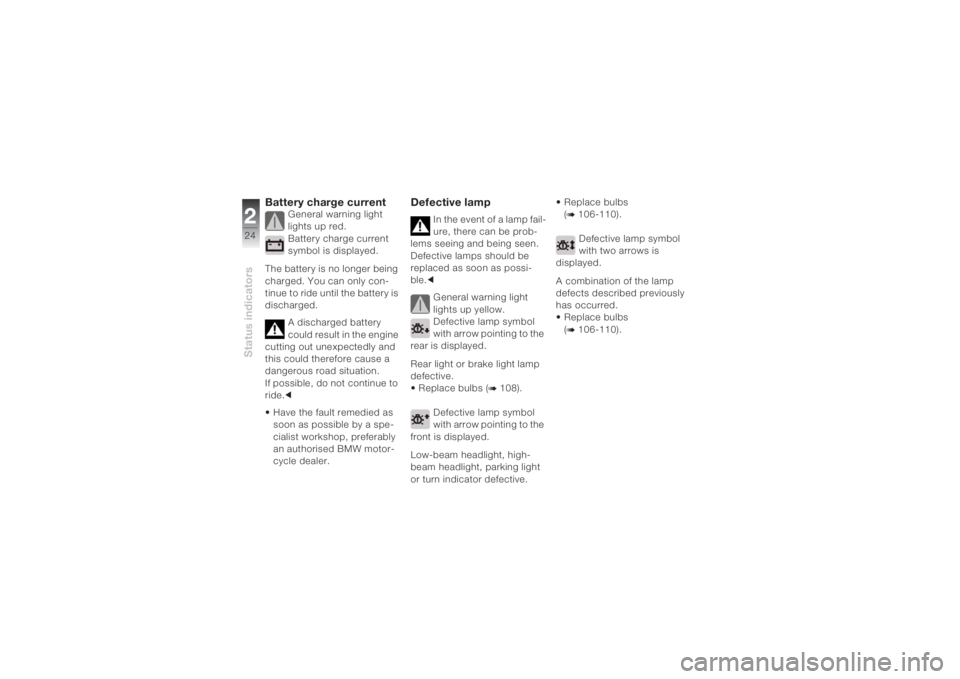
Battery charge current
General warning light
lights up red.
Battery charge current
symbol is displayed.
The battery is no longer being
charged. You can only con-
tinue to ride until the battery is
discharged.
A discharged battery
could result in the engine
cutting out unexpectedly and
this could therefore cause a
dangerous road situation.
If possible, do not continue to
ride.c
• Have the fault remedied as
soon as possible by a spe-
cialist workshop, preferably
an authorised BMW motor-
cycle dealer.
Defective lamp
In the event of a lamp fail-
ure, there can be prob-
lems seeing and being seen.
Defective lamps should be
replaced as soon as possi-
ble.c
General warning light
lights up yellow.
Defective lamp symbol
with arrow pointing to the
rear is displayed.
Rear light or brake light lamp
defective.
• Replace bulbs (
b 108).
Defective lamp symbol
with arrow pointing to the
front is displayed.
Low-beam headlight, high-
beam headlight, parking light
or turn indicator defective.• Replace bulbs
(
b 106-110).
Defective lamp symbol
with two arrows is
displayed.
A combination of the lamp
defects described previously
has occurred.
• Replace bulbs
(b 106-110).
Page 39 of 162
337Operation
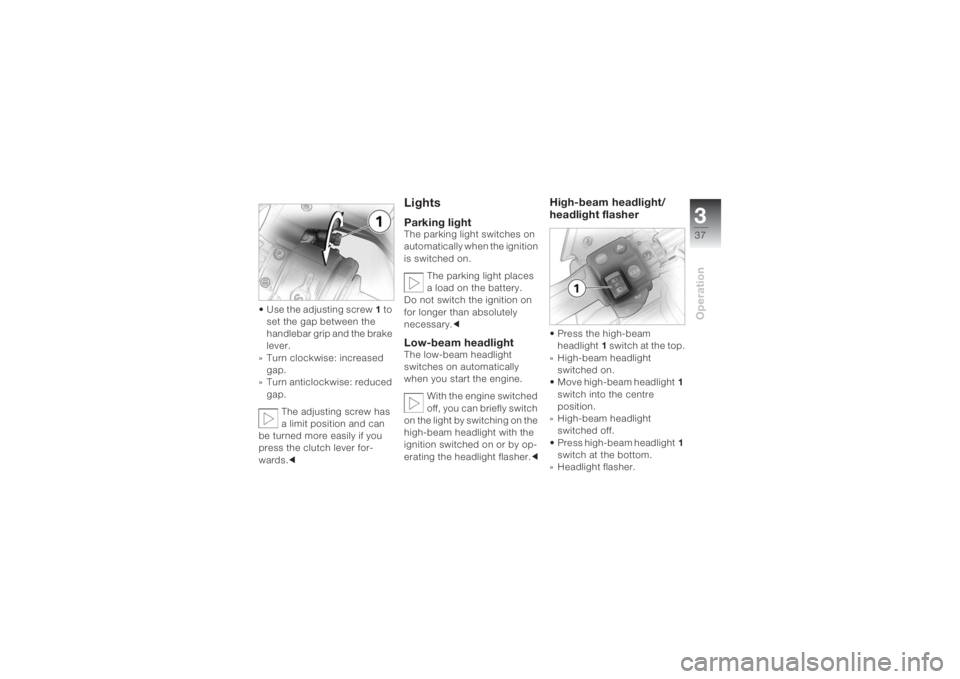
• Use the adjusting screw1 to
set the gap between the
handlebar grip and the brake
lever.
» Turn clockwise: increased
gap.
» Turn anticlockwise: reduced
gap.
The adjusting screw has
a limit position and can
be turned more easily if you
press the clutch lever for-
wards.c
LightsParking lightThe parking light switches on
automatically when the ignition
is switched on.
The parking light places
a load on the battery.
Do not switch the ignition on
for longer than absolutely
necessary.cLow-beam headlight The low-beam headlight
switches on automatically
when you start the engine.
With the engine switched
off, you can briefly switch
on the light by switching on the
high-beam headlight with the
ignition switched on or by op-
erating the headlight flasher.c
High-beam headlight/
headlight flasher • Press the high-beam
headlight1 s w i t c h a t t h e t o p .
» High-beam headlight
switched on.
• Move high-beam headlight1
switch into the centre
position.
» High-beam headlight
switched off.
• Press high-beam headlight1
switch at the bottom.
» Headlight flasher.
Page 40 of 162
Operation338
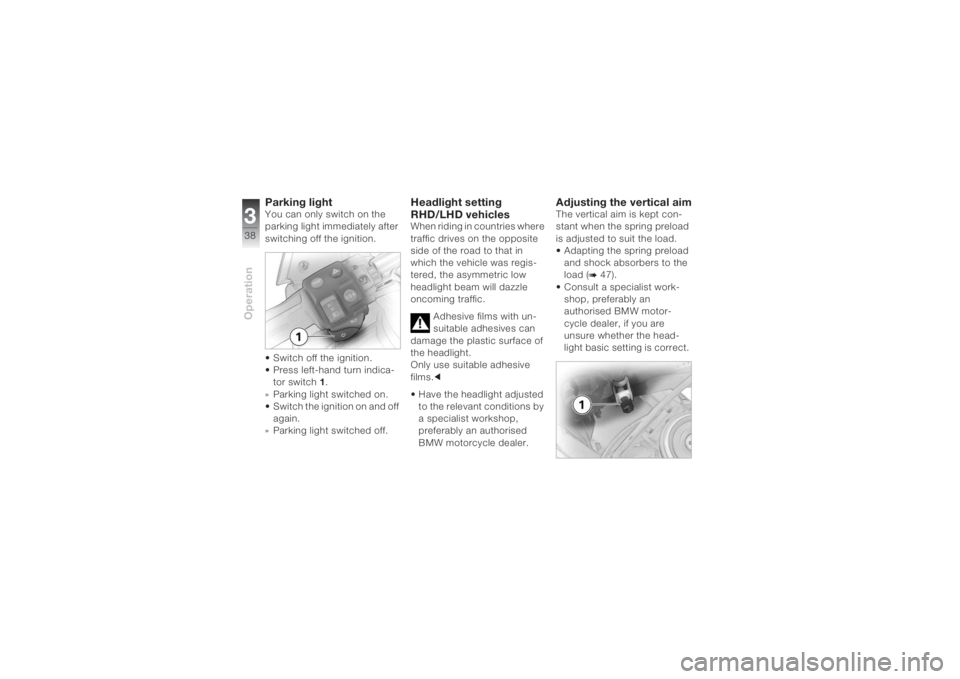
Parking lightYou can only switch on the
parking light immediately after
switching off the ignition.
• Switch off the ignition.
• Press left-hand turn indica-
tor switch1.
» Parking light switched on.
• Switch the ignition on and off
again.
» Parking light switched off.
Headlight setting
RHD/LHD vehiclesWhen riding in countries where
traffic drives on the opposite
side of the road to that in
which the vehicle was regis-
tered, the asymmetric low
headlight beam will dazzle
oncoming traffic.
Adhesive films with un-
suitable adhesives can
damage the plastic surface of
the headlight.
Only use suitable adhesive
films.c
• Have the headlight adjusted
to the relevant conditions by
a specialist workshop,
preferably an authorised
BMW motorcycle dealer.
Adjusting the vertical aimThe vertical aim is kept con-
stant when the spring preload
is adjusted to suit the load.
• Adapting the spring preload
and shock absorbers to the
load (
b 47).
• Consult a specialist work-
shop, preferably an
authorised BMW motor-
cycle dealer, if you are
unsure whether the head-
light basic setting is correct.
Page 108 of 162
Maintenance6106
Do not touch the glass of
new bulbs with your
fingers. Use a clean, dry cloth
when fitting. Dirt deposits, in
particular oil and grease,
interfere with heat radiation
from the bulb. This will result in
overheating and therefore
shorten the service life of the
bulbs.c
You will find an overview
of the types of screw
used on (
b 124).c
Replacing the low-beam
headlight bulb
During the work
described below, a
motorcycle that has been
parked unsafely can fall over.
Make sure that the motorcycle
is parked securely.cThe bulb is pressurised,
injuries may result if the
bulb is damaged.
Wear protective goggles and
gloves when changing
bulbs.c
To achieve better acces-
sibility, turn the handle-
bars to the right.c
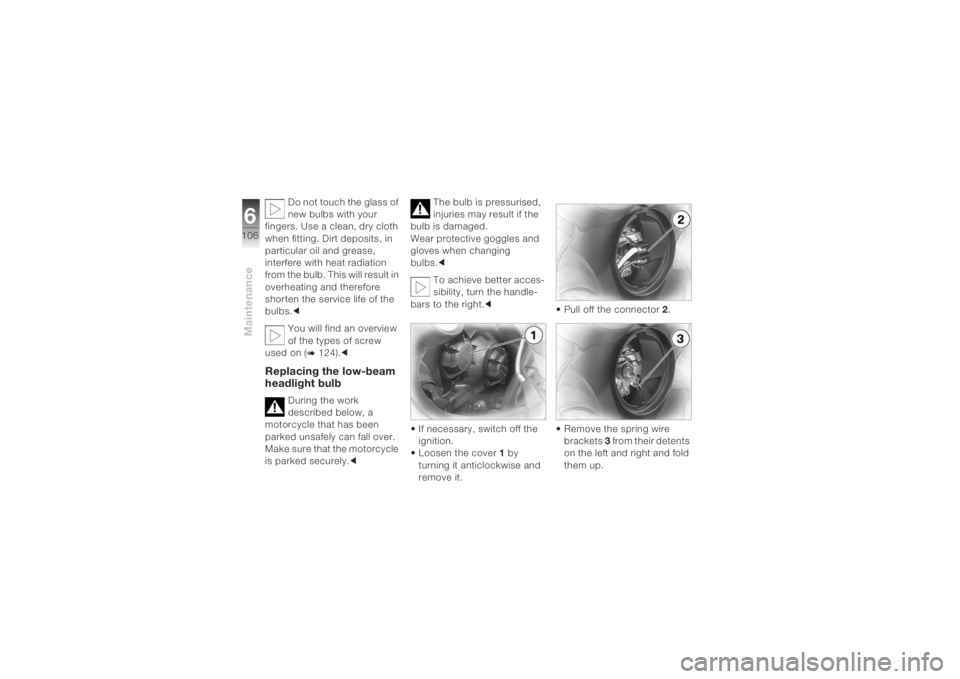
• If necessary, switch off the
ignition.
• Loosen the cover 1 by
turning it anticlockwise and
remove it.• Pull off the connector 2.
• Remove the spring wire
brackets 3 from their detents
on the left and right and fold
them up.
Page 109 of 162
6107
Maintenance
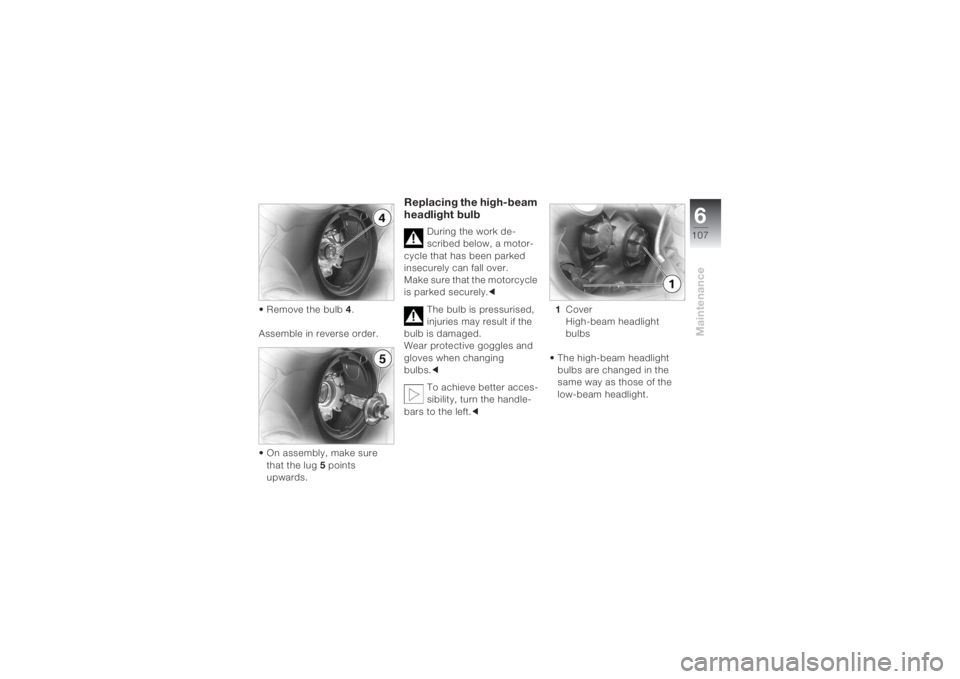
• Remove the bulb 4.
Assemble in reverse order.
• On assembly, make sure
that the lug 5 points
upwards.
Replacing the high-beam
headlight bulb
During the work de-
scribed below, a motor-
cycle that has been parked
insecurely can fall over.
Make sure that the motorcycle
is parked securely.c
The bulb is pressurised,
injuries may result if the
bulb is damaged.
Wear protective goggles and
gloves when changing
bulbs.c
To achieve better acces-
sibility, turn the handle-
bars to the left.c1Cover
High-beam headlight
bulbs
• The high-beam headlight
bulbs are changed in the
same way as those of the
low-beam headlight.
Page 138 of 162
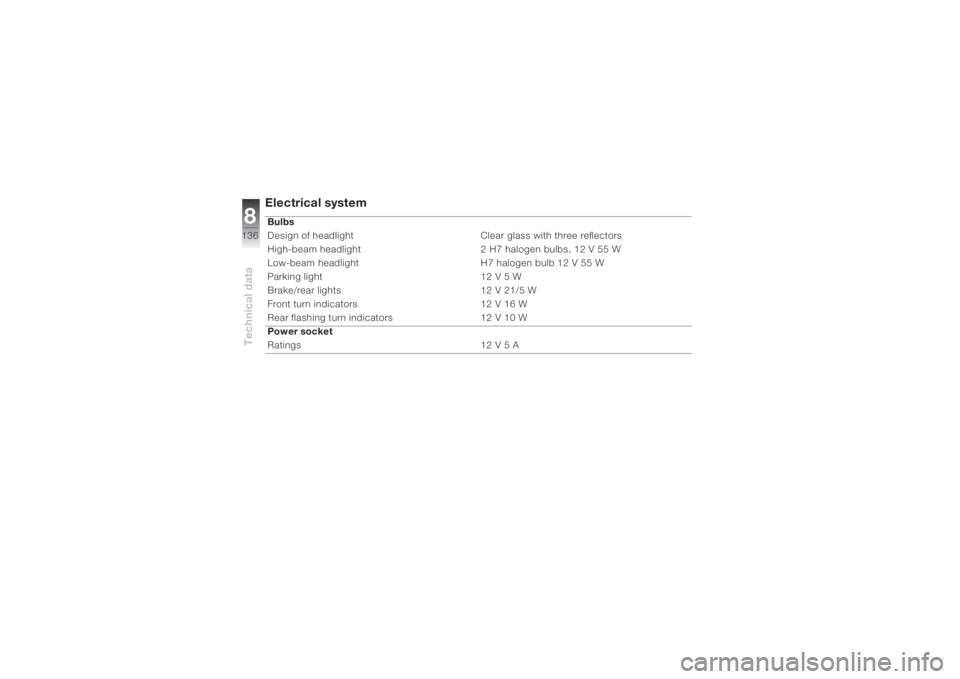
Technical data8136
Electrical systemBulbs
Design of headlight Clear glass with three reflectors
High-beam headlight 2 H7 halogen bulbs, 12 V 55 W
Low-beam headlight H7 halogen bulb 12 V 55 W
Parking light 12 V 5 W
Brake/rear lights 12 V 21/5 W
Front turn indicators 12 V 16 W
Rear flashing turn indicators 12 V 10 W
Power socket
Ratings 12 V 5 A
Page 153 of 162
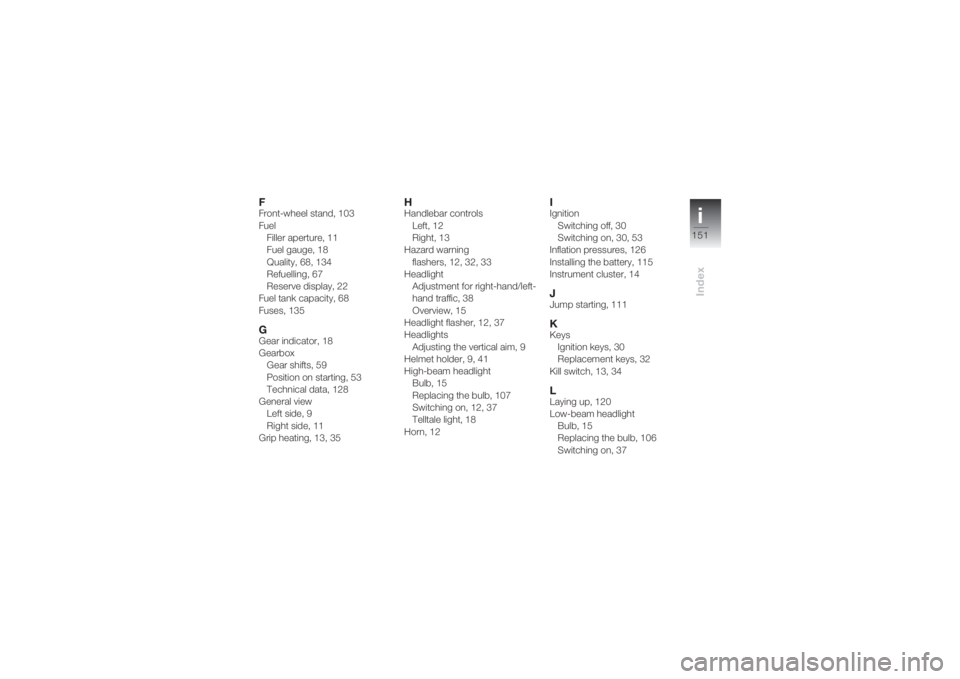
i151
Index
FFront-wheel stand, 103
Fuel
Filler aperture, 11
Fuel gauge, 18
Quality, 68, 134
Refuelling, 67
Reserve display, 22
Fuel tank capacity, 68
Fuses, 135GGear indicator, 18
Gearbox
Gear shifts, 59
Position on starting, 53
Technical data, 128
General view
Left side, 9
Right side, 11
Grip heating, 13, 35
HHandlebar controls
Left, 12
Right, 13
Hazard warning
flashers, 12, 32, 33
Headlight
Adjustment for right-hand/left-
hand traffic, 38
Overview, 15
Headlight flasher, 12, 37
Headlights
Adjusting the vertical aim, 9
Helmet holder, 9, 41
High-beam headlight
Bulb, 15
Replacing the bulb, 107
Switching on, 12, 37
Telltale light, 18
Horn, 12
IIgnition
Switching off, 30
Switching on, 30, 53
Inflation pressures, 126
Installing the battery, 115
Instrument cluster, 14JJump starting, 111KKeys
Ignition keys, 30
Replacement keys, 32
Kill switch, 13, 34LLaying up, 120
Low-beam headlight
Bulb, 15
Replacing the bulb, 106
Switching on, 37