clock BMW MOTORRAD K 1200 S 2005 Rider's Manual (in English)
[x] Cancel search | Manufacturer: BMW MOTORRAD, Model Year: 2005, Model line: K 1200 S, Model: BMW MOTORRAD K 1200 S 2005Pages: 165, PDF Size: 2.01 MB
Page 4 of 165
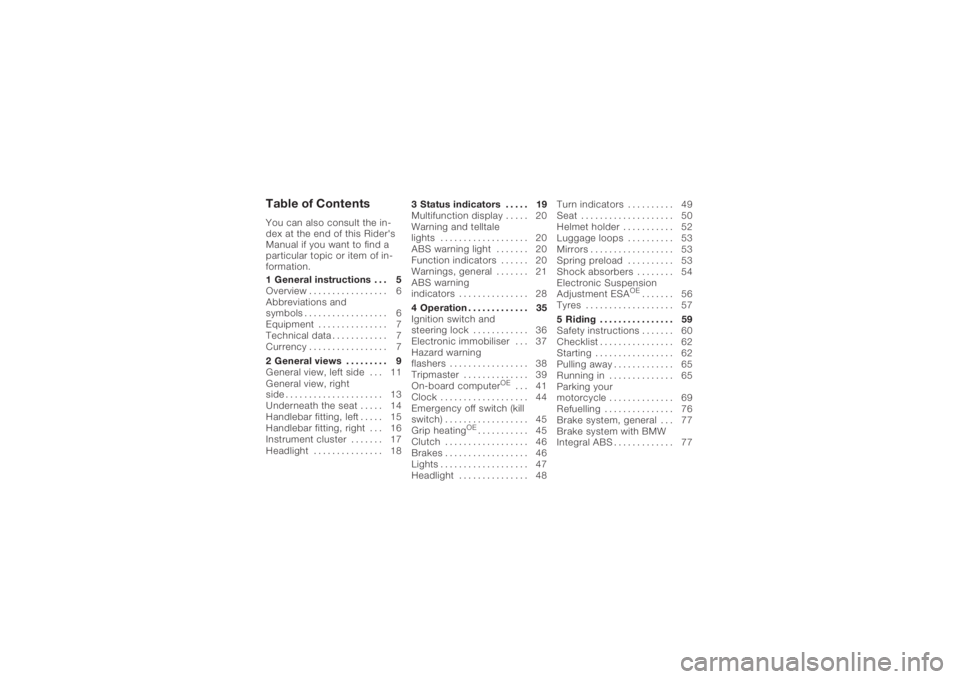
Table of ContentsYou can also consult the in-
dex at the end of this Rider's
Manual if you want to find a
particular topic or item of in-
formation.
1 General instructions . . . 5
Overview . . . . . . . . . . . . . . . . . 6
Abbreviations and
symbols . . . . . . . . . . . . . . . . . . 6
Equipment . . . . . . . . . . . . . . . 7
Technical data . . . . . . . . . . . . 7
Currency . . . . . . . . . . . . . . . . . 7
2 General views . . . . . . . . . 9
General view, left side . . . 11
General view, right
side . . . . . . . . . . . . . . . . . . . . . 13
Underneath the seat . . . . . 14
Handlebar fitting, left . . . . . 15
Handlebar fitting, right . . . 16
Instrument cluster . . . . . . . 17
Headlight . . . . . . . . . . . . . . . 183 Status indicators . . . . . 19
Multifunction display . . . . . 20
Warning and telltale
lights . . . . . . . . . . . . . . . . . . . 20
ABS warning light . . . . . . . 20
Function indicators . . . . . . 20
Warnings, general . . . . . . . 21
ABS warning
indicators . . . . . . . . . . . . . . . 28
4 Operation . . . . . . . . . . . . . 35
Ignition switch and
steering lock . . . . . . . . . . . . 36
Electronic immobiliser . . . 37
Hazard warning
flashers . . . . . . . . . . . . . . . . . 38
Tripmaster . . . . . . . . . . . . . . 39
On-board computer
OE
... 41
Clock . . . . . . . . . . . . . . . . . . . 44
Emergency off switch (kill
switch) . . . . . . . . . . . . . . . . . . 45
Grip heating
OE
........... 45
Clutch . . . . . . . . . . . . . . . . . . 46
Brakes . . . . . . . . . . . . . . . . . . 46
Lights . . . . . . . . . . . . . . . . . . . 47
Headlight . . . . . . . . . . . . . . . 48 Turn indicators . . . . . . . . . . 49
Seat . . . . . . . . . . . . . . . . . . . . 50
Helmet holder . . . . . . . . . . . 52
Luggage loops . . . . . . . . . . 53
Mirrors . . . . . . . . . . . . . . . . . . 53
Spring preload . . . . . . . . . . 53
Shock absorbers . . . . . . . . 54
Electronic Suspension
Adjustment ESA
OE
....... 56
Tyres . . . . . . . . . . . . . . . . . . . 57
5 Riding . . . . . . . . . . . . . . . . 59
Safety instructions . . . . . . . 60
Checklist . . . . . . . . . . . . . . . . 62
Starting . . . . . . . . . . . . . . . . . 62
Pulling away . . . . . . . . . . . . . 65
Running in . . . . . . . . . . . . . . 65
Parking your
motorcycle . . . . . . . . . . . . . . 69
Refuelling . . . . . . . . . . . . . . . 76
Brake system, general . . . 77
Brake system with BMW
Integral ABS . . . . . . . . . . . . . 77
Page 19 of 165
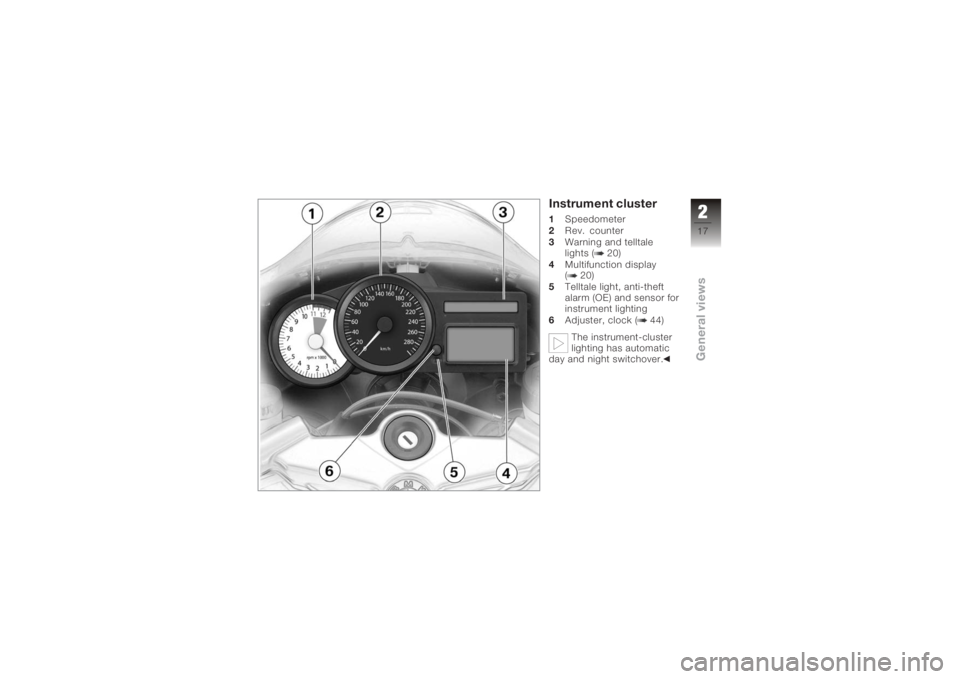
Instrument cluster1Speedometer
2 Rev. counter
3 Warning and telltale
lights ( 20)
4 Multifunction display
( 20)
5 Telltale light, anti-theft
alarm (OE) and sensor for
instrument lighting
6 Adjuster, clock ( 44)
The instrument-cluster
lighting has automatic
day and night switchover.
217zGeneral views
Page 22 of 165
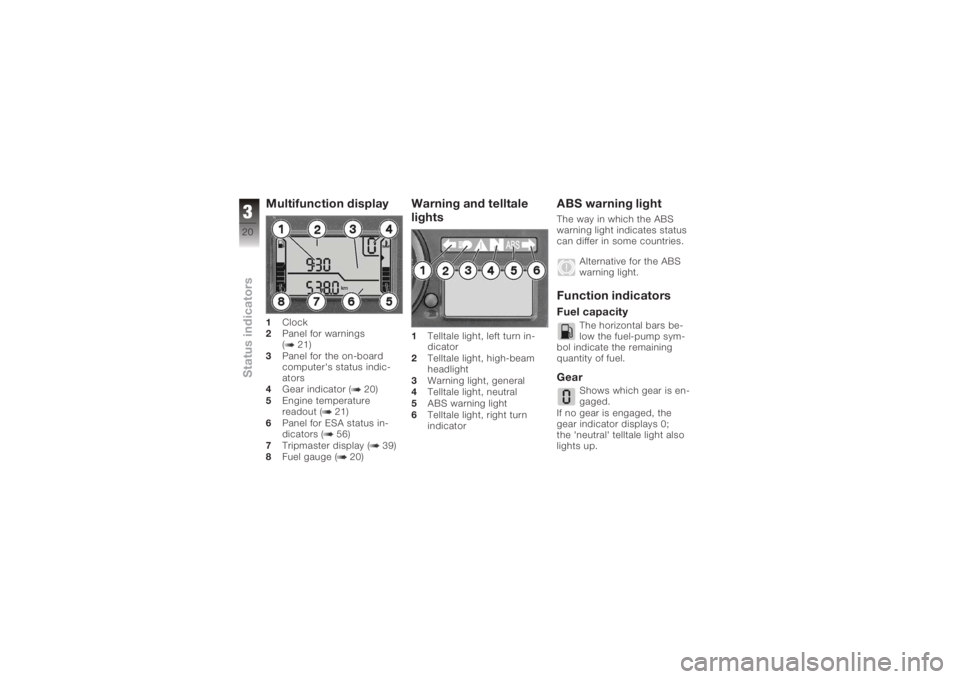
Multifunction display1Clock
2 Panel for warnings
( 21)
3 Panel for the on-board
computer's status indic-
ators
4 Gear indicator ( 20)
5 Engine temperature
readout ( 21)
6 Panel for ESA status in-
dicators ( 56)
7 Tripmaster display ( 39)
8 Fuel gauge ( 20)
Warning and telltale
lights1Telltale light, left turn in-
dicator
2 Telltale light, high-beam
headlight
3 Warning light, general
4 Telltale light, neutral
5 ABS warning light
6 Telltale light, right turn
indicator
ABS warning lightThe way in which the ABS
warning light indicates status
can differ in some countries.
Alternative for the ABS
warning light.Function indicatorsFuel capacity
The horizontal bars be-
low the fuel-pump sym-
bol indicate the remaining
quantity of fuel.
Gear
Shows which gear is en-
gaged.
If no gear is engaged, the
gear indicator displays 0;
the 'neutral' telltale light also
lights up.
320zStatus indicators
Page 37 of 165
Operation
Ignition switch and steering
lock . .......................... 36
Electronic immobiliser ......... 37
Hazard warning flashers . . . .... 38
Tripmaster .................... 39
On-board computer
OE
......... 41
Clock ......................... 44
Emergency off switch (kill
switch) ........................ 45
Grip heating
OE
................ 45
Clutch ........................ 46
Brakes ........................ 46
Lights ......................... 47
Headlight . .................... 48
Turn indicators . ............... 49
Seat . ......................... 50 Helmet holder . .
............... 52
Luggage loops . ............... 53
Mirrors . . . ..................... 53
Spring preload . ............... 53
Shock absorbers .............. 54
Electronic Suspension
Adjustment ESA
OE
............ 56
Tyres ......................... 57
435zOperation
Page 43 of 165
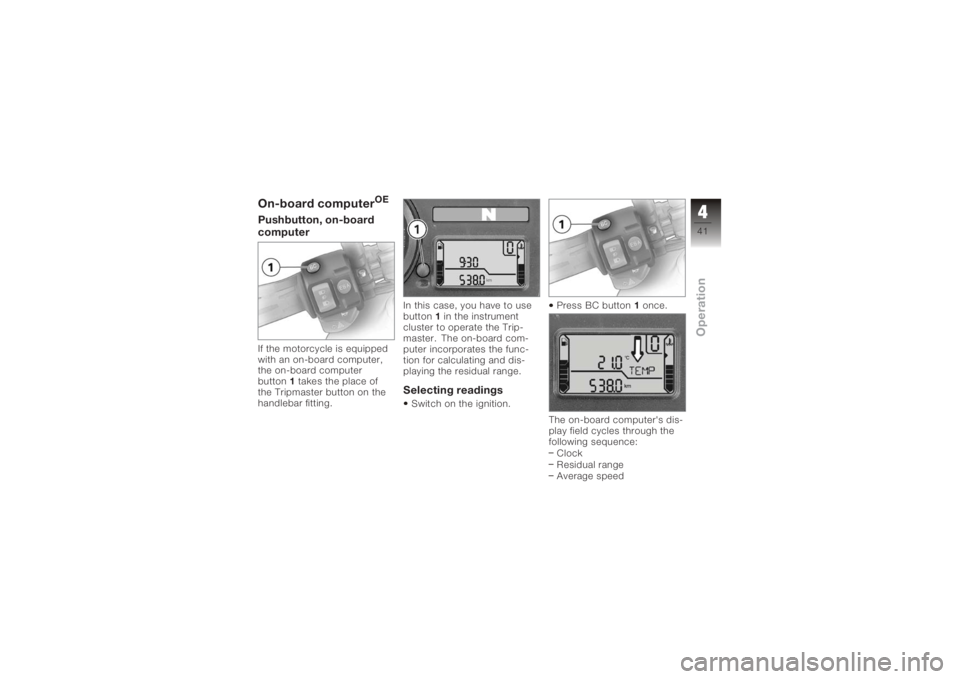
On-board computer
OE
Pushbutton, on-board
computerIf the motorcycle is equipped
with an on-board computer,
the on-board computer
button1 takes the place of
the Tripmaster button on the
handlebar fitting. In this case, you have to use
button
1in the instrument
cluster to operate the Trip-
master. The on-board com-
puter incorporates the func-
tion for calculating and dis-
playing the residual range.
Selecting readingsSwitch on the ignition. Press BC button
1once.
The on-board computer's dis-
play field cycles through the
following sequence: Clock
Residual range
Average speed
441zOperation
Page 46 of 165
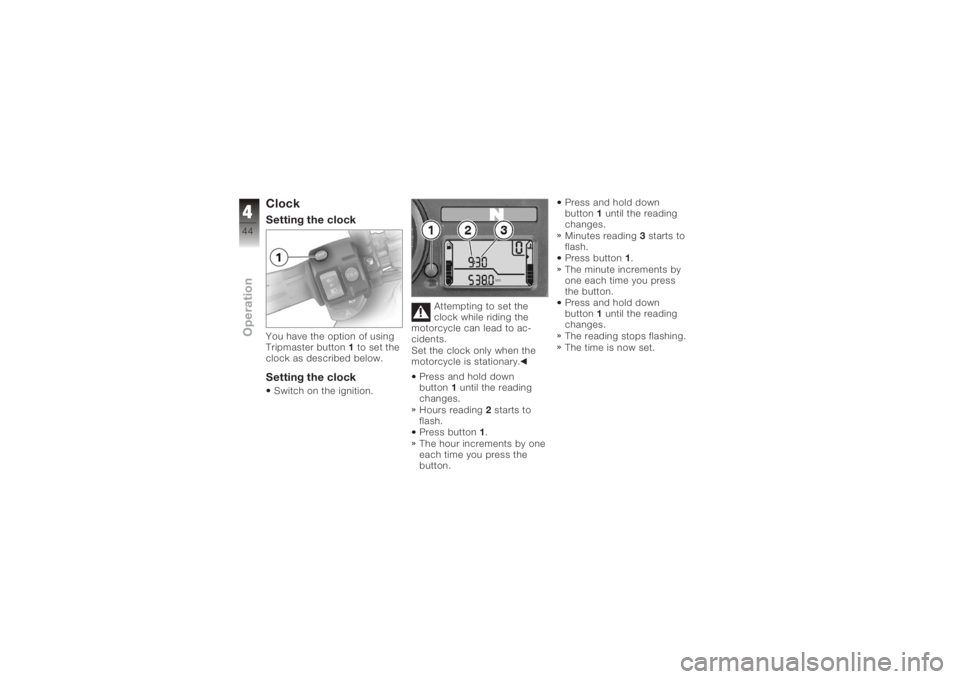
ClockSetting the clockYou have the option of using
Tripmaster button1to set the
clock as described below.Setting the clockSwitch on the ignition. Attempting to set the
clock while riding the
motorcycle can lead to ac-
cidents.
Set the clock only when the
motorcycle is stationary.
Press and hold down
button 1until the reading
changes.
Hours reading 2starts to
flash.
Press button 1.
The hour increments by one
each time you press the
button. Press and hold down
button
1until the reading
changes.
Minutes reading 3starts to
flash.
Press button 1.
The minute increments by
one each time you press
the button.
Press and hold down
button 1until the reading
changes.
The reading stops flashing.
The time is now set.
444zOperation
Page 48 of 165
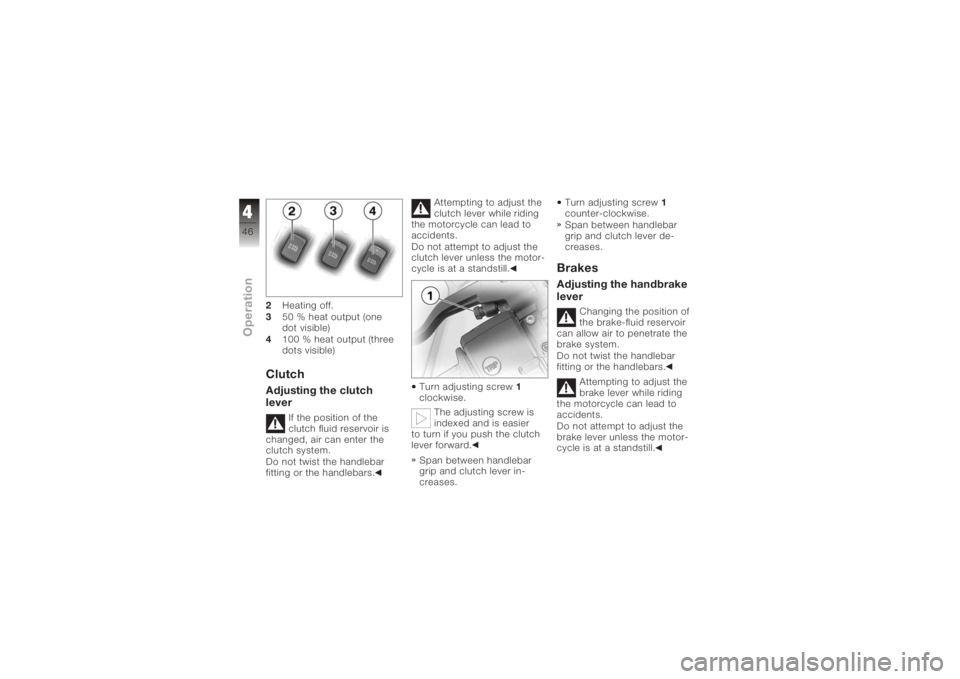
2Heating off.
3 50 % heat output (one
dot visible)
4 100 % heat output (three
dots visible)ClutchAdjusting the clutch
lever
If the position of the
clutch fluid reservoir is
changed, air can enter the
clutch system.
Do not twist the handlebar
fitting or the handlebars. Attempting to adjust the
clutch lever while riding
the motorcycle can lead to
accidents.
Do not attempt to adjust the
clutch lever unless the motor-
cycle is at a standstill.
Turn adjusting screw 1
clockwise.
The adjusting screw is
indexed and is easier
to turn if you push the clutch
lever forward.
Span between handlebar
grip and clutch lever in-
creases. Turn adjusting screw
1
counter-clockwise.
Span between handlebar
grip and clutch lever de-
creases.
BrakesAdjusting the handbrake
lever
Changing the position of
the brake-fluid reservoir
can allow air to penetrate the
brake system.
Do not twist the handlebar
fitting or the handlebars.
Attempting to adjust the
brake lever while riding
the motorcycle can lead to
accidents.
Do not attempt to adjust the
brake lever unless the motor-
cycle is at a standstill.
446zOperation
Page 49 of 165
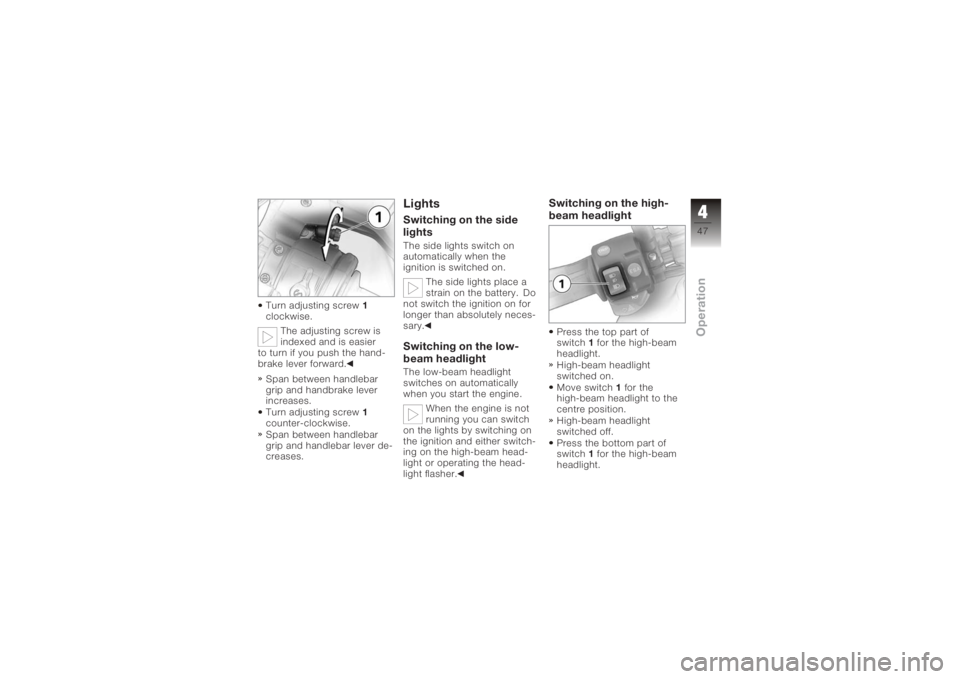
Turn adjusting screw1
clockwise.
The adjusting screw is
indexed and is easier
to turn if you push the hand-
brake lever forward.
Span between handlebar
grip and handbrake lever
increases.
Turn adjusting screw 1
counter-clockwise.
Span between handlebar
grip and handlebar lever de-
creases.
LightsSwitching on the side
lightsThe side lights switch on
automatically when the
ignition is switched on.
The side lights place a
strain on the battery. Do
not switch the ignition on for
longer than absolutely neces-
sary.Switching on the low-
beam headlightThe low-beam headlight
switches on automatically
when you start the engine.
When the engine is not
running you can switch
on the lights by switching on
the ignition and either switch-
ing on the high-beam head-
light or operating the head-
light flasher.
Switching on the high-
beam headlightPress the top part of
switch 1for the high-beam
headlight.
High-beam headlight
switched on.
Move switch 1for the
high-beam headlight to the
centre position.
High-beam headlight
switched off.
Press the bottom part of
switch 1for the high-beam
headlight.
447zOperation
Page 52 of 165
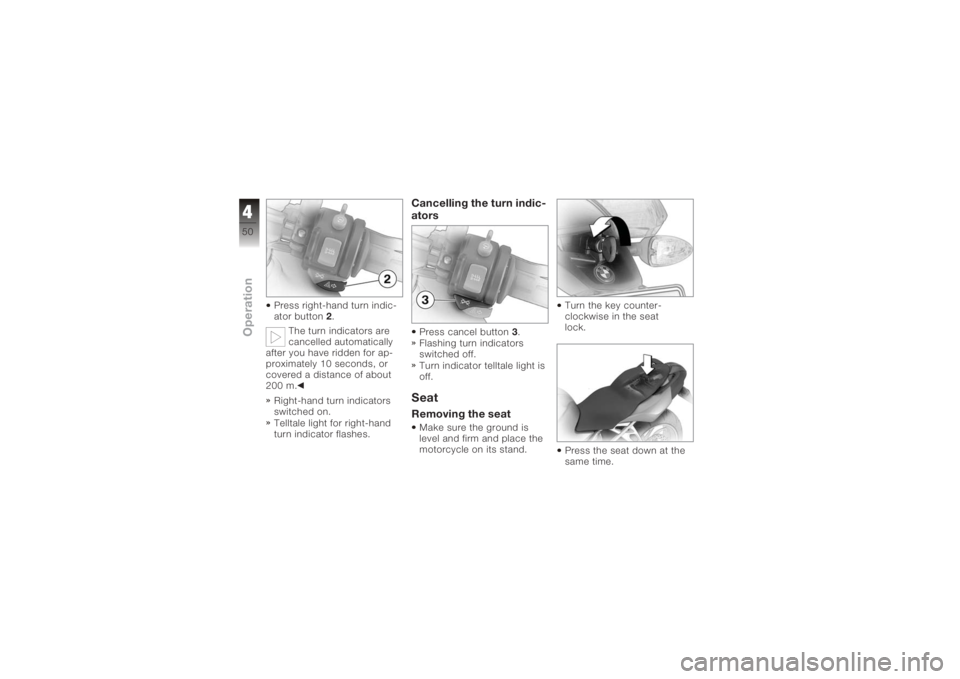
Press right-hand turn indic-
ator button2.
The turn indicators are
cancelled automatically
after you have ridden for ap-
proximately 10 seconds, or
covered a distance of about
200 m.
Right-hand turn indicators
switched on.
Telltale light for right-hand
turn indicator flashes.
Cancelling the turn indic-
atorsPress cancel button 3.
Flashing turn indicators
switched off.
Turn indicator telltale light is
off.SeatRemoving the seatMake sure the ground is
level and firm and place the
motorcycle on its stand. Turn the key counter-
clockwise in the seat
lock.
Press the seat down at the
same time.
450zOperation
Page 78 of 165
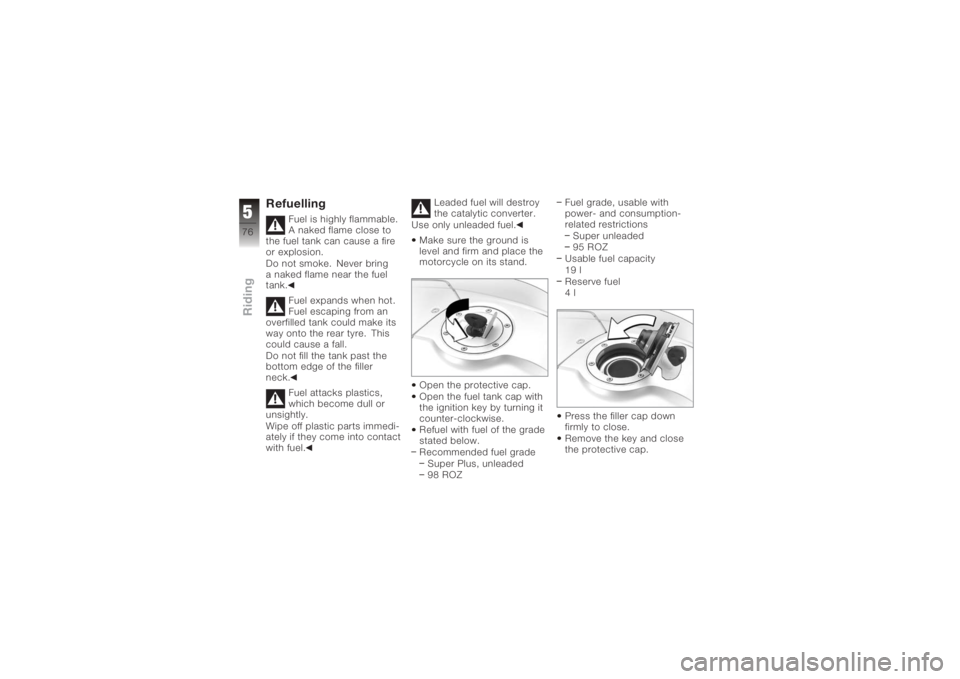
Refuelling
Fuel is highly flammable.
A naked flame close to
the fuel tank can cause a fire
or explosion.
Do not smoke. Never bring
a naked flame near the fuel
tank.
Fuel expands when hot.
Fuel escaping from an
overfilled tank could make its
way onto the rear tyre. This
could cause a fall.
Do not fill the tank past the
bottom edge of the filler
neck.
Fuel attacks plastics,
which become dull or
unsightly.
Wipe off plastic parts immedi-
ately if they come into contact
with fuel. Leaded fuel will destroy
the catalytic converter.
Use only unleaded fuel.
Make sure the ground is
level and firm and place the
motorcycle on its stand.
Open the protective cap.
Open the fuel tank cap with
the ignition key by turning it
counter-clockwise.
Refuel with fuel of the grade
stated below.
Recommended fuel gradeSuper Plus, unleaded
98 ROZ Fuel grade, usable with
power- and consumption-
related restrictions
Super unleaded
95 ROZ
Usable fuel capacity
19 l
Reserve fuel
4l
Press the filler cap down
firmly to close.
Remove the key and close
the protective cap.
576zRiding