BMW MOTORRAD K 1200 S 2006 Rider's Manual (in English)
Manufacturer: BMW MOTORRAD, Model Year: 2006, Model line: K 1200 S, Model: BMW MOTORRAD K 1200 S 2006Pages: 163, PDF Size: 1.75 MB
Page 81 of 163

Accessories
General instructions . . . . . . . . . . . 80
Power socket . . . . . . . . . . . . . . . . . 80
Luggage . . . . . . . . . . . . . . . . . . . . . . 81
Case
OA
....................... 81
Breakdown assistance kit
OA
... 85
679zAccessories
Page 82 of 163
General instructionsBMW Motorrad recommends
the use of parts and ac-
cessories for your motorcycle
that are approved by BMW for
this purpose.
Genuine BMW parts and ac-
cessories and other products
which BMW has approved
can be obtained from your
authorised BMW Motorrad
dealer, together with expert
advice on their installation
and use.
These parts and products
have been tested by BMW for
safety, function and suitability.
BMW accepts product liability
for them.
Conversely, BMW is unable
to accept any liability whatso-
ever for parts and accessor-
ies which it has not approved.BMW Motorrad cannot
assess each non-BMW
product to determine whether
it can be used on or in con-
nection with BMW motor-
cycles without constituting
a safety hazard. Country-
specific official authorisa-
tion does not suffice as as-
surance. Tests conducted
by these instances cannot
make provision for all operat-
ing conditions experienced by
BMW motorcycles and, con-
sequently, they are not suffi-
cient in some circumstances.
Use only parts and accessor-
ies approved by BMW for
your motorcycle.
Whenever you are planning
modifications, comply with all
the legal requirements. Make
sure that the motorcycle does
not infringe national road-
vehicle construction and use
regulations.
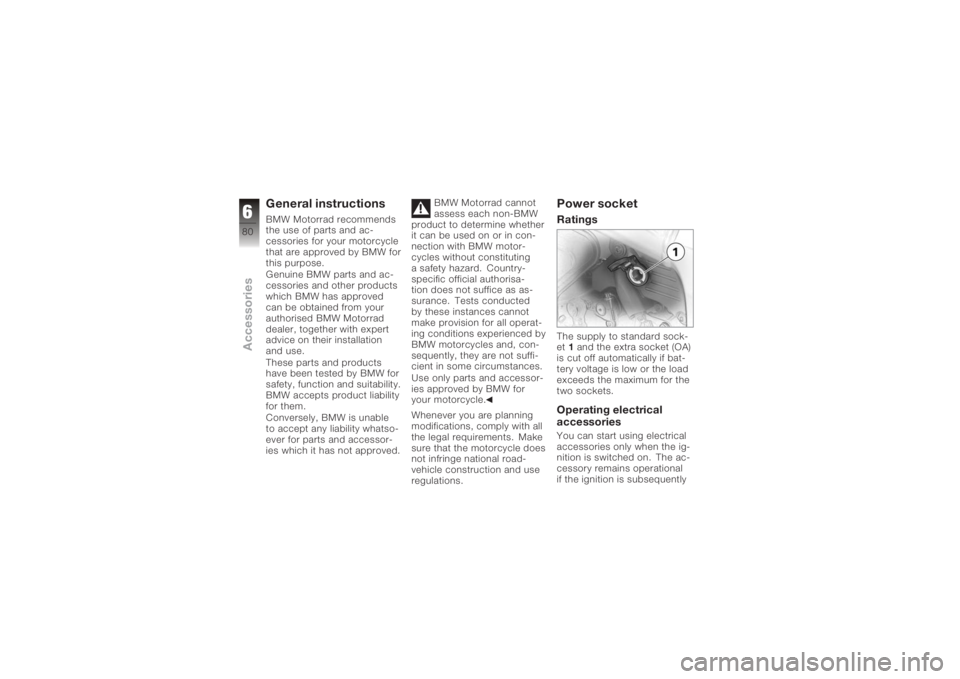
Power socketRatingsThe supply to standard sock-
et 1and the extra socket (OA)
is cut off automatically if bat-
tery voltage is low or the load
exceeds the maximum for the
two sockets.Operating electrical
accessoriesYou can start using electrical
accessories only when the ig-
nition is switched on. The ac-
cessory remains operational
if the ignition is subsequently
680zAccessories
Page 83 of 163
switched off. In order to en-
sure that the drain on the on-
board power supply system is
minimised, the supply to the
power socket is cut off ap-
proximately 15 minutes after
the ignition is switched off,
and it is also temporarily in-
terrupted during the start pro-
cedure.Cable routingThe cables from the power
socket to the auxiliary device
must be routed in such a way
that they:Do not impede the rider
Do not restrict or obstruct
the steering angle and
handling characteristics
Cannot be trapped
Incorrectly routed cables
can impede the rider.
Route the cables as
described above.
LuggageCorrect loading
Overloading and imbal-
anced loads can ad-
versely affect the motorcycle's
handling.
Do not exceed the permiss-
ible gross weight and be sure
to comply with the instruc-
tions on loading.
The maximum speed recom-
mended for riding with loaded
cases is 180 km/h.
Set spring preload, damping
characteristic and tyre pres-
sures to suit total weight.
Ensure that the case
volumes on the left and right
are equal.
Make sure that the weight
is uniformly distributed
between right and left. Pack heavy items at the
bottom and toward the in-
board side.
Max. load in each case (left
and right): 8 kg.
Max. load in tank rucksack
5 kg.
Case
OA
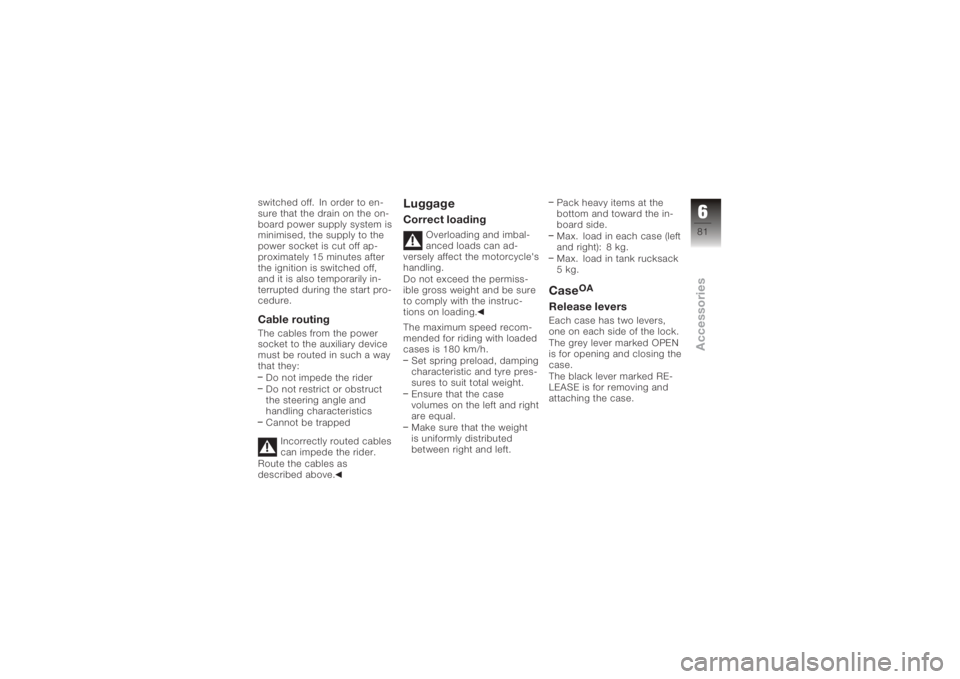
Release leversEach case has two levers,
one on each side of the lock.
The grey lever marked OPEN
is for opening and closing the
case.
The black lever marked RE-
LEASE is for removing and
attaching the case.
681zAccessories
Page 84 of 163
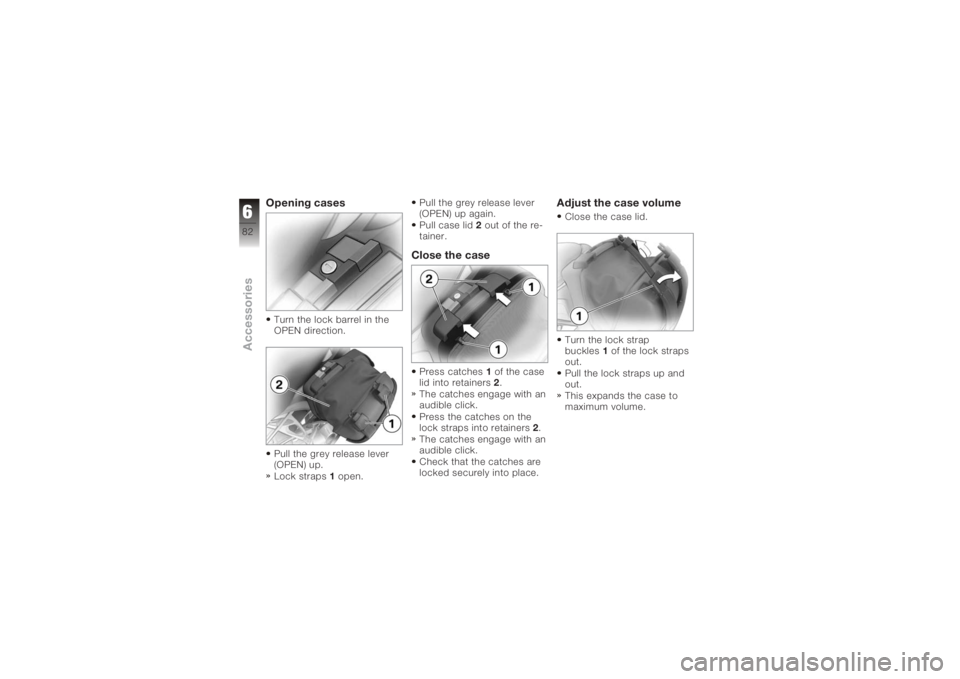
Opening casesTurn the lock barrel in the
OPEN direction.
Pull the grey release lever
(OPEN) up.
Lock straps1open. Pull the grey release lever
(OPEN) up again.
Pull case lid
2out of the re-
tainer.
Close the casePress catches 1of the case
lid into retainers 2.
The catches engage with an
audible click.
Press the catches on the
lock straps into retainers 2.
The catches engage with an
audible click.
Check that the catches are
locked securely into place.
Adjust the case volumeClose the case lid.
Turn the lock strap
buckles 1of the lock straps
out.
Pull the lock straps up and
out.
This expands the case to
maximum volume.
682zAccessories
Page 85 of 163
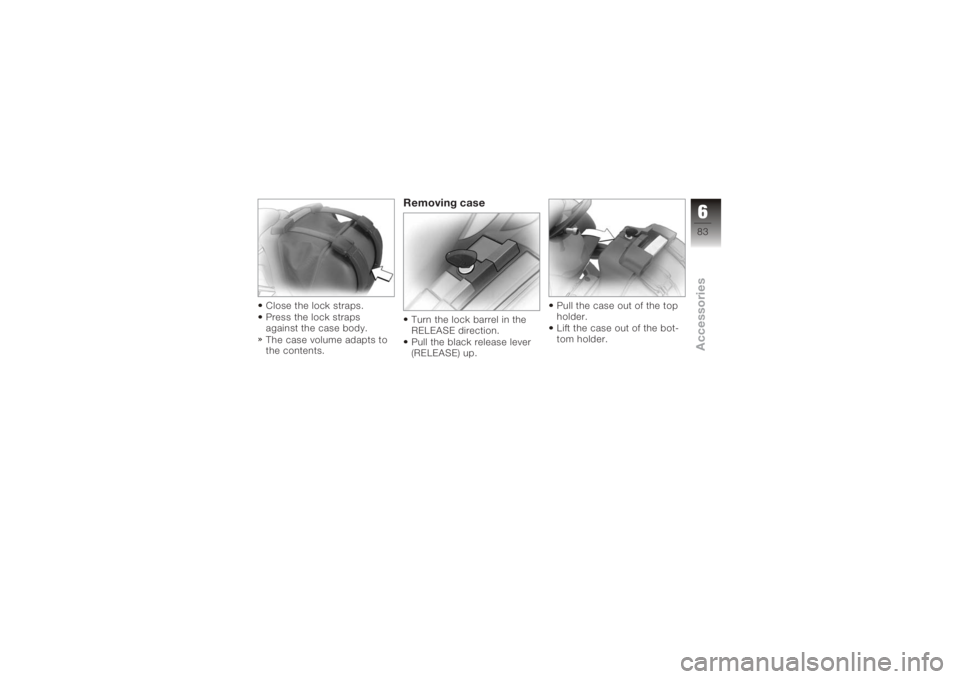
Close the lock straps.
Press the lock straps
against the case body.
The case volume adapts to
the contents.
Removing caseTurn the lock barrel in the
RELEASE direction.
Pull the black release lever
(RELEASE) up.Pull the case out of the top
holder.
Lift the case out of the bot-
tom holder.
683zAccessories
Page 86 of 163
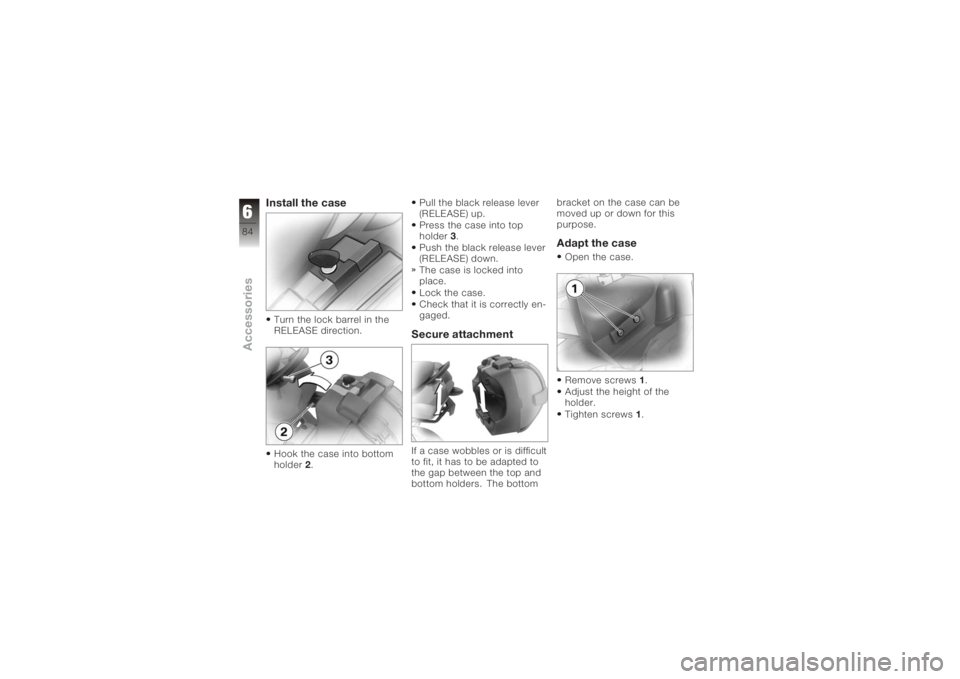
Install the caseTurn the lock barrel in the
RELEASE direction.
Hook the case into bottom
holder2. Pull the black release lever
(RELEASE) up.
Press the case into top
holder
3.
Push the black release lever
(RELEASE) down.
The case is locked into
place.
Lock the case.
Check that it is correctly en-
gaged.
Secure attachmentIf a case wobbles or is difficult
to fit, it has to be adapted to
the gap between the top and
bottom holders. The bottom bracket on the case can be
moved up or down for this
purpose.
Adapt the caseOpen the case.
Remove screws
1.
Adjust the height of the
holder.
Tighten screws 1.
684zAccessories
Page 87 of 163
Breakdown assistance
kit
OA
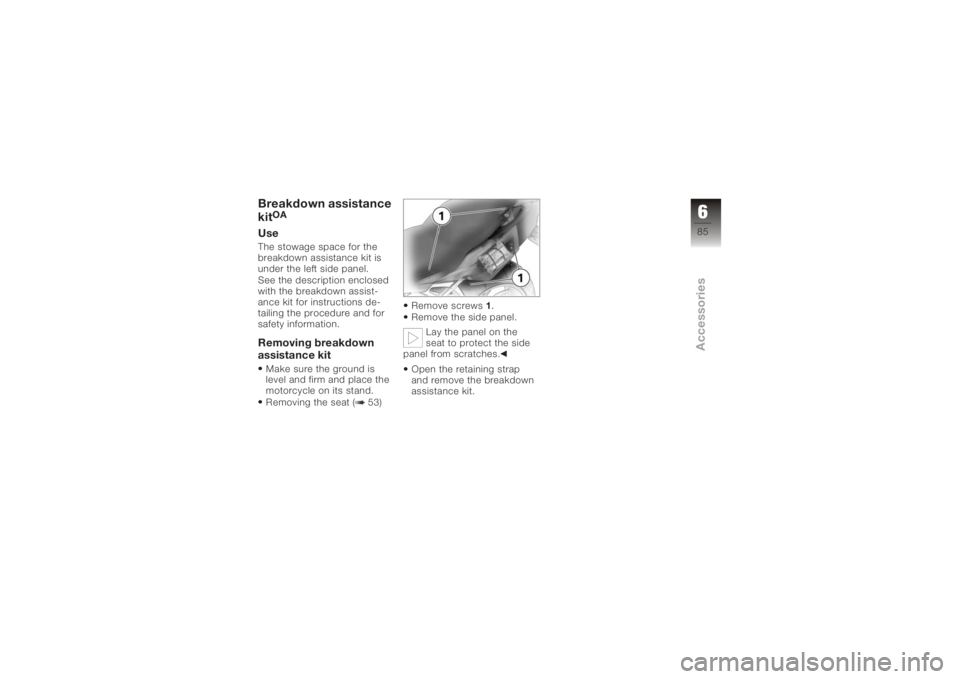
UseThe stowage space for the
breakdown assistance kit is
under the left side panel.
See the description enclosed
with the breakdown assist-
ance kit for instructions de-
tailing the procedure and for
safety information.Removing breakdown
assistance kitMake sure the ground is
level and firm and place the
motorcycle on its stand.
Removing the seat ( 53)Remove screws
1.
Remove the side panel.
Lay the panel on the
seat to protect the side
panel from scratches.
Open the retaining strap
and remove the breakdown
assistance kit.
685zAccessories
Page 88 of 163

686zAccessories
Page 89 of 163
Maintenance
General instructions . . . . . . . . . . . 88
Toolkit . . . . . . . . . . . . . . . . . . . . . . . . 88
Engine oil . . . . . . . . . . . . . . . . . . . . . 89
Brake system, general . . . . . . . . . 91
Brake pads . . . . . . . . . . . . . . . . . . . . 92
Brake fluid . . . . . . . . . . . . . . . . . . . . 94
Clutch . . . . . . . . . . . . . . . . . . . . . . . . 96
Tyres . . . . . . . . . . . . . . . . . . . . . . . . . 97
Rims . . . . . . . . . . . . . . . . . . . . . . . . . . 97
Wheels . . . . . . . . . . . . . . . . . . . . . . . 97
Front-wheel stand . . . . . . . . . . . . 105
Rear-wheel stand . . . . . . . . . . . . 107
Bulbs . . . . . . . . . . . . . . . . . . . . . . . . 108
Jump start . . . . . . . . . . . . . . . . . . . 118
Battery . . . . . . . . . . . . . . . . . . . . . . . 119
787zMaintenance
Page 90 of 163
General instructionsThe 'Maintenance' chapter
describes work involving the
replacement of wear parts
that can be performed with
minimum effort.
Special tightening torques are
listed as applicable.
If you are interested in inform-
ation on more extensive work,
we recommend the repair
manual on CD-ROM which
applies to your particular mo-
torcycle. You can obtain a
copy from your authorised
BMW Motorrad dealer.
Some of the work calls for
special tools and a thorough
knowledge of motorcycles.
If you are in doubt consult a
specialist workshop, prefer-
ably your authorised BMW
Motorrad dealer.
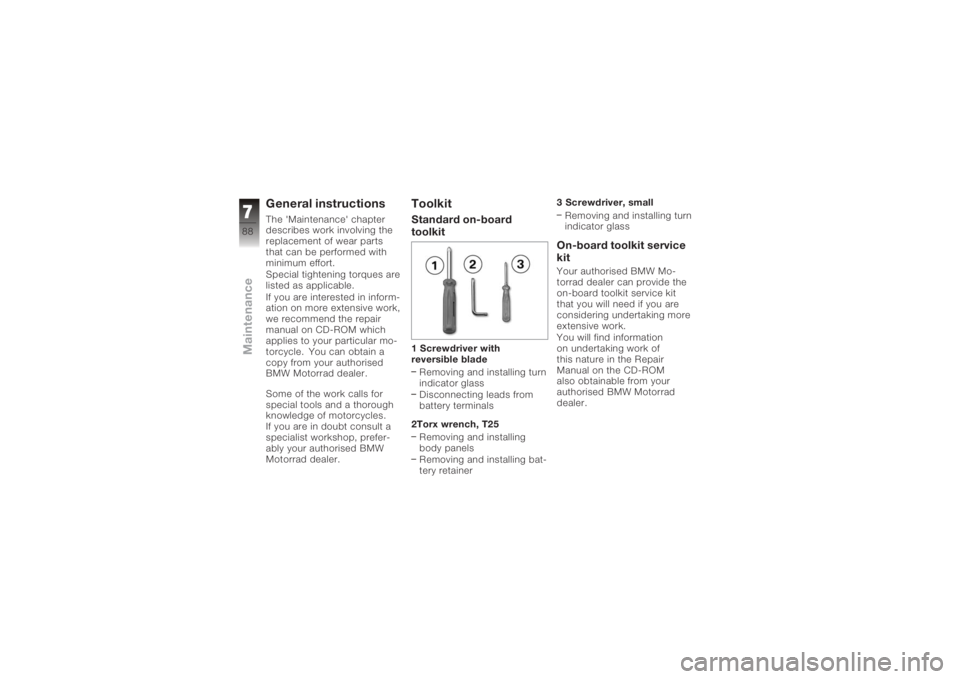
ToolkitStandard on-board
toolkit1 Screwdriver with
reversible bladeRemoving and installing turn
indicator glass
Disconnecting leads from
battery terminals
2Torx wrench, T25 Removing and installing
body panels
Removing and installing bat-
tery retainer 3 Screwdriver, small
Removing and installing turn
indicator glass
On-board toolkit service
kitYour authorised BMW Mo-
torrad dealer can provide the
on-board toolkit service kit
that you will need if you are
considering undertaking more
extensive work.
You will find information
on undertaking work of
this nature in the Repair
Manual on the CD-ROM
also obtainable from your
authorised BMW Motorrad
dealer.
788zMaintenance