brake BMW MOTORRAD K 1200 S 2007 Rider's Manual (in English)
[x] Cancel search | Manufacturer: BMW MOTORRAD, Model Year: 2007, Model line: K 1200 S, Model: BMW MOTORRAD K 1200 S 2007Pages: 166, PDF Size: 2.8 MB
Page 4 of 166

Table of ContentsYou can also consult the index at
the end of this Rider's Manual if
you want to find a particular topic
or item of information.
1 General instructions . . . . . 5
Overview . . . . . . . . . . . . . . . . . . . . . . 6
Abbreviations and symbols . . . . 6
Equipment . . . . . . . . . . . . . . . . . . . . 7
Technical data . . . . . . . . . . . . . . . . 7
Currency . . . . . . . . . . . . . . . . . . . . . . 7
2 General views . . . . . . . . . . . . . 9
General view, left side . . . . . . . . 11
General view, right side . . . . . . 13
Underneath the seat . . . . . . . . . 14
Handlebar fitting, left . . . . . . . . . 15
Handlebar fitting, right . . . . . . . . 16
Instrument cluster . . . . . . . . . . . . 17
Headlight . . . . . . . . . . . . . . . . . . . . . 183 Status indicators . . . . . . . 19
Standard status
indicators . . . . . . . . . . . . . . . . . . . . . 20
Status indicators with on-
board computer
OE
........... 21
Status indicators with
tyre-pressure monitoring
(RDC)
OE...................... 22
Standard warnings . . . . . . . . . . . 22
Warnings issued by the on-
board computer
OE
........... 27
ABS warnings . . . . . . . . . . . . . . . . 29
ASC warnings
OE
............. 31
RDC warnings
OE
............. 33
Anti-theft alarm
warnings
OE................... 38
4 Operation . . . . . . . . . . . . . . . . 41
Ignition switch and steering
lock . . . . . . . . . . . . . . . . . . . . . . . . . . 42
Electronic immobiliser . . . . . . . . 43
Clock . . . . . . . . . . . . . . . . . . . . . . . . . 44
Odometer and tripmeters . . . . 45
On-board computer
OE
....... 47 Tyre pressure monitoring
RDC
OE
....................... 51
Lights . . . . . . . . . . . . . . . . . . . . . . . . 52
Turn indicators . . . . . . . . . . . . . . . 53
Hazard warning flashers . . . . . . 53
Emergency off switch (kill
switch) . . . . . . . . . . . . . . . . . . . . . . . 54
Grip heating
OE
............... 55
Automatic Stability Control
ASC
OE
....................... 55
Clutch . . . . . . . . . . . . . . . . . . . . . . . . 56
Brakes . . . . . . . . . . . . . . . . . . . . . . . 57
Mirrors . . . . . . . . . . . . . . . . . . . . . . . 58
Spring preload . . . . . . . . . . . . . . . 58
Damping . . . . . . . . . . . . . . . . . . . . . 59
Electronic Suspension Ad-
justment ESA
OE
............. 59
Tyres . . . . . . . . . . . . . . . . . . . . . . . . . 62
Headlight . . . . . . . . . . . . . . . . . . . . . 62
Seat . . . . . . . . . . . . . . . . . . . . . . . . . . 63
Helmet holder . . . . . . . . . . . . . . . . 65
Luggage loops . . . . . . . . . . . . . . . 66
Page 5 of 166

5 Riding . . . . . . . . . . . . . . . . . . . . 67
Safety instructions . . . . . . . . . . . 68
Checklist . . . . . . . . . . . . . . . . . . . . . 70
Starting . . . . . . . . . . . . . . . . . . . . . . . 70
Running in . . . . . . . . . . . . . . . . . . . 73
Brakes . . . . . . . . . . . . . . . . . . . . . . . 74
Parking your motorcycle . . . . . 75
Refuelling . . . . . . . . . . . . . . . . . . . . 77
6 Engineering details . . . . . 79
Brake system with BMW Mo-
torrad Integral ABS . . . . . . . . . . . 80
Electronic engine manage-
ment with BMW Motorrad
ASC
OE
....................... 82
Tyre pressure monitoring
RDC
OE
....................... 84
7 Accessories . . . . . . . . . . . . . 87
General instructions . . . . . . . . . . 88
Power socket . . . . . . . . . . . . . . . . 88
Luggage . . . . . . . . . . . . . . . . . . . . . 89
CaseOA
...................... 90
Breakdown assistance
kit
OA
......................... 93 8 Maintenance . . . . . . . . . . . . 95
General instructions . . . . . . . . . . 96
Toolkit . . . . . . . . . . . . . . . . . . . . . . . . 96
Engine oil . . . . . . . . . . . . . . . . . . . . 97
Brake system, general . . . . . . . . 99
Brake pads . . . . . . . . . . . . . . . . . 100
Brake fluid . . . . . . . . . . . . . . . . . . 101
Clutch . . . . . . . . . . . . . . . . . . . . . . 103
Tyres . . . . . . . . . . . . . . . . . . . . . . . 104
Rims . . . . . . . . . . . . . . . . . . . . . . . 105
Wheels . . . . . . . . . . . . . . . . . . . . . 105
Front-wheel stand . . . . . . . . . . 113
Rear-wheel stand . . . . . . . . . . 114
Bulbs . . . . . . . . . . . . . . . . . . . . . . . 115
Jump starting . . . . . . . . . . . . . . 125
Battery . . . . . . . . . . . . . . . . . . . . . 126
9 Care . . . . . . . . . . . . . . . . . . . . . 131
Care products . . . . . . . . . . . . . . 132
Washing motorcycle . . . . . . . . 132
Cleaning easily damaged
components . . . . . . . . . . . . . . . . 132
Paint care . . . . . . . . . . . . . . . . . . 133
Protective wax coating . . . . . 134
Laying up motorcycle . . . . . . 134 Restoring motorcycle to
use......................... 134
10 Technical data . . . . . . . 135
Troubleshooting chart . . . . . . 136
Threaded fasteners . . . . . . . . 137
Engine . . . . . . . . . . . . . . . . . . . . . 138
Fuel . . . . . . . . . . . . . . . . . . . . . . . . 139
Engine oil . . . . . . . . . . . . . . . . . . 139
Clutch . . . . . . . . . . . . . . . . . . . . . . 140
Transmission . . . . . . . . . . . . . . . 140
Rear-wheel drive . . . . . . . . . . . 141
Running gear . . . . . . . . . . . . . . . 141
Brakes . . . . . . . . . . . . . . . . . . . . . 142
Wheels and tyres . . . . . . . . . . . 142
Electrics . . . . . . . . . . . . . . . . . . . . 144
Frame . . . . . . . . . . . . . . . . . . . . . . 145
Dimensions . . . . . . . . . . . . . . . . 146
Weights . . . . . . . . . . . . . . . . . . . . 146
Riding specifications . . . . . . . 147
Page 8 of 166
OverviewChapter 2 of this Rider's Manu-
al will provide you with an initial
overview of your motorcycle. All
maintenance and repair work on
the motorcycle is documented in
Chapter 11. This record of the
maintenance work you have had
performed on your motorcycle is
a precondition for generous treat-
ment of goodwill claims.
When the time comes to sell
your BMW, please remember
to hand over this Rider's Manu-
al; it is an important part of the
motorcycle.Abbreviations and
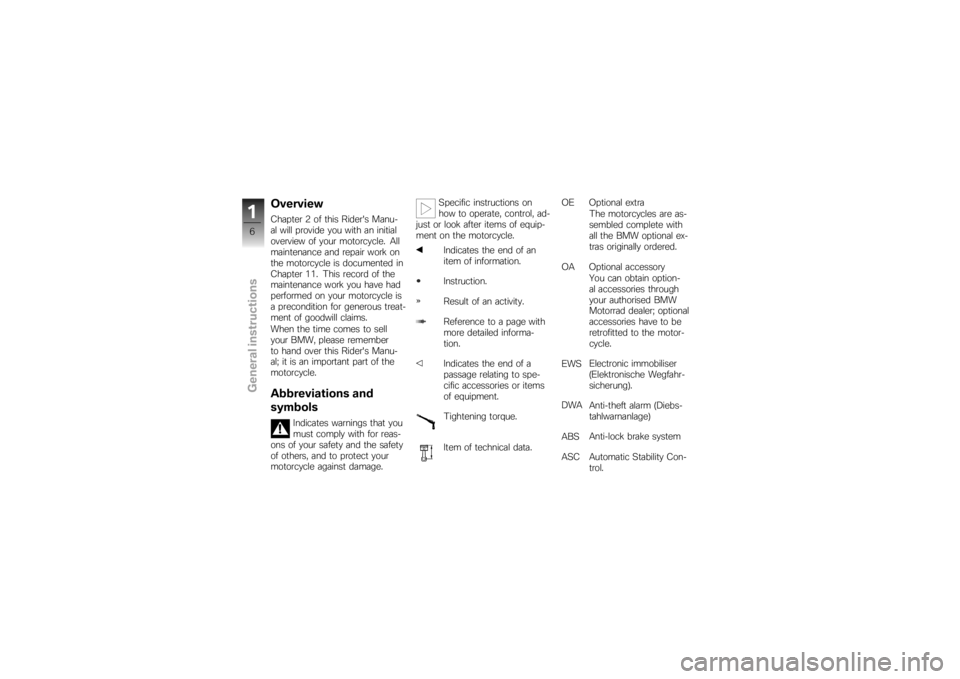
symbols
Indicates warnings that you
must comply with for reas-
ons of your safety and the safety
of others, and to protect your
motorcycle against damage. Specific instructions on
how to operate, control, ad-
just or look after items of equip-
ment on the motorcycle.
Indicates the end of an
item of information.
Instruction.
Result of an activity.
Reference to a page with
more detailed informa-
tion.
Indicates the end of a
passage relating to spe-
cific accessories or items
of equipment.
Tightening torque.
Item of technical data. OE Optional extra
The motorcycles are as-
sembled complete with
all the BMW optional ex-
tras originally ordered.
OA Optional accessory You can obtain option-
al accessories through
your authorised BMW
Motorrad dealer; optional
accessories have to be
retrofitted to the motor-
cycle.
EWS Electronic immobiliser
(Elektronische Wegfahr-
sicherung).
DWA Anti-theft alarm (Diebs-
tahlwarnanlage)
ABS Anti-lock brake system
ASC Automatic Stability Con- trol.
16zGeneral instructions
Page 15 of 166

General view, right side1Engine oil level indicator
( 97)
2 Fuel filler neck ( 77)
3 Battery compartment
( 128)
4 Brake-fluid reservoir, front
( 100)
5 Type plate (on rear cross-
tube)
6 Vehicle identification num-
ber (on side panel, front
right)
7 Brake-fluid reservoir, rear
( 102)
213zGeneral views
Page 28 of 166
If the battery is not char-
ging, continuing to ride can
cause it to discharge completely,
in which case it will suffer irrepar-
able damage.
If possible, do not continue your
journey.
Battery is not being charged.
You can continue to ride until
the battery is discharged. Bear
in mind, however, that the en-
gine could cut out suddenly
and that the battery could dis-
charge until completely flat,
in which case it might have
suffered irreparable damage.
Have the fault rectified as
quickly as possible by a
specialist workshop, preferably
an authorised BMW Motorrad
dealer.
Rear light bulb defective General warning light shows
yellow.
LAMPR !
appears on the dis-
play.
A defective bulb places
your safety at risk because
it is easier for other users to
oversee the motorcycle.
Replace defective bulbs as
soon as possible; always carry a
complete set of spare bulbs if
possible.
Rear light or brake light bulb de-
fective.
Replacing brake light and rear
light bulb ( 120)
Front light bulb defective
LAMPF !
appears on the dis-
play.
A defective bulb places
your safety at risk because
it is easier for other users to
oversee the motorcycle.
Replace defective bulbs as
soon as possible; always carry a complete set of spare bulbs if
possible.
Low-beam headlight, high-beam
headlight, side-light or turn-indic-
ator bulb defective.
Replacing low-beam headlight
bulb ( 116)
Replacing high-beam headlight
bulb ( 118)
Replacing parking-light bulb
( 119)
Replacing front turn indicator
bulbs ( 122)
Replacing rear turn indicator
bulbs ( 123)
Bulbs defective General warning light shows
yellow.
LAMPS !
appears on the dis-
play.
A defective bulb places
your safety at risk because
it is easier for other users to
oversee the motorcycle.
326zStatus indicators
Page 43 of 166

Operation
Operation
Ignition switch and steering lock..... 42
Electronic immobiliser . . . ............ 43
Clock ................................ 44
Odometer and tripmeters ............ 45
On-board computer
OE
............... 47
Tyre pressure monitoring
RDC
OE
.............................. 51
Lights ................................ 52
Turn indicators ....................... 53
Hazard warning flashers . . ............ 53
Emergency off switch (kill switch) . . . . 54
Grip heating
OE
....................... 55
Automatic Stability Control
ASC
OE
.............................. 55
Clutch ............................... 56 Brakes . .
............................. 57
Mirrors . . ............................. 58
Spring preload ....................... 58
Damping ............................. 59
Electronic Suspension Adjustment
ESA
OE
............................... 59
Tyres . . . ............................. 62
Headlight ............................ 62
Seat ................................. 63
Helmet holder ....................... 65
Luggage loops ....................... 66
441zOperation
Page 59 of 166
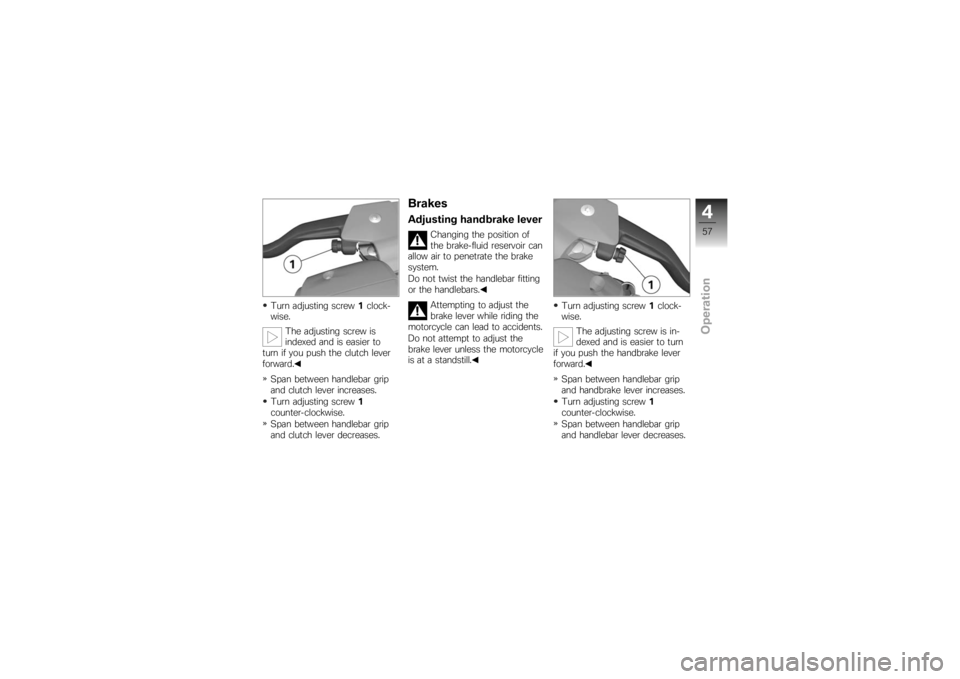
Turn adjusting screw1clock-
wise.
The adjusting screw is
indexed and is easier to
turn if you push the clutch lever
forward.
Span between handlebar grip
and clutch lever increases.
Turn adjusting screw 1
counter-clockwise.
Span between handlebar grip
and clutch lever decreases.
BrakesAdjusting handbrake lever
Changing the position of
the brake-fluid reservoir can
allow air to penetrate the brake
system.
Do not twist the handlebar fitting
or the handlebars.
Attempting to adjust the
brake lever while riding the
motorcycle can lead to accidents.
Do not attempt to adjust the
brake lever unless the motorcycle
is at a standstill. Turn adjusting screw
1clock-
wise.
The adjusting screw is in-
dexed and is easier to turn
if you push the handbrake lever
forward.
Span between handlebar grip
and handbrake lever increases.
Turn adjusting screw 1
counter-clockwise.
Span between handlebar grip
and handlebar lever decreases.
457zOperation
Page 69 of 166

Riding
Riding
Safety instructions................... 68
Checklist ............................. 70
Starting .............................. 70
Running in ........................... 73
Brakes ............................... 74
Parking your motorcycle . ............ 75
Refuelling ............................ 77
567zRiding
Page 72 of 166
ChecklistUse the following checklist to
check important functions, set-
tings and wear limits before you
ride off.Brakes
Brake-fluid levels, front and rear
Clutch
Clutch fluid level
Shock absorber setting and
spring preload
Tyre-tread depth and tyre
pressures
Cases correctly installed and
luggage secured
At regular intervals: Engine oil level (every refuelling
stop)
Brake-pad wear (every third
refuelling stop)
StartingSide standYou cannot start the motorcycle
with the side stand extended and
a gear engaged. The engine will
switch itself off if you start it with
the gearbox in neutral and then
engage a gear before retracting
the side stand.GearboxYou can start the engine when
the gearbox is in neutral or if you
pull the clutch with a gear en-
gaged. Do not pull the clutch un-
til after you have switched on the
ignition, as otherwise the engine
will refuse to start. When the
gearbox is in neutral, the green
neutral telltale light is on and the
gear indicator in the multifunction
display shows N.
Starting engine.Kill switch 1in run position A.
Switch on the ignition.
Pre-ride check is performed.
( 71)
ABS self-diagnosis is
performed. ( 71)
with OE Automatic Stability
Control (ASC): Switch on the ignition.
Pre-ride check is performed.
( 71)
ABS self-diagnosis is
performed. ( 71)
570zRiding
Page 75 of 166
You can continue to ride. Bear
in mind that the ASC function
is not available.
Have the fault rectified as
quickly as possible by a
specialist workshop, preferably
an authorised BMW Motorrad
dealer.Running inThe first 1000 kmWhile running in the motor-
cycle, vary the throttle opening
and engine-speed range fre-
quently.
Try to do most of your rid-
ing during this initial period on
twisting, fairly hilly roads, avoid-
ing high-speed main roads and
highways if possible.Exceeding the specified en-
gine speeds while running
in will lead to increased engine
wear. Keep to the specified engine
speeds for running in.
Do not exceed the rpm limits
recommended for running in.
Running-in speed
<7000 min
-1
No full-load acceleration.
Avoid low engine speeds at full
load.
Do not omit the first inspection
after 500 - 1200 km.Brake padsNew brake pads must "bed
down" and therefore do not
achieve their optimum friction
levels during the first 500
km. You can compensate for
this initial reduction in braking
efficiency by exerting greater
pressure on the levers. New brake pads can ex-
tend stopping distance by a
significant margin.
Apply the brakes in good time.
TyresNew tyres have a smooth sur-
face. This must be roughened by
riding in a restrained manner at
various heel angles until the tyres
are run in. This running in pro-
cedure is essential if the tyres are
to achieve maximum grip.
Tyres do not have their full
grip when new and there
is a risk of accidents at extreme
angles of heel.
Avoid extreme angles of heel.
573zRiding