ESP BMW X1 2014 E84 Owner's Manual
[x] Cancel search | Manufacturer: BMW, Model Year: 2014, Model line: X1, Model: BMW X1 2014 E84Pages: 297, PDF Size: 7 MB
Page 5 of 297
Addendum
ADDENDUM TO BMW X1 OWNER’S
MANUAL 1402957353
We wanted to provide you with some
updates and clarifications with respect to
the printed BMW Owner’s Manual.
These updates and clarifications will
supersede the materials contained in
that document.
1.Where the terms “service center,”
“the service center,” “your service
center,” “service specialist,’ or
“service” are used in the Owner’s
Manual, we wanted to clarify that
the terms refer to a BMW dealer’s
service center or another service
center or repair shop that employs
trained personnel that can perform
maintenance and repair work on
your vehicle in accordance with
BMW specifications.
2.Where the text of the Owner’s
Manual contains an affirmative
instruction to contact a “service
center” or “your service center,” we
wanted to clarify that BMW
recommends that, if you are faced
with one of the situations addressed
by that text, you contact or seek the
assistance of a BMW dealer’s
service center or another service
center or repair shop that employs
trained personnel that can perform
maintenance and repair work on
your vehicle in accordance with
BMW specifications.
While BMW of North America LLC,
at no cost to you, will pay for repairs
required by the limited warranties
provided with respect to your
vehicle and for maintenance under
the Maintenance Program during
the applicable warranty and
maintenance coverage periods, you
are free to elect, both during those
periods and thereafter, to have
maintenance and repair work
provided by other service centers or
repair shops.
3.Where the Owner’s Manual makes
reference to parts and accessories
having been approved by BMW,
those references are intended to
reflect that those parts and
accessories are recommended by
BMW of North America LLC. You
may elect to use other parts and
accessories, but, if you do, we
recommend that you make sure that
any such parts and/or accessories
are appropriate for use on your
vehicle.
4.At page 6 and page 7, under the
warranty section’s discussion of
homologation, where it states that
you “cannot lodge warranty claims
for your vehicle there,” the text
should read that you “may not be
able to lodge warranty claims for
your vehicle there.”
5.At page 7, in the “Parts and
accessories” section, the sentence
beginning “For your own safety, it is
recommended . . . ,” should be
disregarded and the following the
text should be read in lieu thereof:
“The manufacturer of your vehicle
Page 6 of 297
Addendum
recommends using genuine parts
and accessories approved by
BMW.”
In the fifth sentence of that
paragraph, the word “cannot”
should read “does not.”
6.At page 47, in the “Checking and
replacing safety belts” section, the
text beginning, “Have the work
performed only by your service
center . . .” should be disregarded
and the following text should be
read in lieu thereof: “BMW
recommends having this work
performed by a service center as it
is important that this safety feature
functions properly.”
7.At page 131 and page 132 under
the heading: “Objects in the area
around the pedals” and at page 263
and page 264 under the heading:
“Carpets and floor mats,” the
paragraph that begins: “Only use
floor mats . . .” should be
disregarded and the following
language should be read in lieu
thereof: “The manufacturer of your
vehicle recommends that you use
floor mats that have been identified
by it as appropriate for use in your
vehicle and that can be properly
fixed in place.”
8.At page 138, under the heading:
“Have maintenance carried out,” the
sentence beginning, “Have the
maintenance carried out . . .” should
be disregarded and the following
text should be read in lieu thereof:
“BMW recommends that you have
the maintenance carried out by your
service center.”
9.At page 196, under “Telephone,”
the heading that reads “Approved
mobile phones” should read
“Compatible mobile phones.”
10.At page 222 and page 223, under
the heading “Apps” and subheading
“Requirements,” the section that
begins, “Use only . . . ,” should be
disregarded and the following text
should be read in lieu thereof: “The
manufacturer of your vehicle
recommends the use of BMW
recommended software; otherwise
there may be malfunctions in
system operations.”
11.At page 230, under the heading
“Pressure specifications,” the
sentence beginning, “The inflation
pressures apply to the tire
sizes . . . .” should be disregarded.
12.At page 238, under the heading:
“Approved wheels and tires,” the
term “Approved” should be
disregarded and in lieu thereof, the
term “Recommended” should be
read in its place. In addition, the
text of that section should be
disregarded and the following text
should be read in lieu thereof:
The manufacturer of your vehicle
strongly suggests that you use
wheels and tires that have been
recommended by the vehicle
manufacturer for your vehicle type;
otherwise, for example, despite
having the same official size ratings,
variations can lead to body contact
Page 12 of 297
▷Federal Emissions System Defect War‐
ranty▷Federal Emissions Performance Warranty▷California Emission Control System Lim‐
ited Warranty
Detailed information about these warranties is
listed in the Service and Warranty Information
Booklet for US models or in the Warranty and
Service Guide Booklet for Canadian models.
Your vehicle has been specifically adapted and
designed to meet the particular operating con‐
ditions and homologation requirements in your
country and continental region in order to de‐
liver the full driving pleasure while the vehicle
is operated under those conditions. If you wish
to operate your vehicle in another country or
region, you may be required to adapt your ve‐
hicle to meet different prevailing operating
conditions and homologation requirements.
You should also be aware of any applicable
warranty limitations or exclusions for such
country or region. In such case, please contact
Customer Relations for further information.
Maintenance
Maintain the vehicle regularly to sustain the
road safety, operational reliability and the New
Vehicle Limited Warranty.
Specifications for required maintenance meas‐
ures:
▷BMW Maintenance system▷Service and Warranty Information Booklet
for US models▷Warranty and Service Guide Booklet for
Canadian models
If the vehicle is not maintained according to
these specifications, this could result in seri‐
ous damage to the vehicle. Such damage is
not covered by the BMW New Vehicle Limited
Warranty.
Data memory
Numerous electronic components in your vehi‐
cle contain data memories that store technical
information on the vehicle condition, events
and faults, either temporarily or permanently.
This technical information generally docu‐
ments the state of a component, a module, a
system or the environment.▷Operating conditions of system compo‐
nents, such as filling levels.▷Status messages from the vehicle and its
individual components, such as wheel rpm/
speed, motion delay, transverse accelera‐
tion.▷Malfunctions and defects in important sys‐
tem components, such as lights and
brakes.▷Vehicle responses to special driving situa‐
tions, such as airbag deployment, use of
the stability control systems.▷Ambient conditions, such as the tempera‐
ture.
These data are of a technical nature only and
are used to detect and eliminate faults and to
optimize vehicle functions. Travel profiles of
routes driven with the vehicle cannot be cre‐
ated from these data. If services are used, for
instance in the event of repairs, service proc‐
esses, warranty cases, quality assurance, etc.,
this technical information can be read out from
the event and fault data memories by service
personnel, including the manufacturer, using
special diagnosis tools. This service personnel
can provide you with more information if
needed. After troubleshooting, the information
in the fault memory is cleared or overwritten
continuously.
Situations are conceivable during the use of
the vehicle in which these technical data could
become associated with a specific person in
combination with other information, such as an
accident report, damage to the vehicle, wit‐
ness accounts, etc., possibly with the involve‐
ment of an authorized expert.
Seite 8Notes8
Online Edition for Part no. 01 40 2 957 353 - X/14
Page 19 of 297
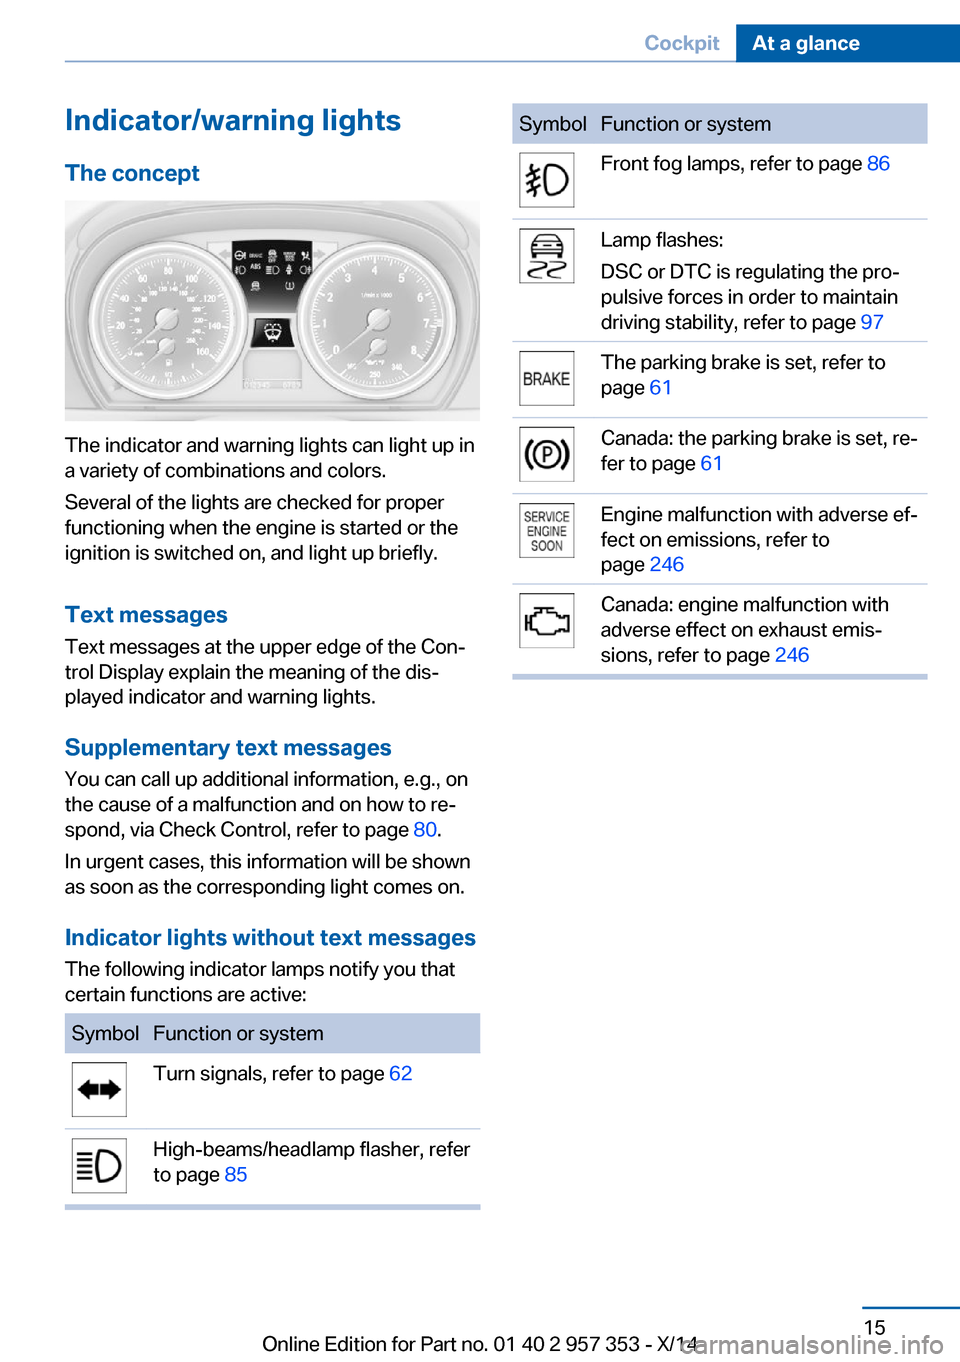
Indicator/warning lightsThe concept
The indicator and warning lights can light up in
a variety of combinations and colors.
Several of the lights are checked for proper
functioning when the engine is started or the
ignition is switched on, and light up briefly.
Text messages Text messages at the upper edge of the Con‐
trol Display explain the meaning of the dis‐
played indicator and warning lights.
Supplementary text messages
You can call up additional information, e.g., on
the cause of a malfunction and on how to re‐
spond, via Check Control, refer to page 80.
In urgent cases, this information will be shown
as soon as the corresponding light comes on.
Indicator lights without text messages The following indicator lamps notify you that
certain functions are active:
SymbolFunction or systemTurn signals, refer to page 62High-beams/headlamp flasher, refer
to page 85SymbolFunction or systemFront fog lamps, refer to page 86Lamp flashes:
DSC or DTC is regulating the pro‐
pulsive forces in order to maintain
driving stability, refer to page 97The parking brake is set, refer to
page 61Canada: the parking brake is set, re‐
fer to page 61Engine malfunction with adverse ef‐
fect on emissions, refer to
page 246Canada: engine malfunction with
adverse effect on exhaust emis‐
sions, refer to page 246Seite 15CockpitAt a glance15
Online Edition for Part no. 01 40 2 957 353 - X/14
Page 30 of 297
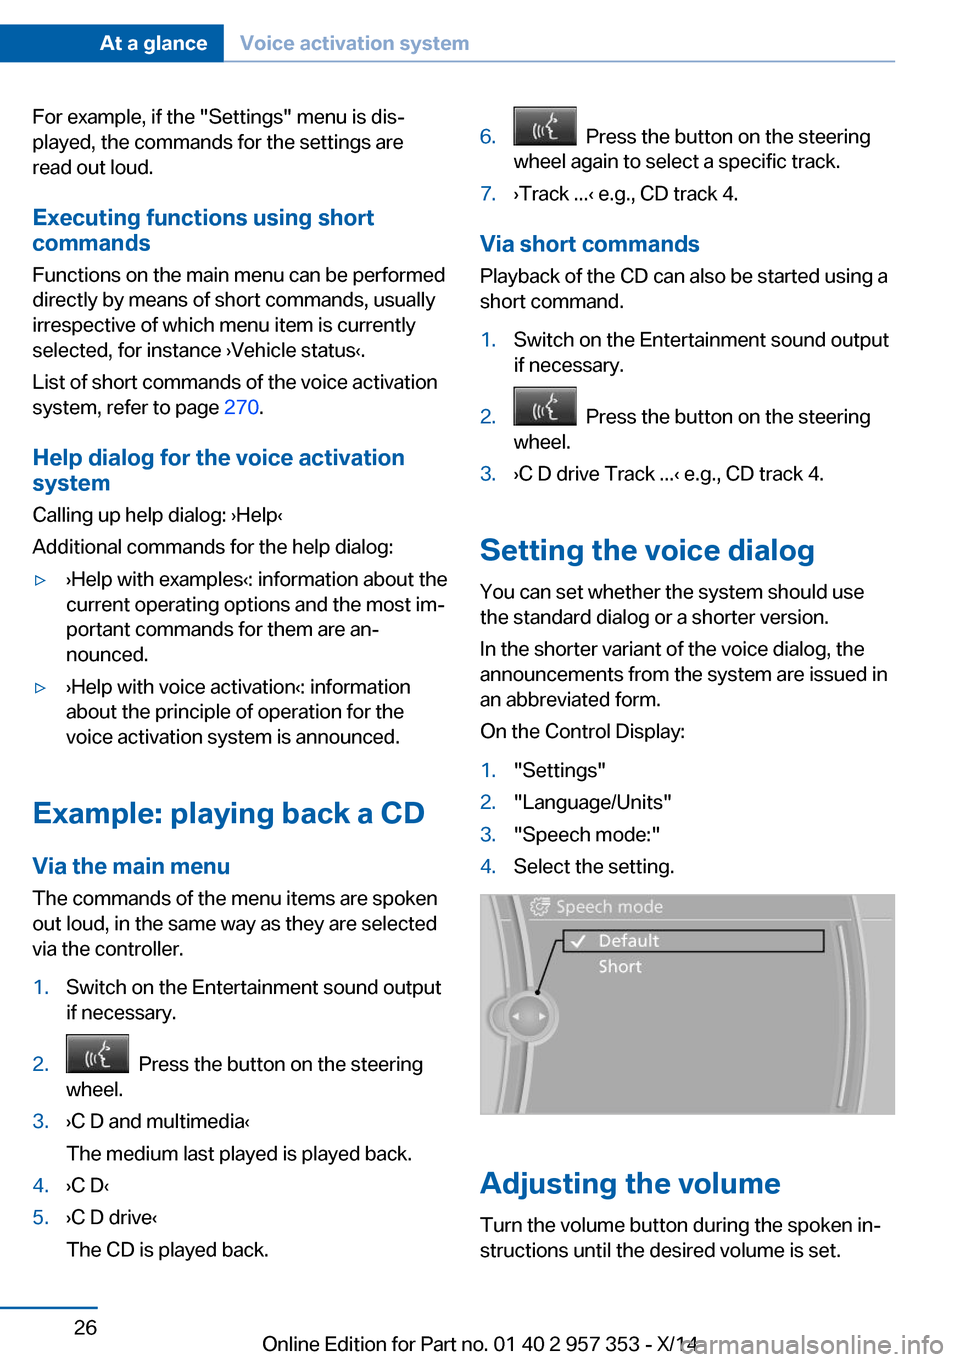
For example, if the "Settings" menu is dis‐
played, the commands for the settings are
read out loud.
Executing functions using short
commands
Functions on the main menu can be performed
directly by means of short commands, usually
irrespective of which menu item is currently selected, for instance ›Vehicle status‹.
List of short commands of the voice activation
system, refer to page 270.
Help dialog for the voice activation
system
Calling up help dialog: ›Help‹
Additional commands for the help dialog:▷›Help with examples‹: information about the
current operating options and the most im‐
portant commands for them are an‐
nounced.▷›Help with voice activation‹: information
about the principle of operation for the
voice activation system is announced.
Example: playing back a CD
Via the main menu The commands of the menu items are spoken
out loud, in the same way as they are selected
via the controller.
1.Switch on the Entertainment sound output
if necessary.2. Press the button on the steering
wheel.3.›C D and multimedia‹
The medium last played is played back.4.›C D‹5.›C D drive‹
The CD is played back.6. Press the button on the steering
wheel again to select a specific track.7.›Track ...‹ e.g., CD track 4.
Via short commands
Playback of the CD can also be started using a
short command.
1.Switch on the Entertainment sound output
if necessary.2. Press the button on the steering
wheel.3.›C D drive Track ...‹ e.g., CD track 4.
Setting the voice dialog
You can set whether the system should use
the standard dialog or a shorter version.
In the shorter variant of the voice dialog, the
announcements from the system are issued in
an abbreviated form.
On the Control Display:
1."Settings"2."Language/Units"3."Speech mode:"4.Select the setting.
Adjusting the volume
Turn the volume button during the spoken in‐
structions until the desired volume is set.
Seite 26At a glanceVoice activation system26
Online Edition for Part no. 01 40 2 957 353 - X/14
Page 35 of 297
▷The settings are automatically saved in the
profile currently activated in the remote
control.▷The remote control used is detected when
the vehicle is unlocked and the stored pro‐
file is called up.▷Your personal settings will be recognized
and called up again even if the vehicle has
been used in the meantime by someone
else with another remote control.
The individual settings are stored for a maxi‐
mum of four remote controls. They are stored
for two remote controls if Comfort Access is in
use.
Personal Profile settingsThe following functions and settings can be
stored in a profile.
More information on the settings can be found
under:
▷Assigning the programmable memory but‐
tons, refer to page 22.▷Response of the central locking system
when the car is being unlocked, refer to
page 32.▷Automatic locking of the vehicle, refer to
page 35.▷Automatic call-up of the driver's seat posi‐
tion after unlocking, refer to page 33.▷Settings for the display on the Control Dis‐
play and in the instrument cluster:▷12h/24h clock format, refer to
page 76.▷Date format, refer to page 77.▷Brightness of the Control Display, refer
to page 78.▷Language on the Control Display, refer
to page 77.▷Units of measure for fuel consumption,
distance covered/remaining distances,
and temperature, refer to page 75.▷Show visual warning for the Park Distance
Control PDC, refer to page 104.▷rearview camera:▷Function selection, refer to page 106.▷Type of display, refer to page 107.▷Light settings:▷Triple turn signal activation, refer to
page 62.▷Welcome lamps, refer to page 83.▷Headlamp courtesy delay feature, refer
to page 84.▷Daytime running lights, refer to
page 84.▷High-beam Assistant, refer to
page 85.▷Automatic climate control: AUTO program,
cooling function and automatic recircu‐
lated air control activated/deactivated,
temperature, air flow rate and distribution,
refer to page 108.▷Navigation:▷Voice activation, refer to page 155.▷Route criteria, refer to page 153.▷Map view settings, refer to page 157.▷Entertainment:▷Tone control, refer to page 164.▷Radio, stored stations, refer to
page 172.▷CD/multimedia, audio source listened
to last, refer to page 174.▷Telephone: volume, refer to page 200.
Central locking system
The concept The central locking system becomes active
when the driver's door is closed.
The system simultaneously engages and re‐
leases the locks on the following:
Seite 31Opening and closingControls31
Online Edition for Part no. 01 40 2 957 353 - X/14
Page 41 of 297
Comfort AccessThe concept
The vehicle can be accessed without activat‐
ing the remote control.
All you need to do is to have the remote con‐
trol with you, e.g., in your jacket pocket.
The vehicle automatically detects the remote
control when it is nearby or in the passenger
compartment.
Comfort Access supports the following func‐
tions:▷Unlocking/locking of the vehicle.▷Unlocking of the tailgate separately.▷Starting the engine.▷Convenient closing.
Functional requirement
▷To lock the vehicle, the remote control
must be located outside of the vehicle.▷The next unlocking and locking cycle is not
possible until after approx. 2 seconds.▷The engine can only be started if the re‐
mote control is inside the vehicle.
Comparison with ordinary remote
control
The functions can be controlled by pressing the buttons or via Comfort Access.
Unlocking
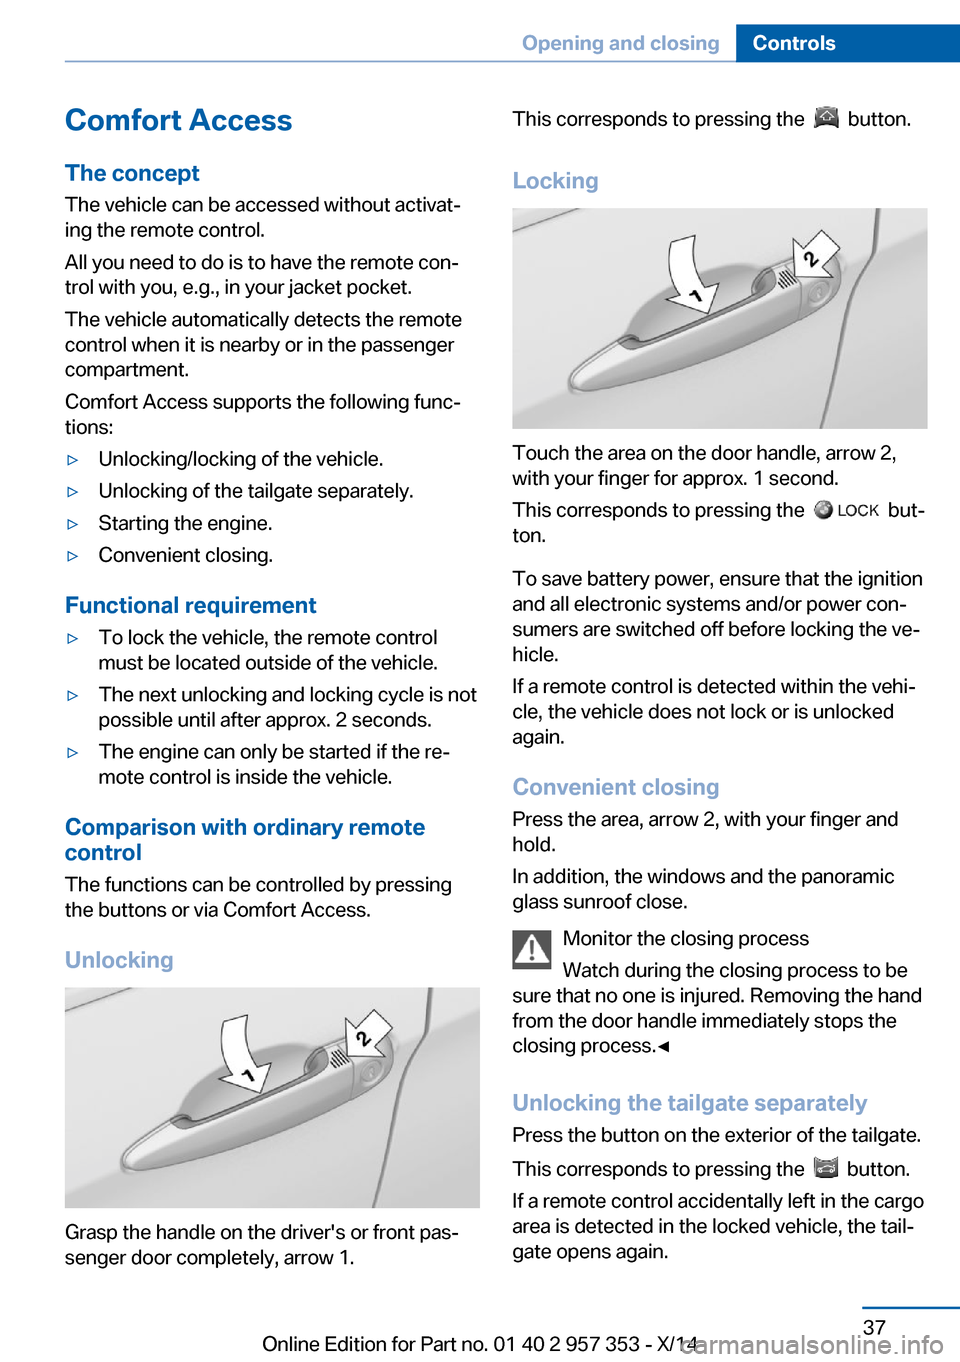
Grasp the handle on the driver's or front pas‐
senger door completely, arrow 1.
This corresponds to pressing the button.
Locking
Touch the area on the door handle, arrow 2,
with your finger for approx. 1 second.
This corresponds to pressing the
but‐
ton.
To save battery power, ensure that the ignition
and all electronic systems and/or power con‐
sumers are switched off before locking the ve‐
hicle.
If a remote control is detected within the vehi‐
cle, the vehicle does not lock or is unlocked
again.
Convenient closing Press the area, arrow 2, with your finger and
hold.
In addition, the windows and the panoramic
glass sunroof close.
Monitor the closing process
Watch during the closing process to be
sure that no one is injured. Removing the hand
from the door handle immediately stops the closing process.◀
Unlocking the tailgate separately
Press the button on the exterior of the tailgate.
This corresponds to pressing the
button.
If a remote control accidentally left in the cargo
area is detected in the locked vehicle, the tail‐
gate opens again.
Seite 37Opening and closingControls37
Online Edition for Part no. 01 40 2 957 353 - X/14
Page 43 of 297
Alarm systemThe conceptThe vehicle alarm system responds to:▷Opening of a door, the hood or the tailgate.▷Movements in the vehicle: interior motion
sensor, refer to page 40.▷Changes in the vehicle tilt, e.g., during at‐
tempts to steal a wheel or tow the car.▷Interruptions in battery voltage.
The alarm system briefly indicates tampering:
▷By sounding an acoustic alarm.▷By switching on the hazard warning sys‐
tem.▷By flashing the high beams.
Arming and disarming the alarm
system
General information
When you lock or unlock the vehicle, either
with the remote control or via Comfort Access,
the alarm system is armed or disarmed at the
same time.
Door lock and armed alarm systemThe alarm system is triggered when the door is
opened if the vehicle was unlocked via the
door lock.
To stop this alarm, unlock the vehicle with the
remote control or switch on the ignition, if nec‐
essary through emergency detection of the re‐
mote control.
Tailgate and armed alarm system
The tailgate can be opened using the remote
control, even if the alarm system is armed.
Press the button on the remote control.
After the tailgate is closed, it is locked and
monitored again by the alarm system. The haz‐
ard warning system flashes once.
In some market-specific versions, the tailgate
can only be opened using the remote control if
the vehicle was unlocked first.
Switching off the alarm▷Unlock the vehicle using the remote con‐
trol, refer to page 32.▷Insert the remote control all the way into
the ignition lock.
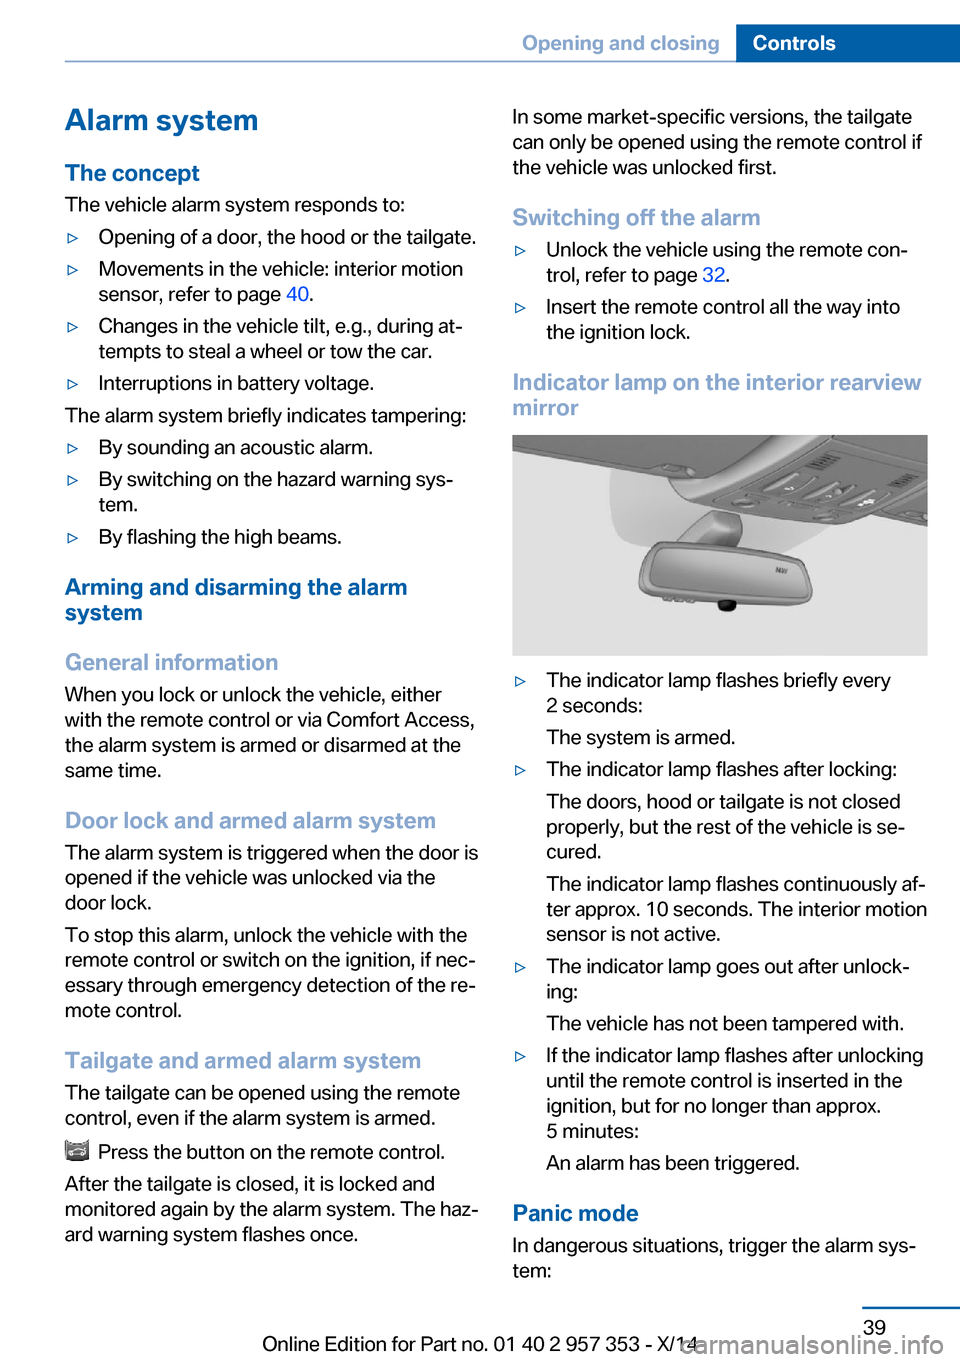
Indicator lamp on the interior rearview
mirror
▷The indicator lamp flashes briefly every
2 seconds:
The system is armed.▷The indicator lamp flashes after locking:
The doors, hood or tailgate is not closed
properly, but the rest of the vehicle is se‐
cured.
The indicator lamp flashes continuously af‐
ter approx. 10 seconds. The interior motion
sensor is not active.▷The indicator lamp goes out after unlock‐
ing:
The vehicle has not been tampered with.▷If the indicator lamp flashes after unlocking
until the remote control is inserted in the
ignition, but for no longer than approx.
5 minutes:
An alarm has been triggered.
Panic mode
In dangerous situations, trigger the alarm sys‐
tem:
Seite 39Opening and closingControls39
Online Edition for Part no. 01 40 2 957 353 - X/14
Page 44 of 297
Press the button on the remote control for
at least 3 seconds.
To switch off the alarm: press any button.
Tilt alarm sensor The tilt of the vehicle is monitored.
The alarm system responds in situations such
as attempts to steal a wheel or tow the car.
Interior motion sensor
For the sensor to function properly, the win‐
dows and panoramic glass sunroof must be
closed.
Avoiding unintentional alarms
The tilt alarm sensor and interior motion sen‐
sor can be switched off together, such as in
the following situations:▷In duplex garages.▷During transport on car-carrying trains, at
sea or on a trailer.▷When animals are to remain in the vehicle.
Switching off the tilt alarm sensor and
interior motion sensor
Press the remote control button again
within 10 seconds after the vehicle is locked.
The indicator lamp lights up for approx. 2 sec‐
onds and then flashes continuously.
The tilt alarm sensor and interior motion sen‐
sor remain switched off until the vehicle is
locked again.
Power windows General information Take the remote control with youTake the remote control with you when
leaving the vehicle so that children, for exam‐
ple, cannot operate the power windows and in‐
jure themselves.◀
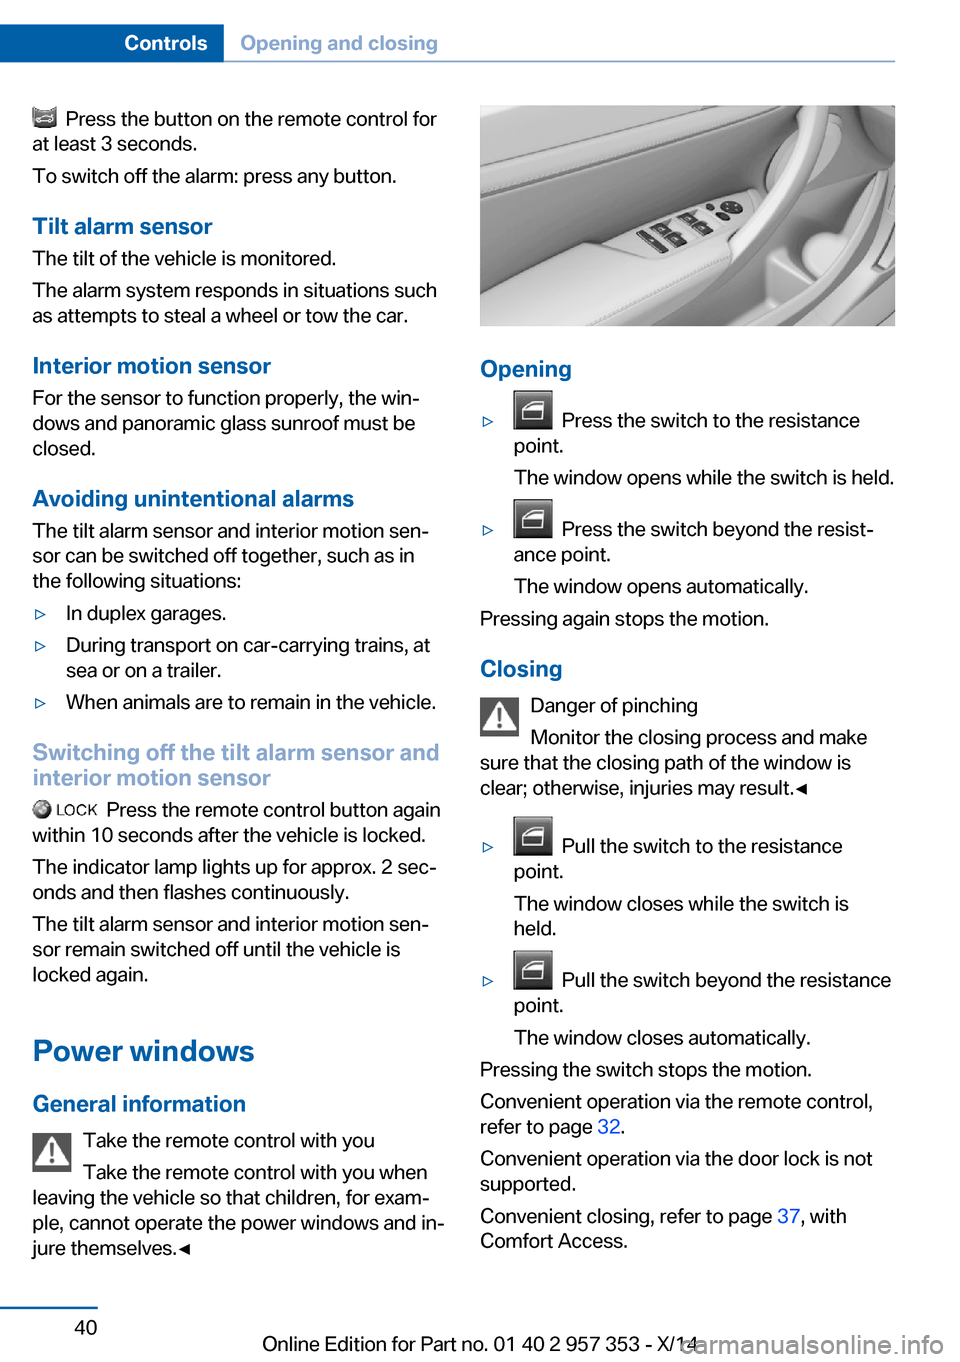
Opening
▷ Press the switch to the resistance
point.
The window opens while the switch is held.▷ Press the switch beyond the resist‐
ance point.
The window opens automatically.
Pressing again stops the motion.
Closing Danger of pinching
Monitor the closing process and make
sure that the closing path of the window is clear; otherwise, injuries may result.◀
▷ Pull the switch to the resistance
point.
The window closes while the switch is
held.▷ Pull the switch beyond the resistance
point.
The window closes automatically.
Pressing the switch stops the motion.
Convenient operation via the remote control,
refer to page 32.
Convenient operation via the door lock is not
supported.
Convenient closing, refer to page 37, with
Comfort Access.
Seite 40ControlsOpening and closing40
Online Edition for Part no. 01 40 2 957 353 - X/14
Page 46 of 297
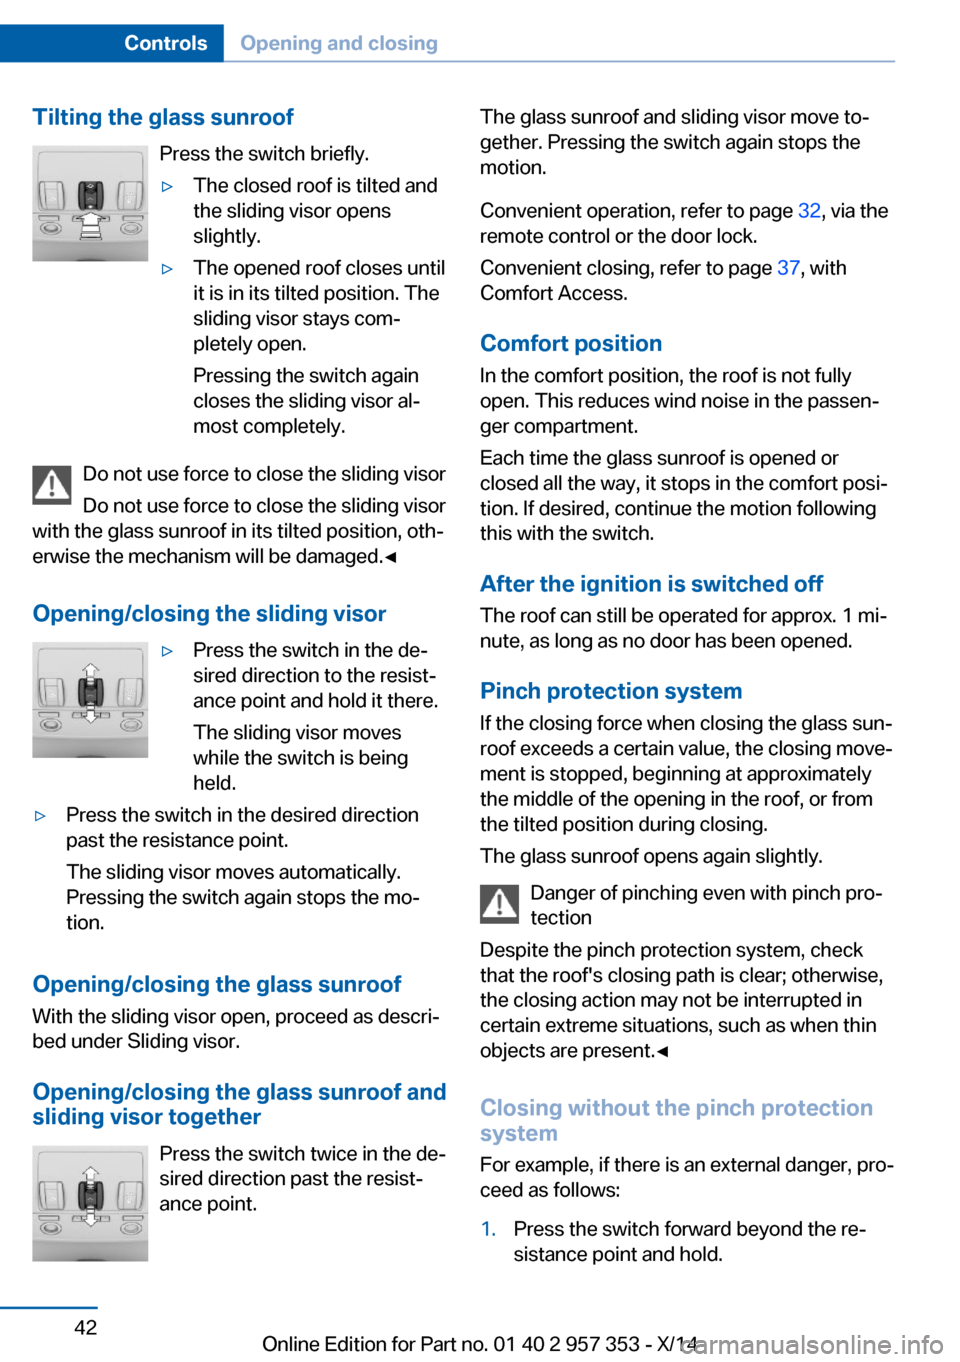
Tilting the glass sunroofPress the switch briefly.▷The closed roof is tilted and
the sliding visor opens
slightly.▷The opened roof closes until
it is in its tilted position. The
sliding visor stays com‐
pletely open.
Pressing the switch again
closes the sliding visor al‐
most completely.
Do not use force to close the sliding visor
Do not use force to close the sliding visor
with the glass sunroof in its tilted position, oth‐
erwise the mechanism will be damaged.◀
Opening/closing the sliding visor
▷Press the switch in the de‐
sired direction to the resist‐
ance point and hold it there.
The sliding visor moves
while the switch is being
held.▷Press the switch in the desired direction
past the resistance point.
The sliding visor moves automatically.
Pressing the switch again stops the mo‐
tion.
Opening/closing the glass sunroof
With the sliding visor open, proceed as descri‐
bed under Sliding visor.
Opening/closing the glass sunroof and
sliding visor together
Press the switch twice in the de‐
sired direction past the resist‐
ance point.
The glass sunroof and sliding visor move to‐
gether. Pressing the switch again stops the
motion.
Convenient operation, refer to page 32, via the
remote control or the door lock.
Convenient closing, refer to page 37, with
Comfort Access.
Comfort position
In the comfort position, the roof is not fully
open. This reduces wind noise in the passen‐
ger compartment.
Each time the glass sunroof is opened or
closed all the way, it stops in the comfort posi‐
tion. If desired, continue the motion following
this with the switch.
After the ignition is switched off
The roof can still be operated for approx. 1 mi‐
nute, as long as no door has been opened.
Pinch protection system
If the closing force when closing the glass sun‐
roof exceeds a certain value, the closing move‐
ment is stopped, beginning at approximately
the middle of the opening in the roof, or from
the tilted position during closing.
The glass sunroof opens again slightly.
Danger of pinching even with pinch pro‐
tection
Despite the pinch protection system, check
that the roof's closing path is clear; otherwise,
the closing action may not be interrupted in
certain extreme situations, such as when thin
objects are present.◀
Closing without the pinch protection
system
For example, if there is an external danger, pro‐
ceed as follows:1.Press the switch forward beyond the re‐
sistance point and hold.Seite 42ControlsOpening and closing42
Online Edition for Part no. 01 40 2 957 353 - X/14