driver seat adjustment BMW X1 XDRIVE 35I 2013 Owners Manual
[x] Cancel search | Manufacturer: BMW, Model Year: 2013, Model line: X1 XDRIVE 35I, Model: BMW X1 XDRIVE 35I 2013Pages: 291, PDF Size: 6.58 MB
Page 33 of 291

Panic mode
You can trigger the alarm system if you find
yourself in a dangerous situation.
Press the button on the remote control for at
least 3 seconds.
To switch off the alarm: press any button.
Unlocking tailgate
Press the button on the remote control for
approx. 1 second and release.
The tailgate will open slightly, regardless of
whether it was previously locked or unlocked.
The tailgate pivots back and up when it opens.
Ensure that adequate clearance is available be‐
fore opening.
To avoid locking yourself out of the vehicle, do
not place the remote control into the cargo area.
The tailgate is locked again as soon as it is
pushed closed.
Before and after each trip, check that the tailgate
has not been inadvertently unlocked.
Confirmation signals from the vehicle
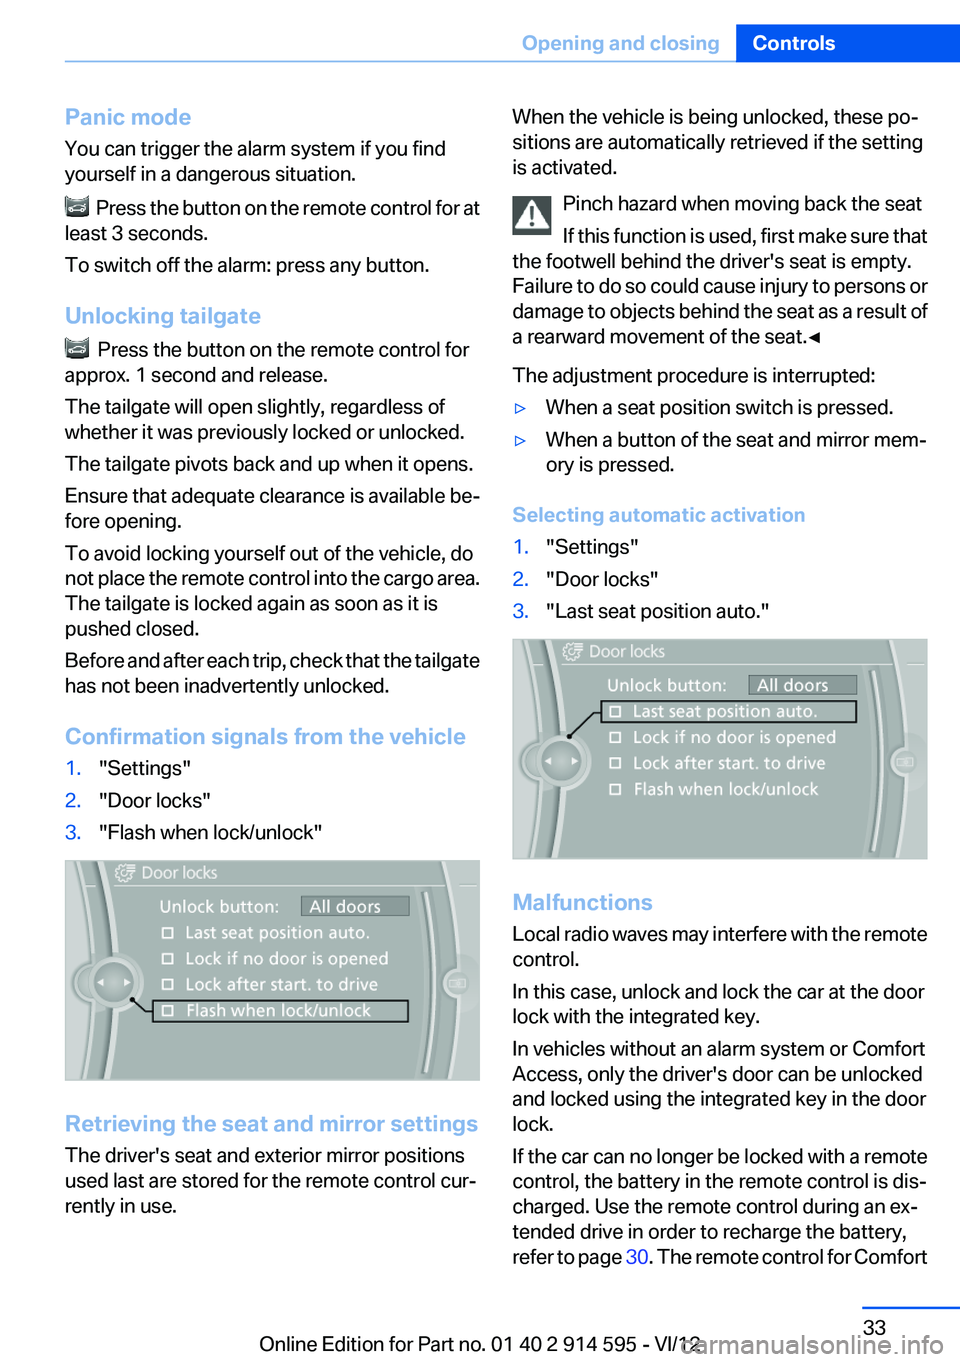
1."Settings"2."Door locks"3."Flash when lock/unlock"
Retrieving the seat and mirror settings
The driver's seat and exterior mirror positions
used last are stored for the remote control cur‐
rently in use.
When the vehicle is being unlocked, these po‐
sitions are automatically retrieved if the setting
is activated.
Pinch hazard when moving back the seat
If this function is used, first make sure that
the footwell behind the driver's seat is empty.
Failure to do so could cause injury to persons or
damage to objects behind the seat as a result of
a rearward movement of the seat.◀
The adjustment procedure is interrupted:▷When a seat position switch is pressed.▷When a button of the seat and mirror mem‐
ory is pressed.
Selecting automatic activation
1."Settings"2."Door locks"3."Last seat position auto."
Malfunctions
Local radio waves may interfere with the remote
control.
In this case, unlock and lock the car at the door
lock with the integrated key.
In vehicles without an alarm system or Comfort
Access, only the driver's door can be unlocked
and locked using the integrated key in the door
lock.
If the car can no longer be locked with a remote
control, the battery in the remote control is dis‐
charged. Use the remote control during an ex‐
tended drive in order to recharge the battery,
refer to page 30. The remote control for Comfort
Seite 33Opening and closingControls33
Online Edition for Part no. 01 40 2 914 595 - VI/12
Page 46 of 291

Reduction of restraining effect
Avoid wearing clothing that prevents the
belt from fitting properly, and pull the shoulder
belt periodically to readjust the tension across
your lap; otherwise, the retention effect of the
safety belt may be reduced.◀
Buckling the belt
Make sure you hear the latch plate engage in the
belt buckle.
Unbuckling the belt
1.Hold the belt firmly.2.Press the red button in the belt buckle.3.Guide the belt back into its reel.
Safety belt reminder for the driver's and
front passenger seat
The indicator lamp lights up and a sig‐
nal sounds. In addition, a message ap‐
pears on the Control Display. Check
whether the safety belt has been fas‐
tened correctly.
The safety belt reminder is active at speeds
above approx. 5 mph/8 km/h. It can also be ac‐
tivated if objects are placed on the front pas‐
senger seat.
Damage to safety belts
In the case of strain caused by accidents or
damage:
Have the safety belts, including the safety belt
tensioners, replaced and have the belt anchors
checked.
Checking and replacing safety belts
Have the work performed only by your
service center; otherwise, it cannot be ensured
that this safety feature will function properly.◀
Head restraints
Correctly adjusted head restraints
A correctly adjusted head restraint reduces the
risk of spinal injury in the event of an accident.
Adjusting the head restraint
Correctly adjust the head restraints of all
occupied seats; otherwise, there is an increased
risk of injury in an accident.◀
Height
Adjust the head restraint so that its center is ap‐
prox. at ear level.
Distance
Adjust the distance so that the head restraint is
as close as possible to the back of the head.
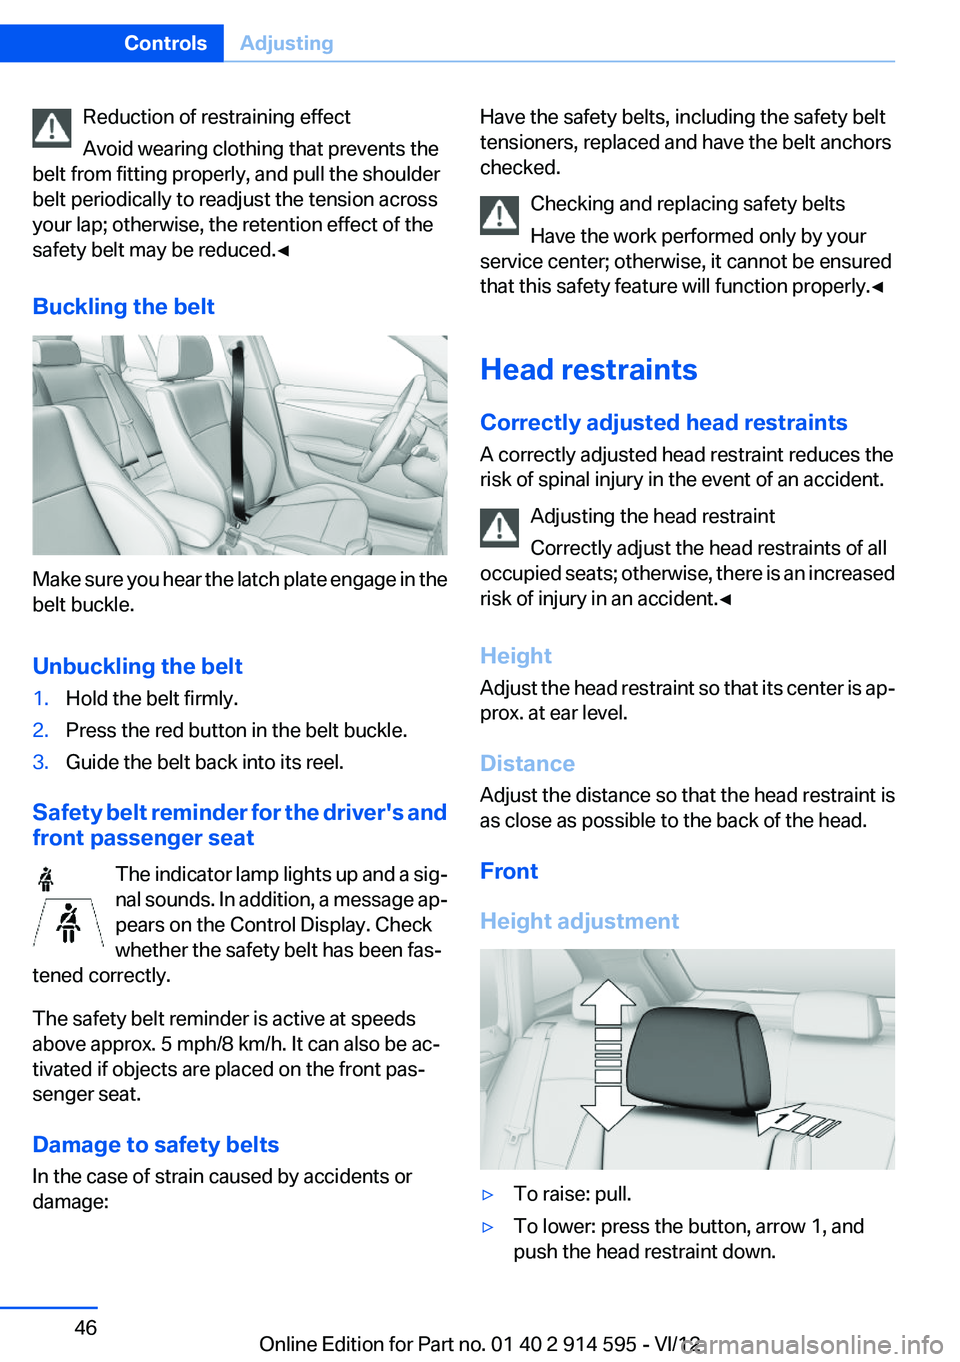
Front
Height adjustment▷To raise: pull.▷To lower: press the button, arrow 1, and
push the head restraint down.Seite 46ControlsAdjusting46
Online Edition for Part no. 01 40 2 914 595 - VI/12
Page 47 of 291

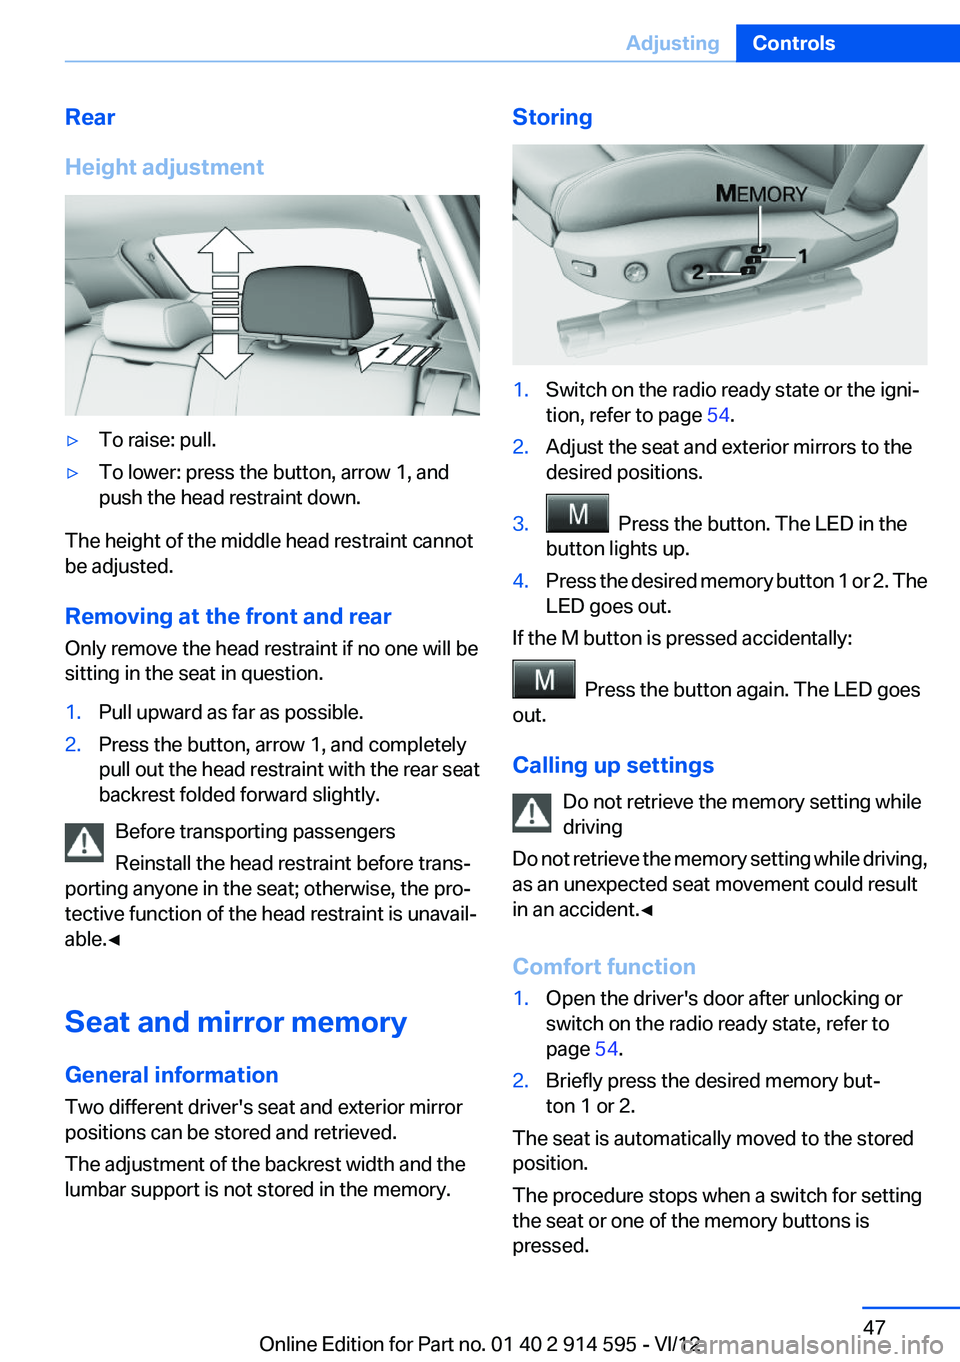
Rear
Height adjustment▷To raise: pull.▷To lower: press the button, arrow 1, and
push the head restraint down.
The height of the middle head restraint cannot
be adjusted.
Removing at the front and rear
Only remove the head restraint if no one will be
sitting in the seat in question.
1.Pull upward as far as possible.2.Press the button, arrow 1, and completely
pull out the head restraint with the rear seat
backrest folded forward slightly.
Before transporting passengers
Reinstall the head restraint before trans‐
porting anyone in the seat; otherwise, the pro‐
tective function of the head restraint is unavail‐
able.◀
Seat and mirror memory
General information
Two different driver's seat and exterior mirror
positions can be stored and retrieved.
The adjustment of the backrest width and the
lumbar support is not stored in the memory.
Storing1.Switch on the radio ready state or the igni‐
tion, refer to page 54.2.Adjust the seat and exterior mirrors to the
desired positions.3. Press the button. The LED in the
button lights up.4.Press the desired memory button 1 or 2. The
LED goes out.
If the M button is pressed accidentally:
Press the button again. The LED goes
out.
Calling up settings Do not retrieve the memory setting while
driving
Do not retrieve the memory setting while driving,
as an unexpected seat movement could result
in an accident.◀
Comfort function
1.Open the driver's door after unlocking or
switch on the radio ready state, refer to
page 54.2.Briefly press the desired memory but‐
ton 1 or 2.
The seat is automatically moved to the stored
position.
The procedure stops when a switch for setting
the seat or one of the memory buttons is
pressed.
Seite 47AdjustingControls47
Online Edition for Part no. 01 40 2 914 595 - VI/12
Page 279 of 291

Cruise control 98
Cruise control– Malfunction 99
Cupholder 122
Curb weight, refer to Weights 267
Current fuel consumption 69
Current location, storing 142
Curve lights, refer to Adaptive light control 81
D
Dashboard lighting, refer to In‐ strument lighting 83
Dashboard, refer to Cock‐ pit 12
Data, technical 266
Date
– Date format 74– Setting 73
Daytime running lights 81
Daytime running lights, bulb replacement 248
Defroster
– Rear window 107
Destination entry via the ad‐
dress book 142
Destination guidance 149
Destination guidance with in‐ termediate destinations 147
Destination input, naviga‐ tion 140
Digital clock 68
Digital compass 112
Digital radio 163
Dimming mirrors 49
Directional indicators, refer to Turn signals 59
Display lighting, refer to Instru‐ ment lighting 83
Displays and controls 12
Displays, care 262
Displays, cleaning 262
Displays, refer to Instrument cluster 14
Disposal, coolant 242
Disposal, vehicle battery 251
Distance warning, refer to Park Distance Control PDC 100
Divided rear seat backrest, re‐ fer to Enlarging the cargo
area 115
Divided screen view, split screen 22
Door key, refer to Remote con‐ trol with integrated key 30
Door lock 34
Doors, manual operation 34
Doors, unlocking and locking– Confirmation signals 33– From the inside 34– From the outside 32
DOT Quality Grades 233
Downhill control 96
Draft-free ventilation 108
Drive-off assistant 97
Driving away on inclines, refer to Drive-off assistant 97
Driving notes, breaking in 126
Driving notes, general 126
Driving on poor roads 128
Driving stability control sys‐ tems 94
Driving through water 127
Driving tips, refer to Driving notes 126
Dry air, refer to Cooling func‐ tion 107
DSC Dynamic Stability Con‐ trol 94
DTC Dynamic Traction Con‐ trol 95
DTMF suffix dialing 198
DVD/CD 170
DVDs, storing 176
DVD, video 172
Dynamic destination guid‐ ance 156
Dynamic Stability Control DSC 94
Dynamic Traction Control DTC 95
E
ECO PRO 134
ECO PRO display 134
ECO PRO driving mode 134
ECO PRO mode 134
EfficientDynamics, refer to Saving fuel 133
Electrical malfunction– Door lock 34– Driver's door 34– Fuel filler flap 225– Tailgate 36
Electric seat adjustment 44
Electronic brake-force distri‐ bution 94
Electronic engine oil level check 239
Electronic Stability Program ESP, refer to Dynamic Stabil‐
ity Control DSC 94
Emergency activation
– Automatic transmission, re‐
fer to Overriding selector
lever lock 64
Emergency operation
– Door lock, refer to Manual
operation 34
Emergency operation, fuel
filler flap, unlocking man‐
ually 225
Emergency Request 253
Emergency service, refer to Roadside Assistance 254
Energy-conscious driving, re‐ fer to Current fuel consump‐
tion 69
Energy, saving
– Automatic Engine Start/Stop
Function 56
Energy, saving, refer to Saving
fuel 133
Engine, breaking in 126
Engine compartment 238
Engine coolant, refer to Cool‐ ant 242
Engine oil, adding 241
Seite 279Everything from A to ZReference279
Online Edition for Part no. 01 40 2 914 595 - VI/12