heating BMW X1 XDRIVE 35I 2013 Owners Manual
[x] Cancel search | Manufacturer: BMW, Model Year: 2013, Model line: X1 XDRIVE 35I, Model: BMW X1 XDRIVE 35I 2013Pages: 291, PDF Size: 6.58 MB
Page 13 of 291
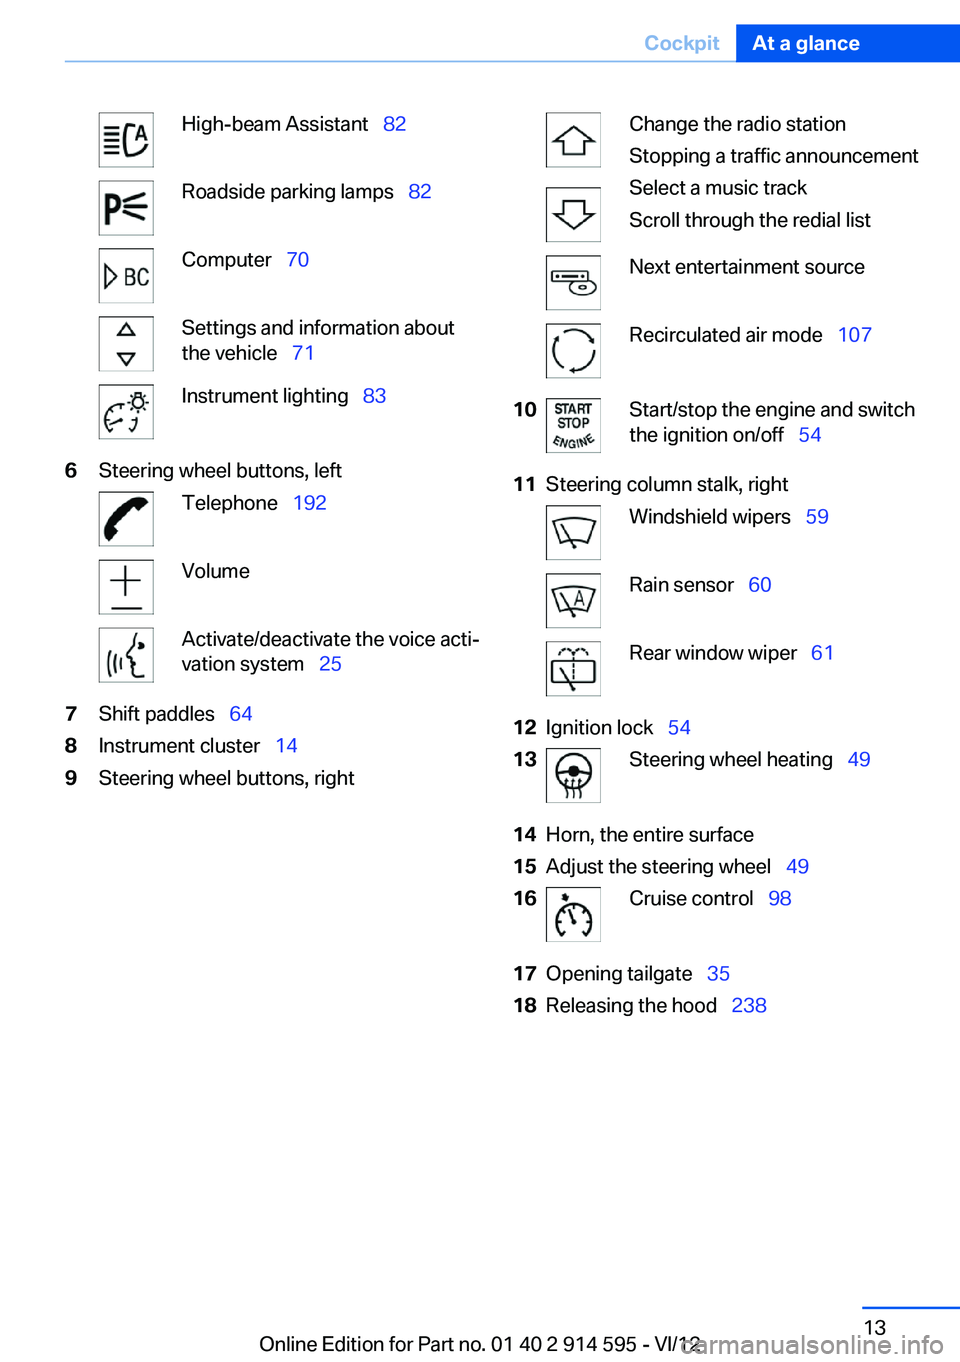
High-beam Assistant 82Roadside parking lamps 82Computer 70Settings and information about
the vehicle 71Instrument lighting 836Steering wheel buttons, leftTelephone 192VolumeActivate/deactivate the voice acti‐
vation system 257Shift paddles 648Instrument cluster 149Steering wheel buttons, rightChange the radio station
Stopping a traffic announcement
Select a music track
Scroll through the redial listNext entertainment sourceRecirculated air mode 10710Start/stop the engine and switch
the ignition on/off 5411Steering column stalk, rightWindshield wipers 59Rain sensor 60Rear window wiper 6112Ignition lock 5413Steering wheel heating 4914Horn, the entire surface15Adjust the steering wheel 4916Cruise control 9817Opening tailgate 3518Releasing the hood 238Seite 13CockpitAt a glance13
Online Edition for Part no. 01 40 2 914 595 - VI/12
Page 35 of 291
Locking and unlockingPress the button in the vehicle.
The doors and the tailgate are locked or un‐
locked when the front doors are closed, but they
are not secured against theft.
The fuel filler flap remains unlocked.
Automatic locking
The setting is stored for the remote control cur‐
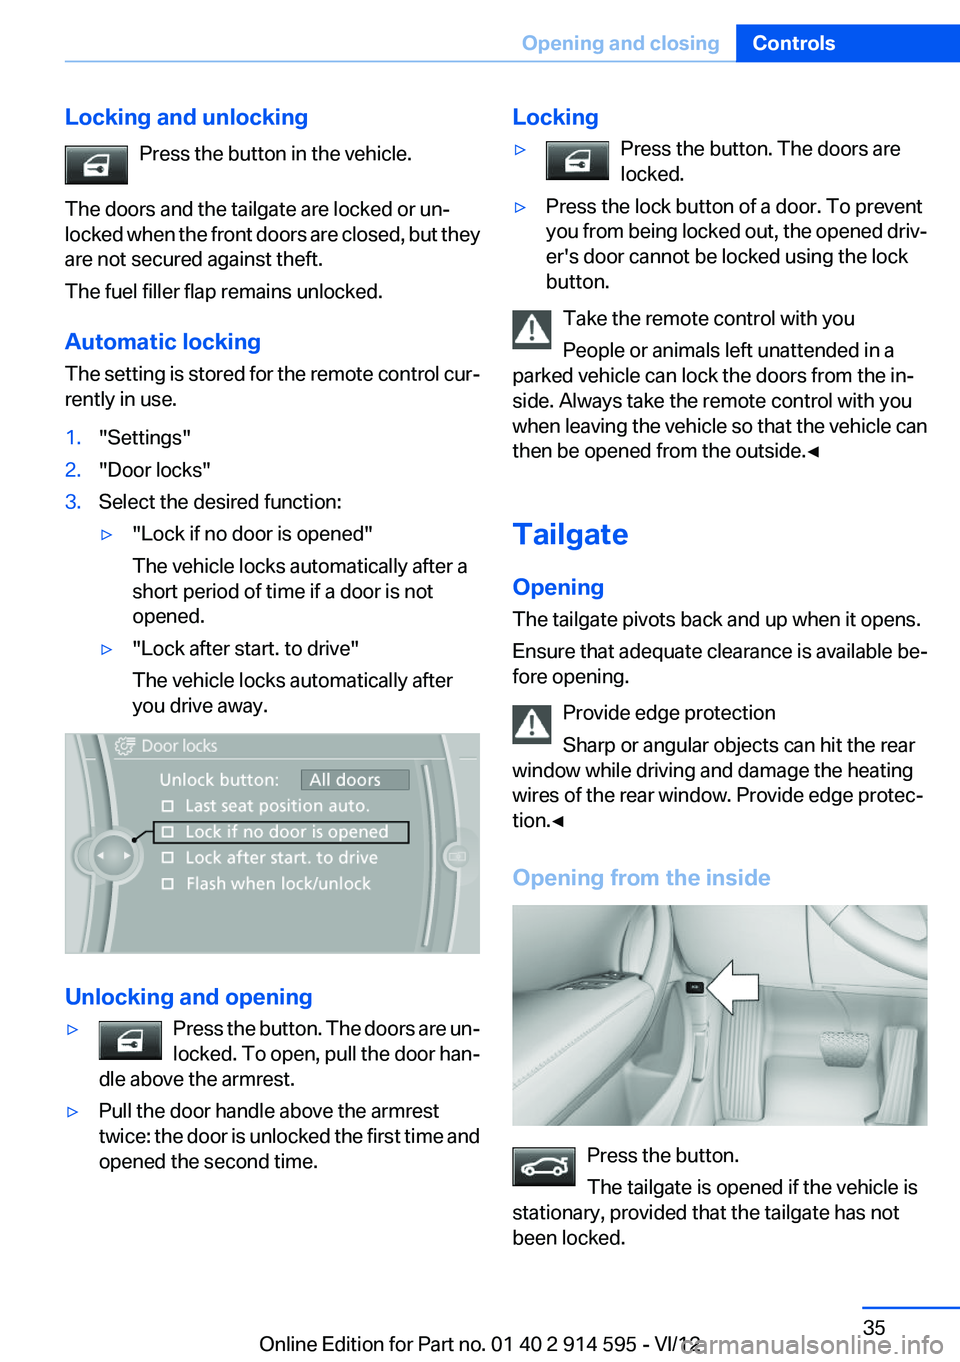
rently in use.1."Settings"2."Door locks"3.Select the desired function:▷"Lock if no door is opened"
The vehicle locks automatically after a
short period of time if a door is not
opened.▷"Lock after start. to drive"
The vehicle locks automatically after
you drive away.
Unlocking and opening
▷Press the button. The doors are un‐
locked. To open, pull the door han‐
dle above the armrest.▷Pull the door handle above the armrest
twice: the door is unlocked the first time and
opened the second time.Locking▷Press the button. The doors are
locked.▷Press the lock button of a door. To prevent
you from being locked out, the opened driv‐
er's door cannot be locked using the lock
button.
Take the remote control with you
People or animals left unattended in a
parked vehicle can lock the doors from the in‐
side. Always take the remote control with you
when leaving the vehicle so that the vehicle can
then be opened from the outside.◀
Tailgate
Opening
The tailgate pivots back and up when it opens.
Ensure that adequate clearance is available be‐
fore opening.
Provide edge protection
Sharp or angular objects can hit the rear
window while driving and damage the heating
wires of the rear window. Provide edge protec‐
tion.◀
Opening from the inside
Press the button.
The tailgate is opened if the vehicle is
stationary, provided that the tailgate has not
been locked.
Seite 35Opening and closingControls35
Online Edition for Part no. 01 40 2 914 595 - VI/12
Page 45 of 291
The width of the backrest can be changed with
the side wings to adjust the side support to your
own needs.
Press front or rear section of switch.
The backrest width decreases or increases.
Adjusting the rear seat backrests
Adjust the backrest tilt, refer to page 115.
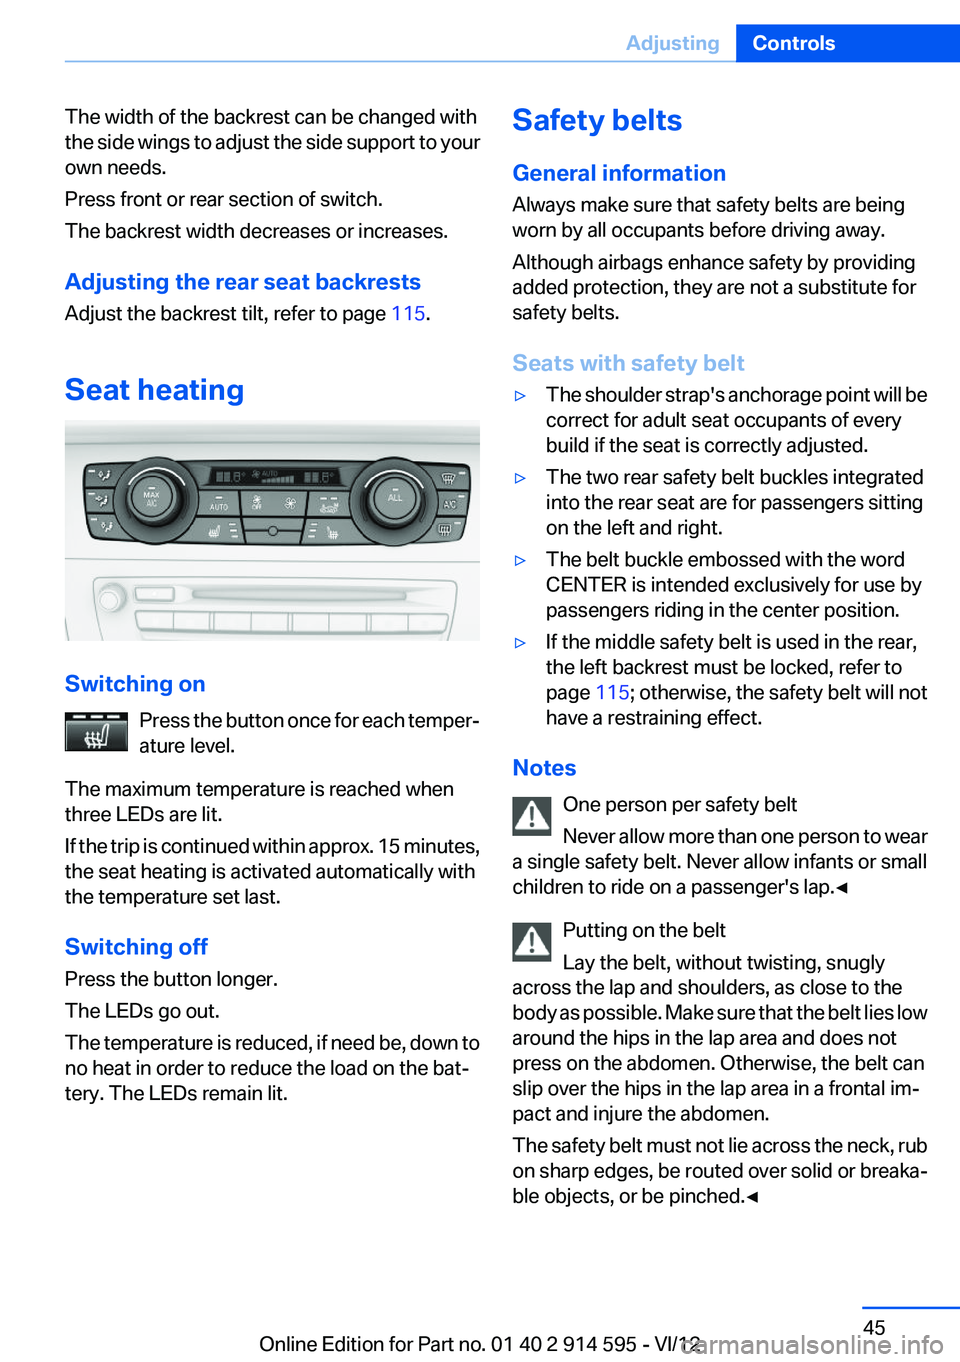
Seat heating
Switching on Press the button once for each temper‐
ature level.
The maximum temperature is reached when
three LEDs are lit.
If the trip is continued within approx. 15 minutes,
the seat heating is activated automatically with
the temperature set last.
Switching off
Press the button longer.
The LEDs go out.
The temperature is reduced, if need be, down to
no heat in order to reduce the load on the bat‐
tery. The LEDs remain lit.
Safety belts
General information
Always make sure that safety belts are being
worn by all occupants before driving away.
Although airbags enhance safety by providing
added protection, they are not a substitute for
safety belts.
Seats with safety belt▷The shoulder strap's anchorage point will be
correct for adult seat occupants of every
build if the seat is correctly adjusted.▷The two rear safety belt buckles integrated
into the rear seat are for passengers sitting
on the left and right.▷The belt buckle embossed with the word
CENTER is intended exclusively for use by
passengers riding in the center position.▷If the middle safety belt is used in the rear,
the left backrest must be locked, refer to
page 115; otherwise, the safety belt will not
have a restraining effect.
Notes
One person per safety belt
Never allow more than one person to wear
a single safety belt. Never allow infants or small
children to ride on a passenger's lap.◀
Putting on the belt
Lay the belt, without twisting, snugly
across the lap and shoulders, as close to the
body as possible. Make sure that the belt lies low
around the hips in the lap area and does not
press on the abdomen. Otherwise, the belt can
slip over the hips in the lap area in a frontal im‐
pact and injure the abdomen.
The safety belt must not lie across the neck, rub
on sharp edges, be routed over solid or breaka‐
ble objects, or be pinched.◀
Seite 45AdjustingControls45
Online Edition for Part no. 01 40 2 914 595 - VI/12
Page 49 of 291
Fold in the mirror in a car wash
Before entering an automatic car wash,
fold in the exterior mirrors by hand or with the
button; otherwise, they could be damaged, de‐
pending on the width of the vehicle.◀
Automatic heating
Depending on the external temperature, both
exterior mirrors are automatically heated when
the engine is running or the ignition is switched
on.
Interior rearview mirror
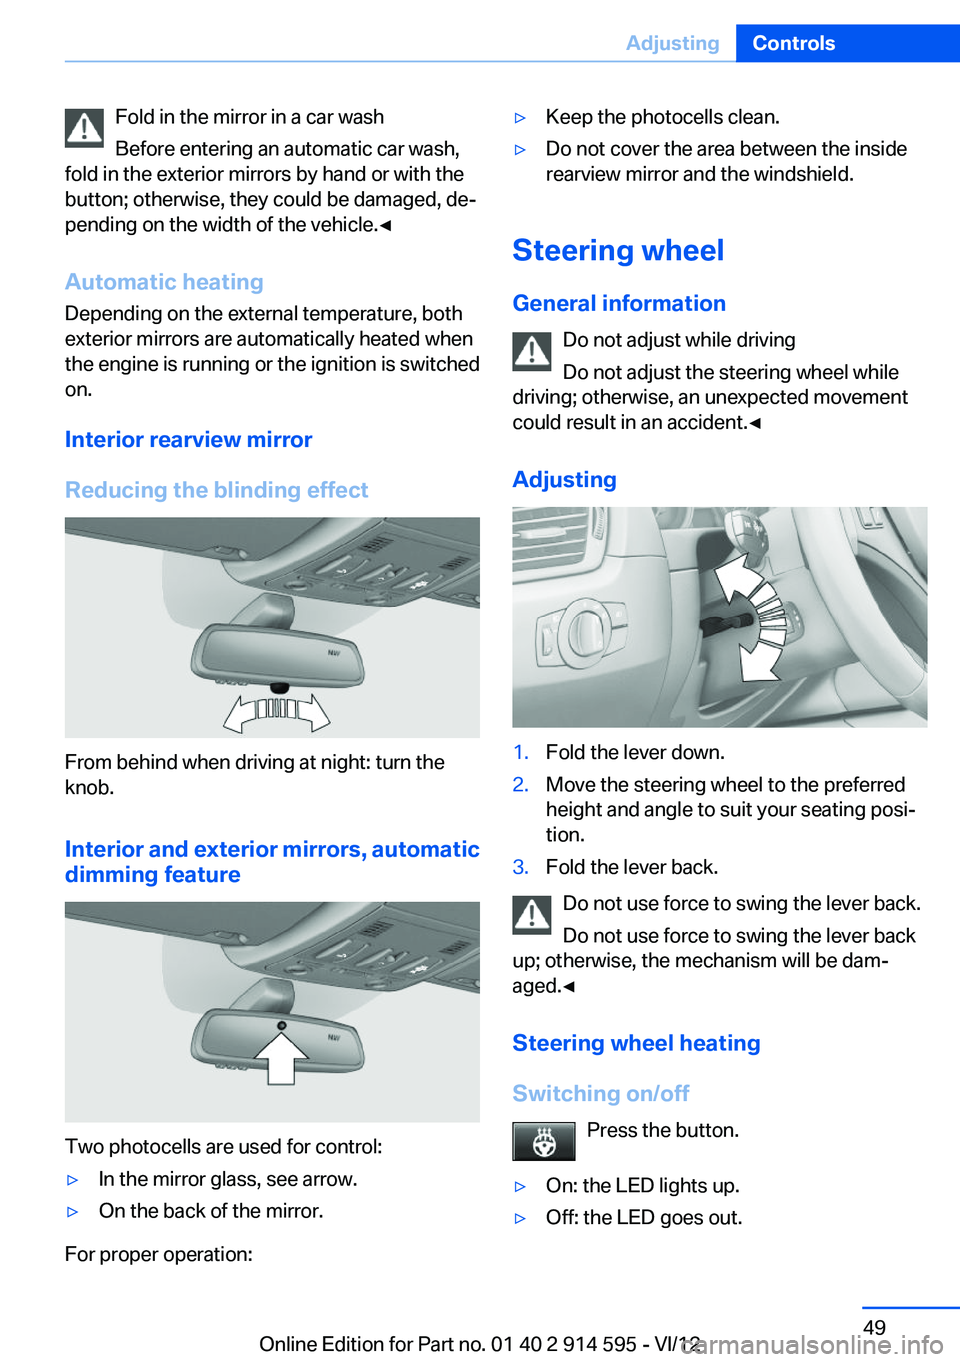
Reducing the blinding effect
From behind when driving at night: turn the
knob.
Interior and exterior mirrors, automatic
dimming feature
Two photocells are used for control:
▷In the mirror glass, see arrow.▷On the back of the mirror.
For proper operation:
▷Keep the photocells clean.▷Do not cover the area between the inside
rearview mirror and the windshield.
Steering wheel
General information Do not adjust while driving
Do not adjust the steering wheel while
driving; otherwise, an unexpected movement
could result in an accident.◀
Adjusting
1.Fold the lever down.2.Move the steering wheel to the preferred
height and angle to suit your seating posi‐
tion.3.Fold the lever back.
Do not use force to swing the lever back.
Do not use force to swing the lever back
up; otherwise, the mechanism will be dam‐
aged.◀
Steering wheel heating
Switching on/off Press the button.
▷On: the LED lights up.▷Off: the LED goes out.Seite 49AdjustingControls49
Online Edition for Part no. 01 40 2 914 595 - VI/12
Page 55 of 291
To save battery power when the engine is off,
switch off the ignition and any unnecessary
electronic systems/power consumers.
Radio ready state and ignition off
All indicator and warning lamps as well as dis‐
plays in the instrument cluster go out.
Automatic transmission, 8-gear
In certain situations, transmission position P is
engaged automatically. To make it possible for
the vehicle to roll, such as in an automatic car
wash, follow the instructions in Car washes, re‐
fer to page 259.
Starting the engine
General information Enclosed areas
Do not let the engine run in enclosed
areas; otherwise, breathing of exhaust fumes
may lead to loss of consciousness and death.
The exhaust gases contain carbon monoxide, an
odorless and colorless but highly toxic gas.◀
Unattended vehicle
Do not leave the car unattended with the
engine running; otherwise, it presents a poten‐
tial source of danger.
Before leaving the car with the engine running,
shift to neutral or engage transmission posi‐
tion P and set the handbrake firmly; otherwise,
the vehicle may begin to roll.◀
Frequent starting in quick succession
Avoid repeated futile attempts at starting
the car and avoid starting the car frequently in
quick succession. Otherwise, the fuel is not
burned or is inadequately burned, and there is
the danger of overheating and damaging the
catalytic converter.◀Do not wait for the engine to warm up while the
vehicle remains stationary. Start driving right
away, but at moderate engine speeds.
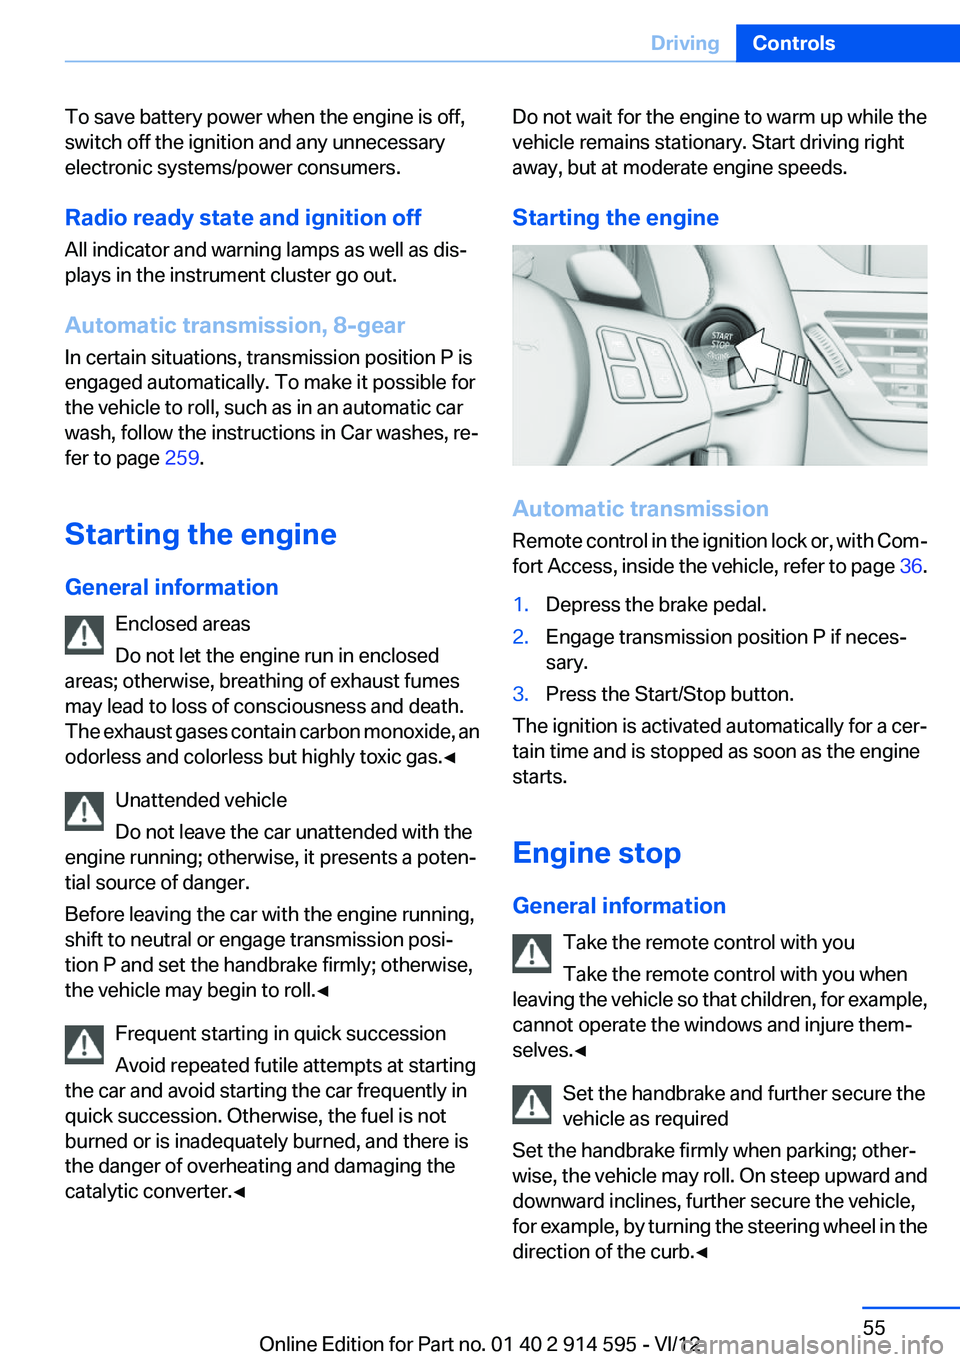
Starting the engine
Automatic transmission
Remote control in the ignition lock or, with Com‐
fort Access, inside the vehicle, refer to page 36.
1.Depress the brake pedal.2.Engage transmission position P if neces‐
sary.3.Press the Start/Stop button.
The ignition is activated automatically for a cer‐
tain time and is stopped as soon as the engine
starts.
Engine stop
General information Take the remote control with you
Take the remote control with you when
leaving the vehicle so that children, for example,
cannot operate the windows and injure them‐
selves.◀
Set the handbrake and further secure the
vehicle as required
Set the handbrake firmly when parking; other‐
wise, the vehicle may roll. On steep upward and
downward inclines, further secure the vehicle,
for example, by turning the steering wheel in the
direction of the curb.◀
Seite 55DrivingControls55
Online Edition for Part no. 01 40 2 914 595 - VI/12
Page 57 of 291
Parking the vehicle during an
automatic engine stop
The vehicle can be parked safely during an au‐
tomatic engine stop, such as when you wish to
leave the vehicle.1.Press the Start/Stop button. The ignition is
switched off. The Auto Start/Stop function
is deactivated.
Automatic transmission: transmission posi‐
tion P is engaged automatically.2.Set the handbrake.
Start the engine as usual using the Start/Stop
button.
Automatic engine start
The engine starts automatically under the fol‐
lowing conditions to enable the driver to drive
away:
▷Automatic transmission:
The brake pedal is released.
After the engine starts, accelerate as usual.
Safety mode
The engine does not start by itself after it is
switched off automatically if any of the following
conditions are fulfilled:
▷The driver's safety belt is unfastened or the
driver's door is open.▷Hood was unlocked.
The indicator lamp lights up. A mes‐
sage appears on the Control Display.
The engine can only be started via the
Start/Stop button.
Note
Even if you do not wish to drive away, the stop‐
ped engine still starts automatically in the fol‐
lowing situations:
▷The interior has heated up strongly with the
cooling function switched on.▷The steering wheel is turned.▷The vehicle begins to roll.▷Automatic transmission: the transmission
position is changed from D to N, R or M/S.▷Automatic transmission: the transmission
position is changed from P to N, D, R or M/
S.▷Fogging of the windows when the automatic
climate control is switched on.▷Vehicle battery charge is very low.▷The interior has cooled down strongly with
the heating switched on.▷Low braking pressure, such as from de‐
pressing the brake pedal a number of times
consecutively.
Preventing automatic engine stop with
an automatic transmission
The concept
To permit the driver to drive away especially
quickly, such as at intersections, the automatic
engine stop can be actively prevented.
Preventing the engine stop using the
brake pedal
The engine stop can be actively prevented
within one second after the vehicle comes to a
standstill.
▷Depress the brake pedal briefly and force‐
fully immediately after the vehicle comes to
a standstill.▷Then continue depressing the brake pedal
with normal braking force.Seite 57DrivingControls57
Online Edition for Part no. 01 40 2 914 595 - VI/12
Page 105 of 291
ClimateVehicle equipment
This chapter describes all series equipment as
well as country-specific and special equipment
offered for this model series.Therefore, it alsodescribes equipment that may not be found in
your vehicle, for instance due to the selected
special equipment or the country version. This
also applies to safety-related functions and sys‐
tems.
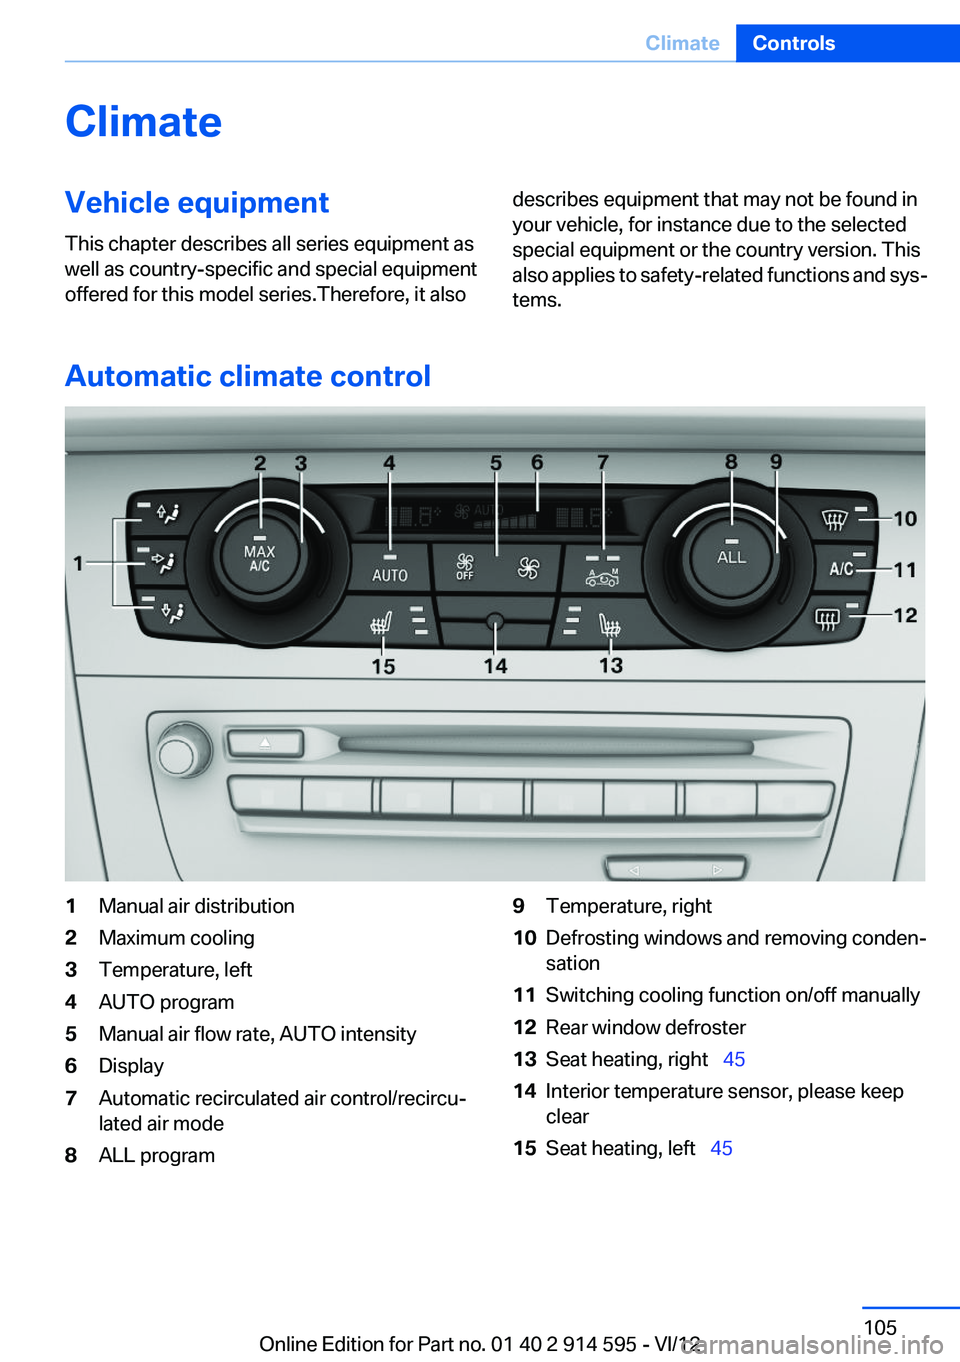
Automatic climate control
1Manual air distribution2Maximum cooling3Temperature, left4AUTO program5Manual air flow rate, AUTO intensity6Display7Automatic recirculated air control/recircu‐
lated air mode8ALL program9Temperature, right10Defrosting windows and removing conden‐
sation11Switching cooling function on/off manually12Rear window defroster13Seat heating, right 4514Interior temperature sensor, please keep
clear15Seat heating, left 45Seite 105ClimateControls105
Online Edition for Part no. 01 40 2 914 595 - VI/12
Page 106 of 291
Comfortable interior climate
For almost all conditions, the AUTO program 4
offers the optimum air distribution and air flow
rate, refer to AUTO program below. Select a
comfortable interior temperature only.
The following sections contain more detailed in‐
formation on the available setting options.
Most of these settings are stored for the remote
control currently in use, Personal Profile set‐
tings, refer to page 31.
Manual air distribution
Press the buttons repeatedly to select a pro‐
gram:▷Windows.▷Upper body region.▷Footwell.
The programs can be combined as necessary.
Temperature Turn the wheel to set the desired
temperature.
The automatic climate control
achieves this temperature as
quickly as possible, if necessary
with the maximum cooling or heating capacity,
and then keeps it constant.
Avoid rapidly switching between different tem‐
perature settings. The automatic climate control
will not have sufficient time to adjust the set
temperature.
Maximum heating power can be obtained with
the highest setting, regardless of the external
temperature.
At the lowest setting, cooling is continuous, re‐
gardless of the external temperature.
Maximum cooling
Press the button.
The system is set to the lowest tem‐
perature, maximum air volume and recirculated-
air mode.
Air flows out of the vents for the upper body re‐
gion. Open them for this purpose.
Air is cooled as quickly as possible:▷At an external temperature of approx.
32 ℉/0 ℃.▷When the engine is running.
AUTO program
Press the button.
Air volume, air distribution, and tem‐
perature are controlled automatically.
Depending on the selected temperature, AUTO
intensity, and outside influences, the air is di‐
rected to the windshield, side windows, upper
body, and into the footwell.
The cooling function is switched on automati‐
cally with the AUTO program.
At the same time, a condensation sensor con‐
trols the program in such a way that window
condensation is prevented as much as possible.
To switch off the program: press the button
again or manually adjust the air distribution.
Intensity of the AUTO program
With the AUTO program switched on, automatic
control of the air volume and air distribution can
be adjusted.
Press the left or right side of the button:
decrease or increase the intensity.
The selected intensity is shown on the display
of the automatic climate control.
Air volume, manual
To be able to manually adjust the air volume,
switch off the AUTO program first.
Seite 106ControlsClimate106
Online Edition for Part no. 01 40 2 914 595 - VI/12
Page 108 of 291
Switching the system on/off
Switching off Press and hold the left button or, with
the setting at the lowest level, press the
left button.
All displays are cleared except for the rear win‐
dow defroster if it is switched on.
When the automatic climate control is switched
off, the supply of outside air is suspended. If the
air quality deteriorates or the window fogs over,
switch the system back on and increase the air
flow rate.
Switching on
Press any button, except for the buttons for the
ALL program or rear window heating.
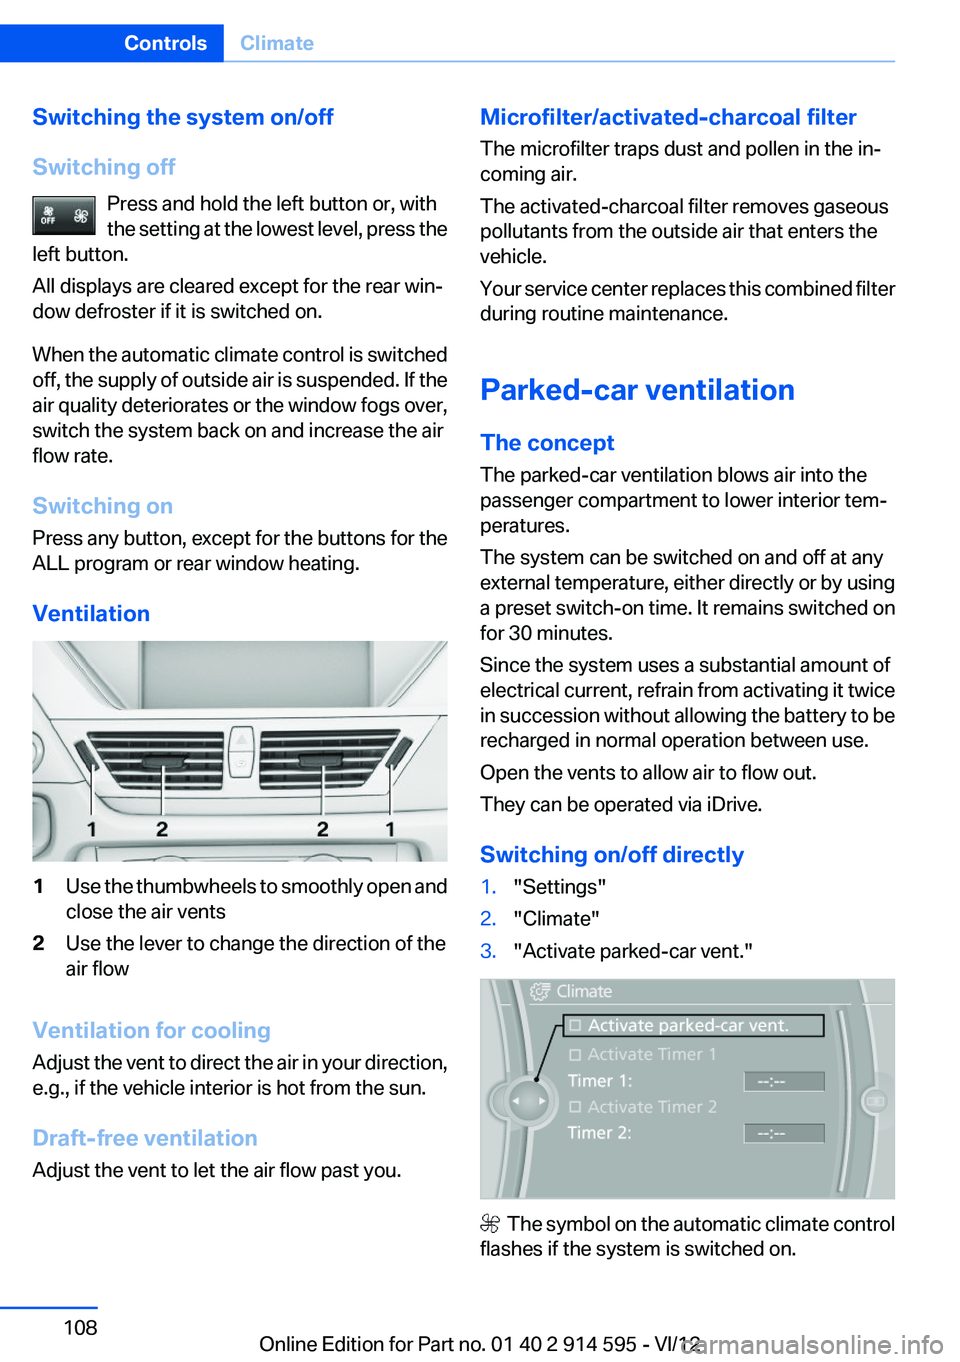
Ventilation1Use the thumbwheels to smoothly open and
close the air vents2Use the lever to change the direction of the
air flow
Ventilation for cooling
Adjust the vent to direct the air in your direction,
e.g., if the vehicle interior is hot from the sun.
Draft-free ventilation
Adjust the vent to let the air flow past you.
Microfilter/activated-charcoal filter
The microfilter traps dust and pollen in the in‐
coming air.
The activated-charcoal filter removes gaseous
pollutants from the outside air that enters the
vehicle.
Your service center replaces this combined filter
during routine maintenance.
Parked-car ventilation
The concept
The parked-car ventilation blows air into the
passenger compartment to lower interior tem‐
peratures.
The system can be switched on and off at any
external temperature, either directly or by using
a preset switch-on time. It remains switched on
for 30 minutes.
Since the system uses a substantial amount of
electrical current, refrain from activating it twice
in succession without allowing the battery to be
recharged in normal operation between use.
Open the vents to allow air to flow out.
They can be operated via iDrive.
Switching on/off directly1."Settings"2."Climate"3."Activate parked-car vent."
The symbol on the automatic climate control
flashes if the system is switched on.
Seite 108ControlsClimate108
Online Edition for Part no. 01 40 2 914 595 - VI/12
Page 130 of 291
LoadingVehicle equipment
This chapter describes all series equipment as
well as country-specific and special equipment
offered for this model series.Therefore, it also
describes equipment that may not be found in
your vehicle, for instance due to the selected
special equipment or the country version. This
also applies to safety-related functions and sys‐
tems.
General information Overloading the vehicle
To avoid exceeding the approved carrying
capacity of the tires, never overload the vehicle.
Overloading can lead to overheating and in‐
creases the rate at which damage develops in‐
side the tires. This could result in a sudden loss
of tire inflation pressure.◀
No fluids in the cargo area
Make sure that fluids do not leak into the
cargo area; otherwise, the vehicle may be dam‐
aged.◀
Determining the load limit1.Locate the following statement on your ve‐
hicle’s placard:▷The combined weight of occupants and
cargo should never exceed XXX kg orYYY lbs. Otherwise, damage to the ve‐
hicle and unstable driving situations may
result.2.Determine the combined weight of the
driver and passengers that will be riding in
your vehicle.3.Subtract the combined weight of the driver
and passengers from XXX kilograms or YYY
pounds.4.The resulting figure equals the available
amount of cargo and luggage load capacity.
For example, if the YYY amount equals
1,000 lbs and there will be four 150 lbs pas‐
sengers in your vehicle, the amount of avail‐
able cargo and luggage load capacity is
400 lbs: 1,000 lbs minus 600 lbs = 400 lbs.5.Determine the combined weight of luggage
and cargo being loaded on the vehicle. That
weight may not safely exceed the available
cargo and luggage load capacity calculated
in Step 4.6.If your vehicle will be towing a trailer, load
from your trailer will be transfered to your
vehicle. Consult the manual for transporting
a trailer to determine how this may reduce
the available cargo and luggage load ca‐
pacity of your vehicle.
Load
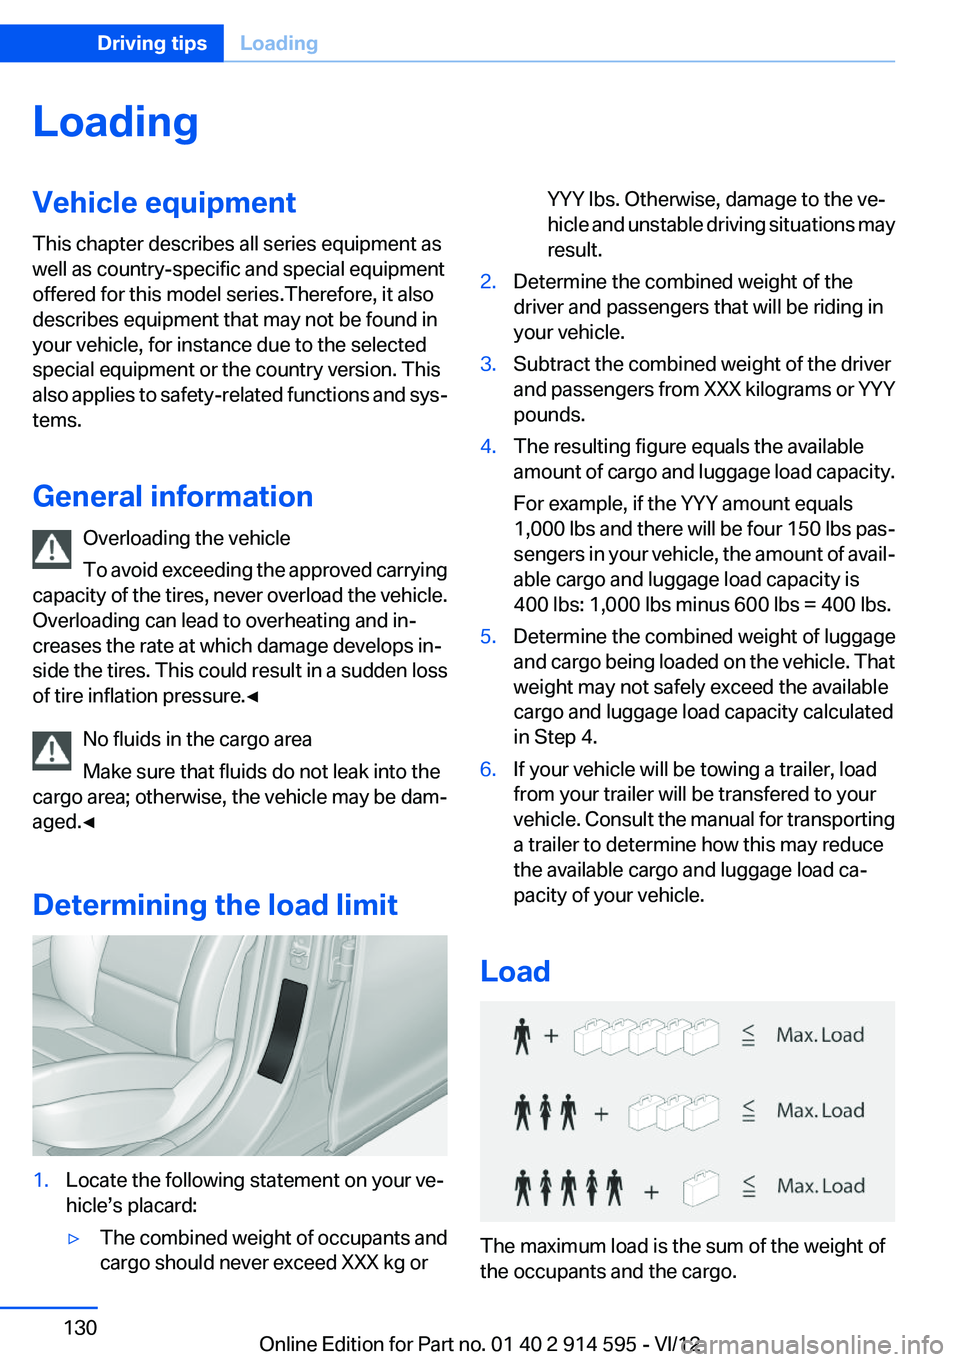
The maximum load is the sum of the weight of
the occupants and the cargo.
Seite 130Driving tipsLoading130
Online Edition for Part no. 01 40 2 914 595 - VI/12