parking brake BMW X1 XDRIVE 35I 2013 Owners Manual
[x] Cancel search | Manufacturer: BMW, Model Year: 2013, Model line: X1 XDRIVE 35I, Model: BMW X1 XDRIVE 35I 2013Pages: 291, PDF Size: 6.58 MB
Page 15 of 291
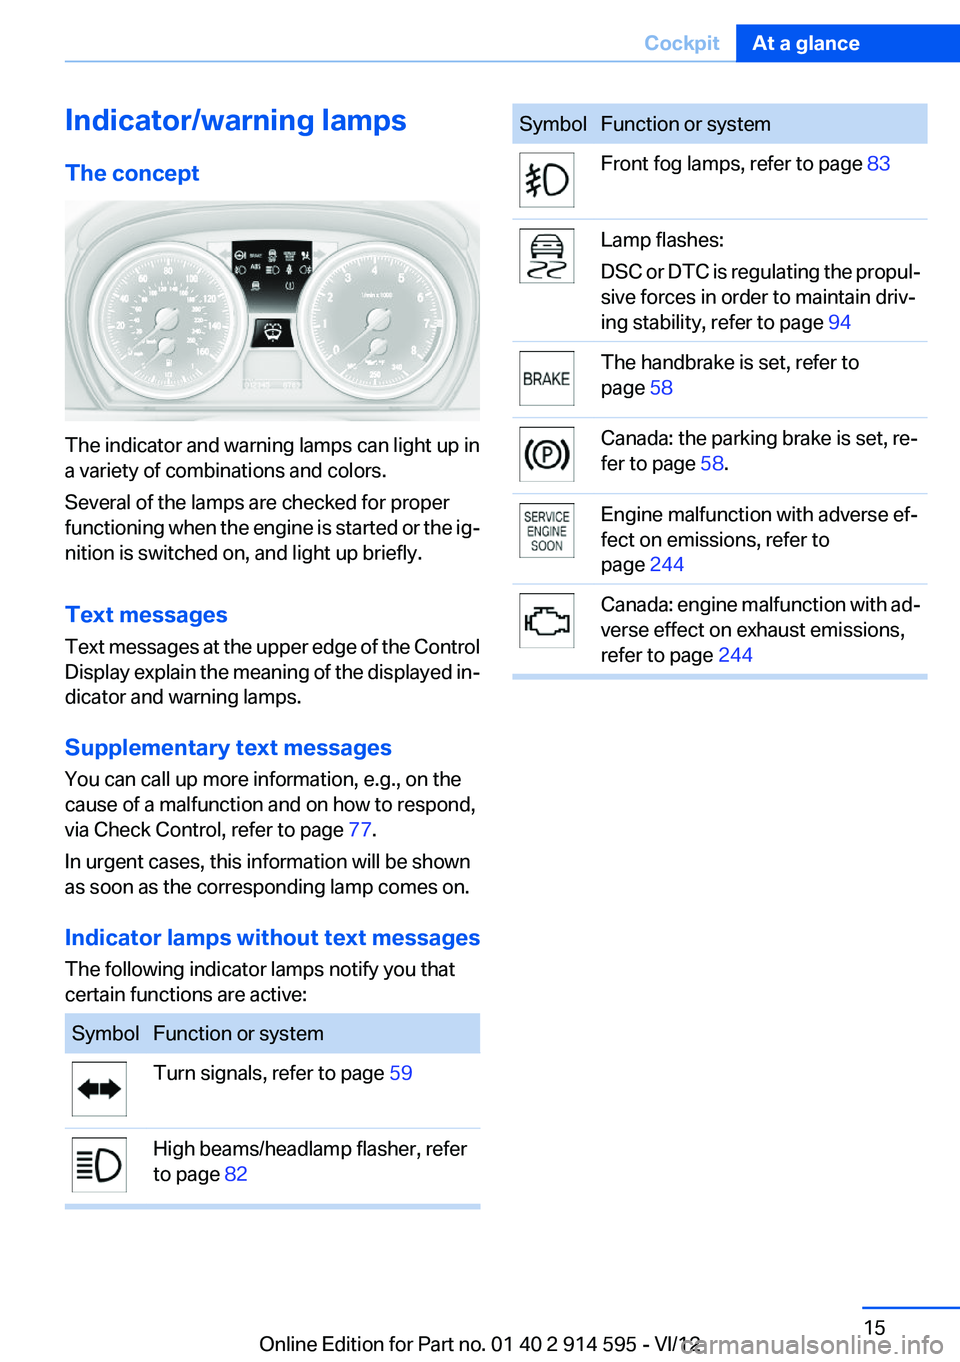
Indicator/warning lamps
The concept
The indicator and warning lamps can light up in
a variety of combinations and colors.
Several of the lamps are checked for proper
functioning when the engine is started or the ig‐
nition is switched on, and light up briefly.
Text messages
Text messages at the upper edge of the Control
Display explain the meaning of the displayed in‐
dicator and warning lamps.
Supplementary text messages
You can call up more information, e.g., on the
cause of a malfunction and on how to respond,
via Check Control, refer to page 77.
In urgent cases, this information will be shown
as soon as the corresponding lamp comes on.
Indicator lamps without text messages
The following indicator lamps notify you that
certain functions are active:
SymbolFunction or systemTurn signals, refer to page 59High beams/headlamp flasher, refer
to page 82SymbolFunction or systemFront fog lamps, refer to page 83Lamp flashes:
DSC or DTC is regulating the propul‐
sive forces in order to maintain driv‐
ing stability, refer to page 94The handbrake is set, refer to
page 58Canada: the parking brake is set, re‐
fer to page 58.Engine malfunction with adverse ef‐
fect on emissions, refer to
page 244Canada: engine malfunction with ad‐
verse effect on exhaust emissions,
refer to page 244Seite 15CockpitAt a glance15
Online Edition for Part no. 01 40 2 914 595 - VI/12
Page 55 of 291
To save battery power when the engine is off,
switch off the ignition and any unnecessary
electronic systems/power consumers.
Radio ready state and ignition off
All indicator and warning lamps as well as dis‐
plays in the instrument cluster go out.
Automatic transmission, 8-gear
In certain situations, transmission position P is
engaged automatically. To make it possible for
the vehicle to roll, such as in an automatic car
wash, follow the instructions in Car washes, re‐
fer to page 259.
Starting the engine
General information Enclosed areas
Do not let the engine run in enclosed
areas; otherwise, breathing of exhaust fumes
may lead to loss of consciousness and death.
The exhaust gases contain carbon monoxide, an
odorless and colorless but highly toxic gas.◀
Unattended vehicle
Do not leave the car unattended with the
engine running; otherwise, it presents a poten‐
tial source of danger.
Before leaving the car with the engine running,
shift to neutral or engage transmission posi‐
tion P and set the handbrake firmly; otherwise,
the vehicle may begin to roll.◀
Frequent starting in quick succession
Avoid repeated futile attempts at starting
the car and avoid starting the car frequently in
quick succession. Otherwise, the fuel is not
burned or is inadequately burned, and there is
the danger of overheating and damaging the
catalytic converter.◀Do not wait for the engine to warm up while the
vehicle remains stationary. Start driving right
away, but at moderate engine speeds.
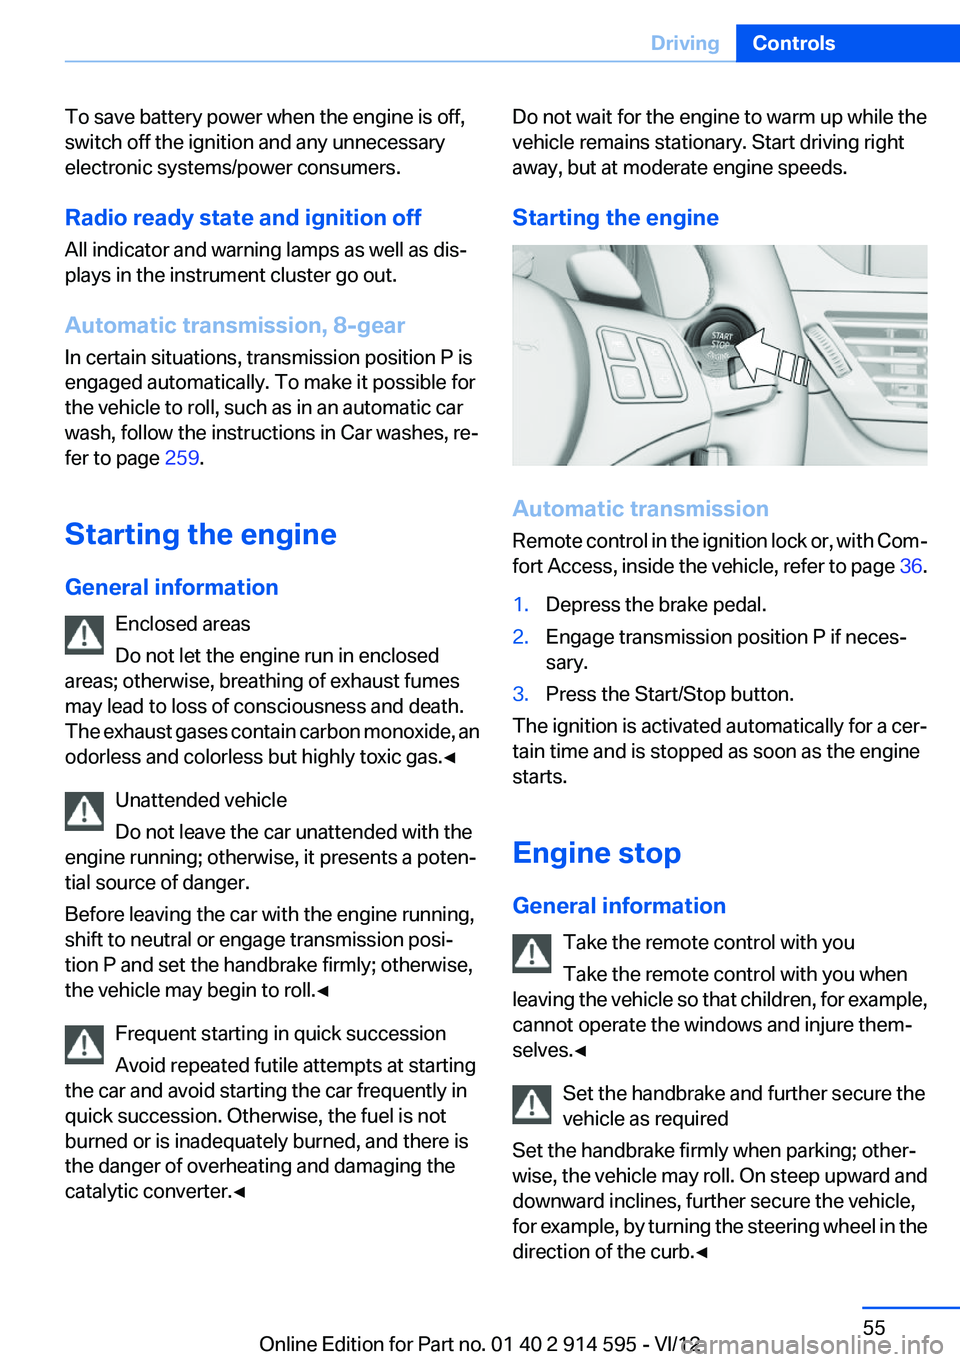
Starting the engine
Automatic transmission
Remote control in the ignition lock or, with Com‐
fort Access, inside the vehicle, refer to page 36.
1.Depress the brake pedal.2.Engage transmission position P if neces‐
sary.3.Press the Start/Stop button.
The ignition is activated automatically for a cer‐
tain time and is stopped as soon as the engine
starts.
Engine stop
General information Take the remote control with you
Take the remote control with you when
leaving the vehicle so that children, for example,
cannot operate the windows and injure them‐
selves.◀
Set the handbrake and further secure the
vehicle as required
Set the handbrake firmly when parking; other‐
wise, the vehicle may roll. On steep upward and
downward inclines, further secure the vehicle,
for example, by turning the steering wheel in the
direction of the curb.◀
Seite 55DrivingControls55
Online Edition for Part no. 01 40 2 914 595 - VI/12
Page 57 of 291
Parking the vehicle during an
automatic engine stop
The vehicle can be parked safely during an au‐
tomatic engine stop, such as when you wish to
leave the vehicle.1.Press the Start/Stop button. The ignition is
switched off. The Auto Start/Stop function
is deactivated.
Automatic transmission: transmission posi‐
tion P is engaged automatically.2.Set the handbrake.
Start the engine as usual using the Start/Stop
button.
Automatic engine start
The engine starts automatically under the fol‐
lowing conditions to enable the driver to drive
away:
▷Automatic transmission:
The brake pedal is released.
After the engine starts, accelerate as usual.
Safety mode
The engine does not start by itself after it is
switched off automatically if any of the following
conditions are fulfilled:
▷The driver's safety belt is unfastened or the
driver's door is open.▷Hood was unlocked.
The indicator lamp lights up. A mes‐
sage appears on the Control Display.
The engine can only be started via the
Start/Stop button.
Note
Even if you do not wish to drive away, the stop‐
ped engine still starts automatically in the fol‐
lowing situations:
▷The interior has heated up strongly with the
cooling function switched on.▷The steering wheel is turned.▷The vehicle begins to roll.▷Automatic transmission: the transmission
position is changed from D to N, R or M/S.▷Automatic transmission: the transmission
position is changed from P to N, D, R or M/
S.▷Fogging of the windows when the automatic
climate control is switched on.▷Vehicle battery charge is very low.▷The interior has cooled down strongly with
the heating switched on.▷Low braking pressure, such as from de‐
pressing the brake pedal a number of times
consecutively.
Preventing automatic engine stop with
an automatic transmission
The concept
To permit the driver to drive away especially
quickly, such as at intersections, the automatic
engine stop can be actively prevented.
Preventing the engine stop using the
brake pedal
The engine stop can be actively prevented
within one second after the vehicle comes to a
standstill.
▷Depress the brake pedal briefly and force‐
fully immediately after the vehicle comes to
a standstill.▷Then continue depressing the brake pedal
with normal braking force.Seite 57DrivingControls57
Online Edition for Part no. 01 40 2 914 595 - VI/12
Page 62 of 291
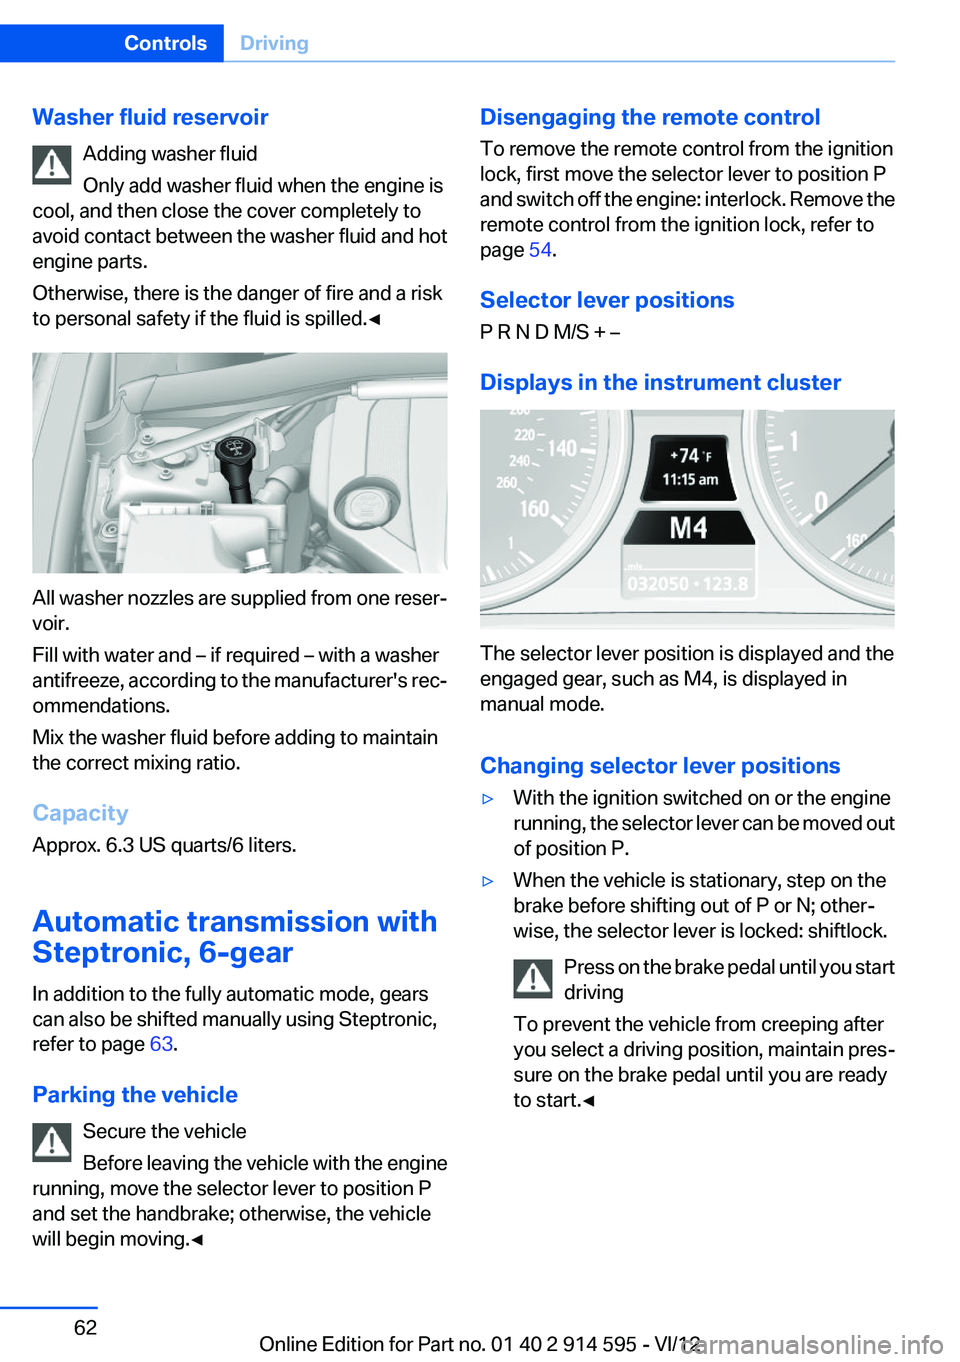
Washer fluid reservoirAdding washer fluid
Only add washer fluid when the engine is
cool, and then close the cover completely to
avoid contact between the washer fluid and hot
engine parts.
Otherwise, there is the danger of fire and a risk
to personal safety if the fluid is spilled.◀
All washer nozzles are supplied from one reser‐
voir.
Fill with water and – if required – with a washer
antifreeze, according to the manufacturer's rec‐
ommendations.
Mix the washer fluid before adding to maintain
the correct mixing ratio.
Capacity
Approx. 6.3 US quarts/6 liters.
Automatic transmission with
Steptronic, 6-gear
In addition to the fully automatic mode, gears
can also be shifted manually using Steptronic,
refer to page 63.
Parking the vehicle Secure the vehicle
Before leaving the vehicle with the engine
running, move the selector lever to position P
and set the handbrake; otherwise, the vehicle
will begin moving.◀
Disengaging the remote control
To remove the remote control from the ignition
lock, first move the selector lever to position P
and switch off the engine: interlock. Remove the
remote control from the ignition lock, refer to
page 54.
Selector lever positions
P R N D M/S + –
Displays in the instrument cluster
The selector lever position is displayed and the
engaged gear, such as M4, is displayed in
manual mode.
Changing selector lever positions
▷With the ignition switched on or the engine
running, the selector lever can be moved out
of position P.▷When the vehicle is stationary, step on the
brake before shifting out of P or N; other‐
wise, the selector lever is locked: shiftlock.
Press on the brake pedal until you start
driving
To prevent the vehicle from creeping after
you select a driving position, maintain pres‐
sure on the brake pedal until you are ready
to start.◀Seite 62ControlsDriving62
Online Edition for Part no. 01 40 2 914 595 - VI/12
Page 249 of 291
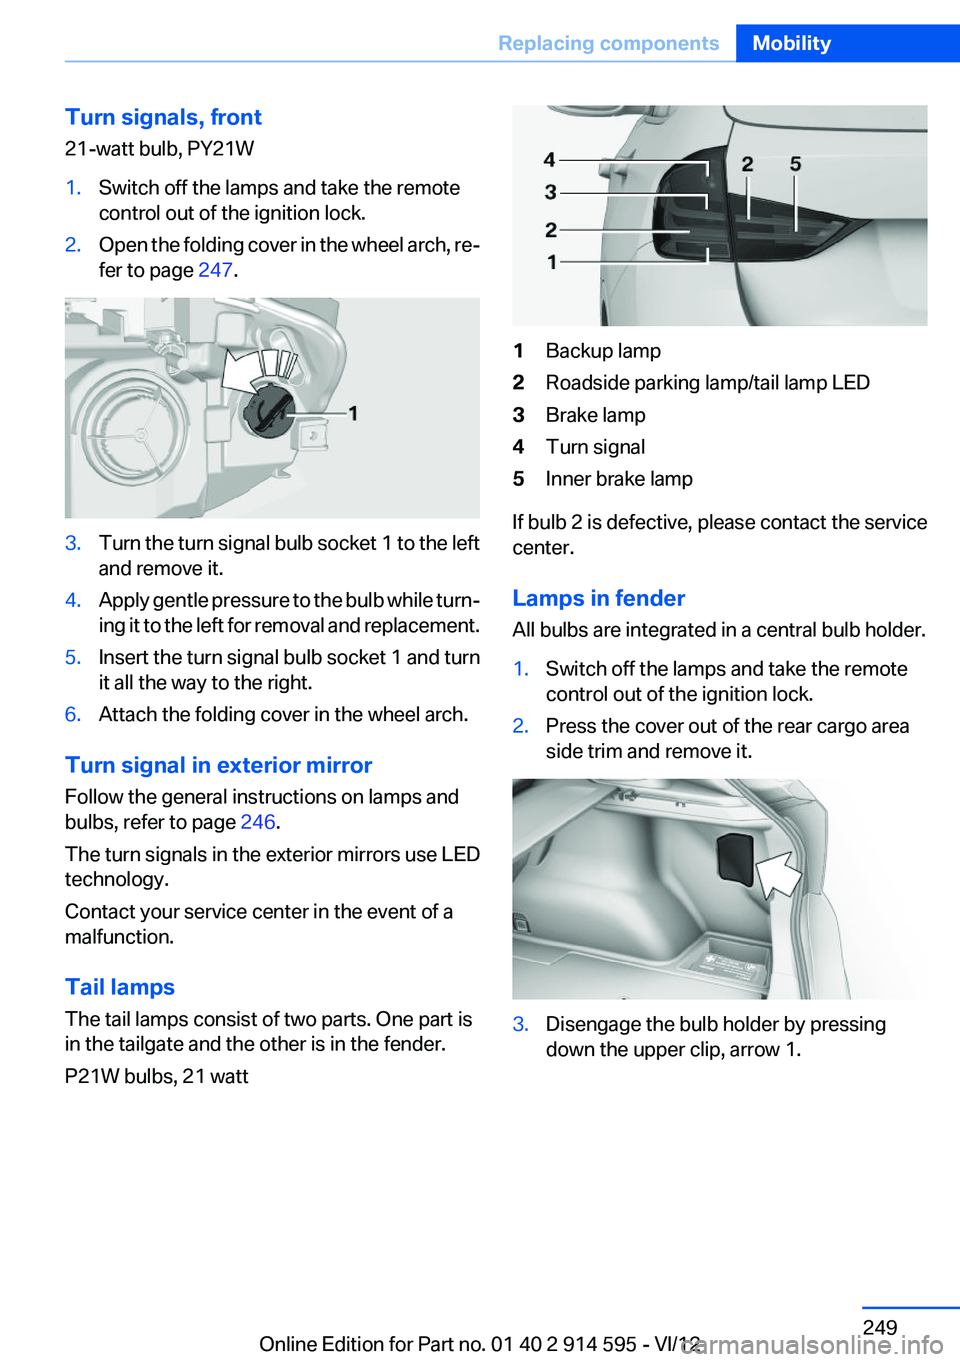
Turn signals, front
21-watt bulb, PY21W1.Switch off the lamps and take the remote
control out of the ignition lock.2.Open the folding cover in the wheel arch, re‐
fer to page 247.3.Turn the turn signal bulb socket 1 to the left
and remove it.4.Apply gentle pressure to the bulb while turn‐
ing it to the left for removal and replacement.5.Insert the turn signal bulb socket 1 and turn
it all the way to the right.6.Attach the folding cover in the wheel arch.
Turn signal in exterior mirror
Follow the general instructions on lamps and
bulbs, refer to page 246.
The turn signals in the exterior mirrors use LED
technology.
Contact your service center in the event of a
malfunction.
Tail lamps
The tail lamps consist of two parts. One part is
in the tailgate and the other is in the fender.
P21W bulbs, 21 watt
1Backup lamp2Roadside parking lamp/tail lamp LED3Brake lamp4Turn signal5Inner brake lamp
If bulb 2 is defective, please contact the service
center.
Lamps in fender
All bulbs are integrated in a central bulb holder.
1.Switch off the lamps and take the remote
control out of the ignition lock.2.Press the cover out of the rear cargo area
side trim and remove it.3.Disengage the bulb holder by pressing
down the upper clip, arrow 1.Seite 249Replacing componentsMobility249
Online Edition for Part no. 01 40 2 914 595 - VI/12
Page 250 of 291
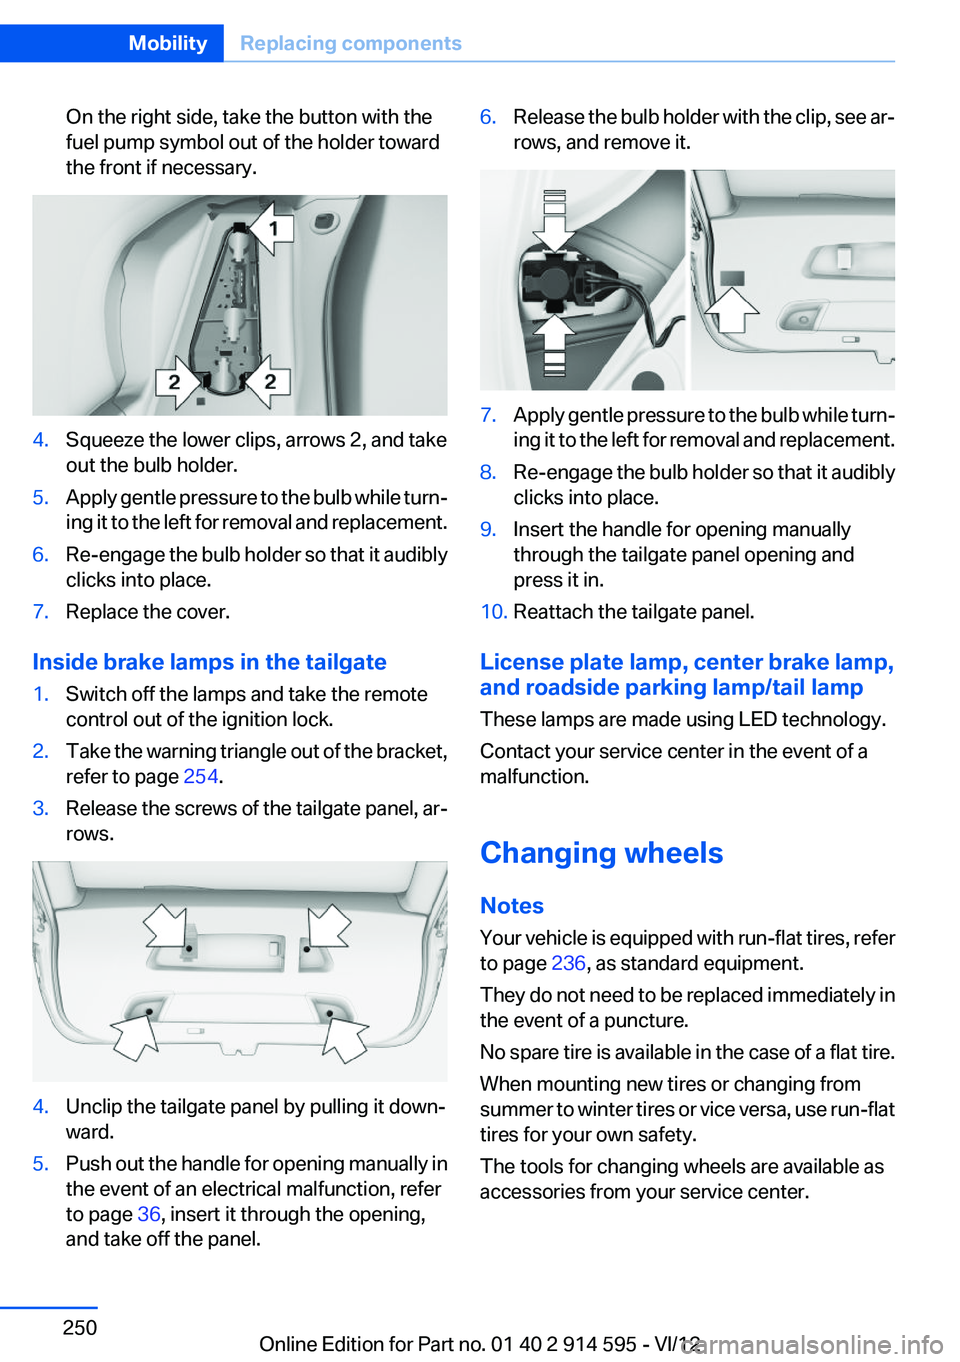
On the right side, take the button with the
fuel pump symbol out of the holder toward
the front if necessary.4.Squeeze the lower clips, arrows 2, and take
out the bulb holder.5.Apply gentle pressure to the bulb while turn‐
ing it to the left for removal and replacement.6.Re-engage the bulb holder so that it audibly
clicks into place.7.Replace the cover.
Inside brake lamps in the tailgate
1.Switch off the lamps and take the remote
control out of the ignition lock.2.Take the warning triangle out of the bracket,
refer to page 254.3.Release the screws of the tailgate panel, ar‐
rows.4.Unclip the tailgate panel by pulling it down‐
ward.5.Push out the handle for opening manually in
the event of an electrical malfunction, refer
to page 36, insert it through the opening,
and take off the panel.6.Release the bulb holder with the clip, see ar‐
rows, and remove it.7.Apply gentle pressure to the bulb while turn‐
ing it to the left for removal and replacement.8.Re-engage the bulb holder so that it audibly
clicks into place.9.Insert the handle for opening manually
through the tailgate panel opening and
press it in.10.Reattach the tailgate panel.
License plate lamp, center brake lamp,
and roadside parking lamp/tail lamp
These lamps are made using LED technology.
Contact your service center in the event of a
malfunction.
Changing wheels
Notes
Your vehicle is equipped with run-flat tires, refer
to page 236, as standard equipment.
They do not need to be replaced immediately in
the event of a puncture.
No spare tire is available in the case of a flat tire.
When mounting new tires or changing from
summer to winter tires or vice versa, use run-flat
tires for your own safety.
The tools for changing wheels are available as
accessories from your service center.
Seite 250MobilityReplacing components250
Online Edition for Part no. 01 40 2 914 595 - VI/12
Page 282 of 291
Inflation pressure monitor, re‐fer to Flat Tire Monitor 88
Inflation pressure, refer to Tire inflation pressure 228
Information on the navigation data 138
Initialization after power fail‐ ure 251
Initializing– Compass, refer to Calibrat‐
ing 113– Panoramic glass sunroof 42– Refer to Setting the time and
date 73
Initializing, Flat Tire Monitor
FTM 88
Initializing, Tire Pressure Mon‐ itor TPM 91
Inside brake lamps
– Bulb replacement 250
Installation location, tele‐
phone 120
Instrument cluster 14
Instrument lighting 83
Instrument panel, refer to In‐ strument cluster 14
Instruments, refer to Cock‐ pit 12
Integrated key 30
Interactive map 145
Interior equipment 110
Interior lamps 84
Interior lamps
– Remote control 32
Interior mirror 49
Interior rearview mirror, auto‐ matic dimming 49
Interior rearview mirror, com‐ pass 112
Interior temperature, setting
– Automatic climate con‐
trol 105
Interlock, refer to Disengaging
the remote control 62
Intermediate destinations 147
Internet page 6
Intersection, entering for navi‐
gation 141
iPod/iPhone 182
J
Jacking points for the vehicle jack 251
Jack, refer to Vehicle jack 251
Joystick, refer to Selector lever 65
Jump-starting 255
K
Keyless Go, refer to Comfort Access 36
Keyless opening and closing, refer to Comfort Access 36
Key Memory, refer to Personal Profile 30
Key, refer to Integrated key/re‐ mote control 30
Kickdown– Automatic transmission with
Steptronic 63, 64
Knee airbag 85
Knocking control 226
L
Label, run-flat tire 236
Lamp and bulb replacement, lamp replacement 246
Lamps 80
Lamps, automatic headlamp control 80, 81
Lamps, High-beam Assis‐ tant 82
Lamps, parking lamps/low beams 80
Lamps, replacing, refer to Lamp and bulb replace‐
ment 246
Language, changing on the Control Display 74
Lap-and-shoulder belt, refer to
Safety belts 45
Lashing eyes, securing cargo 131
LATCH child restraint fixing system 51
Leather, care 260
LEDs, light-emitting di‐ odes 246
Length, refer to Dimen‐ sions 266
Letters and numbers, enter‐ ing 23
License plate lamp, bulb re‐ placement 250
Light-alloy wheels, care 261
Light-emitting diodes, LEDs 246
Lighter 114
Lighting– Instruments 83– Lamp and bulb replace‐
ment 246
Lighting, vehicle, refer to
Lamps 80
Light switch 80
Limit, refer to Speed limit 78
Load 130
Loading 130
Lock buttons, doors, refer to Locking 35
Locking
– From the inside 35– From the outside 32– Setting the confirmation sig‐
nals 33– Without remote control, refer
to Comfort Access 36
Locking the vehicle
– From the inside 34– From the outside 32
Locks, doors, and win‐
dows 53
Longlife oils, alternative oil types 241
Longlife oils, refer to Approved engine oils 241
Seite 282ReferenceEverything from A to Z282
Online Edition for Part no. 01 40 2 914 595 - VI/12
Page 284 of 291
Onboard monitor, refer toControl Display 18
Onboard vehicle tool kit 245
Opening and closing– Comfort Access 36– From the inside 34– From the outside 32– Using the door lock 34– Using the remote control 32
Operating concept, iDrive 18
Outside-air mode
– Automatic climate con‐
trol 107
Outside air, refer to Recircu‐
lated air mode 107
Overheating of engine, refer to Coolant temperature 69
P
Paint, vehicle 260
Pairing, mobile phone 193
Panic mode 33
Panoramic glass sunroof
– Convenient operation 32– Initializing 42– Opening, closing 41– Pinch protection 42– Power failure 42– Remote control 32– Tilting 41
Park Distance Control
PDC 100
Parked-car ventilation 108
Parked vehicle, condensa‐ tion 128
Parking aid, refer to Park Dis‐ tance Control PDC 100
Parking assistant, refer to Park Distance Control PDC 100
Parking brake, refer to Hand‐ brake 58
Parking lamps 80
Parking lamps/low beams 80
Parking lamps, bulb replace‐ ment 248
Passenger airbags, deactivat‐ ing 86
Passenger side mirror, tilt‐
ing 48
PDC Park Distance Con‐ trol 100
Performance Control 96
Personal information 204
Personal Profile 30
Pinch protection– Panoramic glass sunroof 42– Windows 40
Plastic, care 261
PlugIn 220
Pollen
– Refer to Microfilter/acti‐
vated-charcoal filter with au‐
tomatic climate control 108
Poor road operation 128
Position, storing 142
Postal code, entering in navi‐ gation 141
Power windows
– Safety switch 41
Power windows, opening and
closing 40
Power windows, refer to Win‐ dows 40
Prescribed engine oils, refer to Approved engine oils 241
Pressure, tires 228
Pressure warning, tires 88
Profile depth, refer to Mini‐ mum tread depth 234
Profile, tires 234
Programmable memory but‐ tons, iDrive 23
Protection function, refer to
Pinch protection
– Panoramic glass sunroof 42
Protective function, refer to
Pinch protection
– Windows 40
Push-and-turn switch, refer to
Controller 19
R
Radiator fluid, refer to Cool‐ ant 242
Radio-operated key, refer to Remote control with
integrated key 30
Radio ready state 54
Radio ready state, switched off 55
Radio ready state, switched on 54
Radio setting, refer to Radio ready state 54
Rain sensor 60
Random 171
Random playback 171
Range 70
RDS 163
Reading lamps 84
Reading out loud 211
Rear lamps, refer to Tail lamps 249
Rear seat backrest– Foldable 115
Rear seats
– Adjusting the backrest
tilt 115– Adjusting the head re‐
straints 47– Folding down 115– Folding down the back‐
rests 115
Rear socket 114
Rearview mirror, refer to Mir‐ rors 48
Rear window defroster 107
Rear window, washing 61
Rear window wiper 61
Recirculated air mode 107
Recommended tire brands 236
Redialing 199
Refueling 224
Remaining distance to desti‐ nation, refer to Computer 70
Seite 284ReferenceEverything from A to Z284
Online Edition for Part no. 01 40 2 914 595 - VI/12