radio controls BMW X1 XDRIVE 35I 2013 Owners Manual
[x] Cancel search | Manufacturer: BMW, Model Year: 2013, Model line: X1 XDRIVE 35I, Model: BMW X1 XDRIVE 35I 2013Pages: 291, PDF Size: 6.58 MB
Page 5 of 291
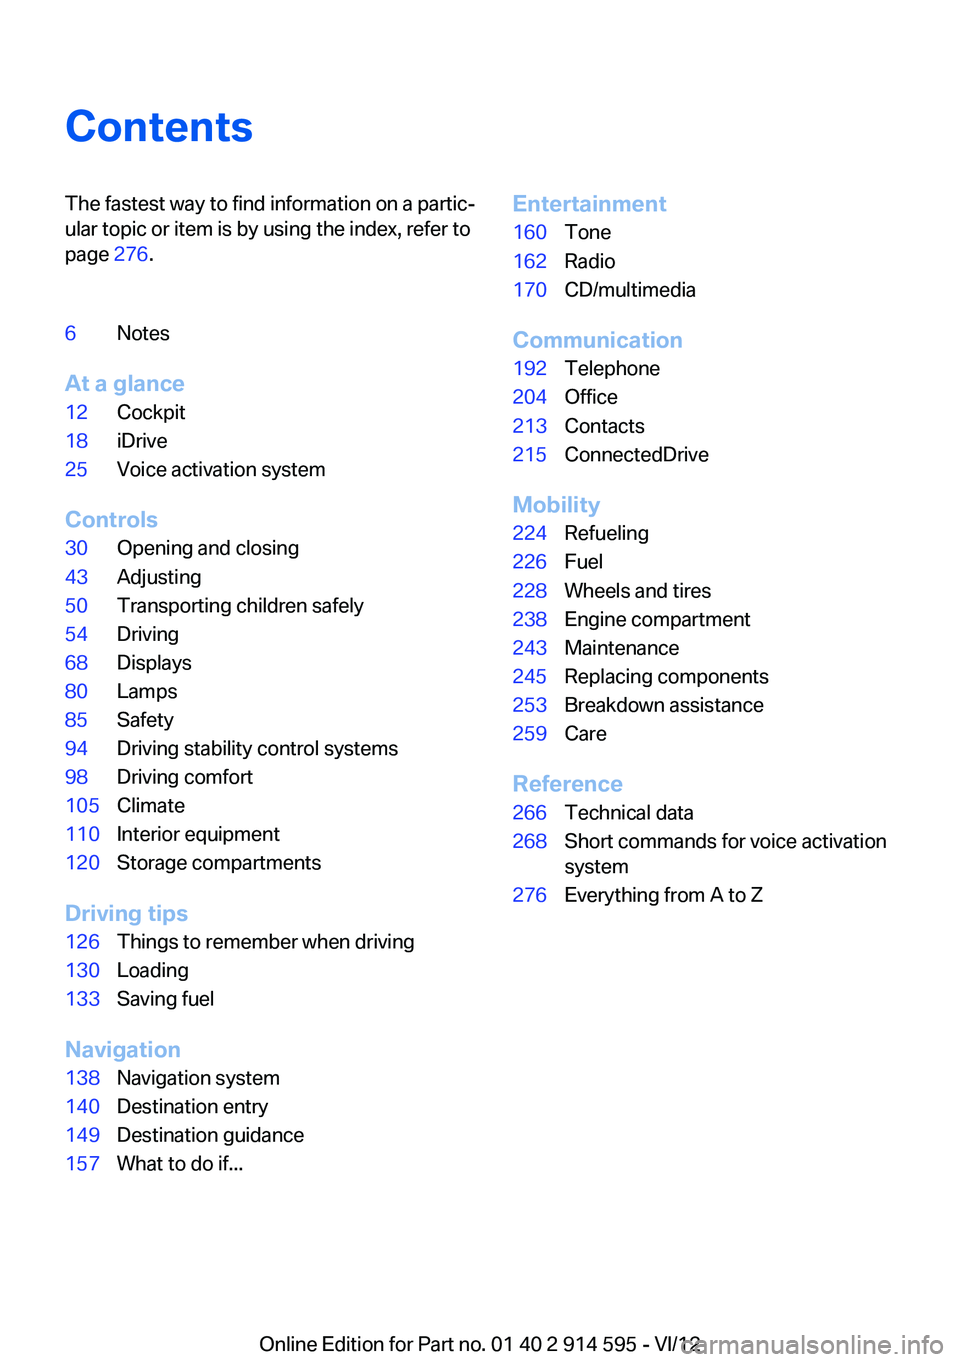
ContentsThe fastest way to find information on a partic‐
ular topic or item is by using the index, refer to
page 276.6Notes
At a glance
12Cockpit18iDrive25Voice activation system
Controls
30Opening and closing43Adjusting50Transporting children safely54Driving68Displays80Lamps85Safety94Driving stability control systems98Driving comfort105Climate110Interior equipment120Storage compartments
Driving tips
126Things to remember when driving130Loading133Saving fuel
Navigation
138Navigation system140Destination entry149Destination guidance157What to do if...Entertainment160Tone162Radio170CD/multimedia
Communication
192Telephone204Office213Contacts215ConnectedDrive
Mobility
224Refueling226Fuel228Wheels and tires238Engine compartment243Maintenance245Replacing components253Breakdown assistance259Care
Reference
266Technical data268Short commands for voice activation
system276Everything from A to Z
Online Edition for Part no. 01 40 2 914 595 - VI/12
Page 31 of 291
▷The remote control used is detected when
the vehicle is unlocked and the stored profile
is called up.▷Your personal settings will be recognized
and called up again even if the vehicle has
been used in the meantime by someone else
with another remote control.
The individual settings are stored for a maximum
of four remote controls. They are stored for two
remote controls if Comfort Access is in use.
Personal Profile settings
The following functions and settings can be
stored in a profile.
More information on the settings can be found
under:
▷Assigning the programmable memory but‐
tons, refer to page 23.▷Response of the central locking system
when the car is being unlocked, refer to
page 32.▷Automatic locking of the vehicle, refer to
page 35.▷Automatic call-up of the driver's seat posi‐
tion after unlocking, refer to page 33.▷Settings for the display on the Control Dis‐
play and in the instrument cluster:▷12h/24h clock format, refer to
page 73.▷Date format, refer to page 74.▷Brightness of the Control Display, refer
to page 75.▷Language on the Control Display, refer
to page 74.▷Units of measure for fuel consumption,
distance covered/remaining distances,
and temperature, refer to page 72.▷Show visual warning for the Park Distance
Control PDC, refer to page 101.▷Backup camera:▷Function selection, refer to page 102.▷Type of display, refer to page 104.▷Light settings:▷Triple turn signal activation, refer to
page 59.▷Welcome lamps, refer to page 80.▷Headlamp courtesy delay feature, refer
to page 81.▷Daytime running lights, refer to
page 81.▷High-beam Assistant, refer to
page 82.▷Automatic climate control: AUTO program,
cooling function and automatic recirculated
air control activated/deactivated, tempera‐
ture, air flow rate and distribution, refer to
page 105.▷Navigation:▷Voice activation, refer to page 151.▷Route criteria, refer to page 149.▷Map view settings, refer to page 152.▷Entertainment:▷Tone control, refer to page 160.▷Radio, stored stations, refer to
page 168.▷CD/multimedia, audio source listened to
last, refer to page 170.▷Telephone: volume, refer to page 196.
Central locking system
The concept
The central locking system becomes active
when the driver's door is closed.
The system simultaneously engages and re‐
leases the locks on the following:
▷Doors.▷Tailgate.▷Fuel filler flap.Seite 31Opening and closingControls31
Online Edition for Part no. 01 40 2 914 595 - VI/12
Page 33 of 291
Panic mode
You can trigger the alarm system if you find
yourself in a dangerous situation.
Press the button on the remote control for at
least 3 seconds.
To switch off the alarm: press any button.
Unlocking tailgate
Press the button on the remote control for
approx. 1 second and release.
The tailgate will open slightly, regardless of
whether it was previously locked or unlocked.
The tailgate pivots back and up when it opens.
Ensure that adequate clearance is available be‐
fore opening.
To avoid locking yourself out of the vehicle, do
not place the remote control into the cargo area.
The tailgate is locked again as soon as it is
pushed closed.
Before and after each trip, check that the tailgate
has not been inadvertently unlocked.
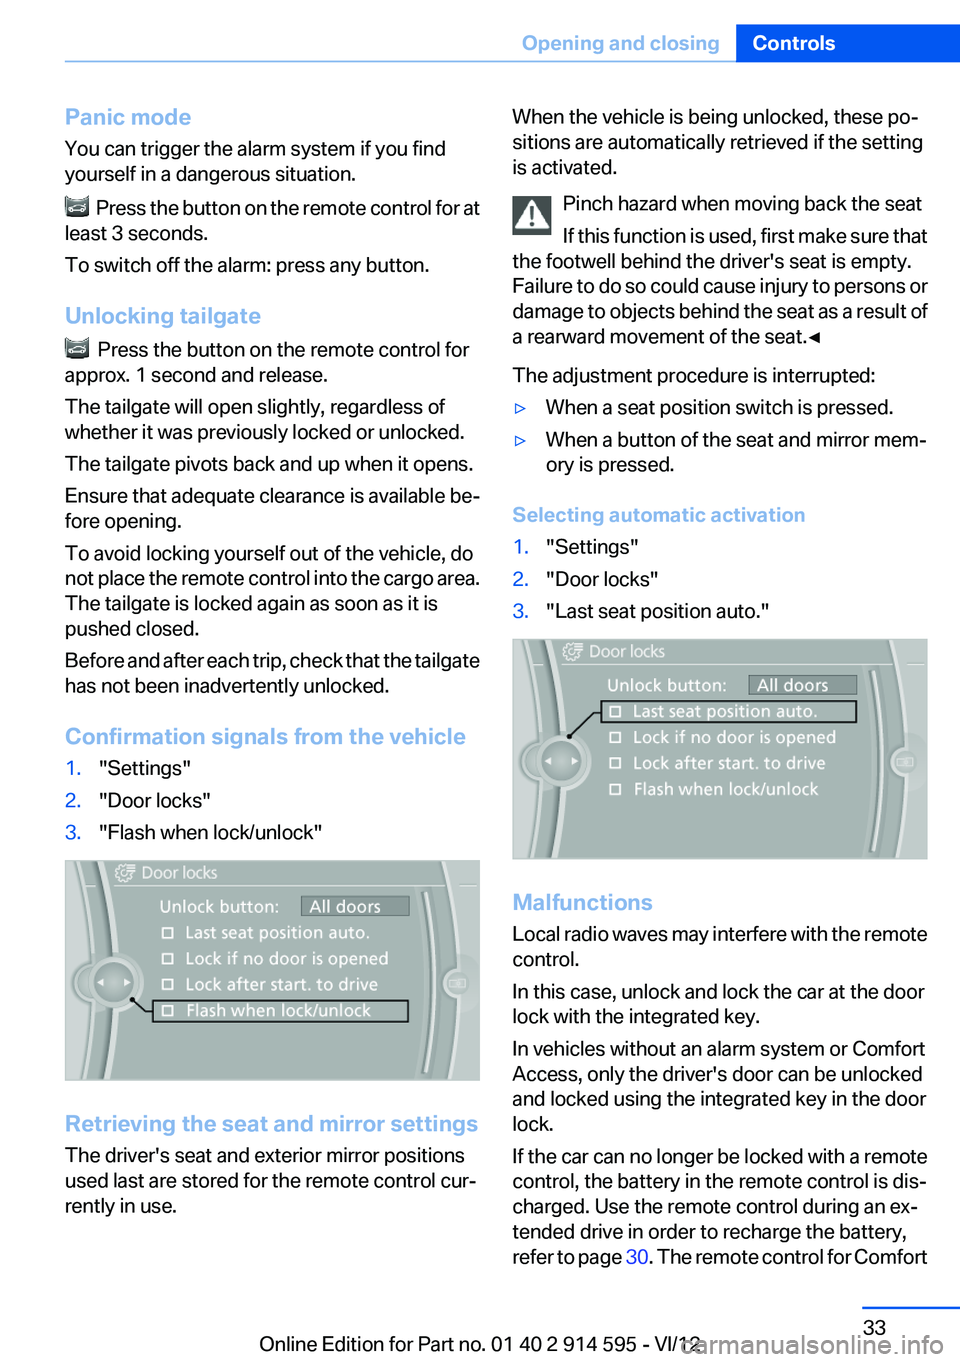
Confirmation signals from the vehicle
1."Settings"2."Door locks"3."Flash when lock/unlock"
Retrieving the seat and mirror settings
The driver's seat and exterior mirror positions
used last are stored for the remote control cur‐
rently in use.
When the vehicle is being unlocked, these po‐
sitions are automatically retrieved if the setting
is activated.
Pinch hazard when moving back the seat
If this function is used, first make sure that
the footwell behind the driver's seat is empty.
Failure to do so could cause injury to persons or
damage to objects behind the seat as a result of
a rearward movement of the seat.◀
The adjustment procedure is interrupted:▷When a seat position switch is pressed.▷When a button of the seat and mirror mem‐
ory is pressed.
Selecting automatic activation
1."Settings"2."Door locks"3."Last seat position auto."
Malfunctions
Local radio waves may interfere with the remote
control.
In this case, unlock and lock the car at the door
lock with the integrated key.
In vehicles without an alarm system or Comfort
Access, only the driver's door can be unlocked
and locked using the integrated key in the door
lock.
If the car can no longer be locked with a remote
control, the battery in the remote control is dis‐
charged. Use the remote control during an ex‐
tended drive in order to recharge the battery,
refer to page 30. The remote control for Comfort
Seite 33Opening and closingControls33
Online Edition for Part no. 01 40 2 914 595 - VI/12
Page 38 of 291
To switch the engine off with transmission po‐
sition N engaged, insert the remote control in
the ignition lock.
Malfunction
The Comfort Access functions can be disturbed
by local radio waves, such as by a mobile phone
in the immediate vicinity of the remote control or
when a mobile phone is being charged in the
vehicle.
If this occurs, open or close the vehicle using the
buttons on the remote control or use the
integrated key in the door lock.
To start the engine afterward, insert the remote
control into the ignition switch.
Warning lamps The warning lamp in the instrument
cluster lights up when you attempt to
start the engine: the engine cannot be
started.
The remote control is not in the vehicle or has a
malfunction. Take the remote control with you
inside the vehicle or have it checked. If neces‐
sary, insert another remote control into the ig‐
nition switch.
The warning lamp in the instrument
cluster lights up while the engine is
running: the remote control is no lon‐
ger inside the vehicle.
After switching off the engine, the engine can
only be started again within approx. 10 seconds
if no door has been opened.
The indicator lamp in the instrument
cluster comes on and a message ap‐
pears on the Control Display: replace
the remote control battery.Replacing the battery
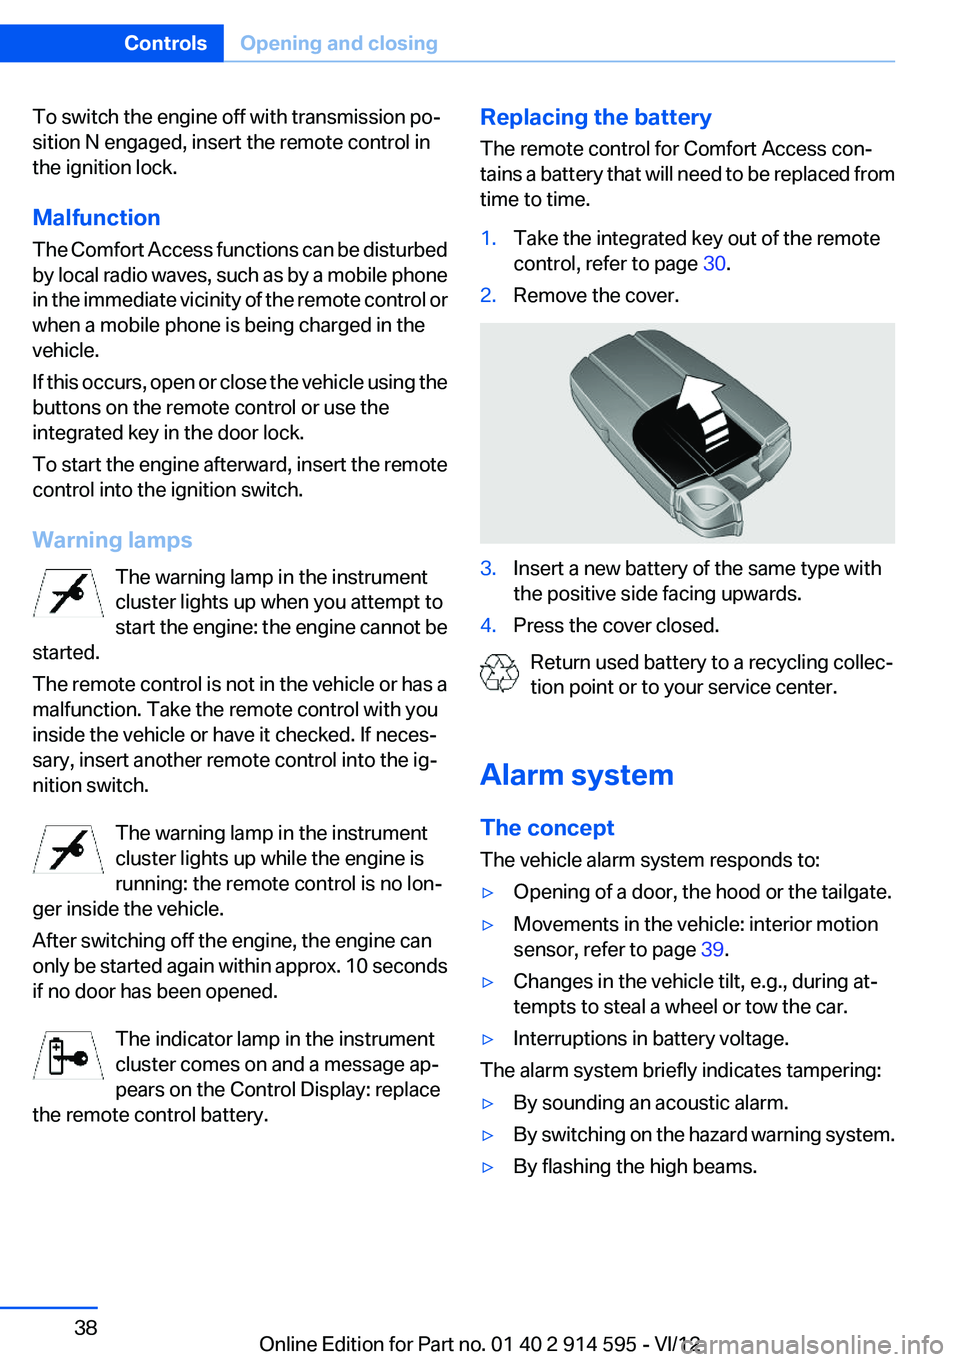
The remote control for Comfort Access con‐
tains a battery that will need to be replaced from
time to time.1.Take the integrated key out of the remote
control, refer to page 30.2.Remove the cover.3.Insert a new battery of the same type with
the positive side facing upwards.4.Press the cover closed.
Return used battery to a recycling collec‐
tion point or to your service center.
Alarm system
The concept
The vehicle alarm system responds to:
▷Opening of a door, the hood or the tailgate.▷Movements in the vehicle: interior motion
sensor, refer to page 39.▷Changes in the vehicle tilt, e.g., during at‐
tempts to steal a wheel or tow the car.▷Interruptions in battery voltage.
The alarm system briefly indicates tampering:
▷By sounding an acoustic alarm.▷By switching on the hazard warning system.▷By flashing the high beams.Seite 38ControlsOpening and closing38
Online Edition for Part no. 01 40 2 914 595 - VI/12
Page 47 of 291
Rear
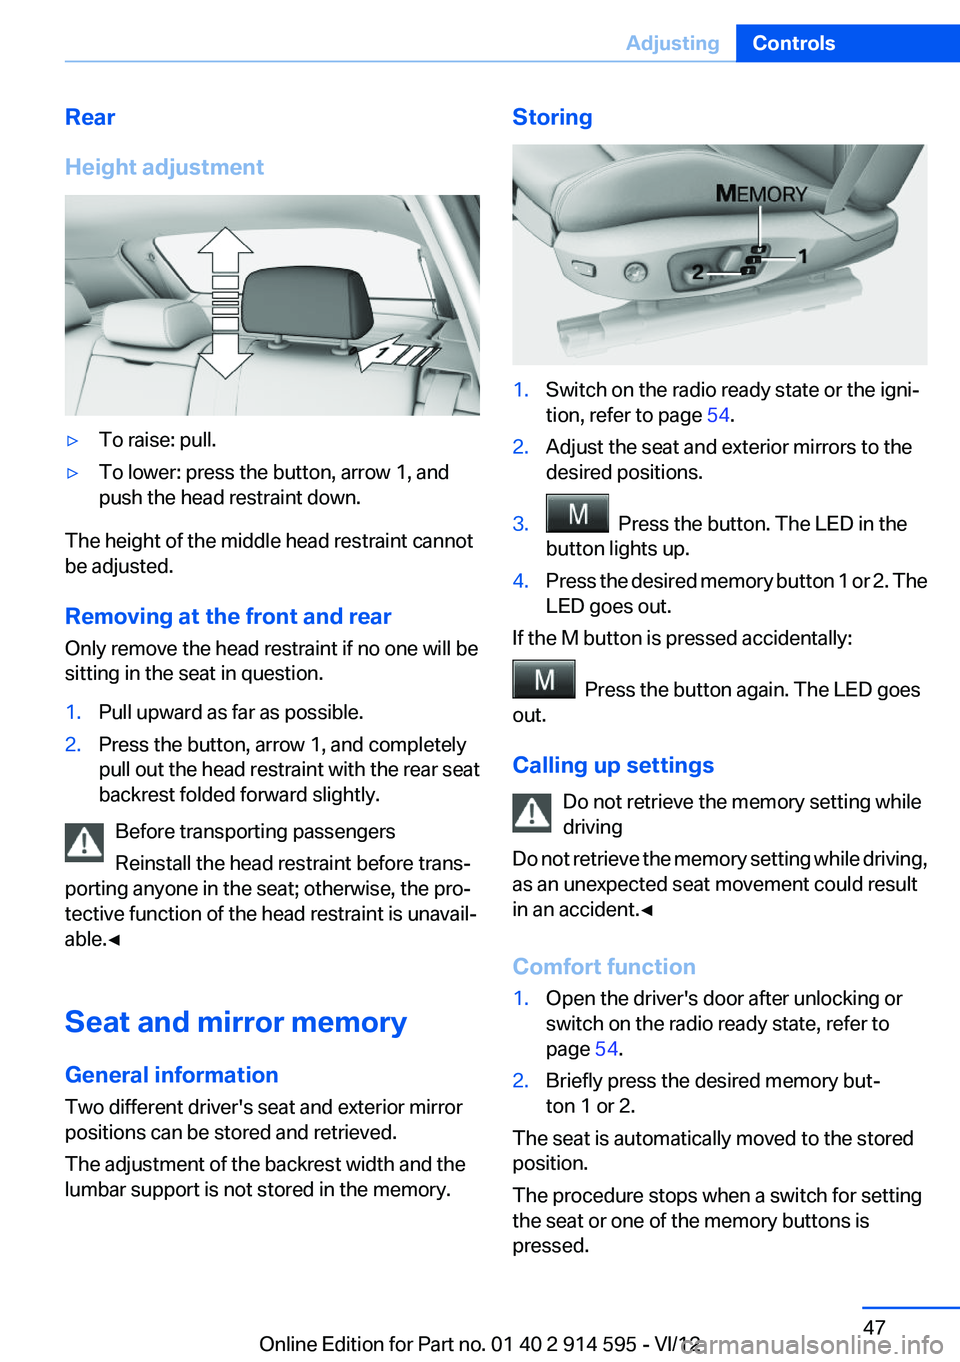
Height adjustment▷To raise: pull.▷To lower: press the button, arrow 1, and
push the head restraint down.
The height of the middle head restraint cannot
be adjusted.
Removing at the front and rear
Only remove the head restraint if no one will be
sitting in the seat in question.
1.Pull upward as far as possible.2.Press the button, arrow 1, and completely
pull out the head restraint with the rear seat
backrest folded forward slightly.
Before transporting passengers
Reinstall the head restraint before trans‐
porting anyone in the seat; otherwise, the pro‐
tective function of the head restraint is unavail‐
able.◀
Seat and mirror memory
General information
Two different driver's seat and exterior mirror
positions can be stored and retrieved.
The adjustment of the backrest width and the
lumbar support is not stored in the memory.
Storing1.Switch on the radio ready state or the igni‐
tion, refer to page 54.2.Adjust the seat and exterior mirrors to the
desired positions.3. Press the button. The LED in the
button lights up.4.Press the desired memory button 1 or 2. The
LED goes out.
If the M button is pressed accidentally:
Press the button again. The LED goes
out.
Calling up settings Do not retrieve the memory setting while
driving
Do not retrieve the memory setting while driving,
as an unexpected seat movement could result
in an accident.◀
Comfort function
1.Open the driver's door after unlocking or
switch on the radio ready state, refer to
page 54.2.Briefly press the desired memory but‐
ton 1 or 2.
The seat is automatically moved to the stored
position.
The procedure stops when a switch for setting
the seat or one of the memory buttons is
pressed.
Seite 47AdjustingControls47
Online Edition for Part no. 01 40 2 914 595 - VI/12
Page 54 of 291
DrivingVehicle equipment
This chapter describes all series equipment as
well as country-specific and special equipment
offered for this model series.Therefore, it also
describes equipment that may not be found in
your vehicle, for instance due to the selected
special equipment or the country version. This
also applies to safety-related functions and sys‐
tems.
Ignition lock
Insert the remote control into the
ignition lock
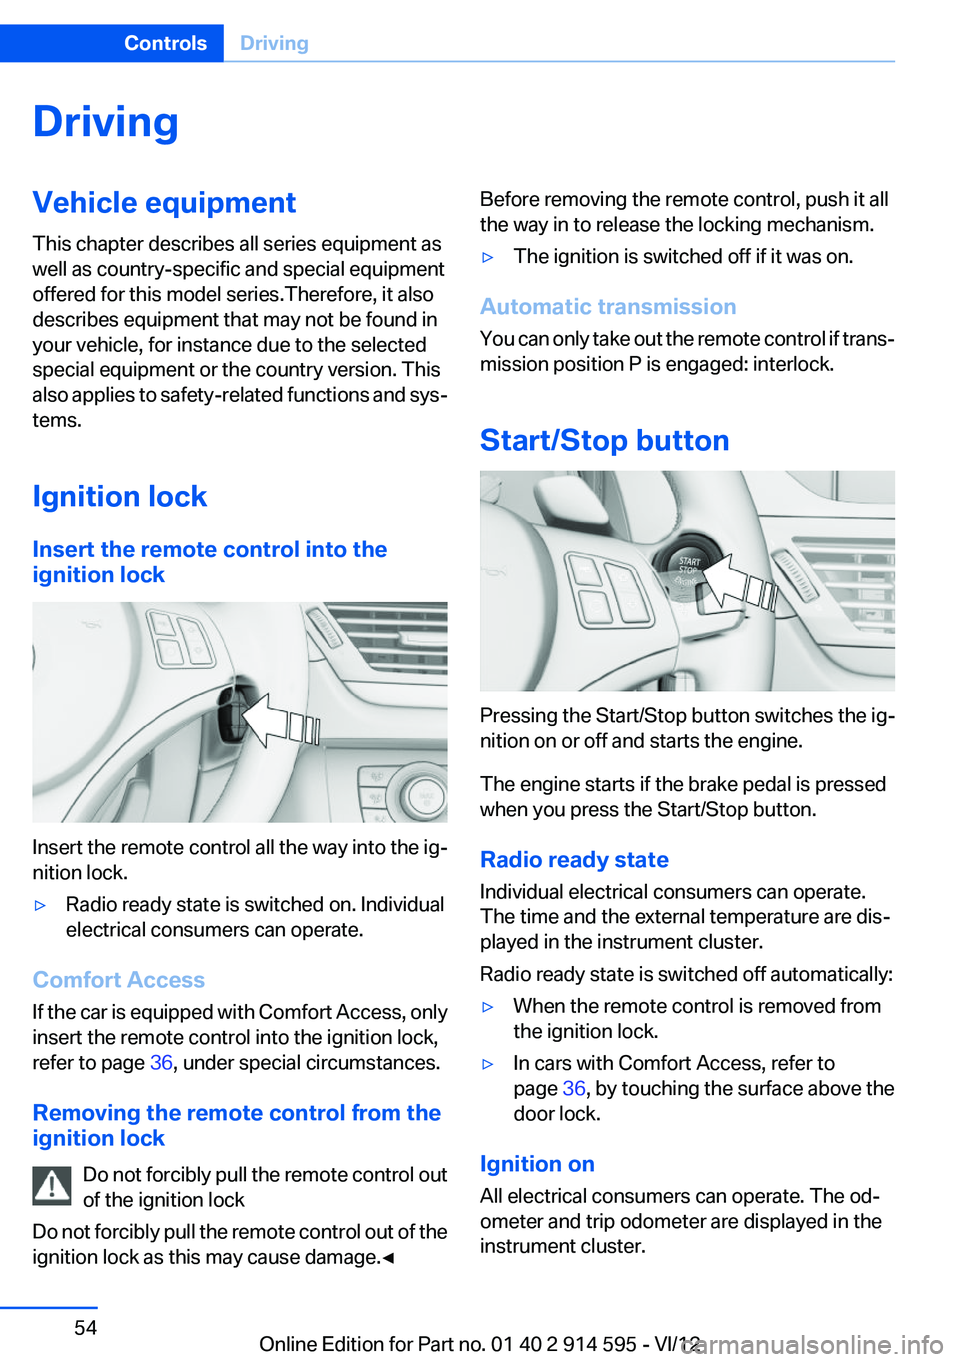
Insert the remote control all the way into the ig‐
nition lock.
▷Radio ready state is switched on. Individual
electrical consumers can operate.
Comfort Access
If the car is equipped with Comfort Access, only
insert the remote control into the ignition lock,
refer to page 36, under special circumstances.
Removing the remote control from the
ignition lock
Do not forcibly pull the remote control out
of the ignition lock
Do not forcibly pull the remote control out of the
ignition lock as this may cause damage.◀
Before removing the remote control, push it all
the way in to release the locking mechanism.▷The ignition is switched off if it was on.
Automatic transmission
You can only take out the remote control if trans‐
mission position P is engaged: interlock.
Start/Stop button
Pressing the Start/Stop button switches the ig‐
nition on or off and starts the engine.
The engine starts if the brake pedal is pressed
when you press the Start/Stop button.
Radio ready state
Individual electrical consumers can operate.
The time and the external temperature are dis‐
played in the instrument cluster.
Radio ready state is switched off automatically:
▷When the remote control is removed from
the ignition lock.▷In cars with Comfort Access, refer to
page 36, by touching the surface above the
door lock.
Ignition on
All electrical consumers can operate. The od‐
ometer and trip odometer are displayed in the
instrument cluster.
Seite 54ControlsDriving54
Online Edition for Part no. 01 40 2 914 595 - VI/12
Page 55 of 291
To save battery power when the engine is off,
switch off the ignition and any unnecessary
electronic systems/power consumers.
Radio ready state and ignition off
All indicator and warning lamps as well as dis‐
plays in the instrument cluster go out.
Automatic transmission, 8-gear
In certain situations, transmission position P is
engaged automatically. To make it possible for
the vehicle to roll, such as in an automatic car
wash, follow the instructions in Car washes, re‐
fer to page 259.
Starting the engine
General information Enclosed areas
Do not let the engine run in enclosed
areas; otherwise, breathing of exhaust fumes
may lead to loss of consciousness and death.
The exhaust gases contain carbon monoxide, an
odorless and colorless but highly toxic gas.◀
Unattended vehicle
Do not leave the car unattended with the
engine running; otherwise, it presents a poten‐
tial source of danger.
Before leaving the car with the engine running,
shift to neutral or engage transmission posi‐
tion P and set the handbrake firmly; otherwise,
the vehicle may begin to roll.◀
Frequent starting in quick succession
Avoid repeated futile attempts at starting
the car and avoid starting the car frequently in
quick succession. Otherwise, the fuel is not
burned or is inadequately burned, and there is
the danger of overheating and damaging the
catalytic converter.◀Do not wait for the engine to warm up while the
vehicle remains stationary. Start driving right
away, but at moderate engine speeds.
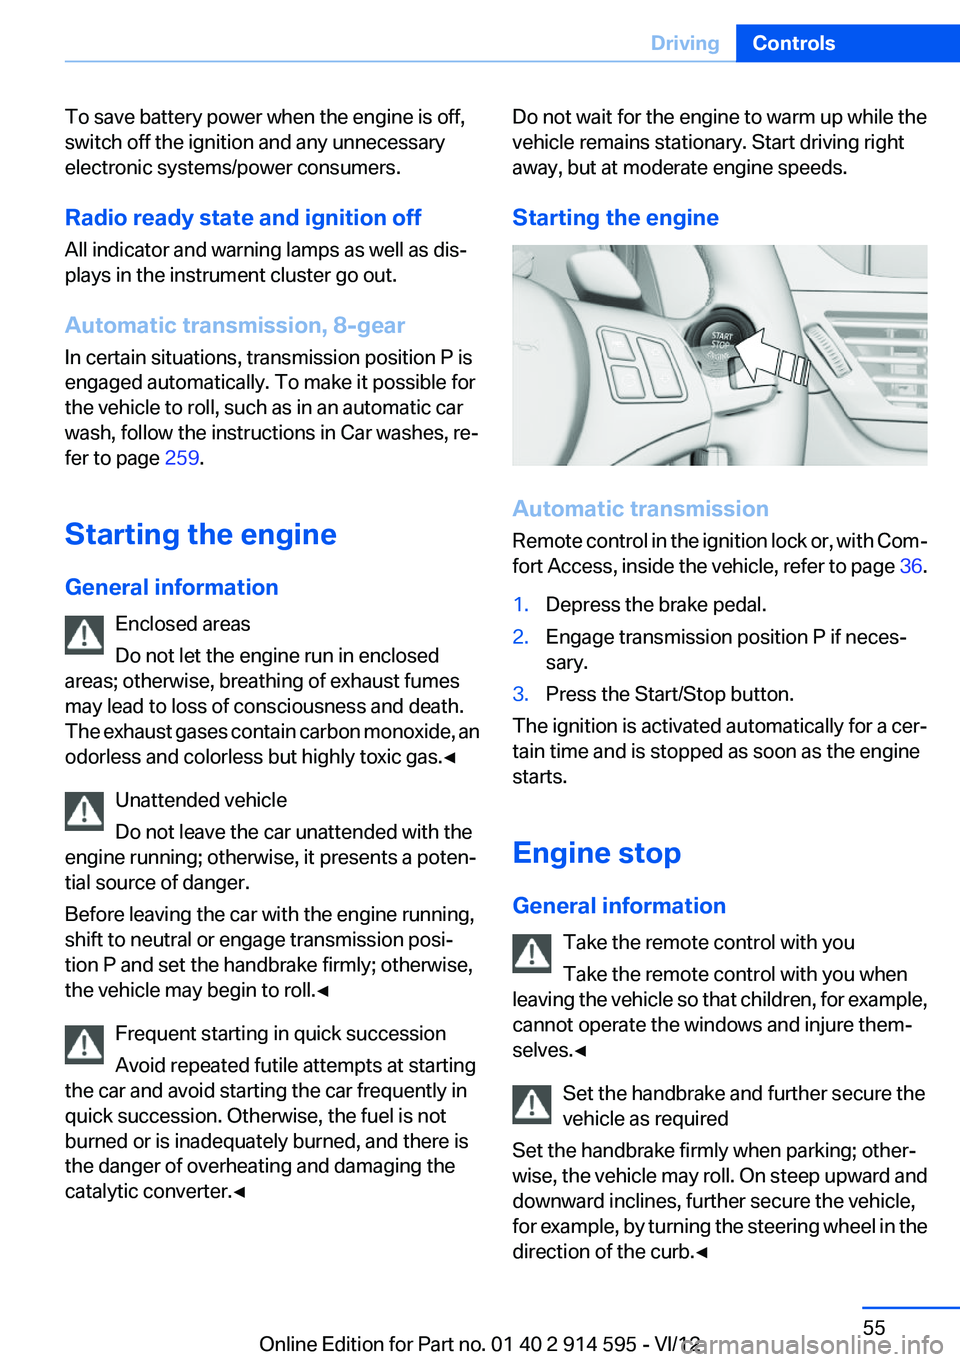
Starting the engine
Automatic transmission
Remote control in the ignition lock or, with Com‐
fort Access, inside the vehicle, refer to page 36.
1.Depress the brake pedal.2.Engage transmission position P if neces‐
sary.3.Press the Start/Stop button.
The ignition is activated automatically for a cer‐
tain time and is stopped as soon as the engine
starts.
Engine stop
General information Take the remote control with you
Take the remote control with you when
leaving the vehicle so that children, for example,
cannot operate the windows and injure them‐
selves.◀
Set the handbrake and further secure the
vehicle as required
Set the handbrake firmly when parking; other‐
wise, the vehicle may roll. On steep upward and
downward inclines, further secure the vehicle,
for example, by turning the steering wheel in the
direction of the curb.◀
Seite 55DrivingControls55
Online Edition for Part no. 01 40 2 914 595 - VI/12
Page 90 of 291
Final tire failure
Vibrations or loud noises while driving can
indicate the final failure of the tire. Reduce speed
and stop; otherwise, pieces of the tire could
come loose and cause an accident. Do not con‐
tinue driving, and contact your service center. ◀
Tire Pressure Monitor TPM
The concept
The tire inflation pressure is measured in the
four mounted tires. The system notifies you if
there is a significant loss of pressure in one or
more tires.
Functional requirements
The system must have been reset while the in‐
flation pressure was correct; otherwise, reliable
signaling of a flat tire is not ensured.
Always use wheels with TPM electronics to en‐
sure that the system will operate properly.
Reset the system after each correction of the
tire inflation pressure and after every tire or
wheel change.
System limits Sudden tire damage
Sudden serious tire damage caused by
external influences cannot be indicated in ad‐
vance.◀
The system does not operate correctly if it has
not been reset. For example, a flat tire may be
indicated despite correct tire inflation pres‐
sures.
The system is inactive and cannot indicate a flat
tire:▷For a mounted wheel without TPM electron‐
ics.▷When the TPM is disturbed by other sys‐
tems or devices with the same radio fre‐
quency.Status display1."Vehicle Info"2."Vehicle status"3. "TPM"
The status is displayed.
Status indicator on the Control Display
The tire and system status is indicated by the
color of the tires.
A change in the tire inflation pressure during
driving is taken into account.
A correction is only necessary if this is indicated
by the TPM
Wheels, green
The tire inflation pressure is equal to the target
state.
One wheel is yellow
A flat tire or major drop in inflation pressure in
the indicated tire.
All wheels are yellow
▷A flat tire or major drop in inflation pressure
in several tires.▷The system was not reset after a wheel
change and thus issues a warning based on
the inflation pressures initialized last.▷A flat tire in one or more tires while the sys‐
tem is being reset.
Wheels, gray
The system cannot detect a flat tire.
Reasons for this may be:
▷TPM is being reset.▷Disturbance by systems or devices with the
same radio frequency.▷Malfunction.Seite 90ControlsSafety90
Online Edition for Part no. 01 40 2 914 595 - VI/12
Page 92 of 291
Because the possible driving distance depends
on how the vehicle is used during the trip, the
actual distance may be smaller or greater de‐
pending on the driving speed, road conditions,
external temperature, cargo load, etc.
Continued driving with a flat tire
Drive moderately and do not exceed a
speed of 50 mph/80 km/h.
A loss of tire inflation pressure results in a
change in the handling characteristics, e.g., re‐
duced lane stability during braking, a longer
braking distance and altered self-steering prop‐
erties.◀
Final tire failure
Vibrations or loud noises while driving can
indicate the final failure of the tire. Reduce speed
and stop; otherwise, pieces of the tire could
come loose and cause an accident. Do not con‐
tinue driving, and contact your service center. ◀
Message when the system was not
reset
The yellow warning lamp lights up. A
message appears on the Control Dis‐
play.
The system detected a wheel change but was
not reset.
Warnings regarding the current tire inflation
pressure are not reliable.
Check the tire inflation pressure and reset the
system.
Malfunction The small warning lamp flashes in yel‐
low and then lights up continuously;
the larger warning lamp comes on in
yellow. On the Control Display, the
tires are shown in gray and a message appears.
No flat tire can be detected.
Display in the following situations:▷A wheel without TPM electronics is fitted:
have the service center check it if necessary.▷Malfunction: have the system checked by
your service center.▷TPM could not be fully reset. Reset the sys‐
tem again.
The small warning lamp flashes in yel‐
low and then lights up continuously;
the larger warning lamp comes on in
yellow. On the Control Display, the
tires are shown in gray and a message appears.
No flat tire can be detected.
Display in the following situations:
▷Disturbance by systems or devices with the
same radio frequency: after leaving the area
of the disturbance, the system automatically
becomes active again.
Declaration according to NHTSA/
FMVSS 138 Tire Pressure Monitoring
Systems
Each tire, including the spare (if provided)
should be checked monthly when cold and in‐
flated to the inflation pressure recommended by
the vehicle manufacturer on the vehicle placard
or tire inflation pressure label (If your vehicle has
tires of a different size than the size indicated on
the vehicle placard or tire inflation pressure la‐
bel, you should determine the proper tire infla‐
tion pressure for those tires.).
As an added safety feature, your vehicle has
been equipped with a tire pressure monitoring
system (TPMS) that illuminates a low tire pres‐
sure telltale when one or more of your tires is
significantly under-inflated. Accordingly, when
the low tire pressure telltale illuminates, you
should stop and check your tires as soon as
possible, and inflate them to the proper pres‐
sure. Driving on a significantly under-inflated tire
causes the tire to overheat and can lead to tire
failure. Under-inflation also reduces fuel effi‐
ciency and tire tread life, and may affect the ve‐
hicle's handling and stopping ability.
Seite 92ControlsSafety92
Online Edition for Part no. 01 40 2 914 595 - VI/12
Page 111 of 291
distance depends on the particular hand-
held transmitter.4.Press the button of the desired function on
the hand-held transmitter and the button
being programmed on the interior rearview
mirror simultaneously and hold. The LED on
the interior rearview mirror flashes slowly at
first.5.When the LED flashes more rapidly, release
both buttons. Rapid flashing indicates that
the button on the interior rearview mirror has
been programmed.
If the LED does not flash faster after 60 sec‐
onds, change the distance between the in‐
terior rearview mirror and the hand-held
transmitter and repeat the step. Multiple tri‐
als at different distances may be necessary.
Wait at least 15 seconds between trials.6.To program additional functions on other
buttons, repeat steps 3 to 5.
The systems can be operated with the buttons
on the interior rearview mirror.
Special characteristics of alternating-
code radio systems
If the system cannot be operated after repeated
programming, check whether the system to be
operated uses an alternating-code system.
Read the operating instructions of the system or
press and hold the programmed button on the
interior rearview mirror. If the LED on the interior
rearview mirror flashes rapidly at first and then
lights up continuously for 2 seconds, the system
is equipped with an alternating-code system.
This flashing LED pattern repeats itself for ap‐
prox. 20 seconds.
In systems with an alternating-code system, the
Universal Garage Door Opener and the system
must be additionally synchronized.
Please obtain additional information on syn‐
chronization in the operating instructions of the
system being set up.
The systems will be easier to synchronize with
the aid of a second person.
Synchronization:1.Park the vehicle within range of the remote-
controlled system.2.Program the corresponding button on the
interior rearview mirror as described.3.Identify and press the synchronization but‐
ton on the system being set up. You have
approx. 30 seconds for the next step.4.Press and hold the button on the interior
rearview mirror for approx. 3 seconds and
then release it. Repeat this step up to three
times if necessary to complete the synchro‐
nization procedure. When synchronization
is completed, the programmed function is
executed.
Reprogramming individual buttons
1.Switch on the ignition.2.Hold the hand-held transmitter at a distance
of approx. 1 to 3 in/2.5 to 8 cm from the
memory buttons.
The required distance depends on the par‐
ticular hand-held transmitter.3.Press the memory button of the Universal
Garage Door Opener.4.If the LED flashes slowly after approx.
20 seconds, press the transmit button on
the hand-held transmitter.5.Release both buttons when the LED flashes
rapidly.
If the LED does not flash rapidly after approx.
60 seconds, change the distance and repeat
the step.
Canada: if the LED does not flash rapidly af‐
ter approx. 60 seconds, change the distance
and repeat the step. If programming was
aborted by the hand-held transmitter, hold
down the memory button and press and re‐
lease the button on the hand-held transmit‐
ter several times for 2 seconds.Seite 111Interior equipmentControls111
Online Edition for Part no. 01 40 2 914 595 - VI/12