ECU BMW X3 2015 F25 Owner's Guide
[x] Cancel search | Manufacturer: BMW, Model Year: 2015, Model line: X3, Model: BMW X3 2015 F25Pages: 257, PDF Size: 5.26 MB
Page 172 of 257
Storage compartmentsVehicle features and optionsThis chapter describes all standard, country-
specific and optional features offered with the
series. It also describes features that are not
necessarily available in your car, e. g., due to
the selected options or country versions. This
also applies to safety-related functions and
systems. The respectively applicable country
provisions must be observed when using the
respective features and systems.
Hints No loose objects in the car's interior
Do not stow any objects in the car's inte‐
rior without securing them; otherwise, they
may present a danger to occupants e.g., during
braking and evasive maneuvers.◀
Do not place anti-slip mats on the dash‐
board
Do not place anti-slip mats on the dashboard.
The mat materials could damage the dash‐
board.◀
Storage compartments The following storage compartments are avail‐
able in the vehicle interior:▷Glove compartment on the front passenger
side, refer to page 168.▷Storage compartment in the front center
armrest, refer to page 169.▷Compartments in the doors, refer to
page 169.▷Pockets on the backrests of the front
seats.▷Net in the front passenger footwell.Glove compartment
Front passenger side
Note Close the glove compartment again im‐
mediately
Close the glove compartment immediately af‐
ter use while driving; otherwise, injury may oc‐
cur during accidents.◀
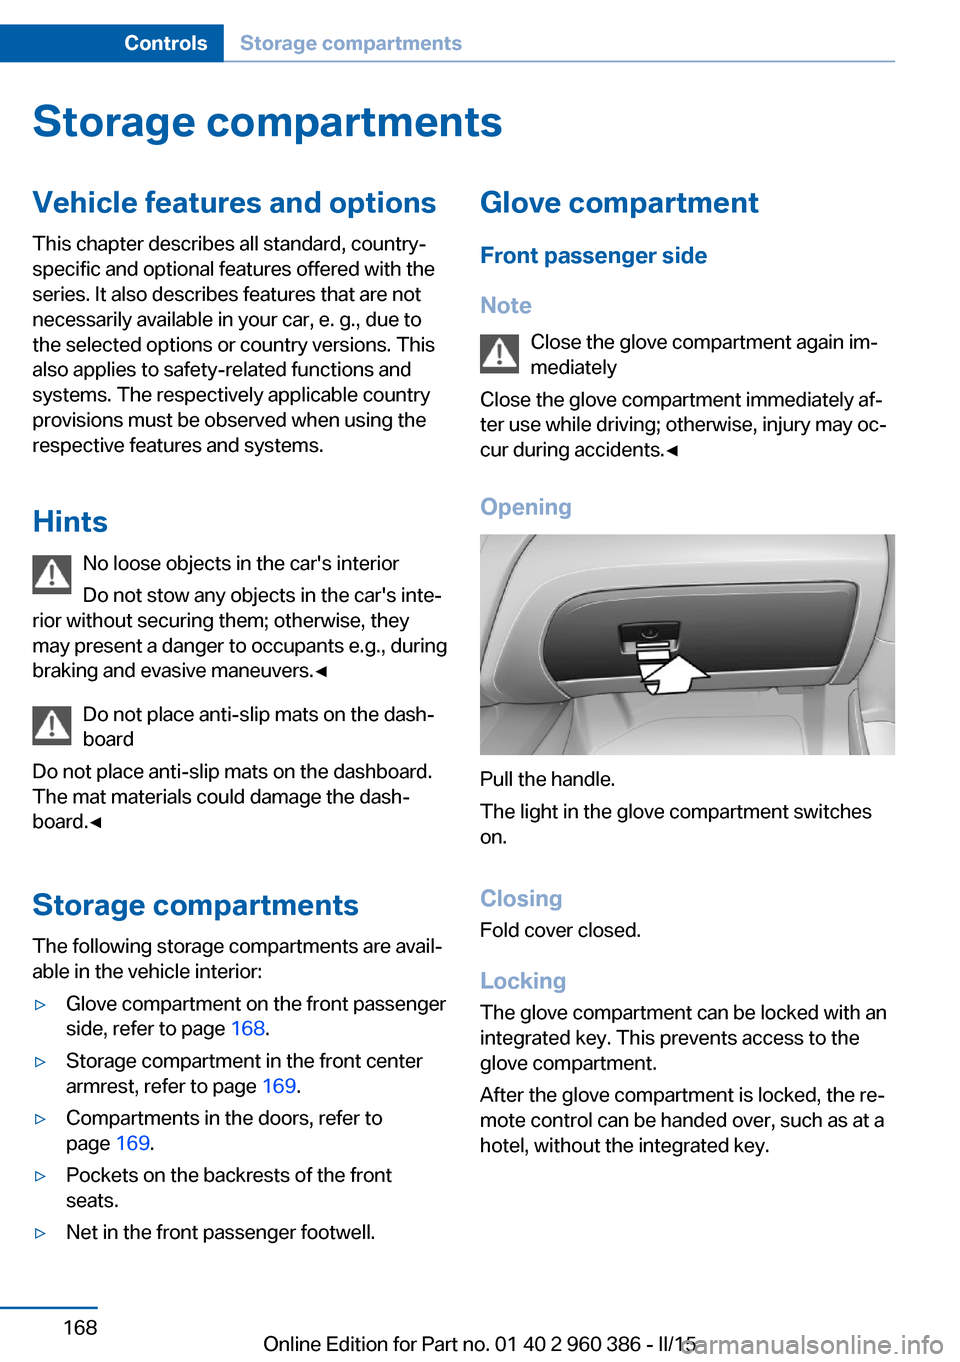
Opening
Pull the handle.
The light in the glove compartment switches
on.
ClosingFold cover closed.
Locking
The glove compartment can be locked with an
integrated key. This prevents access to the
glove compartment.
After the glove compartment is locked, the re‐
mote control can be handed over, such as at a
hotel, without the integrated key.
Seite 168ControlsStorage compartments168
Online Edition for Part no. 01 40 2 960 386 - II/15
Page 174 of 257

Pushing back the covers
Push back the covers before folding up
the center armrest; otherwise, the cupholder
could become damaged.◀
Clothes hooks Do not obstruct view
When suspending clothing from the
hooks, ensure that it will not obstruct the driv‐
er's view.◀
No heavy objects
Do not hang heavy objects from the
hooks; otherwise, they may present a danger
to passengers during braking and evasive ma‐
neuvers.◀
The clothes hooks are located in the grab han‐
dles in the rear.
Storage compartments in the
cargo area
Storage space under cargo floor panel
Fold up the cargo floor panel. The storage
space under the cargo floor panel is subdi‐
vided.
Two additional subdividers can be inserted to
partition it further.
Storage compartment on the right
side
A waterproof storage compartment is available
on the right side of the cargo area.
Multi-function hook Lightweight objects only
Only hang lightweight objects, e.g. shop‐
ping bags, from the multifunction hooks. Oth‐
erwise, there is a danger of objects flying about
during braking and evasive maneuvers.
Only transport heavy luggage in the trunk if it
has been appropriately secured.◀
Depending on the installed equipment version,
there are one or two multi-function hooks in
the cargo area.
Retaining strap A retaining strap is available on the right side
trim for fastening small objects.
Net
Smaller objects can be stored in the net on the
left side of the cargo area.
Seite 170ControlsStorage compartments170
Online Edition for Part no. 01 40 2 960 386 - II/15
Page 175 of 257

Left side storage compartment
Pull the handle.Lashing eyes in the trunk
To secure the cargo, refer to page 179, there
are lashing eyes in the cargo area.
Lashing eyes in the trunk with rail To secure the cargo, refer to page 179, there
are lashing eyes in the cargo area.
Reversible floor panel The bottom of the cargo floor panel is coated
with a water- and dirt-resistant finish.
Fold the cargo floor panel up, remove and turn
it over.
Cargo net, FlexNet
To secure the cargo, refer to page 179, the
flexible cargo net can also be used.
Folding box
A folding box is located under the cargo area
floor.
Seite 171Storage compartmentsControls171
Online Edition for Part no. 01 40 2 960 386 - II/15
Page 180 of 257
mission will be conducted away from the vehi‐
cle interior.◀
Hydroplaning Hydroplaning
When driving on wet or slushy roads, re‐
duce your speed to prevent hydroplaning.◀
On wet or slushy roads, a wedge of water can
form between the tires and road surface.
This phenomenon is referred to as hydroplan‐
ing. It is characterized by a partial or complete
loss of contact between the tires and the road
surface, ultimately undermining your ability to
steer and brake the vehicle.
Driving through water Observe water level and speed
Do not exceed the maximum water level
and maximum speed; otherwise, the vehicle's
engine, the electrical systems and the trans‐
mission may be damaged.◀
Drive though calm water only and only if it is
not deeper than 19.6 inches/50 cm and at this
height, no faster than walking speed, up to
3 mph/5 km/h.
Braking safely
Your vehicle is equipped with ABS as a stand‐
ard feature.
Applying the brakes fully is the most effective
way of braking in situations needed.
Steering is still responsive. You can still avoid
any obstacles with a minimum of steering ef‐
fort.
Pulsation of the brake pedal and sounds from
the hydraulic circuits indicate that ABS is in its
active mode.
In certain braking situations, the perforated
brake discs can cause functional problems.
However, this has no effect on the perform‐
ance and operational reliability of the brake.Objects within the range of movement
of the pedals
No objects in the area around the pedals
Keep floor mats, carpets, and any other
objects out of the pedal area; otherwise, the
function of the pedals could be impeded while
driving and create the risk of an accident.
Do not place additional floor mats over existing
mats or other objects.
Only use floor mats that have been approved
for the vehicle and can be properly attached to
floor.
Ensure that the floor mats are securely fas‐
tened again after they were removed for clean‐
ing, e.g.◀
Driving in wet conditions When roads are wet, salted, or in heavy rain,
press brake pedal ever so gently every few
miles.
Ensure that this action does not endanger other traffic.
The heat generated in this process helps dry
the brake discs and pads.
In this way braking efficiency will be available
when you need it.
Hills Avoid stressing the brakes
Avoid placing excessive stress on the
brake system. Light but consistent brake pres‐
sure can lead to high temperatures, brakes
wearing out and possibly even brake failure.◀
Do not drive in neutral
Do not drive in neutral or with the engine
stopped, as doing so disables engine braking.
In addition, steering and brake assist are un‐
available with the engine stopped.◀
Drive long or steep downhill gradients in the
gear that requires least braking efforts. Other‐Seite 176Driving tipsThings to remember when driving176
Online Edition for Part no. 01 40 2 960 386 - II/15
Page 182 of 257
LoadingVehicle features and options
This chapter describes all standard, country-
specific and optional features offered with the
series. It also describes features that are not
necessarily available in your car, e. g., due to
the selected options or country versions. This
also applies to safety-related functions and
systems. The respectively applicable country
provisions must be observed when using the
respective features and systems.
Hints Overloading the vehicle
To avoid exceeding the approved ca‐
pacity of the tires, never overload the vehicle.
Overloading can lead to overheating and in‐
creases the rate at which damage develops in‐
side the tires. This could result in a sudden
loss of tire inflation pressure.◀
No fluids in the cargo area
Make sure that fluids do not leak into the
cargo area; otherwise, the vehicle may be dam‐
aged.◀
Heavy and hard objects
Do not stow any heavy and hard objects
in the car's interior without securing them; oth‐
erwise, they may present a danger to occu‐
pants, e.g., during braking and evasive maneu‐
vers.◀
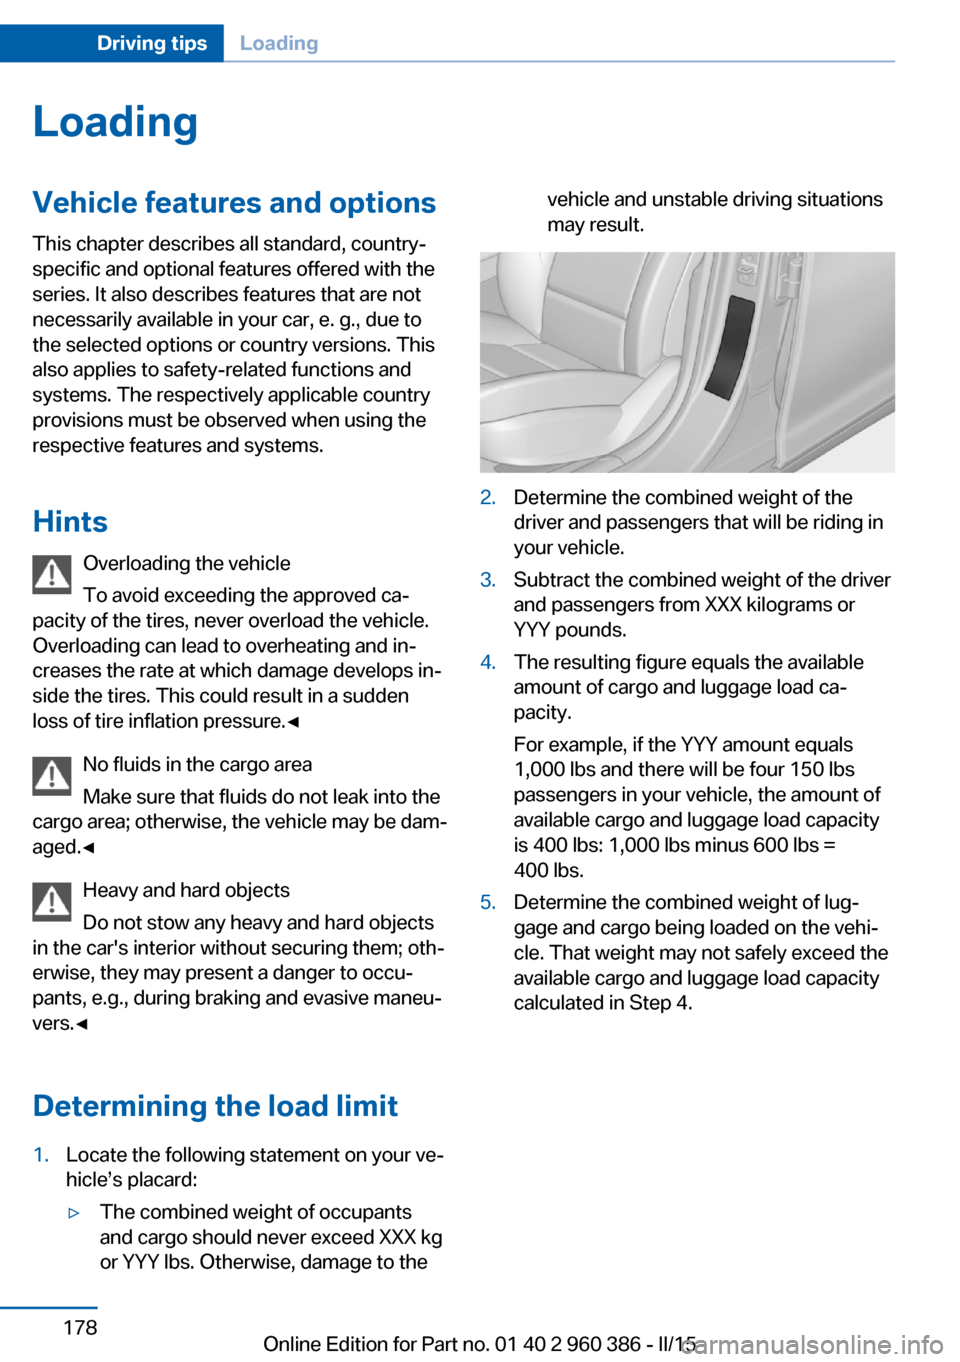
Determining the load limit1.Locate the following statement on your ve‐
hicle’s placard:▷The combined weight of occupants
and cargo should never exceed XXX kg
or YYY lbs. Otherwise, damage to thevehicle and unstable driving situations
may result.2.Determine the combined weight of the
driver and passengers that will be riding in
your vehicle.3.Subtract the combined weight of the driver
and passengers from XXX kilograms or
YYY pounds.4.The resulting figure equals the available
amount of cargo and luggage load ca‐
pacity.
For example, if the YYY amount equals
1,000 lbs and there will be four 150 lbs
passengers in your vehicle, the amount of
available cargo and luggage load capacity
is 400 lbs: 1,000 lbs minus 600 lbs =
400 lbs.5.Determine the combined weight of lug‐
gage and cargo being loaded on the vehi‐
cle. That weight may not safely exceed the
available cargo and luggage load capacity
calculated in Step 4.Seite 178Driving tipsLoading178
Online Edition for Part no. 01 40 2 960 386 - II/15
Page 183 of 257

Load
The maximum load is the sum of the weight of
the occupants and the cargo.
The greater the weight of the occupants, the
less cargo that can be transported.
Stowing cargo
▷Cover sharp edges and corners on the
cargo.▷Heavy cargo: stow as far forward as possi‐
ble, directly behind and at the bottom of
the rear passenger seat backrests.▷Very heavy cargo: when the rear seat is not
occupied, secure each of the outer safety
belts in the opposite buckle.▷If necessary, fold down the rear backrests
to stow cargo.▷Do not stack cargo above the top edge of
the backrests.▷Use the trunk partition net, refer to
page 166, to protect passengers. Make
sure that objects cannot penetrate the
trunk partition net.Securing cargo
Lashing eyes in the trunk
To secure the cargo there are four lashing
eyes in the cargo area.
Lashing eyes in the trunk with rails
To secure the cargo there are four movable
lashing eyes in the cargo area.
To slide the lashing eyes, press the button, ar‐
row 1. Make sure that the lashing eyes latch at
the new position.
The lashing eyes at the openings in the rails
can be removed.
Seite 179LoadingDriving tips179
Online Edition for Part no. 01 40 2 960 386 - II/15
Page 184 of 257
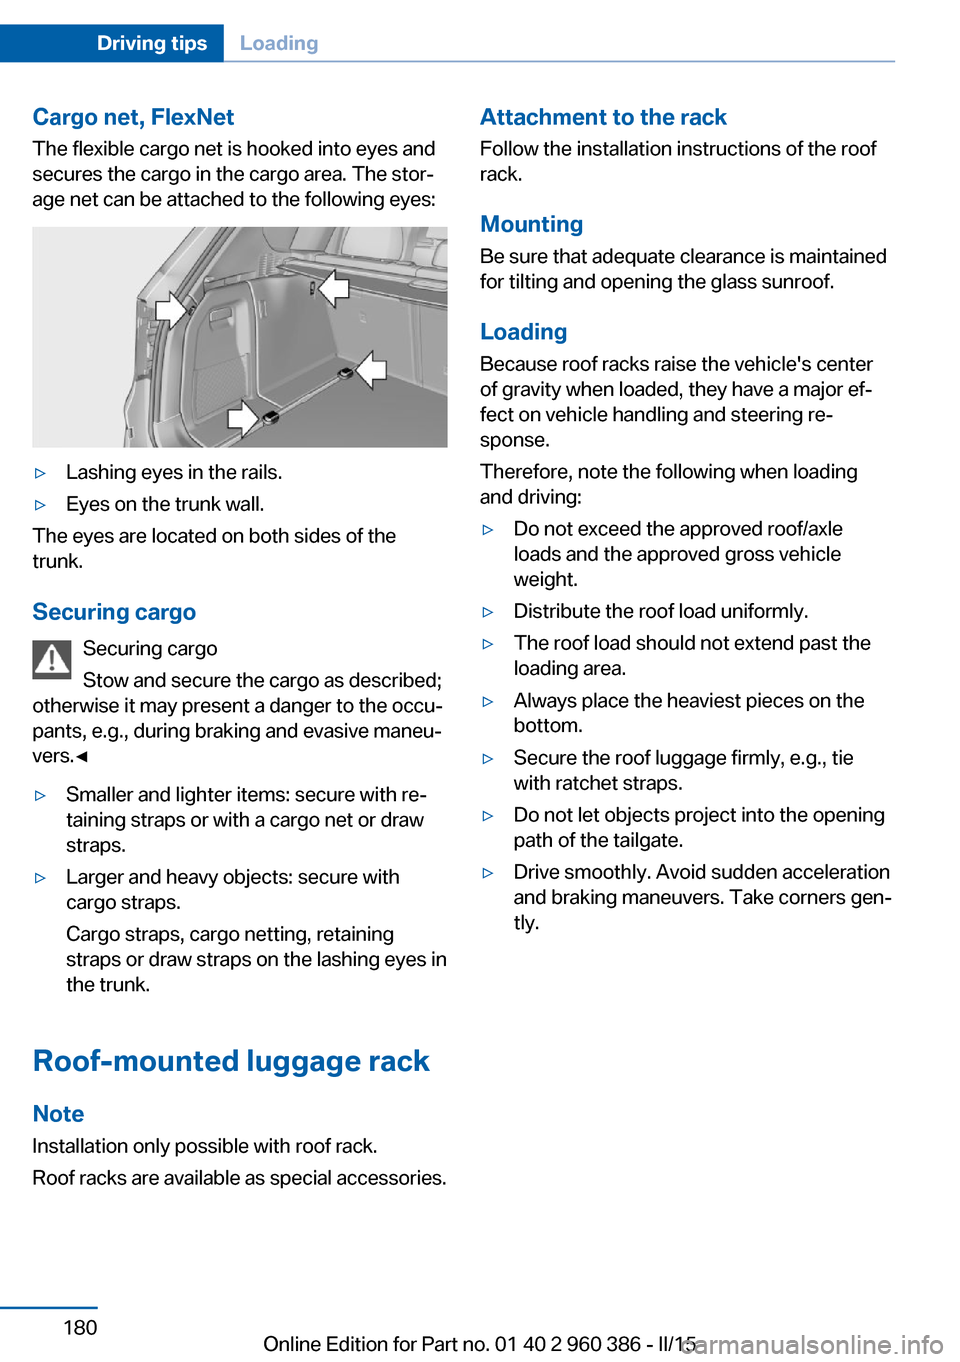
Cargo net, FlexNetThe flexible cargo net is hooked into eyes and
secures the cargo in the cargo area. The stor‐
age net can be attached to the following eyes:▷Lashing eyes in the rails.▷Eyes on the trunk wall.
The eyes are located on both sides of the
trunk.
Securing cargo Securing cargo
Stow and secure the cargo as described;
otherwise it may present a danger to the occu‐
pants, e.g., during braking and evasive maneu‐
vers.◀
▷Smaller and lighter items: secure with re‐
taining straps or with a cargo net or draw
straps.▷Larger and heavy objects: secure with
cargo straps.
Cargo straps, cargo netting, retaining
straps or draw straps on the lashing eyes in
the trunk.
Roof-mounted luggage rack
NoteInstallation only possible with roof rack.
Roof racks are available as special accessories.
Attachment to the rack Follow the installation instructions of the roof
rack.
Mounting
Be sure that adequate clearance is maintained
for tilting and opening the glass sunroof.
LoadingBecause roof racks raise the vehicle's centerof gravity when loaded, they have a major ef‐
fect on vehicle handling and steering re‐
sponse.
Therefore, note the following when loading
and driving:▷Do not exceed the approved roof/axle
loads and the approved gross vehicle
weight.▷Distribute the roof load uniformly.▷The roof load should not extend past the
loading area.▷Always place the heaviest pieces on the
bottom.▷Secure the roof luggage firmly, e.g., tie
with ratchet straps.▷Do not let objects project into the opening
path of the tailgate.▷Drive smoothly. Avoid sudden acceleration
and braking maneuvers. Take corners gen‐
tly.Seite 180Driving tipsLoading180
Online Edition for Part no. 01 40 2 960 386 - II/15
Page 213 of 257

Never reach into the engine compart‐
ment
Never reach into spaces or gaps in the engine
compartment; otherwise, there is a risk of in‐
jury, e.g., from rotating or hot parts.◀
Opening the hood Danger of injury when the hood is open
There is a danger of injury from protrud‐
ing parts when the hood is open.◀1.Pull the lever.2.Press the release handle and open the
hood.3.Be careful of protruding parts on the hood.Closing the hood
Hood open when driving
If you see any signs that the hood is not
completely closed while driving, pull over im‐
mediately and close it securely.◀
Danger of jamming
Make sure that the closing path of the
hood is clear; otherwise, injuries may result.◀
Let the hood drop from a height of approx. 16
in/40 cm and push down on it to lock it fully.
Make sure you hear the hood engage.
Seite 209Engine compartmentMobility209
Online Edition for Part no. 01 40 2 960 386 - II/15
Page 228 of 257
The added amount of acid is sufficient for the
service life of the battery.
Further information about the battery can be
obtained from your service center.
Battery replacement Use approved vehicle batteries only
Only use vehicle batteries that have been
approved for your vehicle by the manufacturer;
otherwise, the vehicle could be damaged and
systems or functions may not be fully availa‐
ble.◀
After a battery replacement, have the battery
registered on the vehicle by the service center
to ensure that all comfort features are fully
available and that any Check Control mes‐
sages of these comfort features are no longer
displayed.
Charging the battery
General information
Make sure that the battery is always suffi‐
ciently charged to guarantee that the battery
remains usable for its full service life.
The battery may need to be charged in the fol‐
lowing cases:▷When making frequent short-distance
drives.▷If the vehicle is not used for prolonged pe‐
riods, longer than a month.
Hints
Do not connect charging devices to the
12 volt socket in the vehicle
Do not connect battery chargers to the fac‐
tory-installed 12 volt sockets in the vehicle as
this may damage the vehicle battery due to an
increased power consumption.◀
Starting aid terminals
In the vehicle, only charge the battery via the
starting aid terminals, refer to page 228, in the
engine compartment with the engine off.
Power failure After a temporary power loss, some equipment
needs to be newly initialized or individual set‐
tings updated, e. g.:▷Seat and mirror memory: store the posi‐
tions again.▷Time: update.▷Date: update.▷Glass sunroof: initialize the system, refer to
page 50.
Disposing of old batteries
Have old batteries disposed of by your
service center or bring them to a recy‐
cling center.
Maintain the battery in an upright position for
transport and storage. Secure the battery so
that it does not tip over during transport.
Fuses Hints Replacing fuses
Never attempt to repair a blown fuse and
do not replace a defective fuse with a substi‐
tute of another color or amperage rating; this
could lead to a circuit overload, ultimately re‐
sulting in a fire in the vehicle.◀
Plastic tweezers and information on the fuse
types and locations are stored in the fuse box
in the trunk.
Seite 224MobilityReplacing components224
Online Edition for Part no. 01 40 2 960 386 - II/15
Page 233 of 257
Tow-starting and towingNote Tow-starting and towing
For tow-starting or towing, switch off the
Intelligent Safety systems; otherwise malfunc‐
tions of the individual braking systems might
lead to accidents.◀
Steptronic transmission: transporting
your vehicle
Note Your vehicle is not permitted to be towed.
Therefore, contact a service center in the
event of a breakdown.
Do not have the vehicle towed
Have your vehicle transported on a load‐
ing platform only; otherwise, damage may oc‐
cur.◀
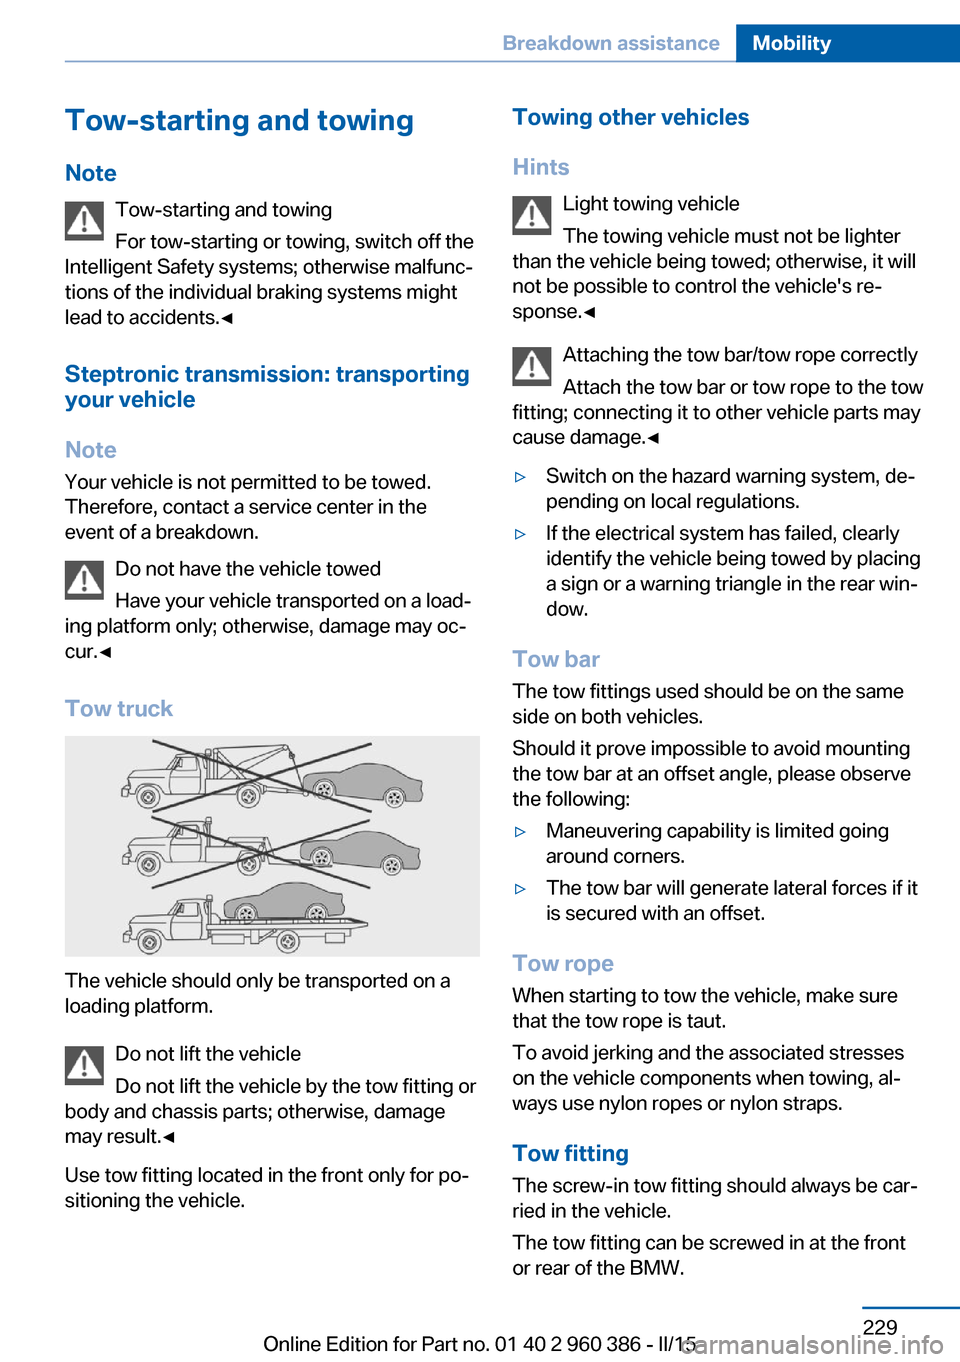
Tow truck
The vehicle should only be transported on a
loading platform.
Do not lift the vehicle
Do not lift the vehicle by the tow fitting or
body and chassis parts; otherwise, damage
may result.◀
Use tow fitting located in the front only for po‐
sitioning the vehicle.
Towing other vehicles
Hints Light towing vehicle
The towing vehicle must not be lighter
than the vehicle being towed; otherwise, it will
not be possible to control the vehicle's re‐
sponse.◀
Attaching the tow bar/tow rope correctly
Attach the tow bar or tow rope to the tow
fitting; connecting it to other vehicle parts may
cause damage.◀▷Switch on the hazard warning system, de‐
pending on local regulations.▷If the electrical system has failed, clearly
identify the vehicle being towed by placing
a sign or a warning triangle in the rear win‐
dow.
Tow bar
The tow fittings used should be on the same
side on both vehicles.
Should it prove impossible to avoid mounting
the tow bar at an offset angle, please observe
the following:
▷Maneuvering capability is limited going
around corners.▷The tow bar will generate lateral forces if it
is secured with an offset.
Tow rope
When starting to tow the vehicle, make sure
that the tow rope is taut.
To avoid jerking and the associated stresses
on the vehicle components when towing, al‐
ways use nylon ropes or nylon straps.
Tow fitting
The screw-in tow fitting should always be car‐
ried in the vehicle.
The tow fitting can be screwed in at the front
or rear of the BMW.
Seite 229Breakdown assistanceMobility229
Online Edition for Part no. 01 40 2 960 386 - II/15