ESP BMW X3 3.0I 2006 E83 Owner's Manual
[x] Cancel search | Manufacturer: BMW, Model Year: 2006, Model line: X3 3.0I, Model: BMW X3 3.0I 2006 E83Pages: 133, PDF Size: 8.37 MB
Page 8 of 133
Notes
6
For your own safety
Maintenance and repair
Advanced technology, e.g. the use of
modern materials and powerful electron-
ics, requires specially adapted maintenance
and repair methods. You should therefore have
the corresponding work on your vehicle per-
formed only by your BMW Sports Activity
Vehicle Center or at a workshop that works
according to BMW repair procedures with cor-
respondingly trained personnel. If this work is
not carried out properly, there is a danger of
subsequent damage and related safety haz-
ards.<
California Proposition 65 Warning
California law requires us to state the following
warning:
Engine exhaust and a wide variety of
automobile components and parts,
including components found in the interior fur-
nishings in a vehicle, contain or emit chemicals
known to the State of California to cause cancer
and birth defects and reproductive harm. In
addition, certain fluids contained in vehicles and
certain products of component wear contain or
emit chemicals known to the State of California
to cause cancer and birth defects or other
reproductive harm.
Battery posts, terminals and related accesso-
ries contain lead and lead compounds. Wash
your hands after handling.
Used engine oil contains chemicals that have
caused cancer in laboratory animals. Always
protect your skin by washing thoroughly with
soap and water.<
Parts and accessories
For your own safety, use genuine parts
and accessories approved by BMW.
When you purchase accessories tested and
approved by BMW and Genuine BMW Parts,
you simultaneously acquire the assurance that
they have been thoroughly tested by BMW to
ensure optimum performance when installed
on your vehicle.
BMW warrants these parts to be free from
defects in material and workmanship.
BMW will not accept any liability for damage
resulting from installation of parts and accesso-
ries not approved by BMW.
BMW cannot test every product made by other
manufacturers to verify if it can be used on a
BMW safely and without risk to either the vehi-
cle, its operation or its occupants.
Genuine BMW Parts, BMW Accessories and
other products approved by BMW, together
with professional advice on using these items,
are available from all BMW Sports Activity Vehi-
cle Centers.
Installation and operation of non-BMW
approved accessories such as alarms, radios,
amplifiers, radar detectors, wheels, suspension
components, brake dust shields, telephones,
including operation of any mobile phone from
within the vehicle without using an externally
mounted antenna, or transceiver equipment
such as CBs, walkie-talkies, ham radios or sim-
ilar accessories may cause extensive damage
to the vehicle, compromise its safety, interfere
with the vehicle’s electrical system, or affect the
validity of the BMW Limited Warranty. See your
BMW Sports Activity Vehicle Center for addi-
tional information.<
Maintenance, replacement, or repair of
the emission control devices and sys-
tems may be performed by any automotive
repair establishment or individual using any cer-
tified automotive part.<
Page 14 of 133
Cockpit
12
Indicator and warning lamps
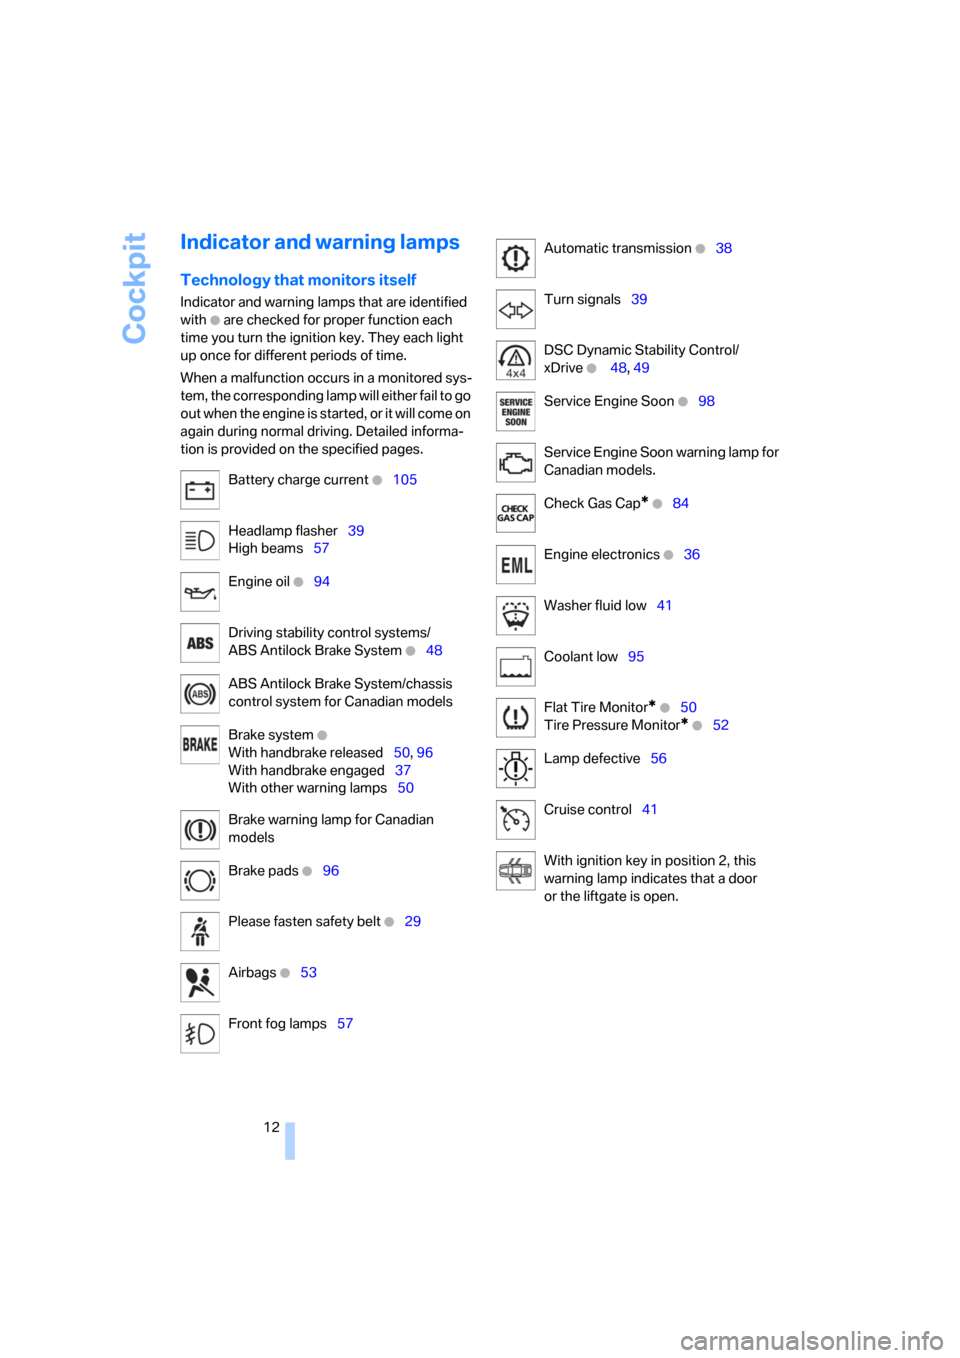
Technology that monitors itself
Indicator and warning lamps that are identified
with
+ are checked for proper function each
time you turn the ignition key. They each light
up once for different periods of time.
When a malfunction occurs in a monitored sys-
tem, the corresponding lamp will either fail to go
o u t w h e n t h e e n g i n e i s s t a r t e d , o r i t w i l l c o m e o n
again during normal driving. Detailed informa-
tion is provided on the specified pages.
Battery charge current
+105
Headlamp flasher39
High beams57
Engine oil
+94
Driving stability control systems/
ABS Antilock Brake System
+48
ABS Antilock Brake System/chassis
control system for Canadian models
Brake system
+
With handbrake released50, 96
With handbrake engaged37
With other warning lamps50
Brake warning lamp for Canadian
models
Brake pads
+96
Please fasten safety belt
+29
Airbags
+53
Front fog lamps57
Automatic transmission +38
Turn signals39
DSC Dynamic Stability Control/
xDrive
+ 48, 49
Service Engine Soon
+98
Service Engine Soon warning lamp for
Canadian models.
Check Gas Cap
* +84
Engine electronics
+36
Washer fluid low41
Coolant low95
Flat Tire Monitor
* +50
Tire Pressure Monitor
* +52
Lamp defective56
Cruise control41
With ignition key in position 2, this
warning lamp indicates that a door
or the liftgate is open.
Page 15 of 133
At a glance
Controls
Driving tips
Mobility Reference
13
Colors
The indicator and warning lamps can light up in
different colors and combinations.
The following section explains the significance
of the individual colors as well as how you
should respond when they appear.
>red:
Stop the vehicle immediately
or
an important reminder
>yellow:
Have the system inspected as soon as
possible
or
for your information
>green:
For your information
>blue:
For your information
Buttons on steering wheel*
The buttons integrated into the steering wheel
are provided so that you can operate a number
of accessories quickly and without being dis-
tracted from traffic conditions. You may oper-
ate:
>Selected audio source functions
>Recirculated-air mode/steering wheel
heater
>Cruise control
>Selected telephone functions
>Voice command system
In order to operate a system, it must be
switched on.<
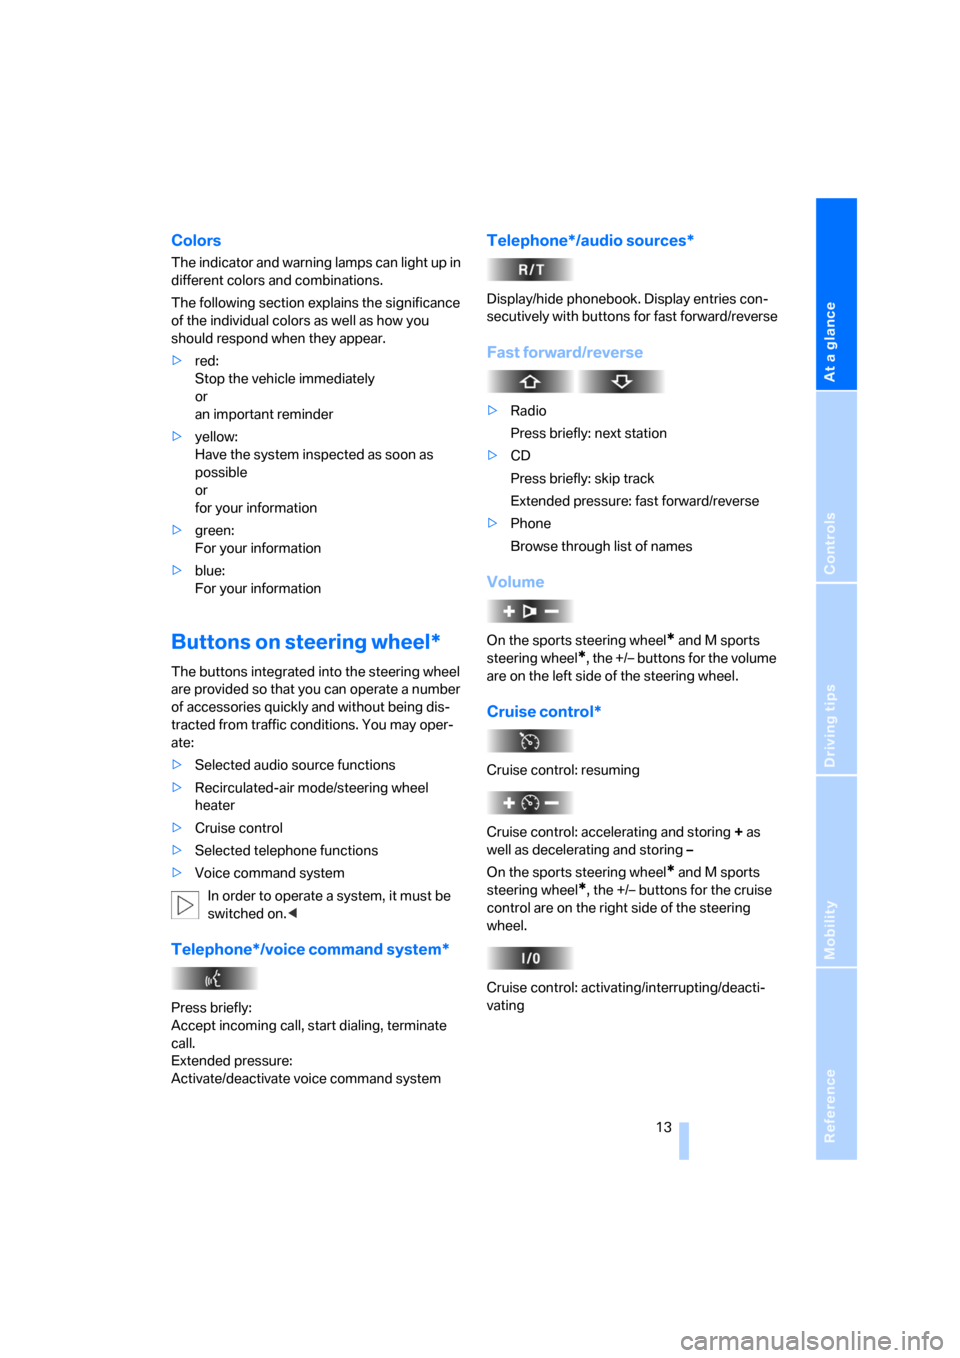
Telephone*/voice command system*
Press briefly:
Accept incoming call, start dialing, terminate
call.
Extended pressure:
Activate/deactivate voice command system
Telephone*/audio sources*
Display/hide phonebook. Display entries con-
secutively with buttons for fast forward/reverse
Fast forward/reverse
>Radio
Press briefly: next station
>CD
Press briefly: skip track
Extended pressure: fast forward/reverse
>Phone
Browse through list of names
Volume
On the sports steering wheel* and M sports
steering wheel
*, the +/– buttons for the volume
are on the left side of the steering wheel.
Cruise control*
Cruise control: resuming
Cruise control: accelerating and storing + as
well as decelerating and storing –
On the sports steering wheel
* and M sports
steering wheel
*, the +/– buttons for the cruise
control are on the right side of the steering
wheel.
Cruise control: activating/interrupting/deacti-
vating
Page 24 of 133
Opening and closing
22
Windows
Keep windows in your line of sight while
closing. Failure to do so can result in
bodily injury.
Always remove the key when leaving the vehi-
cle; otherwise, children could operate the win-
dows and injure themselves.<
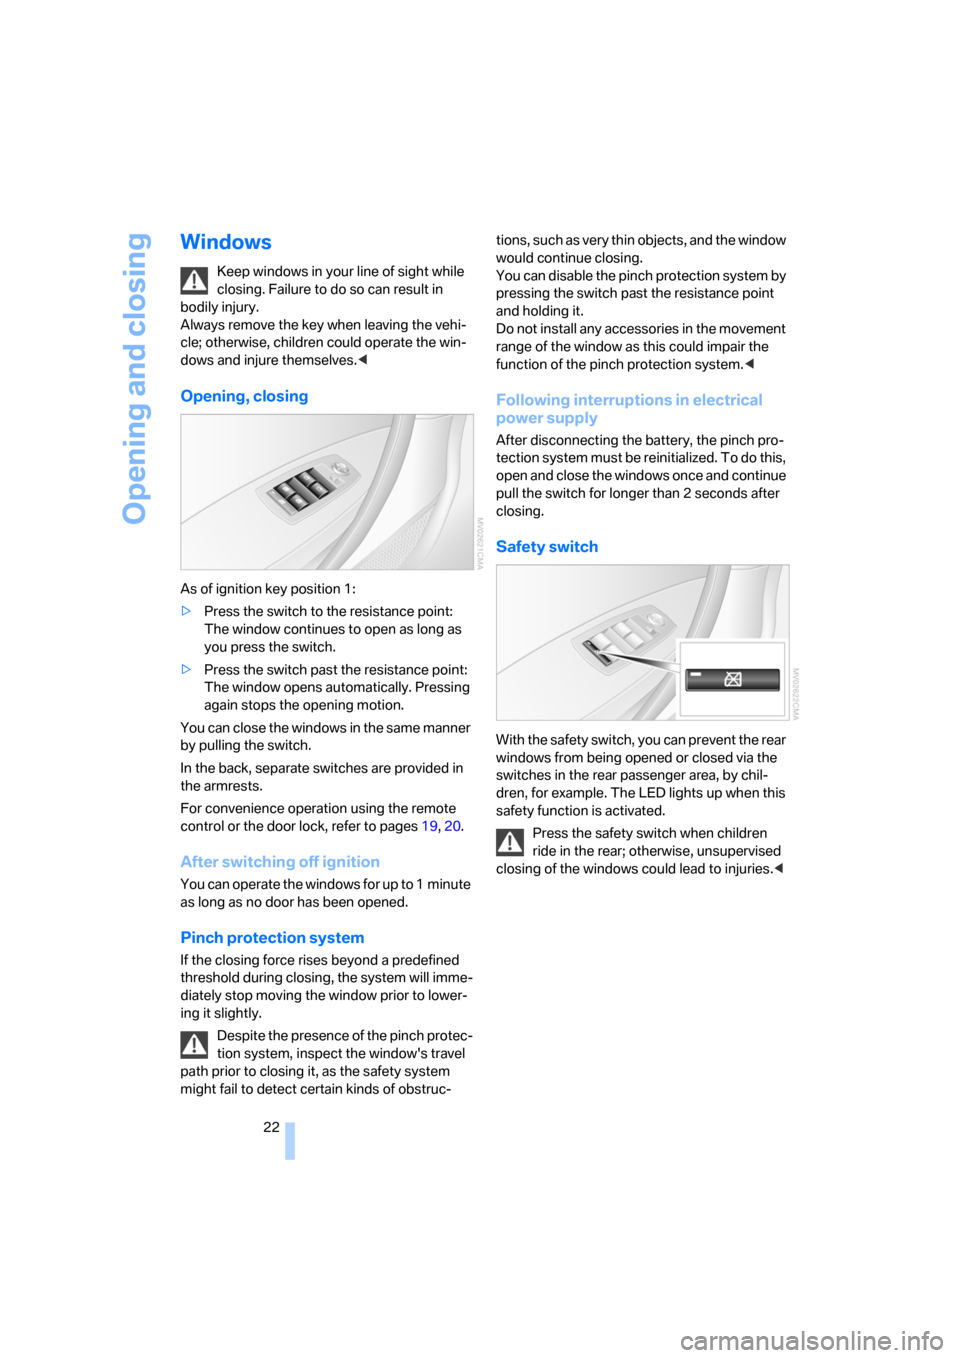
Opening, closing
As of ignition key position 1:
>Press the switch to the resistance point:
The window continues to open as long as
you press the switch.
>Press the switch past the resistance point:
The window opens automatically. Pressing
again stops the opening motion.
You can close the windows in the same manner
by pulling the switch.
In the back, separate switches are provided in
the armrests.
For convenience operation using the remote
control or the door lock, refer to pages19, 20.
After switching off ignition
You can operate the windows for up to 1 minute
as long as no door has been opened.
Pinch protection system
If the closing force rises beyond a predefined
threshold during closing, the system will imme-
diately stop moving the window prior to lower-
ing it slightly.
Despite the presence of the pinch protec-
tion system, inspect the window's travel
path prior to closing it, as the safety system
might fail to detect certain kinds of obstruc-tions, such as very thin objects, and the window
would continue closing.
You can disable the pinch protection system by
pressing the switch past the resistance point
and holding it.
Do not install any accessories in the movement
range of the window as this could impair the
function of the pinch protection system.<
Following interruptions in electrical
power supply
After disconnecting the battery, the pinch pro-
tection system must be reinitialized. To do this,
open and close the windows once and continue
pull the switch for longer than 2 seconds after
closing.
Safety switch
With the safety switch, you can prevent the rear
windows from being opened or closed via the
switches in the rear passenger area, by chil-
dren, for example. The LED lights up when this
safety function is activated.
Press the safety switch when children
ride in the rear; otherwise, unsupervised
closing of the windows could lead to injuries.<
Page 25 of 133
Reference
At a glance
Controls
Driving tips
Mobility
23
Panorama glass sunroof*
The panorama glass sunroof is ready for opera-
tion with the ignition key in position 2.
Keep panorama glass sunroof in your line
of sight while closing. Failure to do so can
result in bodily injury.
Always remove the key when leaving the vehi-
cle; otherwise, children could operate the sun-
roof and injure themselves.<
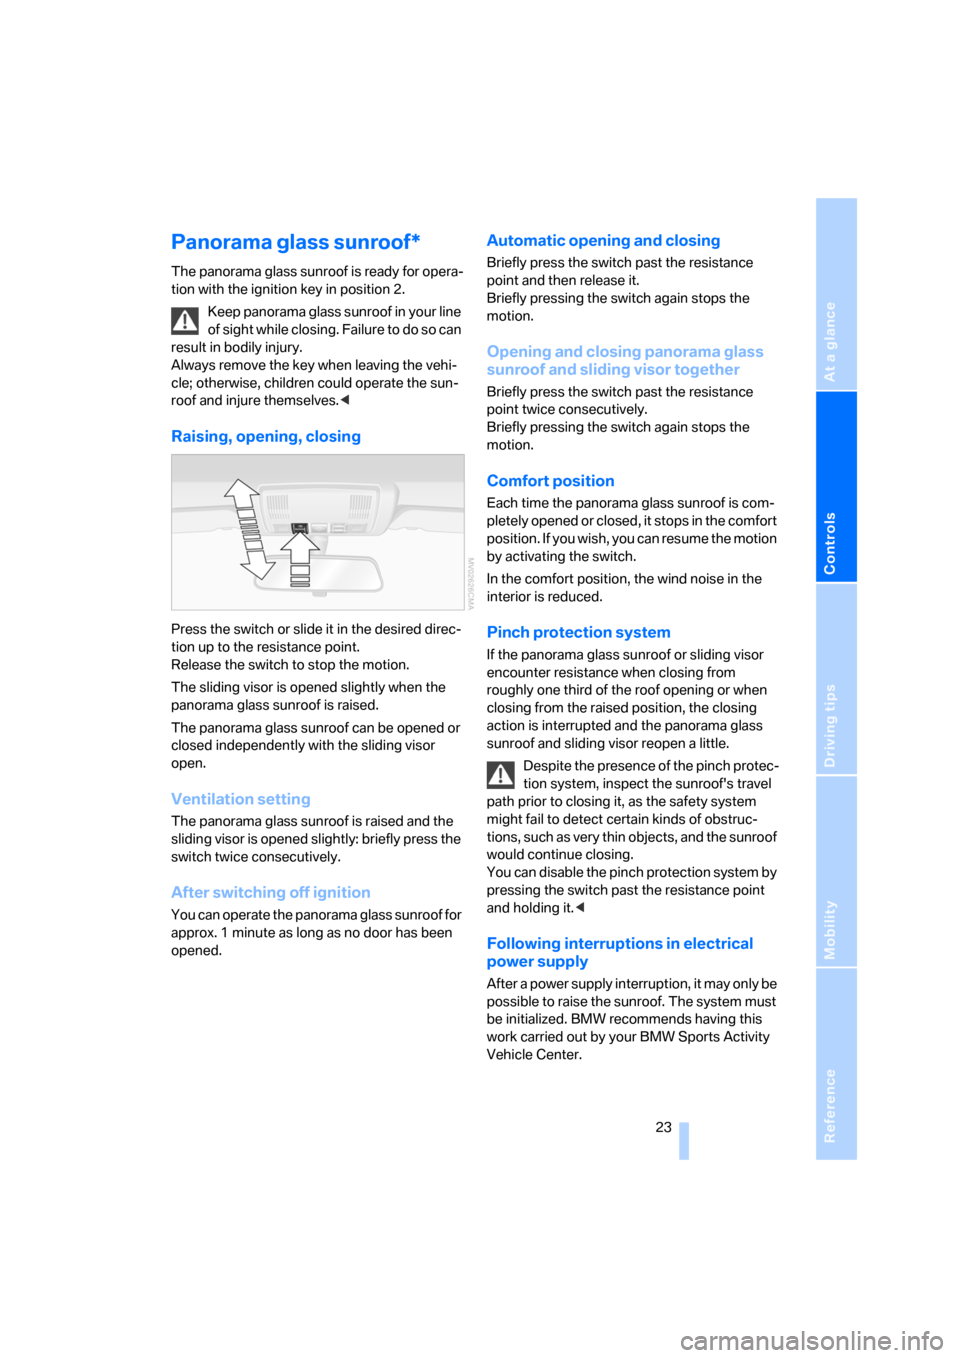
Raising, opening, closing
Press the switch or slide it in the desired direc-
tion up to the resistance point.
Release the switch to stop the motion.
The sliding visor is opened slightly when the
panorama glass sunroof is raised.
The panorama glass sunroof can be opened or
closed independently with the sliding visor
open.
Ventilation setting
The panorama glass sunroof is raised and the
sliding visor is opened slightly: briefly press the
switch twice consecutively.
After switching off ignition
You can operate the panorama glass sunroof for
approx. 1 minute as long as no door has been
opened.
Automatic opening and closing
Briefly press the switch past the resistance
point and then release it.
Briefly pressing the switch again stops the
motion.
Opening and closing panorama glass
sunroof and sliding visor together
Briefly press the switch past the resistance
point twice consecutively.
Briefly pressing the switch again stops the
motion.
Comfort position
Each time the panorama glass sunroof is com-
pletely opened or closed, it stops in the comfort
position. If you wish, you can resume the motion
by activating the switch.
In the comfort position, the wind noise in the
interior is reduced.
Pinch protection system
If the panorama glass sunroof or sliding visor
encounter resistance when closing from
roughly one third of the roof opening or when
closing from the raised position, the closing
action is interrupted and the panorama glass
sunroof and sliding visor reopen a little.
Despite the presence of the pinch protec-
tion system, inspect the sunroof's travel
path prior to closing it, as the safety system
might fail to detect certain kinds of obstruc-
tions, such as very thin objects, and the sunroof
would continue closing.
You can disable the pinch protection system by
pressing the switch past the resistance point
and holding it.<
Following interruptions in electrical
power supply
After a power supply interruption, it may only be
possible to raise the sunroof. The system must
be initialized. BMW recommends having this
work carried out by your BMW Sports Activity
Vehicle Center.
Page 26 of 133
Opening and closing
24
Closing manually
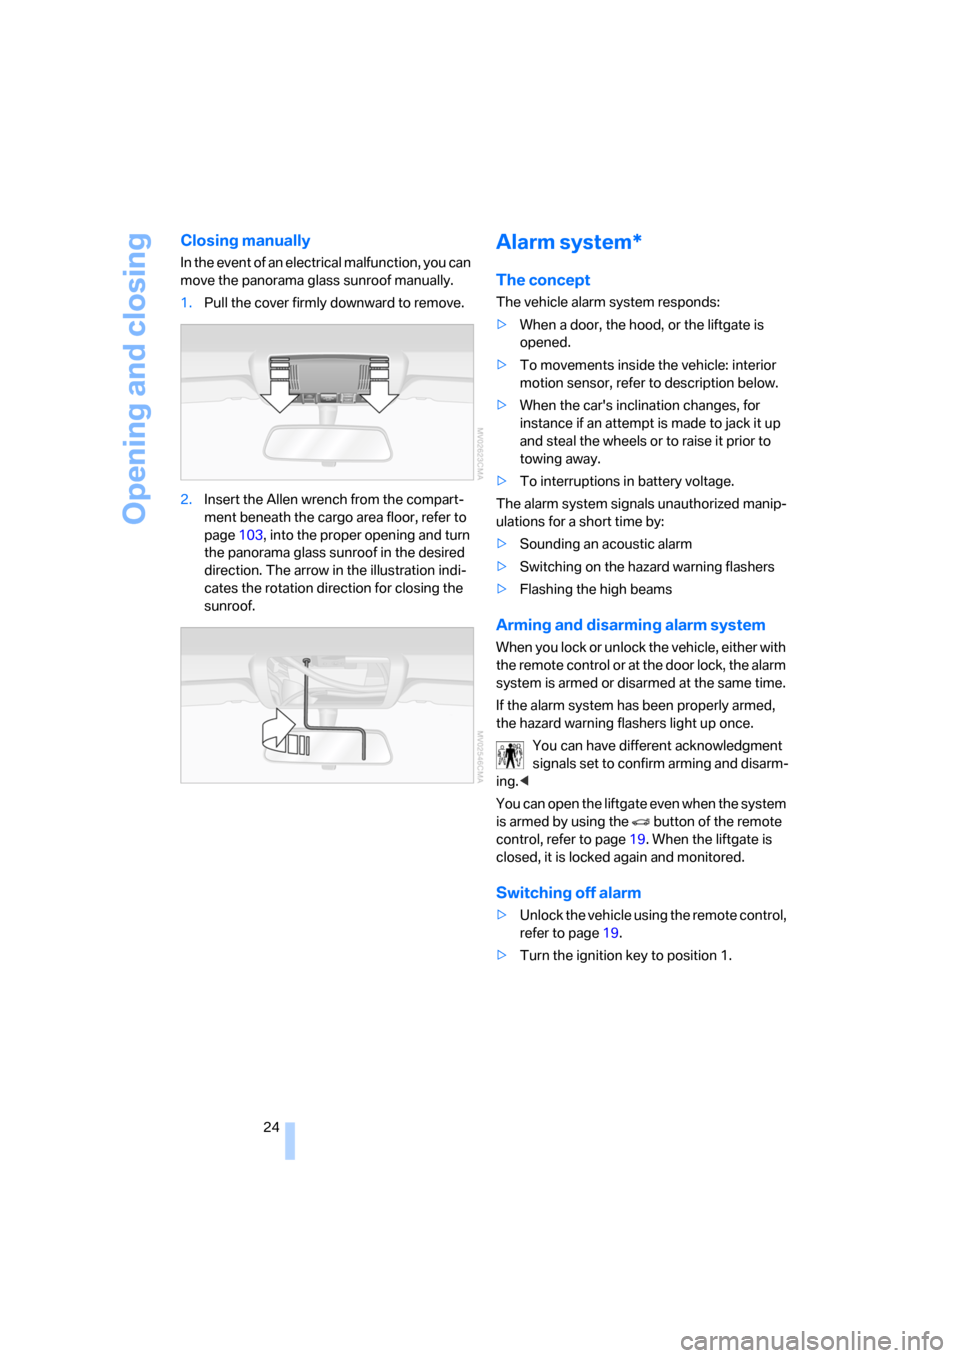
In the event of an electrical malfunction, you can
move the panorama glass sunroof manually.
1.Pull the cover firmly downward to remove.
2.Insert the Allen wrench from the compart-
ment beneath the cargo area floor, refer to
page103, into the proper opening and turn
the panorama glass sunroof in the desired
direction. The arrow in the illustration indi-
cates the rotation direction for closing the
sunroof.
Alarm system*
The concept
The vehicle alarm system responds:
>When a door, the hood, or the liftgate is
opened.
>To movements inside the vehicle: interior
motion sensor, refer to description below.
>When the car's inclination changes, for
instance if an attempt is made to jack it up
and steal the wheels or to raise it prior to
towing away.
>To interruptions in battery voltage.
The alarm system signals unauthorized manip-
ulations for a short time by:
>Sounding an acoustic alarm
>Switching on the hazard warning flashers
>Flashing the high beams
Arming and disarming alarm system
When you lock or unlock the vehicle, either with
the remote control or at the door lock, the alarm
system is armed or disarmed at the same time.
If the alarm system has been properly armed,
the hazard warning flashers light up once.
You can have different acknowledgment
signals set to confirm arming and disarm-
ing.<
You can open the liftgate even when the system
is armed by using the button of the remote
control, refer to page19. When the liftgate is
closed, it is locked again and monitored.
Switching off alarm
>Unlock the vehicle using the remote control,
refer to page19.
>Turn the ignition key to position 1.
Page 29 of 133
Reference
At a glance
Controls
Driving tips
Mobility
27
Seats
Note before adjusting
Never try to adjust your seat while operat-
ing the vehicle. The seat could respond
with unexpected movement, and the ensuing
loss of vehicle control could lead to an accident.
On the passenger seat as well, do not incline
the backrest too far to the rear while the vehicle
is being driven; otherwise, there is a danger in
the event of an accident of sliding under the
safety belt, eliminating the protection normally
provided by the belt.<
Also follow the instructions regarding the
height of head restraints on page28 and
regarding safety belt damage on page30.
Adjusting manually
To ensure that the safety systems con-
tinue to provide optimized protection, fol-
low the adjustment instructions above.<
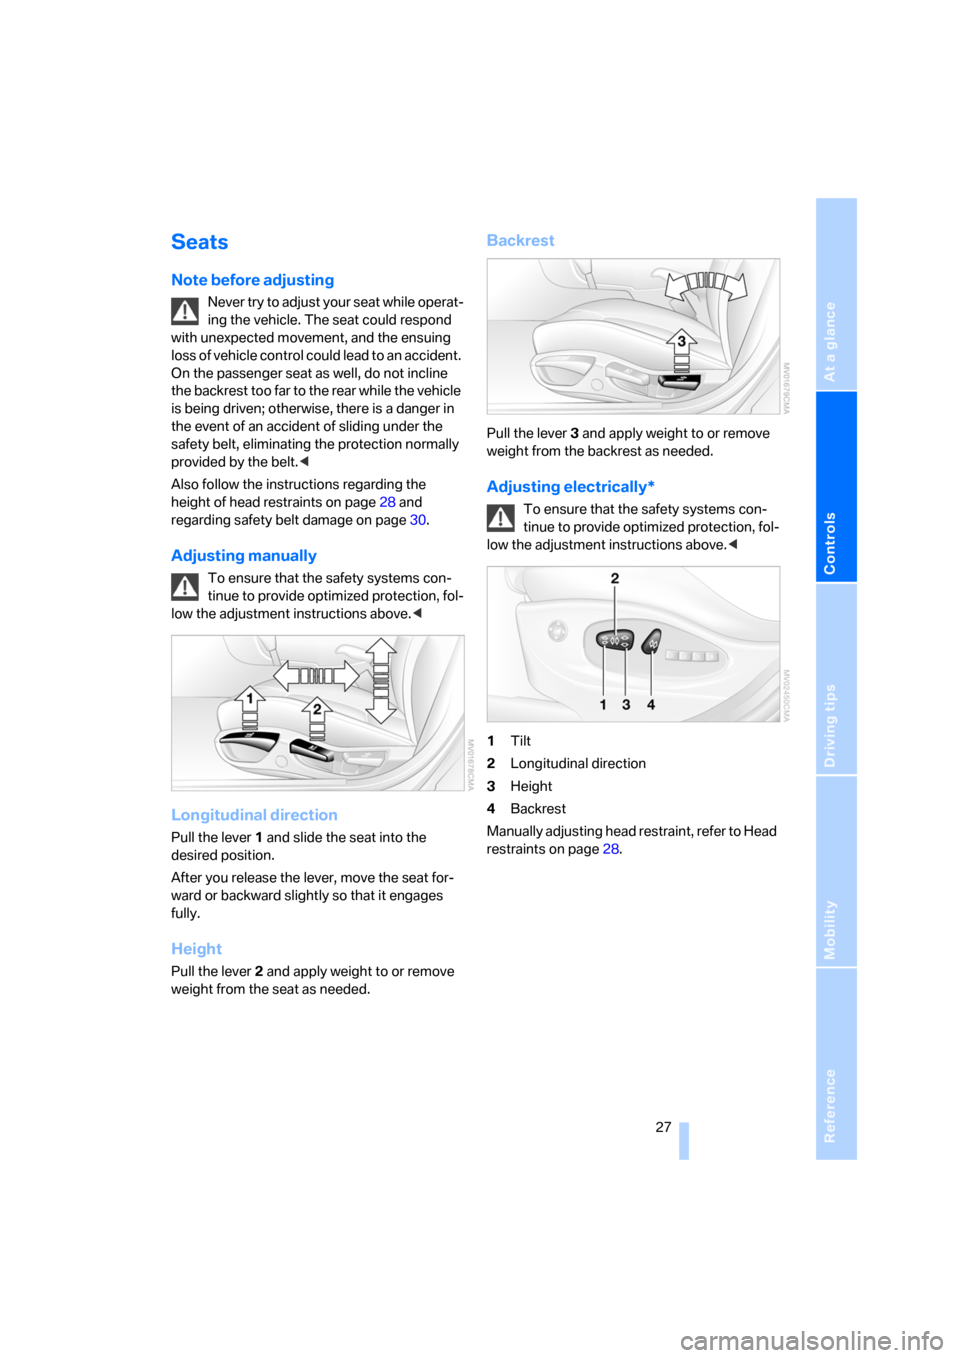
Longitudinal direction
Pull the lever 1 and slide the seat into the
desired position.
After you release the lever, move the seat for-
ward or backward slightly so that it engages
fully.
Height
Pull the lever 2 and apply weight to or remove
weight from the seat as needed.
Backrest
Pull the lever 3 and apply weight to or remove
weight from the backrest as needed.
Adjusting electrically*
To ensure that the safety systems con-
tinue to provide optimized protection, fol-
low the adjustment instructions above.<
1Tilt
2Longitudinal direction
3Height
4Backrest
Manually adjusting head restraint, refer to Head
restraints on page28.
Page 32 of 133
Adjustments
30 tection, they are not a substitute for safety
belts.
In the rear, the middle belt buckle embossed
with the word CENTER is intended exclusively
for use by passengers riding in the center posi-
tion.
Fastening
Make sure you hear the latch plate engage in
the belt buckle.
The upper shoulder strap's anchorage point will
be in the correct position for seat occupants of
every build if the seat is correctly adjusted, refer
to page26.
Releasing
1.Hold the belt firmly.
2.Press the red button in the buckle.
3.Guide the belt back into its reel.
Safety belt reminder for front seats
The indicator lamp flashes or lights up.
In addition, a signal sounds. Please
make sure that the safety belts are
being worn correctly.
The safety belt reminder is activated if the
safety belt on the driver's side has not yet been
fastened.
At speeds greater than 5 mph/8 km/h, the
safety belt reminder is also activated if the
passenger side safety belt has not yet been
fastened, if heavy objects are placed on the
passenger's seat, or if the driver or front pas-
senger's safety belt is released.
Damage to safety belts
When strained by an accident or when
damaged: have the safety belt system,
including the belt tensioners, replaced and have
belt anchorage points inspected. Have this
work done only by your BMW Sports Activity
Vehicle Center or by a workshop that works
according to BMW repair procedures with cor-
respondingly trained personnel. Otherwise,
there can be no guarantee that the safety
devices will function properly.<
Mirrors
Exterior mirrors
The passenger side mirror is more curved
than the driver's mirror. Objects in the
mirrors are closer than they appear. Do not esti-
mate the distance to following traffic based on
the view in the mirrors; otherwise, there is an
increased risk of accident.<
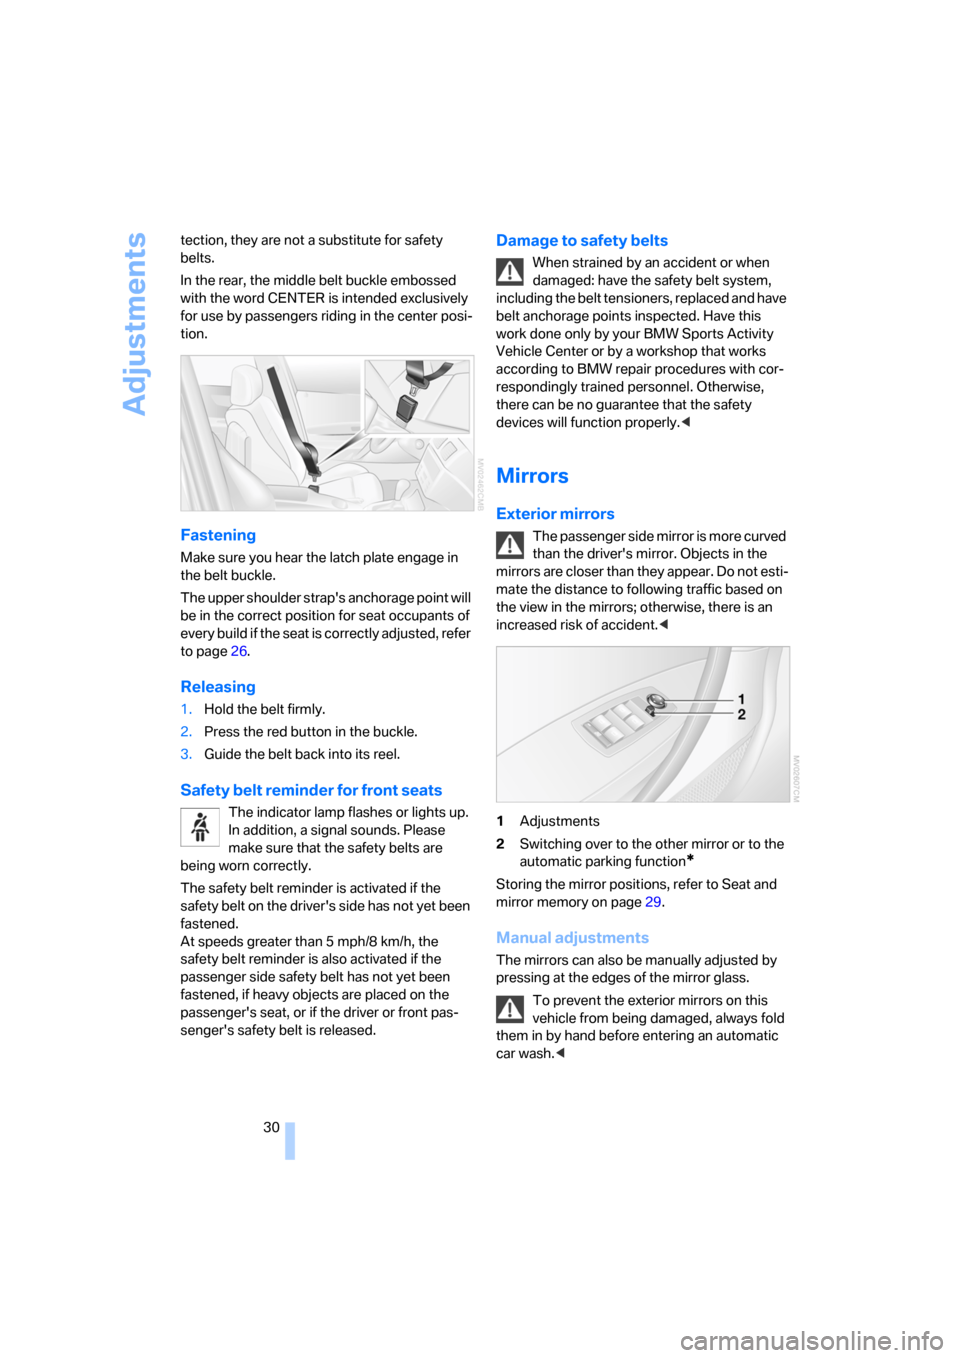
1Adjustments
2Switching over to the other mirror or to the
automatic parking function
*
Storing the mirror positions, refer to Seat and
mirror memory on page29.
Manual adjustments
The mirrors can also be manually adjusted by
pressing at the edges of the mirror glass.
To prevent the exterior mirrors on this
vehicle from being damaged, always fold
them in by hand before entering an automatic
car wash.<
Page 35 of 133
Reference
At a glance
Controls
Driving tips
Mobility
33
Transporting children safely
The right place for children
Do not leave children unattended in the
vehicle; otherwise, they could endanger
themselves and/or others, for example by open-
ing the doors.<
Children always in the rear
Accident research has demonstrated that the
safest place for children is in the rear seat.
Children younger than 13 or smaller than
5 ft/150 cm should only ride in the rear, in
child restraint systems provided in accordance
with their age, weight, and height. Otherwise,
there is an increased risk of injury in the event of
an accident.<
Children older than 13 must be secured with a
safety belt as soon as they have outgrown a
suitable child restraint system due to their age,
height, and weight.
All seats in your BMW, except for the driver's
seat, correspond to the recommendations of
the norm SAE J1819 for safely securing child
restraint systems in motor vehicles.
Exception for the front passenger seat
If it should be necessary to use a child
restraint system on the front passenger
seat, the front and side airbags must be deacti-
vated. Otherwise, there is an increased risk of
injury to the child if the airbag is triggered, even
with a child restraint system. Your BMW Sports
Activity Vehicle Center will be happy to advise
you.<
For more information on automatic deactivation
of the front passenger airbags, refer to page54.
Installing child restraint
systems
Follow the child restraint system manu-
facturer's instructions for selection,
installation and use of the child restraint sys-
tem. Otherwise, the degree of protection can be
reduced.<
On the passenger's seat
Before installing a child restraint system
in the passenger seat, make sure that the
front and side airbag on the passenger seat
have been deactivated. Otherwise, there is an
increased risk of injury when the airbag is trig-
gered.<
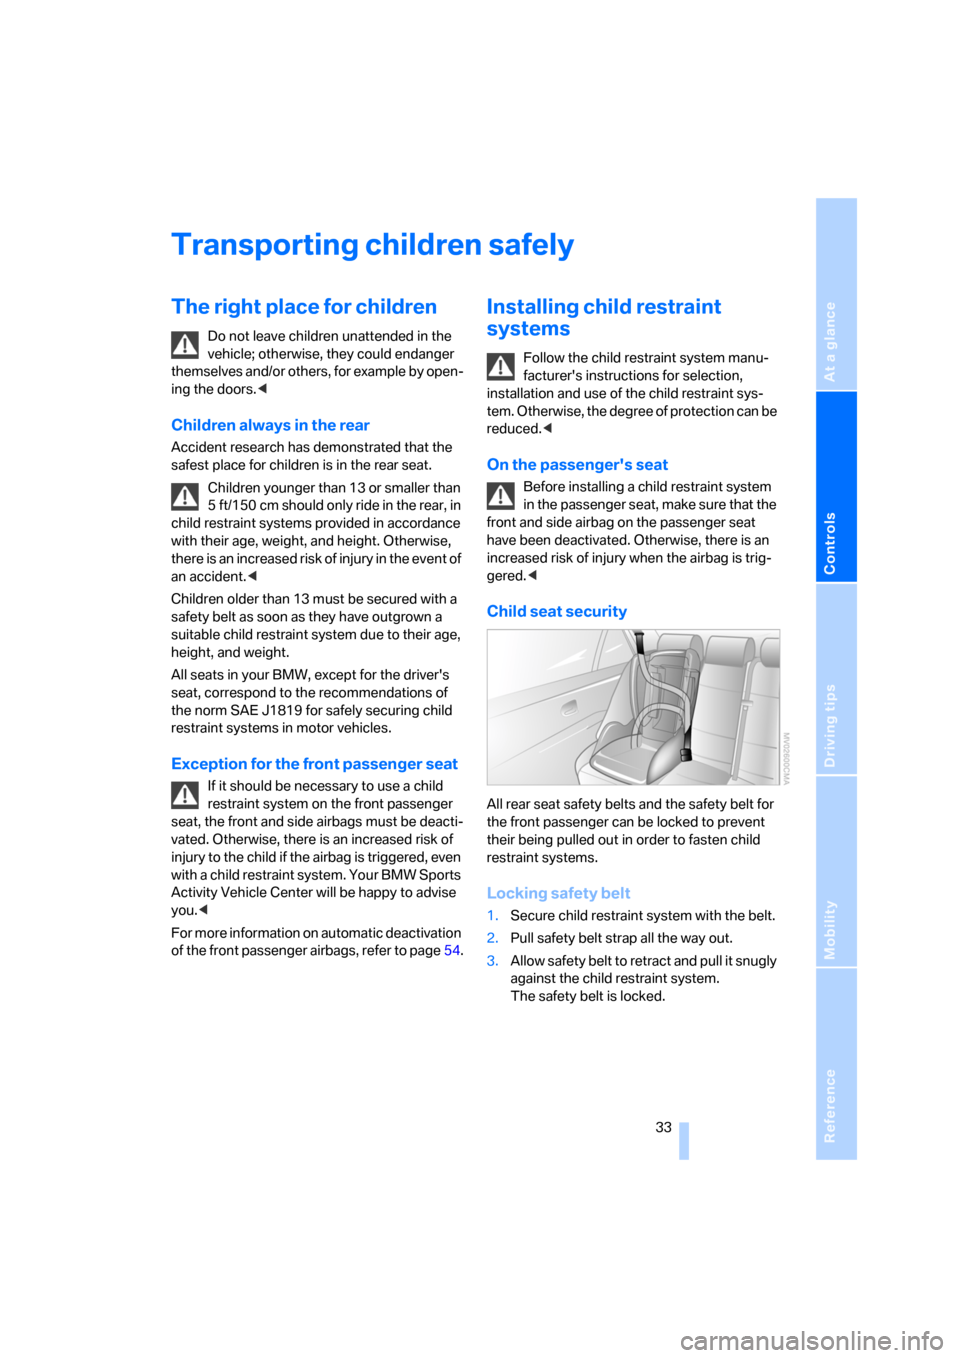
Child seat security
All rear seat safety belts and the safety belt for
the front passenger can be locked to prevent
their being pulled out in order to fasten child
restraint systems.
Locking safety belt
1.Secure child restraint system with the belt.
2.Pull safety belt strap all the way out.
3.Allow safety belt to retract and pull it snugly
against the child restraint system.
The safety belt is locked.
Page 38 of 133
Driving
36
Driving
Ignition lock
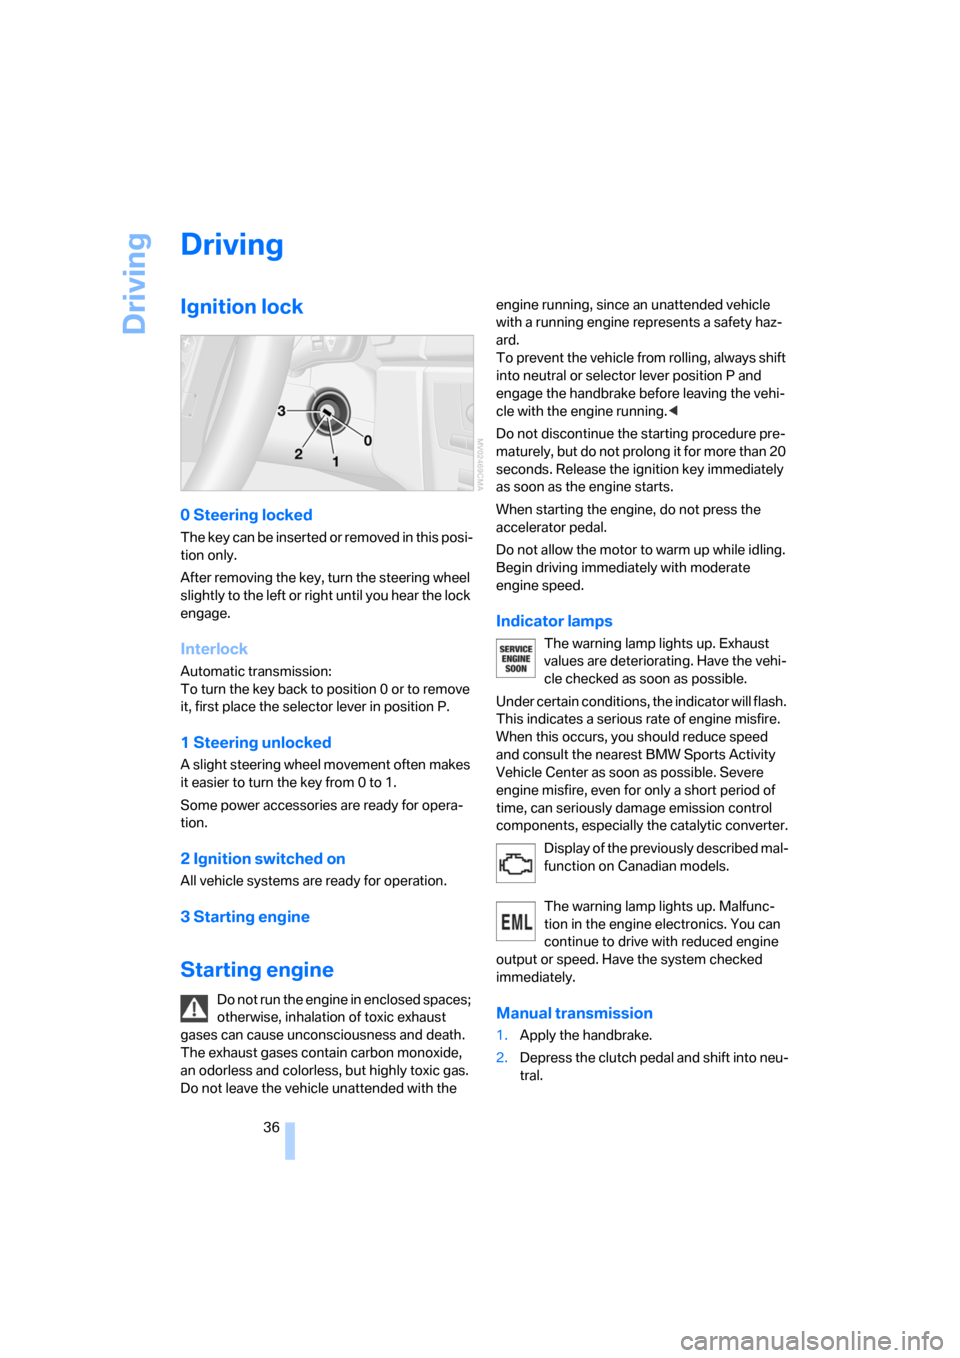
0 Steering locked
T h e k e y c a n b e in s e r t e d o r r e m o v e d in t h i s p o s i-
tion only.
After removing the key, turn the steering wheel
slightly to the left or right until you hear the lock
engage.
Interlock
Automatic transmission:
To turn the key back to position 0 or to remove
it, first place the selector lever in position P.
1 Steering unlocked
A slight steering wheel movement often makes
it easier to turn the key from 0 to 1.
Some power accessories are ready for opera-
tion.
2 Ignition switched on
All vehicle systems are ready for operation.
3 Starting engine
Starting engine
Do not run the engine in enclosed spaces;
otherwise, inhalation of toxic exhaust
gases can cause unconsciousness and death.
The exhaust gases contain carbon monoxide,
an odorless and colorless, but highly toxic gas.
Do not leave the vehicle unattended with the engine running, since an unattended vehicle
with a running engine represents a safety haz-
ard.
To prevent the vehicle from rolling, always shift
into neutral or selector lever position P and
engage the handbrake before leaving the vehi-
cle with the engine running.<
Do not discontinue the starting procedure pre-
maturely, but do not prolong it for more than 20
seconds. Release the ignition key immediately
as soon as the engine starts.
When starting the engine, do not press the
accelerator pedal.
Do not allow the motor to warm up while idling.
Begin driving immediately with moderate
engine speed.
Indicator lamps
The warning lamp lights up. Exhaust
values are deteriorating. Have the vehi-
cle checked as soon as possible.
Under certain conditions, the indicator will flash.
This indicates a serious rate of engine misfire.
When this occurs, you should reduce speed
and consult the nearest BMW Sports Activity
Vehicle Center as soon as possible. Severe
engine misfire, even for only a short period of
time, can seriously damage emission control
components, especially the catalytic converter.
Display of the previously described mal-
function on Canadian models.
The warning lamp lights up. Malfunc-
tion in the engine electronics. You can
continue to drive with reduced engine
output or speed. Have the system checked
immediately.
Manual transmission
1.Apply the handbrake.
2.Depress the clutch pedal and shift into neu-
tral.