brake BMW X3 3.0I 2007 E83 User Guide
[x] Cancel search | Manufacturer: BMW, Model Year: 2007, Model line: X3 3.0I, Model: BMW X3 3.0I 2007 E83Pages: 139, PDF Size: 4.74 MB
Page 57 of 139
Reference
At a glance
Controls
Driving tips
Mobility
55
The compact wheel is not equipped with the
required TPM electronics and is not monitored
when mounted.
When driving with the compact wheel, the sys-
tem indicates a malfunction.
Have the damaged tire replaced by your BMW
Sports Activity Vehicle Center or a workshop
that is familiar with TPM and works in accor-
dance with BMW repair procedures, using
appropriately trained personnel.
Malfunction
The yellow warning lamp flashes and
then lights up continuously. Flat tires
cannot be detected.
Such a message is displayed in the following
situations:
>When a malfunction is occurring:
Have the system checked
>When a wheel without TPM electronics is
mounted, e.g. a compact wheel
>When TPM is experiencing temporary inter-
ference from other systems or devices that
use the same frequency
NHTSA/FMVSS-required explanation
of 138 Tire Pressure Monitoring
System
Each tire, including the spare, should be
checked monthly when cold and inflated to the
inflation pressure recommended by the vehicle
manufacturer on the vehicle placard or tire infla-
tion pressure label. If your vehicle has tires of a
different size than the size indicated on the
vehicle placard or tire inflation pressure label,
then you should determine the proper tire infla-
tion pressure for those tires. As an added safety
feature, your vehicle has been equipped with a
tire pressure monitoring system, TPMS, that
illuminates a low tire pressure warning lamp
when one or more of your tires are significantly
under-inflated. When the low tire pressure
warning lamp lights up, you should stop and
check your tires as soon as possible, and inflate
them to the proper pressure. Driving on a signif-
icantly underinflated tire causes the tire to over-
heat and can lead to tire failure. Underinflation also reduces fuel efficiency and tire tread life,
and may affect the vehicle’s handling and stop-
ping ability. Please note that the TPMS is not a
substitute for proper tire maintenance, and it is
the driver's responsibility to maintain correct
tire pressure, even if underinflation has not
reached the level to trigger illumination of the
TPMS low tire pressure warning lamp.
The TPMS malfunction indicator is combined
with the low tire pressure warning lamp. When
the system detects a malfunction, the warning
lamp will flash for approximately one minute and
then remain continuously illuminated. This
sequence will continue upon subsequent vehi-
cle startups as long as the malfunction exists.
When the malfunction indicator is illuminated,
the system may not be able to detect or signal
low tire pressure as intended. TPMS malfunc-
tions may occur for a variety of reasons, includ-
ing the installation of replacement or alternate
tires or wheels on the vehicle that prevent the
TPMS from functioning properly. Always check
the TPMS malfunction warning lamp after
replacing one or more tires or wheels on your
vehicle to ensure that the replacement or alter-
nate tires and wheels allow the TPMS to con-
tinue to function properly.Brake force display
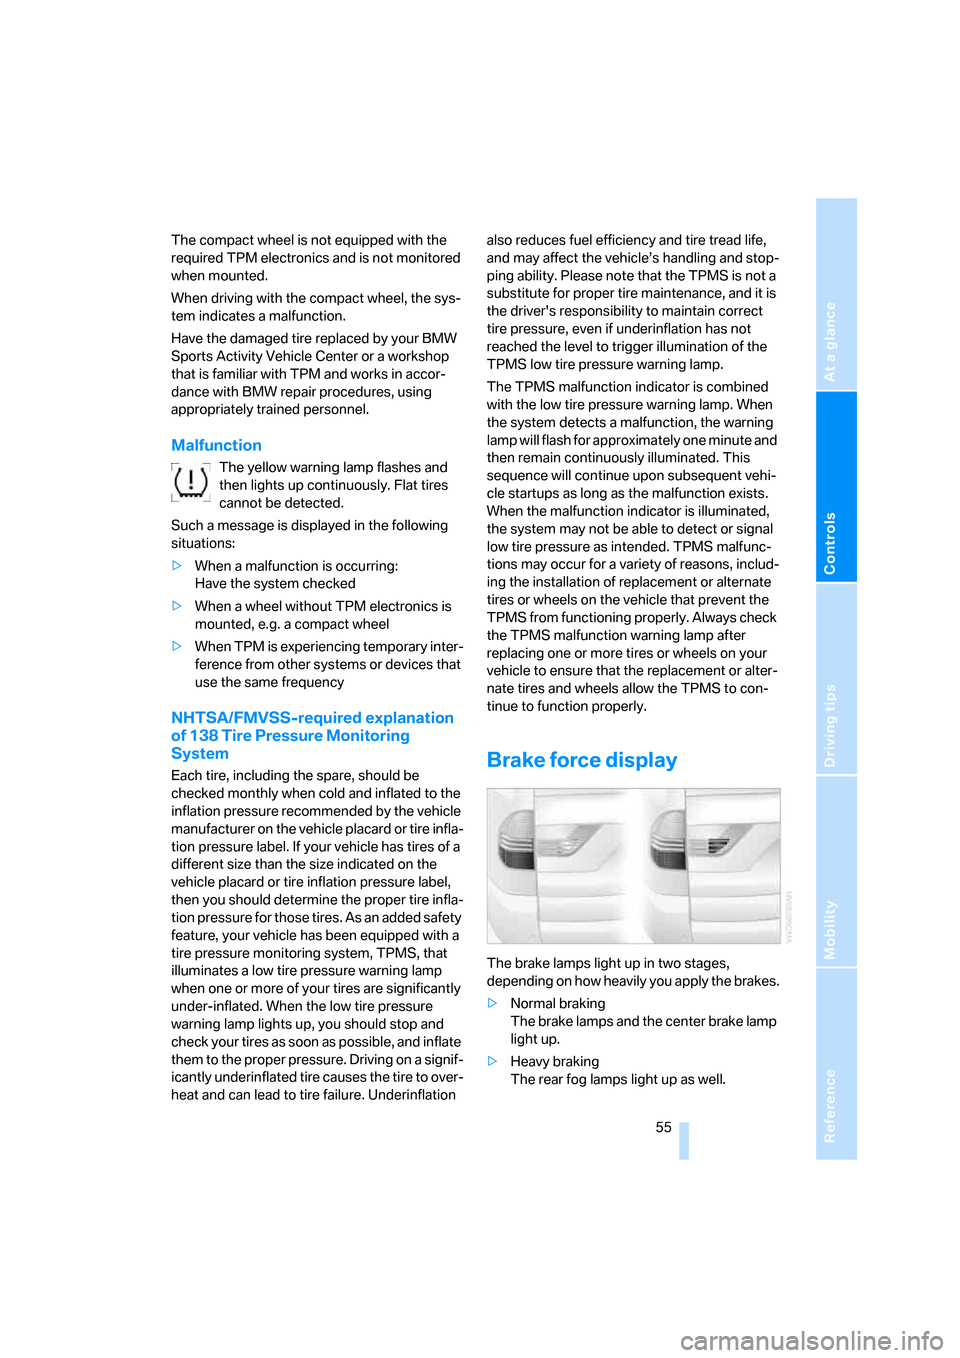
The brake lamps light up in two stages,
depending on how heavily you apply the brakes.
>Normal braking
The brake lamps and the center brake lamp
light up.
>Heavy braking
The rear fog lamps light up as well.
Page 82 of 139
Things to remember when driving
80
Things to remember when driving
Breaking-in
Moving parts should be allowed to adjust to one
another. To ensure that your vehicle provides
maximum economy throughout a long service
life, we request that you comply with the follow-
ing instructions.
Engine and differential
Always obey all official speed limits.
For the first 1,200 miles/2,000 km
Drive at varying engine and driving speeds, but
do not exceed 4,500 rpm or 100 mph / 160 km/h
in the process.
Generally avoid full throttle or kick-down posi-
tion of the accelerator pedal.
After 1,200 miles/2,000 km
Engine and road speed can be gradually
increased.
Tires
Due to technical factors associated with their
manufacture, tires do not achieve their full trac-
tion potential until after an initial break-in
period. For this reason, drive with extra care
during the initial 200 miles/300 km.
Obey your local and state maximum speed lim-
its.
When the vehicle is operated on wet or
slushy roads, a wedge of water may form
between the tire and the road surface. This phe-
nomenon is referred to as hydroplaning and can
lead to partial or complete loss of traction, vehi-
cle control and braking effectiveness. Reduce
your speed on wet roads.<
Brake system
Your vehicle must travel approx. 300 miles/
500 km before the brake pads and rotors
achieve the optimum pad-surface and wear patterns required for trouble-free operation and
long service life later on.
To break in the separate handbrake drums,
apply the handbrake lightly when coasting to a
stop – at a traffic signal, for instance; use cau-
tion to avoid posing a danger to other road
users.
To avoid corrosion, repeat this procedure from
time to time.
The brake lamps do not come on when the
handbrake is applied.
Vacuum for the brake system servo unit
on your BMW is available only when the
engine is running. When you move the car with
the engine off – e.g., by towing – substantially
higher levels of pedal force will be required to
brake the vehicle.<
Clutch
The function of the clutch reaches its optimum
level only after a distance driven of approx.
300 miles/500 km. During this break-in period,
engage the clutch gently.
Following component replacements
Follow the breaking-in instructions again when-
ever subsequent driving requires replacement
of previously mentioned components.
General driving notes
Close the liftgate
Operate the vehicle only when the liftgate
is completely closed; otherwise, exhaust
fumes could enter the interior of the vehicle.<
If special circumstances should make it abso-
lutely necessary to operate the vehicle with the
liftgate open:
1.Close all windows and the panorama glass
sunroof.
Page 83 of 139
Reference
At a glance
Controls
Driving tips
Mobility
81
2.Greatly increase the air supply of the air
conditioning system or automatic climate
control, refer to page62 or65.
Hot exhaust system
High temperatures occur in the exhaust
system of every vehicle. Do not remove
the heat shields installed adjacent to various
sections of the exhaust system, and never apply
undercoating to them. When driving, standing
at idle, and parking, take care to avoid possible
contact between the hot exhaust system and
any highly flammable materials such as hay,
leaves, grass, etc. Such contact could lead to
a fire, resulting in serious personal injury and
property damage. Do not touch hot exhaust
pipe, it can cause burns.<
Mobile communications devices in
vehicle
BMW does not recommend using mobile
communications devices, e.g. mobile
phones, on the interior of the vehicle without a
direct connection to an outside antenna. Other-
wise, the vehicle electronics and mobile com-
munications device can affect each other. In
addition, there is no assurance that the radia-
tion which results during transmission will be
dissipated from the vehicle interior.<
When the vehicle is parked
Condensation forms in the air conditioner/auto-
matic climate control system during operation,
and then exits under the vehicle. Traces of con-
densed water under the vehicle are therefore
normal.
Before driving into a car wash
Fold in the exterior mirrors, refer to page32;
otherwise, they could be damaged due to the
width of the vehicle.
Deactivate the rain sensor; otherwise, damage
could result from undesired wiper activation,
refer to page41.
Hydroplaning
When driving on wet or slushy roads,
reduce road speed. If you do not, a wedge
of water can form between tires and road sur-
face. This phenomenon is referred to as hydro-
planing, and is characterized by a partial or
complete loss of contact between tires and
road surface, ultimately undermining your abil-
ity to steer and brake the vehicle.<
The danger of hydroplaning increases as tire
tread depth decreases, also refer to Minimum
tread depth on page94.
Driving through water
Do not drive through water on the road if it
is deeper than 20 in/50 cm, and then only
at walking speed. Otherwise, the vehicle's
engine, the electrical systems, and the trans-
mission may be damaged.<
Using handbrake on inclines
Do not hold the vehicle in place on slopes
by slipping or riding the clutch, use the
handbrake instead. Otherwise, greater clutch
wear will result.<
Safe braking
Your BMW is equipped with ABS as standard
equipment. In situations in which it is required, it
is best to apply the brakes fully. Since the vehi-
cle maintains steering responsiveness, you can
nevertheless avoid possible obstacles with a
minimum of steering effort.
Pulsation at the brake pedal combined with
sounds from the hydraulic circuits indicates to
the driver that ABS is in its active mode.
Wet roads
On wet roads or in heavy rain, briefly apply light
pressure to the brake pedal every few miles.
Watch traffic conditions to ensure that this
maneuver does not endanger other road users.
The heat that is generated by the brake applica-
tions helps to dry the brake pads and rotors.
The full braking force will then be available
when you need it.
Page 84 of 139
Things to remember when driving
82
Hills
To prevent overheating and reduced effi-
ciency of the brake system, drive long or
steep downhill grades in the gear in which the
least braking is required. Otherwise, even light
but continuous pressure on the brake can lead
to high temperatures, brake wear and possibly
even brake failure.<
The braking action of the engine can be further
intensified by downshifting, all the way down to
first gear if need be. This strategy helps you
avoid placing excessive loads on the brake sys-
tem. Downshifting in manual mode of automatic
transmission, refer to page40. When descend-
ing hills slowly, use HDC Hill Descent Control,
refer to page51.
Never drive with the clutch depressed,
with the transmission in neutral, or with
the engine switched off; otherwise, you will
have neither the braking action of the engine or
nor its power assistance to the brakes or steer-
ing.
Never allow floor mats, carpeting, or other arti-
cles to protrude into the area around the brake
or accelerator pedals and obstruct their move-
ment.<
Corrosion on brake rotors
When the vehicle is driven only occasionally,
during extended periods when the vehicle is not
used at all, and in operating conditions where
brake applications are less frequent, there is an
increased tendency for corrosion to form on
rotors, while contaminants accumulate on the
brake pads. This occurs because the minimal
pressure which must be exerted by the pads
during brake applications to clean the rotors is
not reached.
Should corrosion form on the brake rotors, the
brakes will tend to respond with a pulsating
effect that even extended application will fail to
cure.
Brake pads
The warning lamp lights up.
The brake pads have reached their min-
imum pad thickness. Have brake pads
replaced immediately.
Cargo loading
To avoid loading the tires beyond their
approved carrying capacity, never over-
load the vehicle. Overloading can lead to over-
heating of the tire and increases the rate at
which damage develops inside the tires. The
ultimate result can assume the form of a sudden
blow-out.<
Determining load limit
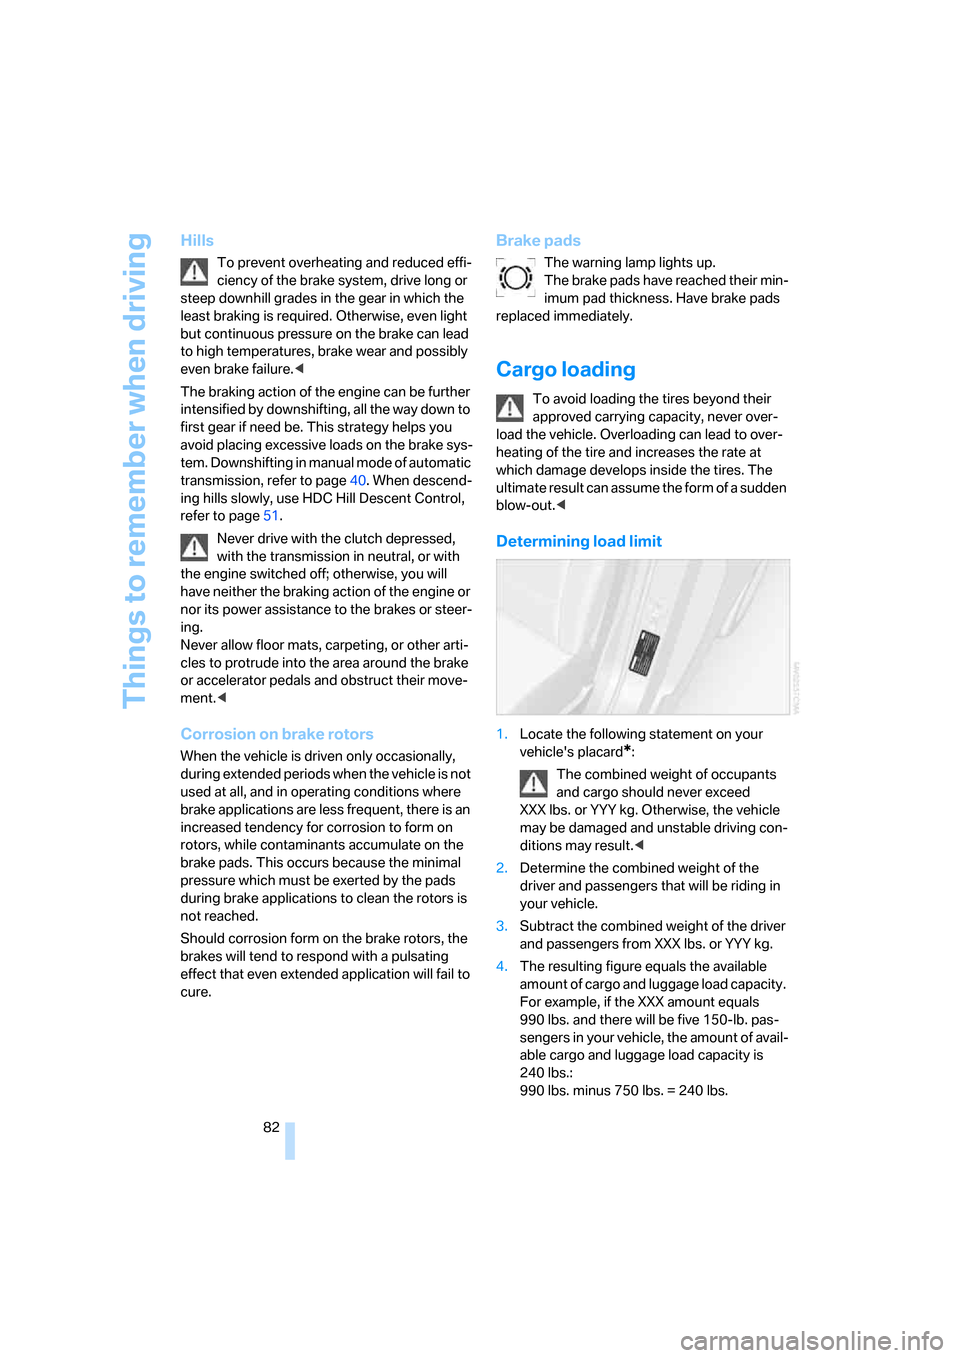
1.Locate the following statement on your
vehicle's placard
*:
The combined weight of occupants
and cargo should never exceed
XXX lbs. or YYY kg. Otherwise, the vehicle
may be damaged and unstable driving con-
ditions may result.<
2.Determine the combined weight of the
driver and passengers that will be riding in
your vehicle.
3.Subtract the combined weight of the driver
and passengers from XXX lbs. or YYY kg.
4.The resulting figure equals the available
amount of cargo and luggage load capacity.
For example, if the XXX amount equals
990 lbs. and there will be five 150-lb. pas-
sengers in your vehicle, the amount of avail-
able cargo and luggage load capacity is
240 lbs.:
990 lbs. minus 750 lbs. = 240 lbs.
Page 86 of 139
Things to remember when driving
84
Roof-mounted luggage rack*
A special rack system is available as an optional
accessory for your BMW. Please familiarize
yourself with the information contained in the
installation instructions.
Loading luggage rack
Because roof racks raise the vehicle's center of
gravity when loaded, they have a major effect on
its handling and steering response. You should
therefore always remember not to exceed the
approved roof load capacity, the approved
gross vehicle weight, or the axle loads when
loading the rack.
These specifications can be found under
Weights on page122.
The roof load must be evenly distributed and
must not extend outward beyond the limits of
the loading surface. Always stow the heaviest
pieces on the bottom. Be sure that adequate
clearance is maintained for raising the glass
sunroof and that objects do not project into the
opening path of the liftgate.
Secure roof-mounted cargo correctly and
securely to prevent it from shifting or falling off
while you drive.
Drive smoothly. Avoid sudden acceleration and
braking maneuvers. Take corners gently.
Driving on poor roads
Your X3 is at home on all paved and unpaved
roads. It combines all-wheel drive with the
advantages of a normal passenger car.
Driving on unpaved terrain can cause
damage to the vehicle.<
When you are driving on poor roads, there are a
few points which you should strictly observe –
for your own safety and that of your passengers,
as well as to protect the vehicle:
>Familiarize yourself with the vehicle before
you begin driving. Do not take risks with the
vehicle under any circumstances.>Always adapt your driving speed to the road
conditions. The more steep and uneven the
roadway is, the lower the speed should be.
>You can operate your vehicle on uphill and
downhill gradients with a maximum slope
of 50 %. If you wish to drive on uphill and
downhill grades of this nature, make sure
beforehand that the engine oil and coolant
levels are near the MAX mark, refer to
pages99 and101.
>When descending very steep hills, use
HDC Hill Descent Control, refer to page51.
It is possible to start off on inclines of up
to 32 %.
The permitted side tilt is 32 %.
>While driving, watch carefully for obstacles
such as rocks or holes. Try to avoid these
obstacles whenever possible.
>Avoid having the body make contact with
the ground, e.g. on the crests of hills and
bumpy roads. The ground clearance of the
vehicle is a maximum of approx. 8.0 in/
20 cm. Please be aware that the ground
clearance can vary depending on the load
and operating conditions of the vehicle.
>Do not drive in water that is deeper than
20 in/50 cm. If you must drive through water
up to that depth, drive at a walking speed
and do not stop.
After leaving the water, press on the foot-
brake gently several times while driving at a
low speed. The brake applications will help
to dry the brakes, thus preventing a reduc-
tion in braking performance caused by the
moisture.
To clean the handbrake, apply the lever
slightly at approx. 25 mph/40 km/h and con-
tinue to drive for approx. 200 yards/
200 meters, provided that traffic conditions
allow you to do so.
>Depending on the road condition, it can be
useful to temporarily activate DTC, refer to
DTC Dynamic Traction Control on page51.
>If the drive wheels spin on one side, depress
the accelerator pedal far enough to permit
the driving stability control systems to dis-
Page 100 of 139
Under the hood
98
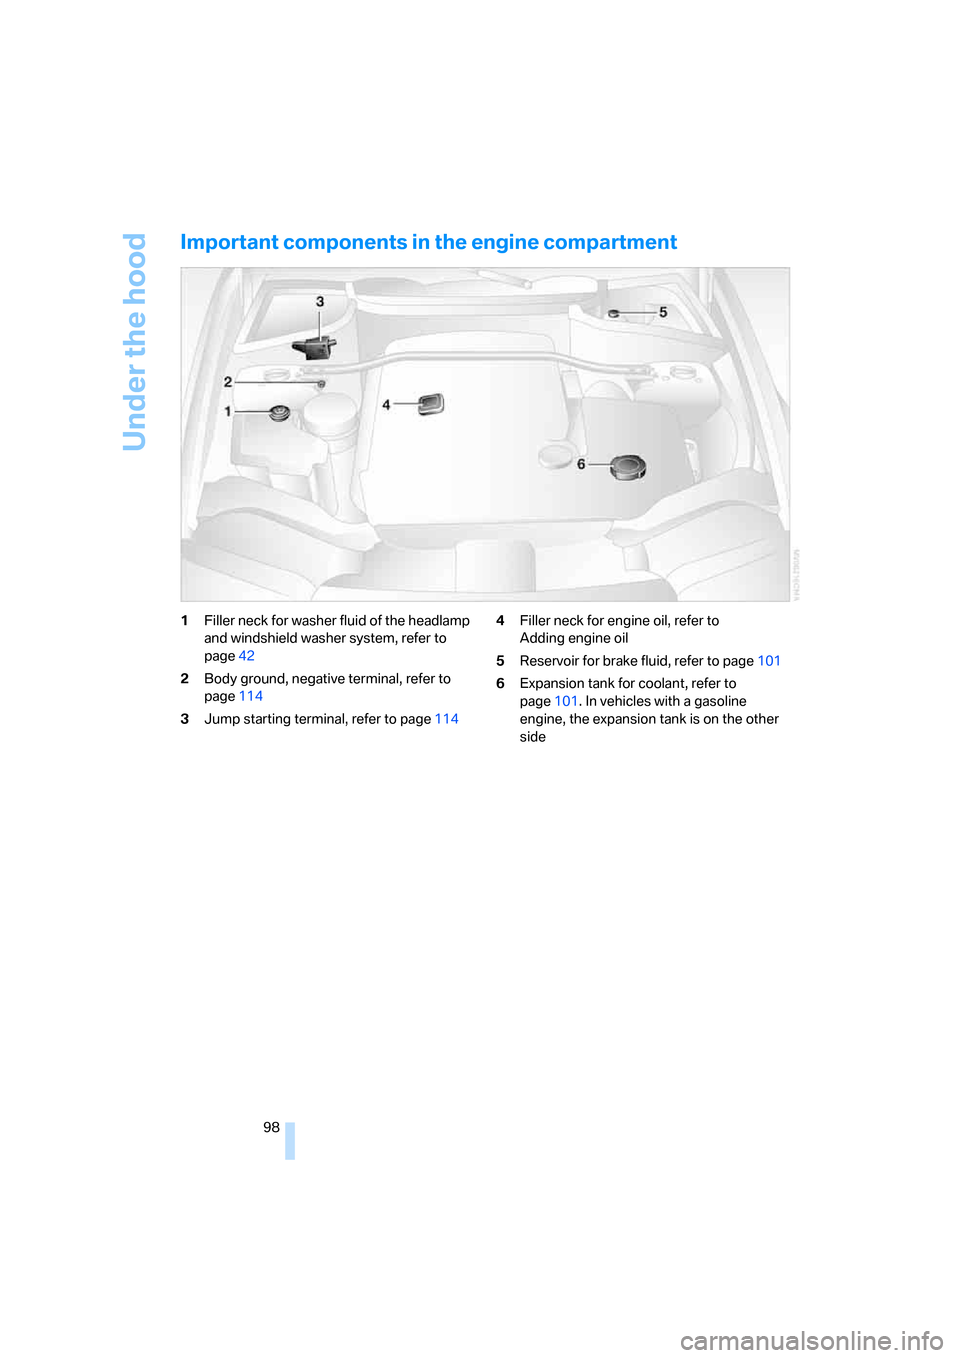
Important components in the engine compartment
1Filler neck for washer fluid of the headlamp
and windshield washer system, refer to
page42
2Body ground, negative terminal, refer to
page114
3Jump starting terminal, refer to page1144Filler neck for engine oil, refer to
Adding engine oil
5Reservoir for brake fluid, refer to page101
6Expansion tank for coolant, refer to
page101. In vehicles with a gasoline
engine, the expansion tank is on the other
side
Page 103 of 139
Reference
At a glance
Controls
Driving tips
Mobility
101
Coolant
Warning lamp
The warning lamp lights up: coolant
level is too low; top off at the next
opportunity.
Do not open the cooling system when the
engine is hot. Escaping coolant can cause
burns.<
Coolant consists of water and coolant additive.
Not all commercially available additives are suit-
able for your BMW. Ask your BMW Sports
Activity Vehicle Center for suitable additives.
Only use suitable additives; otherwise,
engine damage may result. The additives
are harmful to your health, so follow the instruc-
tions on the containers.<
Always observe all applicable environ-
mental laws and regulations when dis-
posing of used coolant additives.<
Checking coolant level
1.Allow engine to cool.
2.Turn the cap of the expansion tank counter-
clockwise to allow any accumulated pres-
sure to escape, then continue turning to
open.
3.The coolant level is correct when it is
between the MIN and MAX marks, also refer
to illustration next to filler neck.
4.If the coolant is low, slowly add coolant up to
the specified level – do not overfill.
5.Screw on the cap and tighten snugly.
6.Have the reason for the coolant loss cor-
rected as soon as possible.
Brake system
Malfunction
Brake fluid
The warning lamp lights up red despite
the handbrake being released.
The brake fluid in the reservoir has
fallen to below the minimum level. At the same
time, a considerably longer brake pedal travel
may be noticeable. Have the system checked
immediately.
During continued driving, increased brake
pedal travel may be necessary, and con-
siderably longer braking distances may result.
Please adapt your driving style accordingly.<
Display of the previously described mal-
function on Canadian models.
Page 104 of 139
Maintenance
102
Maintenance
BMW maintenance system
The BMW maintenance system supports the
preservation of the road and operating safety of
your BMW.
Regular maintenance is not only required for
the safety of the vehicle, it also improves the
resale value.
Service Interval Display
The BMW maintenance system takes the driv-
ing conditions of the vehicle into account when
determining service intervals:
From the maintenance standpoint,
62,000 miles/100,000 km accumulated in
short-distance urban driving are not the equiva-
lent of the same distance covered at moderate
speeds in long-distance highway travel.
The BMW maintenance system is divided into
engine oil service and Inspections I and II.
Determining the maintenance intervals accord-
ing to the actual loads on the vehicle covers
practically every kind of operating situation.
However, even those who drive only short dis-
tances, significantly less than 6,200 miles/
10,000 km annually, should have the engine oil
changed at least every 2 years since oil deterio-
rates over time, regardless of use.
Brake fluid is hygroscopic: it absorbs
moisture from the atmosphere over the
course of time. To ensure that the brake system
continues to provide safe and reliable perfor-
mance, remember to have the brake fluid
changed at least every two years by a BMW Sports Activity Vehicle Center, also refer
to the Service and Warranty Information Book-
let for US models or the Warranty and Service
Guide Booklet for Canadian models.<
Service and Warranty Information
Booklet for US models and
Warranty and Service Guide Booklet
for Canadian models
Please consult your Service and Warranty Infor-
mation Booklet for US models and Warranty
and Service Guide Booklet for Canadian models
for additional information on service require-
ments.
BMW recommends that you have service
and repair operations performed at your
BMW Sports Activity Vehicle Center.
Take the time to ensure that these service pro-
cedures are confirmed by entries in your vehi-
cle's Service and Warranty Information Booklet
for US models and Warranty and Service Guide
Booklet for Canadian models. These entries
verify that your vehicle has received the speci-
fied regular maintenance.<
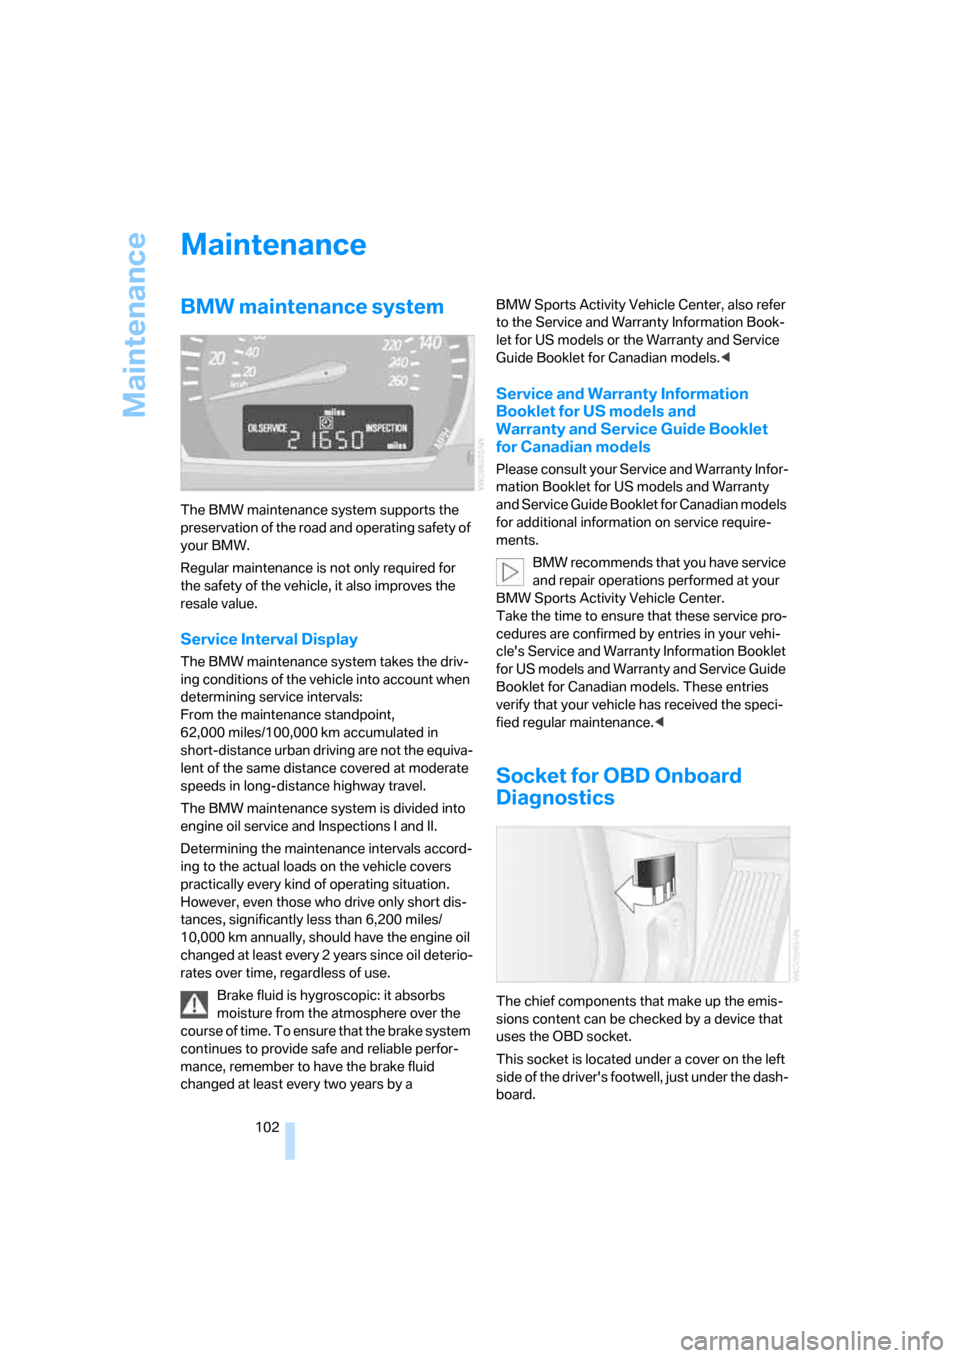
Socket for OBD Onboard
Diagnostics
The chief components that make up the emis-
sions content can be checked by a device that
uses the OBD socket.
This socket is located under a cover on the left
side of the driver's footwell, just under the dash-
board.
Page 109 of 139
Reference
At a glance
Controls
Driving tips
Mobility
107
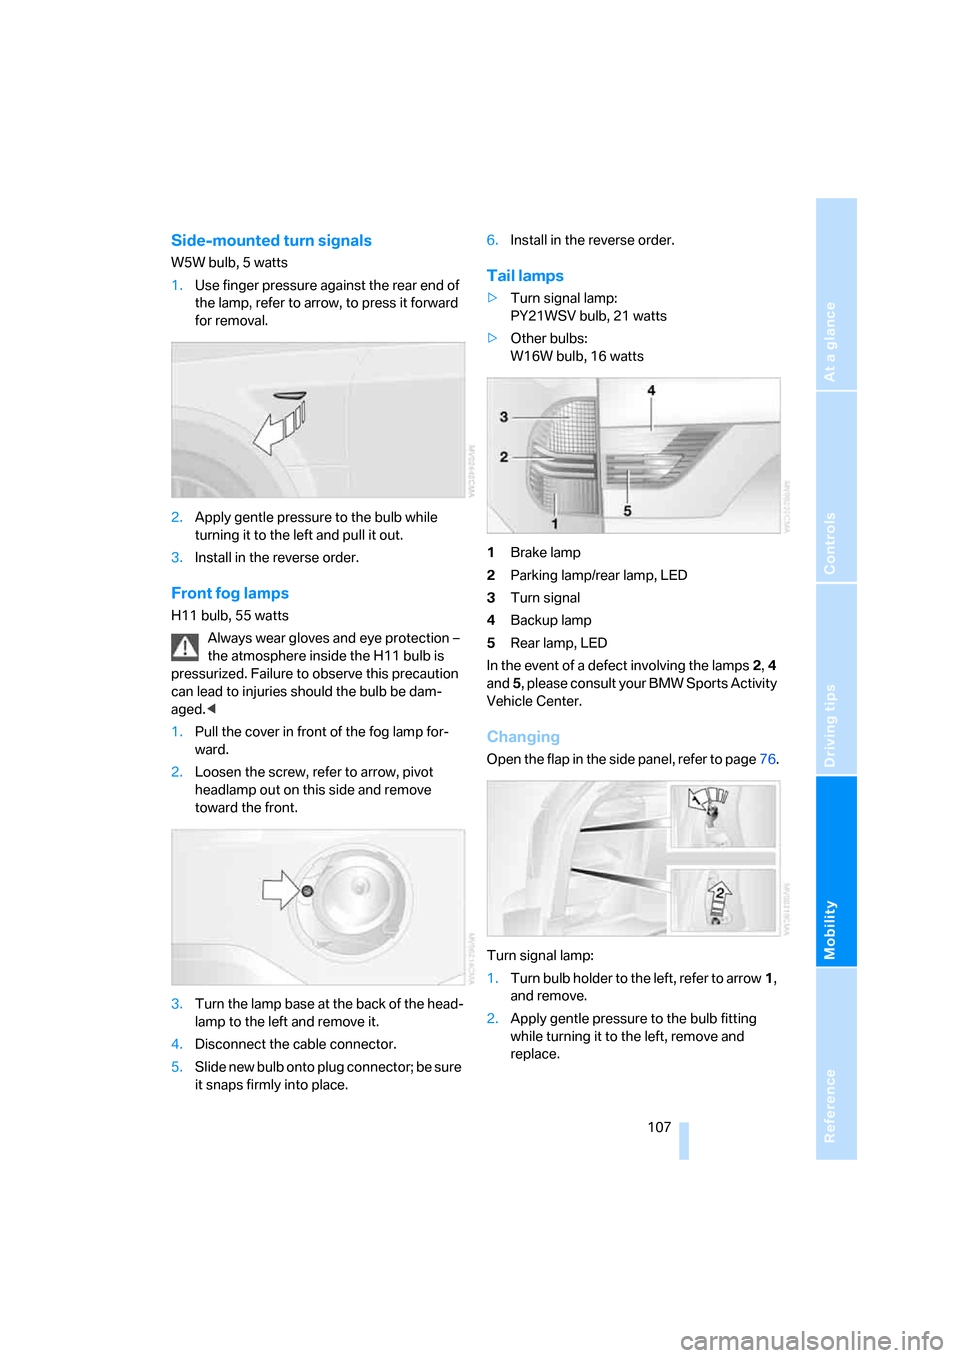
Side-mounted turn signals
W5W bulb, 5 watts
1.Use finger pressure against the rear end of
the lamp, refer to arrow, to press it forward
for removal.
2.Apply gentle pressure to the bulb while
turning it to the left and pull it out.
3.Install in the reverse order.
Front fog lamps
H11 bulb, 55 watts
Always wear gloves and eye protection –
the atmosphere inside the H11 bulb is
pressurized. Failure to observe this precaution
can lead to injuries should the bulb be dam-
aged.<
1.Pull the cover in front of the fog lamp for-
ward.
2.Loosen the screw, refer to arrow, pivot
headlamp out on this side and remove
toward the front.
3.Turn the lamp base at the back of the head-
lamp to the left and remove it.
4.Disconnect the cable connector.
5.Slide new bulb onto plug connector; be sure
it snaps firmly into place.6.Install in the reverse order.
Tail lamps
>Turn signal lamp:
PY21WSV bulb, 21 watts
>Other bulbs:
W16W bulb, 16 watts
1Brake lamp
2Parking lamp/rear lamp, LED
3Turn signal
4Backup lamp
5Rear lamp, LED
In the event of a defect involving the lamps 2, 4
and 5, please consult your BMW Sports Activity
Vehicle Center.
Changing
Open the flap in the side panel, refer to page76.
Turn signal lamp:
1.Turn bulb holder to the left, refer to arrow1,
and remove.
2.Apply gentle pressure to the bulb fitting
while turning it to the left, remove and
replace.
Page 110 of 139
Replacing components
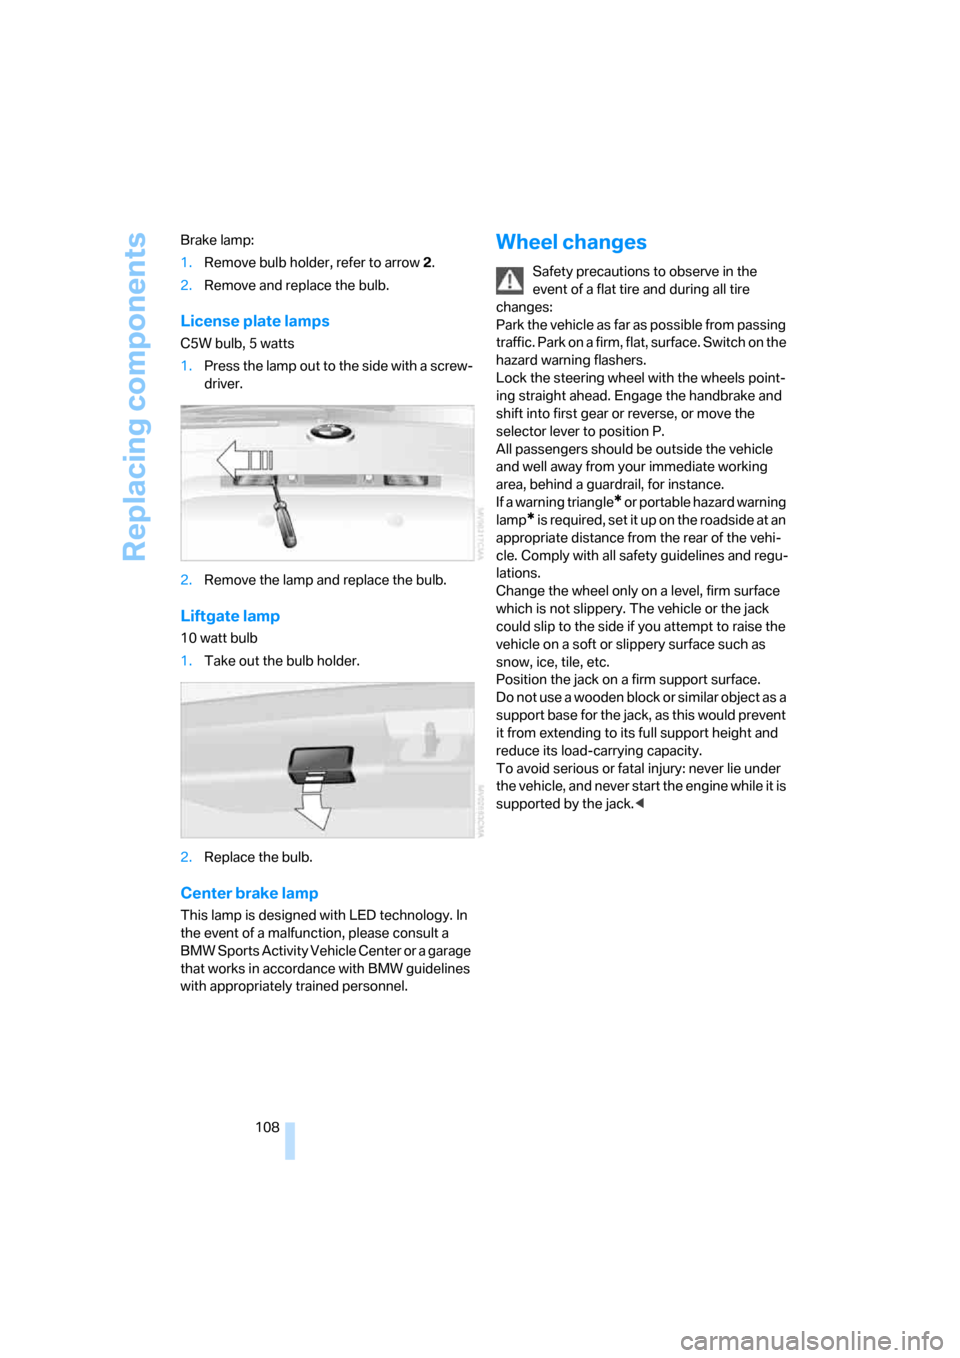
108 Brake lamp:
1.Remove bulb holder, refer to arrow 2.
2.Remove and replace the bulb.
License plate lamps
C5W bulb, 5 watts
1.Press the lamp out to the side with a screw-
driver.
2.Remove the lamp and replace the bulb.
Liftgate lamp
10 watt bulb
1.Take out the bulb holder.
2.Replace the bulb.
Center brake lamp
This lamp is designed with LED technology. In
the event of a malfunction, please consult a
BMW Sports Activity Vehicle Center or a garage
that works in accordance with BMW guidelines
with appropriately trained personnel.
Wheel changes
Safety precautions to observe in the
event of a flat tire and during all tire
changes:
Park the vehicle as far as possible from passing
traffic. Park on a firm, flat, surface. Switch on the
hazard warning flashers.
Lock the steering wheel with the wheels point-
ing straight ahead. Engage the handbrake and
shift into first gear or reverse, or move the
selector lever to position P.
All passengers should be outside the vehicle
and well away from your immediate working
area, behind a guardrail, for instance.
If a warning triangle
* or portable hazard warning
lamp
* is required, set it up on the roadside at an
appropriate distance from the rear of the vehi-
cle. Comply with all safety guidelines and regu-
lations.
Change the wheel only on a level, firm surface
which is not slippery. The vehicle or the jack
could slip to the side if you attempt to raise the
vehicle on a soft or slippery surface such as
snow, ice, tile, etc.
Position the jack on a firm support surface.
Do not use a wooden block or similar object as a
support base for the jack, as this would prevent
it from extending to its full support height and
reduce its load-carrying capacity.
To avoid serious or fatal injury: never lie under
the vehicle, and never start the engine while it is
supported by the jack.<