sunroof BMW X3 3.0SI 2007 E83 Owner's Manual
[x] Cancel search | Manufacturer: BMW, Model Year: 2007, Model line: X3 3.0SI, Model: BMW X3 3.0SI 2007 E83Pages: 139, PDF Size: 4.74 MB
Page 22 of 139
Opening and closing
20
Convenience opening mode
Press and hold the button.
The windows and the panorama glass sunroof
*
are opened.
If you wish, you can have this special fea-
ture activated/deactivated.<
Engaging locks
Press the button.
Hazard warning flashers flash once.
If you wish, you can have this special fea-
ture deactivated on vehicles without an
alarm system.<
Do not lock the vehicle from the outside
when people are in it since they will be
unable to unlock it from the inside if they do not
know the special procedure.<
If you unlock the vehicle, but do not open
any doors, the central locking system
automatically relocks the vehicle after a short
time. If you wish, you can have this special fea-
ture activated/deactivated.<
Switching off tilt alarm sensor* and
interior motion sensor*
Press the button again directly after
locking.
For details, refer to page26.
Switching on interior lamps
With the vehicle locked:
Press the button.
You can also use this function to locate your
vehicle in parking garages etc.
Panic mode*
You can also trigger the alarm system* in case
of danger:
Press the button for at least 3 seconds.
Deactivating alarm: press any button.
Unlocking liftgate
Press the button.
The liftgate will open slightly, regardless of
whether it was previously locked or unlocked.If you wish, you can have the liftgate open
only after the vehicle has been unlocked.
You may have this function activated/deacti-
vated.<
To avoid damage, make sure there is suf-
ficient space when opening the liftgate.
A previously locked liftgate is also locked again
after closing.
Before and after a drive, make sure that the lift-
gate has not been inadvertently released.<
Malfunction
The remote control may malfunction due to
local radio waves.
Should this occur, use the master key to unlock
and relock the vehicle via the door lock.
If it is no longer possible to lock the vehicle
using the remote control, its battery is dis-
charged. Use this remote control during an
extended drive; this will recharge the battery,
refer to page18.
For US owners only
The transmitter and receiver units comply with
part 15 of the FCC/Federal Communications
Commission regulations. Operation is gov-
erned by the following:
FCC ID:
LX8EWS
LX8FZVS
LX8FZVE
Compliance statement:
This device complies with part 15 of the FCC
Rules. Operation is subject to the following two
conditions:
>This device must not cause harmful inter-
ference, and
>this device must accept any interference
received, including interference that may
cause undesired operation.
Any unauthorized modifications or
changes to these devices could void the
user's authority to operate this equipment.<
Page 23 of 139
Reference
At a glance
Controls
Driving tips
Mobility
21
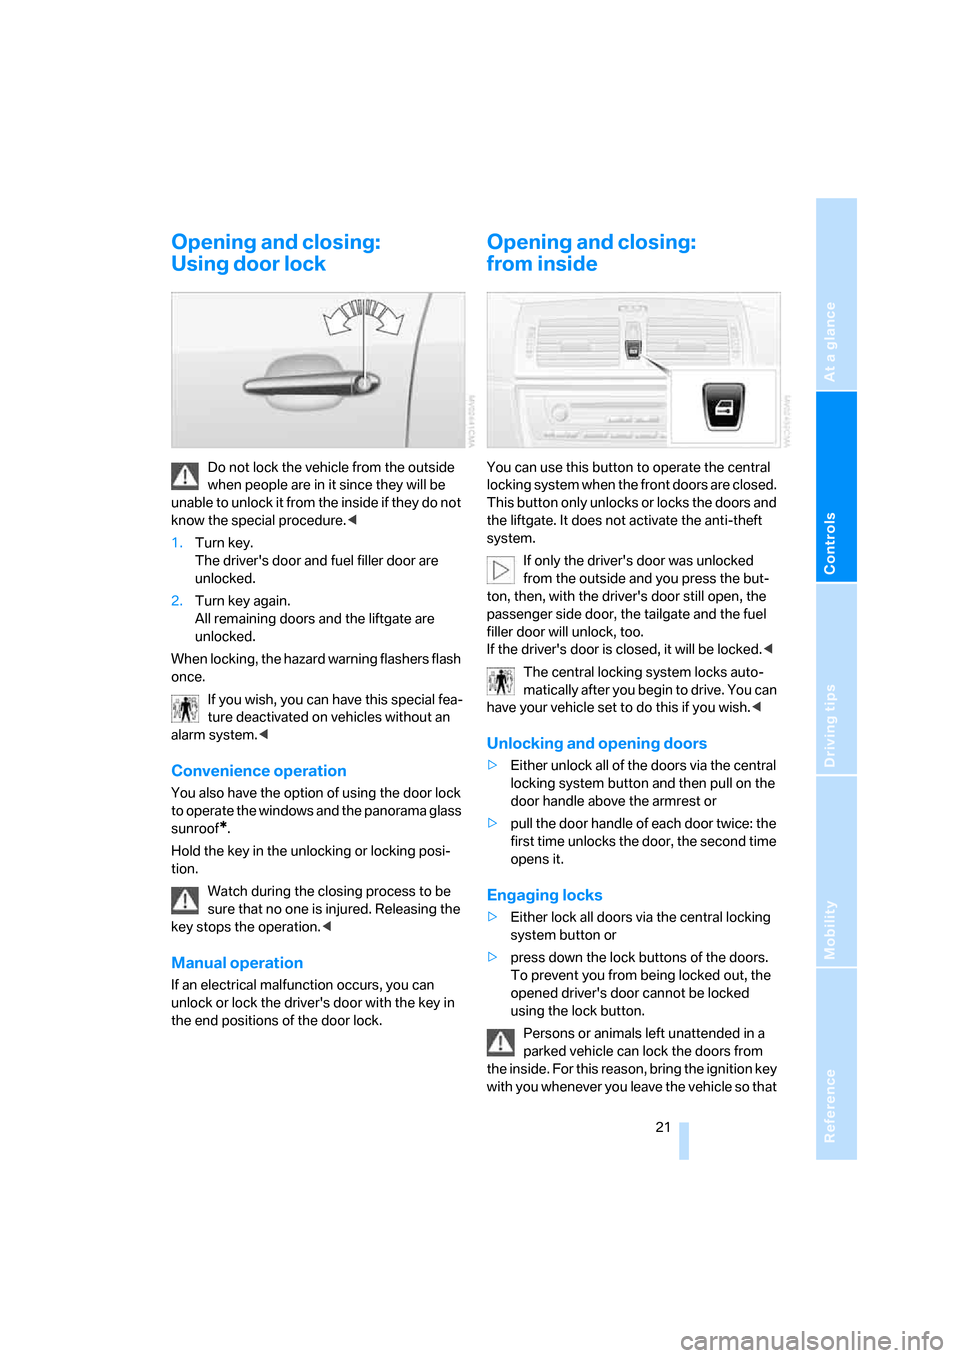
Opening and closing:
Using door lock
Do not lock the vehicle from the outside
when people are in it since they will be
unable to unlock it from the inside if they do not
know the special procedure.<
1.Turn key.
The driver's door and fuel filler door are
unlocked.
2.Turn key again.
All remaining doors and the liftgate are
unlocked.
When locking, the hazard warning flashers flash
once.
If you wish, you can have this special fea-
ture deactivated on vehicles without an
alarm system.<
Convenience operation
You also have the option of using the door lock
to operate the windows and the panorama glass
sunroof
*.
Hold the key in the unlocking or locking posi-
tion.
Watch during the closing process to be
sure that no one is injured. Releasing the
key stops the operation.<
Manual operation
If an electrical malfunction occurs, you can
unlock or lock the driver's door with the key in
the end positions of the door lock.
Opening and closing:
from inside
You can use this button to operate the central
locking system when the front doors are closed.
This button only unlocks or locks the doors and
the liftgate. It does not activate the anti-theft
system.
If only the driver's door was unlocked
from the outside and you press the but-
ton, then, with the driver's door still open, the
passenger side door, the tailgate and the fuel
filler door will unlock, too.
If the driver's door is closed, it will be locked.<
The central locking system locks auto-
matically after you begin to drive. You can
have your vehicle set to do this if you wish.<
Unlocking and opening doors
>Either unlock all of the doors via the central
locking system button and then pull on the
door handle above the armrest or
>pull the door handle of each door twice: the
first time unlocks the door, the second time
opens it.
Engaging locks
>Either lock all doors via the central locking
system button or
>press down the lock buttons of the doors.
To prevent you from being locked out, the
opened driver's door cannot be locked
using the lock button.
Persons or animals left unattended in a
parked vehicle can lock the doors from
the inside. For this reason, bring the ignition key
with you whenever you leave the vehicle so that
Page 25 of 139
Reference
At a glance
Controls
Driving tips
Mobility
23
In the back, separate switches are provided in
the armrests.
For convenience operation using the remote
control or the door lock, refer to pages20, 21.
After switching off ignition
You can operate the windows for up to 1 minute
as long as no door has been opened.
Pinch protection system
If the closing force rises beyond a predefined
threshold when a window is being closed, the
system will interrupt the closing of the window
prior to lowering it slightly.
Despite the presence of the pinch protec-
tion system, inspect the window's travel
path prior to closing it, as the safety system
might fail to detect certain kinds of obstruc-
tions, such as very thin objects, and the window
would continue closing.
Do not install any accessories in the movement
range of the window as this could impair the
function of the pinch protection system.<
Closing without pinch protection
system
When there is danger outside or when, for
example, ice on the window prevents a normal
closing, press the switch past the resistance
point and hold it there. The window will close
without the pinch protection system.
Following interruptions in electrical
power supply
After disconnecting the battery, the pinch pro-
tection system must be reinitialized. To do this,
open and close the windows once and continue
pull the switch for longer than approx. 2 sec-
onds after closing.
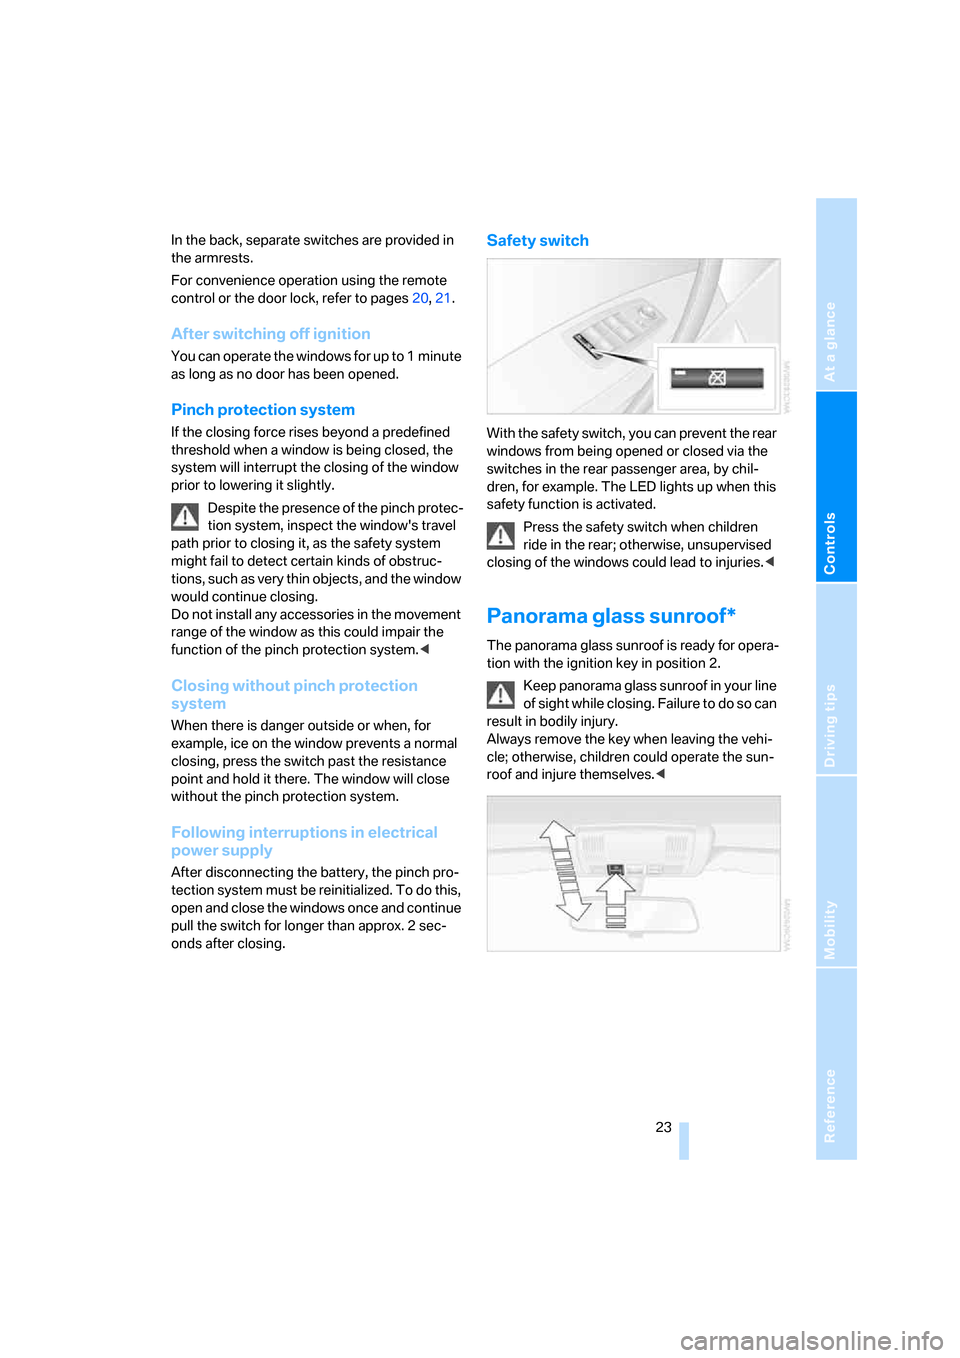
Safety switch
With the safety switch, you can prevent the rear
windows from being opened or closed via the
switches in the rear passenger area, by chil-
dren, for example. The LED lights up when this
safety function is activated.
Press the safety switch when children
ride in the rear; otherwise, unsupervised
closing of the windows could lead to injuries.<
Panorama glass sunroof*
The panorama glass sunroof is ready for opera-
tion with the ignition key in position 2.
Keep panorama glass sunroof in your line
of sight while closing. Failure to do so can
result in bodily injury.
Always remove the key when leaving the vehi-
cle; otherwise, children could operate the sun-
roof and injure themselves.<
Page 26 of 139
Opening and closing
24
Raising
Press the switch.
The closed roof is raised and the sliding visor
opens slightly.
Do not use force to close the sliding visor
when the sunroof is in its raised position,
as this could damage the mechanism.<
Opening, closing
Sliding visor
You can move the sliding visor independently
when the roof is in the closed or raised position.
>Slide the switch backward to the resistance
point.
The sliding visor continues to open for as
long as you hold the switch in this position.
>Press the switch backward briefly past the
resistance point.
The sliding visor opens automatically. Press
the switch briefly to stop the movement.
You close the sliding visor in the same way by
sliding the switch forward.
Panorama glass sunroof
With the sliding visor open, proceed as
described under Sliding visor.
For convenience operation using the remote
control or the door lock, refer to page20 or21.
Opening and closing sunroof and
sliding visor together
Briefly press the switch past the resistance
point twice consecutively.
Press the switch briefly to stop the movement.
Convenience functions
>With the sunroof open, press the switch
twice:
The sunroof is raised.
>With the sunroof raised, briefly press the
switch twice in the opening direction:
The sunroof is completely opened.
Comfort position
In the comfort position, the sunroof is not com-
pletely open. This reduces the wind noise in the
passenger compartment.
Each time the panorama glass sunroof is com-
pletely opened or closed, it stops in the comfort
position. If you wish, you can resume the motion
by activating the switch.
After switching off ignition
You can operate the panorama glass sunroof for
approx. 1 minute as long as no door has been
opened.
Pinch protection system
If the panorama glass sunroof or sliding visor
encounter resistance when closing from
roughly one third of the roof opening or when
closing from the raised position, then the clos-
ing action is interrupted and the panorama
glass sunroof and sliding visor reopen slightly.
Despite the presence of the pinch protec-
tion system, inspect the sunroof's travel
path prior to closing it, as the safety system
might fail to detect certain kinds of obstruc-
tions, such as very thin objects, and the sunroof
would continue closing.<
Closing without pinch protection
system
If there is danger outside, press the switch
beyond the resistance point and hold it there.
The sunroof will close without the pinch protec-
tion system.
Following interruptions in electrical
power supply
After a power supply interruption, it may only be
possible to raise the sunroof. Have the system
reinitialized. BMW recommends having this
work carried out by your BMW Sports Activity
Vehicle Center.
Page 27 of 139
Reference
At a glance
Controls
Driving tips
Mobility
25
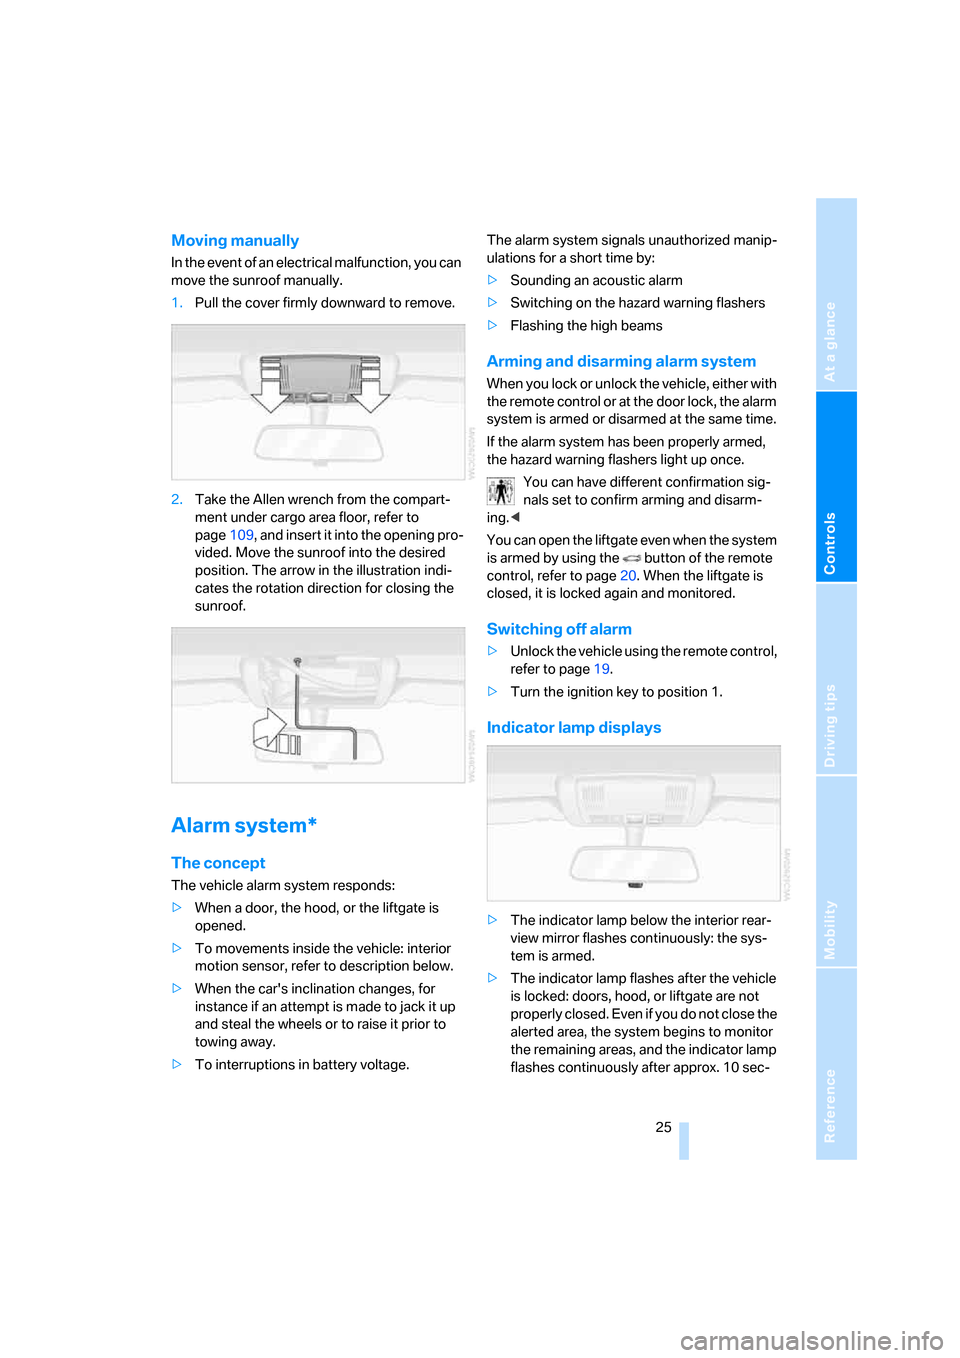
Moving manually
In the event of an electrical malfunction, you can
move the sunroof manually.
1.Pull the cover firmly downward to remove.
2.Take the Allen wrench from the compart-
ment under cargo area floor, refer to
page109, and insert it into the opening pro-
vided. Move the sunroof into the desired
position. The arrow in the illustration indi-
cates the rotation direction for closing the
sunroof.
Alarm system*
The concept
The vehicle alarm system responds:
>When a door, the hood, or the liftgate is
opened.
>To movements inside the vehicle: interior
motion sensor, refer to description below.
>When the car's inclination changes, for
instance if an attempt is made to jack it up
and steal the wheels or to raise it prior to
towing away.
>To interruptions in battery voltage.The alarm system signals unauthorized manip-
ulations for a short time by:
>Sounding an acoustic alarm
>Switching on the hazard warning flashers
>Flashing the high beams
Arming and disarming alarm system
When you lock or unlock the vehicle, either with
the remote control or at the door lock, the alarm
system is armed or disarmed at the same time.
If the alarm system has been properly armed,
the hazard warning flashers light up once.
You can have different confirmation sig-
nals set to confirm arming and disarm-
ing.<
You can open the liftgate even when the system
is armed by using the button of the remote
control, refer to page20. When the liftgate is
closed, it is locked again and monitored.
Switching off alarm
>Unlock the vehicle using the remote control,
refer to page19.
>Turn the ignition key to position 1.
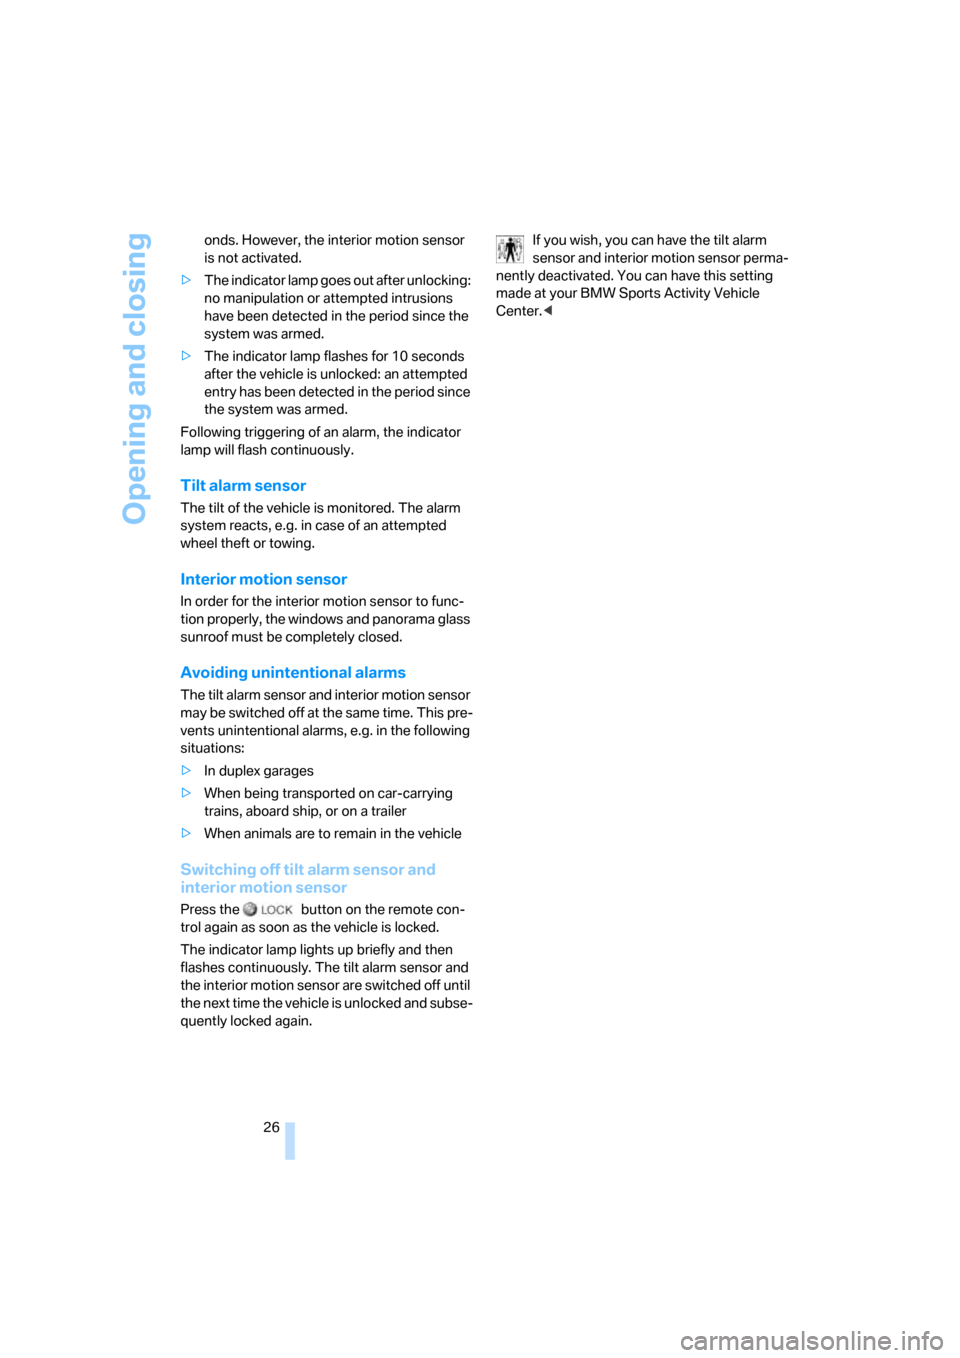
Indicator lamp displays
>The indicator lamp below the interior rear-
view mirror flashes continuously: the sys-
tem is armed.
>The indicator lamp flashes after the vehicle
is locked: doors, hood, or liftgate are not
properly closed. Even if you do not close the
alerted area, the system begins to monitor
the remaining areas, and the indicator lamp
flashes continuously after approx. 10 sec-
Page 28 of 139
Opening and closing
26 onds. However, the interior motion sensor
is not activated.
>The indicator lamp goes out after unlocking:
no manipulation or attempted intrusions
have been detected in the period since the
system was armed.
>The indicator lamp flashes for 10 seconds
after the vehicle is unlocked: an attempted
entry has been detected in the period since
the system was armed.
Following triggering of an alarm, the indicator
lamp will flash continuously.
Tilt alarm sensor
The tilt of the vehicle is monitored. The alarm
system reacts, e.g. in case of an attempted
wheel theft or towing.
Interior motion sensor
In order for the interior motion sensor to func-
tion properly, the windows and panorama glass
sunroof must be completely closed.
Avoiding unintentional alarms
The tilt alarm sensor and interior motion sensor
may be switched off at the same time. This pre-
vents unintentional alarms, e.g. in the following
situations:
>In duplex garages
>When being transported on car-carrying
trains, aboard ship, or on a trailer
>When animals are to remain in the vehicle
Switching off tilt alarm sensor and
interior motion sensor
Press the button on the remote con-
trol again as soon as the vehicle is locked.
The indicator lamp lights up briefly and then
flashes continuously. The tilt alarm sensor and
the interior motion sensor are switched off until
the next time the vehicle is unlocked and subse-
quently locked again.If you wish, you can have the tilt alarm
sensor and interior motion sensor perma-
nently deactivated. You can have this setting
made at your BMW Sports Activity Vehicle
Center.<
Page 82 of 139
Things to remember when driving
80
Things to remember when driving
Breaking-in
Moving parts should be allowed to adjust to one
another. To ensure that your vehicle provides
maximum economy throughout a long service
life, we request that you comply with the follow-
ing instructions.
Engine and differential
Always obey all official speed limits.
For the first 1,200 miles/2,000 km
Drive at varying engine and driving speeds, but
do not exceed 4,500 rpm or 100 mph / 160 km/h
in the process.
Generally avoid full throttle or kick-down posi-
tion of the accelerator pedal.
After 1,200 miles/2,000 km
Engine and road speed can be gradually
increased.
Tires
Due to technical factors associated with their
manufacture, tires do not achieve their full trac-
tion potential until after an initial break-in
period. For this reason, drive with extra care
during the initial 200 miles/300 km.
Obey your local and state maximum speed lim-
its.
When the vehicle is operated on wet or
slushy roads, a wedge of water may form
between the tire and the road surface. This phe-
nomenon is referred to as hydroplaning and can
lead to partial or complete loss of traction, vehi-
cle control and braking effectiveness. Reduce
your speed on wet roads.<
Brake system
Your vehicle must travel approx. 300 miles/
500 km before the brake pads and rotors
achieve the optimum pad-surface and wear patterns required for trouble-free operation and
long service life later on.
To break in the separate handbrake drums,
apply the handbrake lightly when coasting to a
stop – at a traffic signal, for instance; use cau-
tion to avoid posing a danger to other road
users.
To avoid corrosion, repeat this procedure from
time to time.
The brake lamps do not come on when the
handbrake is applied.
Vacuum for the brake system servo unit
on your BMW is available only when the
engine is running. When you move the car with
the engine off – e.g., by towing – substantially
higher levels of pedal force will be required to
brake the vehicle.<
Clutch
The function of the clutch reaches its optimum
level only after a distance driven of approx.
300 miles/500 km. During this break-in period,
engage the clutch gently.
Following component replacements
Follow the breaking-in instructions again when-
ever subsequent driving requires replacement
of previously mentioned components.
General driving notes
Close the liftgate
Operate the vehicle only when the liftgate
is completely closed; otherwise, exhaust
fumes could enter the interior of the vehicle.<
If special circumstances should make it abso-
lutely necessary to operate the vehicle with the
liftgate open:
1.Close all windows and the panorama glass
sunroof.
Page 86 of 139
Things to remember when driving
84
Roof-mounted luggage rack*
A special rack system is available as an optional
accessory for your BMW. Please familiarize
yourself with the information contained in the
installation instructions.
Loading luggage rack
Because roof racks raise the vehicle's center of
gravity when loaded, they have a major effect on
its handling and steering response. You should
therefore always remember not to exceed the
approved roof load capacity, the approved
gross vehicle weight, or the axle loads when
loading the rack.
These specifications can be found under
Weights on page122.
The roof load must be evenly distributed and
must not extend outward beyond the limits of
the loading surface. Always stow the heaviest
pieces on the bottom. Be sure that adequate
clearance is maintained for raising the glass
sunroof and that objects do not project into the
opening path of the liftgate.
Secure roof-mounted cargo correctly and
securely to prevent it from shifting or falling off
while you drive.
Drive smoothly. Avoid sudden acceleration and
braking maneuvers. Take corners gently.
Driving on poor roads
Your X3 is at home on all paved and unpaved
roads. It combines all-wheel drive with the
advantages of a normal passenger car.
Driving on unpaved terrain can cause
damage to the vehicle.<
When you are driving on poor roads, there are a
few points which you should strictly observe –
for your own safety and that of your passengers,
as well as to protect the vehicle:
>Familiarize yourself with the vehicle before
you begin driving. Do not take risks with the
vehicle under any circumstances.>Always adapt your driving speed to the road
conditions. The more steep and uneven the
roadway is, the lower the speed should be.
>You can operate your vehicle on uphill and
downhill gradients with a maximum slope
of 50 %. If you wish to drive on uphill and
downhill grades of this nature, make sure
beforehand that the engine oil and coolant
levels are near the MAX mark, refer to
pages99 and101.
>When descending very steep hills, use
HDC Hill Descent Control, refer to page51.
It is possible to start off on inclines of up
to 32 %.
The permitted side tilt is 32 %.
>While driving, watch carefully for obstacles
such as rocks or holes. Try to avoid these
obstacles whenever possible.
>Avoid having the body make contact with
the ground, e.g. on the crests of hills and
bumpy roads. The ground clearance of the
vehicle is a maximum of approx. 8.0 in/
20 cm. Please be aware that the ground
clearance can vary depending on the load
and operating conditions of the vehicle.
>Do not drive in water that is deeper than
20 in/50 cm. If you must drive through water
up to that depth, drive at a walking speed
and do not stop.
After leaving the water, press on the foot-
brake gently several times while driving at a
low speed. The brake applications will help
to dry the brakes, thus preventing a reduc-
tion in braking performance caused by the
moisture.
To clean the handbrake, apply the lever
slightly at approx. 25 mph/40 km/h and con-
tinue to drive for approx. 200 yards/
200 meters, provided that traffic conditions
allow you to do so.
>Depending on the road condition, it can be
useful to temporarily activate DTC, refer to
DTC Dynamic Traction Control on page51.
>If the drive wheels spin on one side, depress
the accelerator pedal far enough to permit
the driving stability control systems to dis-
Page 113 of 139
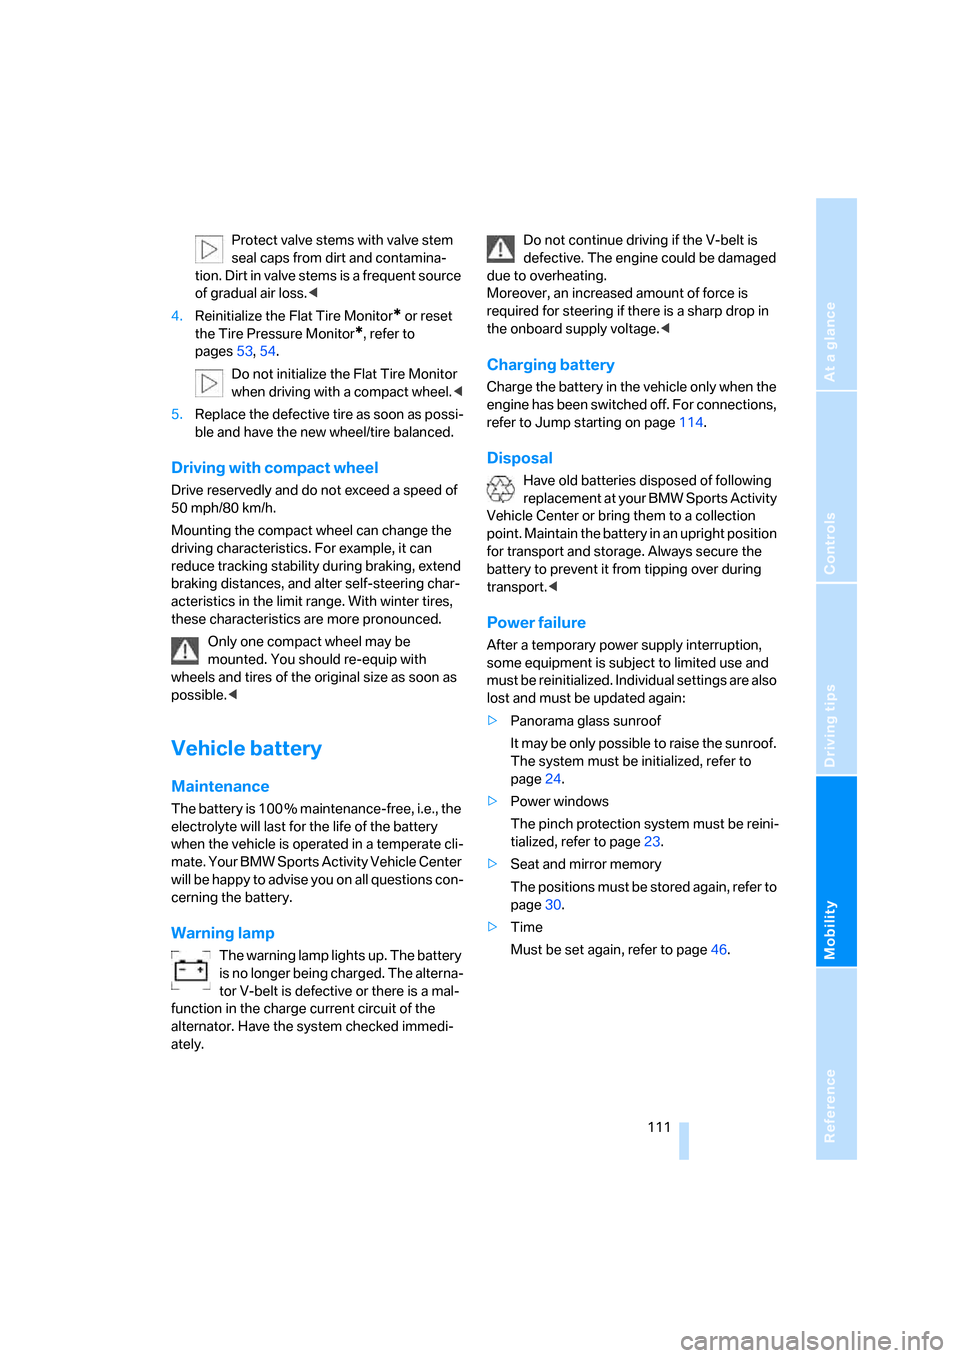
Reference
At a glance
Controls
Driving tips
Mobility
111
Protect valve stems with valve stem
seal caps from dirt and contamina-
tion. Dirt in valve stems is a frequent source
of gradual air loss.<
4.Reinitialize the Flat Tire Monitor
* or reset
the Tire Pressure Monitor
*, refer to
pages53, 54.
Do not initialize the Flat Tire Monitor
when driving with a compact wheel.<
5.Replace the defective tire as soon as possi-
ble and have the new wheel/tire balanced.
Driving with compact wheel
Drive reservedly and do not exceed a speed of
50 mph/80 km/h.
Mounting the compact wheel can change the
driving characteristics. For example, it can
reduce tracking stability during braking, extend
braking distances, and alter self-steering char-
acteristics in the limit range. With winter tires,
these characteristics are more pronounced.
Only one compact wheel may be
mounted. You should re-equip with
wheels and tires of the original size as soon as
possible.<
Vehicle battery
Maintenance
The battery is 100 % maintenance-free, i.e., the
electrolyte will last for the life of the battery
when the vehicle is operated in a temperate cli-
mate. Your BMW Sports Activity Vehicle Center
will be happy to advise you on all questions con-
cerning the battery.
Warning lamp
The warning lamp lights up. The battery
is no longer being charged. The alterna-
tor V-belt is defective or there is a mal-
function in the charge current circuit of the
alternator. Have the system checked immedi-
ately.Do not continue driving if the V-belt is
defective. The engine could be damaged
due to overheating.
Moreover, an increased amount of force is
required for steering if there is a sharp drop in
the onboard supply voltage.<
Charging battery
Charge the battery in the vehicle only when the
engine has been switched off. For connections,
refer to Jump starting on page114.
Disposal
Have old batteries disposed of following
replacement at your BMW Sports Activity
Vehicle Center or bring them to a collection
point. Maintain the battery in an upright position
for transport and storage. Always secure the
battery to prevent it from tipping over during
transport.<
Power failure
After a temporary power supply interruption,
some equipment is subject to limited use and
must be reinitialized. Individual settings are also
lost and must be updated again:
>Panorama glass sunroof
It may be only possible to raise the sunroof.
The system must be initialized, refer to
page24.
>Power windows
The pinch protection system must be reini-
tialized, refer to page23.
>Seat and mirror memory
The positions must be stored again, refer to
page30.
>Time
Must be set again, refer to page46.
Page 128 of 139
Everything from A to Z
126 Charge-current indicator
lamp12,111
Check Gas Cap, warning
lamp12,88
Child's seat, refer to Child
restraint systems34
Child restraint fixing system
LATCH35
Child restraint systems34
– installing34
– with tether strap35
Child-safety locks36
Child seat security34
Chock109
Chrome parts, care, refer to
Caring for your vehicle
brochure
Cigarette lighter72
Circulation of air, refer to
Recirculated-air
mode62,66
Cleaning, vehicle, refer to
Caring for your vehicle
brochure
Cleaning rear window42
Clock46,47
– 12 or 24 hour mode47
– setting, also refer to Owner's
Manual for Radio/Onboard
Computer
– setting time46
Closing
– from inside21
– with the remote control19
Clothes hooks71
Clutch80
– breaking-in80
Cockpit10
Cold start, refer to Starting
engine37
Combination of wheel/tire95
Compact wheel, wheel
changes109
Compartments, refer to
Storage compartments71
Compartments in cargo area,
refer to Behind side trim
panel76Compass, digital68
Computer47
– also refer to Owner's Manual
for Onboard Computer
– functions47
Condensation, refer to When
the vehicle is parked81
Confirmation signal for
locking/unlocking
vehicle19,21
Connecting car vacuum
cleaner, refer to Connecting
electrical devices72
Connecting electrical
devices72
Consumption, refer to
Average fuel
consumption48
Consumption indicator, refer
to Fuel gauge45
Controls, refer to Cockpit10
Convenience operation
– from outside21
– panorama glass sunroof21
– windows21
Coolant101
– level101
– temperature gauge46
– warning lamp101
Cooling, refer to
Temperature62,65
Copyright2
Correct wheels and tires95
Cruise control43
– buttons on steering
wheel13
– indicator lamp43
Cruising range48
Cup holders70
Curb weight, refer to
Weights122
Cylinders, refer to Engine
data120
D
Dashboard lighting, refer to
Instrument lighting60
Dashboard system, refer to
Cockpit10
Data, technical120
– dimensions121
– engine120
– filling capacities123
– weights122
Daytime running lamps58
Deactivating front passenger
airbags34,56
Defective lamp58
Defects7
Defrosting windows62,65
– air conditioner62
– automatic climate control65
Defrosting windows and
removing condensation
– air conditioner62
– automatic climate control65
Defrost position, refer to
Defrosting windows62,65
Digital clock46
Digital compass68
Dimensions121
Dimming mirror33
Directional indicators, refer to
Turn signals40
Disk brakes82
Displacement, refer to Engine
data120
Display illumination, refer to
Instrument lighting60
Display lighting, refer to
Instrument lighting60
Displays, refer to Instrument
cluster11
Disposal, vehicle battery111
Disposal of the vehicle, refer
to Caring for your vehicle
brochure
Distance warning, refer to
PDC Park Distance
Control49
Door keys18