BMW X3 XDRIVE 35I 2011 Owners Manual
Manufacturer: BMW, Model Year: 2011, Model line: X3 XDRIVE 35I, Model: BMW X3 XDRIVE 35I 2011Pages: 262, PDF Size: 11.2 MB
Page 111 of 262
no one reaches into the area of movement of the
rear seat backrests when the middle section is
folded down. Otherwise, injury or damage may
result.◀
Locking the backrest
Before letting passengers ride in the rear,
engage the seat backrests, locking them in
place. Otherwise, the restraining effect of the
safety belts may be limited in an accident.◀
Ensure that the lock is securely engaged
When folding back the backrest, be sure
that it locks in place securely. The red warning
field in the control display disappears. If it is not
properly engaged, transported cargo could en‐
ter the passenger compartment during braking
or evasive maneuvers and endanger the vehicle
occupants.◀
Using the middle safety belt
If the middle safety belt in the rear is used,
the larger section of the backrest must be
locked. Otherwise, the safety belt will not have
a restraining effect.◀
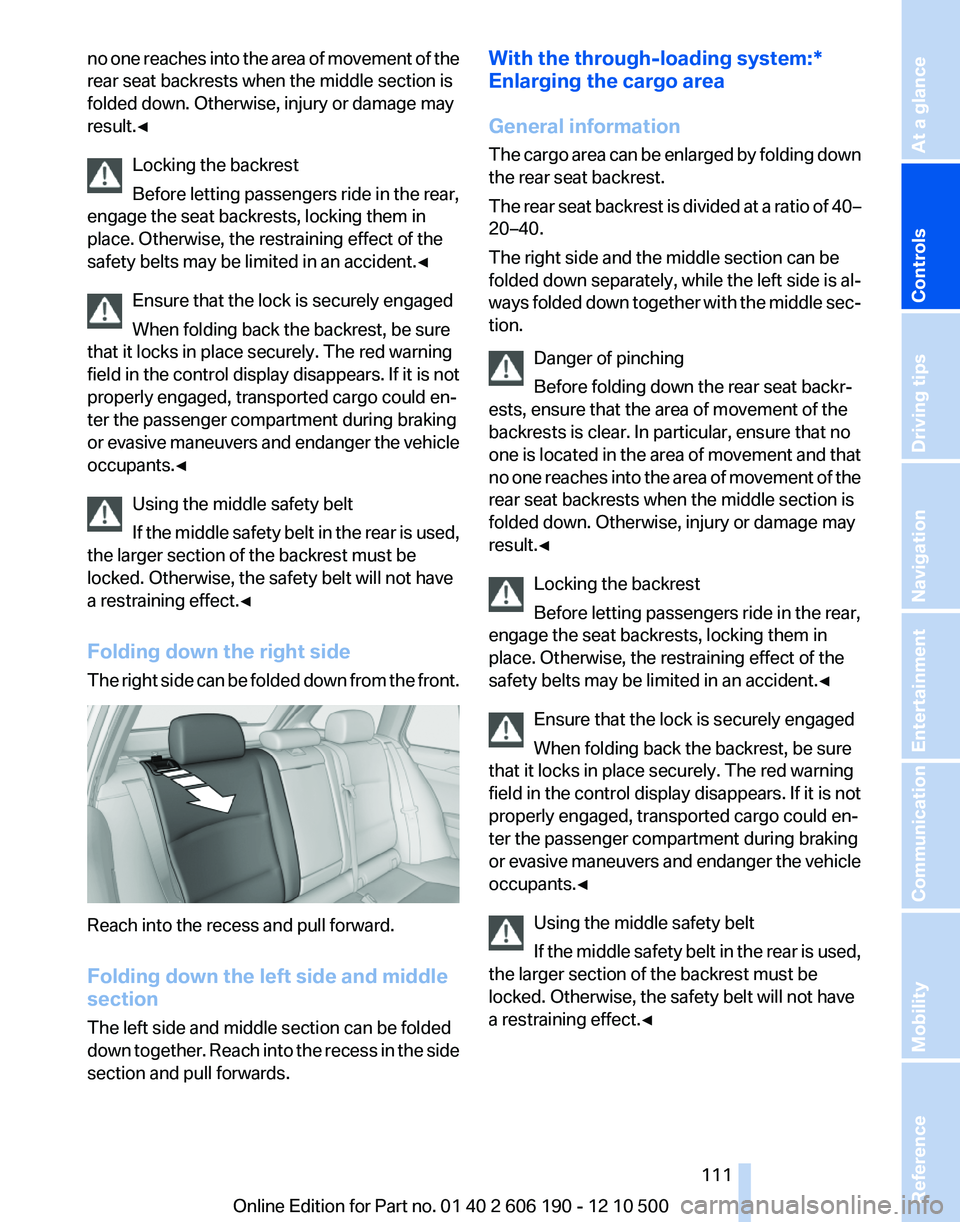
Folding down the right side
The right side can be folded down from the front.
Reach into the recess and pull forward.
Folding down the left side and middle
section
The left side and middle section can be folded
down together. Reach into the recess in the side
section and pull forwards.
With the through-loading system:*
Enlarging the cargo area
General information
The cargo area can be enlarged by folding down
the rear seat backrest.
The rear seat backrest is divided at a ratio of 40–
20–40.
The right side and the middle section can be
folded down separately, while the left side is al‐
ways folded down together with the middle sec‐
tion.
Danger of pinching
Before folding down the rear seat backr‐
ests, ensure that the area of movement of the
backrests is clear. In particular, ensure that no
one is located in the area of movement and that
no one reaches into the area of movement of the
rear seat backrests when the middle section is
folded down. Otherwise, injury or damage may
result.◀
Locking the backrest
Before letting passengers ride in the rear,
engage the seat backrests, locking them in
place. Otherwise, the restraining effect of the
safety belts may be limited in an accident.◀
Ensure that the lock is securely engaged
When folding back the backrest, be sure
that it locks in place securely. The red warning
field in the control display disappears. If it is not
properly engaged, transported cargo could en‐
ter the passenger compartment during braking
or evasive maneuvers and endanger the vehicle
occupants.◀
Using the middle safety belt
If the middle safety belt in the rear is used,
the larger section of the backrest must be
locked. Otherwise, the safety belt will not have
a restraining effect.◀Seite 111111
Online Edition for Part no. 01 40 2 606 190 - 12 10 500
ReferenceMobilityCommunicationEntertainmentNavigationDriving tipsControlsAt a glance
Page 112 of 262
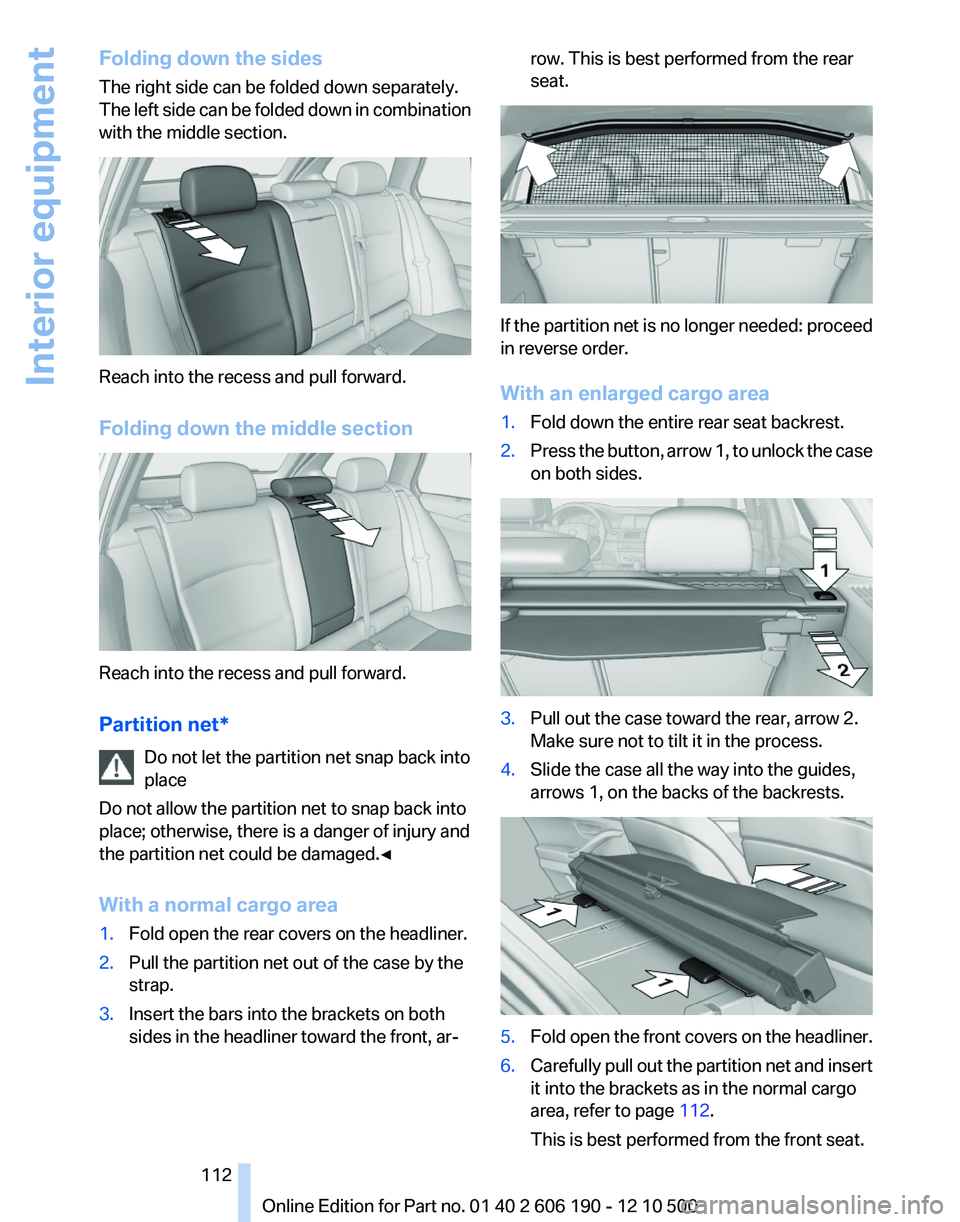
Folding down the sides
The right side can be folded down separately.
The left side can be folded down in combination
with the middle section.
Reach into the recess and pull forward.
Folding down the middle section
Reach into the recess and pull forward.
Partition net* Do not let the partition net snap back into
place
Do not allow the partition net to snap back into
place; otherwise, there is a danger of injury and
the partition net could be damaged.◀
With a normal cargo area
1.Fold open the rear covers on the headliner.2.Pull the partition net out of the case by the
strap.3.Insert the bars into the brackets on both
sides in the headliner toward the front, ar‐row. This is best performed from the rear
seat.
If the partition net is no longer needed: proceed
in reverse order.
With an enlarged cargo area
1.Fold down the entire rear seat backrest.2.Press the button, arrow 1, to unlock the case
on both sides.3.Pull out the case toward the rear, arrow 2.
Make sure not to tilt it in the process.4.Slide the case all the way into the guides,
arrows 1, on the backs of the backrests.5.Fold open the front covers on the headliner.6.Carefully pull out the partition net and insert
it into the brackets as in the normal cargo
area, refer to page 112.
This is best performed from the front seat.Seite 112112
Online Edition for Part no. 01 40 2 606 190 - 12 10 500Interior equipment
Page 113 of 262
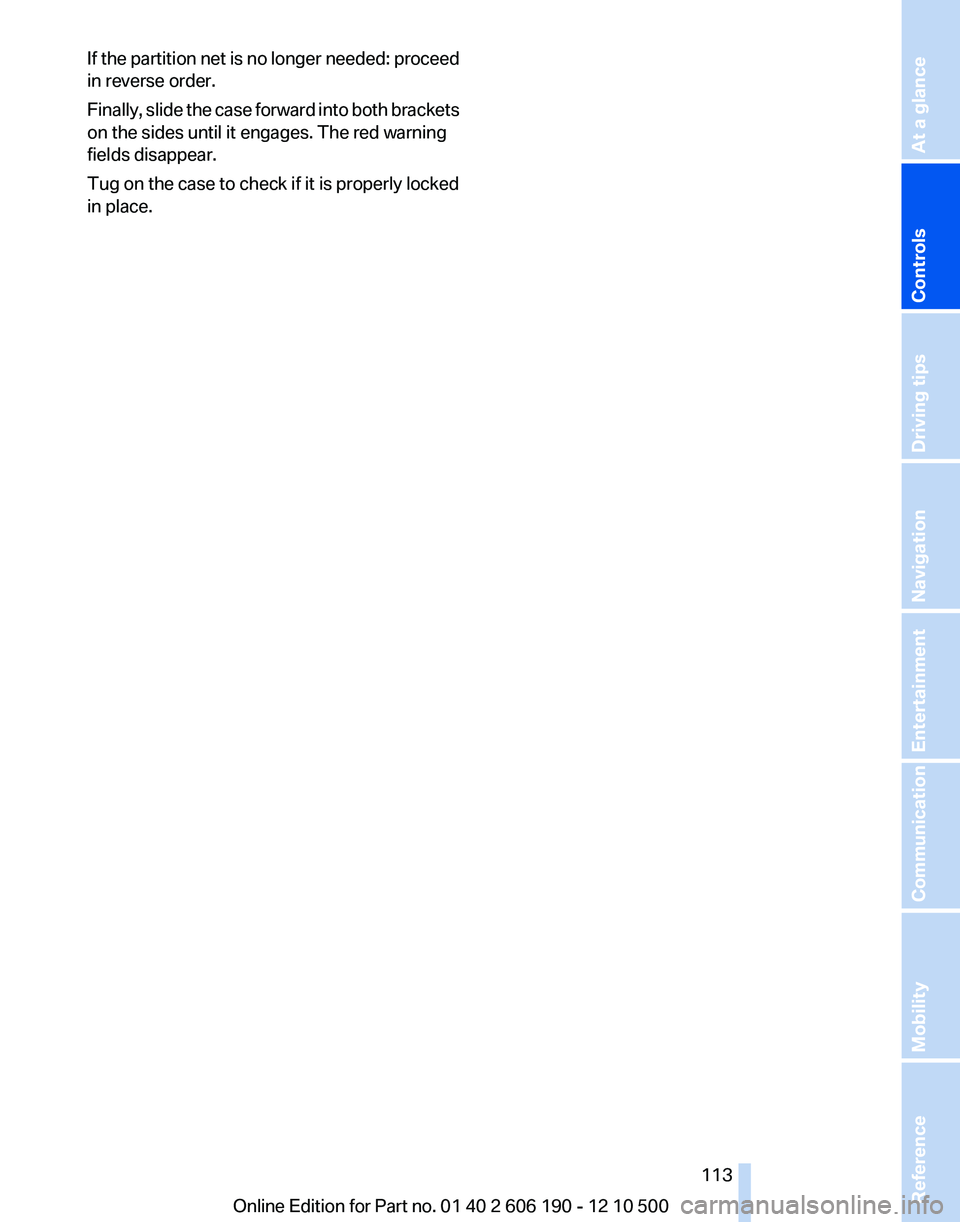
If the partition net is no longer needed: proceed
in reverse order.
Finally, slide the case forward into both brackets
on the sides until it engages. The red warning
fields disappear.
Tug on the case to check if it is properly locked
in place.Seite 113113
Online Edition for Part no. 01 40 2 606 190 - 12 10 500
ReferenceMobilityCommunicationEntertainmentNavigationDriving tipsControlsAt a glance
Page 114 of 262
Storage compartmentsStorage compartments
The following storage compartments are avail‐
able in the vehicle interior:▷Glove compartment on the front passenger
side, refer to page 114.▷Storage compartment in the front center
armrest, refer to page 114.▷Compartments in the doors.▷Pockets * on the backrests of the front seats.▷Net* in the front passenger footwell.
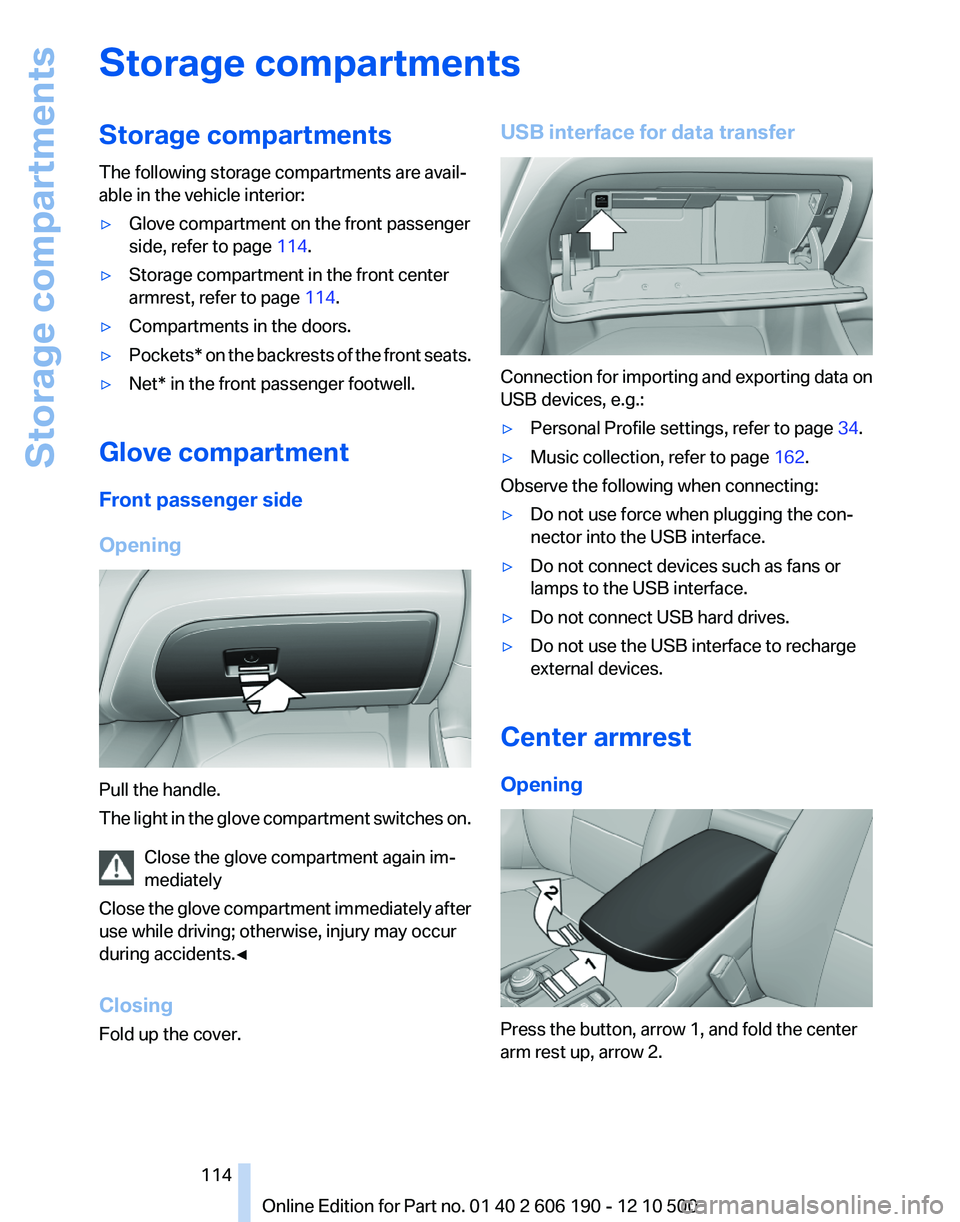
Glove compartment
Front passenger side
Opening
Pull the handle.
The light in the glove compartment switches on.
Close the glove compartment again im‐
mediately
Close the glove compartment immediately after
use while driving; otherwise, injury may occur
during accidents.◀
Closing
Fold up the cover.
USB interface for data transfer
Connection for importing and exporting data on
USB devices, e.g.:
▷Personal Profile settings, refer to page 34.▷Music collection, refer to page 162.
Observe the following when connecting:
▷Do not use force when plugging the con‐
nector into the USB interface.▷Do not connect devices such as fans or
lamps to the USB interface.▷Do not connect USB hard drives.▷Do not use the USB interface to recharge
external devices.
Center armrest
Opening
Press the button, arrow 1, and fold the center
arm rest up, arrow 2.
Seite 114114
Online Edition for Part no. 01 40 2 606 190 - 12 10 500Storage compartments
Page 115 of 262
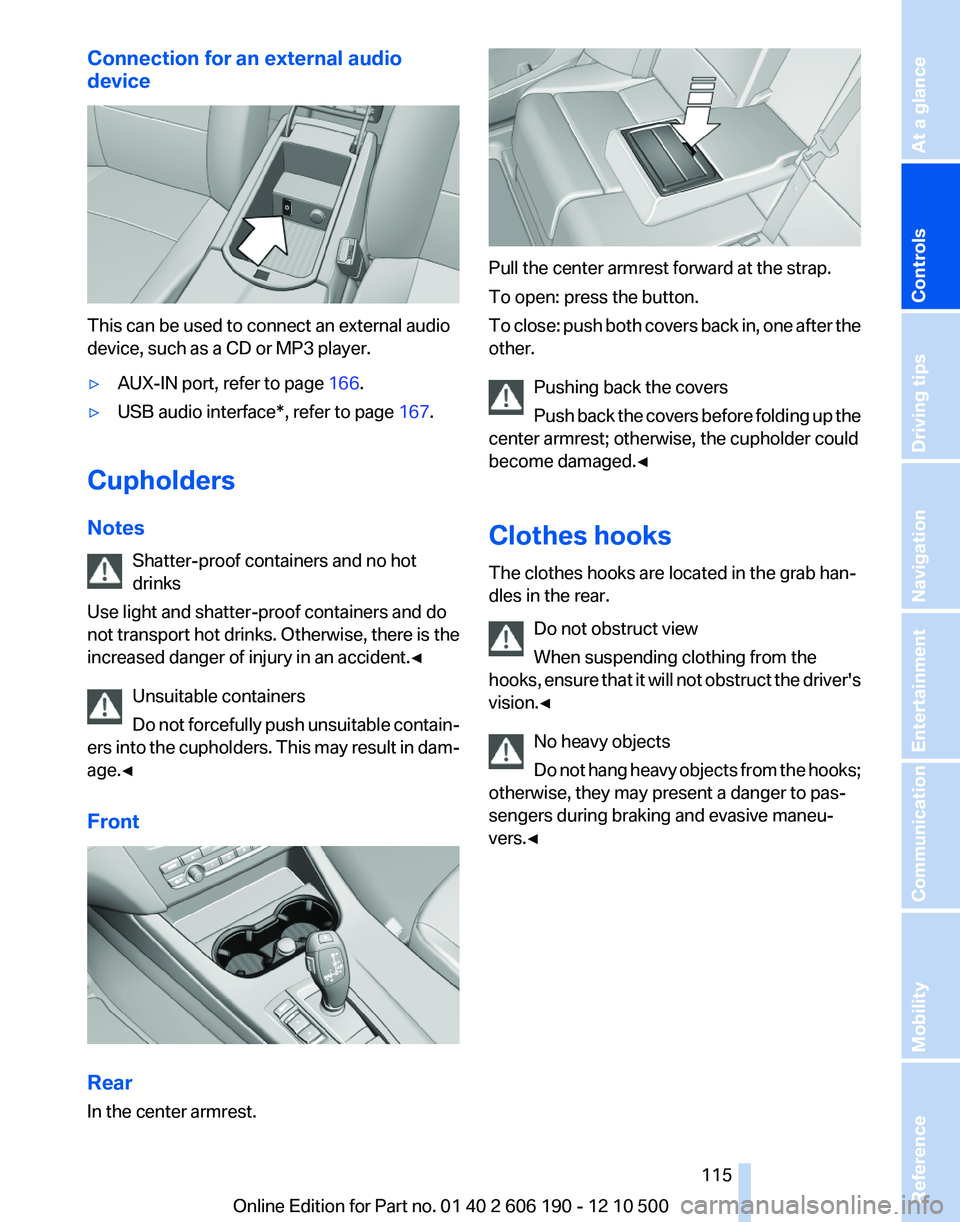
Connection for an external audio
device
This can be used to connect an external audio
device, such as a CD or MP3 player.
▷AUX-IN port, refer to page 166.▷USB audio interface*, refer to page 167.
Cupholders
Notes Shatter-proof containers and no hot
drinks
Use light and shatter-proof containers and do
not transport hot drinks. Otherwise, there is the
increased danger of injury in an accident.◀
Unsuitable containers
Do not forcefully push unsuitable contain‐
ers into the cupholders. This may result in dam‐
age.◀
Front
Rear
In the center armrest.
Pull the center armrest forward at the strap.
To open: press the button.
To close: push both covers back in, one after the
other.
Pushing back the covers
Push back the covers before folding up the
center armrest; otherwise, the cupholder could
become damaged.◀
Clothes hooks
The clothes hooks are located in the grab han‐
dles in the rear.
Do not obstruct view
When suspending clothing from the
hooks, ensure that it will not obstruct the driver's
vision.◀
No heavy objects
Do not hang heavy objects from the hooks;
otherwise, they may present a danger to pas‐
sengers during braking and evasive maneu‐
vers.◀
Seite 115115
Online Edition for Part no. 01 40 2 606 190 - 12 10 500
ReferenceMobilityCommunicationEntertainmentNavigationDriving tipsControlsAt a glance
Page 116 of 262
Storage compartments in the
cargo area
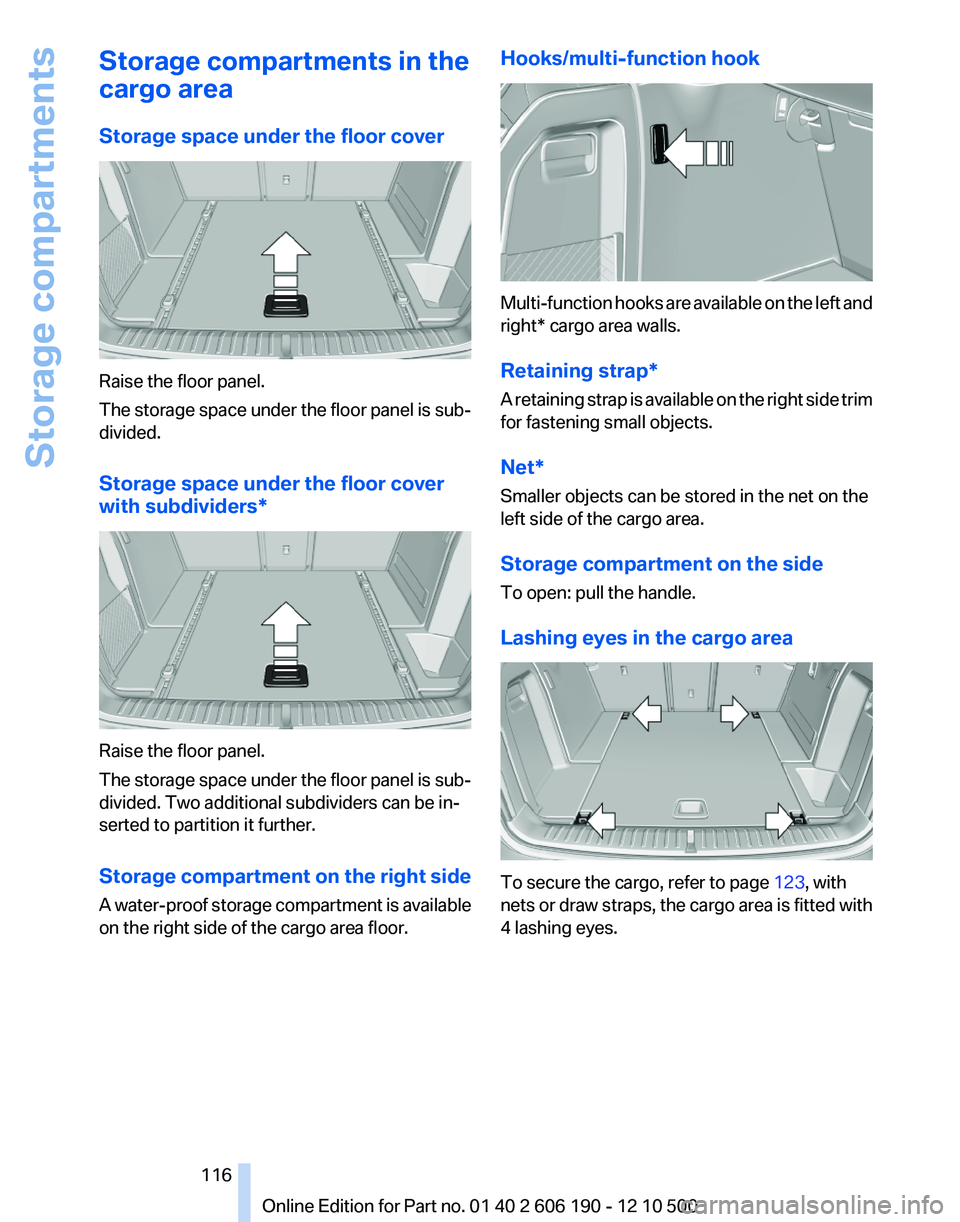
Storage space under the floor cover
Raise the floor panel.
The storage space under the floor panel is sub‐
divided.
Storage space under the floor cover
with subdividers*
Raise the floor panel.
The storage space under the floor panel is sub‐
divided. Two additional subdividers can be in‐
serted to partition it further.
Storage compartment on the right side
A water-proof storage compartment is available
on the right side of the cargo area floor.
Hooks/multi-function hook
Multi-function hooks are available on the left and
right* cargo area walls.
Retaining strap*
A retaining strap is available on the right side trim
for fastening small objects.
Net*
Smaller objects can be stored in the net on the
left side of the cargo area.
Storage compartment on the side
To open: pull the handle.
Lashing eyes in the cargo area
To secure the cargo, refer to page 123, with
nets or draw straps, the cargo area is fitted with
4 lashing eyes.
Seite 116116
Online Edition for Part no. 01 40 2 606 190 - 12 10 500Storage compartments
Page 117 of 262
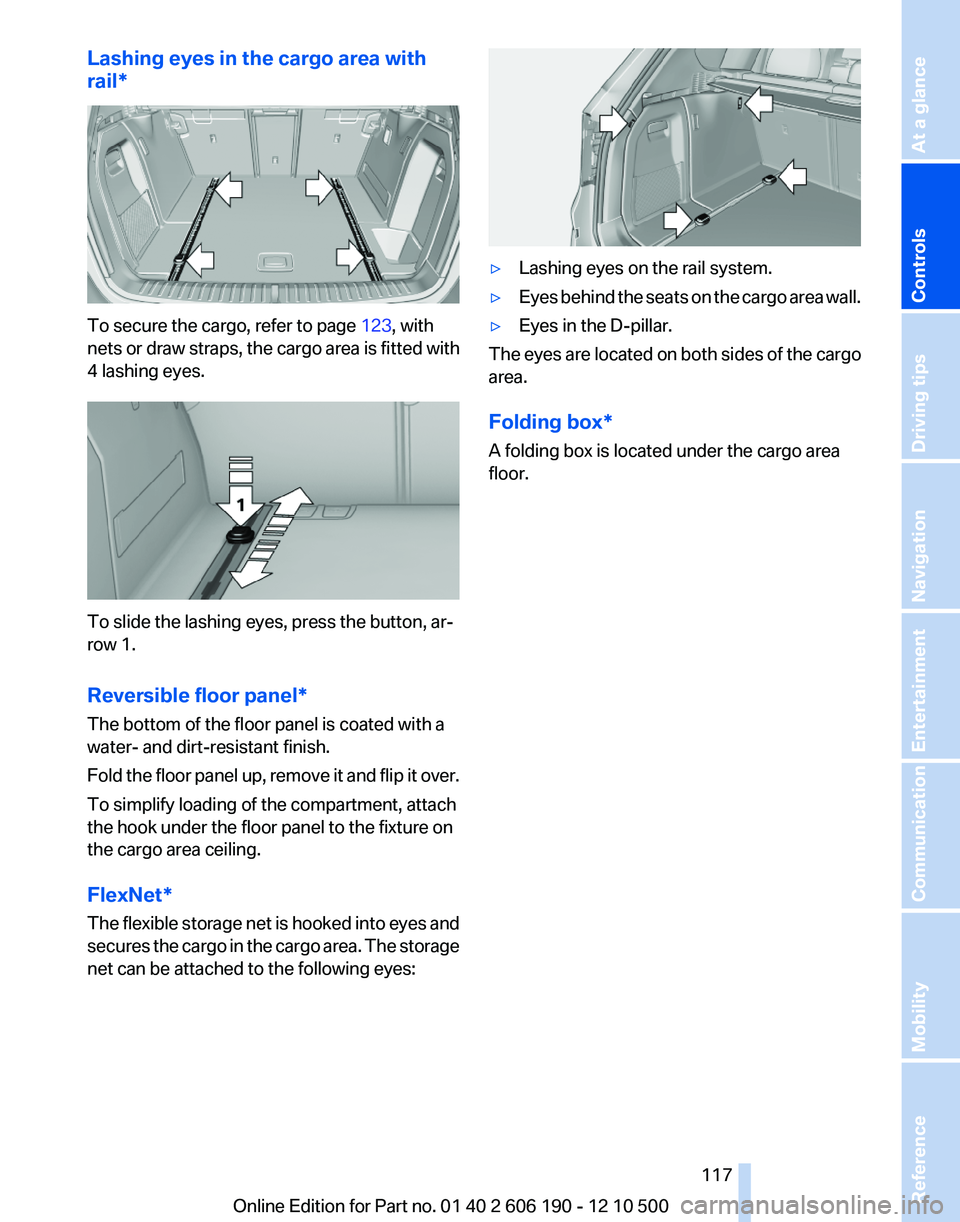
Lashing eyes in the cargo area with
rail*
To secure the cargo, refer to page 123, with
nets or draw straps, the cargo area is fitted with
4 lashing eyes.
To slide the lashing eyes, press the button, ar‐
row 1.
Reversible floor panel*
The bottom of the floor panel is coated with a
water- and dirt-resistant finish.
Fold the floor panel up, remove it and flip it over.
To simplify loading of the compartment, attach
the hook under the floor panel to the fixture on
the cargo area ceiling.
FlexNet*
The flexible storage net is hooked into eyes and
secures the cargo in the cargo area. The storage
net can be attached to the following eyes:
▷Lashing eyes on the rail system.▷Eyes behind the seats on the cargo area wall.▷Eyes in the D-pillar.
The eyes are located on both sides of the cargo
area.
Folding box*
A folding box is located under the cargo area
floor.
Seite 117117
Online Edition for Part no. 01 40 2 606 190 - 12 10 500
ReferenceMobilityCommunicationEntertainmentNavigationDriving tipsControlsAt a glance
Page 118 of 262
Online Edition for Part no. 01 40 2 606 190 - 12 10 500
Page 119 of 262
Driving tips
This chapter provides you with information useful in dealing with specific driving and operating modes.Online Edition for Part no. 01 40 2 606 190 - 12 10 500
Page 120 of 262
Things to remember when drivingBreaking-in period
General information
Moving parts need to be broken in to adjust to
each other.
The following instructions will help achieve a
long vehicle life and good economy.
Engine and differential
Always obey the official speed limit.
Up to 1,200 miles/2,000 km
Do not exceed the maximum engine and road
speeds:▷For gasoline engine, 4500 rpm and
100 mph/160 km/h.
Avoid full-throttle operation and use of the
transmission's kickdown mode for the initial
miles.
From 1,200 miles/2,000 km
The engine and vehicle speed can gradually be
increased.
Tires
Due to technical factors associated with their
manufacture, tires do not achieve their full trac‐
tion potential until after an initial breaking-in pe‐
riod.
Drive conservatively for the first 200 miles/
300 km.
Brake system
Brakes require an initial break-in period of ap‐
prox. 300 miles/500 km to achieve optimized
contact and wear patterns between brake pads
and discs. Drive moderately during this break-in
period.
Following part replacement
The same breaking in procedures should be ob‐
served if any of the components mentioned
above have to be renewed in the course of the
vehicle's operating life.
General driving notes
Closing the tailgate Drive with the tailgate closed
Only drive with the tailgate closed; other‐
wise, in the event of an accident or braking or
evasive maneuvers, passengers or other road
users may be injured or the vehicle may be dam‐
aged. In addition, exhaust fumes may enter the
passenger compartment.◀
If driving with the tailgate open cannot be
avoided:1.Drive moderately.2.Close all windows and the glass sunroof*.3.Greatly increase the blower speed.
Hot exhaust system
Hot exhaust system
High temperatures are generated in the
exhaust system.
Do not remove the heat shields installed and
never apply undercoating to them. When driv‐
ing, standing at idle and while parking, take care
to avoid possible contact between the hot ex‐
haust system and any highly flammable materi‐
als such as hay, leaves, grass, etc. Such contact
could lead to a fire, and with it the risk of serious
personal injury as well as property damage.
Do not touch hot exhaust pipes; otherwise, there
is the danger of getting burned.◀
Seite 120120
Online Edition for Part no. 01 40 2 606 190 - 12 10 500Things to remember when driving