turn signal BMW X3 XDRIVE 35I 2011 User Guide
[x] Cancel search | Manufacturer: BMW, Model Year: 2011, Model line: X3 XDRIVE 35I, Model: BMW X3 XDRIVE 35I 2011Pages: 262, PDF Size: 11.2 MB
Page 78 of 262
To avoid blinding oncoming traffic, the adaptive
light control directs light towards the front pas‐
senger side when the vehicle is at a standstill.
When driving in reverse, only the turning lamp is
active.
Malfunction
A Check Control message is displayed.
Adaptive light control is malfunctioning or has
failed. Have the system checked as soon as pos‐
sible.
High-beam Assistant*
The concept
When the low beams are switched on, this sys‐
tem automatically switches the high beams on
and off. The procedure is controlled by a sensor
on the front of the interior rearview mirror. The
assistant ensures that the high beams are
switched on whenever the traffic situation al‐
lows. The driver can intervene at any time and
switch the high beams on and off as usual.
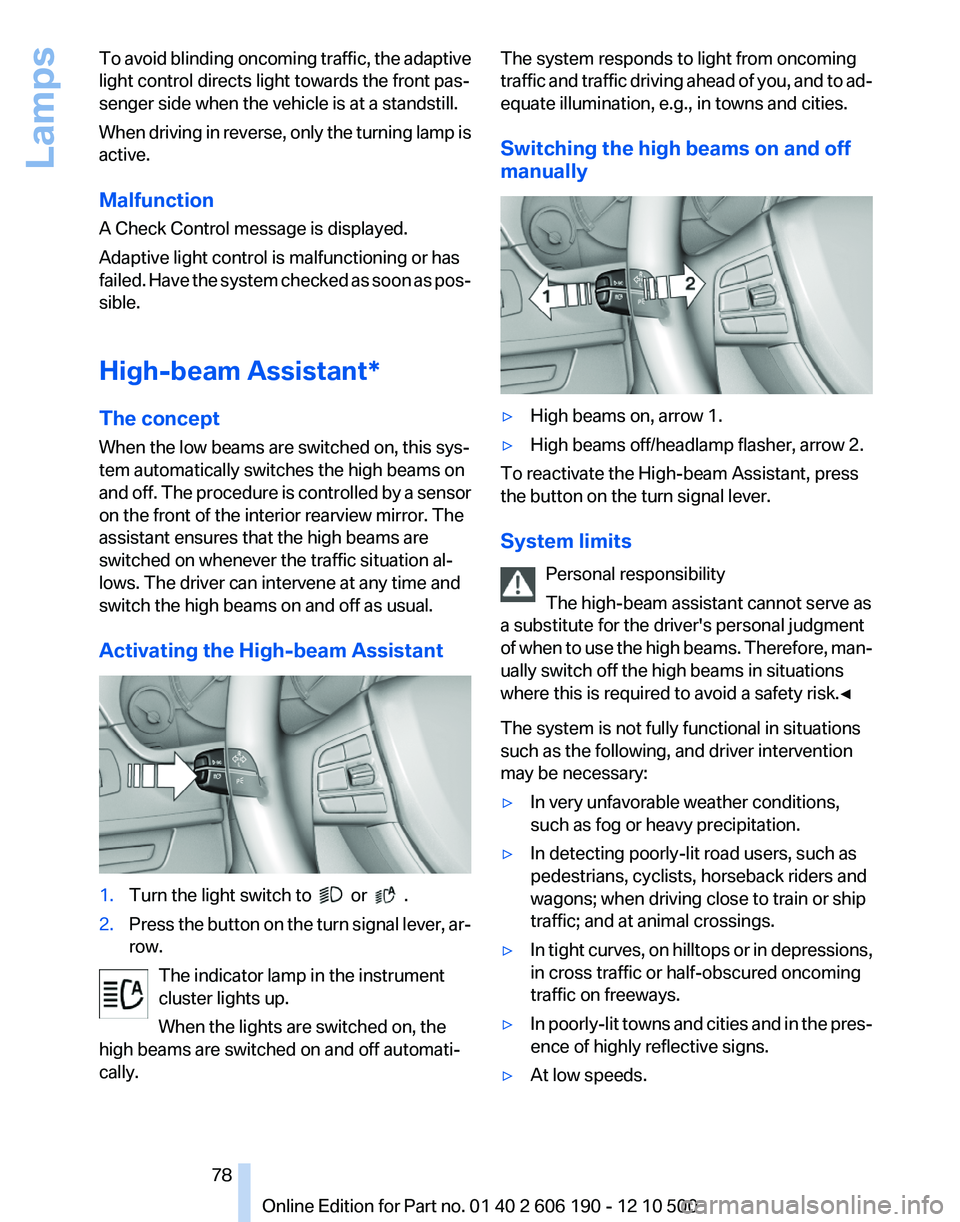
Activating the High-beam Assistant1.Turn the light switch to or .2.Press the button on the turn signal lever, ar‐
row.
The indicator lamp in the instrument
cluster lights up.
When the lights are switched on, the
high beams are switched on and off automati‐
cally.
The system responds to light from oncoming
traffic and traffic driving ahead of you, and to ad‐
equate illumination, e.g., in towns and cities.
Switching the high beams on and off
manually▷High beams on, arrow 1.▷High beams off/headlamp flasher, arrow 2.
To reactivate the High-beam Assistant, press
the button on the turn signal lever.
System limits Personal responsibility
The high-beam assistant cannot serve as
a substitute for the driver's personal judgment
of when to use the high beams. Therefore, man‐
ually switch off the high beams in situations
where this is required to avoid a safety risk.◀
The system is not fully functional in situations
such as the following, and driver intervention
may be necessary:
▷In very unfavorable weather conditions,
such as fog or heavy precipitation.▷In detecting poorly-lit road users, such as
pedestrians, cyclists, horseback riders and
wagons; when driving close to train or ship
traffic; and at animal crossings.▷In tight curves, on hilltops or in depressions,
in cross traffic or half-obscured oncoming
traffic on freeways.▷In poorly-lit towns and cities and in the pres‐
ence of highly reflective signs.▷At low speeds.Seite 7878
Online Edition for Part no. 01 40 2 606 190 - 12 10 500Lamps
Page 147 of 262
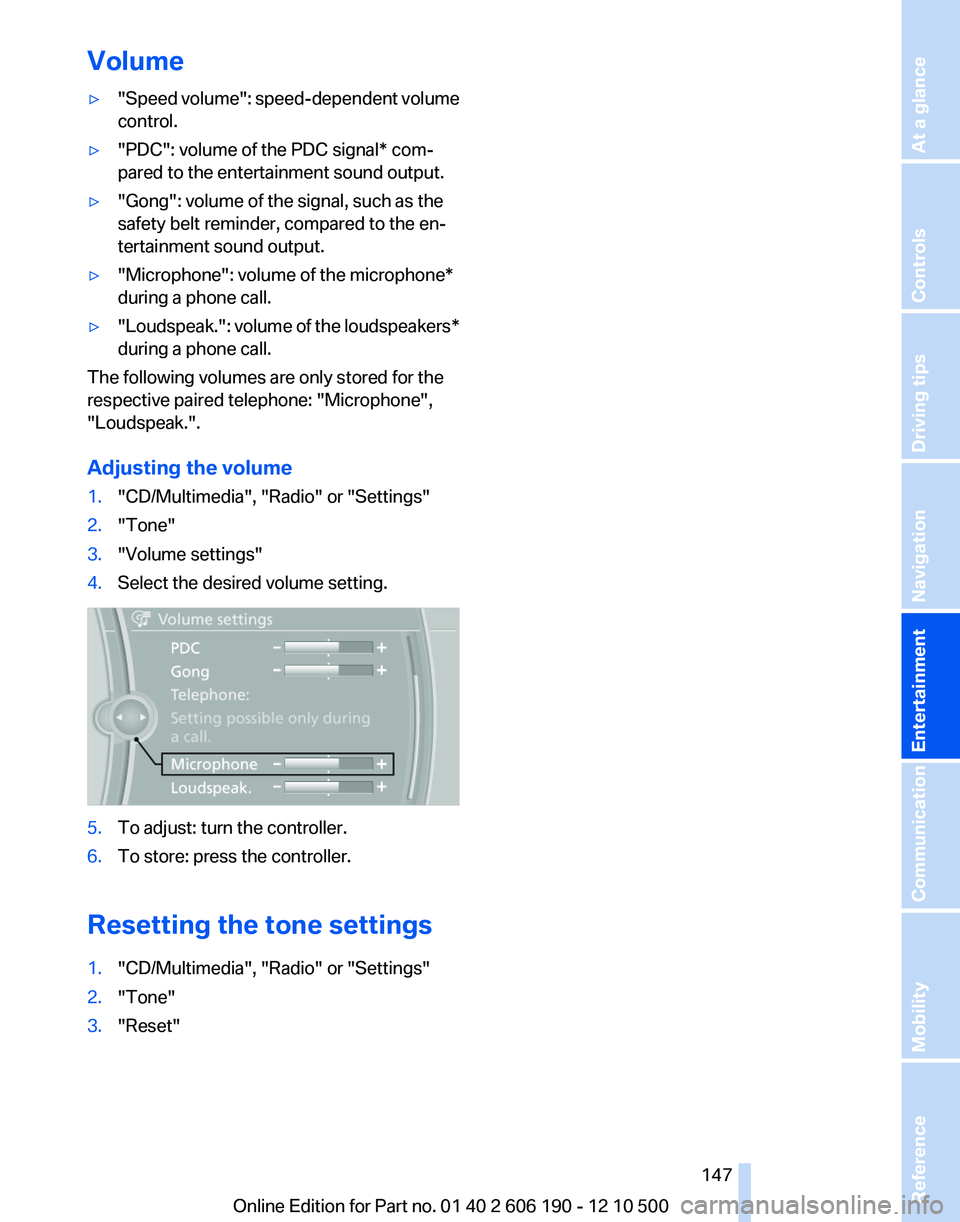
Volume▷"Speed volume": speed-dependent volume
control.▷"PDC": volume of the PDC signal* com‐
pared to the entertainment sound output.▷"Gong": volume of the signal, such as the
safety belt reminder, compared to the en‐
tertainment sound output.▷"Microphone": volume of the microphone*
during a phone call.▷"Loudspeak." : volume of the loudspeakers*
during a phone call.
The following volumes are only stored for the
respective paired telephone: "Microphone",
"Loudspeak.".
Adjusting the volume
1."CD/Multimedia", "Radio" or "Settings"2."Tone"3."Volume settings"4.Select the desired volume setting.5.To adjust: turn the controller.6.To store: press the controller.
Resetting the tone settings
1."CD/Multimedia", "Radio" or "Settings"2."Tone"3."Reset"Seite 147147
Online Edition for Part no. 01 40 2 606 190 - 12 10 500
ReferenceMobilityCommunicationEntertainmentNavigationDriving tipsControlsAt a glance
Page 151 of 262
5.The phone number and an electronic serial
number, ESN, are displayed.6.Call Sirius to unsubscribe from the chan‐
nels.
Selecting channels
You can only listen to enabled channels.
The selected channel is stored for the remote
control currently in use.
Via iDrive
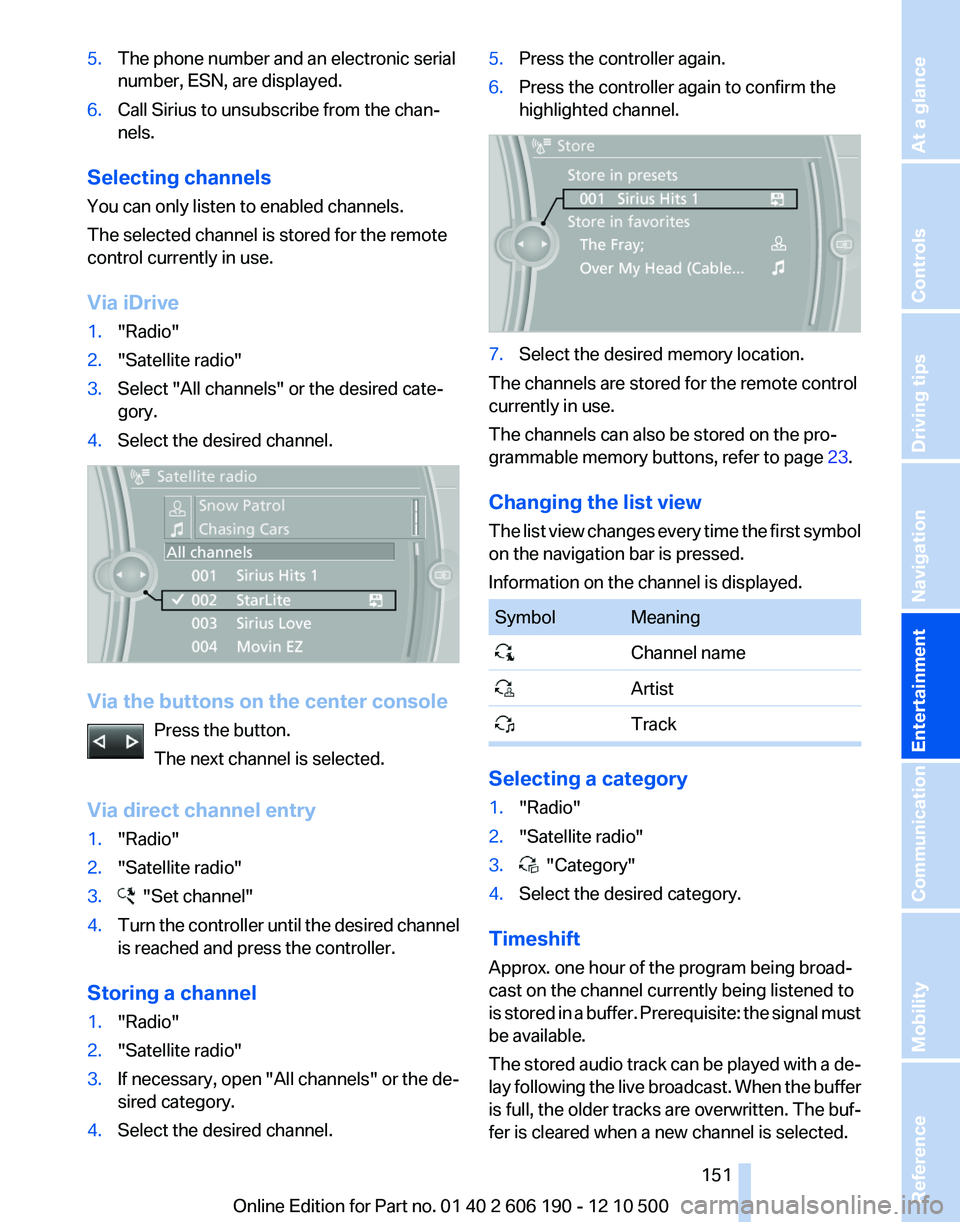
1."Radio"2."Satellite radio"3.Select "All channels" or the desired cate‐
gory.4.Select the desired channel.
Via the buttons on the center console
Press the button.
The next channel is selected.
Via direct channel entry
1."Radio"2."Satellite radio"3. "Set channel"4.Turn the controller until the desired channel
is reached and press the controller.
Storing a channel
1."Radio"2."Satellite radio"3.If necessary, open "All channels" or the de‐
sired category.4.Select the desired channel.5.Press the controller again.6.Press the controller again to confirm the
highlighted channel.7.Select the desired memory location.
The channels are stored for the remote control
currently in use.
The channels can also be stored on the pro‐
grammable memory buttons, refer to page 23.
Changing the list view
The list view changes every time the first symbol
on the navigation bar is pressed.
Information on the channel is displayed.
SymbolMeaning Channel name Artist Track
Selecting a category
1."Radio"2."Satellite radio"3. "Category"4.Select the desired category.
Timeshift
Approx. one hour of the program being broad‐
cast on the channel currently being listened to
is stored in a buffer. Prerequisite: the signal must
be available.
The stored audio track can be played with a de‐
lay following the live broadcast. When the buffer
is full, the older tracks are overwritten. The buf‐
fer is cleared when a new channel is selected.
Seite 151151
Online Edition for Part no. 01 40 2 606 190 - 12 10 500
ReferenceMobilityCommunicationEntertainmentNavigationDriving tipsControlsAt a glance
Page 179 of 262
What to do if...
Information on suitable mobile phones, refer to
page 176.
The mobile phone could not be paired or con‐
nected.▷Is Bluetooth activated in the vehicle and on
the mobile phone? Activate Bluetooth in the
vehicle and on the mobile phone.▷Do the Bluetooth passkeys on the mobile
phone and the vehicle match? Enter the
same passkey on the mobile phone and via
iDrive.▷Did it take longer than 30 seconds to enter
the passkey? Repeat the pairing procedure.▷Are too many Bluetooth devices connected
to the mobile phone or vehicle? Delete con‐
nections with other devices if necessary.▷Is the audio connection activated? Deacti‐
vate the audio connection.▷Is the mobile phone in power-save mode or
does it have only a limited remaining battery
life? Charge the mobile phone in the snap-
in adapter* or via the charging cable.▷Depending on the mobile phone, it is possi‐
ble that only one device can be connected
to the vehicle. Unpair the connected device
from the vehicle and pair and connect only
one device.▷The mobile phone no longer reacts? Switch
the mobile phone off and on again. Repeat
the pairing procedure.
The telephone functions are not available.
▷Is the mobile phone paired as an additional
telephone and is the additional telephone
function deactivated? Activate the function.▷Is an outgoing call not possible? Connect
the mobile phone as a telephone.
No or not all phone book entries are displayed,
or they are incomplete.
▷Transmission of the phone book entries is
not yet complete.▷It is possible that only the phone book en‐
tries of the mobile phone or the SIM card*
are transmitted.▷It may not be possible to display phone book
entries with special characters.▷The number of phone book entries being
stored is too high.▷Is the data volume of the contact too large,
e.g., due to stored information such as
notes? Reduce the data volume of the con‐
tact.▷Is the mobile phone connected as an audio
source or additional telephone? The mobile
phone must be connected as a telephone.
The phone connection quality is poor.
▷The strength of the Bluetooth signal on the
mobile phone can be adjusted, depending
on the mobile phone.▷Insert the mobile phone into the snap-in
adapter* or place it in the area of the center
console.▷Adjust the volume of the microphone and
loudspeakers separately.
If all points in this list have been checked and the
required function is still not available, please
contact the hotline or service center.
Controls
Adjusting the volume
Turn the knob until the desired volume is se‐
lected. The setting is stored for the remote con‐
trol currently in use.
The vehicle automatically adjusts the volume of
the microphone on the telephone and the vol‐
ume of the called party. Depending on the mo‐
bile phone, the volumes may need to be ad‐
justed. The settings can only be created during
a call and must be adjusted separately for each
telephone. The settings are deleted when the
telephone is unpaired.
1."Settings"2."Tone"3."Volume settings"4.Select the desired setting: "Microphone" or
"Loudspeak."Seite 179179
Online Edition for Part no. 01 40 2 606 190 - 12 10 500
ReferenceMobilityCommunicationEntertainmentNavigationDriving tipsControlsAt a glance
Page 180 of 262
5.To adjust: turn the controller.6.To store: press the controller.
Incoming call
Receiving calls
If the number of the caller is stored in the phone
book and is transmitted by the network, the
name of the contact is displayed. Otherwise,
only the phone number is displayed.
If more than one phone number is assigned to a
contact, only the name of the contact is dis‐
played.
For calls on the additional telephone, the num‐
ber is only displayed if it is transmitted by the
network.
An incoming call to the additional telephone is
automatically rejected if there is an active call on
the other telephone.
Accepting a call
Via iDrive
"Accept"
Via the button on the steering wheel Press the button.
Via the instrument cluster*
"Accept"
Rejecting a call
Via iDrive
"Reject"
Via the instrument cluster*
"Reject"
Ending a call
Via iDrive
"Hang up"
Via the button on the steering wheel Press the button.
Via the instrument cluster*
"End call"
Entering a phone number
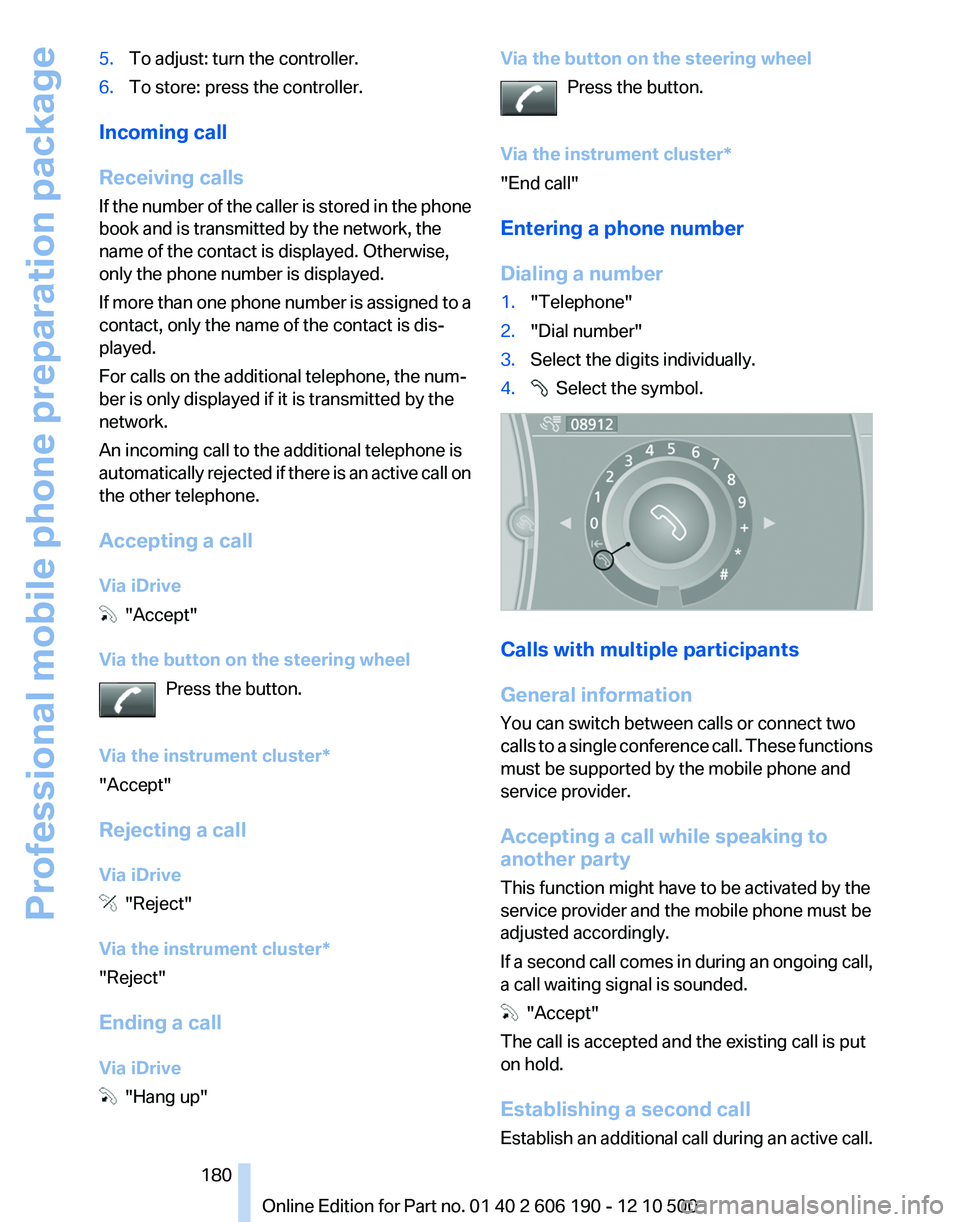
Dialing a number1."Telephone"2."Dial number"3.Select the digits individually.4. Select the symbol.
Calls with multiple participants
General information
You can switch between calls or connect two
calls to a single conference call. These functions
must be supported by the mobile phone and
service provider.
Accepting a call while speaking to
another party
This function might have to be activated by the
service provider and the mobile phone must be
adjusted accordingly.
If a second call comes in during an ongoing call,
a call waiting signal is sounded.
"Accept"
The call is accepted and the existing call is put
on hold.
Establishing a second call
Establish an additional call during an active call.
Seite 180180
Online Edition for Part no. 01 40 2 606 190 - 12 10 500Professional mobile phone preparation package
Page 222 of 262
Danger of burns
Only change bulbs when they are cool;
otherwise, there is the danger of getting
burned.◀
Working on the lighting system
When working on the lighting system, you
should always switch off the lights affected to
prevent short circuits.
To avoid possible injury or equipment damage
when replacing bulbs, observe any instructions
provided by the bulb manufacturer.◀
Do not touch the bulbs
Do not touch the glass of new bulbs with
your bare hands, as even minute amounts of
contamination will burn into the bulb's surface
and reduce its service life.
Use a clean tissue, cloth or something similar, or
hold the bulb by its base.◀
Light-emitting diodes (LEDs)
Light-emitting diodes installed behind a cover
serve as the light source for controls, display el‐
ements and other equipment.
These light-emitting diodes, which are related
to conventional lasers, are officially designated
as Class 1 light-emitting diodes.
Do not remove the covers
Do not remove the covers, and never stare
into the unfiltered light for several hours; other‐
wise, irritation of the retina could result.◀
Headlamp glass
Condensation can form on the inside of the ex‐
ternal lamps in cool or humid weather. When the
light is switched on, the condensation evapo‐
rates after a short time. The headlamp glasses
do not need to be changed.
If there is a large amount of moisture, e.g., water
droplets form in the lamp, have it checked by
your service center.Front lamps, bulb replacement
At a glance
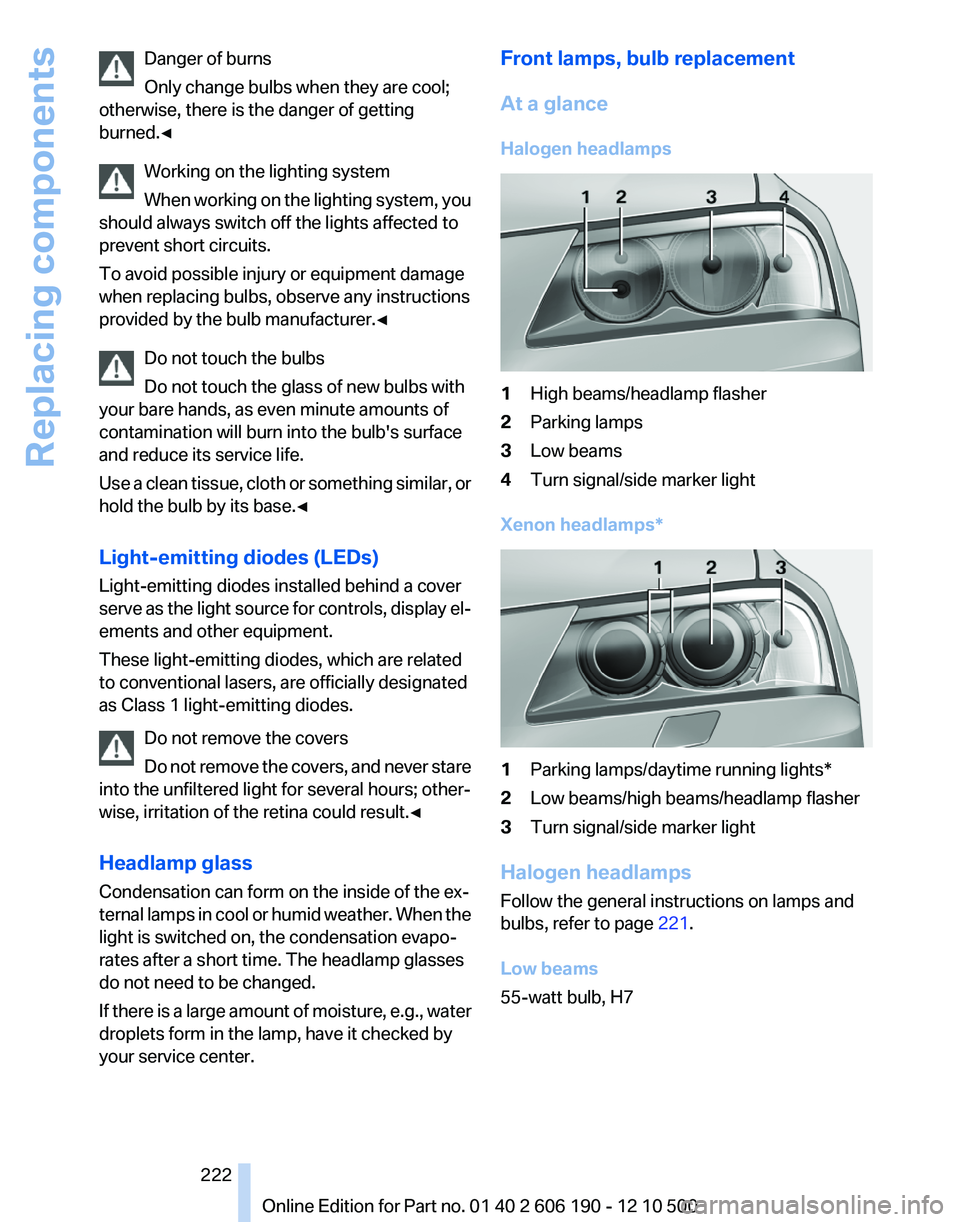
Halogen headlamps1High beams/headlamp flasher2Parking lamps3Low beams4Turn signal/side marker light
Xenon headlamps*
1Parking lamps/daytime running lights*2Low beams/high beams/headlamp flasher3Turn signal/side marker light
Halogen headlamps
Follow the general instructions on lamps and
bulbs, refer to page 221.
Low beams
55-watt bulb, H7
Seite 222222
Online Edition for Part no. 01 40 2 606 190 - 12 10 500Replacing components
Page 224 of 262
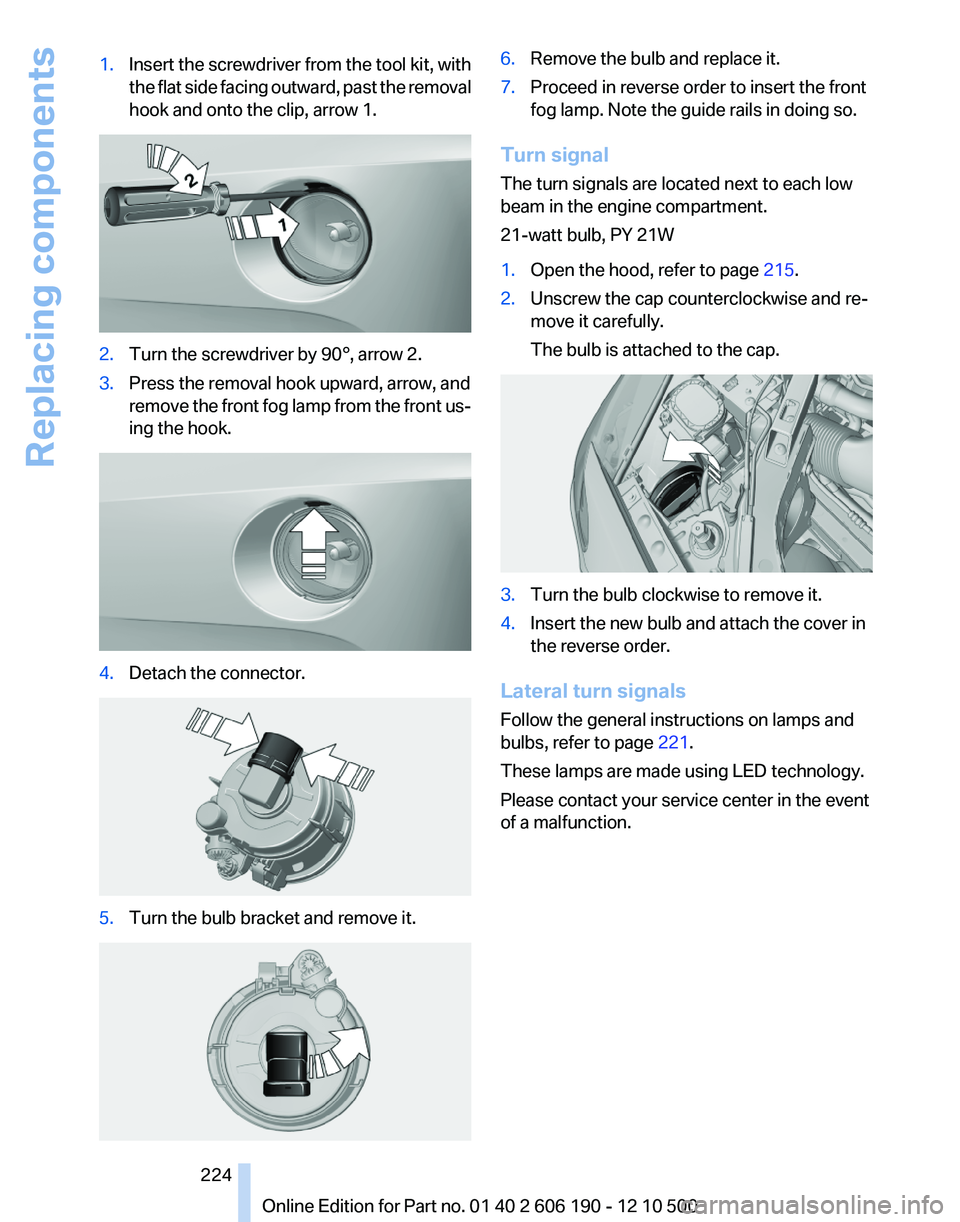
1.Insert the screwdriver from the tool kit, with
the flat side facing outward, past the removal
hook and onto the clip, arrow 1.2.Turn the screwdriver by 90°, arrow 2.3.Press the removal hook upward, arrow, and
remove the front fog lamp from the front us‐
ing the hook.4.Detach the connector.5.Turn the bulb bracket and remove it.6.Remove the bulb and replace it.7.Proceed in reverse order to insert the front
fog lamp. Note the guide rails in doing so.
Turn signal
The turn signals are located next to each low
beam in the engine compartment.
21-watt bulb, PY 21W
1.Open the hood, refer to page 215.2.Unscrew the cap counterclockwise and re‐
move it carefully.
The bulb is attached to the cap.3.Turn the bulb clockwise to remove it.4.Insert the new bulb and attach the cover in
the reverse order.
Lateral turn signals
Follow the general instructions on lamps and
bulbs, refer to page 221.
These lamps are made using LED technology.
Please contact your service center in the event
of a malfunction.
Seite 224224
Online Edition for Part no. 01 40 2 606 190 - 12 10 500Replacing components
Page 225 of 262
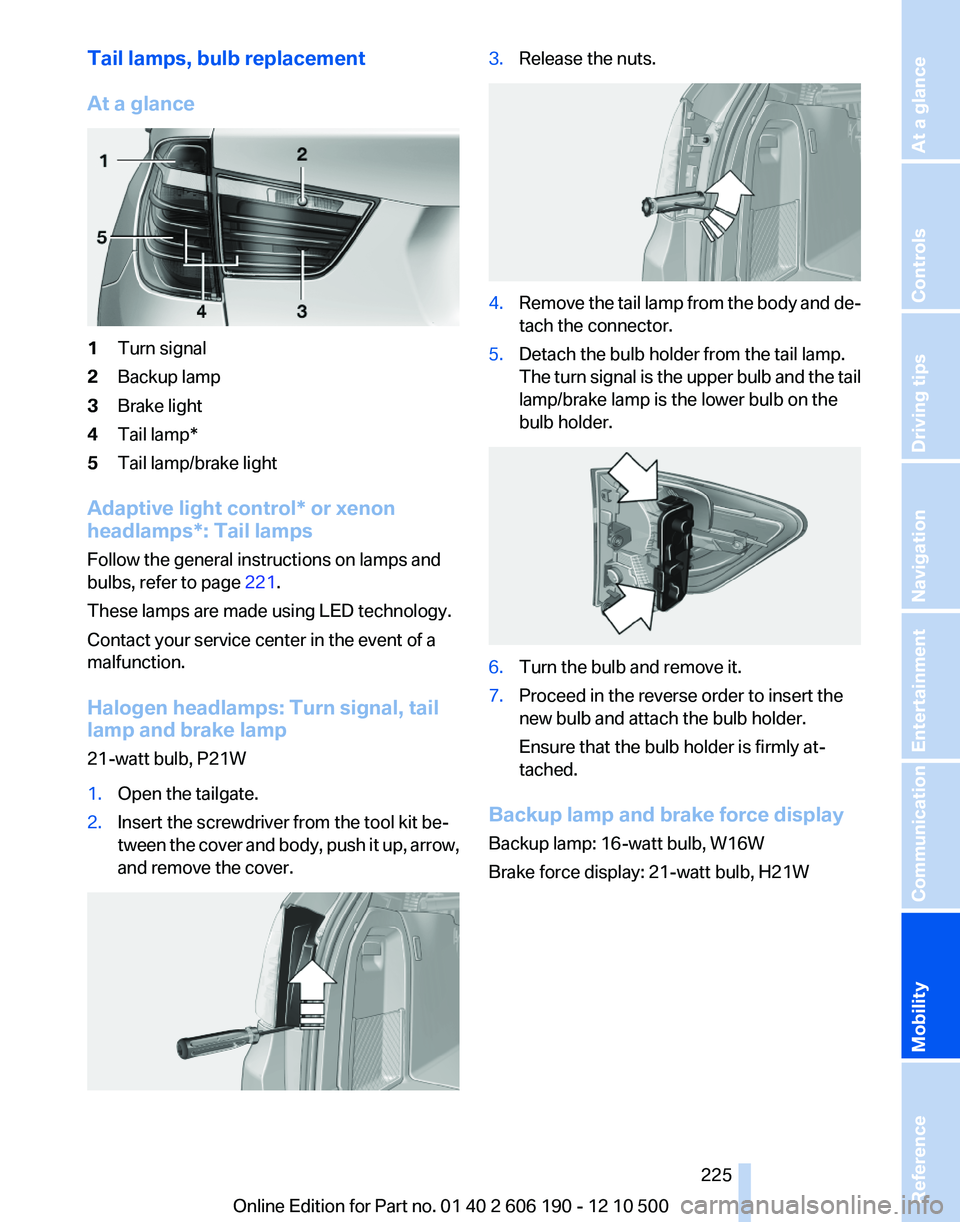
Tail lamps, bulb replacement
At a glance1Turn signal2Backup lamp3Brake light4Tail lamp*5Tail lamp/brake light
Adaptive light control* or xenon
headlamps*: Tail lamps
Follow the general instructions on lamps and
bulbs, refer to page 221.
These lamps are made using LED technology.
Contact your service center in the event of a
malfunction.
Halogen headlamps: Turn signal, tail
lamp and brake lamp
21-watt bulb, P21W
1.Open the tailgate.2.Insert the screwdriver from the tool kit be‐
tween the cover and body, push it up, arrow,
and remove the cover.3.Release the nuts.4.Remove the tail lamp from the body and de‐
tach the connector.5.Detach the bulb holder from the tail lamp.
The turn signal is the upper bulb and the tail
lamp/brake lamp is the lower bulb on the
bulb holder.6.Turn the bulb and remove it.7.Proceed in the reverse order to insert the
new bulb and attach the bulb holder.
Ensure that the bulb holder is firmly at‐
tached.
Backup lamp and brake force display
Backup lamp: 16-watt bulb, W16W
Brake force display: 21-watt bulb, H21W
Seite 225225
Online Edition for Part no. 01 40 2 606 190 - 12 10 500
ReferenceMobilityCommunicationEntertainmentNavigationDriving tipsControlsAt a glance
Page 253 of 262
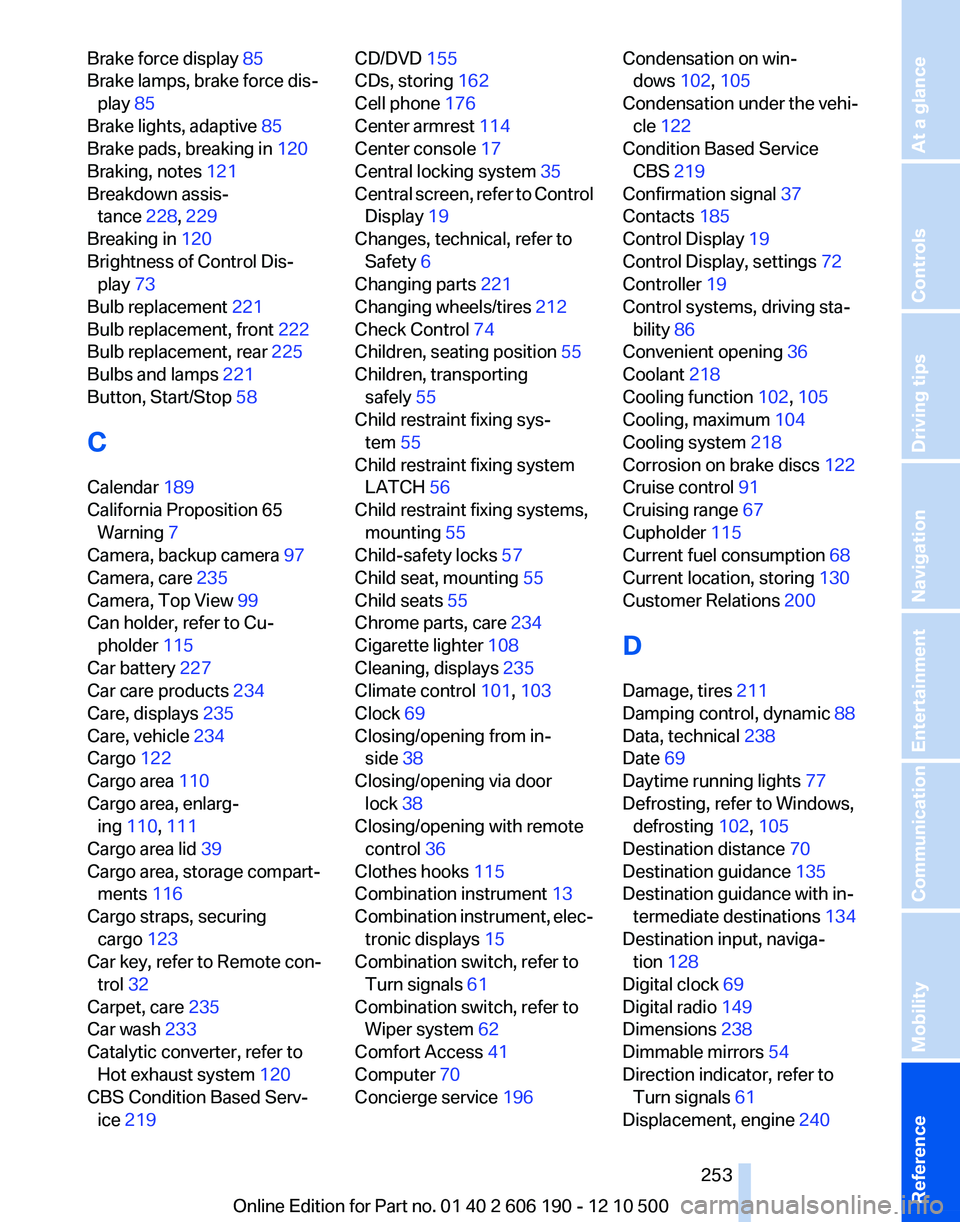
Brake force display 85
Brake lamps, brake force dis‐ play 85
Brake lights, adaptive 85
Brake pads, breaking in 120
Braking, notes 121
Breakdown assis‐ tance 228, 229
Breaking in 120
Brightness of Control Dis‐ play 73
Bulb replacement 221
Bulb replacement, front 222
Bulb replacement, rear 225
Bulbs and lamps 221
Button, Start/Stop 58
C
Calendar 189
California Proposition 65 Warning 7
Camera, backup camera 97
Camera, care 235
Camera, Top View 99
Can holder, refer to Cu‐ pholder 115
Car battery 227
Car care products 234
Care, displays 235
Care, vehicle 234
Cargo 122
Cargo area 110
Cargo area, enlarg‐ ing 110 , 111
Cargo area lid 39
Cargo area, storage compart‐ ments 116
Cargo straps, securing cargo 123
Car key, refer to Remote con‐ trol 32
Carpet, care 235
Car wash 233
Catalytic converter, refer to Hot exhaust system 120
CBS Condition Based Serv‐ ice 219 CD/DVD 155
CDs, storing 162
Cell phone 176
Center armrest 114
Center console 17
Central locking system 35
Central screen, refer to Control Display 19
Changes, technical, refer to Safety 6
Changing parts 221
Changing wheels/tires 212
Check Control 74
Children, seating position 55
Children, transporting safely 55
Child restraint fixing sys‐ tem 55
Child restraint fixing system LATCH 56
Child restraint fixing systems, mounting 55
Child-safety locks 57
Child seat, mounting 55
Child seats 55
Chrome parts, care 234
Cigarette lighter 108
Cleaning, displays 235
Climate control 101, 103
Clock 69
Closing/opening from in‐ side 38
Closing/opening via door lock 38
Closing/opening with remote control 36
Clothes hooks 115
Combination instrument 13
Combination instrument, elec‐ tronic displays 15
Combination switch, refer to Turn signals 61
Combination switch, refer to Wiper system 62
Comfort Access 41
Computer 70
Concierge service 196 Condensation on win‐
dows 102, 105
Condensation under the vehi‐ cle 122
Condition Based Service CBS 219
Confirmation signal 37
Contacts 185
Control Display 19
Control Display, settings 72
Controller 19
Control systems, driving sta‐ bility 86
Convenient opening 36
Coolant 218
Cooling function 102, 105
Cooling, maximum 104
Cooling system 218
Corrosion on brake discs 122
Cruise control 91
Cruising range 67
Cupholder 115
Current fuel consumption 68
Current location, storing 130
Customer Relations 200
D
Damage, tires 211
Damping control, dynamic 88
Data, technical 238
Date 69
Daytime running lights 77
Defrosting, refer to Windows, defrosting 102, 105
Destination distance 70
Destination guidance 135
Destination guidance with in‐ termediate destinations 134
Destination input, naviga‐ tion 128
Digital clock 69
Digital radio 149
Dimensions 238
Dimmable mirrors 54
Direction indicator, refer to Turn signals 61
Displacement, engine 240 Seite 253253
Online Edition for Part no. 01 40 2 606 190 - 12 10 500
ReferenceMobilityCommunicationEntertainmentNavigationDriving tipsControlsAt a glance
Page 258 of 262
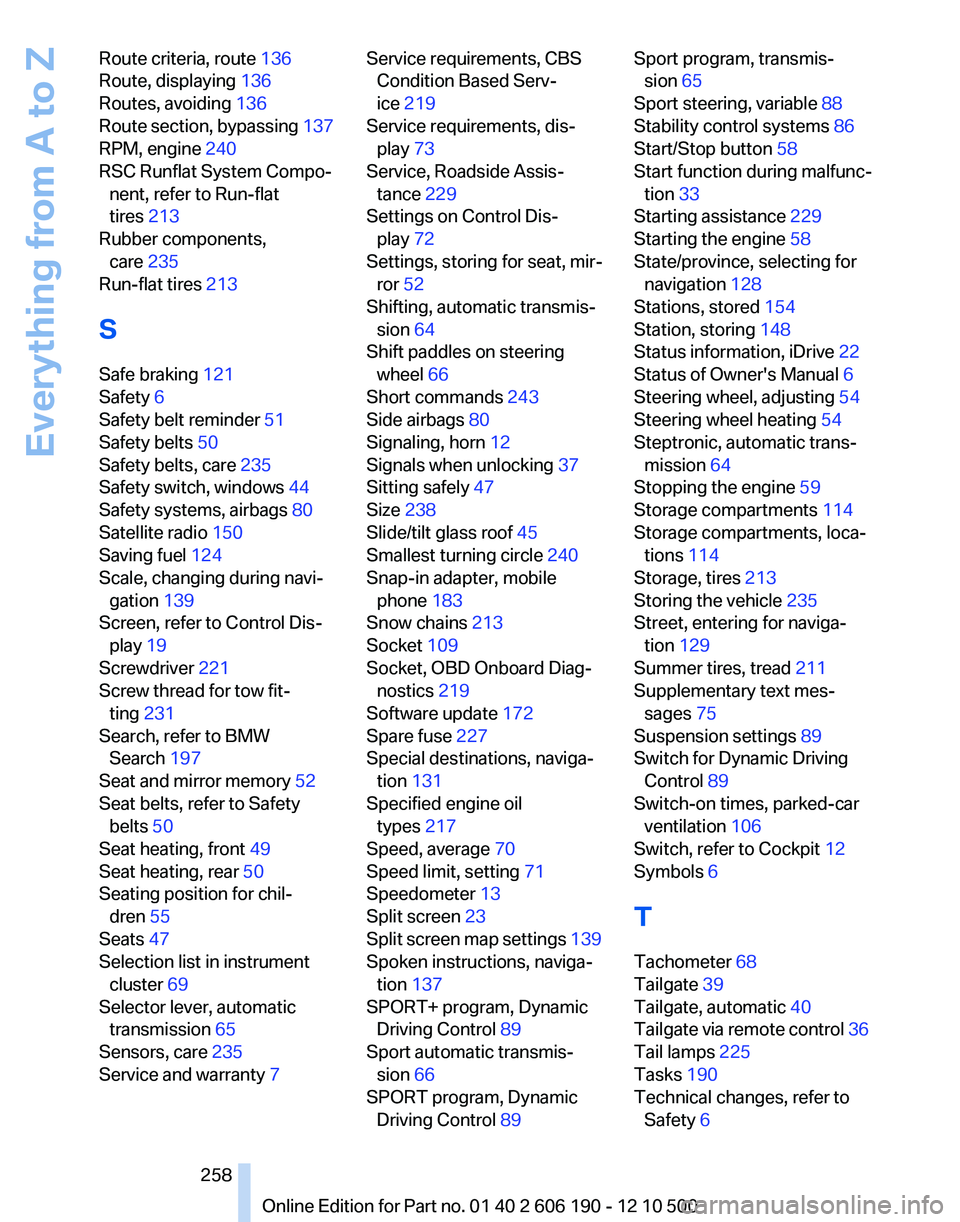
Route criteria, route 136
Route, displaying 136
Routes, avoiding 136
Route section, bypassing 137
RPM, engine 240
RSC Runflat System Compo‐ nent, refer to Run-flat
tires 213
Rubber components, care 235
Run-flat tires 213
S
Safe braking 121
Safety 6
Safety belt reminder 51
Safety belts 50
Safety belts, care 235
Safety switch, windows 44
Safety systems, airbags 80
Satellite radio 150
Saving fuel 124
Scale, changing during navi‐ gation 139
Screen, refer to Control Dis‐ play 19
Screwdriver 221
Screw thread for tow fit‐ ting 231
Search, refer to BMW Search 197
Seat and mirror memory 52
Seat belts, refer to Safety belts 50
Seat heating, front 49
Seat heating, rear 50
Seating position for chil‐ dren 55
Seats 47
Selection list in instrument cluster 69
Selector lever, automatic transmission 65
Sensors, care 235
Service and warranty 7 Service requirements, CBS
Condition Based Serv‐
ice 219
Service requirements, dis‐ play 73
Service, Roadside Assis‐ tance 229
Settings on Control Dis‐ play 72
Settings, storing for seat, mir‐ ror 52
Shifting, automatic transmis‐ sion 64
Shift paddles on steering wheel 66
Short commands 243
Side airbags 80
Signaling, horn 12
Signals when unlocking 37
Sitting safely 47
Size 238
Slide/tilt glass roof 45
Smallest turning circle 240
Snap-in adapter, mobile phone 183
Snow chains 213
Socket 109
Socket, OBD Onboard Diag‐ nostics 219
Software update 172
Spare fuse 227
Special destinations, naviga‐ tion 131
Specified engine oil types 217
Speed, average 70
Speed limit, setting 71
Speedometer 13
Split screen 23
Split screen map settings 139
Spoken instructions, naviga‐ tion 137
SPORT+ program, Dynamic Driving Control 89
Sport automatic transmis‐ sion 66
SPORT program, Dynamic Driving Control 89 Sport program, transmis‐
sion 65
Sport steering, variable 88
Stability control systems 86
Start/Stop button 58
Start function during malfunc‐ tion 33
Starting assistance 229
Starting the engine 58
State/province, selecting for navigation 128
Stations, stored 154
Station, storing 148
Status information, iDrive 22
Status of Owner's Manual 6
Steering wheel, adjusting 54
Steering wheel heating 54
Steptronic, automatic trans‐ mission 64
Stopping the engine 59
Storage compartments 114
Storage compartments, loca‐ tions 114
Storage, tires 213
Storing the vehicle 235
Street, entering for naviga‐ tion 129
Summer tires, tread 211
Supplementary text mes‐ sages 75
Suspension settings 89
Switch for Dynamic Driving Control 89
Switch-on times, parked-car ventilation 106
Switch, refer to Cockpit 12
Symbols 6
T
Tachometer 68
Tailgate 39
Tailgate, automatic 40
Tailgate via remote control 36
Tail lamps 225
Tasks 190
Technical changes, refer to Safety 6 Seite 258258
Online Edition for Part no. 01 40 2 606 190 - 12 10 500Everything from A to Z