stop start BMW X5 2009 E70 Owner's Manual
[x] Cancel search | Manufacturer: BMW, Model Year: 2009, Model line: X5, Model: BMW X5 2009 E70Pages: 317, PDF Size: 9.56 MB
Page 13 of 317
At a glance
11Reference
Controls
Driving tips
Communications
Navigation
Entertainment
Mobility
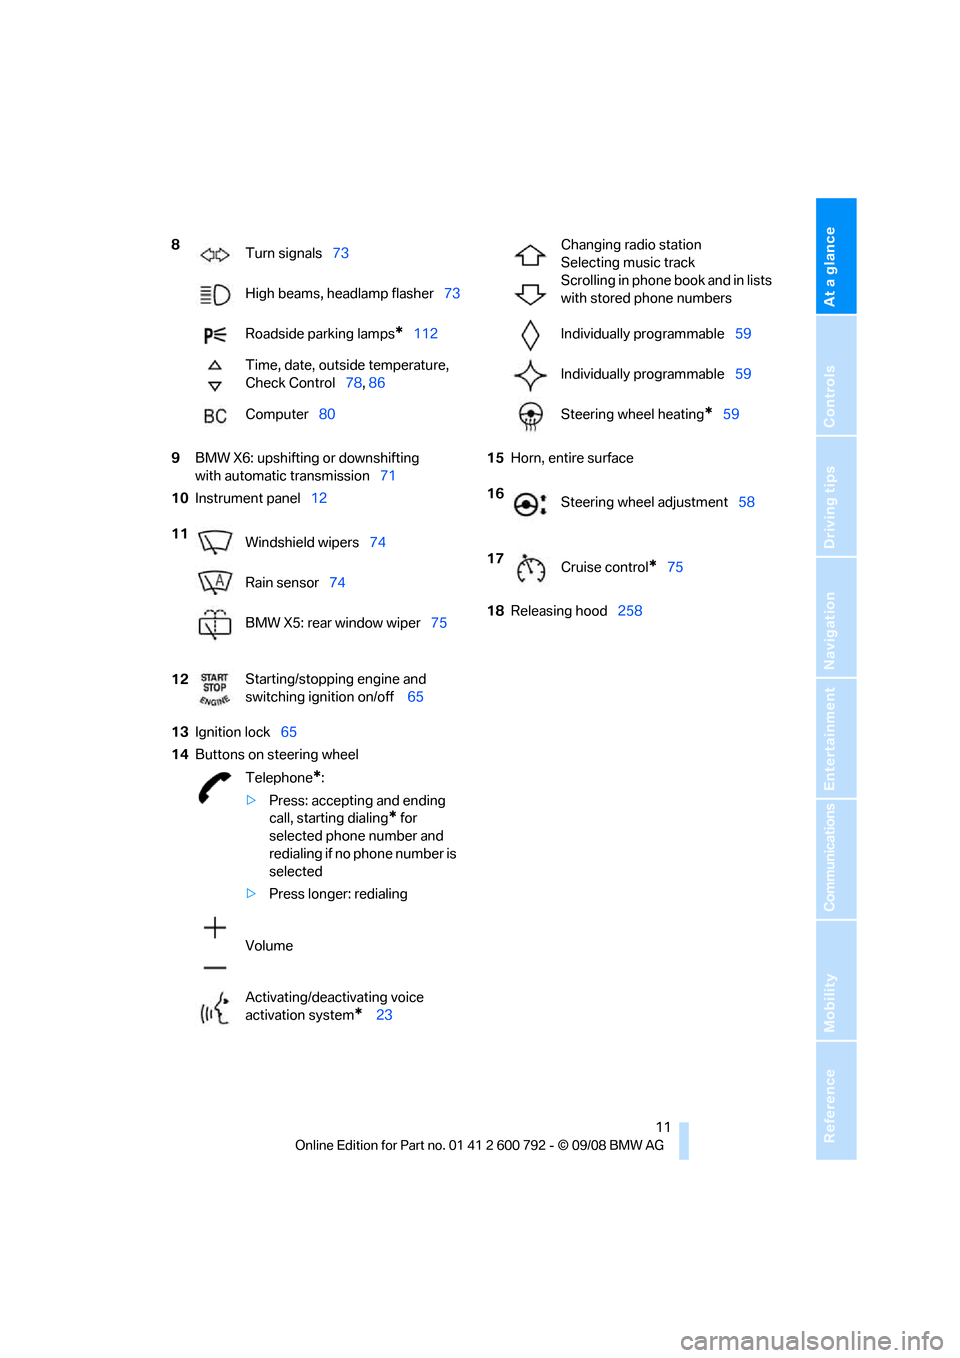
9BMW X6: upshifting or downshifting
with automatic transmission 71
10 Instrument panel 12
13 Ignition lock 65
14 Buttons on steering wheel 15
Horn, entire surface
18 Releasing hood 258
8
Turn signals 73
High beams, headlamp flasher 73
Roadside parking lamps
*112
Time, date, outside temperature,
Check Control 78, 86
Computer 80
11 Windshield wipers 74
Rain sensor 74
BMW X5: rear window wiper 75
12 Starting/stopping engine and
switching ignition on/off
65
Telephone
*:
> Press: accepting and ending
call, starting dialing
* for
selected phone number and
redialing if no phone number is
selected
> Press longer: redialing
Volume
Activating/deactivating voice
activation system
* 23
Changing radio station
Selecting music track
Scrolling in phone book and in lists
with stored phone numbers
Individually programmable 59
Individually programmable 59
Steering wheel heating
*59
16 Steering wheel adjustment 58
17 Cruise control
*75
Page 34 of 317
Opening and closing
32
Opening and closing:
Using door lock
Do not lock the vehicle from the outside if
persons are inside because unlocking
from the inside is not possible without special
knowledge. <
When unlocking
1.Turning the key once unlocks the driver's
door and the fuel filler door.
2. Turning the key a second time unlocks the
remaining doors and the liftgate.
Convenience operation
You can use the door lock to operate the win-
dows and the glass sunroof
*/panorama glass
sunroof
*.
Turn and hold the key in the positions for
unlocking or locking.
Watch during the closing process to be
sure that no one is injured. Rotating the
key back into the initial position stops the
movement. <
Manual operation
In the event of an electrical malfunction, you can
turn a key all the way to the right or left in the
door lock to lock or unlock the driver's door.
Opening and closing:
From inside
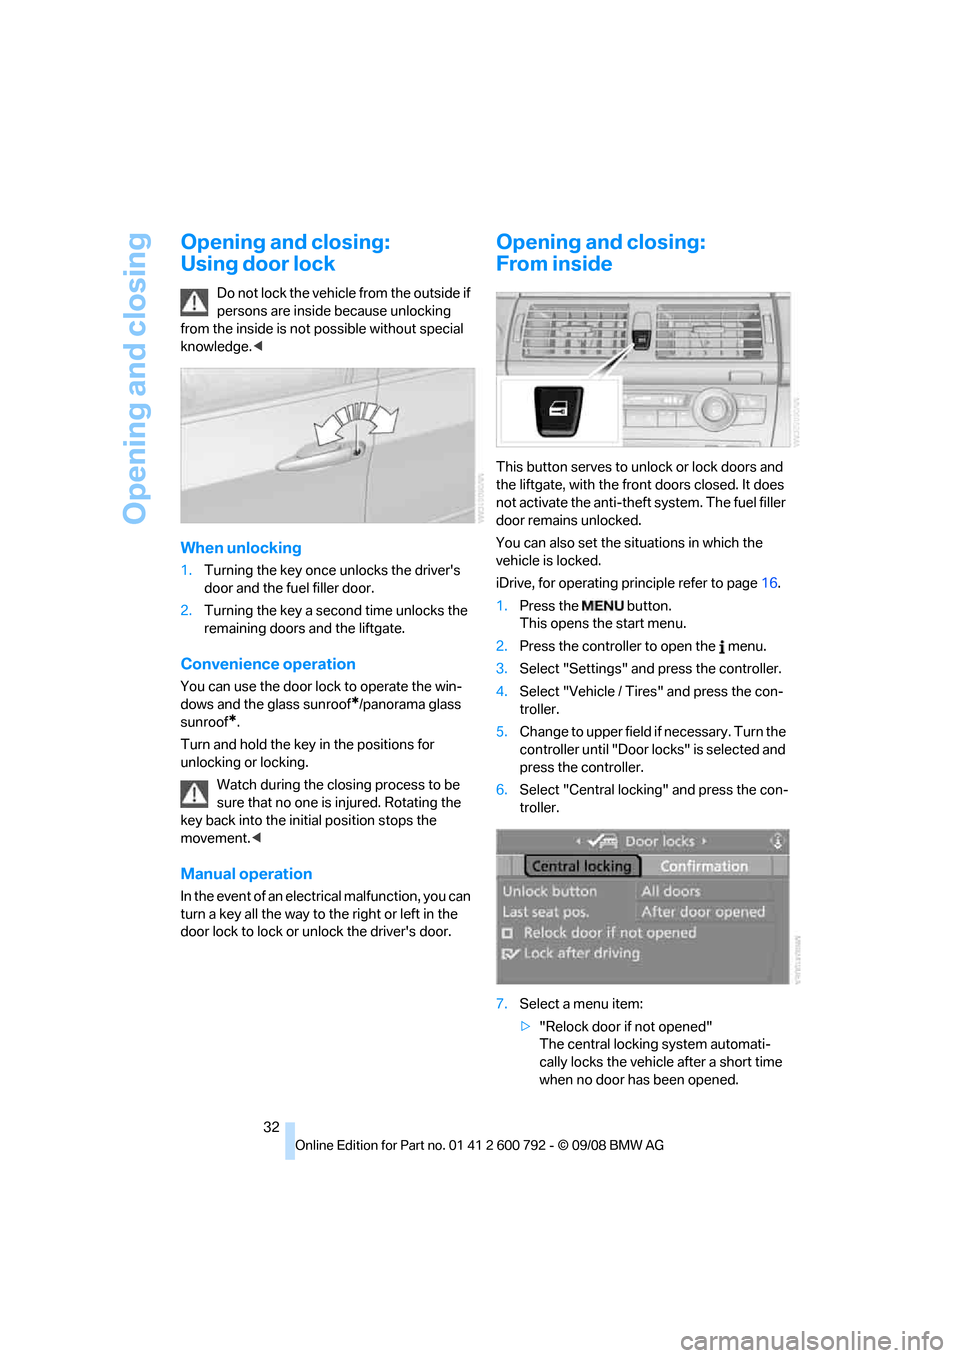
This button serves to unlock or lock doors and
the liftgate, with the front doors closed. It does
not activate the anti-theft system. The fuel filler
door remains unlocked.
You can also set the si tuations in which the
vehicle is locked.
iDrive, for operating pr inciple refer to page16.
1. Press the button.
This opens the start menu.
2. Press the controller to open the menu.
3. Select "Settings" an d press the controller.
4. Select "Vehicle / Tire s" and press the con-
troller.
5. Change to upper field if necessary. Turn the
controller until "Door locks" is selected and
press the controller.
6. Select "Central locking" and press the con-
troller.
7. Select a menu item:
>"Relock door if not opened"
The central locking system automati-
cally locks the vehicl e after a short time
when no door has been opened.
Page 42 of 317
Opening and closing
40
>
The engine can only be started if the vehicle
detects that the remote control is located in
the vehicle.
Comparison with ordinary remote
control
You can control the functions mentioned previ-
ously with the comfort access or by pressing
the buttons on the remote control. Therefore,
please familiarize yourself with the information
on opening and closing beginning on page 28
beforehand.
The special features when using comfort
access are described in the following.
Should a short delay occur when opening
or closing the windows or the glass sun-
roof
*/panorama glass sunroof*, the system
checks whether a remote control is located in
the vehicle. Please repeat opening or closing if
necessary. <
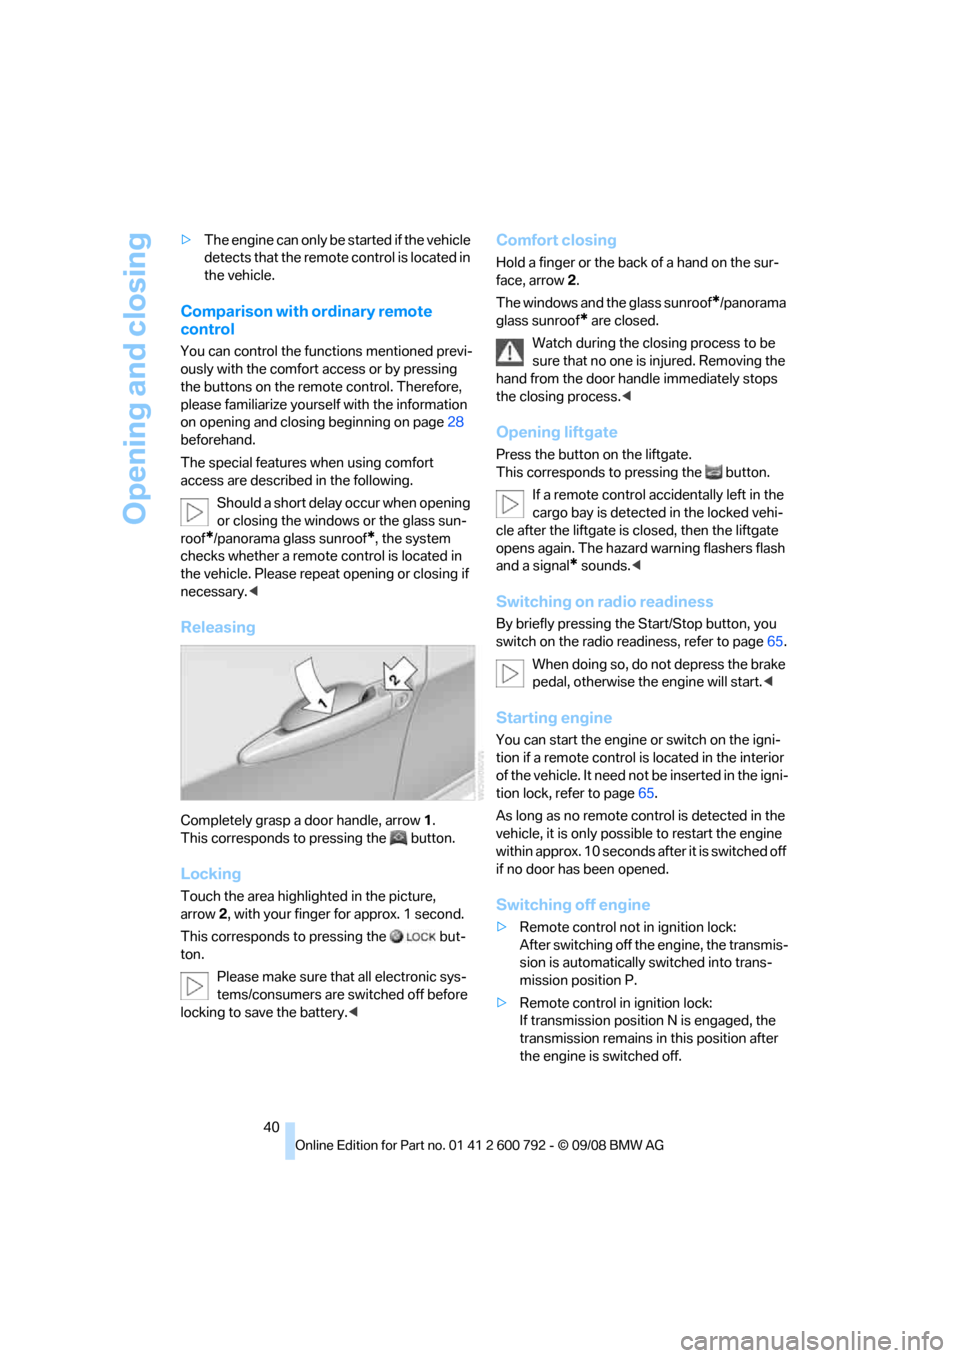
Releasing
Completely grasp a door handle, arrow 1.
This corresponds to pressing the button.
Locking
Touch the area highlighted in the picture,
arrow 2, with your finger for approx. 1 second.
This corresponds to pressing the but-
ton.
Please make sure that all electronic sys-
tems/consumers are sw itched off before
locking to save the battery. <
Comfort closing
Hold a finger or the back of a hand on the sur-
face, arrow2.
The windows and the glass sunroof
*/panorama
glass sunroof
* are closed.
Watch during the closing process to be
sure that no one is injured. Removing the
hand from the door handle immediately stops
the closing process. <
Opening liftgate
Press the button on the liftgate.
This corresponds to pr essing the button.
If a remote control acci dentally left in the
cargo bay is detected in the locked vehi-
cle after the liftgate is closed, then the liftgate
opens again. The hazard warning flashers flash
and a signal
* sounds. <
Switching on radio readiness
By briefly pressing the Start/Stop button, you
switch on the radio readiness, refer to page 65.
When doing so, do not depress the brake
pedal, otherwise the engine will start.<
Starting engine
You can start the engine or switch on the igni-
tion if a remote control is located in the interior
of the vehicle. It need not be inserted in the igni-
tion lock, refer to page 65.
As long as no remote co ntrol is detected in the
vehicle, it is only possible to restart the engine
within approx. 10 seconds after it is switched off
if no door has been opened.
Switching off engine
> Remote control not in ignition lock:
After switching off the engine, the transmis-
sion is automatically switched into trans-
mission position P.
> Remote control in ignition lock:
If transmission position N is engaged, the
transmission remains in this position after
the engine is switched off.
Page 43 of 317
Controls
41Reference
At a glance
Driving tips
Communications
Navigation
Entertainment
Mobility
Before driving into a car wash
The vehicle can roll if you proceed according to
the following steps:
1.Insert remote control into ignition lock.
2. Depress brake pedal.
3. Engage transmission position N.
4. Release the parking brake.
5. Switch off the engine.
6. Leave the remote control in the ignition
lock.
Malfunction
The comfort access function may malfunction
due to local radio waves. Then open or close the
vehicle with the buttons on the remote control
or with a key. To start the engine following this,
insert the remote control in the ignition lock.
The warning lamp in the instrument
panel lights up when an attempt is
made to start the engine: starting the
engine is not possible. The remote control is
not in the vehicle or has a malfunction. Take
along the remote control into the vehicle or
have it checked. Insert another remote control
into the ignition lock if necessary.
The warning lamp in the instrument
panel lights up when the engine is
running: the remote control is no
longer in the vehicle. After switching off the
engine, the engine can only be started again
within approx. 10 seconds if no door has been
opened.
The indicator lamp in the instrument
panel lights up and a message
appears on the Control Display:
Replace the battery of the remote control.
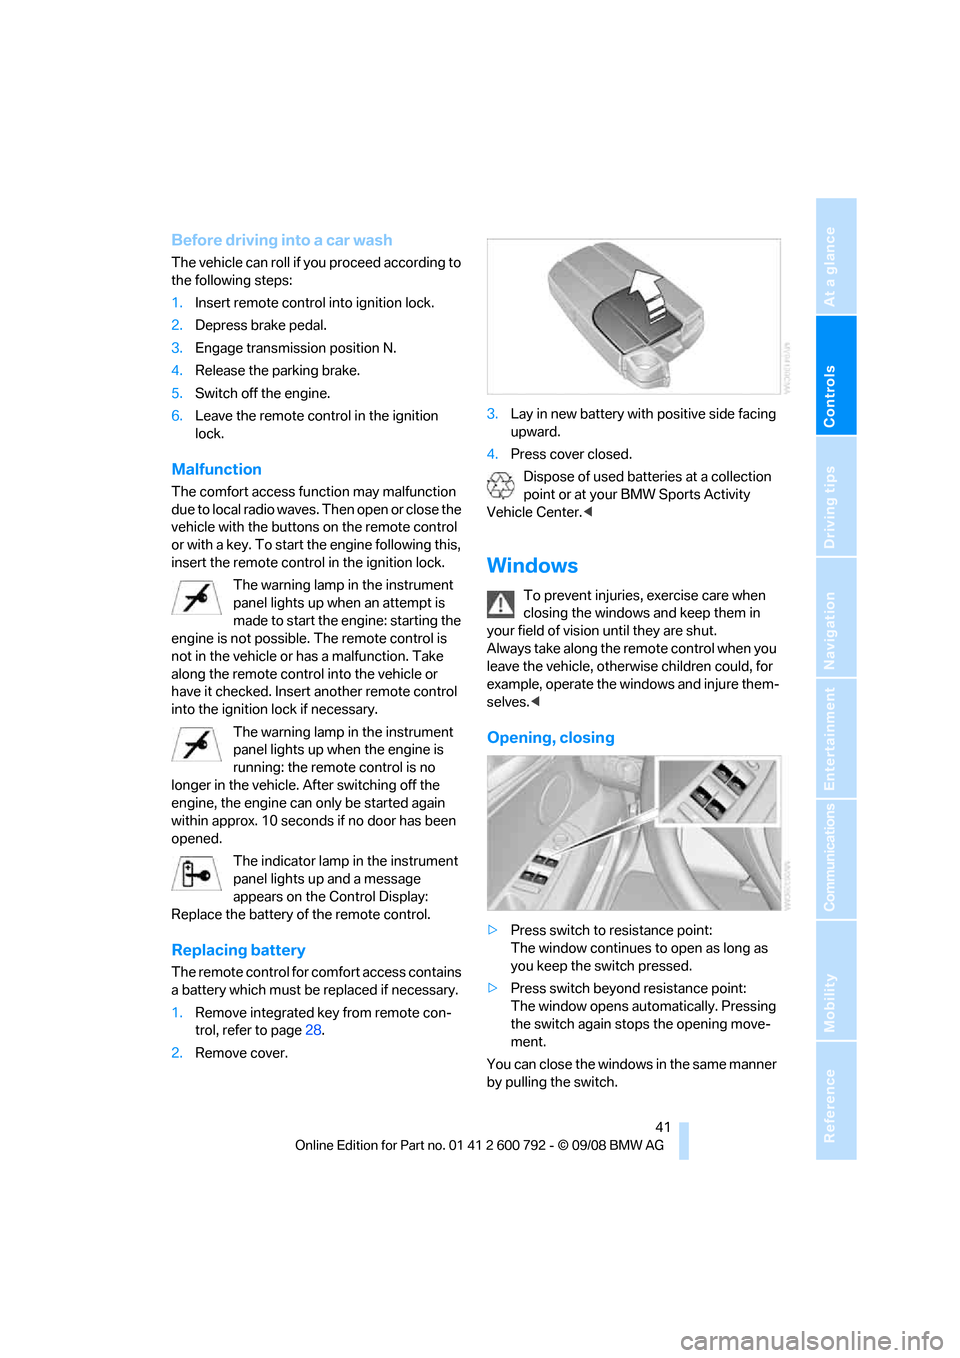
Replacing battery
The remote control for comfort access contains
a battery which must be replaced if necessary.
1.Remove integrated key from remote con-
trol, refer to page 28.
2. Remove cover. 3.
Lay in new battery with positive side facing
upward.
4. Press cover closed.
Dispose of used batteries at a collection
point or at your BMW Sports Activity
Vehicle Center. <
Windows
To prevent injuries, exercise care when
closing the windows and keep them in
your field of vision until they are shut.
Always take along the remote control when you
leave the vehicle, otherw ise children could, for
example, operate the windows and injure them-
selves. <
Opening, closing
>Press switch to resistance point:
The window continues to open as long as
you keep the switch pressed.
> Press switch beyond resistance point:
The window opens automatically. Pressing
the switch again stops the opening move-
ment.
You can close the windows in the same manner
by pulling the switch.
Page 67 of 317
Controls
65Reference
At a glance
Driving tips
Communications
Navigation
Entertainment
Mobility
Driving
Ignition lock
Inserting remote control into ignition
lock
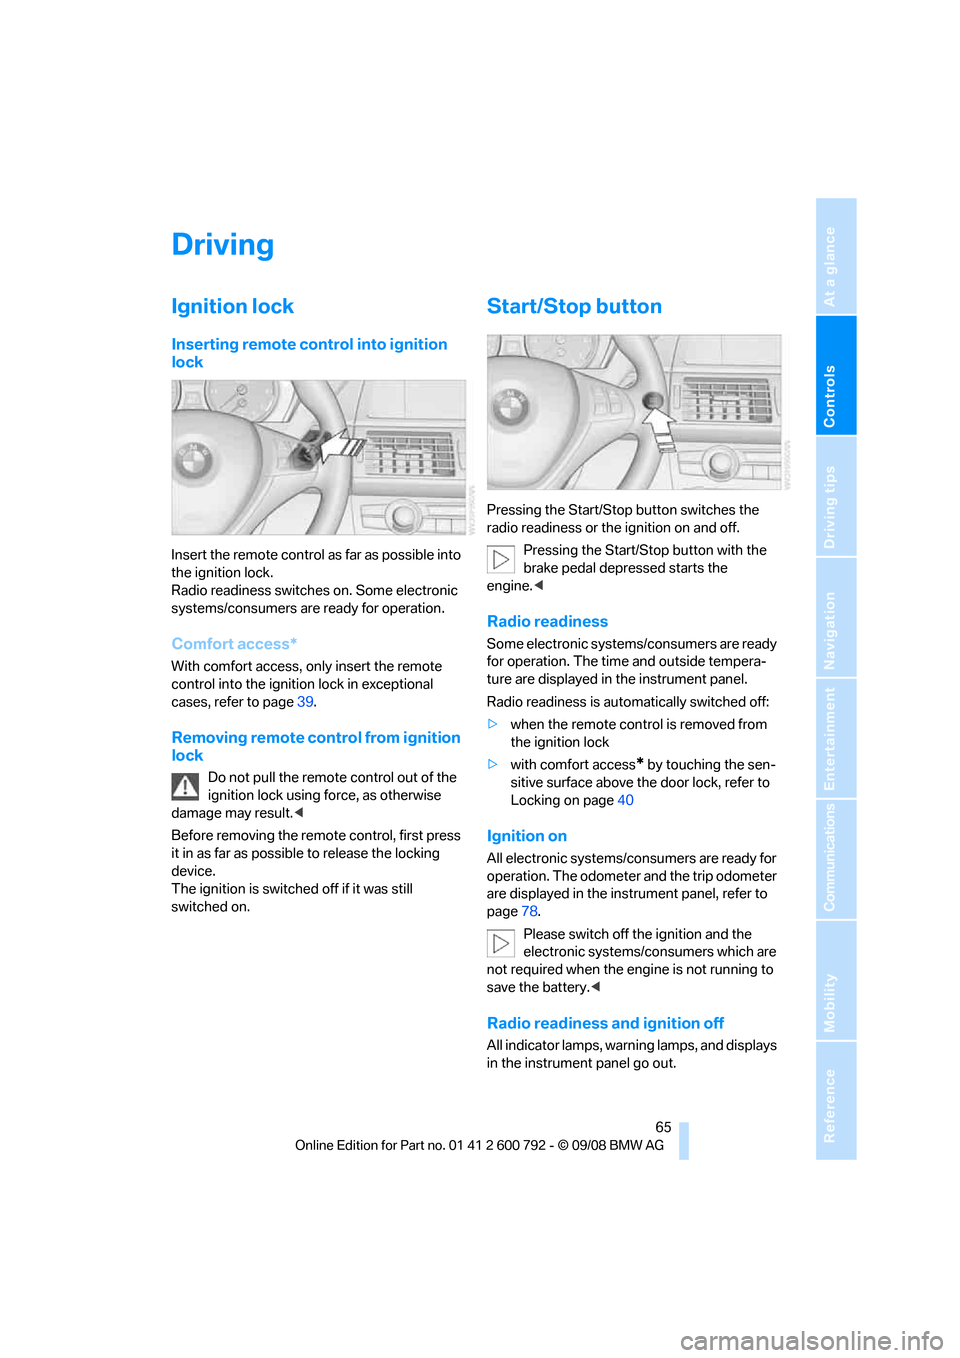
Insert the remote control as far as possible into
the ignition lock.
Radio readiness switches on. Some electronic
systems/consumers are ready for operation.
Comfort access*
With comfort access, only insert the remote
control into the ignition lock in exceptional
cases, refer to page 39.
Removing remote control from ignition
lock
Do not pull the remote control out of the
ignition lock using force, as otherwise
damage may result. <
Before removing the remo te control, first press
it in as far as possibl e to release the locking
device.
The ignition is switched off if it was still
switched on.
Start/Stop button
Pressing the Start/Stop button switches the
radio readiness or the ignition on and off.
Pressing the Start/Stop button with the
brake pedal depre ssed starts the
engine. <
Radio readiness
Some electronic systems/consumers are ready
for operation. The time and outside tempera-
ture are displayed in the instrument panel.
Radio readiness is auto matically switched off:
> when the remote control is removed from
the ignition lock
> with comfort access
* by touching the sen-
sitive surface above the door lock, refer to
Locking on page 40
Ignition on
All electronic systems/consumers are ready for
operation. The odometer and the trip odometer
are displayed in the instrument panel, refer to
page78.
Please switch off the ignition and the
electronic systems/consumers which are
not required when the engine is not running to
save the battery. <
Radio readiness and ignition off
All indicator lamps, warning lamps, and displays
in the instrument panel go out.
Page 68 of 317
Driving
66
The ignition switches off automatically
* if the
driver's door is opened. Pressing the start/stop
button again switches the ignition back on.
For example, the ignition is not switched off in
the following situations:
> the brakes are actuated
> the low beams are switched on
Starting engine
Do not run the engine in closed rooms,
otherwise the inhalati on of toxic exhaust
gases can cause uncons ciousness and death.
The exhaust gases contain carbon monoxide,
an odorless and colorless, but highly toxic gas.
Never leave an unattend ed vehicle with the
engine running, as such a vehicle represents a
potential safety hazard.
To prevent the vehicle from rolling, always
engage transmission position N or P and set the
parking brake before le aving the vehicle with
the engine running. <
Do not allow the engine to warm up by leaving it
running while the vehicl e remains stationary.
Instead, begin to drive at a moderate engine
speed.
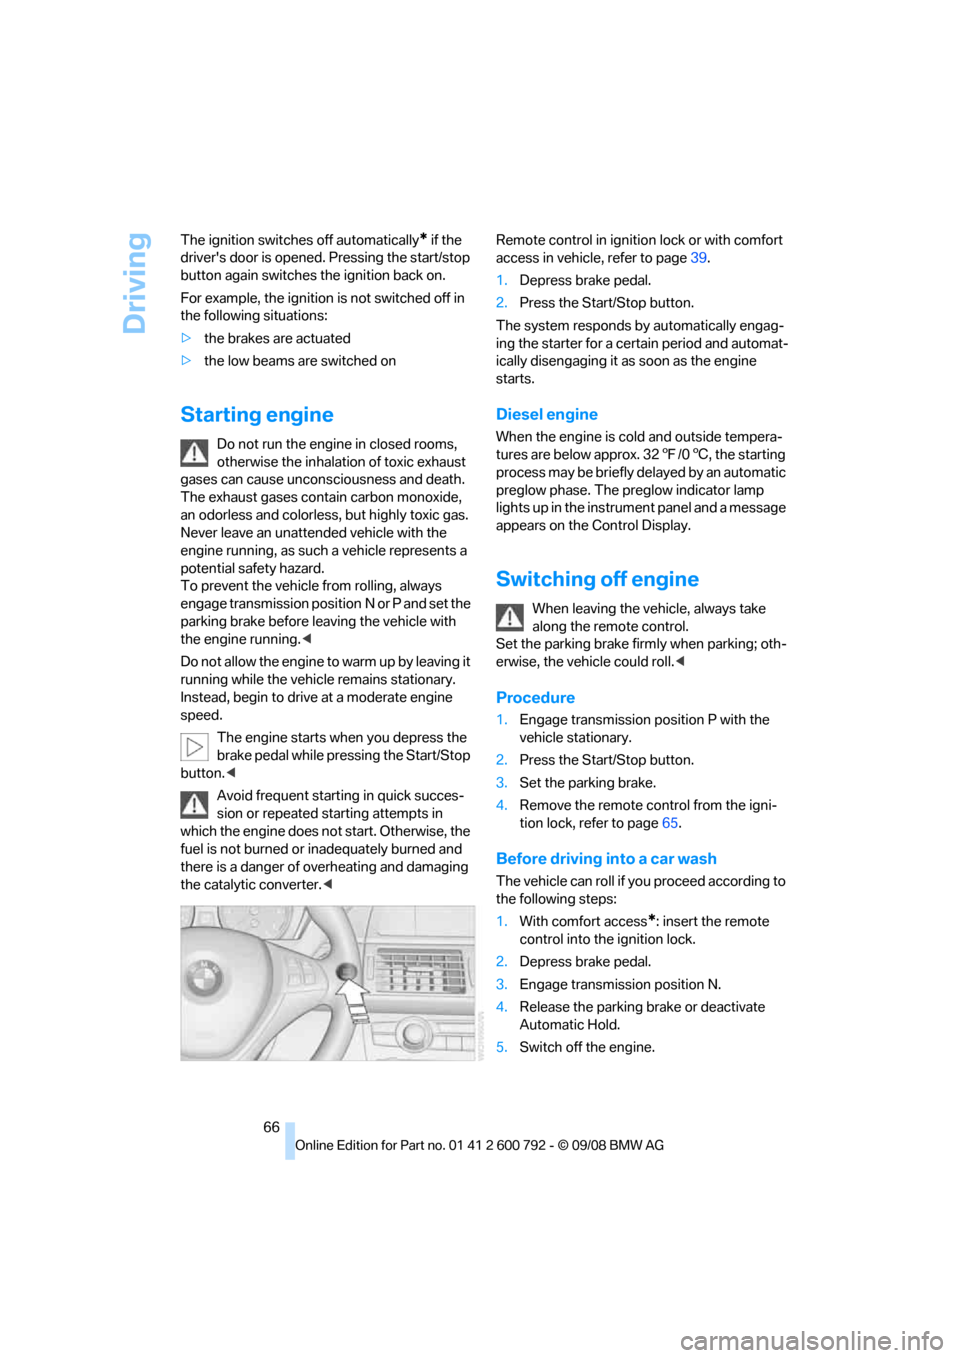
The engine starts when you depress the
brake pedal while pressing the Start/Stop
button. <
Avoid frequent starting in quick succes-
sion or repeated starting attempts in
which the engine does no t start. Otherwise, the
fuel is not burned or inadequately burned and
there is a danger of overheating and damaging
the catalytic converter. < Remote control in ignition lock or with comfort
access in vehicle, refer to page
39.
1. Depress brake pedal.
2. Press the Start/Stop button.
The system responds by automatically engag-
ing the starter for a cert ain period and automat-
ically disengaging it as soon as the engine
starts.
Diesel engine
When the engine is cold and outside tempera-
tures are below approx. 32 7/06 , the starting
process may be briefly delayed by an automatic
preglow phase. The pr eglow indicator lamp
lights up in the instrument panel and a message
appears on the Control Display.
Switching off engine
When leaving the vehicle, always take
along the remote control.
Set the parking brake firmly when parking; oth-
erwise, the vehicle could roll. <
Procedure
1.Engage transmission position P with the
vehicle stationary.
2. Press the Start/Stop button.
3. Set the parking brake.
4. Remove the remote control from the igni-
tion lock, refer to page 65.
Before driving into a car wash
The vehicle can roll if yo u proceed according to
the following steps:
1. With comfort access
*: insert the remote
control into the ignition lock.
2. Depress brake pedal.
3. Engage transmission position N.
4. Release the parking brake or deactivate
Automatic Hold.
5. Switch off the engine.
Page 71 of 317
Controls
69Reference
At a glance
Driving tips
Communications
Navigation
Entertainment
Mobility
>the vehicle is braked to a stop during driv-
ing.
In the instrument panel, the indicator
lamp changes from green to red and
the indication AUTO H goes out.
Indicator lamp on Canadian models.
Before you start to driv e, either release the
parking brake manually, refer to page 67, or
reactivate Automatic Hold, refer to page68.
Before leaving the vehi cle with the engine
running, shift the selector lever into posi-
tion P of the automatic transmission and make
sure that the parking brake is set. Otherwise,
the vehicle may begin to roll. <
Malfunction
If the parking brake fails or malfunctions, secure
the vehicle against rolling, e.g. with a wheel
chock, if you leave the vehicle.
Releasing parking brake manually
In the event of an electrical power loss or elec-
trical malfunction, you can release the parking
brake manually.
Before manually re leasing the parking
brake and each time you park the vehicle
without setting the park ing brake, make sure
that the automatic transmission is in position P,
refer to page 71. Be sure to pay attention to the
information in the instrument panel.
In addition, secure the vehicle against rolling,
e.g. with a wheel chock. Otherwise there is a
danger that the vehicle could roll if parked on a
steep slope. <
If it becomes necessary to also release the
transmission lock of the automatic transmission
manually, follow this sequence:
1. If necessary, start by releasing the parking
brake manually.
2. Then release the auto matic transmission's
transmission lock manually, refer to
page 72.
Jump starting and towing , refer to information
starting on page 280.
Releasing
1.Open the left-hand side panel in the cargo
bay.
2. Remove the first-aid kit
* and the warning
triangle
* if necessary. Close the bracket of
the warning triangle.
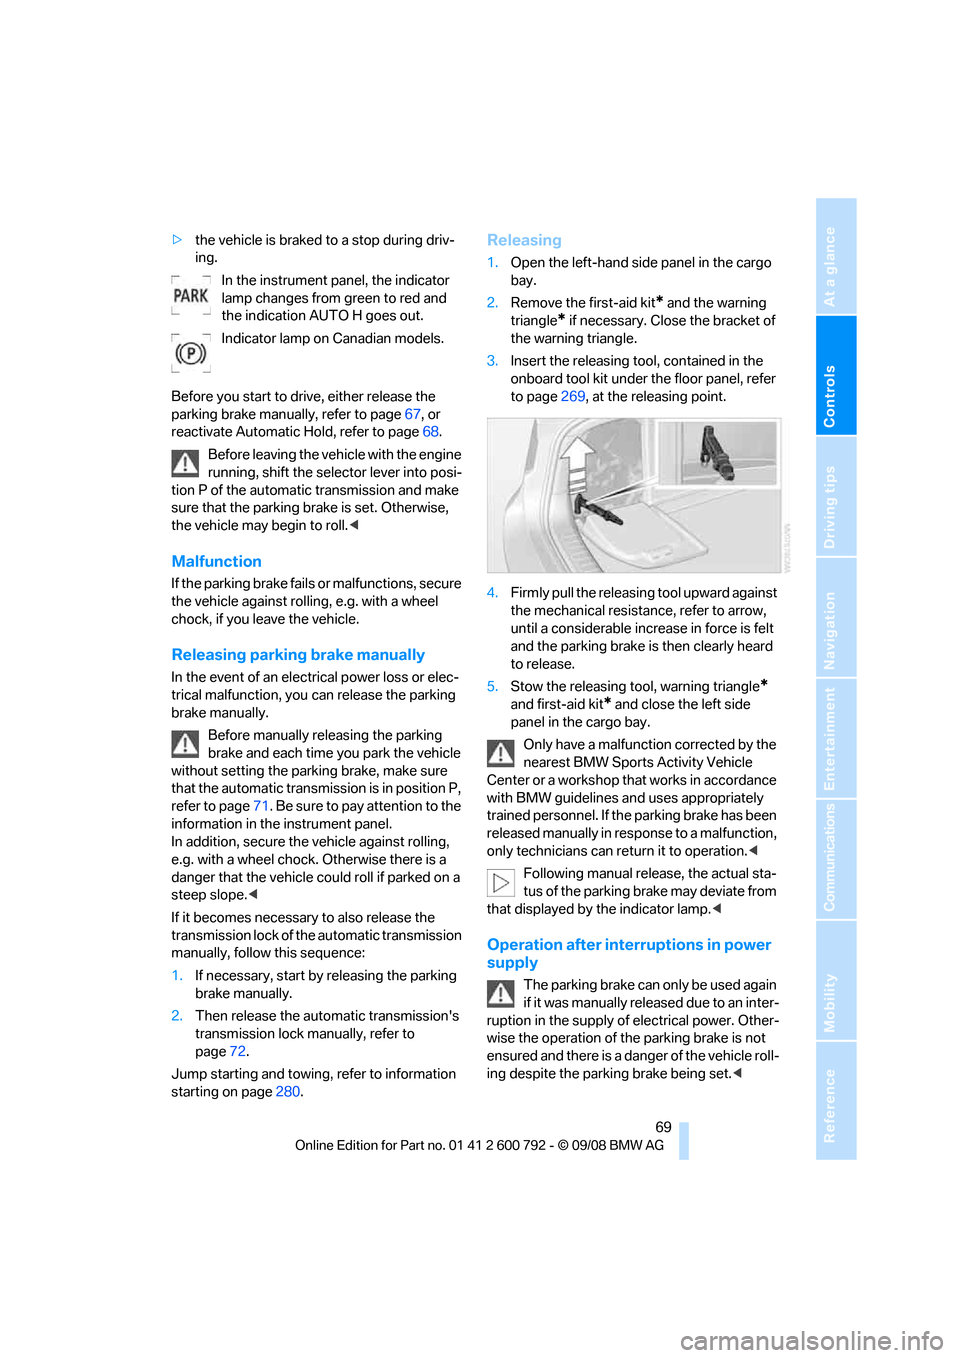
3. Insert the releasing tool, contained in the
onboard tool kit under the floor panel, refer
to page 269, at the releasing point.
4. Firmly pull the releasing tool upward against
the mechanical resistance, refer to arrow,
until a considerable incr ease in force is felt
and the parking brake is then clearly heard
to release.
5. Stow the releasing tool, warning triangle
*
and first-aid kit* and close the left side
panel in the cargo bay.
Only have a malfunction corrected by the
nearest BMW Sports Activity Vehicle
Center or a workshop that works in accordance
with BMW guidelines an d uses appropriately
trained personnel. If the parking brake has been
released manually in response to a malfunction,
only technicians can re turn it to operation.<
Following manual release, the actual sta-
tus of the parking brake may deviate from
that displayed by the indicator lamp. <
Operation after interruptions in power
supply
The parking brake can only be used again
if it was manually rele ased due to an inter-
ruption in the supply of electrical power. Other-
wise the operation of the parking brake is not
ensured and there is a danger of the vehicle roll-
ing despite the parking brake being set. <
Page 82 of 317
Everything under control
80
Fuel gauge
Fuel tank capacity: approx. 22.5 US gal/
85 liters. You will find information on refueling
on page244.
If the tilt of the vehicle varies for a longer period,
when you are driving in mountainous areas, for
example, the indicator may fluctuate slightly.
Reserve
After the reserve quantity has been reached, a
message briefly appears on the Control Display;
the remaining range is shown in the computer.
Below a range of approx. 30 miles/50 km, the
message remains on the Control Display.
Refuel as soon as possible once your
cruising range falls below 30 miles/
50 km, otherwise engine functions are not
ensured and damage can occur. <
Computer
Displays in instrument panel
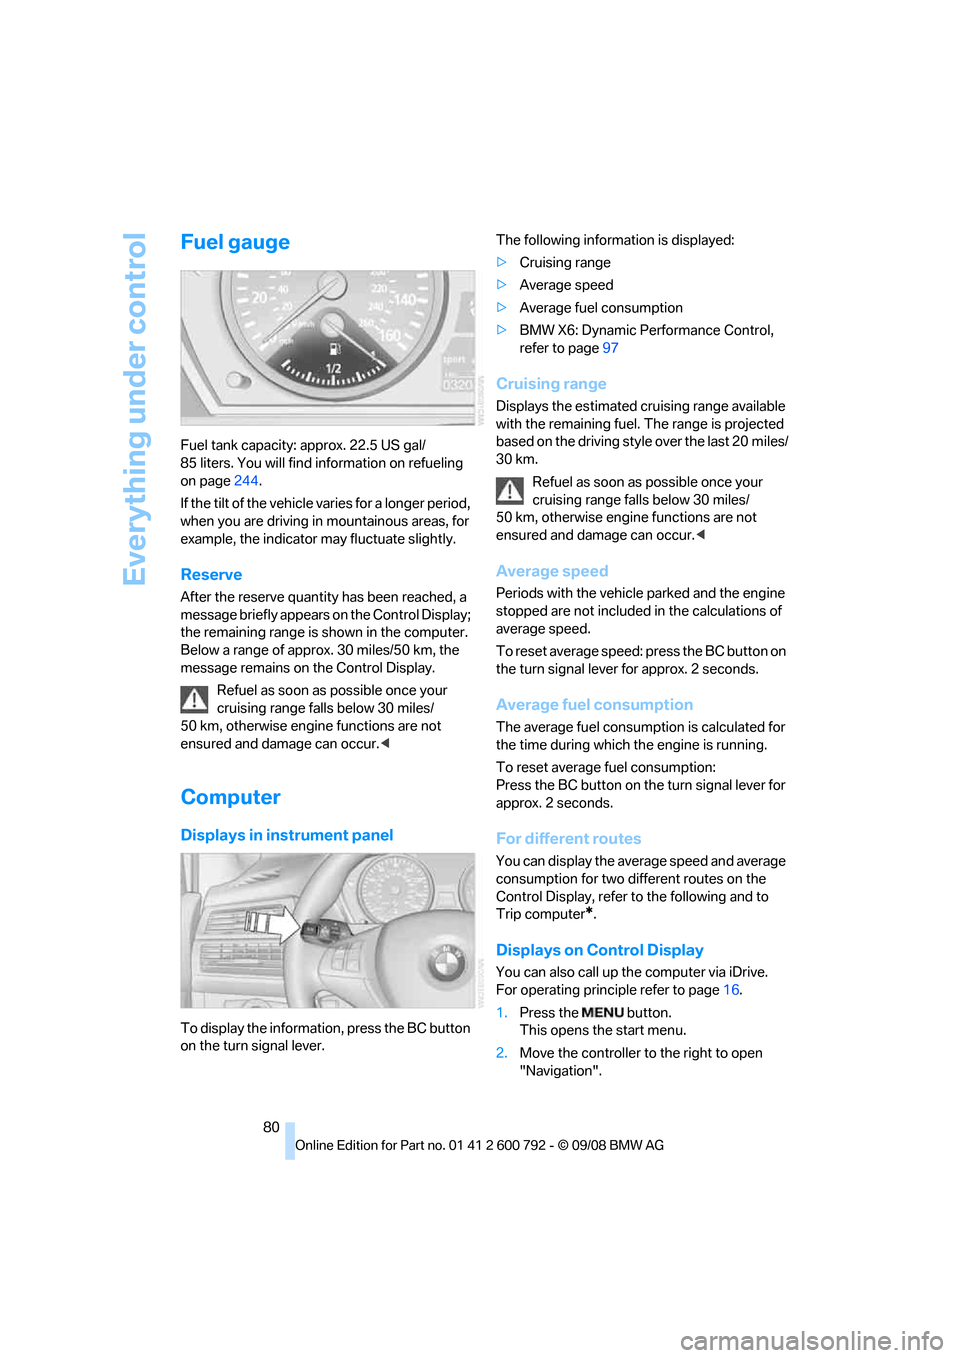
To display the information, press the BC button
on the turn signal lever. The following information is displayed:
>
Cruising range
> Average speed
> Average fuel consumption
> BMW X6: Dynamic Perf ormance Control,
refer to page 97
Cruising range
Displays the estimated cruising range available
with the remaining fuel. The range is projected
based on the driving style over the last 20 miles/
30 km.
Refuel as soon as possible once your
cruising range falls below 30 miles/
50 km, otherwise engine functions are not
ensured and damage can occur. <
Average speed
Periods with the vehicle parked and the engine
stopped are not included in the calculations of
average speed.
To reset average speed: press the BC button on
the turn signal lever for approx. 2 seconds.
Average fuel consumption
The average fuel consumption is calculated for
the time during which the engine is running.
To reset average fuel consumption:
Press the BC button on the turn signal lever for
approx. 2 seconds.
For different routes
You can display the average speed and average
consumption for two different routes on the
Control Display, refer to the following and to
Trip computer
*.
Displays on Control Display
You can also call up the computer via iDrive.
For operating princi ple refer to page16.
1. Press the button.
This opens the start menu.
2. Move the controller to the right to open
"Navigation".
Page 84 of 317
Everything under control
82
Starting or stopping the
trip computer, or reset-
ting all values:
1. Select "Set" and pr ess the controller.
2. Select the desired menu item.
3. Press the controller.
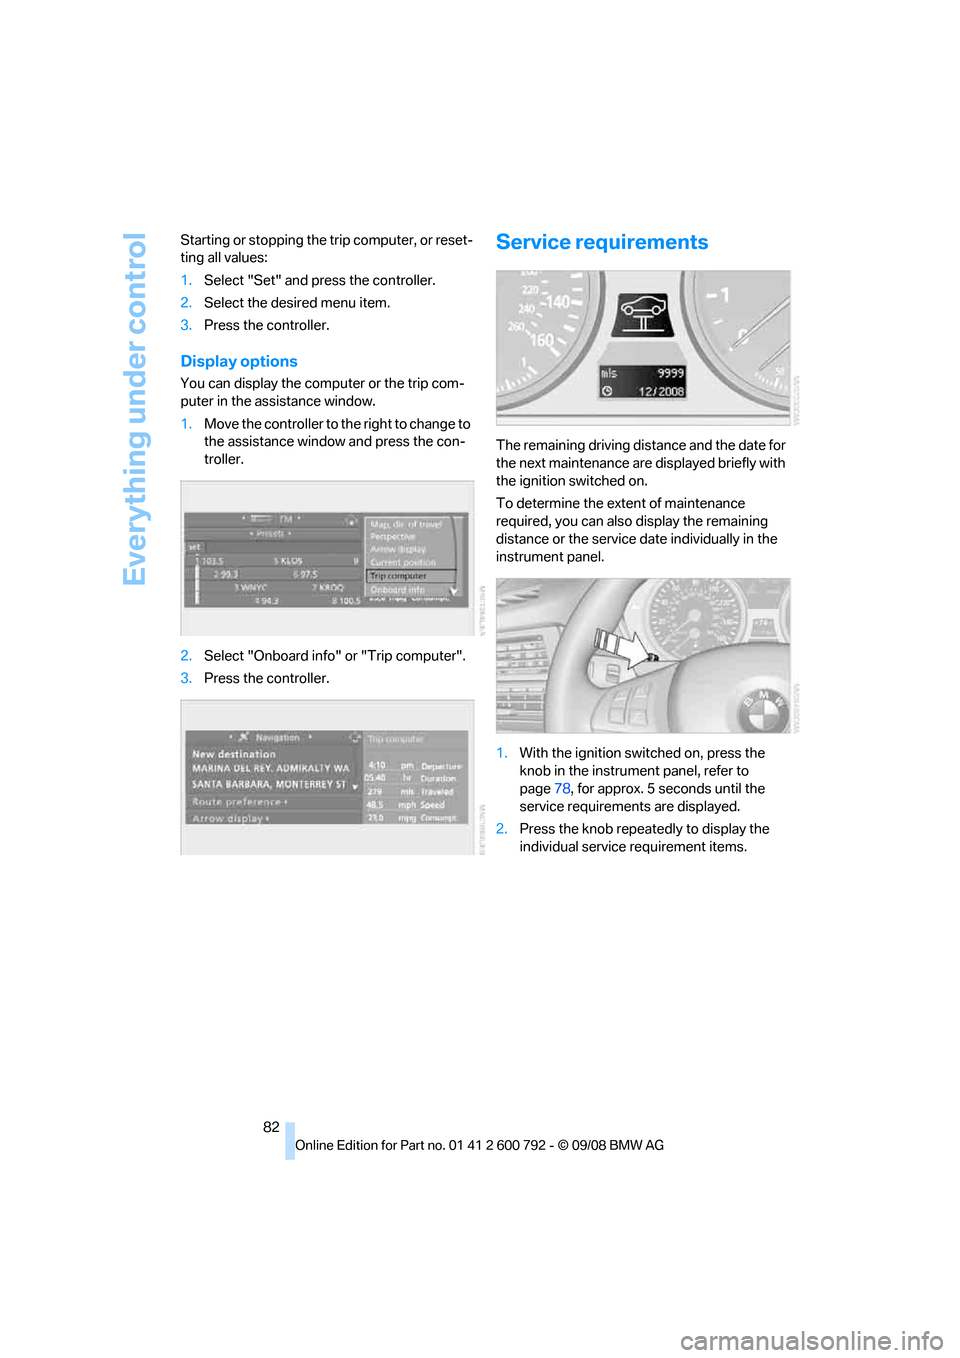
Display options
You can display the computer or the trip com-
puter in the assistance window.
1.Move the controller to the right to change to
the assistance window and press the con-
troller.
2. Select "Onboard info" or "Trip computer".
3. Press the controller.
Service requirements
The remaining driving dist ance and the date for
the next maintenance are displayed briefly with
the ignition switched on.
To determine the extent of maintenance
required, you can also display the remaining
distance or the service da te individually in the
instrument panel.
1. With the ignition switched on, press the
knob in the instrument panel, refer to
page 78, for approx. 5 seconds until the
service requirements are displayed.
2. Press the knob repeatedly to display the
individual service requirement items.
Page 89 of 317
Controls
87Reference
At a glance
Driving tips
Communications
Navigation
Entertainment
Mobility
Speed limit
You can enter a speed and a Check Control
message indicates when you have reached this
speed. This enables you, for example, to
receive warnings if you exceed a speed limit in
an urban area.
You are only warned of reaching this speed a
second time if your vehi cle speed falls below it
again by at least 3 mph/5 km/h.
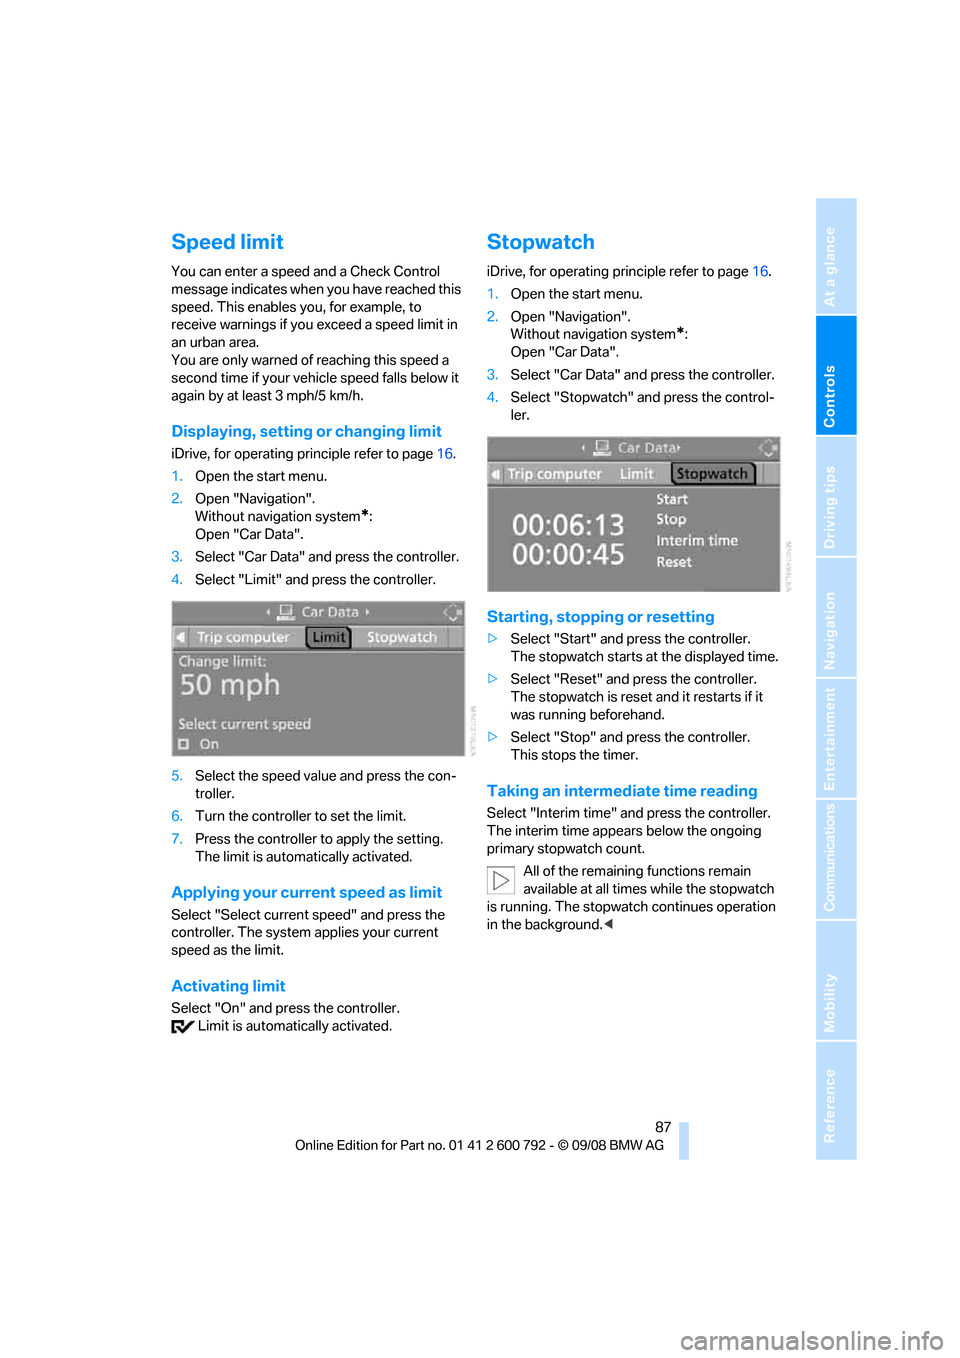
Displaying, setting or changing limit
iDrive, for operating principle refer to page 16.
1. Open the start menu.
2. Open "Navigation".
Without navigation system
*:
Open "Car Data".
3. Select "Car Data" and press the controller.
4. Select "Limit" and press the controller.
5. Select the speed value and press the con-
troller.
6. Turn the controller to set the limit.
7. Press the controller to apply the setting.
The limit is automatically activated.
Applying your current speed as limit
Select "Select current speed" and press the
controller. The system applies your current
speed as the limit.
Activating limit
Select "On" and press the controller. Limit is automatically activated.
Stopwatch
iDrive, for operating pr inciple refer to page16.
1. Open the start menu.
2. Open "Navigation".
Without navigation system
*:
Open "Car Data".
3. Select "Car Data" and press the controller.
4. Select "Stopwatch" and press the control-
ler.
Starting, stopping or resetting
>Select "Start" and press the controller.
The stopwatch starts at the displayed time.
> Select "Reset" and press the controller.
The stopwatch is reset and it restarts if it
was running beforehand.
> Select "Stop" and press the controller.
This stops the timer.
Taking an intermediate time reading
Select "Interim time" an d press the controller.
The interim time appe ars below the ongoing
primary stopwatch count.
All of the remaining functions remain
available at all times while the stopwatch
is running. The stopwa tch continues operation
in the background. <