range BMW X5 2010 E70 User Guide
[x] Cancel search | Manufacturer: BMW, Model Year: 2010, Model line: X5, Model: BMW X5 2010 E70Pages: 300, PDF Size: 12.41 MB
Page 98 of 300
Technology for comfort, convenience and safety
96 3."Tire Pressure Monitor - TPM"
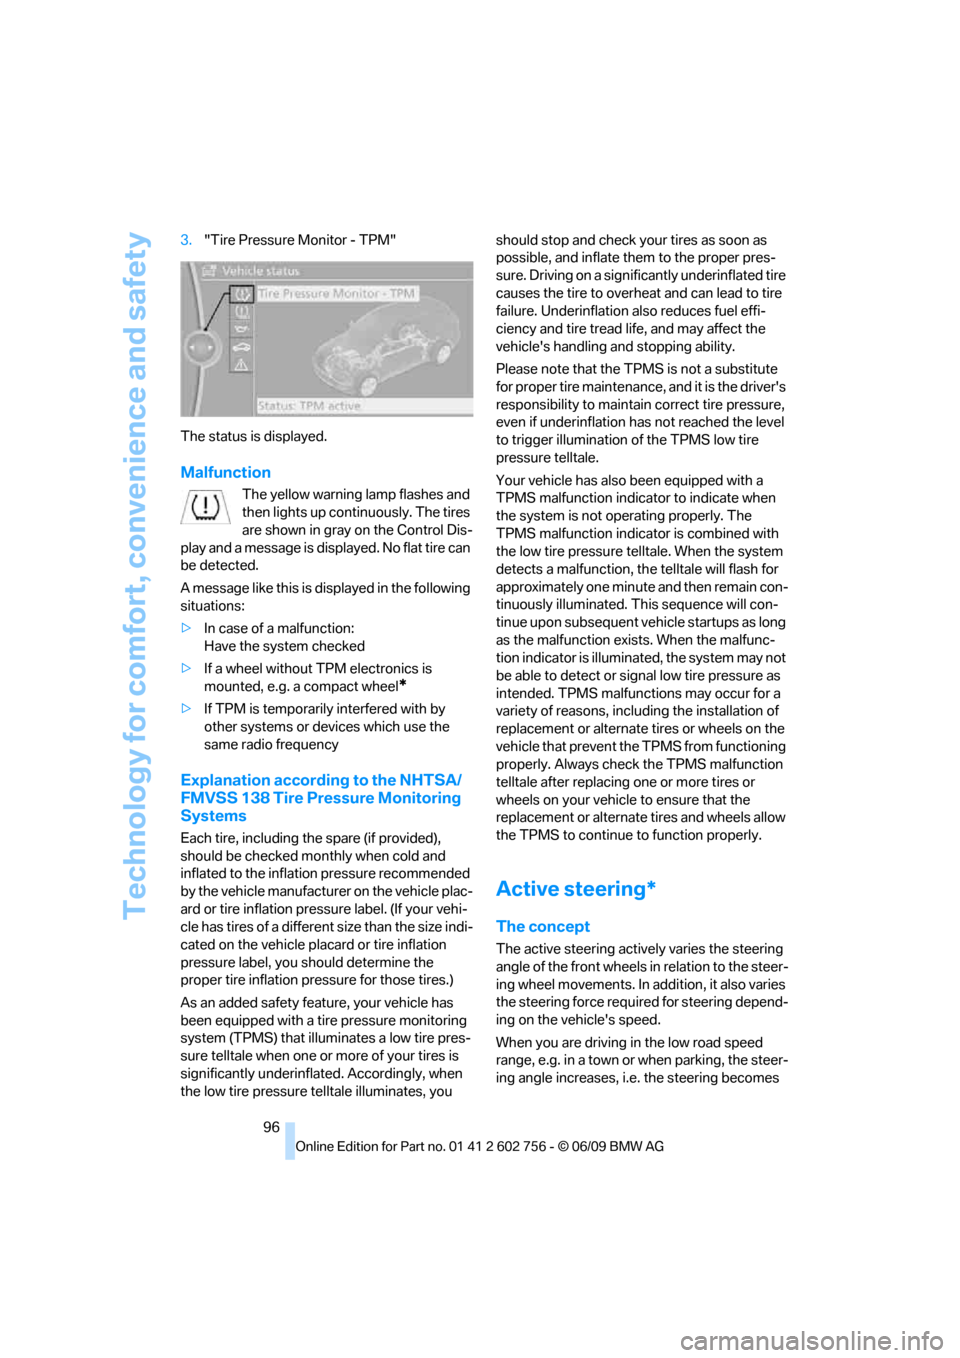
The status is displayed.
Malfunction
The yellow warning lamp flashes and
then lights up continuously. The tires
are shown in gray on the Control Dis-
play and a message is displayed. No flat tire can
be detected.
A message like this is displayed in the following
situations:
>In case of a malfunction:
Have the system checked
>If a wheel without TPM electronics is
mounted, e.g. a compact wheel
*
>If TPM is temporarily interfered with by
other systems or devices which use the
same radio frequency
Explanation according to the NHTSA/
FMVSS 138 Tire Pressure Monitoring
Systems
Each tire, including the spare (if provided),
should be checked monthly when cold and
inflated to the inflation pressure recommended
by the vehicle manufacturer on the vehicle plac-
ard or tire inflation pressure label. (If your vehi-
cle has tires of a different size than the size indi-
cated on the vehicle placard or tire inflation
pressure label, you should determine the
proper tire inflation pressure for those tires.)
As an added safety feature, your vehicle has
been equipped with a tire pressure monitoring
system (TPMS) that illuminates a low tire pres-
sure telltale when one or more of your tires is
significantly underinflated. Accordingly, when
the low tire pressure telltale illuminates, you should stop and check your tires as soon as
possible, and inflate them to the proper pres-
sure. Driving on a significantly underinflated tire
causes the tire to overheat and can lead to tire
failure. Underinflation also reduces fuel effi-
ciency and tire tread life, and may affect the
vehicle's handling and stopping ability.
Please note that the TPMS is not a substitute
for proper tire maintenance, and it is the driver's
responsibility to maintain correct tire pressure,
even if underinflation has not reached the level
to trigger illumination of the TPMS low tire
pressure telltale.
Your vehicle has also been equipped with a
TPMS malfunction indicator to indicate when
the system is not operating properly. The
TPMS malfunction indicator is combined with
the low tire pressure telltale. When the system
detects a malfunction, the telltale will flash for
approximately one minute and then remain con-
tinuously illuminated. This sequence will con-
tinue upon subsequent vehicle startups as long
as the malfunction exists. When the malfunc-
tion indicator is illuminated, the system may not
be able to detect or signal low tire pressure as
intended. TPMS malfunctions may occur for a
variety of reasons, including the installation of
replacement or alternate tires or wheels on the
vehicle that prevent the TPMS from functioning
properly. Always check the TPMS malfunction
telltale after replacing one or more tires or
wheels on your vehicle to ensure that the
replacement or alternate tires and wheels allow
the TPMS to continue to function properly.
Active steering*
The concept
The active steering actively varies the steering
angle of the front wheels in relation to the steer-
ing wheel movements. In addition, it also varies
the steering force required for steering depend-
ing on the vehicle's speed.
When you are driving in the low road speed
range, e.g. in a town or when parking, the steer-
ing angle increases, i.e. the steering becomes
ba8_e70ag.book Seite 96 Freitag, 5. Juni 2009 11:42 11
Page 99 of 300
Controls
97Reference
At a glance
Driving tips
Communications
Navigation
Entertainment
Mobility
very direct. In the higher speed range, on the
other hand, the steering angle is reduced more
and more. This improves the handling capability
of your BMW over the entire speed range.
In critical situations, the system can make tar-
geted corrections to the steering angle pro-
vided by the driver and thus stabilize the vehicle
before the driver intervenes.
Malfunction
The warning lamp lights up yellow
and a message is shown on the Con-
trol Display. The active steering is
defective or has been temporarily
deactivated. At low speeds, greater steering
wheel movements are required, whereas at
higher speeds, the vehicle reacts more sensi-
tively to steering wheel movements. The stabil-
ity-promoting intervention can also be deacti-
vated. Proceed cautiously and drive
defensively.
Deactivation
Active steering deactivates in order to carry out
an initialization. This deactivation is displayed
by means of a message. The initialization can
take several minutes.
If the message does not disappear during the
current trip, have the system checked.
Defect
In the event of a defect, a corresponding text
message is displayed. Have the system
checked.
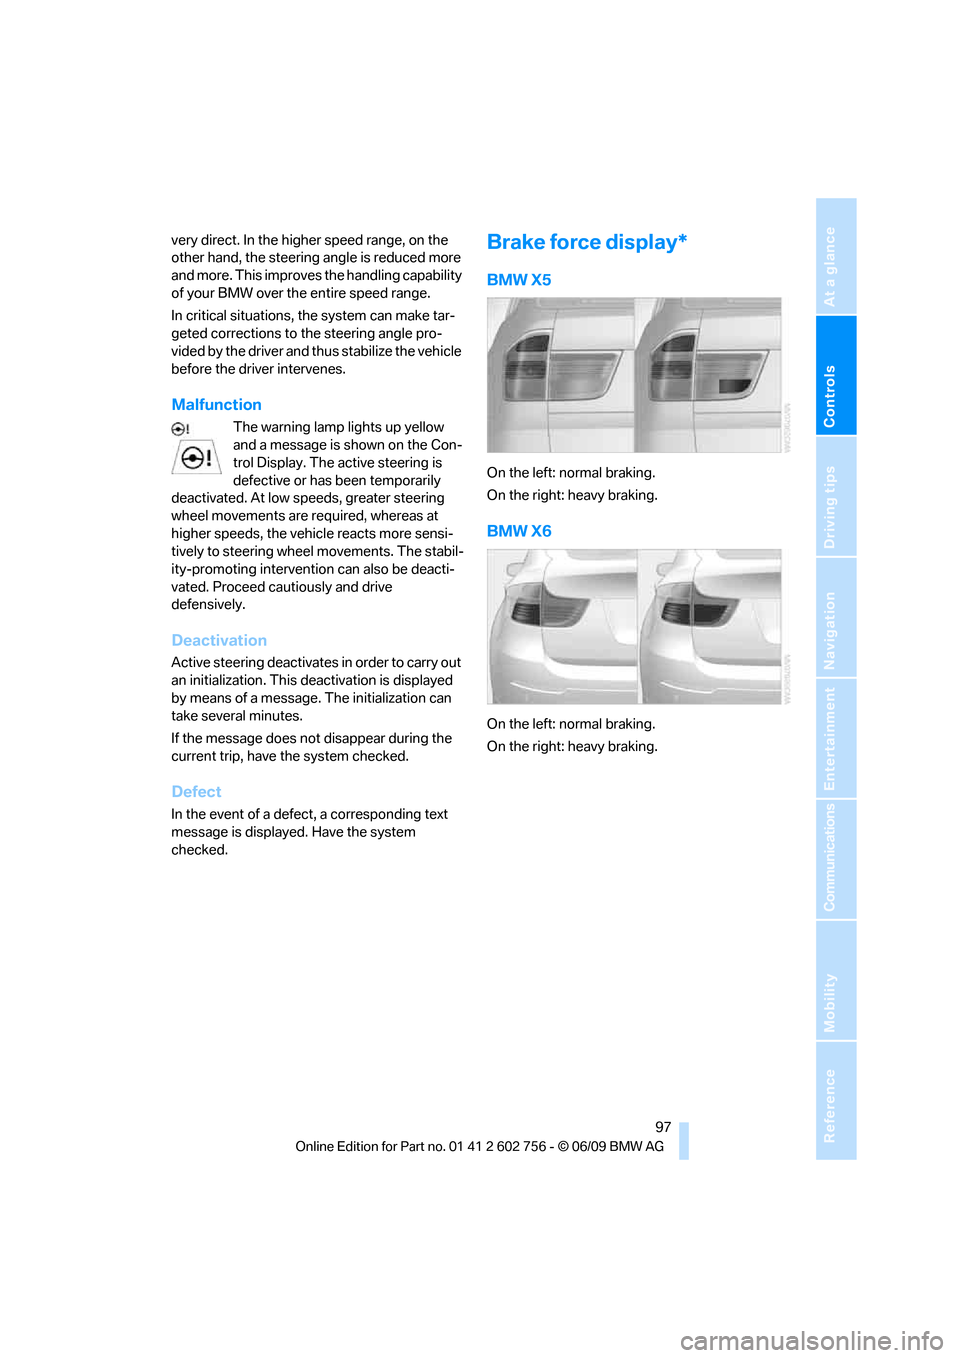
Brake force display*
BMW X5
On the left: normal braking.
On the right: heavy braking.
BMW X6
On the left: normal braking.
On the right: heavy braking.
ba8_e70ag.book Seite 97 Freitag, 5. Juni 2009 11:42 11
Page 101 of 300
Controls
99Reference
At a glance
Driving tips
Communications
Navigation
Entertainment
Mobility
indicated by the indicator lamp over the interior
rearview mirror, refer to Operating state of front
passenger airbags in the following.<
Before transporting a child on the front
passenger seat, read the safety informa-
tion and follow the instructions under Trans-
porting children safely, refer to page55.
When teenagers and adults assume certain sit-
ting positions, this can cause the front and side
airbags to deactivate. The indicator lamp for the
front passenger airbags lights up when this
occurs. In these cases, change the sitting posi-
tion so that the front passenger airbags are acti-
vated and the indicator lamp goes out. If the
desired status cannot be produced by changing
the sitting position, transport the correspond-
ing person on the rear seat. Do not fit seat cov-
ers, seat cushion padding, ball mats or other
items onto the front passenger seat unless they
are specifically recommended by BMW. Do not
lay objects under the seat which could press
against the seat from below. Otherwise a cor-
rect evaluation of the occupied seat surface
cannot be ensured.<
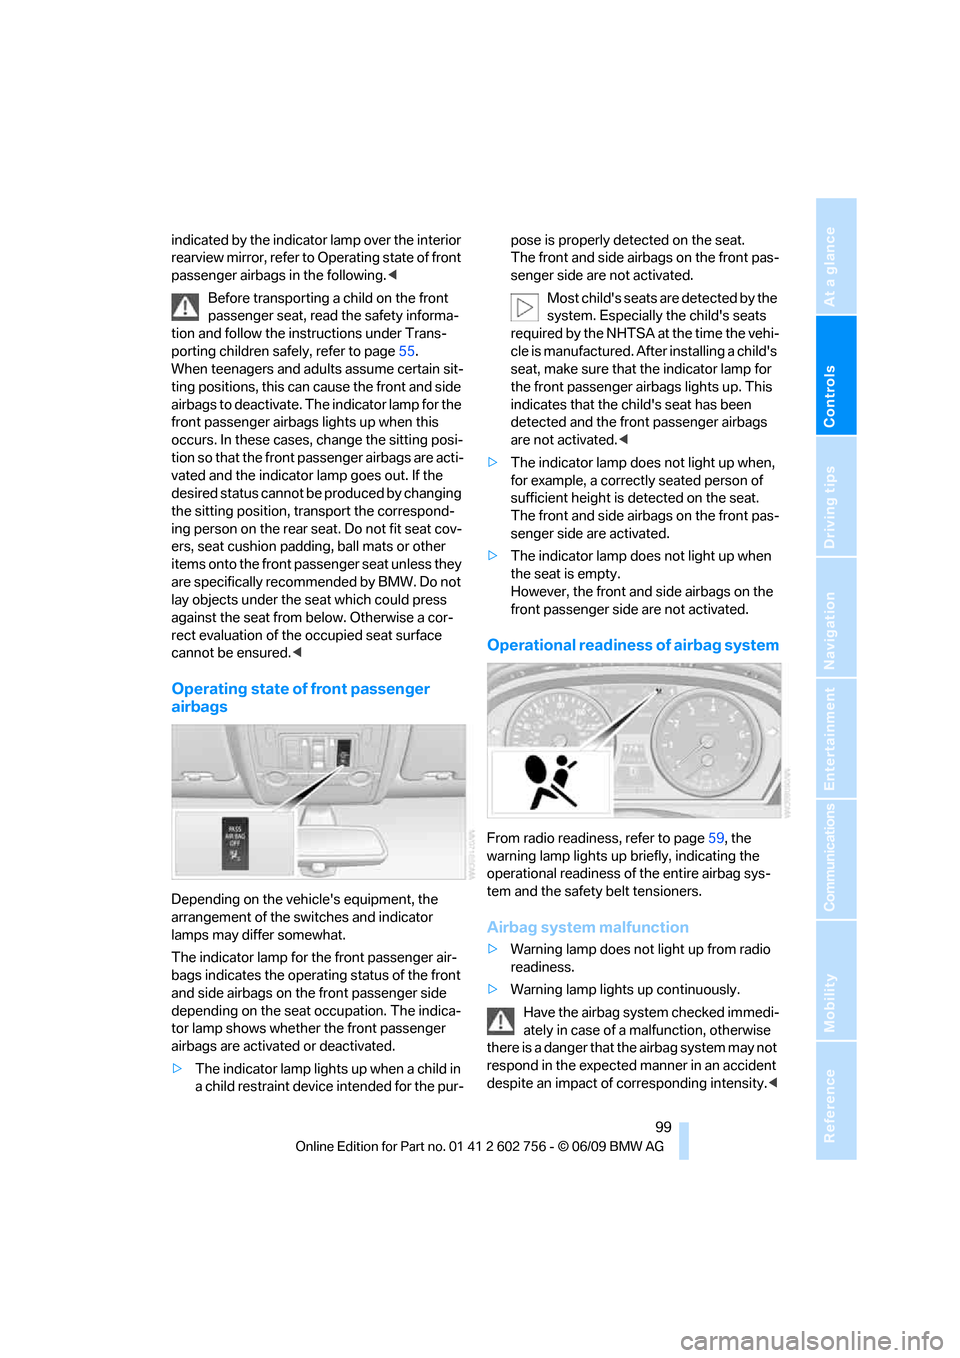
Operating state of front passenger
airbags
Depending on the vehicle's equipment, the
arrangement of the switches and indicator
lamps may differ somewhat.
The indicator lamp for the front passenger air-
bags indicates the operating status of the front
and side airbags on the front passenger side
depending on the seat occupation. The indica-
tor lamp shows whether the front passenger
airbags are activated or deactivated.
>The indicator lamp lights up when a child in
a child restraint device intended for the pur-pose is properly detected on the seat.
The front and side airbags on the front pas-
senger side are not activated.
Most child's seats are detected by the
system. Especially the child's seats
required by the NHTSA at the time the vehi-
cle is manufactured. After installing a child's
seat, make sure that the indicator lamp for
the front passenger airbags lights up. This
indicates that the child's seat has been
detected and the front passenger airbags
are not activated.<
>The indicator lamp does not light up when,
for example, a correctly seated person of
sufficient height is detected on the seat.
The front and side airbags on the front pas-
senger side are activated.
>The indicator lamp does not light up when
the seat is empty.
However, the front and side airbags on the
front passenger side are not activated.
Operational readiness of airbag system
From radio readiness, refer to page59, the
warning lamp lights up briefly, indicating the
operational readiness of the entire airbag sys-
tem and the safety belt tensioners.
Airbag system malfunction
>Warning lamp does not light up from radio
readiness.
>Warning lamp lights up continuously.
Have the airbag system checked immedi-
ately in case of a malfunction, otherwise
there is a danger that the airbag system may not
respond in the expected manner in an accident
despite an impact of corresponding intensity.<
ba8_e70ag.book Seite 99 Freitag, 5. Juni 2009 11:42 11
Page 107 of 300
Controls
105Reference
At a glance
Driving tips
Communications
Navigation
Entertainment
Mobility
>Use the headlamp flasher as usual when the
low beams are on.
System limits
The high-beam assistant cannot replace
personal judgment about the use of high
beams. In situations that require it, you should
therefore switch to low beams manually; failure
to do so can constitute a safety hazard.<
In the following sample situations, the system
will not function or will only function to a limited
degree, possibly requiring the driver to react
personally:
>in extremely unfavorable weather condi-
tions such as fog or heavy precipitation
>when you perceive poorly illuminated road
users such as pedestrians, cyclists, horse-
back riders, carriages, when rail or shipping
traffic is close to the road, or at deer cross-
ings
>in sharp curves, on steep hilltops or dips,
when there cross-traffic, or in the presence
of half-concealed oncoming traffic on the
highway
>in poorly lit areas and in the presence of
highly reflective signs
>in the low speed range
>when the windshield in the region of the
interior rearview mirror is fogged, dirty, or
covered by stickers, decals, etc.
>when the sensor is dirty. Clean the sensor
on the front side of the interior rearview mir-
ror with a cloth moistened with a little glass
cleaner.
Switching off using iDrive
1."Settings"
2."Lighting"
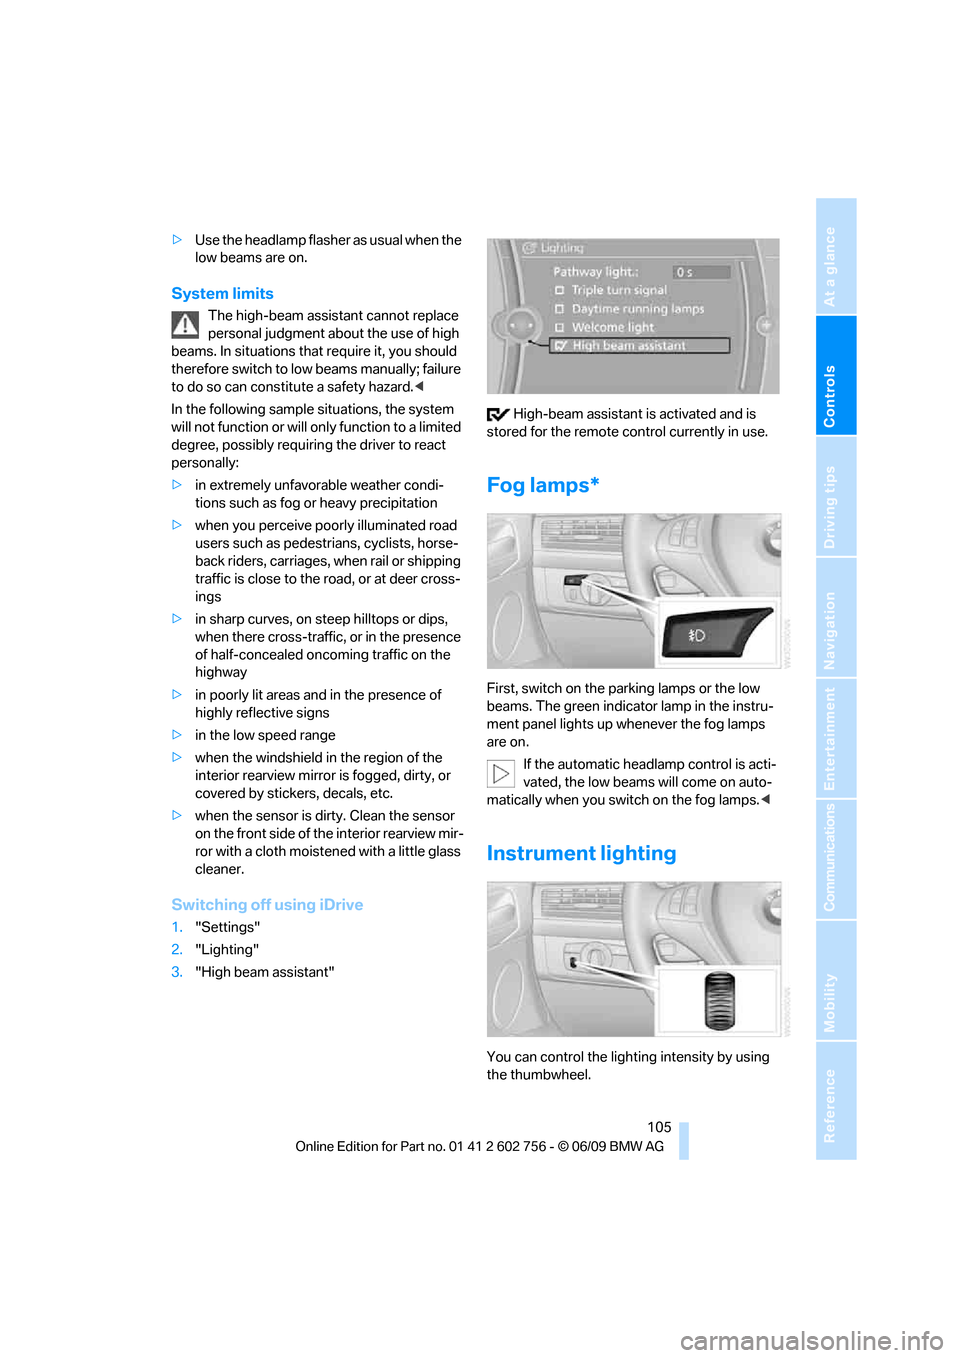
3."High beam assistant" High-beam assistant is activated and is
stored for the remote control currently in use.
Fog lamps*
First, switch on the parking lamps or the low
beams. The green indicator lamp in the instru-
ment panel lights up whenever the fog lamps
are on.
If the automatic headlamp control is acti-
vated, the low beams will come on auto-
matically when you switch on the fog lamps.<
Instrument lighting
You can control the lighting intensity by using
the thumbwheel.
ba8_e70ag.book Seite 105 Freitag, 5. Juni 2009 11:42 11
Page 117 of 300
Controls
115Reference
At a glance
Driving tips
Communications
Navigation
Entertainment
Mobility
Practical interior accessories
Integrated universal remote
control*
The concept
The integrated universal remote control can
replace as many as three hand-held transmit-
ters for various remote-controlled accessories,
such as garage and gate or lighting systems.
The integrated universal remote control regis-
ters and stores signals from the original hand-
held transmitters.
The signal of an original hand-held transmitter
can be programmed on one of the three mem-
ory buttons1. Then with the ignition switched
on, this programmed memory button1 can be
used to operate the respective feature. The
LED2 flashes to confirm transmission of the
signal.
Should you sell your vehicle one day, be sure to
delete the stored programs beforehand for your
safety, refer to page116.
To prevent possible damage or injury,
before programming or using the inte-
grated universal remote control, always inspect
the immediate area to make certain that no peo-
ple, animals or objects are within the travel
range of the device. Also, comply with the
safety precautions of the original hand-held
transmitter.<
Checking compatibility
If you see this symbol on the packaging
or in the manual supplied with the orig-
inal hand-held transmitter, it is safe to
assume that it is compatible with the integrated
universal remote control.
Should you have additional questions,
please contact your BMW Sports Activity
Vehicle Center or call: 1-800-355-3515.
Information is also provided on the Internet at:
www.bmwusa.com or
www.homelink.com.HomeLink is a registered trademark of Johnson
Controls, Inc.<
Programming
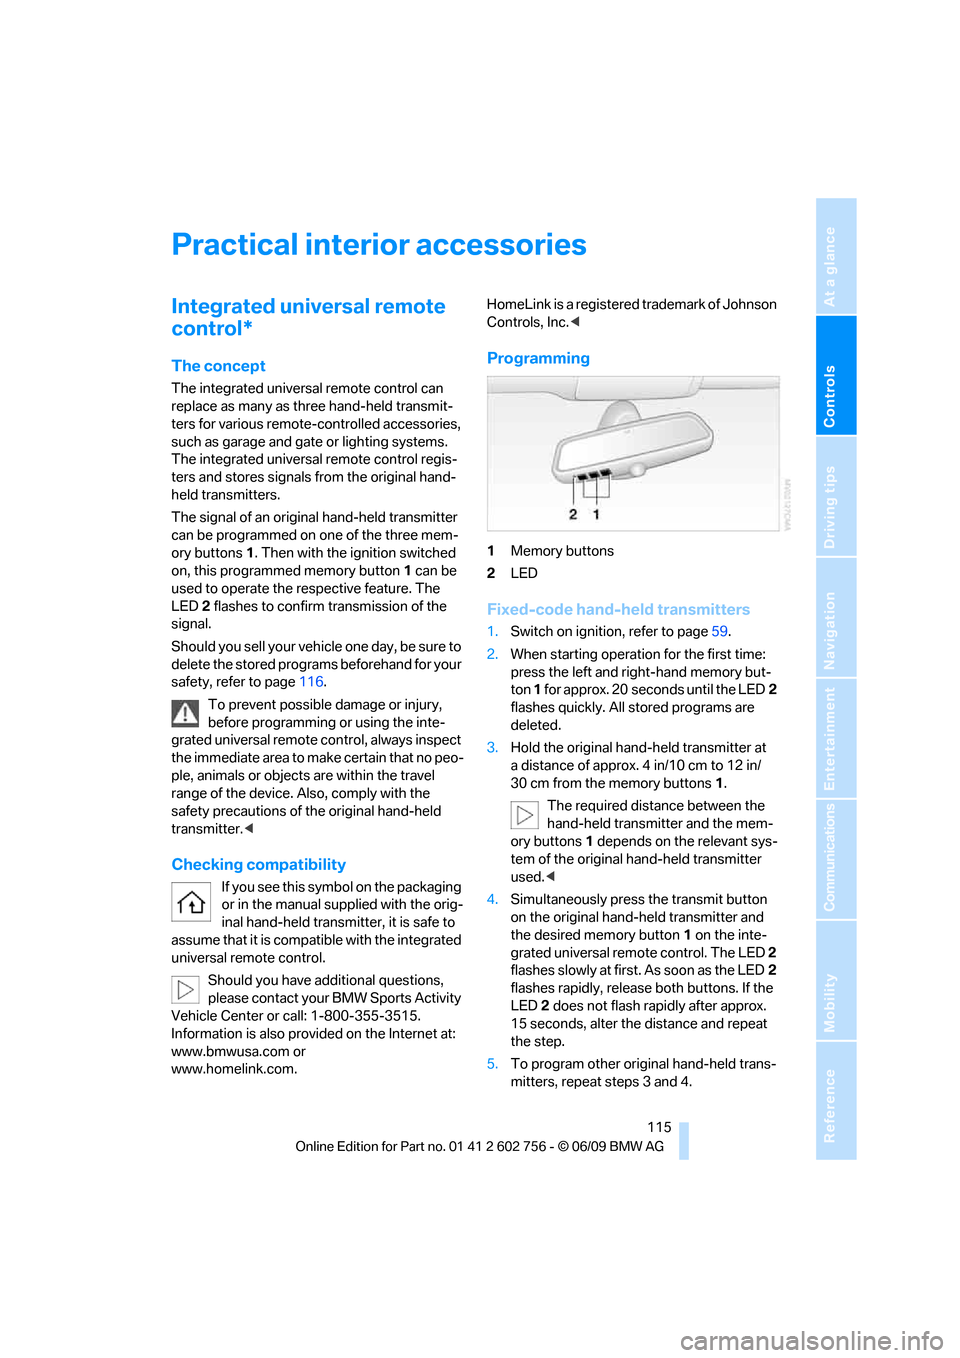
1Memory buttons
2LED
Fixed-code hand-held transmitters
1.Switch on ignition, refer to page59.
2.When starting operation for the first time:
press the left and right-hand memory but-
ton 1 for approx. 20 seconds until the LED2
flashes quickly. All stored programs are
deleted.
3.Hold the original hand-held transmitter at
a distance of approx. 4 in/10 cm to 12 in/
30 cm from the memory buttons1.
The required distance between the
hand-held transmitter and the mem-
ory buttons1 depends on the relevant sys-
tem of the original hand-held transmitter
used.<
4.Simultaneously press the transmit button
on the original hand-held transmitter and
the desired memory button1 on the inte-
grated universal remote control. The LED 2
flashes slowly at first. As soon as the LED2
flashes rapidly, release both buttons. If the
LED2 does not flash rapidly after approx.
15 seconds, alter the distance and repeat
the step.
5.To program other original hand-held trans-
mitters, repeat steps 3 and 4.
ba8_e70ag.book Seite 115 Freitag, 5. Juni 2009 11:42 11
Page 118 of 300
Practical interior accessories
116 The corresponding memory button1 is now
programmed with the signal of the original
hand-held transmitter.
You can operate the device when the engine is
running or when the ignition is switched on.
If the device cannot be used after
repeated programming, check whether
the original hand-held transmitter uses an alter-
nating-code system. To do so, either read the
instructions for the original hand-held transmit-
ter or hold down the programmed memory but-
ton 1 of the integrated universal remote control.
If the LED2 on the integrated universal remote
control flashes rapidly for a short time and then
remains lit for approx. 2 seconds, this indicates
that the original hand-held transmitter uses an
alternating-code system. In the case of an alter-
nating-code system, program the memory but-
tons 1 as described at Alternating-code hand-
held transmitters.<
Alternating-code hand-held
transmitters
To program the integrated universal remote
control, consult the operating instructions for
the equipment to be set. You will find informa-
tion there on the possibilities for synchroniza-
tion.
When programming hand-held transmitters
that employ an alternating code, observe the
following supplementary instructions:
Programming will be easier with the aid of
a second person.<
1.Park your vehicle within the range of the
remote-controlled device.
2.Program the integrated universal remote
control as described above in the section
Fixed-code hand-held transmitters.
3.Locate the button on the receiver of the
device to be set, e.g. on the drive unit.
4.Press the button on the receiver of the
device to be set. After step 4, you have
approx. 30 seconds for step 5.
5.Press the programmed memory button1
of the integrated universal remote control
three times.The corresponding memory button1 is now
programmed with the signal of the original
hand-held transmitter.
Should you have questions, please con-
tact your BMW Sports Activity Vehicle
Center.<
Deleting all stored programs
Press the left and right-hand memory button1
for approx. 20 seconds until the LED2 flashes
quickly:
All stored programs are deleted.
Reassigning individual programs
1.Hold the original hand-held transmitter at
a distance of approx. 4 in/10 cm to 12 in/
30 cm from the memory buttons1.
The required distance between the
hand-held transmitter and the mem-
ory buttons1 depends on the relevant sys-
tem of the original hand-held transmitter
used.<
2.Press the desired memory button1 of the
integrated universal remote control.
3.When the LED2 flashes slowly after approx.
20 seconds, press the transmit button of
the original hand-held transmitter. Release
both buttons as soon as the LED2 flashes
rapidly. If the LED2 does not flash rapidly
after approx. 15 seconds, alter the distance
and repeat the step.
Digital compass*
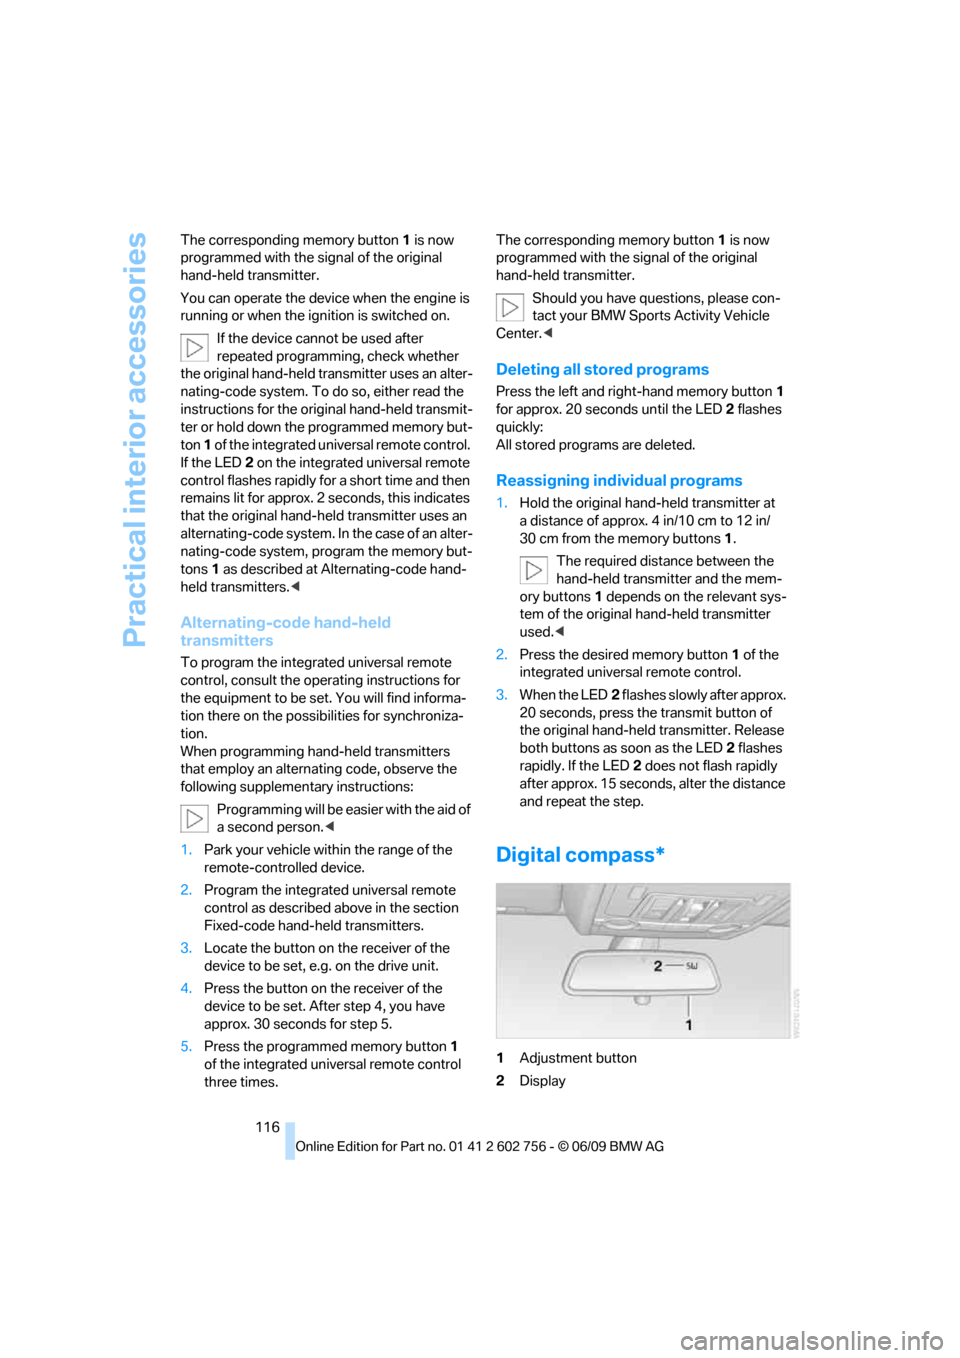
1Adjustment button
2Display
ba8_e70ag.book Seite 116 Freitag, 5. Juni 2009 11:42 11
Page 145 of 300
Navigation
Driving tips
143Reference
At a glance
Controls
Communications
Entertainment
Mobility
3.Change to the list of house numbers.
4.Select a house number or range of house
numbers.
Selection after destination entry
>"Accept destination"
Destination guidance starts immediately.
>"Route preference"
refer to page150.
>"Points of Interest at loc."
refer to page144.
If a new town/city is selected during destination
guidance, the current destination guidance is
terminated.
Address book
To create contacts, refer to page213.
Selecting a destination from the
address book
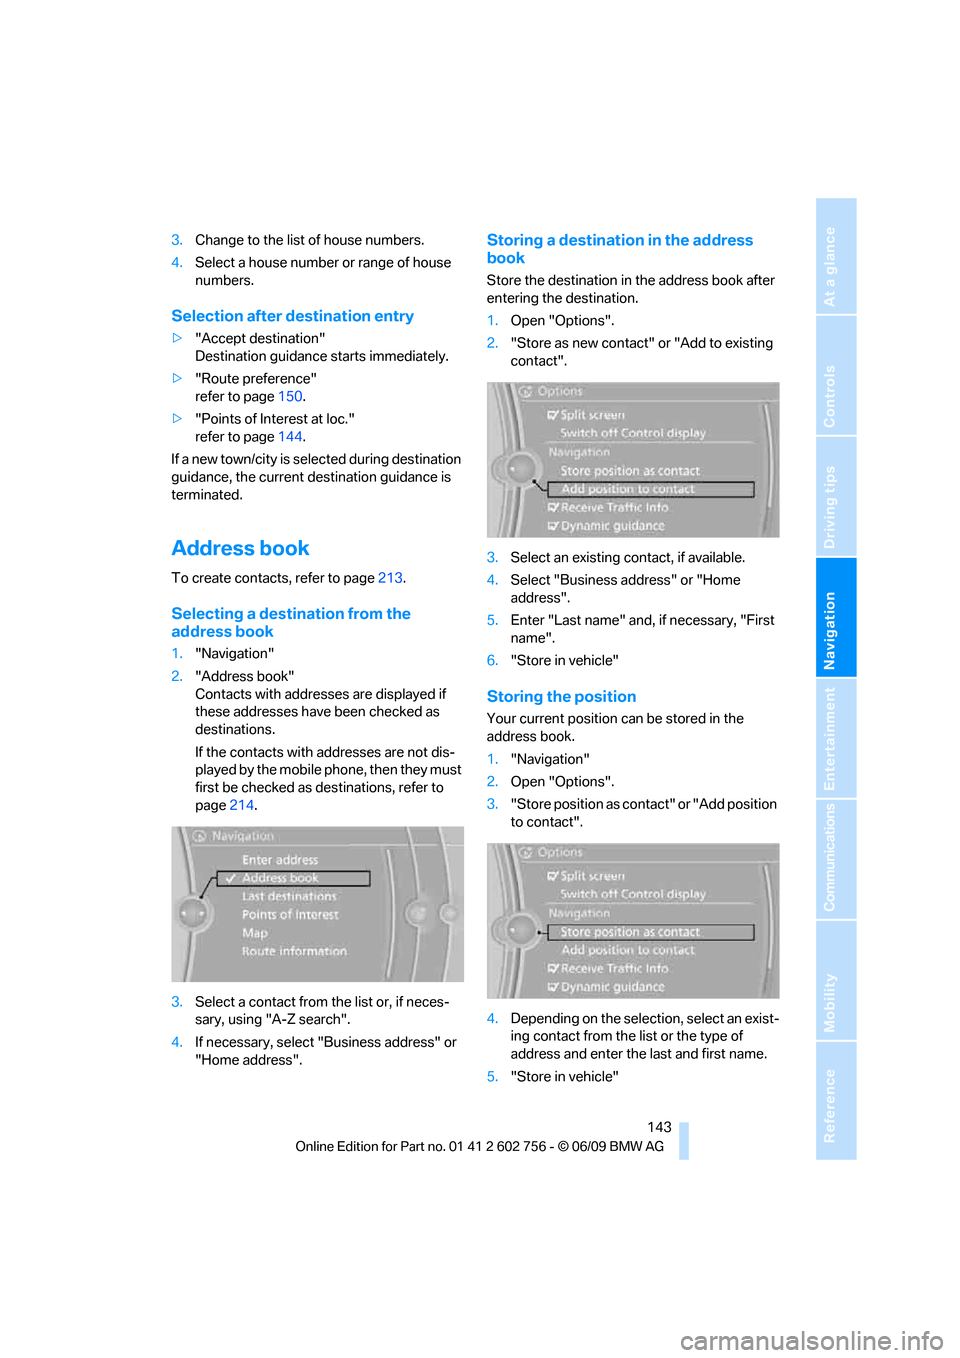
1."Navigation"
2."Address book"
Contacts with addresses are displayed if
these addresses have been checked as
destinations.
If the contacts with addresses are not dis-
played by the mobile phone, then they must
first be checked as destinations, refer to
page214.
3.Select a contact from the list or, if neces-
sary, using "A-Z search".
4.If necessary, select "Business address" or
"Home address".
Storing a destination in the address
book
Store the destination in the address book after
entering the destination.
1.Open "Options".
2."Store as new contact" or "Add to existing
contact".
3.Select an existing contact, if available.
4.Select "Business address" or "Home
address".
5.Enter "Last name" and, if necessary, "First
name".
6."Store in vehicle"
Storing the position
Your current position can be stored in the
address book.
1."Navigation"
2.Open "Options".
3."Store position as contact" or "Add position
to contact".
4.Depending on the selection, select an exist-
ing contact from the list or the type of
address and enter the last and first name.
5."Store in vehicle"
ba8_e70ag.book Seite 143 Freitag, 5. Juni 2009 11:42 11
Page 153 of 300
Navigation
Driving tips
151Reference
At a glance
Controls
Communications
Entertainment
Mobility
The setting applies to the current route and to
the planning of future routes.
Dynamic destination guidance
"Dynamic guidance" is switched on:
The route is automatically changed in the event
of traffic obstructions. The system does not
point out traffic obstructions along the original
route.
Depending on the type of road and the nature
and length of the traffic obstruction, the route
can also be calculated so that you travel
through the traffic obstruction.
1."Navigation"
2.Open "Options".
3."Dynamic guidance"
If the "Avoid highways", "Avoid toll roads"
or "Avoid ferries" route criteria are
selected, route calculation may take consider-
ably longer.<
Route
General information
Depending on the equipment in your vehicle,
various views of the route are available during
destination guidance.
>Map display
>Arrow display
>Display of the streets and towns/cities on
the route
Displaying a list of the streets or towns/
cities on the route
When destination guidance is started, a list of
the streets and towns/cities on the route is dis-
played. The driving distances and traffic bulle-
tins are displayed for each route section.
>Display a list of the streets and towns/cities
on the route.
>Display the traffic bulletins and the driving
distance for each route section.1."Navigation"
2."Route information"
3.Highlight a section.
The section is displayed in the preview map.
Bypassing a section of the route
During destination guidance, you can revise the
navigation system's route recommendations to
avoid particular stretches of road. Enter the
number of miles/kilometers that you want to
travel before returning to the original route.
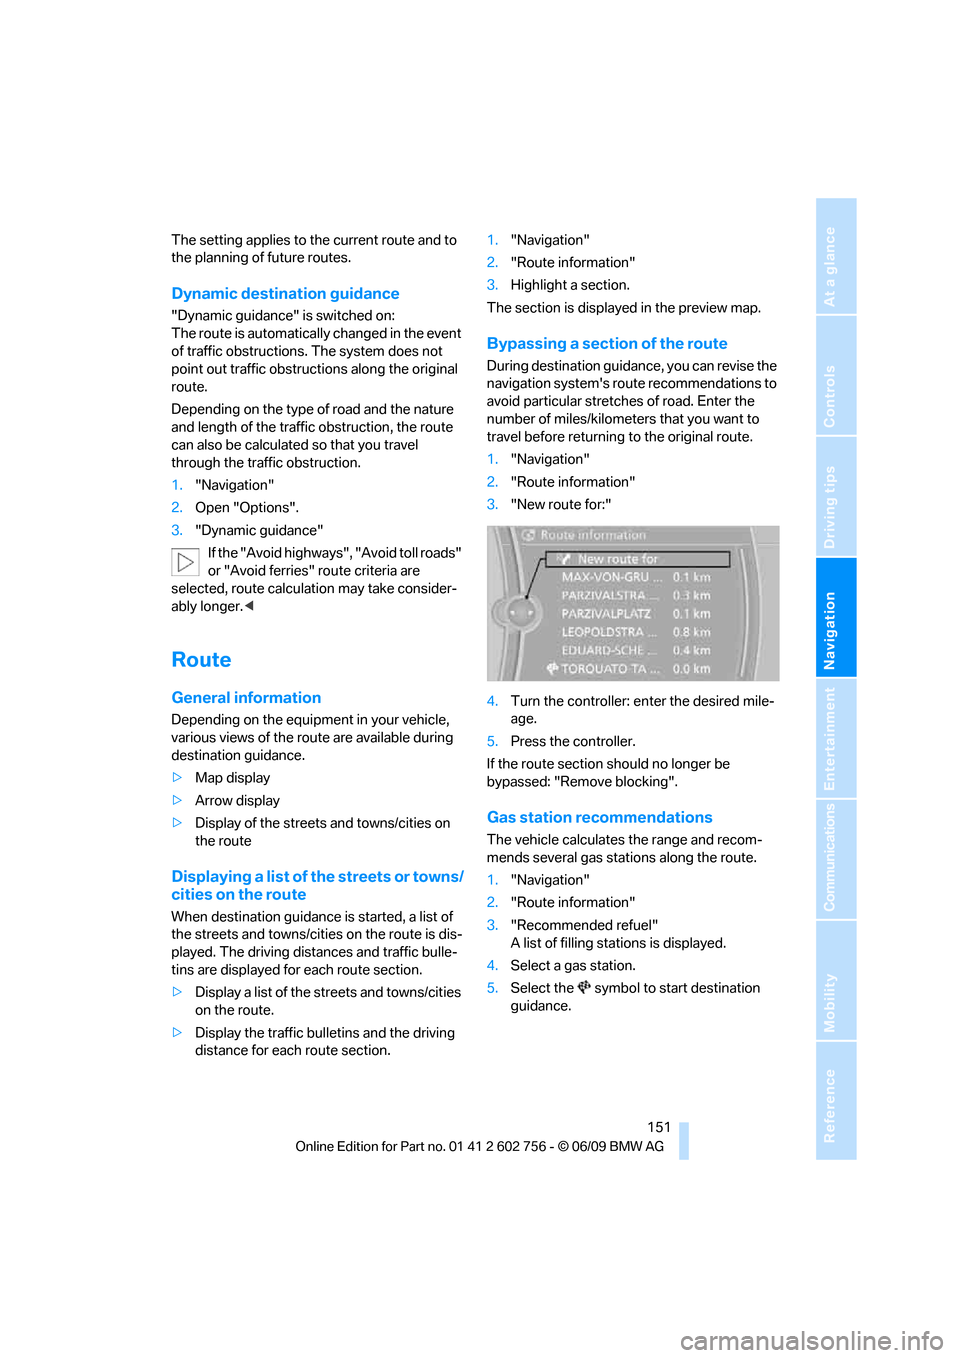
1."Navigation"
2."Route information"
3."New route for:"
4.Turn the controller: enter the desired mile-
age.
5.Press the controller.
If the route section should no longer be
bypassed: "Remove blocking".
Gas station recommendations
The vehicle calculates the range and recom-
mends several gas stations along the route.
1."Navigation"
2."Route information"
3."Recommended refuel"
A list of filling stations is displayed.
4.Select a gas station.
5.Select the symbol to start destination
guidance.
ba8_e70ag.book Seite 151 Freitag, 5. Juni 2009 11:42 11
Page 155 of 300
Navigation
Driving tips
153Reference
At a glance
Controls
Communications
Entertainment
Mobility
Viewing the map
1.Select the symbol.
2.Select a setting:
>"View facing north"
>"View in dir. of travel"
>"Perspective view"
>"Arrow display"
3.Press the controller.
Changing map scale
Select interactive map.
>Moving map: move the controller in the cor-
responding direction.
>Shifting map diagonally: move the control-
ler in the corresponding direction and turn
the controller.
Changing scale
1.Select the symbol.
2.Turn the controller to change the scale.
Automatic scaling of the map
In the map display facing north, turn the control-
ler in any direction until AUTO is displayed as
the map scale.
The map shows the entire range from your loca-
tion to the destination.
Settings for the map display
The map appears on the Control Display.
1.Open "Options".
2."Settings"
3.Set the optimum map view.
>"Day/night mode"
Select according to lighting conditions
and make adjustments. This setting is
disregarded when the traffic info map is
activated.
>"Satellite images"
Satellite images
* are displayed,
depending on availability and resolution.
>"Perspective view in 3D"
Shows a three-dimensional depiction. Prominent landmarks contained in the
navigation data are displayed on the map
in 3D.
>"Traffic Info map"
Split screen settings
The map settings for the split screen can be
created separately from the main screen.
1.Open "Options".
2."Split screen"
3.Select the settings:
>"Arrow display"
>"View facing north"
>"View in dir. of travel"
>"Perspective view"
>"Exit ramp view"
Changing scale
1.Move the controller to the right until the
split screen is selected.
2.Turn the controller.
Traffic information*
You can display the traffic bulletins from radio
stations that broadcast the TMC (Traffic Mes-
sage Channel) of a traffic information service.
This information from the traffic information
service is continuously updated on the basis of
measurement data from traffic control centers
and information on traffic congestion.
During destination guidance, traffic bulletins
that are relevant to areas along the route are
automatically displayed and taken into account
in the route planning. You can open all traffic
bulletins manually using iDrive.
The traffic bulletins are shown in the map dis-
play.
Real Time Traffic Information End-User
Provisions
Certain BMW models equipped with navigation
have the capability to display real-time traffic
information. If your system has this capability
ba8_e70ag.book Seite 153 Freitag, 5. Juni 2009 11:42 11
Page 163 of 300
Navigation
Entertainment
Driving tips
161Reference
At a glance
Controls
Communications
Mobility
Treble, bass, balance, fader
>"Balance": left/right volume distribution
>"Fader": front/rear volume distribution
Adjustments
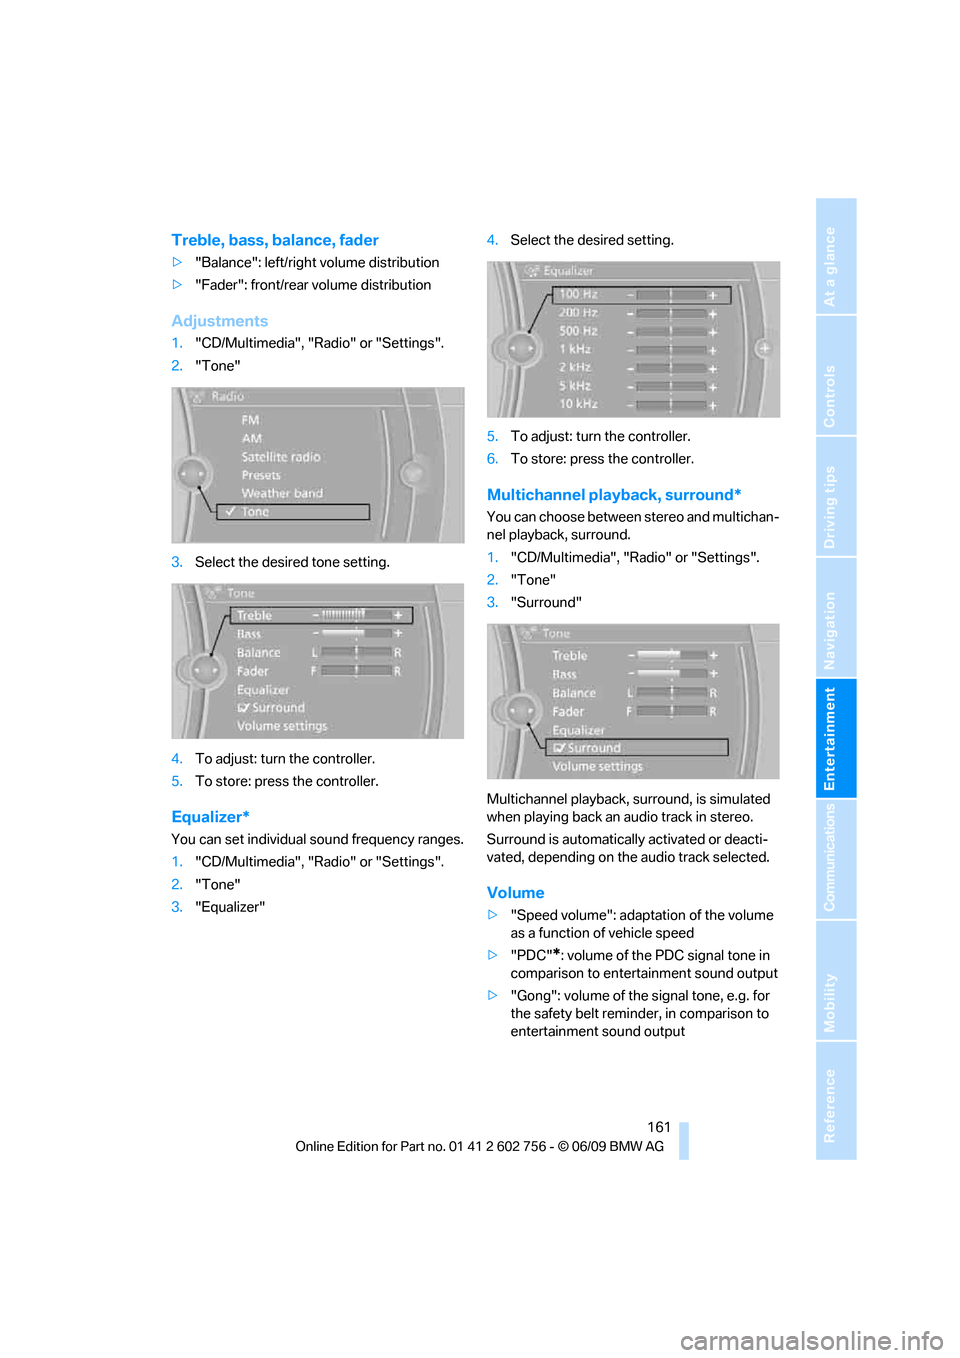
1."CD/Multimedia", "Radio" or "Settings".
2."Tone"
3.Select the desired tone setting.
4.To adjust: turn the controller.
5.To store: press the controller.
Equalizer*
You can set individual sound frequency ranges.
1."CD/Multimedia", "Radio" or "Settings".
2."Tone"
3."Equalizer"4.Select the desired setting.
5.To adjust: turn the controller.
6.To store: press the controller.
Multichannel playback, surround*
You can choose between stereo and multichan-
nel playback, surround.
1."CD/Multimedia", "Radio" or "Settings".
2."Tone"
3."Surround"
Multichannel playback, surround, is simulated
when playing back an audio track in stereo.
Surround is automatically activated or deacti-
vated, depending on the audio track selected.
Volume
>"Speed volume": adaptation of the volume
as a function of vehicle speed
>"PDC"
*: volume of the PDC signal tone in
comparison to entertainment sound output
>"Gong": volume of the signal tone, e.g. for
the safety belt reminder, in comparison to
entertainment sound output
ba8_e70ag.book Seite 161 Freitag, 5. Juni 2009 11:42 11