Install BMW X5 2010 E70 Owner's Manual
[x] Cancel search | Manufacturer: BMW, Model Year: 2010, Model line: X5, Model: BMW X5 2010 E70Pages: 300, PDF Size: 12.41 MB
Page 7 of 300
5Reference
At a glance
Controls
Driving tips
Communications
Navigation
Entertainment
Mobility
The individual vehicle
When purchasing your BMW, you have decided
in favor of a model with individualized equip-
ment and features. This Owner's Manual
describes the entire array of options and equip-
ment available with a specific BMW model.
Please bear in mind that the manual may con-
tain information on accessories and equipment
that you have not specified for your own vehicle.
Sections describing options and special equip-
ment are marked by asterisks
* to assist you in
identifying possible differences between the
descriptions in this manual and your own vehi-
cle's equipment.
If equipment in your BMW is not described in
this Owner's Manual, please refer to the accom-
panying Supplementary Owner's Manuals.
Editorial notice
BMW pursues a policy of continuous, ongoing
development that is conceived to ensure that
our vehicles continue to embody the highest
quality and safety standards combined with
advanced, state-of-the-art technology. For this
reason, it is possible that the features described
in this Owner's Manual could differ from those
on your vehicle.
For your own safety
Maintenance and repairs
Advanced technology, e.g. the use of
modern materials and high-performance
electronics, requires specially adapted mainte-
nance and repair methods. Therefore, have cor-
responding work on your BMW performed only
by your BMW Sports Activity Vehicle Center or
a workshop that works according to BMW
repair procedures with correspondingly trained
personnel. If this work is not carried out prop-
erly, there is a danger of subsequent damage
and related safety hazards.<
Parts and accessories
For your own safety, use genuine parts
and accessories approved by BMW.
When you purchase accessories tested and
approved by BMW and Genuine BMW Parts,
you simultaneously acquire the assurance that
they have been thoroughly tested by BMW to
ensure optimum performance when installed
on your vehicle.
BMW warrants these parts to be free from
defects in material and workmanship.
BMW will not accept any liability for damage
resulting from installation of parts and accesso-
ries not approved by BMW.
BMW cannot test every product made by other
manufacturers to verify if it can be used on a
BMW safely and without risk to either the vehi-
cle, its operation or its occupants.
Genuine BMW Parts, BMW Accessories and
other products approved by BMW, together
with professional advice on using these items,
are available from all BMW Sports Activity Vehi-
cle Centers.
Installation and operation of non-BMW
approved accessories such as alarms, radios,
amplifiers, radar detectors, wheels, suspension
components, brake dust shields, telephones,
including operation of any mobile phone from
within the vehicle without using an externally
mounted antenna, or transceiver equipment
such as CBs, walkie-talkies, ham radios, or sim-
ilar accessories may cause extensive damage
to the vehicle, compromise its safety, interfere
with the vehicle's electrical system or affect the
validity of the BMW Limited Warranty. Refer to
your BMW Sports Activity Vehicle Center for
additional information.<
Maintenance, replacement, or repair of
the emission control devices and sys-
tems may be performed by any automotive
repair establishment or individual using any cer-
tified automotive part.<
ba8_e70ag.book Seite 5 Freitag, 5. Juni 2009 11:42 11
Page 40 of 300
Opening and closing
38 Separate switches for the rear windows are
located in the rear.
For information on using convenience opera-
tion at the door lock or with the remote control,
refer to page28 or29.
For information on comfort closing with comfort
access, refer to page36.
After switching off ignition
You can still operate the windows with the
remote control removed or the ignition
switched off for approx. 1 minute, as long as
neither of the front doors has been opened.
Pinch protection system
If the closing force rises beyond a predefined
threshold during closing, the system will stop
moving the window prior to lowering it again
slightly.
Despite the pinch protection system,
inspect the window's travel path prior to
closing it, as the safety system might fail to
detect certain kinds of obstructions, such as
thin objects, and the window would continue
closing.
Do not install any accessories in the range of
movement of the windows, otherwise the pinch
protection system will be impaired.<
Closing without pinch protection
system
In case of danger from outside or if, for example,
ice on the window prevents normal closing, pro-
ceed as follows:
1.Pull the switch beyond the resistance point
and hold. The pinch protection system is
limited and the window opens slightly if the
closing force exceeds a certain value.
2.Pull the switch beyond the resistance point
and hold again within approx. 4 seconds.
The window closes without the pinch pro-
tection system.
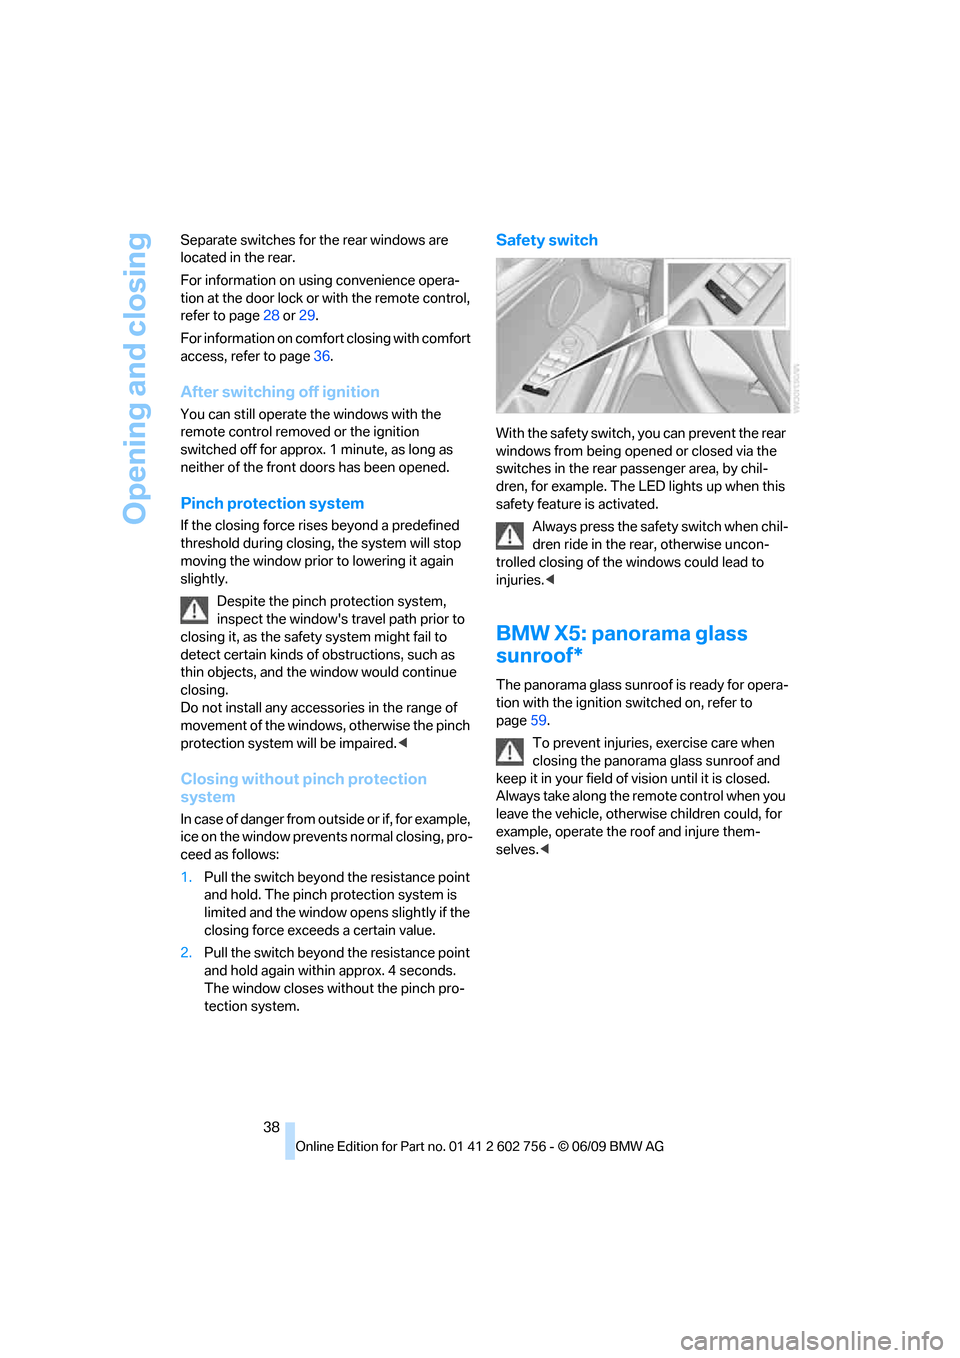
Safety switch
With the safety switch, you can prevent the rear
windows from being opened or closed via the
switches in the rear passenger area, by chil-
dren, for example. The LED lights up when this
safety feature is activated.
Always press the safety switch when chil-
dren ride in the rear, otherwise uncon-
trolled closing of the windows could lead to
injuries.<
BMW X5: panorama glass
sunroof*
The panorama glass sunroof is ready for opera-
tion with the ignition switched on, refer to
page59.
To prevent injuries, exercise care when
closing the panorama glass sunroof and
keep it in your field of vision until it is closed.
Always take along the remote control when you
leave the vehicle, otherwise children could, for
example, operate the roof and injure them-
selves.<
ba8_e70ag.book Seite 38 Freitag, 5. Juni 2009 11:42 11
Page 48 of 300
Adjusting
46 3.Press the button:
The LED in the button lights up.
4.Press the desired memory button1 or2:
the LED goes out.
The positions of the driver's seat, the exte-
rior mirrors, and steering wheel are stored
for the remote control currently in use.
Activating
Do not activate the memory function
while the vehicle is moving. There is a risk
of accident from unexpected movement of the
seat or steering wheel.<
Comfort mode
1.After unlocking, open the driver's door or
switch on radio readiness, refer to page59.
2.Briefly press the desired memory button1
or 2.
The adjusting procedure is canceled if you
briefly press a seat-adjusting switch or one of
the memory buttons.
Safety feature
1.Close the driver's door and switch the igni-
tion on or off, refer to page59.
2.Press the desired memory button1 or2
and maintain pressure until the adjustment
process has been completed.
If the button was pressed inadvertently:
press the button again; the LED goes out.
Activating with the remote control
The driver's seat position last set is stored for
the remote control currently in use.
You can select whether or not the seat is reset
to that position automatically.
When using this feature, always make
sure that the footwell behind the driver's
seat is empty and unobstructed. Failure to do
so could cause injury to persons or damage to
objects behind the seat as a result of a rearward
movement of the seat.
the memory buttons.
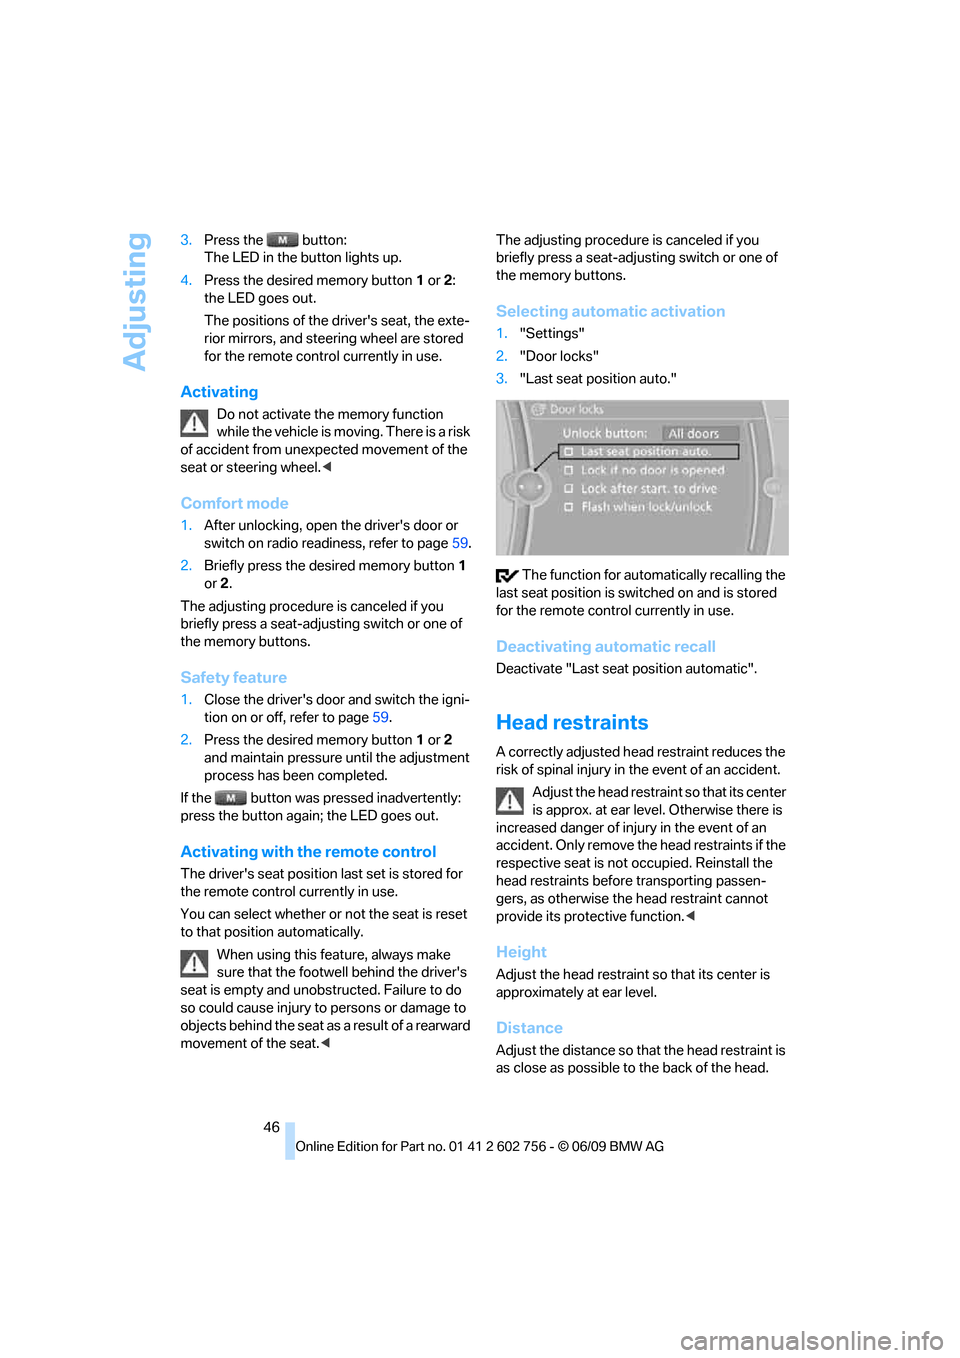
Selecting automatic activation
1."Settings"
2."Door locks"
3."Last seat position auto."
The function for automatically recalling the
last seat position is switched on and is stored
for the remote control currently in use.
Deactivating automatic recall
Deactivate "Last seat position automatic".
Head restraints
A correctly adjusted head restraint reduces the
risk of spinal injury in the event of an accident.
Adjust the head restraint so that its center
is approx. at ear level. Otherwise there is
increased danger of injury in the event of an
accident. Only remove the head restraints if the
respective seat is not occupied. Reinstall the
head restraints before transporting passen-
gers, as otherwise the head restraint cannot
provide its protective function.<
Height
Adjust the head restraint so that its center is
approximately at ear level.
Distance
Adjust the distance so that the head restraint is
as close as possible to the back of the head.
ba8_e70ag.book Seite 46 Freitag, 5. Juni 2009 11:42 11
Page 49 of 300
Controls
47Reference
At a glance
Driving tips
Communications
Navigation
Entertainment
Mobility
Active front head restraints
In the event of a rear-end collision of sufficient
severity, the active head restraint reduces the
distance to the head.
Do not use seat covers or head restraint
covers that could impede the proper
functioning of the active head restraint. Other-
wise, there is no assurance that the active head
restraint will perform its protective function and
it is not possible to take advantage of its injury-
reducing potential in the event of a rear-end
collision.
Have the active head restraints reset after they
are triggered in a rear-end collision. Have this
work carried out only at a BMW Sports Activity
Vehicle Center or at a workshop that works
according to BMW repair procedures with cor-
respondingly trained personnel. Otherwise,
correct operation of this safety equipment is not
guaranteed.<
Removal and installation of the front head
restraints should be performed by a BMW
Sports Activity Vehicle Center.<
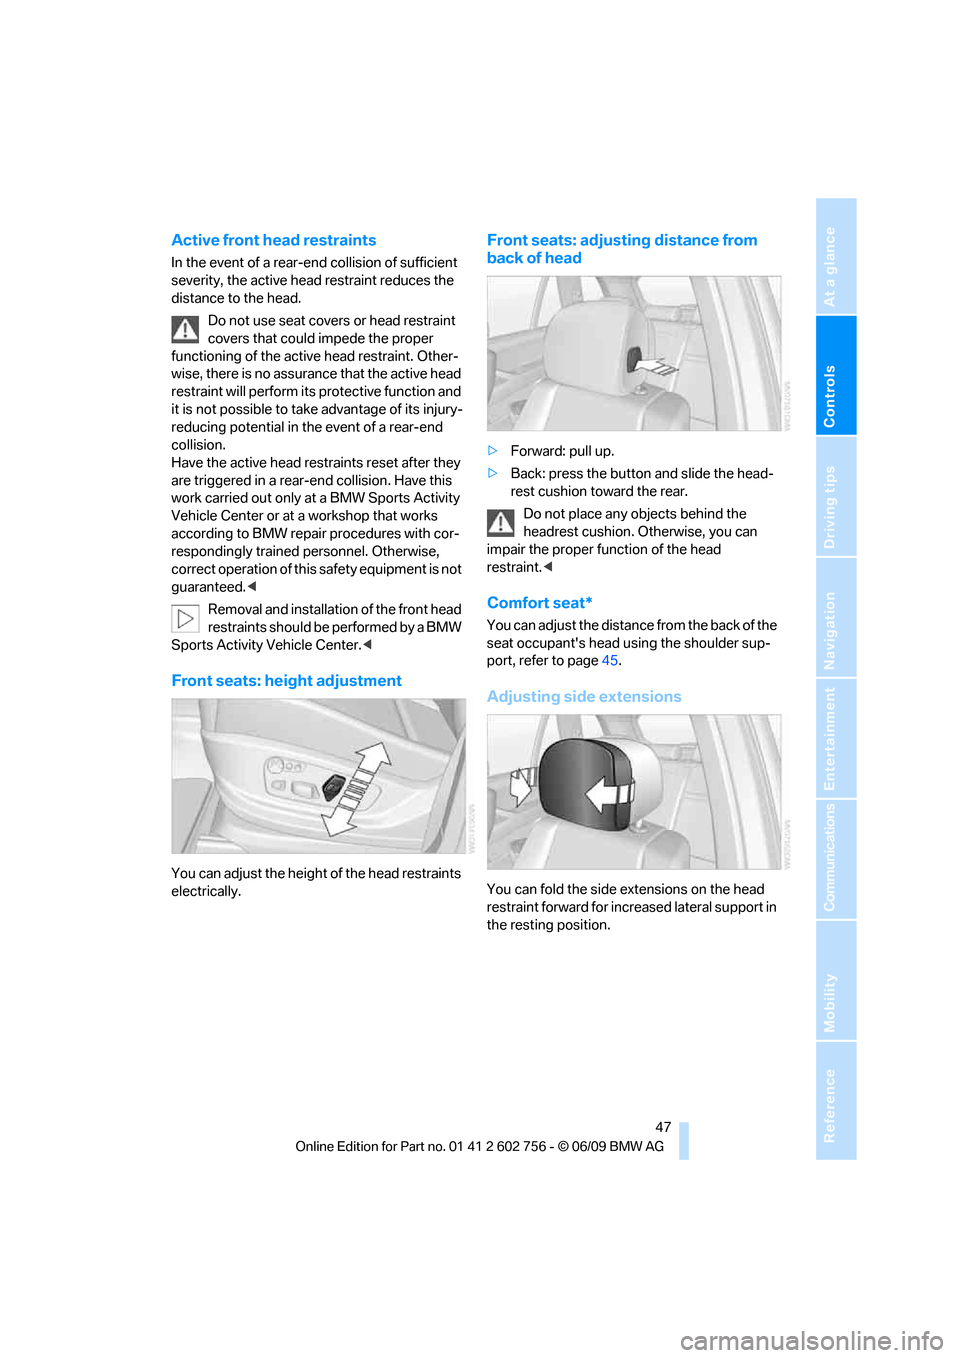
Front seats: height adjustment
You can adjust the height of the head restraints
electrically.
Front seats: adjusting distance from
back of head
>Forward: pull up.
>Back: press the button and slide the head-
rest cushion toward the rear.
Do not place any objects behind the
headrest cushion. Otherwise, you can
impair the proper function of the head
restraint.<
Comfort seat*
You can adjust the distance f r o m t h e b a c k o f t h e
seat occupant's head using the shoulder sup-
port, refer to page45.
Adjusting side extensions
You can fold the side extensions on the head
restraint forward for increased lateral support in
the resting position.
ba8_e70ag.book Seite 47 Freitag, 5. Juni 2009 11:42 11
Page 57 of 300
Controls
55Reference
At a glance
Driving tips
Communications
Navigation
Entertainment
Mobility
Transporting children safely
The right place for children
Do not leave children unattended in the
vehicle, otherwise they could endanger
themselves and other persons, e.g. by opening
the doors.<
Children always in rear
Accident research shows that the safest place
for children is on the rear seat.
Children younger than 13 years of age or
with a height under 5 ft/150 cm may only
be transported on the 2nd row seats in child
restraint devices which correspond to the age,
weight and height of the child. Otherwise there
is an increased danger of injury in an accident.<
Children 13 years of age or older must wear a
safety belt as soon as a suitable child restraint
device can no longer be used due to their age,
weight and size.
Exception for front passenger seat
Should it be necessary to use a child
restraint device on the front passenger
seat, the front and side airbags on the passen-
ger side must be deactivated. Otherwise, there
is an increased risk of injury for the child if the
airbags are triggered, even with a child restraint
device.<
For more information on automatic deactivation
of the front passenger airbags, refer to page98.
Installing child restraint
devices
Follow the child restraint device manufac-
turer's instructions for selection, installa-
tion, and use of child restraint devices. Other-
wise, the degree of protection may be
reduced.
*, make sure that the seat of the 2nd
row seats on which the child restraint device is
mounted is properly locked. Otherwise there is
an increased risk of injury for the child in an
accident.
Do not mount child restraint devices on the
3rd row seats, as otherwise the protection pro-
vided by these child restraint devices may be
reduced.<
BMW X5: before mounting a child restraint
device in the center seat of the 2nd row seats,
move the outer seat cushions and backrests
into the rearmost positions.
On front passenger seat
After mounting a child restraint device on
the front passenger seat, make sure that
the front and side airbags on the front passen-
ger side are deactivated; otherwise, there is an
increased risk of injury if the airbags are trig-
gered.<
Seat position
Before installing a child restraint device, move
the passenger seat into the furthest back and
highest
* position in order to achieve the best
possible safety belt position. Do not change the
seat position after this.
Backrest width*
The backrest width adjustment of the
front passenger seat must be completely
open. After installing the child's seat, no mem-
ory position may be called up; otherwise, the
stability of the child's seat on the front passen-
ger seat is reduced.<
1.Open backrest width adjustment com-
pletely, refer to page45.
2.Install child's seat.
ba8_e70ag.book Seite 55 Freitag, 5. Juni 2009 11:42 11
Page 58 of 300
Transporting children safely
56
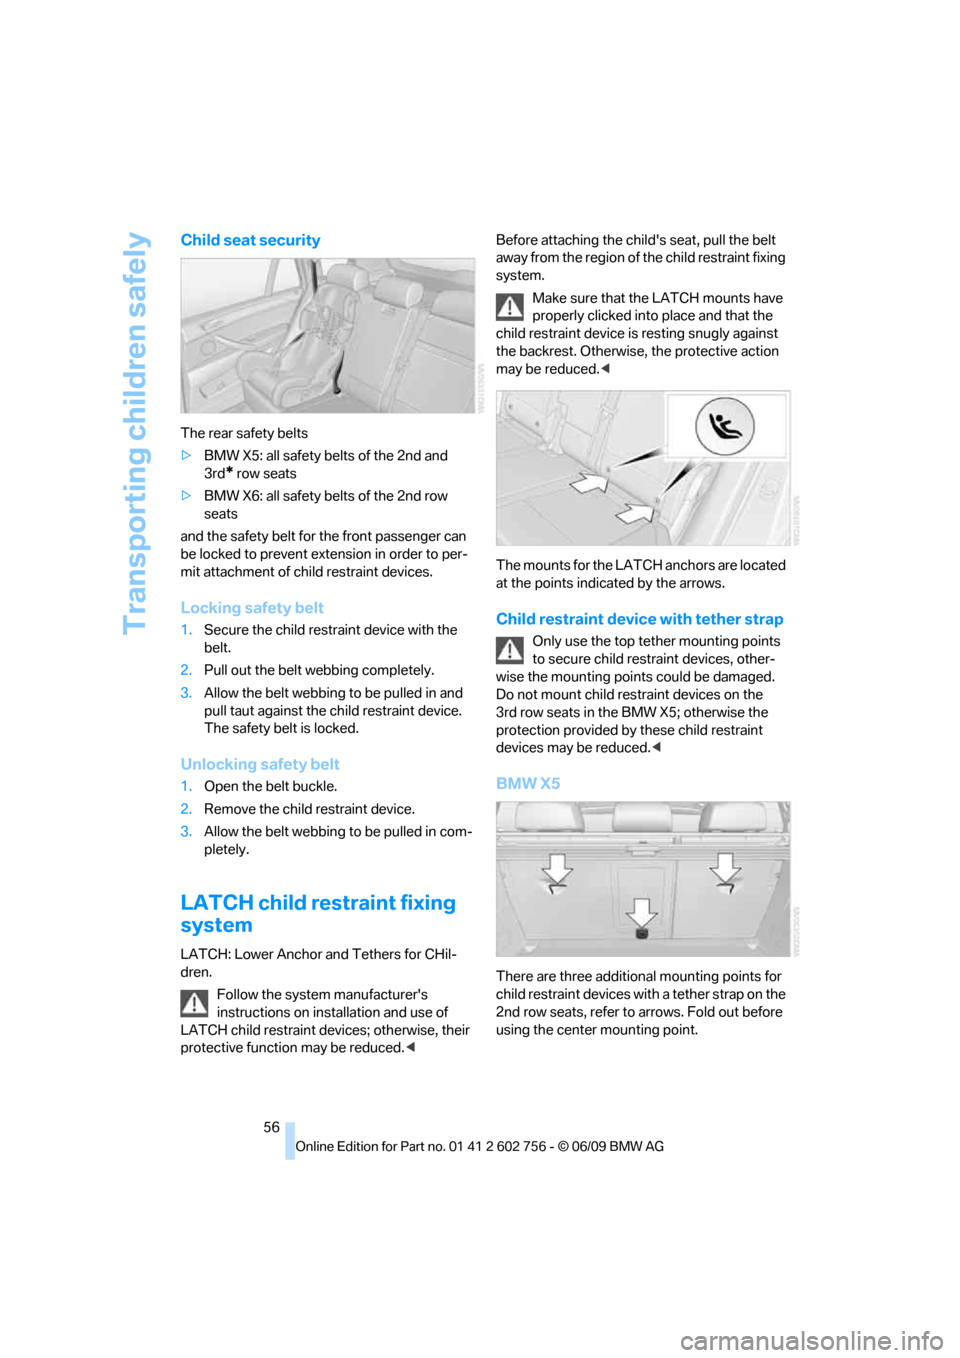
Child seat security
The rear safety belts
>BMW X5: all safety belts of the 2nd and
3rd
* row seats
>BMW X6: all safety belts of the 2nd row
seats
and the safety belt for the front passenger can
be locked to prevent extension in order to per-
mit attachment of child restraint devices.
Locking safety belt
1.Secure the child restraint device with the
belt.
2.Pull out the belt webbing completely.
3.Allow the belt webbing to be pulled in and
pull taut against the child restraint device.
The safety belt is locked.
Unlocking safety belt
1.Open the belt buckle.
2.Remove the child restraint device.
3.Allow the belt webbing to be pulled in com-
pletely.
LATCH child restraint fixing
system
LATCH: Lower Anchor and Tethers for CHil-
dren.
Follow the system manufacturer's
instructions on installation and use of
LATCH child restraint devices; otherwise, their
protective function may be reduced.
system.
Make sure that the LATCH mounts have
properly clicked into place and that the
child restraint device is resting snugly against
the backrest. Otherwise, the protective action
may be reduced.<
The mounts for the LATCH anchors are located
at the points indicated by the arrows.
Child restraint device with tether strap
Only use the top tether mounting points
to secure child restraint devices, other-
wise the mounting points could be damaged.
Do not mount child restraint devices on the
3rd row seats in the BMW X5; otherwise the
protection provided by these child restraint
devices may be reduced.<
BMW X5
There are three additional mounting points for
child restraint devices with a tether strap on the
2nd row seats, refer to arrows. Fold out before
using the center mounting point.
ba8_e70ag.book Seite 56 Freitag, 5. Juni 2009 11:42 11
Page 98 of 300
Technology for comfort, convenience and safety
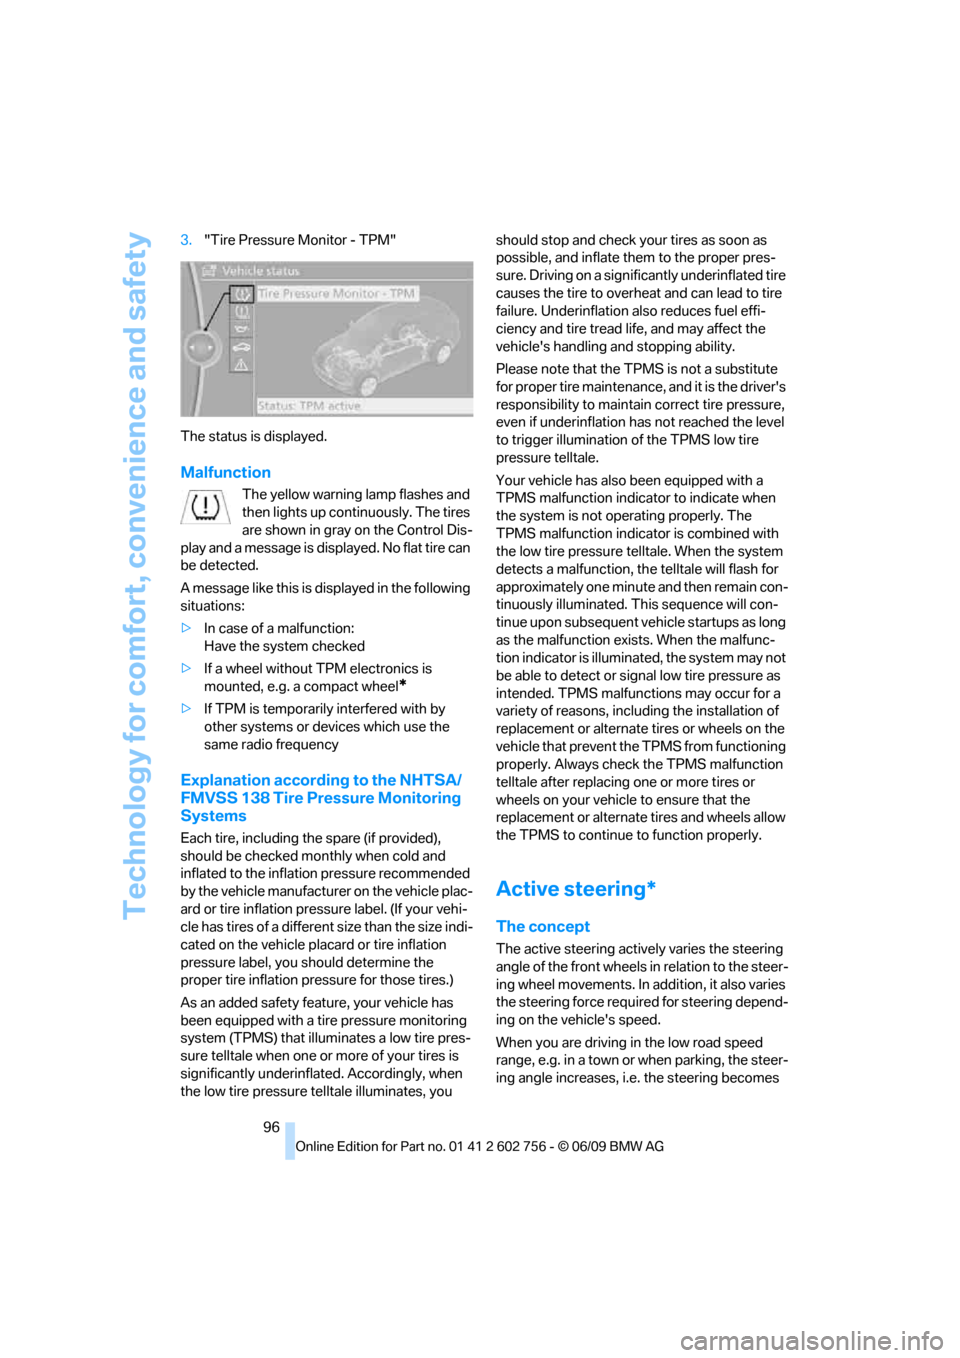
96 3."Tire Pressure Monitor - TPM"
The status is displayed.
Malfunction
The yellow warning lamp flashes and
then lights up continuously. The tires
are shown in gray on the Control Dis-
play and a message is displayed. No flat tire can
be detected.
A message like this is displayed in the following
situations:
>In case of a malfunction:
Have the system checked
>If a wheel without TPM electronics is
mounted, e.g. a compact wheel
*
>If TPM is temporarily interfered with by
other systems or devices which use the
same radio frequency
Explanation according to the NHTSA/
FMVSS 138 Tire Pressure Monitoring
Systems
Each tire, including the spare (if provided),
should be checked monthly when cold and
inflated to the inflation pressure recommended
by the vehicle manufacturer on the vehicle plac-
ard or tire inflation pressure label. (If your vehi-
cle has tires of a different size than the size indi-
cated on the vehicle placard or tire inflation
pressure label, you should determine the
proper tire inflation pressure for those tires.)
As an added safety feature, your vehicle has
been equipped with a tire pressure monitoring
system (TPMS) that illuminates a low tire pres-
sure telltale when one or more of your tires is
significantly underinflated. Accordingly, when
the low tire pressure telltale illuminates, you should stop and check your tires as soon as
possible, and inflate them to the proper pres-
sure. Driving on a significantly underinflated tire
causes the tire to overheat and can lead to tire
failure. Underinflation also reduces fuel effi-
ciency and tire tread life, and may affect the
vehicle's handling and stopping ability.
Please note that the TPMS is not a substitute
for proper tire maintenance, and it is the driver's
responsibility to maintain correct tire pressure,
even if underinflation has not reached the level
to trigger illumination of the TPMS low tire
pressure telltale.
Your vehicle has also been equipped with a
TPMS malfunction indicator to indicate when
the system is not operating properly. The
TPMS malfunction indicator is combined with
the low tire pressure telltale. When the system
detects a malfunction, the telltale will flash for
approximately one minute and then remain con-
tinuously illuminated. This sequence will con-
tinue upon subsequent vehicle startups as long
as the malfunction exists. When the malfunc-
tion indicator is illuminated, the system may not
be able to detect or signal low tire pressure as
intended. TPMS malfunctions may occur for a
variety of reasons, including the installation of
replacement or alternate tires or wheels on the
vehicle that prevent the TPMS from functioning
properly. Always check the TPMS malfunction
telltale after replacing one or more tires or
wheels on your vehicle to ensure that the
replacement or alternate tires and wheels allow
the TPMS to continue to function properly.
Active steering*
The concept
The active steering actively varies the steering
angle of the front wheels in relation to the steer-
ing wheel movements. In addition, it also varies
the steering force required for steering depend-
ing on the vehicle's speed.
When you are driving in the low road speed
range, e.g. in a town or when parking, the steer-
ing angle increases, i.e. the steering becomes
ba8_e70ag.book Seite 96 Freitag, 5. Juni 2009 11:42 11
Page 100 of 300
Technology for comfort, convenience and safety
98
Airbags
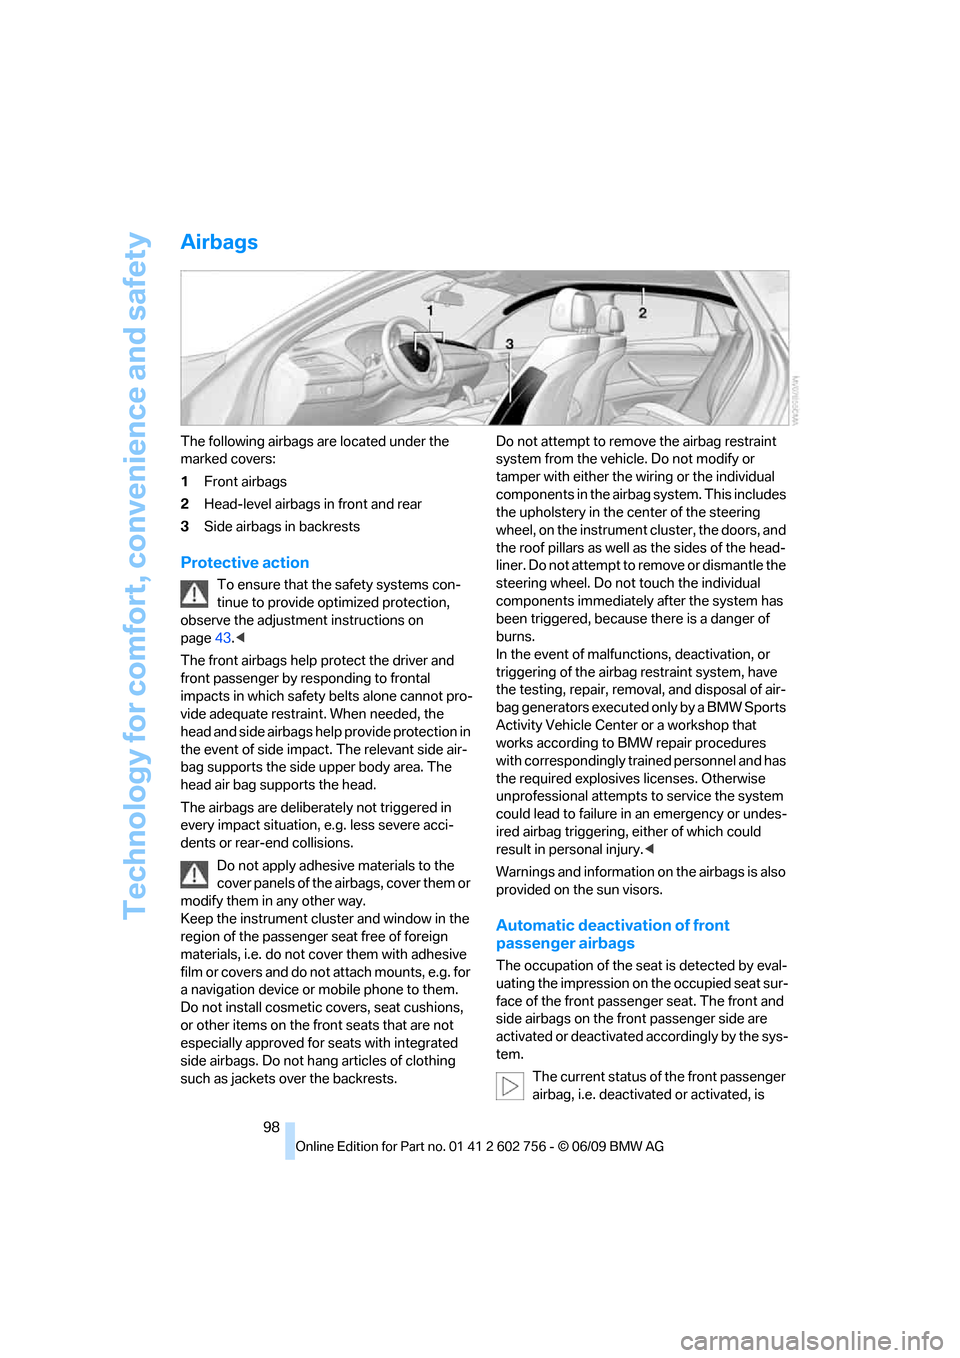
The following airbags are located under the
marked covers:
1Front airbags
2Head-level airbags in front and rear
3Side airbags in backrests
Protective action
To ensure that the safety systems con-
tinue to provide optimized protection,
observe the adjustment instructions on
page43.<
The front airbags help protect the driver and
front passenger by responding to frontal
impacts in which safety belts alone cannot pro-
vide adequate restraint. When needed, the
head and side airbags help provide protection in
the event of side impact. The relevant side air-
bag supports the side upper body area. The
head air bag supports the head.
The airbags are deliberately not triggered in
every impact situation, e.g. less severe acci-
dents or rear-end collisions.
Do not apply adhesive materials to the
cover panels of the airbags, cover them or
modify them in any other way.
Keep the instrument cluster and window in the
region of the passenger seat free of foreign
materials, i.e. do not cover them with adhesive
film or covers and do not attach mounts, e.g. for
a navigation device or mobile phone to them.
Do not install cosmetic covers, seat cushions,
or other items on the front seats that are not
especially approved for seats with integrated
side airbags. Do not hang articles of clothing
such as jackets over the backrests.Do not attempt to remove the airbag restraint
system from the vehicle. Do not modify or
tamper with either the wiring or the individual
components in the airbag system. This includes
the upholstery in the center of the steering
wheel, on the instrument cluster, the doors, and
the roof pillars as well as the sides of the head-
liner. Do not attempt to remove or dismantle the
steering wheel. Do not touch the individual
components immediately after the system has
been triggered, because there is a danger of
burns.
In the event of malfunctions, deactivation, or
triggering of the airbag restraint system, have
the testing, repair, removal, and disposal of air-
bag generators executed only by a BMW Sports
Activity Vehicle Center or a workshop that
works according to BMW repair procedures
with correspondingly trained personnel and has
the required explosives licenses. Otherwise
unprofessional attempts to service the system
could lead to failure in an emergency or undes-
ired airbag triggering, either of which could
result in personal injury.<
Warnings and information on the airbags is also
provided on the sun visors.
Automatic deactivation of front
passenger airbags
The occupation of the seat is detected by eval-
uating the impression on the occupied seat sur-
face of the front passenger seat. The front and
side airbags on the front passenger side are
activated or deactivated accordingly by the sys-
tem.
The current status of the front passenger
airbag, i.e. deactivated or activated, is
ba8_e70ag.book Seite 98 Freitag, 5. Juni 2009 11:42 11
Page 101 of 300
Controls
99Reference
At a glance
Driving tips
Communications
Navigation
Entertainment
Mobility
indicated by the indicator lamp over the interior
rearview mirror, refer to Operating state of front
passenger airbags in the following.<
Before transporting a child on the front
passenger seat, read the safety informa-
tion and follow the instructions under Trans-
porting children safely, refer to page55.
When teenagers and adults assume certain sit-
ting positions, this can cause the front and side
airbags to deactivate. The indicator lamp for the
front passenger airbags lights up when this
occurs. In these cases, change the sitting posi-
tion so that the front passenger airbags are acti-
vated and the indicator lamp goes out. If the
desired status cannot be produced by changing
the sitting position, transport the correspond-
ing person on the rear seat. Do not fit seat cov-
ers, seat cushion padding, ball mats or other
items onto the front passenger seat unless they
are specifically recommended by BMW. Do not
lay objects under the seat which could press
against the seat from below. Otherwise a cor-
rect evaluation of the occupied seat surface
cannot be ensured.<
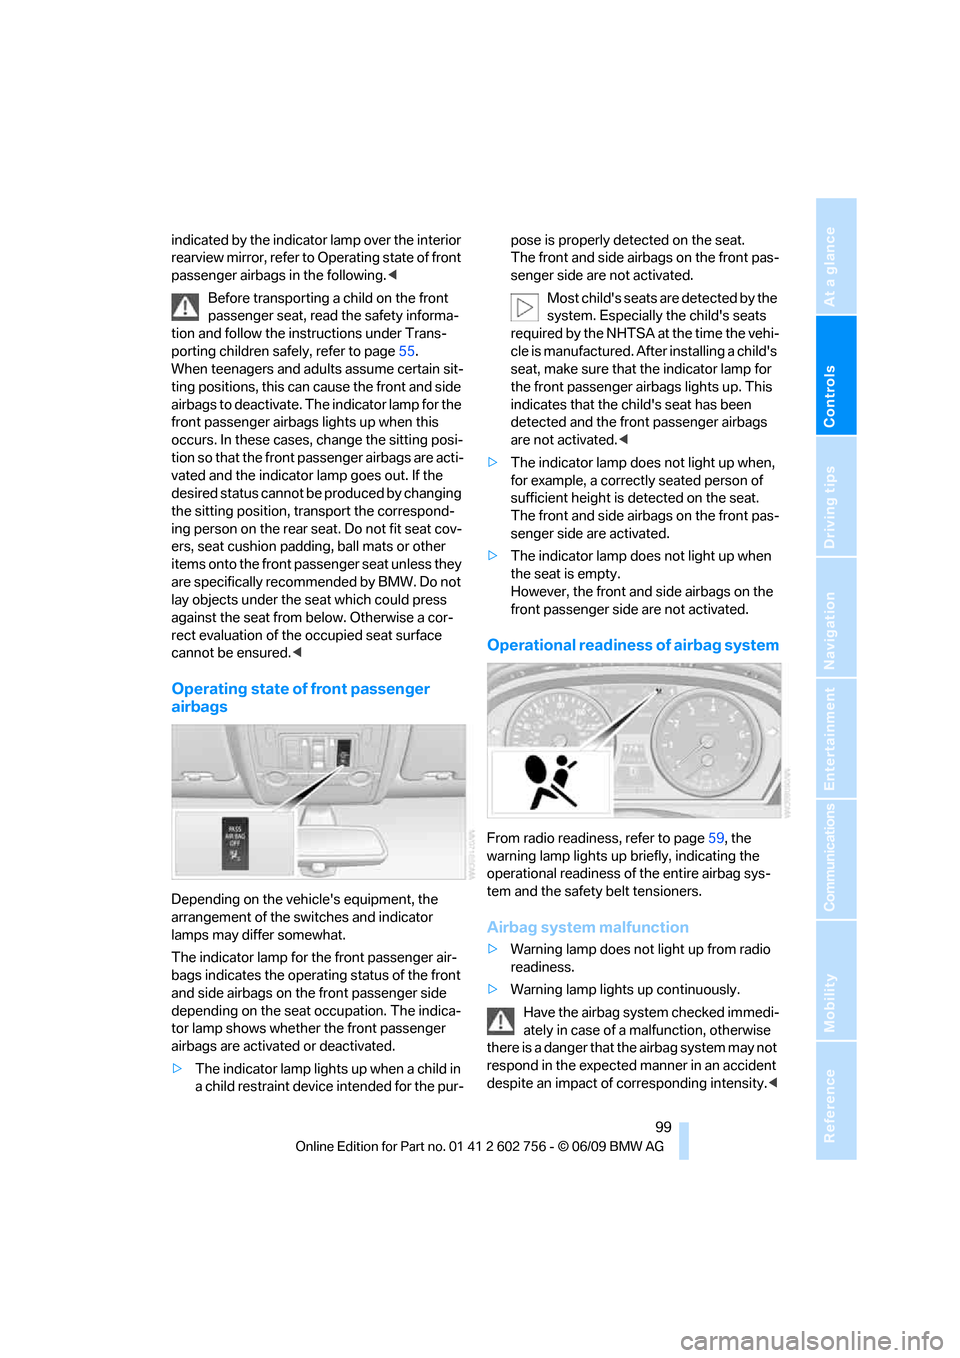
Operating state of front passenger
airbags
Depending on the vehicle's equipment, the
arrangement of the switches and indicator
lamps may differ somewhat.
The indicator lamp for the front passenger air-
bags indicates the operating status of the front
and side airbags on the front passenger side
depending on the seat occupation. The indica-
tor lamp shows whether the front passenger
airbags are activated or deactivated.
>The indicator lamp lights up when a child in
a child restraint device intended for the pur-pose is properly detected on the seat.
The front and side airbags on the front pas-
senger side are not activated.
Most child's seats are detected by the
system. Especially the child's seats
required by the NHTSA at the time the vehi-
cle is manufactured. After installing a child's
seat, make sure that the indicator lamp for
the front passenger airbags lights up. This
indicates that the child's seat has been
detected and the front passenger airbags
are not activated.<
>The indicator lamp does not light up when,
for example, a correctly seated person of
sufficient height is detected on the seat.
The front and side airbags on the front pas-
senger side are activated.
>The indicator lamp does not light up when
the seat is empty.
However, the front and side airbags on the
front passenger side are not activated.
Operational readiness of airbag system
From radio readiness, refer to page59, the
warning lamp lights up briefly, indicating the
operational readiness of the entire airbag sys-
tem and the safety belt tensioners.
Airbag system malfunction
>Warning lamp does not light up from radio
readiness.
>Warning lamp lights up continuously.
Have the airbag system checked immedi-
ately in case of a malfunction, otherwise
there is a danger that the airbag system may not
respond in the expected manner in an accident
despite an impact of corresponding intensity.<
ba8_e70ag.book Seite 99 Freitag, 5. Juni 2009 11:42 11
Page 125 of 300
Controls
123Reference
At a glance
Driving tips
Communications
Navigation
Entertainment
Mobility
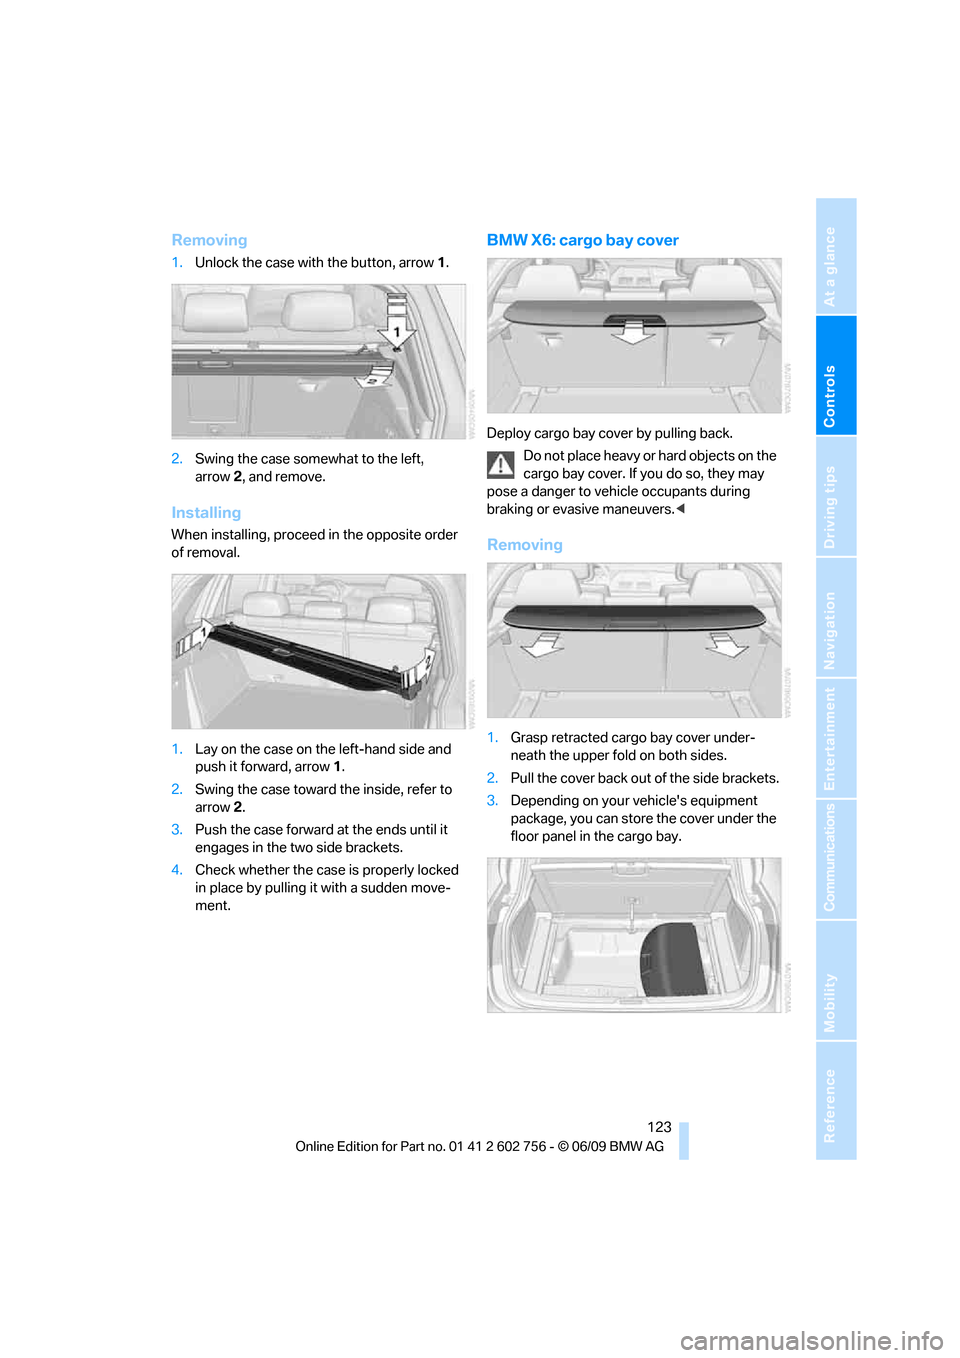
Removing
1.Unlock the case with the button, arrow1.
2.Swing the case somewhat to the left,
arrow2, and remove.
Installing
When installing, proceed in the opposite order
of removal.
1.Lay on the case on the left-hand side and
push it forward, arrow1.
2.Swing the case toward the inside, refer to
arrow2.
3.Push the case forward at the ends until it
engages in the two side brackets.
4.Check whether the case is properly locked
in place by pulling it with a sudden move-
ment.
BMW X6: cargo bay cover
Deploy cargo bay cover by pulling back.
Do not place heavy or hard objects on the
cargo bay cover. If you do so, they may
pose a danger to vehicle occupants during
braking or evasive maneuvers.<
Removing
1.Grasp retracted cargo bay cover under-
neath the upper fold on both sides.
2.Pull the cover back out of the side brackets.
3.Depending on your vehicle's equipment
package, you can store the cover under the
floor panel in the cargo bay.
ba8_e70ag.book Seite 123 Freitag, 5. Juni 2009 11:42 11