diff BMW X5 2014 F15 User Guide
[x] Cancel search | Manufacturer: BMW, Model Year: 2014, Model line: X5, Model: BMW X5 2014 F15Pages: 265, PDF Size: 6.2 MB
Page 121 of 265
The braking intervention is executed only if
DSC Dynamic Stability Control is switched on
and Dynamic Traction Control DTC is acti‐
vated.
The braking intervention can be interrupted by
pressing on the accelerator pedal or by actively
moving the steering wheel.
Tow-starting and towing
When tow-starting and towing the vehi‐
cle, switch off the Intelligent Safety systems;
otherwise, improper behavior of the braking
function of individual systems could result in
an accident.◀
System limits Be alert
Due to system limitations, warnings may
be not be issued at all, or may be issued late or
improperly. Therefore, always be alert and
ready to intervene; otherwise, there is the dan‐
ger of an accident occurring.◀
Detection range
The detection capability of the camera is lim‐
ited.
This may result in the warning not being is‐
sued or being issued late.
For example, the following situations may not
be detected:▷Partially covered pedestrians.▷Pedestrians that are not detected as such
because of the viewing angle or contour.▷Pedestrians outside of the detection range.▷Pedestrians having a body size less than
32 in/80 cm.
Functional limitations
The system may not be fully functional or may
not be available in the following situations:
▷In heavy fog, rain, sprayed water or snow‐
fall.▷In tight curves.▷If the camera view field or the front wind‐
shield are dirty or covered.▷When driving toward bright lights.▷Up to 10 seconds after the start of the en‐
gine, via the Start/Stop knob.▷During calibration of the camera immedi‐
ately after vehicle shipment.▷When it is dark outside.
Night Vision with Pedestrian
and Animal Detection
The concept Night Vision with pedestrian and animal detec‐
tion is a night vision system.
An infrared camera records the area in front of
the vehicle and issues a warning if it detects
pedestrians and animals on the street. Warm
objects that are similar in shape to human be‐
ings or animals are detected by the system. If necessary, the heat image can be displayed on
the Control Display.
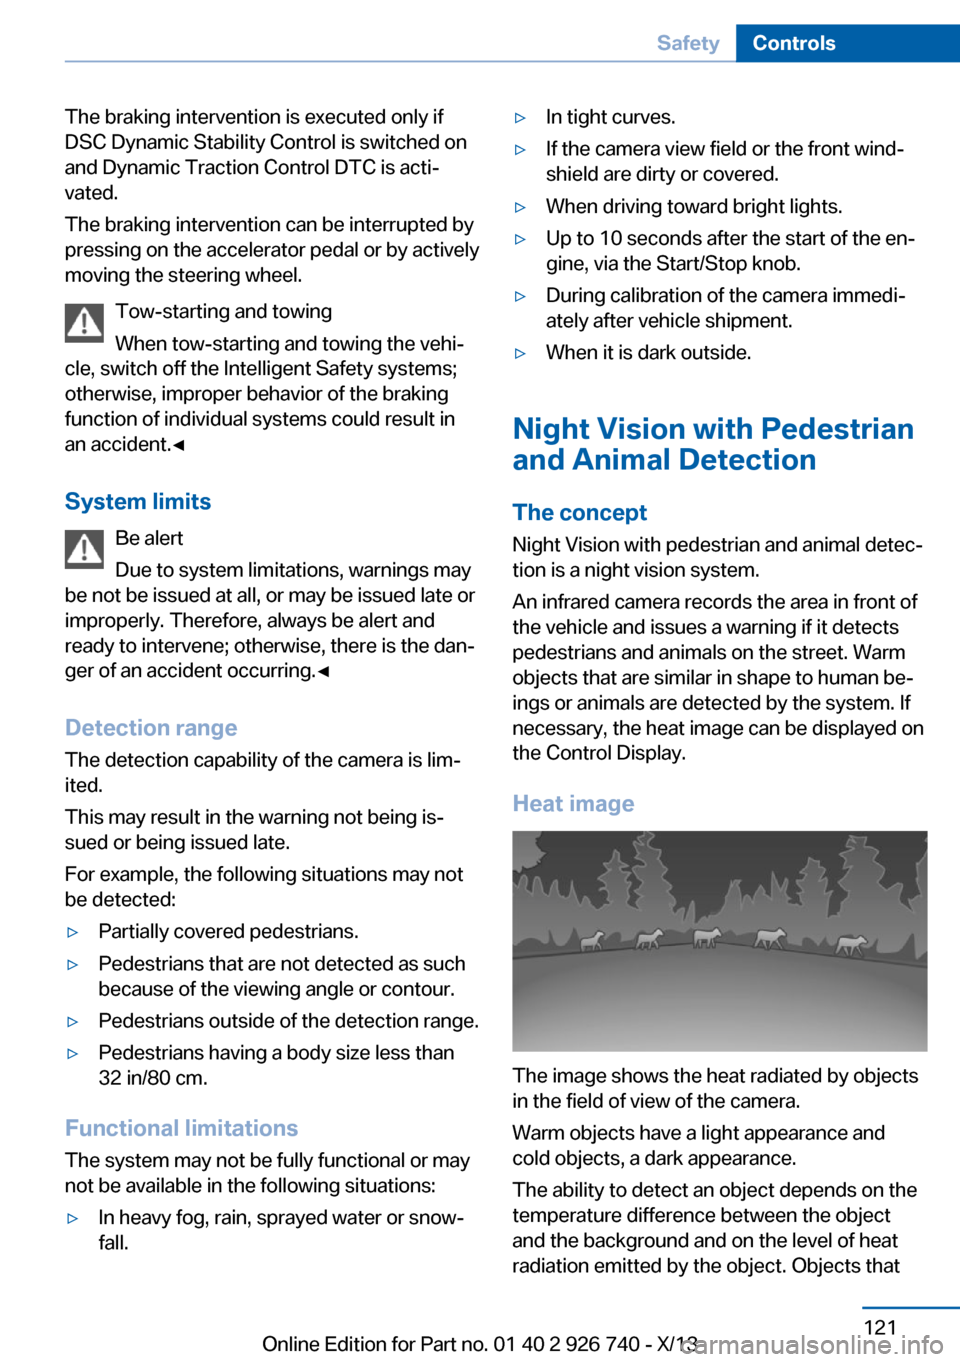
Heat image
The image shows the heat radiated by objects
in the field of view of the camera.
Warm objects have a light appearance and
cold objects, a dark appearance.
The ability to detect an object depends on the
temperature difference between the object
and the background and on the level of heat
radiation emitted by the object. Objects that
Seite 121SafetyControls121
Online Edition for Part no. 01 40 2 926 740 - X/13
Page 122 of 265
are similar in temperature to the environment
or that radiate very little heat are difficult to de‐
tect.
For safety reasons, when driving at speeds
above approx. 3 mph/5 km/h and in low ambi‐
ent light, the image is only displayed when the
low beams are switched on.
A still image is displayed at regular intervals for
a fraction of a second.
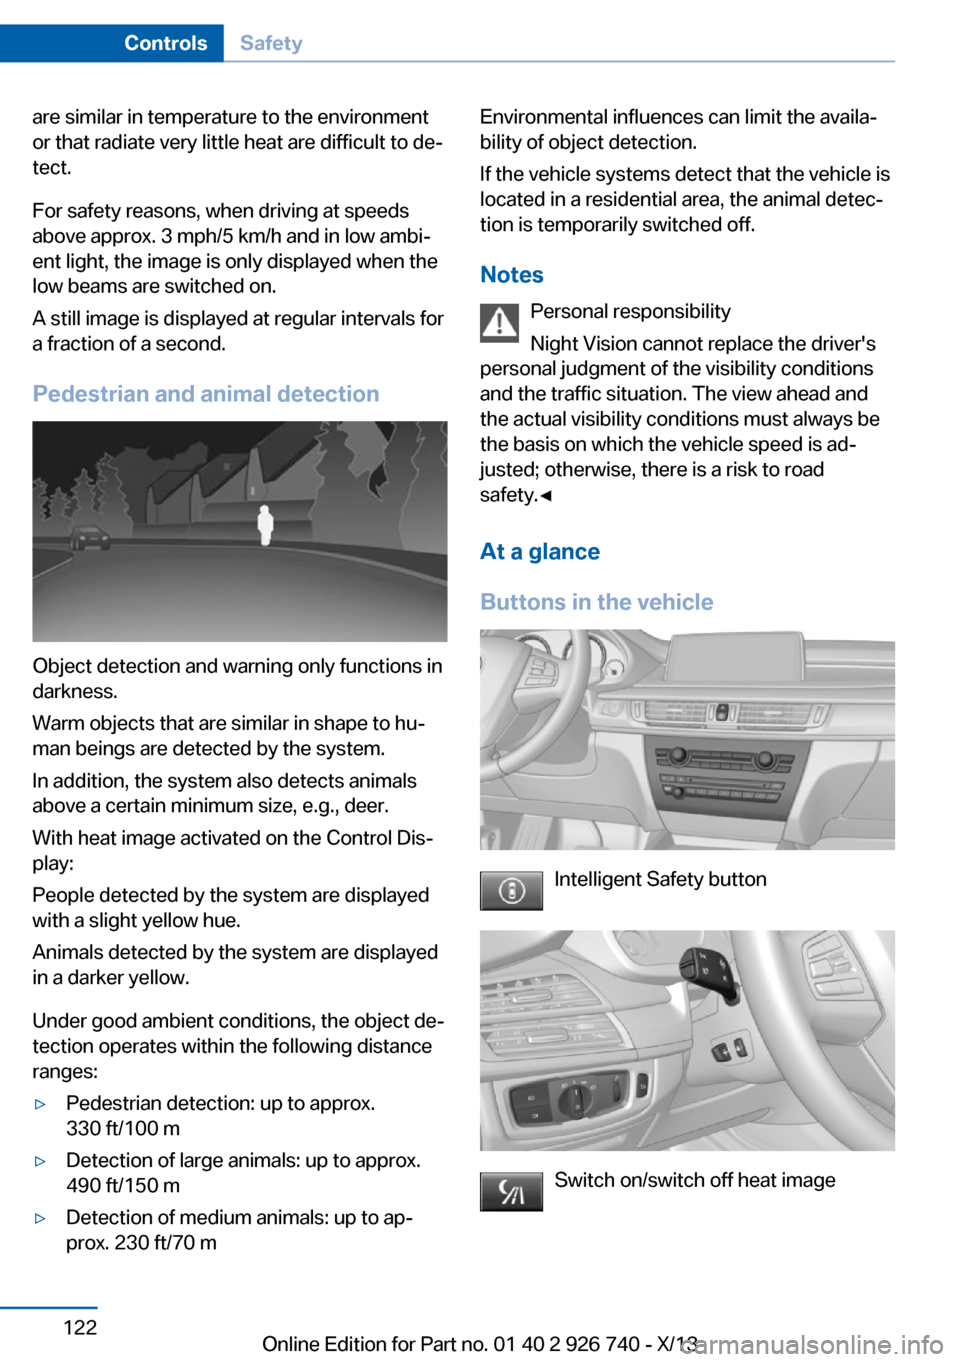
Pedestrian and animal detection
Object detection and warning only functions in
darkness.
Warm objects that are similar in shape to hu‐
man beings are detected by the system.
In addition, the system also detects animals
above a certain minimum size, e.g., deer.
With heat image activated on the Control Dis‐
play:
People detected by the system are displayed
with a slight yellow hue.
Animals detected by the system are displayed
in a darker yellow.
Under good ambient conditions, the object de‐
tection operates within the following distance
ranges:
▷Pedestrian detection: up to approx.
330 ft/100 m▷Detection of large animals: up to approx.
490 ft/150 m▷Detection of medium animals: up to ap‐
prox. 230 ft/70 mEnvironmental influences can limit the availa‐
bility of object detection.
If the vehicle systems detect that the vehicle is
located in a residential area, the animal detec‐
tion is temporarily switched off.
Notes Personal responsibility
Night Vision cannot replace the driver's
personal judgment of the visibility conditions
and the traffic situation. The view ahead and the actual visibility conditions must always be
the basis on which the vehicle speed is ad‐ justed; otherwise, there is a risk to road
safety.◀
At a glance
Buttons in the vehicle
Intelligent Safety button
Switch on/switch off heat image
Seite 122ControlsSafety122
Online Edition for Part no. 01 40 2 926 740 - X/13
Page 131 of 265
Driving stability control systemsVehicle equipmentAll standard, country-specific and optional
equipment that is offered in the model series is
described in this chapter. Therefore, equip‐
ment is also described that is not available in a
vehicle, e. g., because of the selected optional
equipment or country variant. This also applies
for safety-related functions and systems.
Antilock Brake System ABS ABS prevents locking of the wheels during
braking.
The vehicle remains steerable even during full
brake applications, thus increasing active
safety.
ABS is operational every time you start the en‐
gine.
Brake assistant
When you apply the brakes rapidly, this system
automatically produces the maximum braking
force boost. This then reduces braking dis‐ tance to a minimum during full braking. This
system utilizes all of the benefits provided by ABS.
Do not reduce the pressure on the brake pedal
for the duration of the full braking.
When equipped with Driving Assistant Plus or
with Active Cruise Control with Stop & Go
function, ACC is supported by the braking in‐
tervention if there is a possible risk of collision.
To do this, the braking force is automatically increased if the braking pressure is insufficient
when the brakes are applied.Drive-off assistant
This system supports driving away on gradi‐
ents. The parking brake is not required.1.Hold the vehicle in place with the foot
brake.2.Release the foot brake and drive away
without delay.
After the foot brake is released, the vehicle is
held in place for approx. 2 seconds.
Depending on the vehicle load or when a trailer
is being used, the vehicle may roll back
slightly.
Driving off without delay
After releasing the foot brake, start driv‐
ing without delay, since the drive-off assistant
will not hold the vehicle in place for more than
approx. 2 seconds and the vehicle will begin
rolling back.◀
Automatic Differential Brake
The system controls the driving force by auto‐
matic braking intervention on individual
wheels. The function corresponds to a differ‐
ential lock: the system detects if a wheel be‐
gins to spin, because of loose road surface, for
example, and automatically brakes it.
The driving force is diverted to the wheel with
better traction.
As a result, the engine force is transferred
more efficiently to the wheels during accelera‐
tions.
Seite 131Driving stability control systemsControls131
Online Edition for Part no. 01 40 2 926 740 - X/13
Page 135 of 265
At higher speeds, the steering angle is increas‐
ingly reduced.
This enables even more precise handling at
high speeds and more responsive steering
with reduced steering angle at low speeds.
Active roll stabilization
The concept The system reduces the lateral inclination of
the vehicle that occurs during rapid driving in
curves or during quick evasive maneuvers.
Driving stability and driving comfort are in‐
creased under all driving conditions. The sys‐
tem utilizes active stabilizer bars on the front
and rear axles that react immediately to all driv‐
ing situations.
Programs The system offers two different programs.
The programs can be selected via the Driving
Dynamics Control, refer to page 135.
SPORT
Sporty tuning for greater driving agility.
COMFORT
Comfort-oriented tuning for optimal comfort.
Vertical Dynamic Control The concept This system reduces undesirable vehicle mo‐
tion when using a dynamic driving style or trav‐
eling on uneven road surfaces.
The system enhances driving dynamics and
comfort as required for the road surface and
driving style.
Programs The system offers several different programs.The programs can be selected via the Driving
Dynamics Control, refer to page 135.
SPORT/SPORT+
Consistently sporty control of the shock ab‐
sorbers for greater driving agility.
COMFORT/ECO PRO Balanced tuning.
Self-leveling suspension The concept The self-leveling suspension keeps the vehicle
height and ground clearance constant. The
height of the vehicle at the rear axle is main‐
tained at a predefined level under all load con‐
ditions.
The system ensures consistent comfort by
keeping spring travel constant in all driving sit‐
uations.
Malfunction
A Check Control message is displayed. A mal‐ function has occurred in the self-leveling sus‐
pension. Vehicle handling may be altered and
driving comfort may be noticeably reduced.
Visit your nearest service center.
Driving Dynamics ControlThe concept
The Driving Dynamics Control can be used to
adjust the driving dynamics of the vehicle. For
this purpose various programs are available for
selection that are activated via the two buttons
of the Driving Dynamics Control and the DSC
OFF-button.Seite 135Driving stability control systemsControls135
Online Edition for Part no. 01 40 2 926 740 - X/13
Page 141 of 265
Speed differences
Large differences in speed relative to
other vehicles cannot be compensated by the
system for example in the following situations:▷When catching up rapidly with a truck.▷When another vehicle suddenly swerves
into the wrong lane.▷When stationary objects are approached at
speed.◀
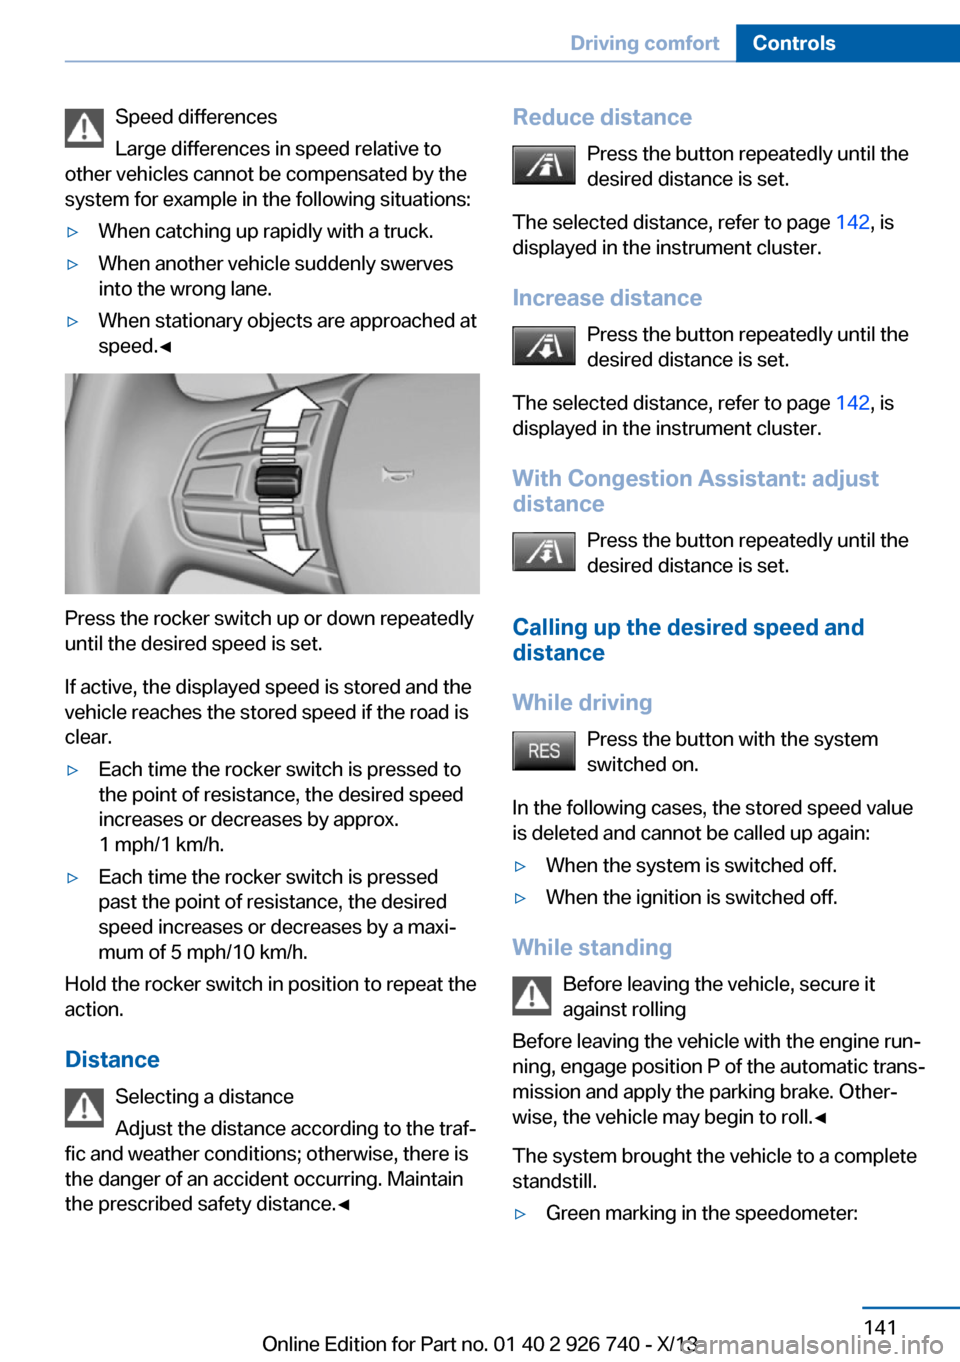
Press the rocker switch up or down repeatedly
until the desired speed is set.
If active, the displayed speed is stored and the
vehicle reaches the stored speed if the road is
clear.
▷Each time the rocker switch is pressed to
the point of resistance, the desired speed
increases or decreases by approx.
1 mph/1 km/h.▷Each time the rocker switch is pressed
past the point of resistance, the desired
speed increases or decreases by a maxi‐
mum of 5 mph/10 km/h.
Hold the rocker switch in position to repeat the
action.
Distance Selecting a distance
Adjust the distance according to the traf‐
fic and weather conditions; otherwise, there is
the danger of an accident occurring. Maintain
the prescribed safety distance.◀
Reduce distance
Press the button repeatedly until the
desired distance is set.
The selected distance, refer to page 142, is
displayed in the instrument cluster.
Increase distance Press the button repeatedly until the
desired distance is set.
The selected distance, refer to page 142, is
displayed in the instrument cluster.
With Congestion Assistant: adjust
distance
Press the button repeatedly until the
desired distance is set.
Calling up the desired speed and distance
While driving Press the button with the system
switched on.
In the following cases, the stored speed value
is deleted and cannot be called up again:▷When the system is switched off.▷When the ignition is switched off.
While standing
Before leaving the vehicle, secure it
against rolling
Before leaving the vehicle with the engine run‐
ning, engage position P of the automatic trans‐
mission and apply the parking brake. Other‐
wise, the vehicle may begin to roll.◀
The system brought the vehicle to a complete
standstill.
▷Green marking in the speedometer:Seite 141Driving comfortControls141
Online Edition for Part no. 01 40 2 926 740 - X/13
Page 143 of 265
The system was deactivated but applies the
brakes until you actively resume control by
pressing on the brake pedal or accelerator
pedal.
The vehicle symbol flashes red and an
acoustic signal sounds:
You are requested to intervene by
braking or making an evasive maneuver.
Displays in the Head-up Display The information from Active Cruise Control
can also be displayed in the Head-up Display.
Adjusting the Head-up Display, refer to
page 97.
System limits
Speed range
Best results are achieved when using the sys‐
tem on well-developed roads and highways.
The system is functional at speeds beginning
at approx. 20 mph/30 km/h.
The maximum speed that can be set depends
on the vehicle.
The system can also be activated when sta‐
tionary.
Comply with the legal speed limit in every sit‐
uation when using the system.
Detection range
The detection capacity of the system and the
automatic braking capacity are limited.
Two-wheeled vehicles for instance might not
be detected.
Limited detection capacity
Because of the limits to the detection ca‐
pacity of the camera and the sensor, you
should be alert at all times so that you can in‐
tervene actively, if necessary; otherwise, there
is the danger of an accident occurring.◀
Deceleration
The system does not decelerate for:▷Pedestrians or similar slow-moving road
users.▷Red traffic lights.▷Cross traffic.▷Oncoming traffic.
Swerving vehicles
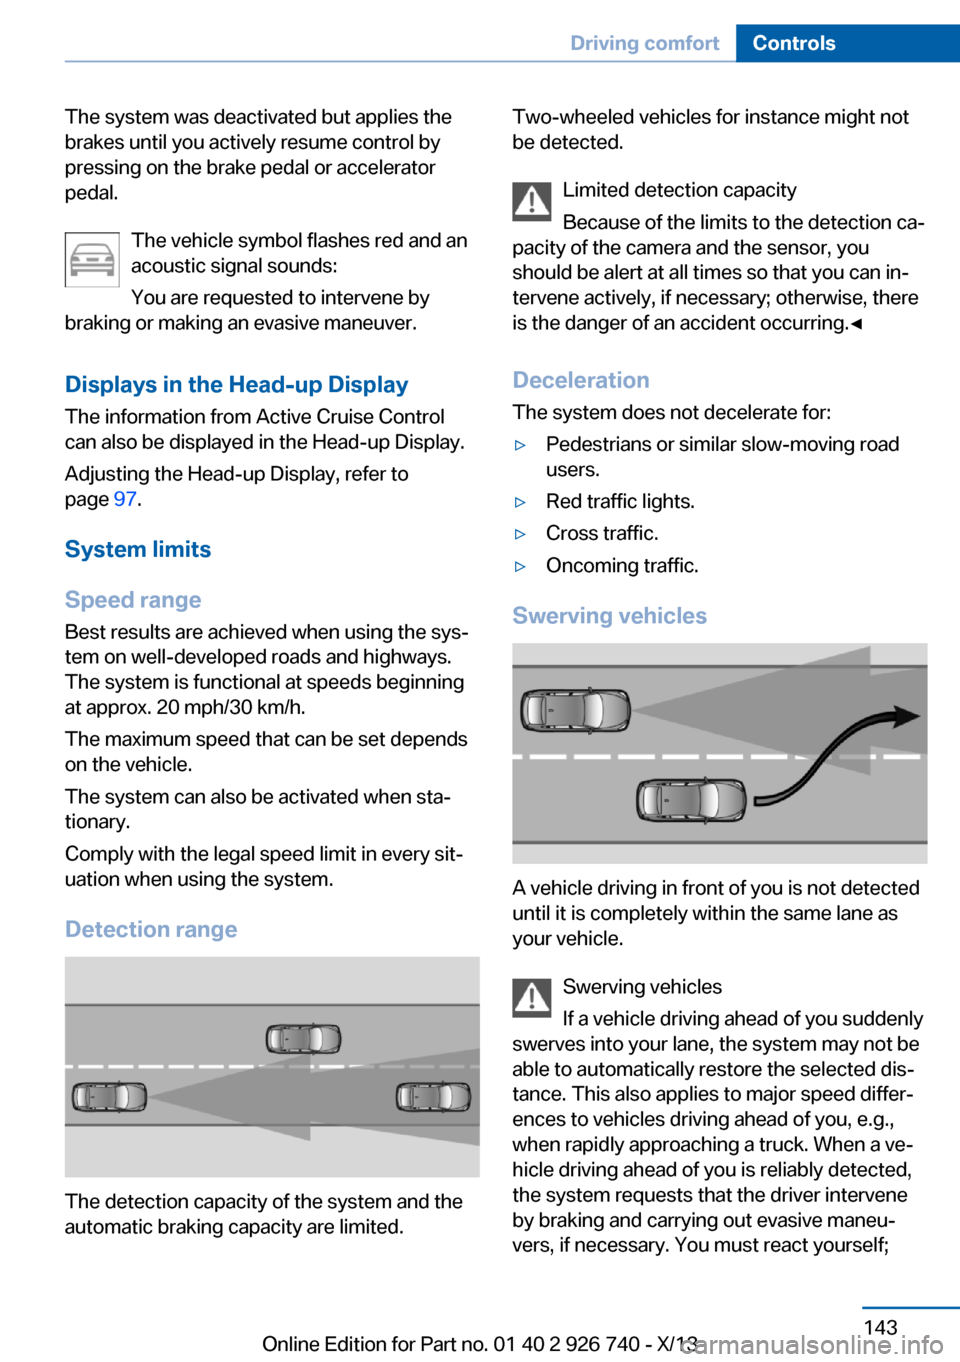
A vehicle driving in front of you is not detected
until it is completely within the same lane as
your vehicle.
Swerving vehicles
If a vehicle driving ahead of you suddenly
swerves into your lane, the system may not be
able to automatically restore the selected dis‐
tance. This also applies to major speed differ‐
ences to vehicles driving ahead of you, e.g.,
when rapidly approaching a truck. When a ve‐
hicle driving ahead of you is reliably detected,
the system requests that the driver intervene
by braking and carrying out evasive maneu‐
vers, if necessary. You must react yourself;
Seite 143Driving comfortControls143
Online Edition for Part no. 01 40 2 926 740 - X/13
Page 159 of 265
Switching on/off
Switching on/off manually Press the button.
Depending on the transmission position, the
picture of the front or rear camera is displayed.
Switching off automaticallyBy switching into a different function or during
drive mode change.
Front Panorama Side View: when a certain
driving distance or speed is exceeded.
Display
General information The traffic area in front of or behind the vehicle
is displayed on the Control Display.
Brightness
With Panorama Side View switched on:1. Select the symbol.2.Turn the controller until the desired setting
is reached, and press the controller.
Contrast
With Panorama Side View switched on:
1. Select the symbol.2.Turn the controller until the desired setting
is reached, and press the controller.
Warning of crossing traffic
The concept If an object approaching from the side is de‐
tected by the front or rear camera, this is de‐ picted by a symbol in the Panorama Side View
display.
Requirements
▷Panorama Side View switched on.▷Your vehicle moves no faster than walking
speed.▷To detect approaching objects, sufficient
brightness, for example, daylight is neces‐
sary.
Display
The yellow symbol is displayed if anapproaching vehicle is detected by the
camera.
A gray symbol is displayed if the detec‐
tion of crossing traffic is not possible.
System limits
In the following situations, the warning about
crossing traffic may be limited:
▷In poor lighting or visibility conditions.▷If the camera is soiled or covered.
System limits
The objects displayed in the Control Display
under certain circumstances are closer than
they appear. Therefore, do not estimate the
distance from the objects on the display.
The viewing angle is approx. 180°.
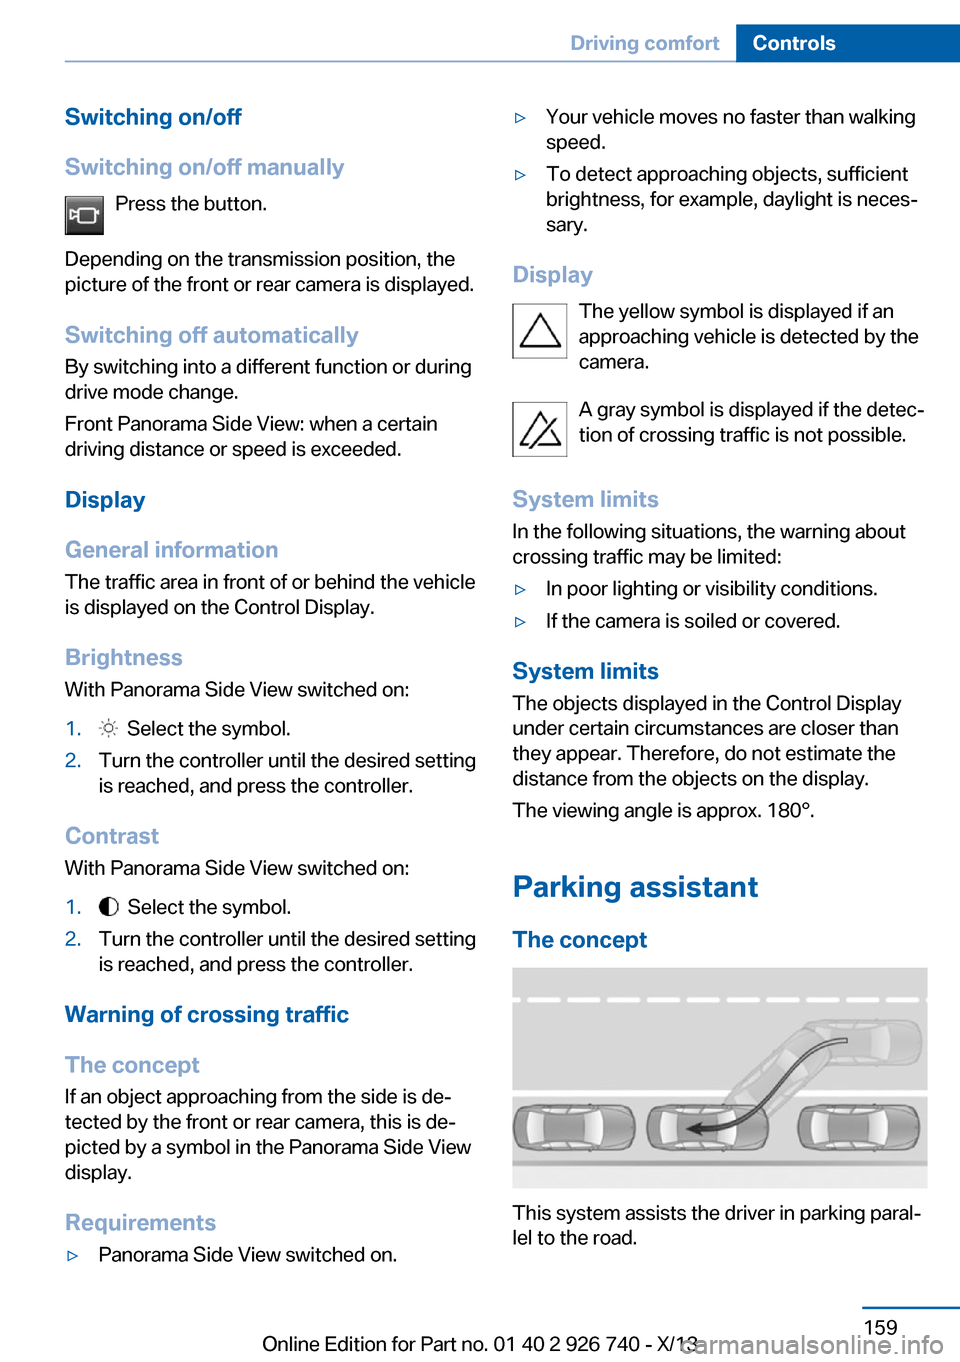
Parking assistantThe concept
This system assists the driver in parking paral‐
lel to the road.
Seite 159Driving comfortControls159
Online Edition for Part no. 01 40 2 926 740 - X/13
Page 161 of 265
At a glance
Button in the vehicle
Parking assistant
Ultrasound sensors
The ultrasound sensors for measuring parking
spaces are located on the wheel arches.
To ensure full operability:
▷Keep the sensors clean and free of ice.▷When using high-pressure washers, do not
spray the sensors for long periods and
maintain a distance of at least 12 in/30 cm.
Switching on/off
Switching on with the button Press the button.
The LED lights up.
The current status of the parking space search
is indicated on the Control Display.
Parking assistant is activated automatically.
Switching on with the reverse gear
Shift into reverse.
The current status of the parking space search
is indicated on the Control Display.
Activate:
"Parking Assistant" Select the
symbol in the Control Display.
Switching off The system can be deactivated as follows:
▷Press the button.▷Switch off the ignition.
Display on the Control Display
System activated/deactivated
SymbolMeaning Gray: the system is not available.
White: the system is available but
not activated. The system is activated.
Status display
Depending on the appointment version, differ‐
ent views of the status display are shown and
are described below as View 1, refer to
page 161, or View 2, refer to page 162.
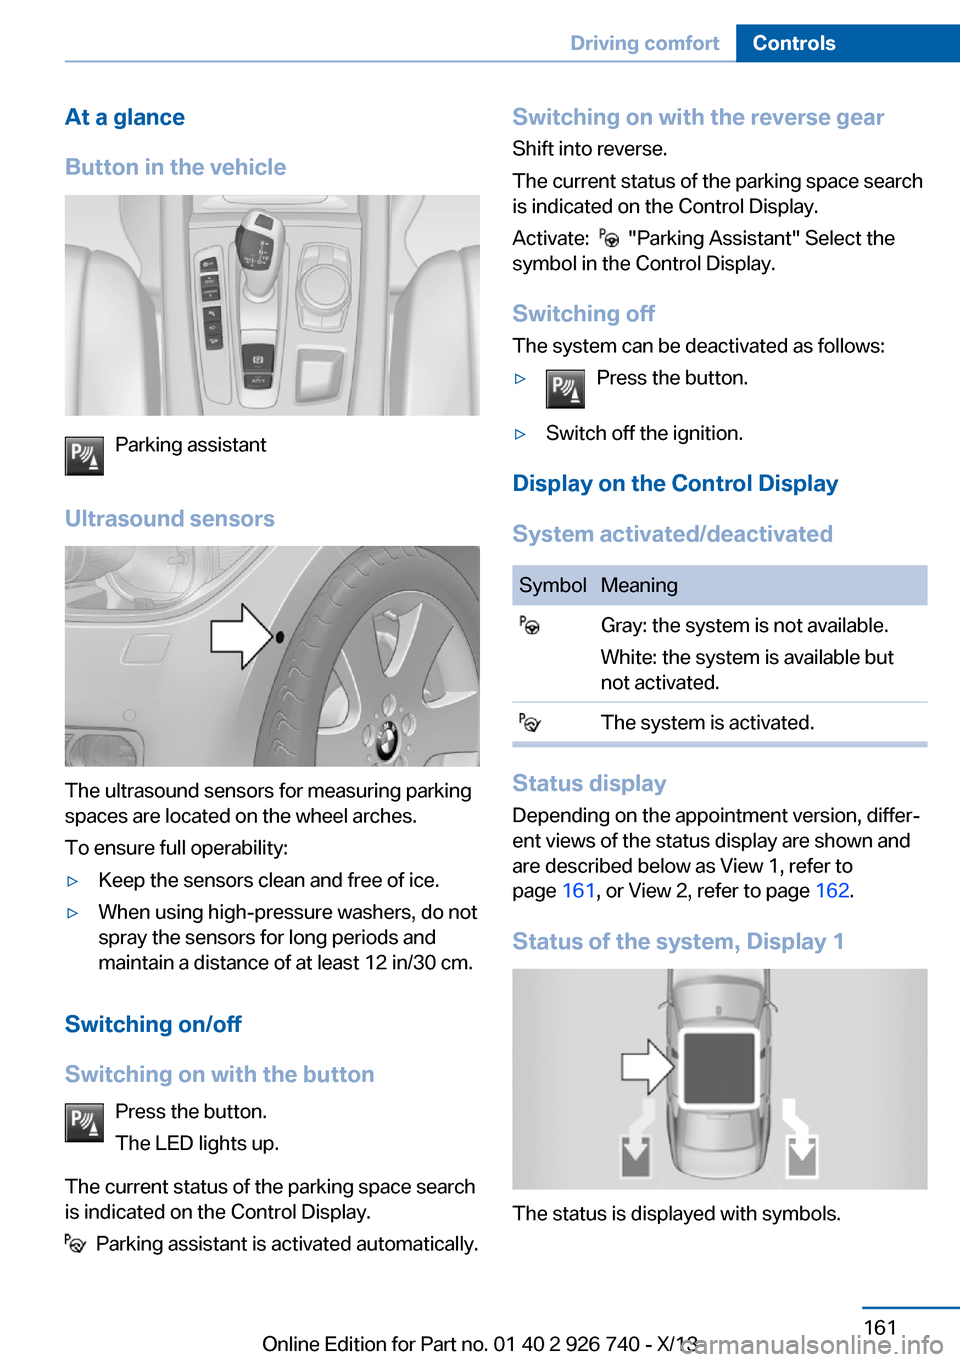
Status of the system, Display 1
The status is displayed with symbols.
Seite 161Driving comfortControls161
Online Edition for Part no. 01 40 2 926 740 - X/13
Page 166 of 265
Climate control functions in detail
Manual air distribution Press the button repeatedly to select
a program:▷Upper body region.▷Upper body region and footwell.▷Footwell.▷Windows and footwell.▷Windows, upper body region, and footwell.▷Windows: driver's side only.▷Windows and upper body region.
If the windows are fogged over, press the
AUTO button on the driver's side to utilize the
condensation sensor.
Temperature Turn the wheel to set the de‐sired temperature.
The automatic climate control achieves this
temperature as quickly as possible, if neces‐
sary with the maximum cooling or heating ca‐
pacity, and then keeps it constant.
Avoid rapidly switching between different tem‐
perature settings. Otherwise, the automatic cli‐
mate control will not have sufficient time to ad‐
just the set temperature.
AUTO program Press the button.
Air flow, air distribution, and tempera‐
ture are controlled automatically.
Depending on the selected temperature,
AUTO intensity program and outside influen‐ ces, the air is directed to the windshield, side
windows, upper body, and into the footwell.
The cooling function, refer to page 167, is
switched on automatically with the AUTO pro‐
gram.
At the same time, a condensation sensor con‐
trols the program so as to prevent window
condensation as much as possible.
Intensity of the AUTO program
With the AUTO program switched on, auto‐
matic control of the air flow and air distribution
can be adjusted.
Press the left or right side of the but‐
ton: decrease or increase the inten‐
sity.
The selected intensity is shown on the display
of the automatic climate control.
Air flow, manual To be able to manually adjust the air flow,
switch off the AUTO program first.
Press the left or right side of the but‐
ton: decrease or increase air flow.
The selected air flow is shown on the display of
the automatic climate control.
The air flow of the automatic climate control
may be reduced automatically to save battery
power.
Defrosting windows and removing condensation
Press the button.
Ice and condensation are quickly re‐
moved from the windshield and the front side
windows.
The air volume can be adjusted when the pro‐
gram is active.
If the windows are fogged over, you can also
switch on the cooling function or press the
AUTO button to utilize the condensation sen‐
sor.Seite 166ControlsClimate control166
Online Edition for Part no. 01 40 2 926 740 - X/13
Page 170 of 265
5Display6Maximum cooling7Seat heating 55
Switching the rear automatic climate
control on/off
1."Settings"2."Climate"3."Rear climate"
The rear automatic climate control is not op‐
erational if the automatic climate control is
switched off or if the function for defrosting or
defogging the windows is active.
AUTO program Press the button.
Air flow, air distribution, and tempera‐
ture are controlled automatically:
Depending on the selected temperature, the
AUTO intensity, and outside influences, the air
is directed to the upper body and into the foot‐
well.
The cooling function is switched on automati‐
cally with the AUTO program.
Intensity of the AUTO program With the AUTO program switched on, auto‐
matic control of the air flow and air distribution
can be adjusted.
Press the left or right side of the but‐
ton: decrease or increase the inten‐
sity.
The selected intensity is shown on the display
of the automatic climate control.
Temperature
Turn the wheel to set the de‐
sired temperature.
The automatic climate control achieves this
temperature as quickly as possible, if neces‐
sary by using the maximum cooling or heating
capacity, and then keeps it constant.
Avoid rapidly switching between different tem‐
perature settings. The automatic climate con‐
trol will not have sufficient time to adjust the
set temperature.
Manual air distribution
The air distribution can be adjusted to individ‐
ual needs.
Press the button repeatedly to select
a program:▷Upper body region.▷Upper body region and footwell.▷Footwell.
Air flow, manual
To be able to manually adjust the air flow,
switch off the AUTO program first.
Press the left or right side of the but‐
ton: decrease or increase air flow.
The selected air flow is shown on the display of
the automatic climate control.
Switching the system on/off
Switching off Press and hold the left button.
Switching on Press any button except:
▷Left side of Air volume button.Seite 170ControlsClimate control170
Online Edition for Part no. 01 40 2 926 740 - X/13