children safety BMW X5 2014 F15 Owner's Manual
[x] Cancel search | Manufacturer: BMW, Model Year: 2014, Model line: X5, Model: BMW X5 2014 F15Pages: 265, PDF Size: 6.2 MB
Page 5 of 265
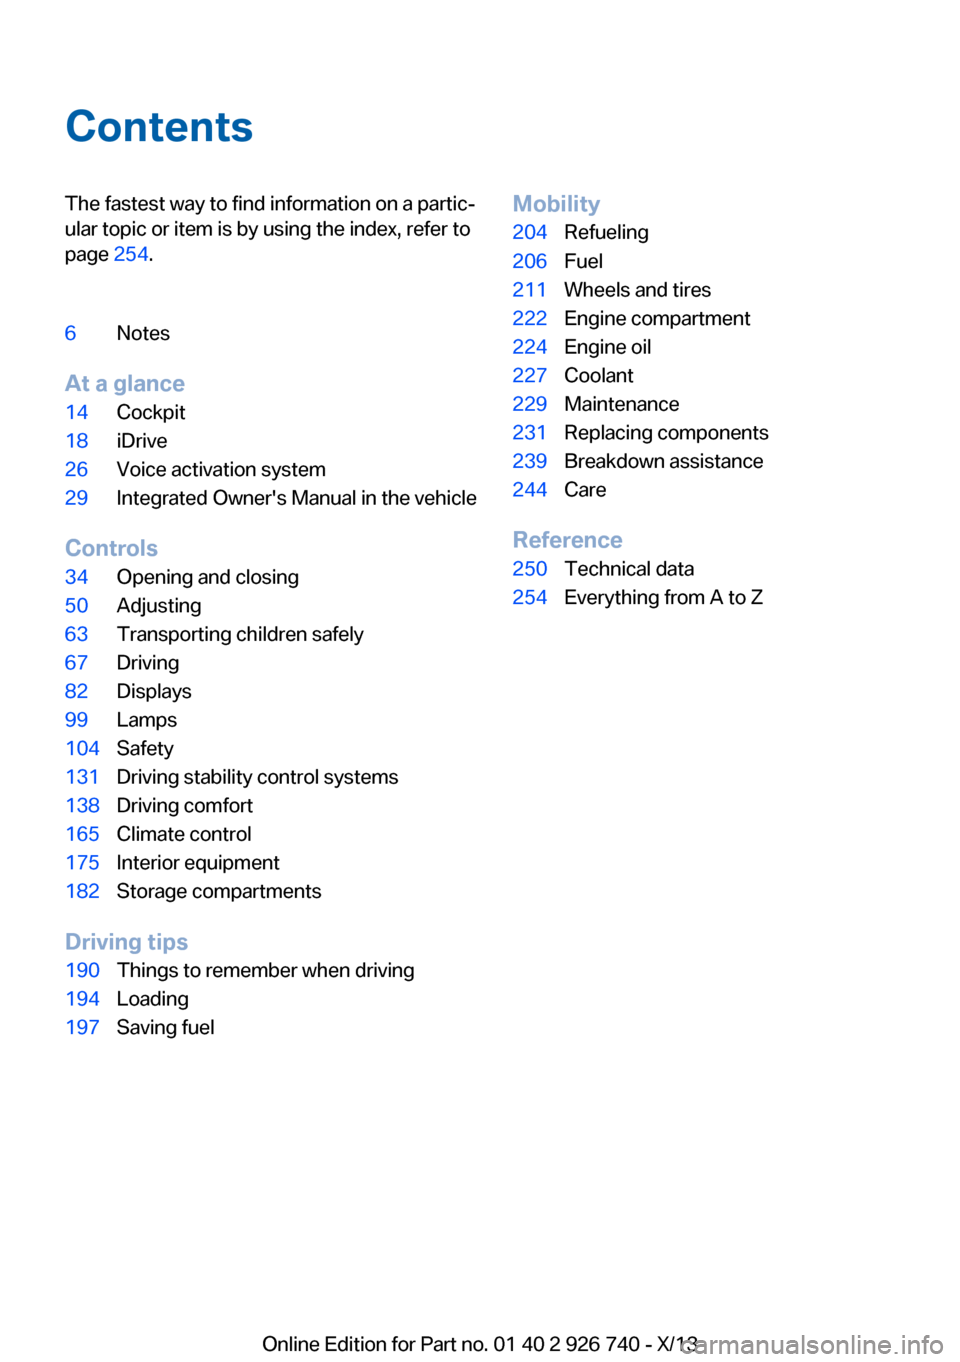
ContentsThe fastest way to find information on a partic‐
ular topic or item is by using the index, refer to
page 254.6Notes
At a glance
14Cockpit18iDrive26Voice activation system29Integrated Owner's Manual in the vehicle
Controls
34Opening and closing50Adjusting63Transporting children safely67Driving82Displays99Lamps104Safety131Driving stability control systems138Driving comfort165Climate control175Interior equipment182Storage compartments
Driving tips
190Things to remember when driving194Loading197Saving fuelMobility204Refueling206Fuel211Wheels and tires222Engine compartment224Engine oil227Coolant229Maintenance231Replacing components239Breakdown assistance244Care
Reference
250Technical data254Everything from A to Z
Online Edition for Part no. 01 40 2 926 740 - X/13
Page 47 of 265
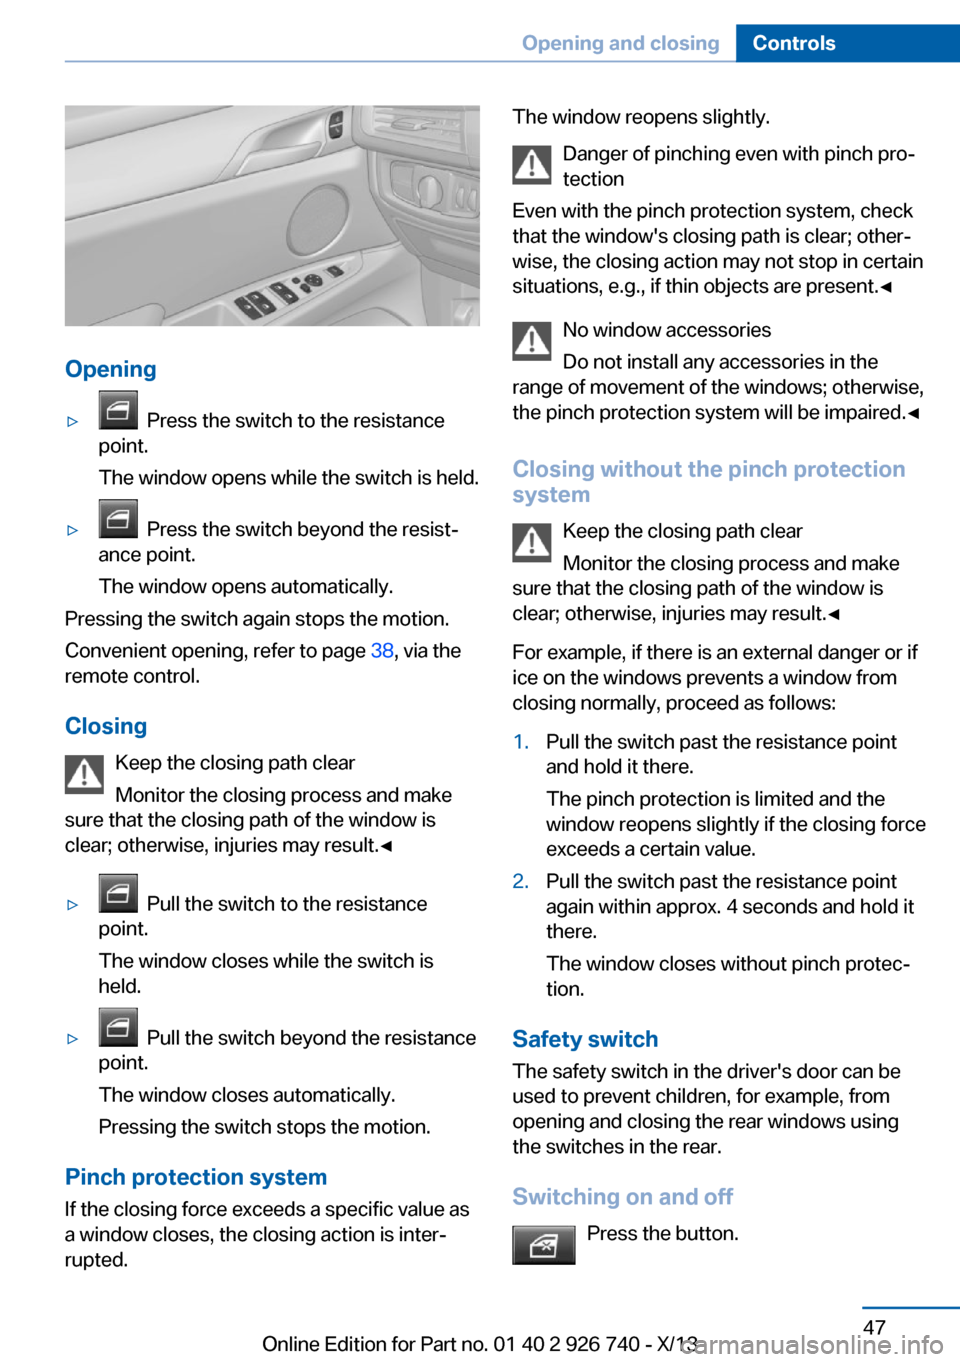
Opening
▷ Press the switch to the resistance
point.
The window opens while the switch is held.▷ Press the switch beyond the resist‐
ance point.
The window opens automatically.
Pressing the switch again stops the motion.
Convenient opening, refer to page 38, via the
remote control.
Closing Keep the closing path clear
Monitor the closing process and make
sure that the closing path of the window is
clear; otherwise, injuries may result.◀
▷ Pull the switch to the resistance
point.
The window closes while the switch is
held.▷ Pull the switch beyond the resistance
point.
The window closes automatically.
Pressing the switch stops the motion.
Pinch protection system If the closing force exceeds a specific value as
a window closes, the closing action is inter‐
rupted.
The window reopens slightly.
Danger of pinching even with pinch pro‐
tection
Even with the pinch protection system, check
that the window's closing path is clear; other‐
wise, the closing action may not stop in certain
situations, e.g., if thin objects are present.◀
No window accessories
Do not install any accessories in the
range of movement of the windows; otherwise,
the pinch protection system will be impaired.◀
Closing without the pinch protection system
Keep the closing path clear
Monitor the closing process and make
sure that the closing path of the window is clear; otherwise, injuries may result.◀
For example, if there is an external danger or if
ice on the windows prevents a window from
closing normally, proceed as follows:1.Pull the switch past the resistance point
and hold it there.
The pinch protection is limited and the
window reopens slightly if the closing force
exceeds a certain value.2.Pull the switch past the resistance point
again within approx. 4 seconds and hold it
there.
The window closes without pinch protec‐
tion.
Safety switch
The safety switch in the driver's door can be
used to prevent children, for example, from
opening and closing the rear windows using
the switches in the rear.
Switching on and off Press the button.
Seite 47Opening and closingControls47
Online Edition for Part no. 01 40 2 926 740 - X/13
Page 48 of 265
The LED lights up if the safety function is
switched on.
Safety switch for rear operation
Press the safety switch when transport‐
ing children in the rear; otherwise, injury may
result if the windows are closed without super‐
vision.◀
Roller sunblinds
Roller sunblinds for the rear side
windows
Pull out the roller sunblind at the loop and hook
it onto the bracket.
Do not open the window while the rollersunblind is raised.
Do not open the window while the roller sun‐
blind is raised; otherwise, there is a risk of
damage at high speeds that may result in per‐
sonal injury.◀
Panoramic-glass sunroof General information
The glass sunroof and the sliding visor can be
operated together or separately, using the
same switch.
The glass sunroof is operational when the igni‐
tion is switched on.
Keep the closing path clear
Monitor the closing process and make
sure that the closing path of the glass sunroof
is clear; otherwise, injuries may result.◀
Take the remote control with you
Take the remote control with you when
leaving the vehicle so that children, for exam‐
ple, cannot operate the roof and injure them‐
selves.◀
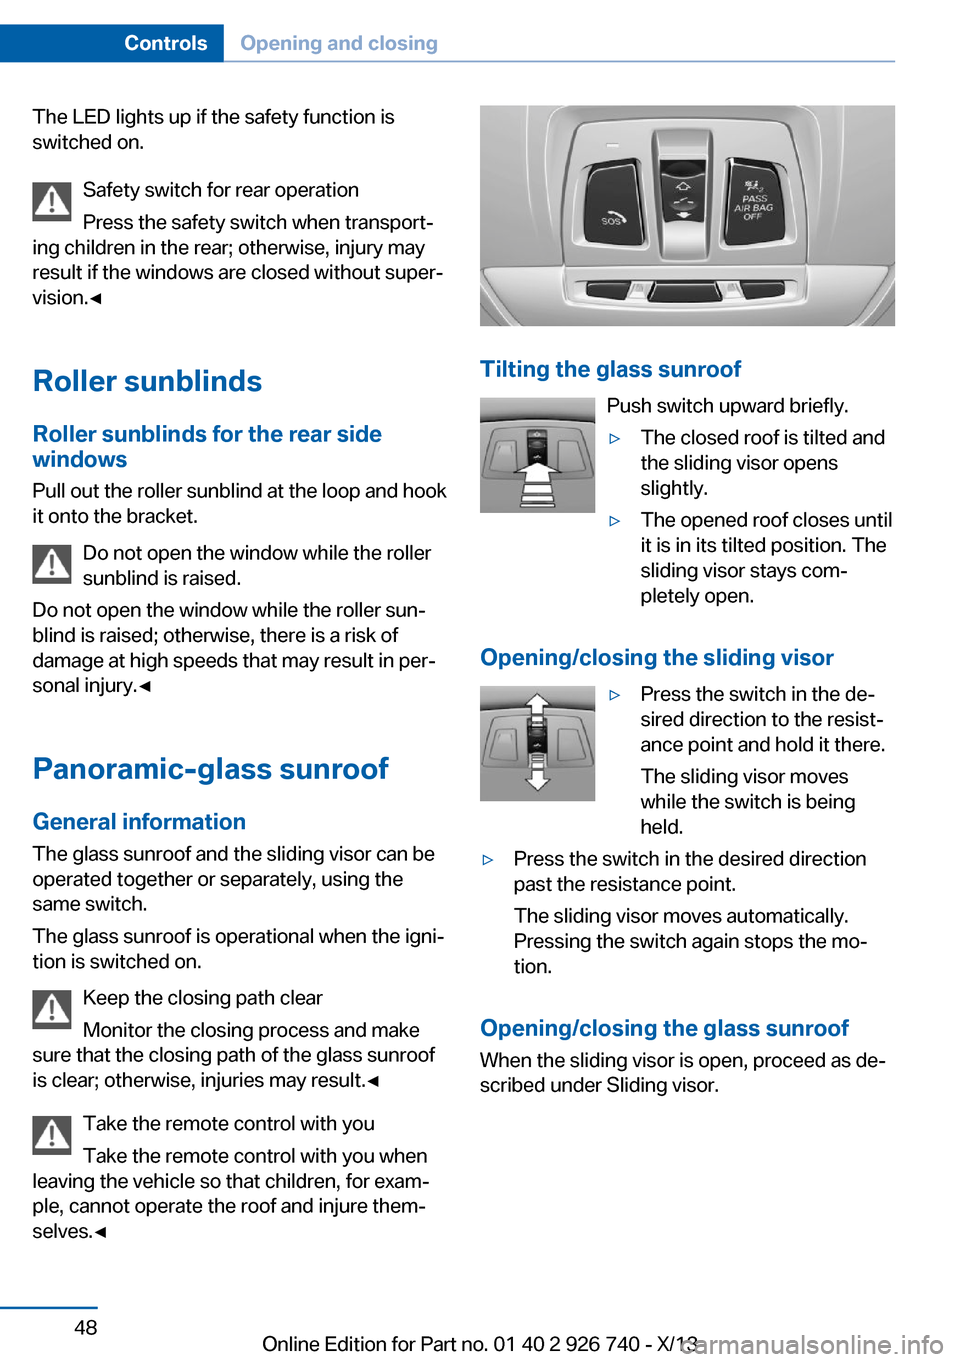
Tilting the glass sunroof
Push switch upward briefly.
▷The closed roof is tilted and
the sliding visor opens
slightly.▷The opened roof closes until
it is in its tilted position. The
sliding visor stays com‐
pletely open.
Opening/closing the sliding visor
▷Press the switch in the de‐
sired direction to the resist‐
ance point and hold it there.
The sliding visor moves
while the switch is being
held.▷Press the switch in the desired direction
past the resistance point.
The sliding visor moves automatically.
Pressing the switch again stops the mo‐
tion.
Opening/closing the glass sunroof
When the sliding visor is open, proceed as de‐
scribed under Sliding visor.
Seite 48ControlsOpening and closing48
Online Edition for Part no. 01 40 2 926 740 - X/13
Page 56 of 265
To protect the occupants, the belt locking trig‐
gers early. Slowly guide the belt out of the
holder when applying it.
Although airbags enhance safety by providing
added protection, they are not a substitute for
safety belts.▷The shoulder strap's anchorage point will
be correct for adult seat occupants of ev‐
ery build if the seat is correctly adjusted.▷The two outer safety belt buckles,
integrated into the 2nd row of seats, are for
passengers sitting on the left and right.▷The center belt buckle of the 2nd row of
seats is solely intended for the center pas‐
senger.▷The safety belt buckles, integrated into the
3rd row of seats, are for passengers sitting
on the left and right.
One person per safety belt
Never allow more than one person to
wear a single safety belt. Never allow infants or
small children to ride on a passenger's lap.◀
Putting on the belt
Lay the belt, without twisting, snugly
across the lap and shoulders, as close to the
body as possible. Make sure that the belt lies
low around the hips in the lap area and does
not press on the abdomen. Otherwise, the belt
can slip over the hips in the lap area in a frontal
impact and injure the abdomen.
The safety belt must not lie across the neck,
rub on sharp edges, be routed over breakable
objects, or be pinched.◀
Reduction of restraining effect
Avoid wearing bulky clothing, and pull
the shoulder belt periodically to readjust the
tension. Make sure that the belt is not jammed;
otherwise, the belt can be damaged and the
restraining effect reduced.◀
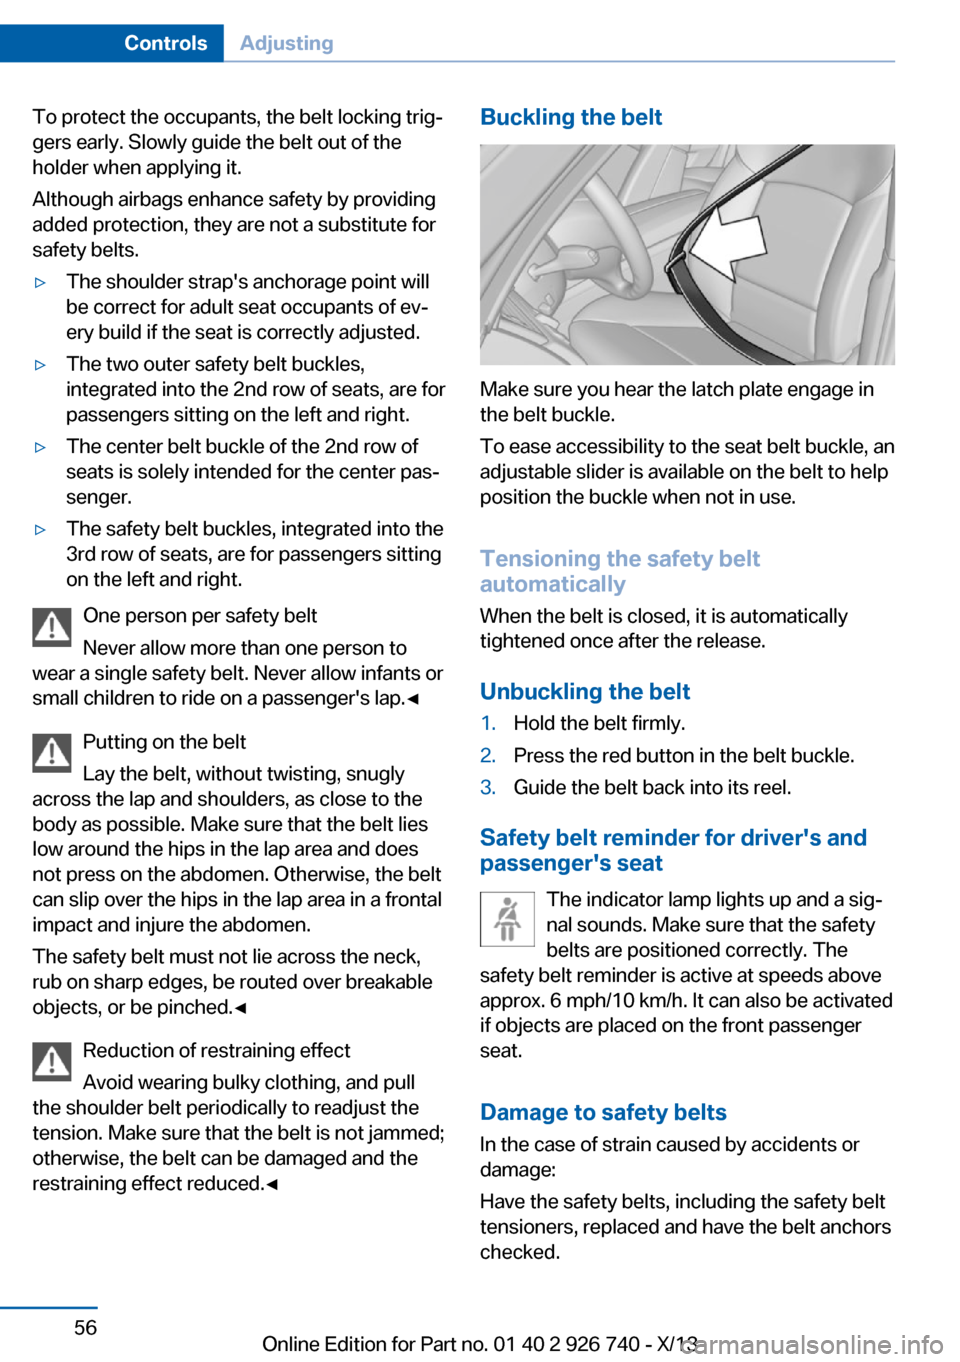
Buckling the belt
Make sure you hear the latch plate engage in
the belt buckle.
To ease accessibility to the seat belt buckle, an
adjustable slider is available on the belt to help
position the buckle when not in use.
Tensioning the safety belt
automatically
When the belt is closed, it is automatically
tightened once after the release.
Unbuckling the belt
1.Hold the belt firmly.2.Press the red button in the belt buckle.3.Guide the belt back into its reel.
Safety belt reminder for driver's and
passenger's seat
The indicator lamp lights up and a sig‐
nal sounds. Make sure that the safety
belts are positioned correctly. The
safety belt reminder is active at speeds above
approx. 6 mph/10 km/h. It can also be activated
if objects are placed on the front passenger
seat.
Damage to safety belts In the case of strain caused by accidents or
damage:
Have the safety belts, including the safety belt
tensioners, replaced and have the belt anchors
checked.
Seite 56ControlsAdjusting56
Online Edition for Part no. 01 40 2 926 740 - X/13
Page 63 of 265
Transporting children safelyVehicle equipmentAll standard, country-specific and optional
equipment that is offered in the model series is
described in this chapter. Therefore, equip‐
ment is also described that is not available in a
vehicle, e. g., because of the selected optional
equipment or country variant. This also applies
for safety-related functions and systems.
The right place for children Note Children in the vehicle
Do not leave children unattended in the
vehicle; otherwise, they could endanger them‐
selves and other persons, e.g., by opening the
doors.◀
Children should always be in the rear
Accident research shows that the safest place
for children is in the back seat.
Transporting children in the rear
Only transport children younger than
13 years of age or shorter than 5 ft/150 cm in
the rear in child restraint fixing systems pro‐
vided in accordance with the age, weight and
size of the child; otherwise, there is an in‐
creased risk of injury in an accident.
Children 13 years of age or older must wear a
safety belt as soon as a suitable child restraint
fixing system can no longer be used, due to
their age, weight and size.◀
Children on the front passenger seat
Should it ever be necessary to use a child re‐
straint fixing system in the front passenger
seat, make sure that the front, knee and side
airbags on the front passenger side are deacti‐vated. Automatic deactivation of front passen‐
ger airbags, refer to page 106.
Note Deactivated front passenger airbags
If a child restraint fixing system is used in
the front passenger seat, the front passenger
airbags must be deactivated; otherwise, there
is an increased risk of injury to the child when
the airbags are triggered, even with a child re‐
straint fixing system.◀
Installing child restraint
fixing systems
Before mounting
Before mounting child restraint fixing systems,
ensure that the rear seat backrests are locked.
Third row of seats Before installing a child restraint system on the
third row of seats, note the following:▷Roll up the cargo cover, partition net and
remove the case▷Bring seats and backrests of the second
row of seats into the forwardmost position▷Raise the headrests of the third row of
seats into the highest position.
Do not change the settings that have been
made after this.
Hints Manufacturer's information for child re‐straint fixing systems
To select, mount and use child restraint fixing
systems, observe the information provided by
the system manufacturer; otherwise, the pro‐
tective effect can be impaired.◀
Seite 63Transporting children safelyControls63
Online Edition for Part no. 01 40 2 926 740 - X/13
Page 64 of 265
Lock the rear seat backrests in position
Before installation of child restraint sys‐
tems on the rear seat backrest, set a backrest
tilt at which the childseat rests firmly against
the backrest and securely latch all backrests.
Otherwise, the stability of the child seat is lim‐
ited, and there is an increased risk of injury be‐
cause of unexpected movement of the rear
seat backrest.◀
Lock seats of the second row of seats
When equipped with a third row of seats:
when a child restraint system is installed on
the second row of seats, make sure that this
seat is correctly locked; otherwise, there is an
increased risk of injury for the child in the event
of an accident.◀
Only approved child restraint systems on
the third row of seats
On the third row of seats install only approved
child restraint systems; otherwise the protec‐
tive effect is not guaranteed and there is an in‐
creased risk of injury for the child in the event
of an accident.◀
On the front passenger seat
Deactivating airbags
After installing a child restraint fixing system in
the front passenger seat, make sure that the
front, knee and side airbags on the front pas‐
senger side are deactivated.
Deactivate the front passenger airbags auto‐
matically, refer to page 106.
Deactivating the front passenger airbags
If a child restraint fixing system is used in
the front passenger seat, the front passenger
airbags must be deactivated; otherwise, there
is an increased risk of injury to the child when
the airbags are triggered, even with a child re‐
straint fixing system.◀Seat position and height
Before installing a child restraint fixing system,
move the front passenger seat as far back as
possible and adjust its height to the highest
position to obtain the best possible position for
the belt and to offer optimal protection in the
event of an accident.
Do not change the seat position and height af‐
ter this.
Backrest width Adjustable backrest width: before installing a
child restraint fixing system in the front pas‐
senger seat, open the backrest width com‐
pletely. Do not change the backrest width
again and do not call up a memory position.
Backrest width for the child seat
Before installing a child restraint fixing
system in the front passenger seat, the back‐
rest width must be opened completely. Do not
change the adjustment after this; otherwise,
the stability of the child seat will be reduced.◀
Child seat security
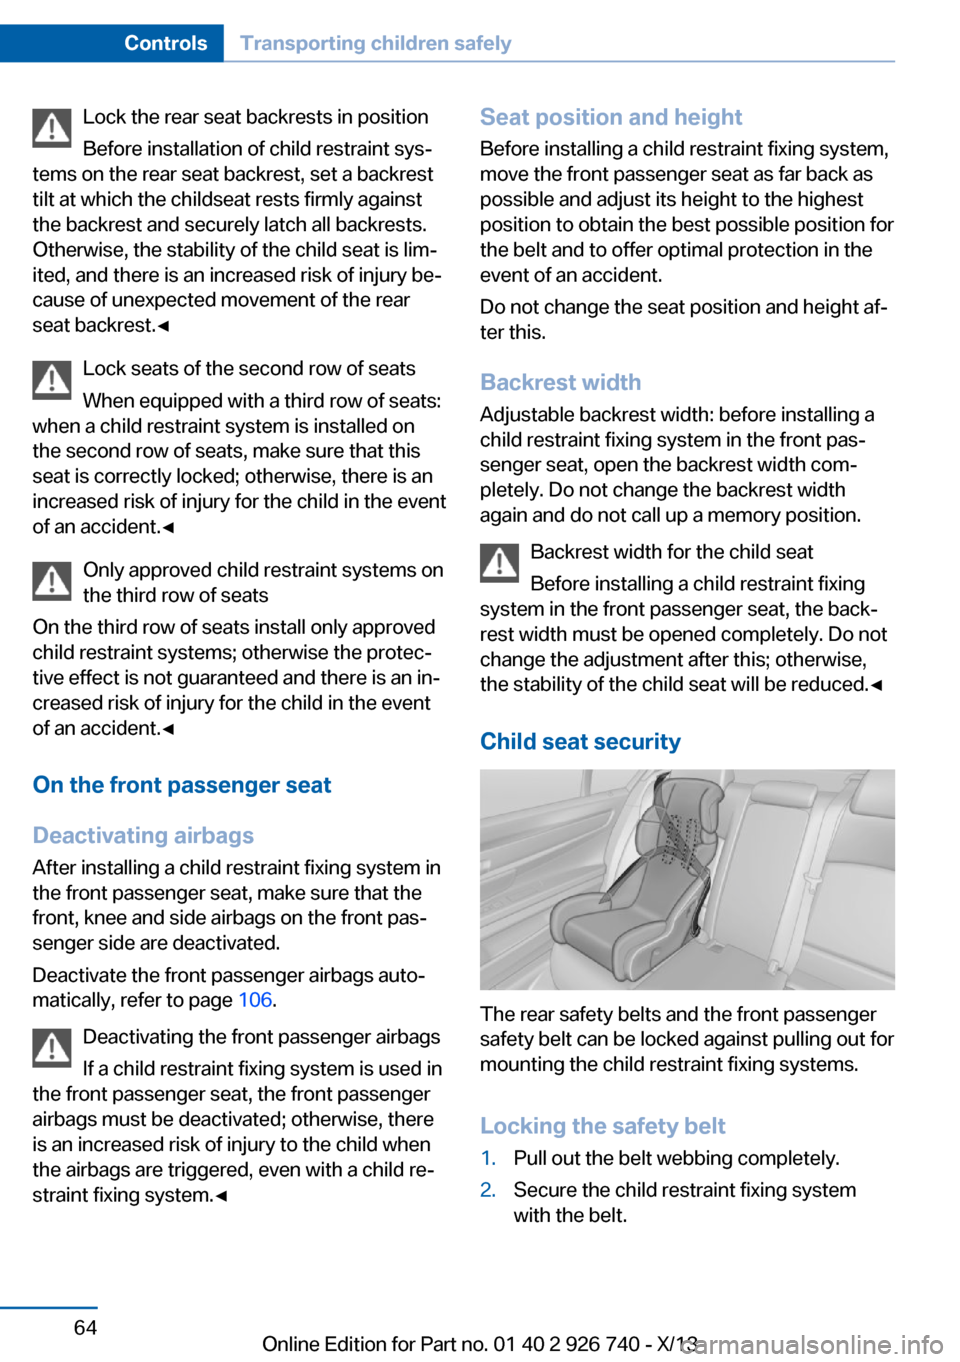
The rear safety belts and the front passenger
safety belt can be locked against pulling out for
mounting the child restraint fixing systems.
Locking the safety belt
1.Pull out the belt webbing completely.2.Secure the child restraint fixing system
with the belt.Seite 64ControlsTransporting children safely64
Online Edition for Part no. 01 40 2 926 740 - X/13
Page 65 of 265
3.Allow the belt webbing to be pulled in and
pull it taut against the child restraint fixing
system. The safety belt is locked.
Unlocking the safety belt
1.Unbuckle the belt buckle.2.Remove the child restraint fixing system.3.Allow the belt webbing to be pulled in com‐
pletely.
LATCH child restraint fixing
system
LATCH: Lower Anchors and Tether for CHil‐dren.
Note Manufacturer's information for LATCH
child restraint fixing systems
To mount and use the LATCH child restraint
fixing systems, observe the operating and
safety information from the system manufac‐
turer; otherwise, the level of protection may be
reduced.◀
Mounts for the lower LATCH anchors The lower anchors may be used to attach the
CRS to the vehicle seat up to a combined child
and CRS weight of 65 lb/30 kg when the child
is restrained by the internal harnesses.
Correctly engage the lower LATCH an‐
chors
Make sure that the lower LATCH anchors have
properly engaged and that the child restraint
fixing system is resting snugly against the
backrest; otherwise, the degree of protection
offered may be reduced.◀
Before mounting the LATCH child restraint fix‐
ing system, pull the belt away from the child
restraint fixing system.
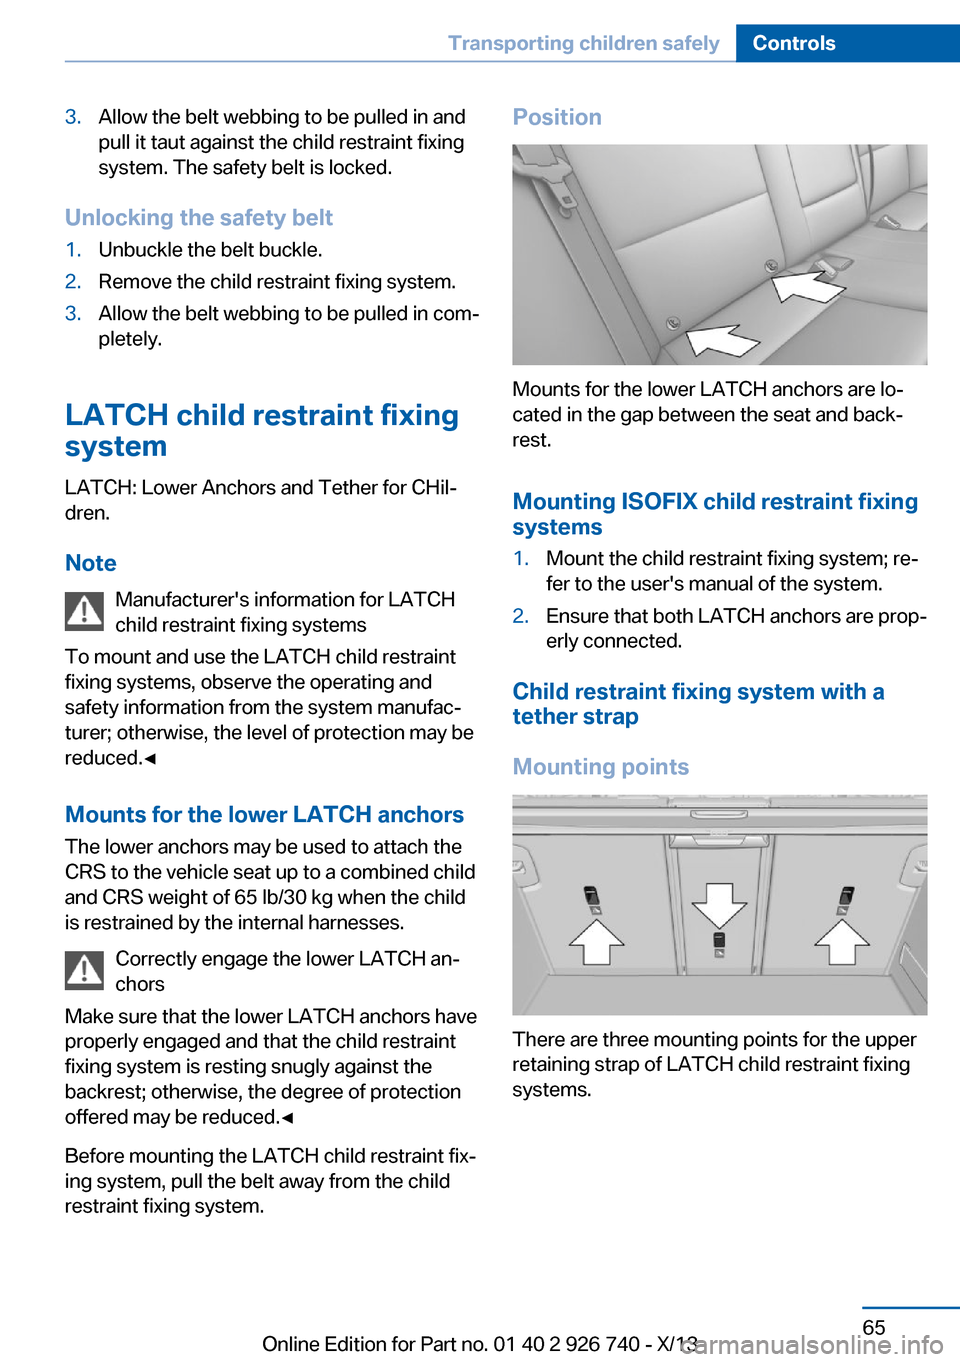
Position
Mounts for the lower LATCH anchors are lo‐
cated in the gap between the seat and back‐
rest.
Mounting ISOFIX child restraint fixing systems
1.Mount the child restraint fixing system; re‐
fer to the user's manual of the system.2.Ensure that both LATCH anchors are prop‐
erly connected.
Child restraint fixing system with a
tether strap
Mounting points
There are three mounting points for the upper
retaining strap of LATCH child restraint fixing
systems.
Seite 65Transporting children safelyControls65
Online Edition for Part no. 01 40 2 926 740 - X/13
Page 66 of 265
Note
Mounting eyes
Only use the mounting eyes for the up‐
per retaining strap to secure child restraint fix‐
ing systems; otherwise, the mounting eyes
could be damaged.◀
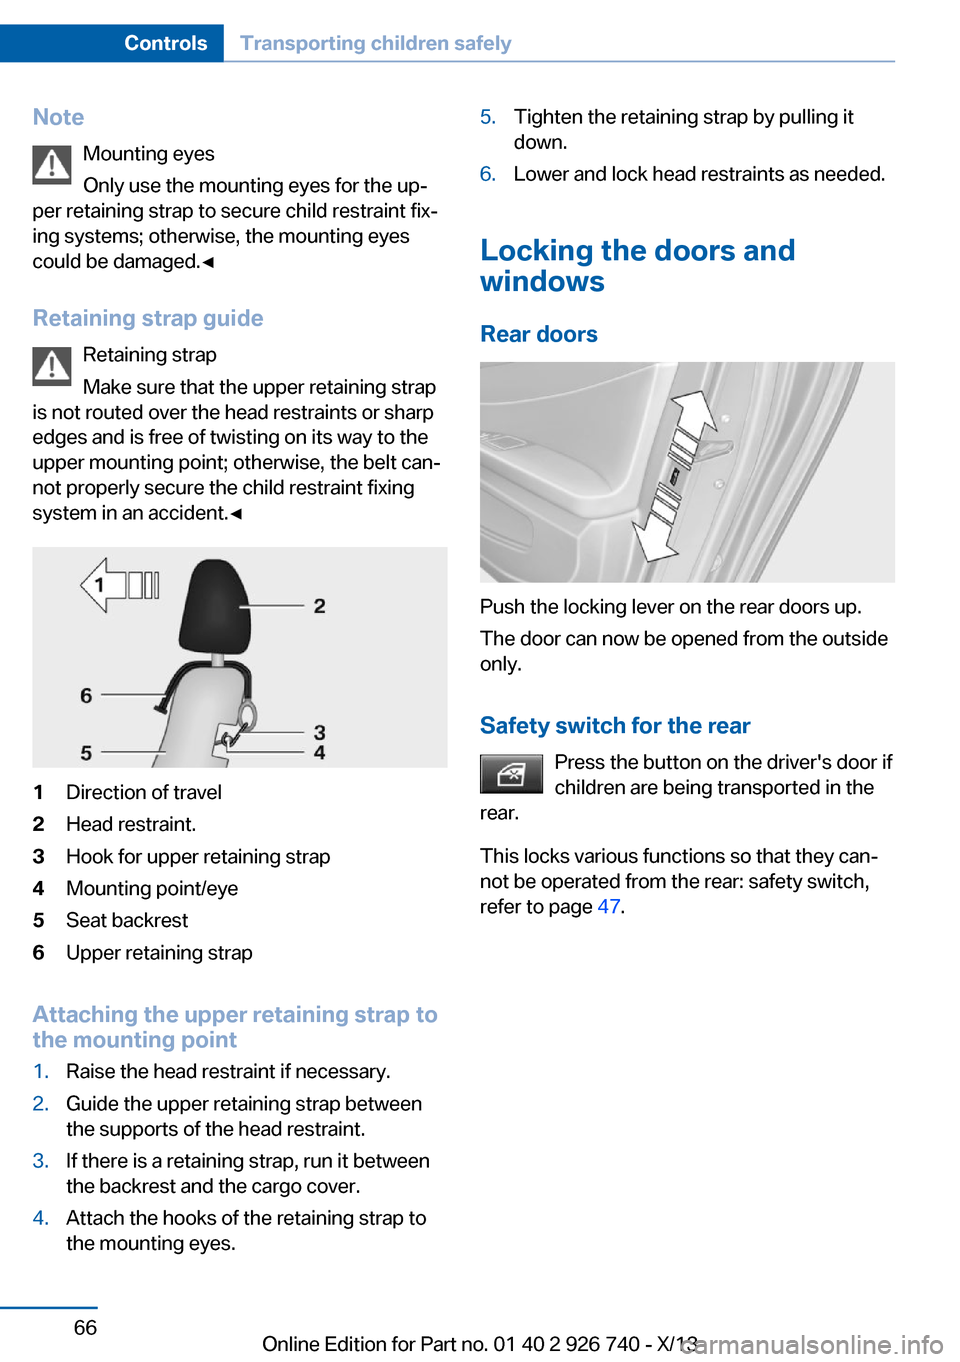
Retaining strap guide
Retaining strap
Make sure that the upper retaining strap
is not routed over the head restraints or sharp
edges and is free of twisting on its way to the
upper mounting point; otherwise, the belt can‐
not properly secure the child restraint fixing
system in an accident.◀
1Direction of travel2Head restraint.3Hook for upper retaining strap4Mounting point/eye5Seat backrest6Upper retaining strap
Attaching the upper retaining strap to
the mounting point
1.Raise the head restraint if necessary.2.Guide the upper retaining strap between
the supports of the head restraint.
3.If there is a retaining strap, run it between
the backrest and the cargo cover.
4.Attach the hooks of the retaining strap to
the mounting eyes.
5.Tighten the retaining strap by pulling it
down.
6.Lower and lock head restraints as needed.
Locking the doors and
windows
Rear doors
Push the locking lever on the rear doors up.
The door can now be opened from the outside
only.
Safety switch for the rear
Press the button on the driver's door if
children are being transported in the
rear.
This locks various functions so that they can‐
not be operated from the rear: safety switch,
refer to page 47.
Seite 66ControlsTransporting children safely66
Online Edition for Part no. 01 40 2 926 740 - X/13
Page 77 of 265
Rear window wiper
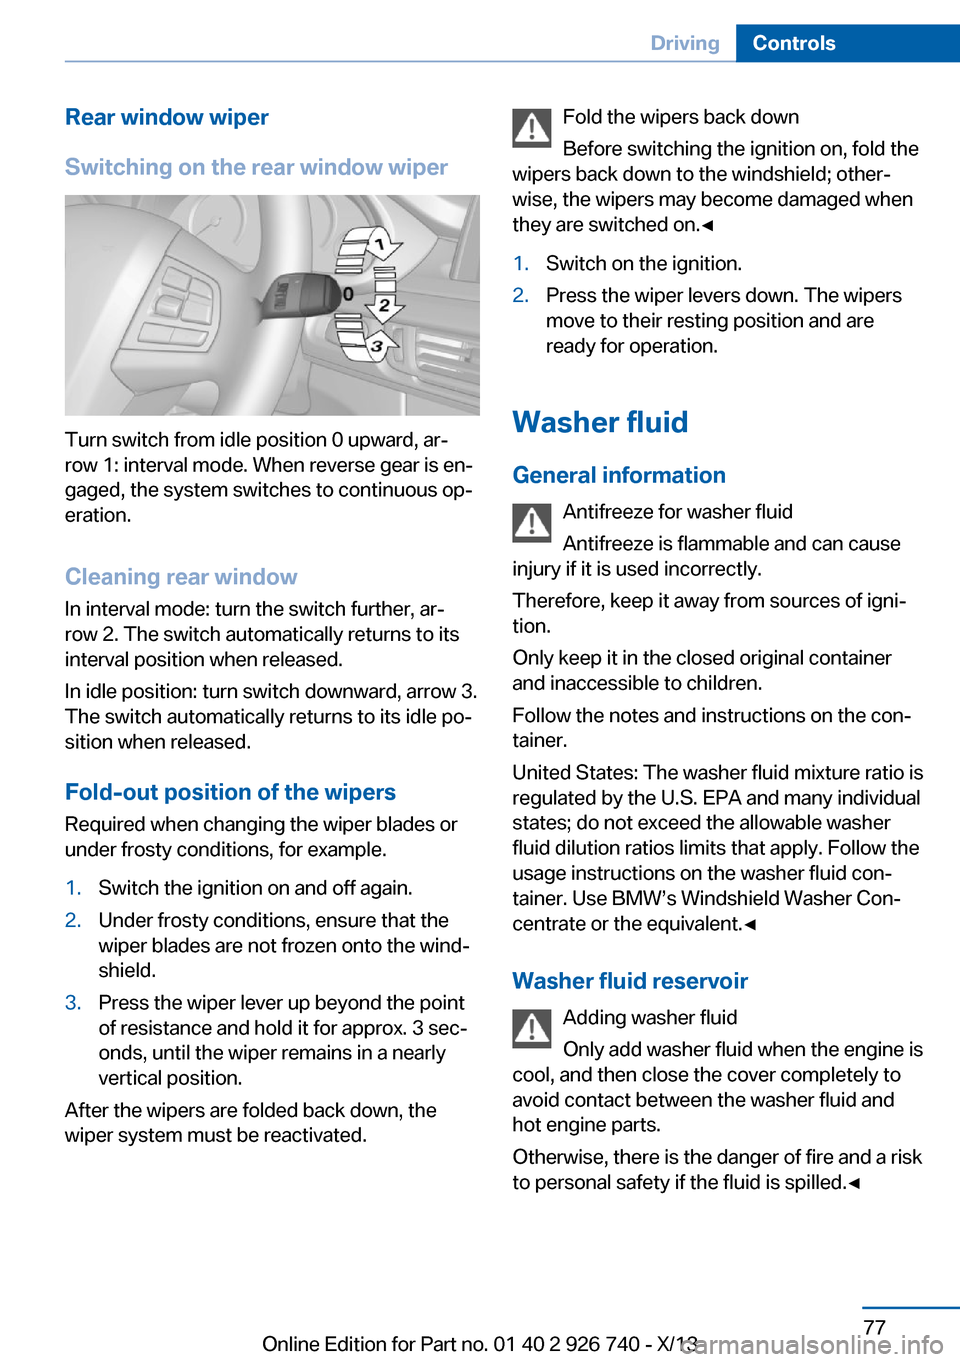
Switching on the rear window wiper
Turn switch from idle position 0 upward, ar‐
row 1: interval mode. When reverse gear is en‐
gaged, the system switches to continuous op‐
eration.
Cleaning rear window
In interval mode: turn the switch further, ar‐
row 2. The switch automatically returns to its
interval position when released.
In idle position: turn switch downward, arrow 3.
The switch automatically returns to its idle po‐
sition when released.
Fold-out position of the wipers Required when changing the wiper blades or
under frosty conditions, for example.
1.Switch the ignition on and off again.2.Under frosty conditions, ensure that the
wiper blades are not frozen onto the wind‐
shield.3.Press the wiper lever up beyond the point
of resistance and hold it for approx. 3 sec‐
onds, until the wiper remains in a nearly
vertical position.
After the wipers are folded back down, the
wiper system must be reactivated.
Fold the wipers back down
Before switching the ignition on, fold the
wipers back down to the windshield; other‐
wise, the wipers may become damaged when
they are switched on.◀1.Switch on the ignition.2.Press the wiper levers down. The wipers
move to their resting position and are
ready for operation.
Washer fluid
General information Antifreeze for washer fluid
Antifreeze is flammable and can cause
injury if it is used incorrectly.
Therefore, keep it away from sources of igni‐
tion.
Only keep it in the closed original container
and inaccessible to children.
Follow the notes and instructions on the con‐
tainer.
United States: The washer fluid mixture ratio is
regulated by the U.S. EPA and many individual
states; do not exceed the allowable washer
fluid dilution ratios limits that apply. Follow the
usage instructions on the washer fluid con‐
tainer. Use BMW’s Windshield Washer Con‐
centrate or the equivalent.◀
Washer fluid reservoir Adding washer fluid
Only add washer fluid when the engine is
cool, and then close the cover completely to
avoid contact between the washer fluid and
hot engine parts.
Otherwise, there is the danger of fire and a risk
to personal safety if the fluid is spilled.◀
Seite 77DrivingControls77
Online Edition for Part no. 01 40 2 926 740 - X/13
Page 106 of 265
When there is a malfunction, have the
airbag system checked immediately
When there is a malfunction, have the airbag
system checked immediately; otherwise, there
is a risk that the system does not function as
expected in the event of an accident despite
corresponding severity of the accident.◀
Automatic deactivation of the front passenger airbags
The system determines whether the front pas‐
senger seat is occupied by measuring the re‐
sistance of the human body.
The front, knee, and side airbag on the front passenger side are activated or deactivated
accordingly.
Leave feet in the footwell
Make sure that the front passenger
keeps his or her feet in the footwell; otherwise,
the front passenger airbags may not function properly.◀
Child restraint fixing system in the front
passenger seat
Before transporting a child on the front pas‐
senger seat, refer to the safety notes and in‐
structions under Children on the front passen‐
ger seat.◀
Malfunction of the automaticdeactivation system
When transporting older children and adults,
the front passenger airbags may be deacti‐
vated in certain sitting positions. In this case,
the indicator lamp for the front passenger air‐
bags lights up.
In this case, change the sitting position so that
the front passenger airbags are activated and
the indicator lamp goes out.
If it is not possible to activate the airbags, have
the person sit in the rear.
To make sure that the occupied seat cushion
can be evaluated correctly▷Do not attach covers, cushions, ball mats
or other items to the front passenger seat
unless they are specifically recommended
by the manufacturer of your vehicle.▷Do not place any electronic devices on the
passenger seat if a child restraint system is
to be installed on it.▷Do not place objects under the seat that
could press against the seat from below.▷No moisture in or on the seat.
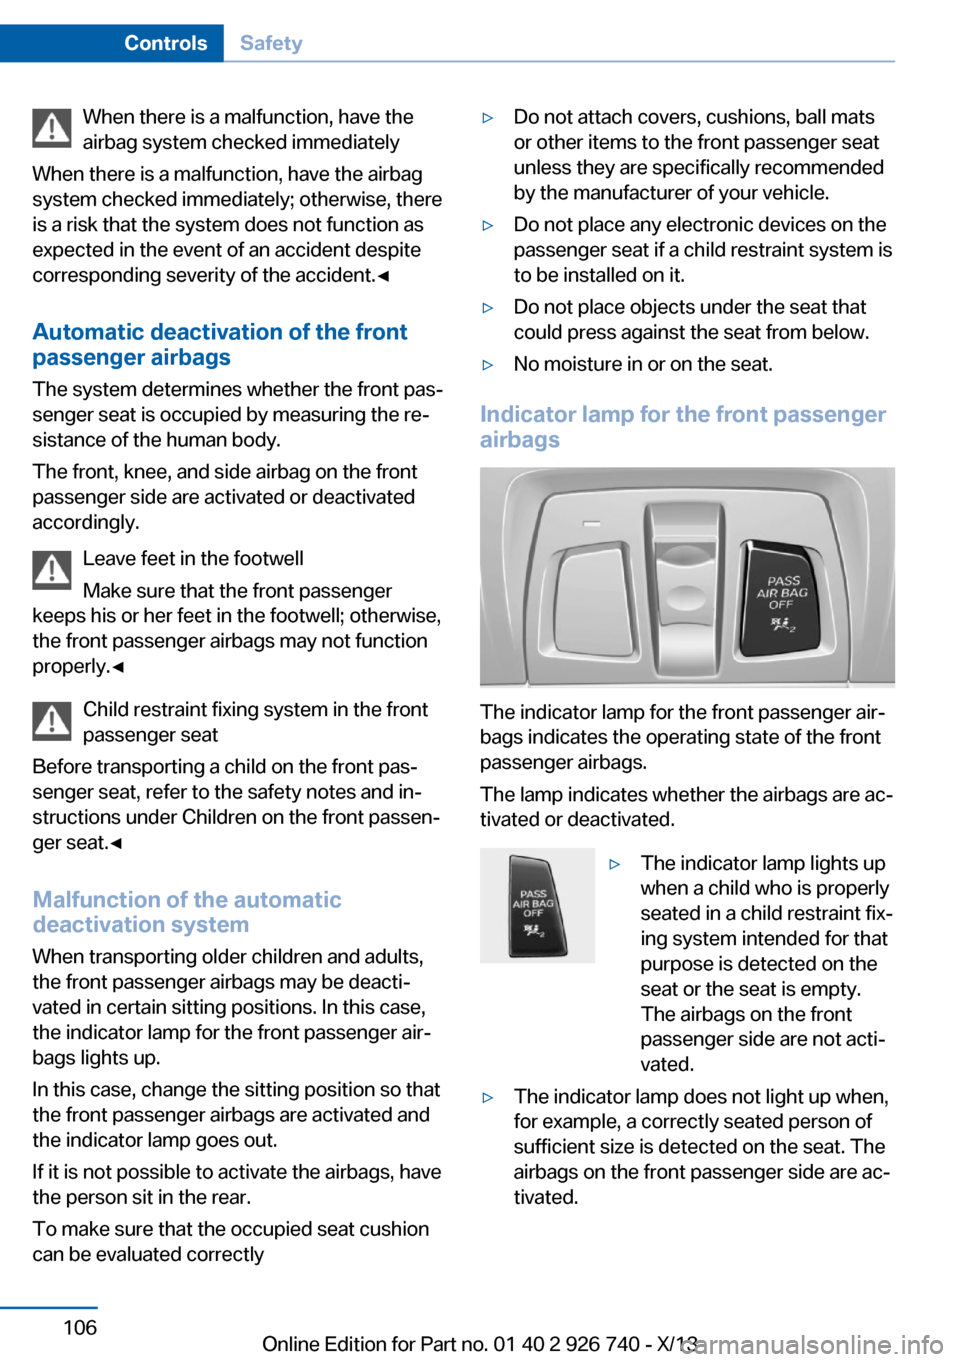
Indicator lamp for the front passenger
airbags
The indicator lamp for the front passenger air‐
bags indicates the operating state of the front
passenger airbags.
The lamp indicates whether the airbags are ac‐
tivated or deactivated.
▷The indicator lamp lights up
when a child who is properly
seated in a child restraint fix‐
ing system intended for that
purpose is detected on the
seat or the seat is empty.
The airbags on the front
passenger side are not acti‐
vated.▷The indicator lamp does not light up when,
for example, a correctly seated person of
sufficient size is detected on the seat. The
airbags on the front passenger side are ac‐
tivated.Seite 106ControlsSafety106
Online Edition for Part no. 01 40 2 926 740 - X/13